使用 Hugging Face Transformers 微调和部署 GPT 模型

对于机器学习研究员和爱好者而言,Hugging Face 如今已是一个家喻户晓的名字。 他们最显著的成果之一便是 Transformers,这是一个适用于文本、计算机视觉、音频和视频领域机器学习模型的模型定义框架。 由于 Hugging Face Hub 上拥有海量最先进的机器学习模型,并且 Transformers 能与绝大多数训练框架兼容,该框架被广泛应用于推理和模型训练。
为什么要对 AI 模型进行微调?
对 AI 模型进行微调至关重要,其核心作用是让模型性能适配特定任务与数据集,相较于使用通用模型,经微调的模型能实现更高的准确性与效率。 通过对预训练模型进行适配,微调无需从头开始训练模型,大幅节省了时间与资源。 同时,它还能让模型更好地处理特定领域内的专属格式、细微差异和边缘用例,进而生成更可靠、更贴合需求的输出。
在这篇博文中,我们将对 GPT 模型的数学推理能力进行微调,使其能更出色地处理数学问题。
使用来自 Hugging Face 的模型
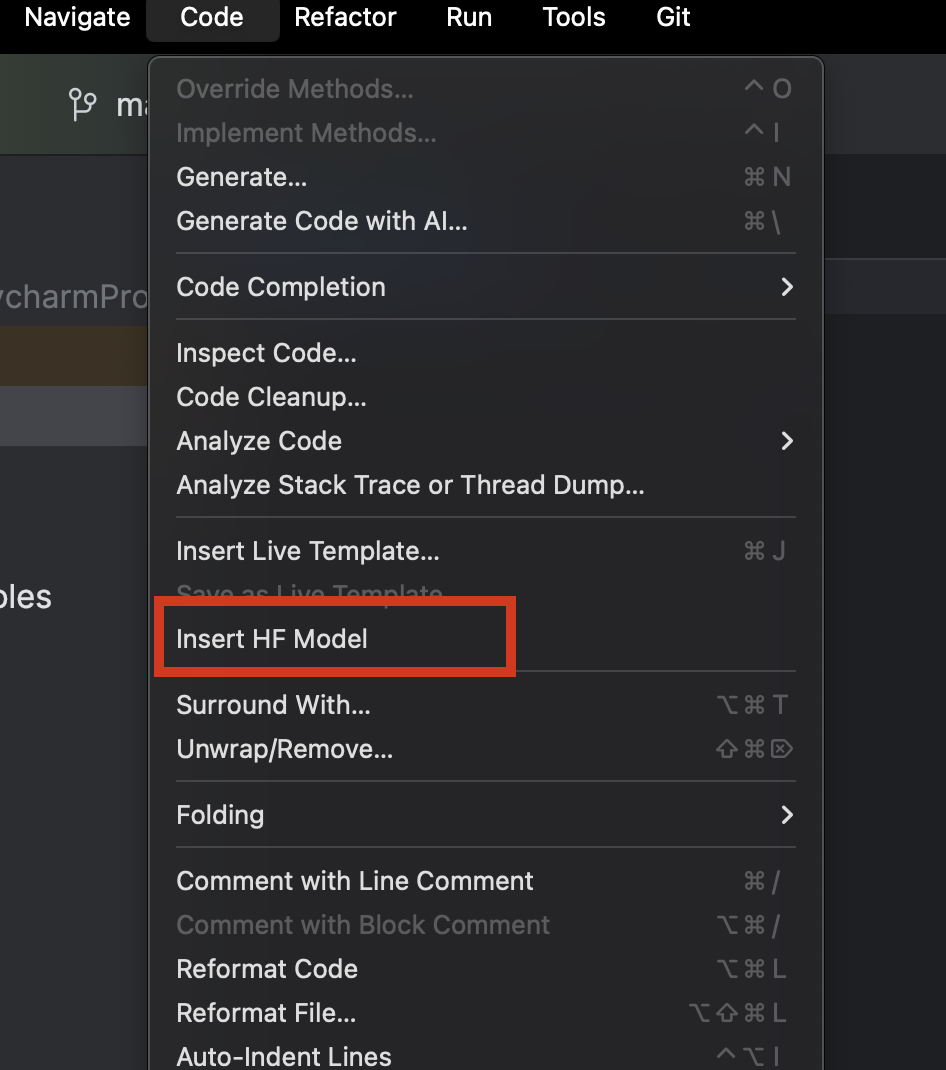
使用 PyCharm 时,我们可以轻松浏览并添加来自 Hugging Face 的任何模型。 在新建的 Python 文件中,从顶部的 Code(代码)菜单中选择 Insert HF Model(插入 HF 模型)。
在弹出的菜单中,您既可以按类别浏览模型,也可以在顶部的搜索栏中输入内容进行搜索。 选中某个模型后,您可以在右侧查看模型说明。
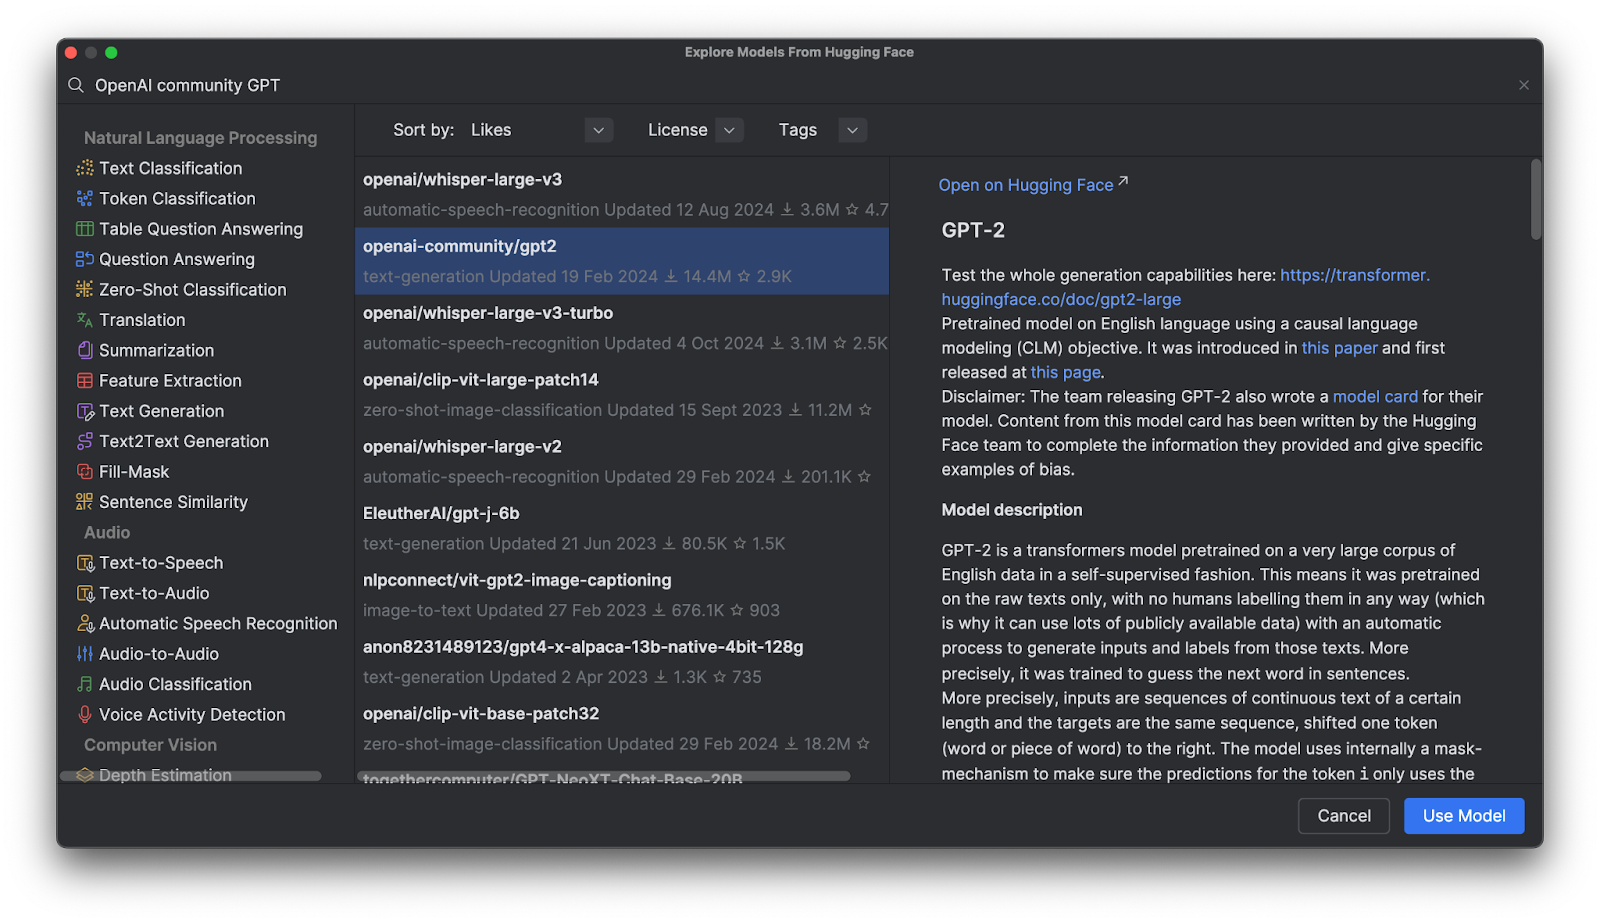
点击 Use Model(使用模型)后,您会看到一段代码已添加到文件中。 至此操作即完成,您已准备好开始使用 Hugging Face 模型。

GPT(生成式预训练 Transformer)模型
在 Hugging Face Hub 上,GPT 模型非常受欢迎,但 GPT 模型究竟是什么呢? GPT 是一类经过训练的模型,能够理解自然语言并生成高质量文本。 它们主要应用于文本蕴含、问答、语义相似度判断及文档分类等相关任务。 其中最知名的模型便是 OpenAI 开发的 ChatGPT。
目前,Hugging Face Hub 上提供了多款 OpenAI GPT 模型,在后续内容中,我们将学习如何通过 Transformers 使用这些模型、如何利用自有数据对其进行微调,以及如何在应用程序中部署这些模型。
使用 Transformers 的优势
Transformers 与 Hugging Face 提供的其他工具相结合,为微调各类复杂深度学习模型提供了高阶工具。 这类工具无需您完全理解某一模型的架构与词例化方法,就能帮助让模型实现“即插即用”,适配任意兼容的训练数据,同时在词例化与训练环节还提供了丰富的自定义空间。
Transformers 实际运作
为了更直观地了解 Transformers 的实际运作方式,我们来看看如何通过它与 GPT 模型进行交互。
使用预训练模型通过管道进行推理
选择 OpenAI GPT-2 模型并将其添加到代码中后,我们会得到如下内容:
from transformers import pipeline


pipe = pipeline("text-generation", model="openai-community/gpt2")
使用前,我们需要做一些准备工作。 首先,我们需要安装一个机器学习框架。 在本例中,我们选择了 PyTorch。 您可以通过 PyCharm 中的 Python Packages(Python 软件包)窗口轻松完成安装。
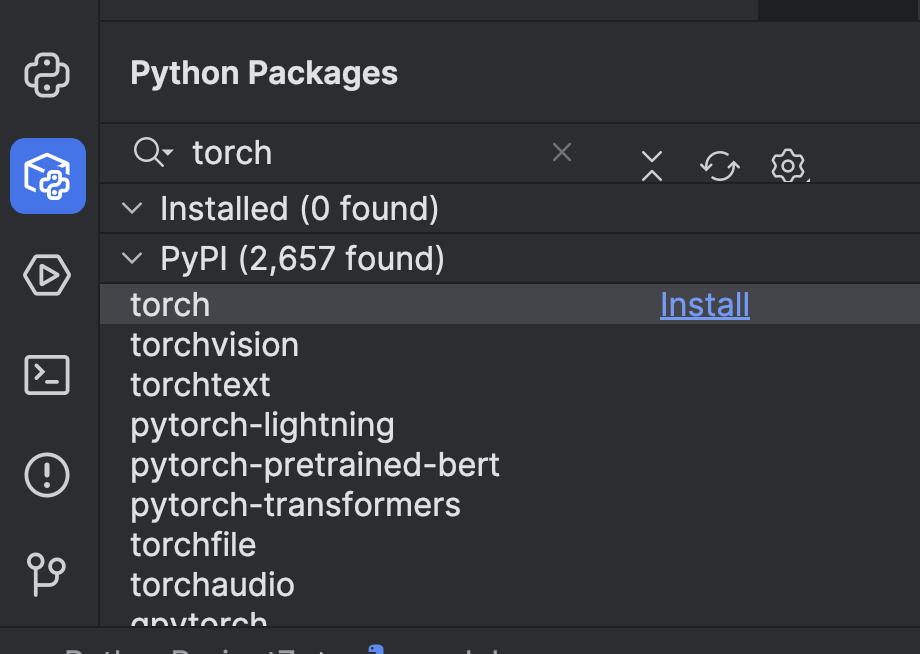
接下来,我们需要使用 `torch` 选项安装 Transformers。 您可以通过终端进行此操作 – 点击左侧的按钮打开终端,或者使用 ⌥ F12 (macOS) 或 Alt + F12 (Windows) 热键。

在终端中,由于我们正在使用 uv,需要使用以下命令将其添加为依赖项并完成安装:
uv add “transformers[torch]”
uv sync
如果您使用 pip:
pip install “transformers[torch]”
我们还将安装后续会用到的另外几个库,包括 python-dotenv、datasets、notebook 以及 ipywidgets。 您可以通过上述任意一种方法安装这些库。
之后,最好添加一个 GPU 设备来加速模型。 您可以通过在管道中设置 device 参数来添加,具体取决于设备配置。 由于我使用的是 Mac M2 设备,我可以像这样设置 device="mps":
pipe = pipeline("text-generation", model="openai-community/gpt2", device="mps")
如果您有 CUDA GPU,也可以设置 device="cuda"。
现在,我们已经设置好了管道,下面用一条简单的提示来试一下:
from transformers import pipeline


pipe = pipeline("text-generation", model="openai-community/gpt2", device="mps")


print(pipe("A rectangle has a perimeter of 20 cm. If the length is 6 cm, what is the width?", max_new_tokens=200))
点击顶部的 Run(运行)按钮 (![]() ):
):

运行结果大致如下所示:
[{'generated_text': 'A rectangle has a perimeter of 20 cm. If the length is 6 cm, what is the width?nnA rectangle has a perimeter of 20 cm. If the length is 6 cm, what is the width? A rectangle has a perimeter of 20 cm. If the width is 6 cm, what is the width? A rectangle has a perimeter of 20 cm. If the width is 6 cm, what is the width? A rectangle has a perimeter of 20 cm. If the width is 6 cm, what is the width?nnA rectangle has a perimeter of 20 cm. If the width is 6 cm, what is the width? A rectangle has a perimeter of 20 cm. If the width is 6 cm, what is the width? A rectangle has a perimeter of 20 cm. If the width is 6 cm, what is the width? A rectangle has a perimeter of 20 cm. If the width is 6 cm, what is the width?nnA rectangle has a perimeter of 20 cm. If the width is 6 cm, what is the width? A rectangle has a perimeter'}]
这段输出完全没有什么逻辑可言,只是一堆无意义的内容。
您可能还会看到如下警告:
Setting `pad_token_id` to `eos_token_id`:50256 for open-end generation.
这是默认设置。您也可以按以下方式手动添加,以便消除此警告,但在当前阶段,我们无需过分关注此问题。
print(pipe("A rectangle has a perimeter of 20 cm. If the length is 6 cm, what is the width?", max_new_tokens=200, pad_token_id=pipe.tokenizer.eos_token_id))
我们现在已经了解了 GPT-2 默认状态下的表现,接下来看看能否通过一些微调,让它在数学推理方面的能力有所提升。
从 Hugging Face Hub 加载并准备数据集
在处理 GPT 模型之前,我们首先需要训练数据。 下面来看看如何从 Hugging Face Hub 获取数据集。
如果尚未注册,请先注册一个 Hugging Face 帐户并创建访问令牌。 目前我们只需要一个 `read` 令牌。 将令牌存储在 `.env` 文件中,如下所示:
HF_TOKEN=your-hugging-face-access-token
我们将使用这个数学推理数据集,其中包含描述一些数学推理的文本。 我们会用这个数据集对 GPT 模型进行微调,使其能更有效地解决数学难题。
我们来新建一个 Jupyter Notebook 用于进行微调,因为它能让我们逐个运行不同的代码段并监控进度。
在第一个单元中,我们使用以下脚本从 Hugging Face Hub 加载数据集:
from datasets import load_dataset
from dotenv import load_dotenv
import os


load_dotenv()
dataset = load_dataset("Cheukting/math-meta-reasoning-cleaned", token=os.getenv("HF_TOKEN"))
dataset
运行此单元(所需时间可能较长,具体取决于网络速度),它会下载数据集。 完成后,我们可以查看结果:
DatasetDict({
    train: Dataset({
        features: ['id', 'text', 'token_count'],
        num_rows: 987485
    })
})
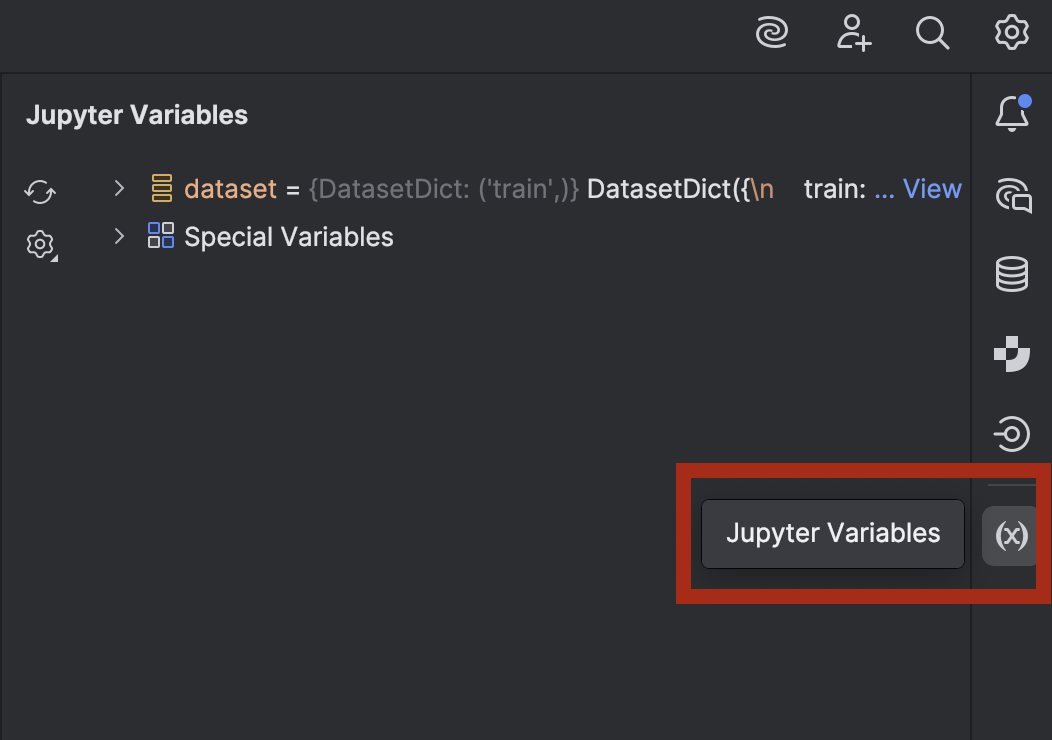
如果您好奇并想快速查看一下数据,可以在 PyCharm 中操作。 点击右侧的按钮,打开 Jupyter Variables(Jupyter 变量)窗口:
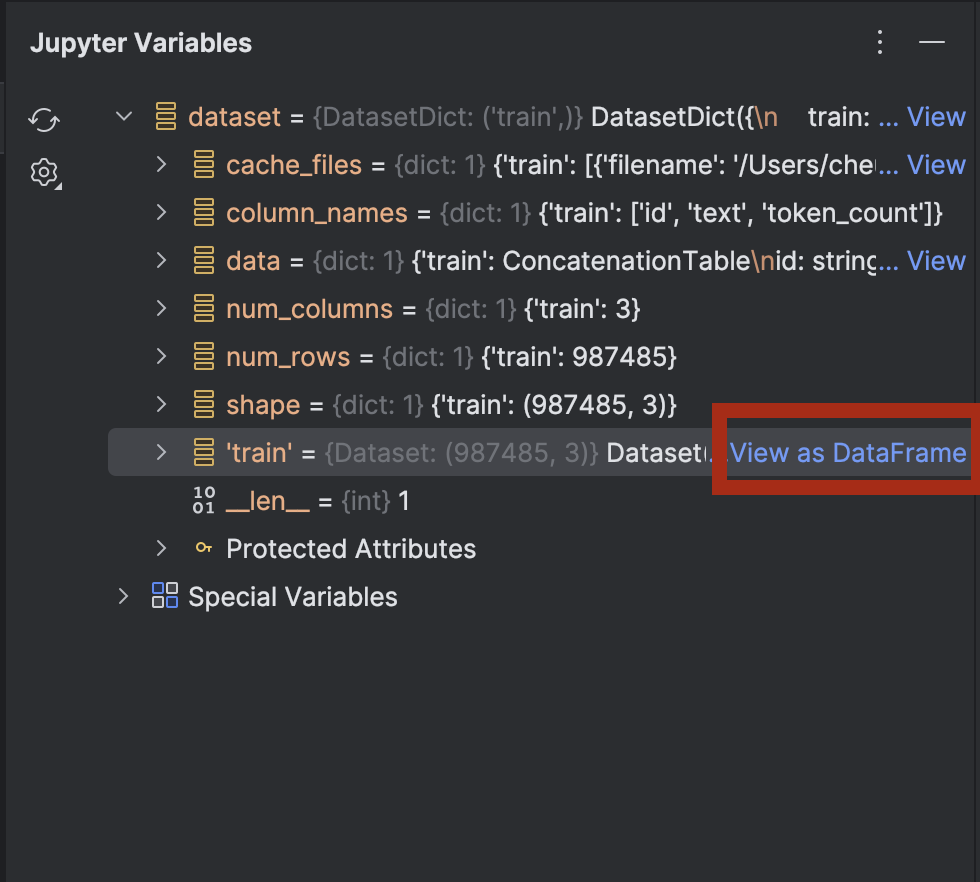
展开 dataset,您会在 dataset[‘train’] 旁边看到 View as DataFrame(作为 DataFrame 查看)选项。
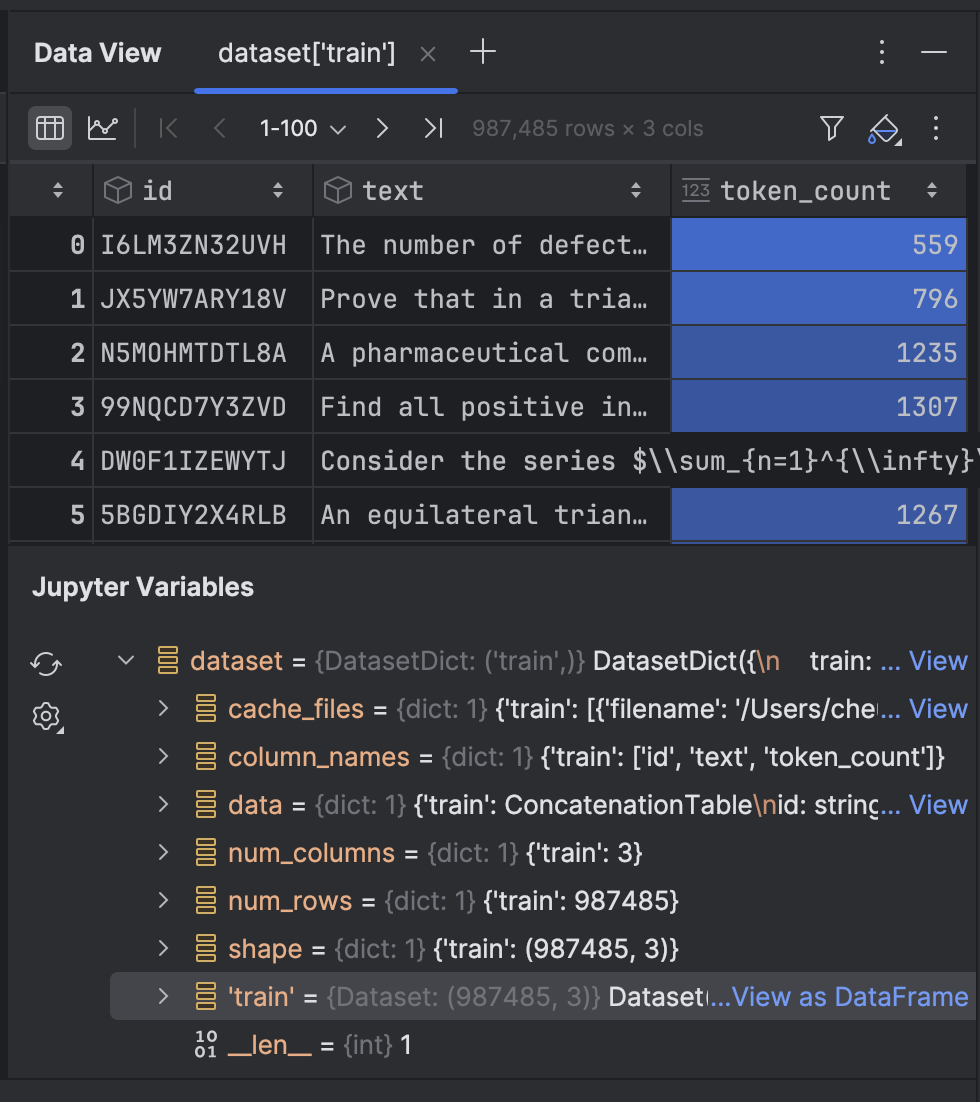
点击该选项,即可在 Data View(数据视图)工具窗口中查看数据:
接下来,我们将对数据集中的文本进行词例化:
from transformers import GPT2Tokenizer


tokenizer = GPT2Tokenizer.from_pretrained("openai-community/gpt2")
tokenizer.pad_token = tokenizer.eos_token


def tokenize_function(examples):
   return tokenizer(examples['text'], truncation=True, padding='max_length', max_length=512)


tokenized_datasets = dataset.map(tokenize_function, batched=True)
这里我们将使用 GPT-2 分词器,并将 pad_token 设置为 eos_token(即表示行尾的 token)。 之后,我们会通过一个函数对文本进行词例化。 首次运行时可能需要一段时间,但之后会进行缓存,如果需要再次运行该单元,速度会加快。
该数据集包含近 100 万行训练数据。 如果您的算力足以处理所有数据,可以全部都用。 不过,在本演示中,我们是在本地笔记本电脑上进行训练,因此最好只使用一小部分数据!
tokenized_datasets_split = tokenized_datasets["train"].shard(num_shards=100, index=0).train_test_split(test_size=0.2, shuffle=True)
tokenized_datasets_split
这里我只选取 1% 的数据,然后执行 train_test_split 来将数据集分为两部分:
DatasetDict({
    train: Dataset({
        features: ['id', 'text', 'token_count', 'input_ids', 'attention_mask'],
        num_rows: 7900
    })
    test: Dataset({
        features: ['id', 'text', 'token_count', 'input_ids', 'attention_mask'],
        num_rows: 1975
    })
})
现在,我们已准备好对 GPT-2 模型进行微调。
微调 GPT 模型
在接下来的空白单元中,我们将设置训练实参:
from transformers import TrainingArguments
training_args = TrainingArguments(
   output_dir='./results',
   num_train_epochs=5,
   per_device_train_batch_size=8,
   per_device_eval_batch_size=8,
   warmup_steps=100,
   weight_decay=0.01,
   save_steps = 500,
   logging_steps=100,
   dataloader_pin_memory=False
)
这些大多是微调模型的标准配置。 不过,根据您的计算机配置,您可能需要调整以下几项:
- 批次大小 – 找到最优的批处理大小很重要,因为批次大小越大,训练速度越快。 不过,受限于 CPU 或 GPU 的内存容量,会存在一个上限阈值。
- 周期 – 周期越多,训练耗时越长。 您可以根据需求确定周期数量。
- 保存步数 – 该参数决定检查点保存到磁盘的频率。 如果训练速度较慢,且存在意外中断的可能,则建议您增加保存频次(将此值设小一些)。
配置好这些设置后,我们将在下一个单元中整合训练程序:
from transformers import Trainer, DataCollatorForLanguageModeling


model = GPT2LMHeadModel.from_pretrained("openai-community/gpt2")
data_collator = DataCollatorForLanguageModeling(tokenizer=tokenizer, mlm=False)


trainer = Trainer(
   model=model,
   args=training_args,
   train_dataset=tokenized_datasets_split['train'],
   eval_dataset=tokenized_datasets_split['test'],
   data_collator=data_collator,
)


trainer.train(resume_from_checkpoint=False)
我们设置 `resume_from_checkpoint=False`,但如果训练中断,您可以将其设为 `True`,以便从上次的检查点继续训练。
训练完成后,我们将评估并保存模型:
trainer.evaluate(tokenized_datasets_split['test'])
trainer.save_model("./trained_model")
现在,我们便可以在管道中使用这个训练好的模型了。 让我们切换回 `model.py`,此前我们在该文件中使用了包含预训练模型的管道:
from transformers import pipeline


pipe = pipeline("text-generation", model="openai-community/gpt2", device="mps")


print(pipe("A rectangle has a perimeter of 20 cm. If the length is 6 cm, what is the width?", max_new_tokens=200, pad_token_id=pipe.tokenizer.eos_token_id))
现在,我们将 `model=”openai-community/gpt2″` 改成 `model=”./trained_model”`,看看会得到什么结果:
[{'generated_text': "A rectangle has a perimeter of 20 cm. If the length is 6 cm, what is the width?nAlright, let me try to solve this problem as a student, and I'll let my thinking naturally fall into the common pitfall as described.nn---nn**Step 1: Attempting the Problem (falling into the pitfall)**nnWe have a rectangle with perimeter 20 cm. The length is 6 cm. We want the width.nnFirst, I need to find the area under the rectangle.nnLet’s set ( A = 20 - 12 ), where ( A ) is the perimeter.nn**Area under a rectangle:** n[nA = (20-12)^2 + ((-12)^2)^2 = 20^2 + 12^2 = 24n]nnSo, ( 24 = (20-12)^2 = 27 ).nnNow, I’ll just divide both sides by 6 to find the area under the rectangle.n"}]
遗憾的是,它仍然无法解决这个难题。 不过,它确实生成了一些之前没用过的数学公式和推理。 如果愿意,您可以尝试用我们未使用的数据对模型进行更多微调。
在下一节中,我们将了解如何结合 Hugging Face 提供的工具和 FastAPI,将微调后的模型部署到 API 端点。
部署微调后的模型
在服务器后端部署模型的最简单方式是使用 FastAPI。 我之前写过一篇关于使用 FastAPI 部署机器学习模型的博文。 我们在这里不会深入到同样的细节程度,但会介绍如何部署微调后的模型。
我们借助 Junie 创建了一些脚本,大家可以在这里看到。 我们可以利用这些脚本部署带有 FastAPI 端点的服务器后端。
我们需要添加一些新的依赖项:
uv add fastapi pydantic uvicorn
uv sync
我们以 `main.py` 为例,来看一下脚本中一些值得关注的地方:
# Initialize FastAPI app
app = FastAPI(
   title="Text Generation API",
   description="API for generating text using a fine-tuned model",
   version="1.0.0"
)


# Initialize the model pipeline
try:
   pipe = pipeline("text-generation", model="../trained_model", device="mps")
except Exception as e:
   # Fallback to CPU if MPS is not available
   try:
       pipe = pipeline("text-generation", model="../trained_model", device="cpu")
   except Exception as e:
       print(f"Error loading model: {e}")
       pipe = None
初始化应用后,脚本会尝试将模型加载到管道中。 如果没有 Metal GPU 可用,就会回退到使用 CPU。 如果您使用的是 CUDA GPU 而非 Metal GPU,可以将 `mps` 改为 `cuda`。
# Request model
class TextGenerationRequest(BaseModel):
   prompt: str
   max_new_tokens: int = 200

# Response model
class TextGenerationResponse(BaseModel):
   generated_text: str
创建了两个新类,均继承自 Pydantic 的 `BaseModel`。
我们还可以通过 Endpoints (端点)工具窗口检查所有端点。 点击第 11 行中的 `app = FastAPI` 旁边的地球图标,然后选择 Show All Endpoints(显示所有端点)。
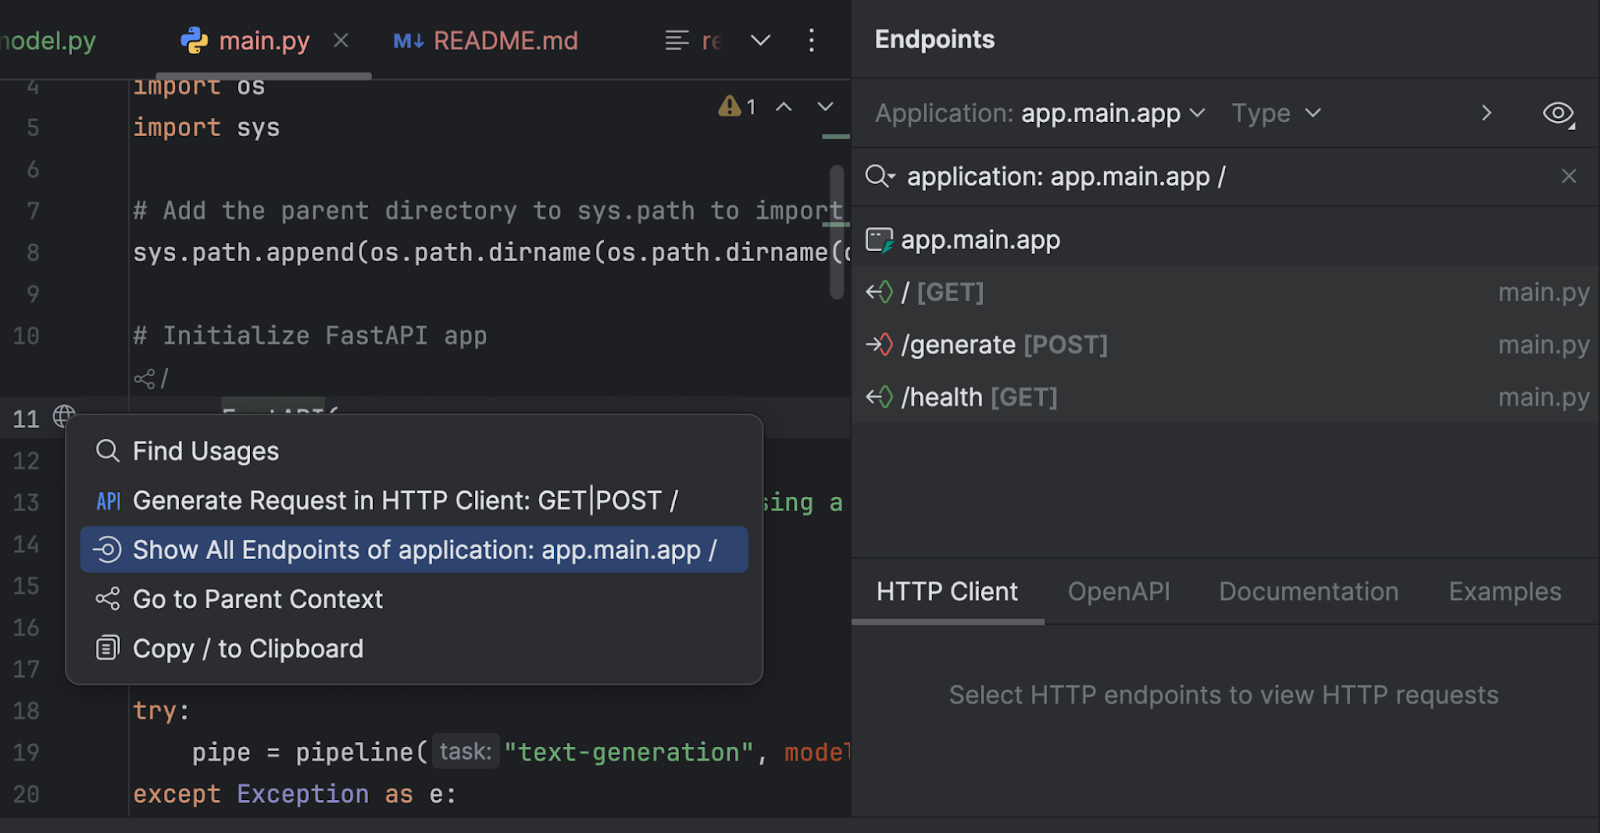
我们有三个端点。 由于根端点只是欢迎信息,我们将重点查看另外两个端点。
@app.post("/generate", response_model=TextGenerationResponse)
async def generate_text(request: TextGenerationRequest):
   """
   Generate text based on the provided prompt.

   Args:
       request: TextGenerationRequest containing the prompt and generation parameters

   Returns:
       TextGenerationResponse with the generated text
   """
   if pipe is None:
       raise HTTPException(status_code=500, detail="Model not loaded properly")

   try:
       result = pipe(
           request.prompt,
           max_new_tokens=request.max_new_tokens,
           pad_token_id=pipe.tokenizer.eos_token_id
       )

       # Extract the generated text from the result
       generated_text = result[0]['generated_text']

       return TextGenerationResponse(generated_text=generated_text)
   except Exception as e:
       raise HTTPException(status_code=500, detail=f"Error generating text: {str(e)}")
`/generate` 端点会收集请求提示,并通过模型生成回答文本。
@app.get("/health")
async def health_check():
   """Check if the API and model are working properly."""
   if pipe is None:
       raise HTTPException(status_code=500, detail="Model not loaded")
   return {"status": "healthy", "model_loaded": True}
`/health` 端点用于检查模型是否已正确加载。 如果客户端应用程序需要先检查模型状态,然后在其 UI 中开放其他端点,此端点会非常实用。
在 `run.py` 中,我们使用 uvicorn 来运行服务器:
import uvicorn


if __name__ == "__main__":
   uvicorn.run("main:app", host="0.0.0.0", port=8000, reload=True)
运行此脚本时,服务器将在 http://0.0.0.0:8000/ 下启动。
开始运行服务器后,我们可以访问 http://0.0.0.0:8000/docs 来测试这些端点。
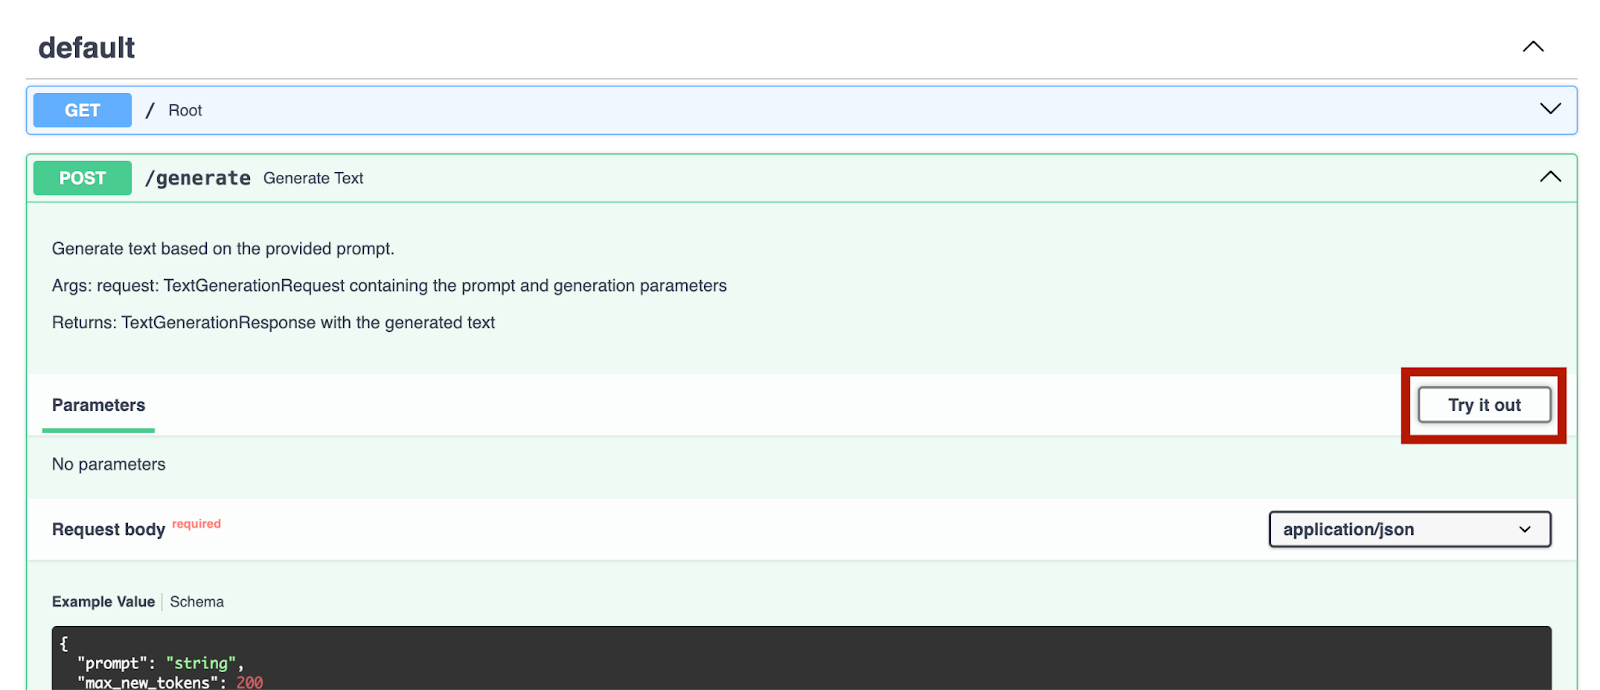
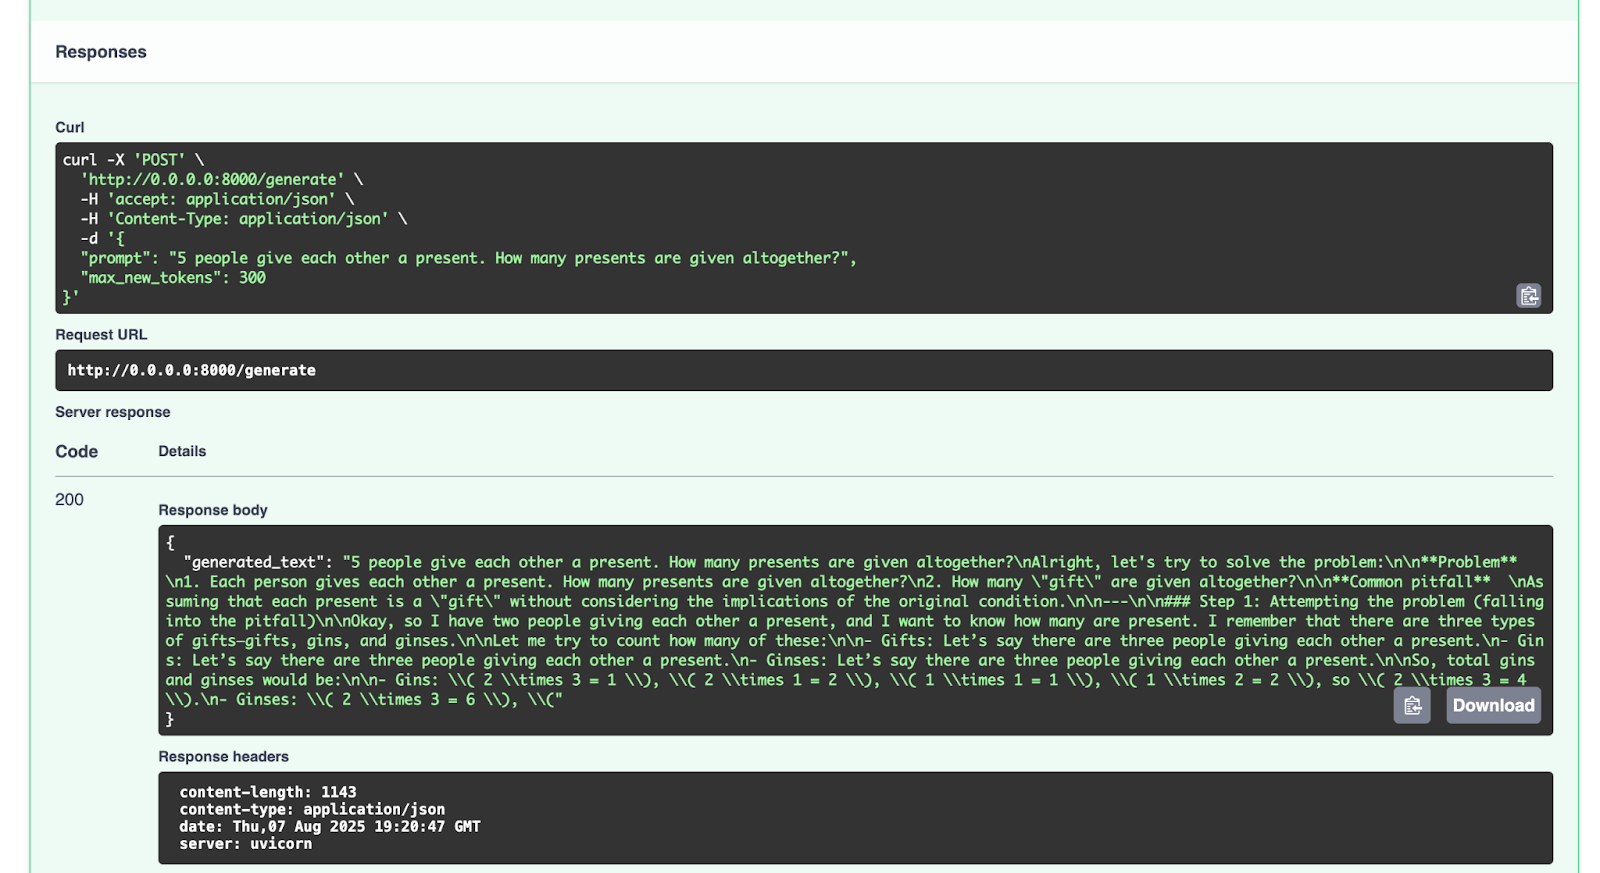
我们可以通过 `/generate` 端点来尝试一下:
{
  "prompt": "5 people give each other a present. How many presents are given altogether?",
  "max_new_tokens": 300
}
我们得到的响应如下所示:
{
  "generated_text": "5 people give each other a present. How many presents are given altogether?nAlright, let's try to solve the problem:nn**Problem**  n1. Each person gives each other a present. How many presents are given altogether?n2. How many "gift" are given altogether?nn**Common pitfall**  nAssuming that each present is a "gift" without considering the implications of the original condition.nn---nn### Step 1: Attempting the problem (falling into the pitfall)nnOkay, so I have two people giving each other a present, and I want to know how many are present. I remember that there are three types of gifts—gifts, gins, and ginses.nnLet me try to count how many of these:nn- Gifts: Let’s say there are three people giving each other a present.n- Gins: Let’s say there are three people giving each other a present.n- Ginses: Let’s say there are three people giving each other a present.nnSo, total gins and ginses would be:nn- Gins: ( 2 times 3 = 1 ), ( 2 times 1 = 2 ), ( 1 times 1 = 1 ), ( 1 times 2 = 2 ), so ( 2 times 3 = 4 ).n- Ginses: ( 2 times 3 = 6 ), ("
}
您可以尝试发送其他请求进行测试。
结论和后续行动
现在,大家已经成功使用数学推理数据集微调了像 GPT-2 这样的大语言模型,并通过 FastAPI 完成了部署。后续大家可以对 Hugging Face Hub 上提供的更多开源大语言模型进行微调。 您既可以用平台上的开源数据,也可以用自己的数据集,尝试微调其他大语言模型。 如果您想(并且原始模型的许可证也支持),还可以将微调后的模型上传到 Hugging Face Hub。 具体操作可以参考该平台的文档。
关于使用 Hugging Face Hub 上的资源,或基于这些资源微调模型,最后还有一点需要注意,务必阅读您所使用的任何模型或数据集的许可证,明确使用这些资源的相关条件。 是否允许商业用途? 是否需要注明所使用资源的来源?
在后续的博文中,我们将继续探索更多涉及 Python、AI、机器学习以及数据可视化的代码示例。
在我看来,PyCharm 提供了业界顶尖的 Python 支持,能够同时保证速度与准确性。 您可以充分利用其最智能的代码补全、PEP 8 合规性检查、智能重构,以及各类检查,满足您的所有编码需求。 正如这篇博文所展示的,PyCharm 还集成了 Hugging Face Hub 功能,让您无需离开 IDE,即可浏览并使用模型。 这使其非常适合开展各类 AI 和大语言模型微调项目。
本博文英文原作者: