

Big Data Tools
A data engineering plugin
How I started out with dbt®

For some time now, I’ve noticed that dbt® is gaining popularity. I’ve seen more questions and more success stories, so a couple of days ago I decided to try it out. But what exactly is dbt anyway?
Here is the first phrase you can find in its documentation: “dbt (data build tool) enables analytics engineers to transform data in their warehouses by simply writing select statements. dbt handles turn these select statements into tables and views.” It sounds interesting, but maybe that’s not entirely clear. Here’s my interpretation: dbt is a half-declarative tool for describing transformations inside a warehouse.
dbt doesn’t perform any extractions or loads (as in ELT); it is only responsible for transformations.
A remarkable fact about dbt: it uses 2 data engineering lingua franca: SQL and YAML.
So, let’s get going!
Installation
As dbt Core is written in Python I would usually install it with pipx. But here is the catch: there are many different connectors from dbt to other databases, so installing dbt in an isolated environment may not be that beneficial in this specific situation.
An alternative way is to use Python virtualenv and install dbt there, but for the sake of simplicity, I won’t describe it here. Thus, I’ll install dbt for Postgres with:
pip install –-user dbt-postgres
This takes some time because there are many dependencies, but not too many. The next step is to create a project.
Creating a project
Navigate to a directory where you want to create a project and call:
dbt init
During execution, this command asks several questions: the name of the project and id of the connector. I have only one connector – postgres – so I will select it by doing the following:
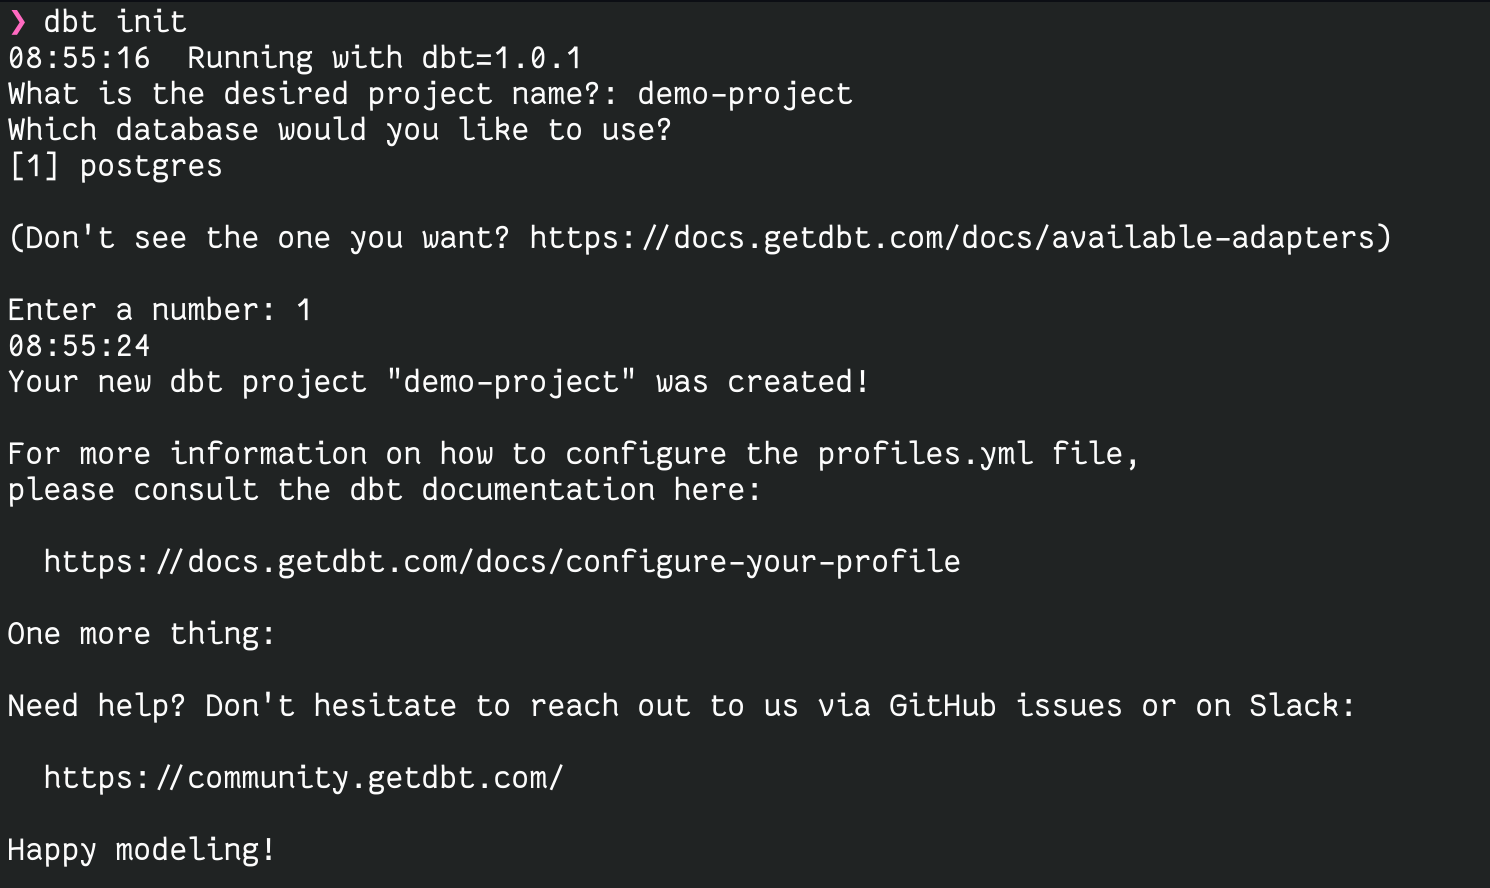
Given that I’ve used demo-project as the project name, the following file structure will be generated:
demo-project
├── analyses
│   └── .gitkeep
├── data
│   └── .gitkeep
├── dbt_project.yml
├── .gitignore
├── macros
│   └── .gitkeep
├── models
│   └── example
│       ├── my_first_dbt_model.sql
│       ├── my_second_dbt_model.sql
│       └── schema.yml
├── README.md
├── snapshots
│   └── .gitkeep
└── tests
    └── .gitkeep
Also, it will create (or update) the file ~/.dbt/profiles.yml, where database connection settings are stored.
As we can see, most of the project is just empty directories. This lets us understand what the most important parts are:
dbt_project.ymlis the description of the project’s global settings.modelsis the directory with the description of models we will work with.
Now it’s time to understand what the model is. A model is an atomic entity of dbt describing a model of our domain. It is just a single SQL file containing a single SELECT statement. Later on, it will be kept in our storage as a view, materialized view, or other related entity.
Besides the SQL model, we should also have a schema.yml file. This file contains a declarative description of models, tests, and types. I’ll elaborate on schema.yml later.
Now it’s time to write the first example.
Test schema
Consider the following DDL:
CREATE TABLE IF NOT EXISTS customer
(
   id         BIGSERIAL PRIMARY KEY,
   email      TEXT                                   NOT NULL,
   username   TEXT                                   NOT NULL,
   activated  BOOLEAN                  DEFAULT FALSE,
   created_at TIMESTAMP WITH TIME ZONE DEFAULT now() NOT NULL
);

CREATE TABLE IF NOT EXISTS post
(
   id         BIGSERIAL PRIMARY KEY,
   author     BIGINT                                 NOT NULL REFERENCES customer,
   content    TEXT,
   created_at TIMESTAMP WITH TIME ZONE DEFAULT now() NOT NULL
);

CREATE TABLE IF NOT EXISTS comment
(
   id         BIGSERIAL PRIMARY KEY,
   author     BIGINT                                 NOT NULL REFERENCES customer,
   content    TEXT,
   created_at TIMESTAMP WITH TIME ZONE DEFAULT now() NOT NULL,
   post       BIGINT                                 NOT NULL REFERENCES post
);
It’s a straightforward schema with three tables: customer, comment, and post. Each post has an author (customer), and each comment has an author (customer) and a post. If you prefer a visual representation of tables, here it is:
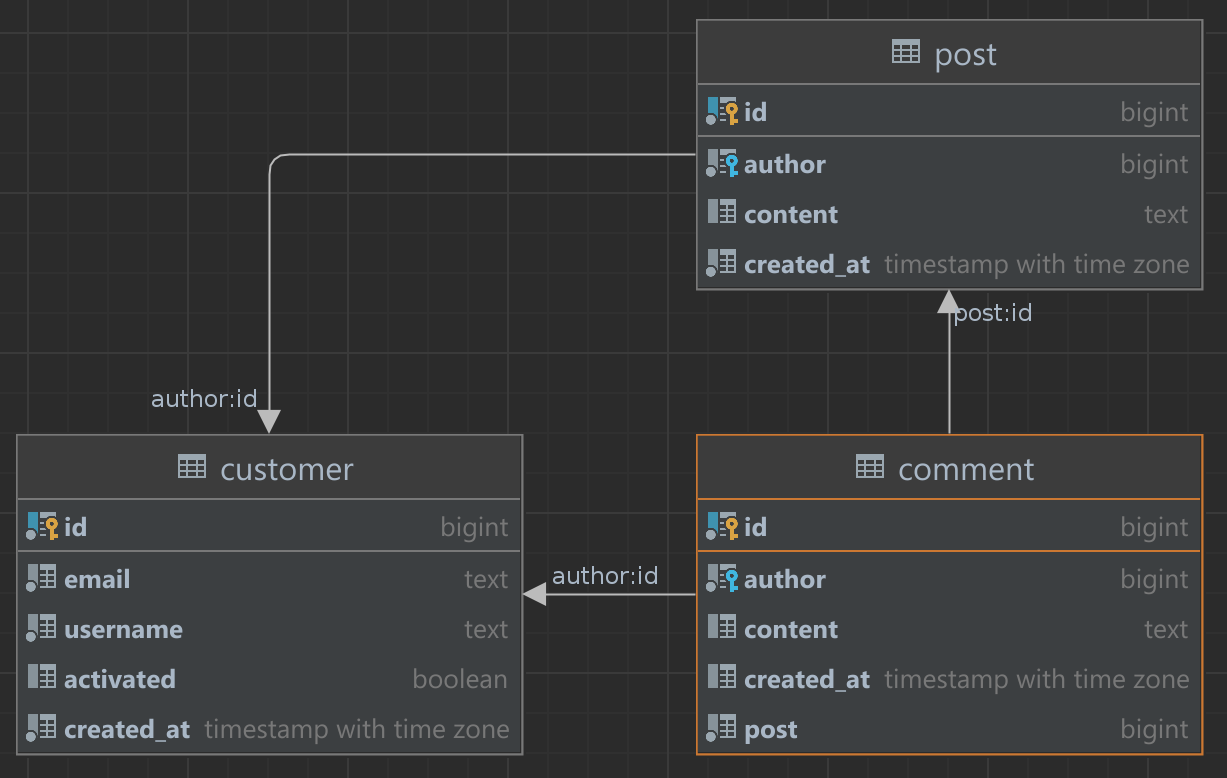
Just for the sake of realism, I added several not entirely necessary fields like created_at.
Now I will put some data into my DB just to have something to test my model on.
INSERT INTO customer (id, email, username, activated, created_at) VALUES (2, 'asm0dey@jetbrains.com', 'asm0dey', true, '2022-01-13 13:59:38.029016 +00:00');
INSERT INTO customer (id, email, username, activated, created_at) VALUES (3, 'pavel.finkelshteyn@jetbrains.com', 'asm0dey', true, '2022-01-13 18:05:22.305746 +00:00');
INSERT INTO comment (id, author, content, created_at, post) VALUES (1, 3, 'Test Comment', '2022-01-13 18:06:08.872014 +00:00', 1);
INSERT INTO public.post (id, author, content, created_at) VALUES (1, 2, 'Hello, world!', '2022-01-13 13:59:59.911324 +00:00');
Two customers, one post, one comment – nothing fancy, but already enough to start my experiments.
First model
First off, I will define the most simple model possible: a user model. I delete everything from the models/example directory and create a new file called user.sql there. Inside I write:
SELECT * FROM customer
That’s all. Of course, it won’t be that easy in real systems, but just imagine that we have a more complex data structure. Now, it’s time to define our view with its constraints in schema.yml and define what schema.yml is. Basically, schema.yml is the registry of all of our models in the current directory. Since all of the models are organized into a tree structure, descriptors can define some properties for underlying directories.
Here is my description of the user model:
version: 2

models:
- name: user
  description: "Same as customer, but with another name"
  columns:
    - name: id
      description: "The primary key for this table"
      tests:
        - unique
        - not_null
    - name: email
      description: email
      tests:
        - unique
        - not_null
    - name: username
      description: unique name of customer
      tests:
        - not_null
        - unique
It’s almost self-descriptive, but let’s look at several interesting things:
- Even though I select all fields from the
customertable, I define only three fields in the schema. This demonstrates that they don’t have to match each other. Of course, not enumerating all these fields leaves us prone to errors and is therefore not recommended. - The model itself and its columns have a field named
description. This description will go into the documentation. - Each column may have field
tests. I will run these tests to see if everything works as expected. Out of the box, dbt ships with four generic tests already defined:unique,not_null,accepted_values, andrelationships. You can read more about them and custom tests in docs.
Now that I have this very basic model, I can create it in my DB with the dbt run command.
This is how the output looks on my machine:
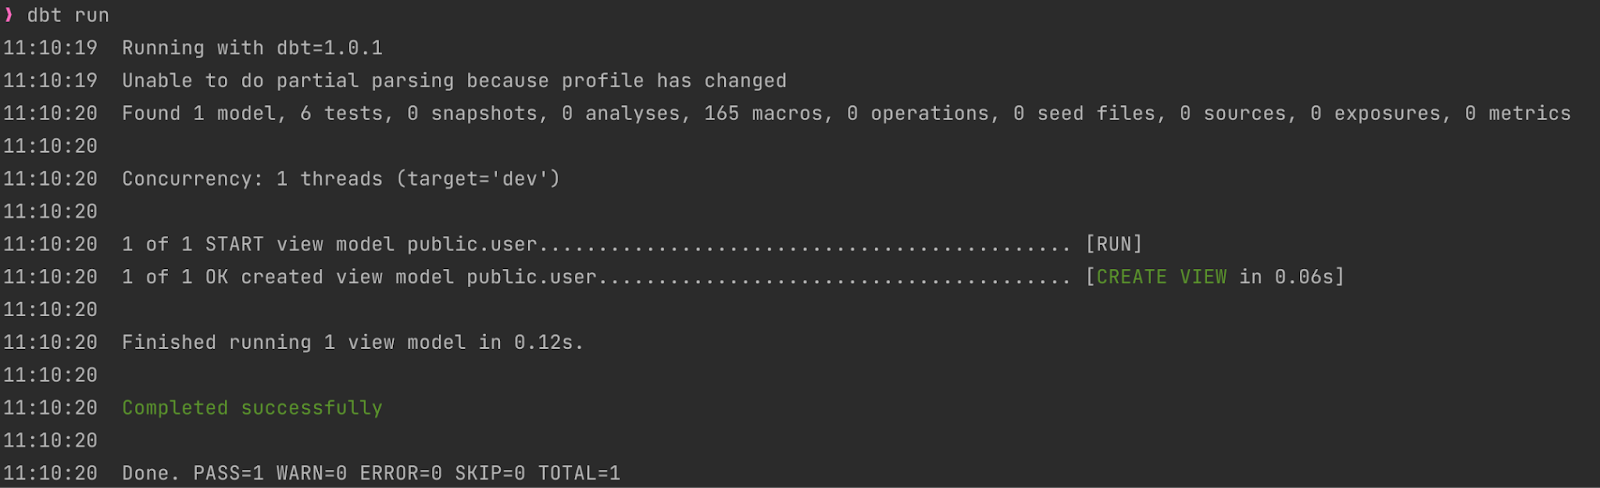
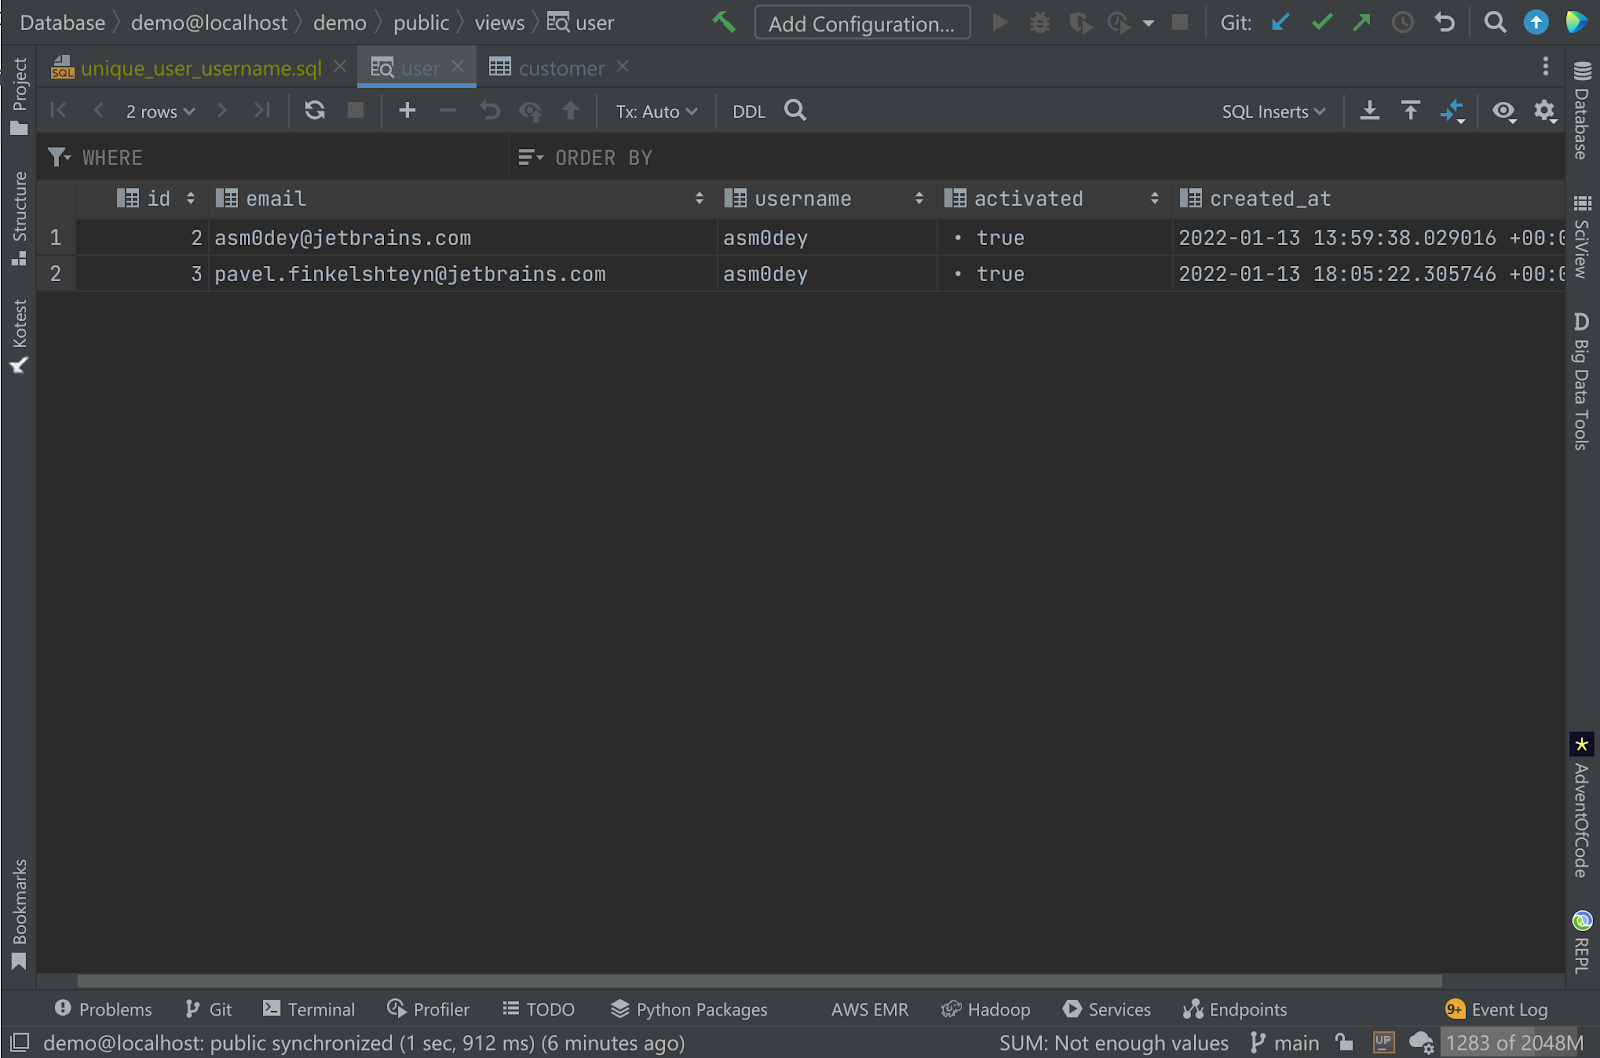
What did this command do? It created a view named user.
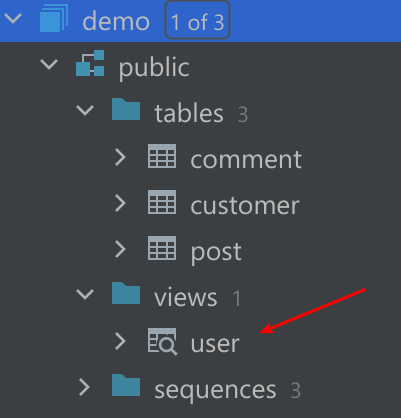
And its content precisely corresponds to our SQL query:
Testing model
Now, let’s test if our model complies with the dbt test command (spoiler: they should fail).
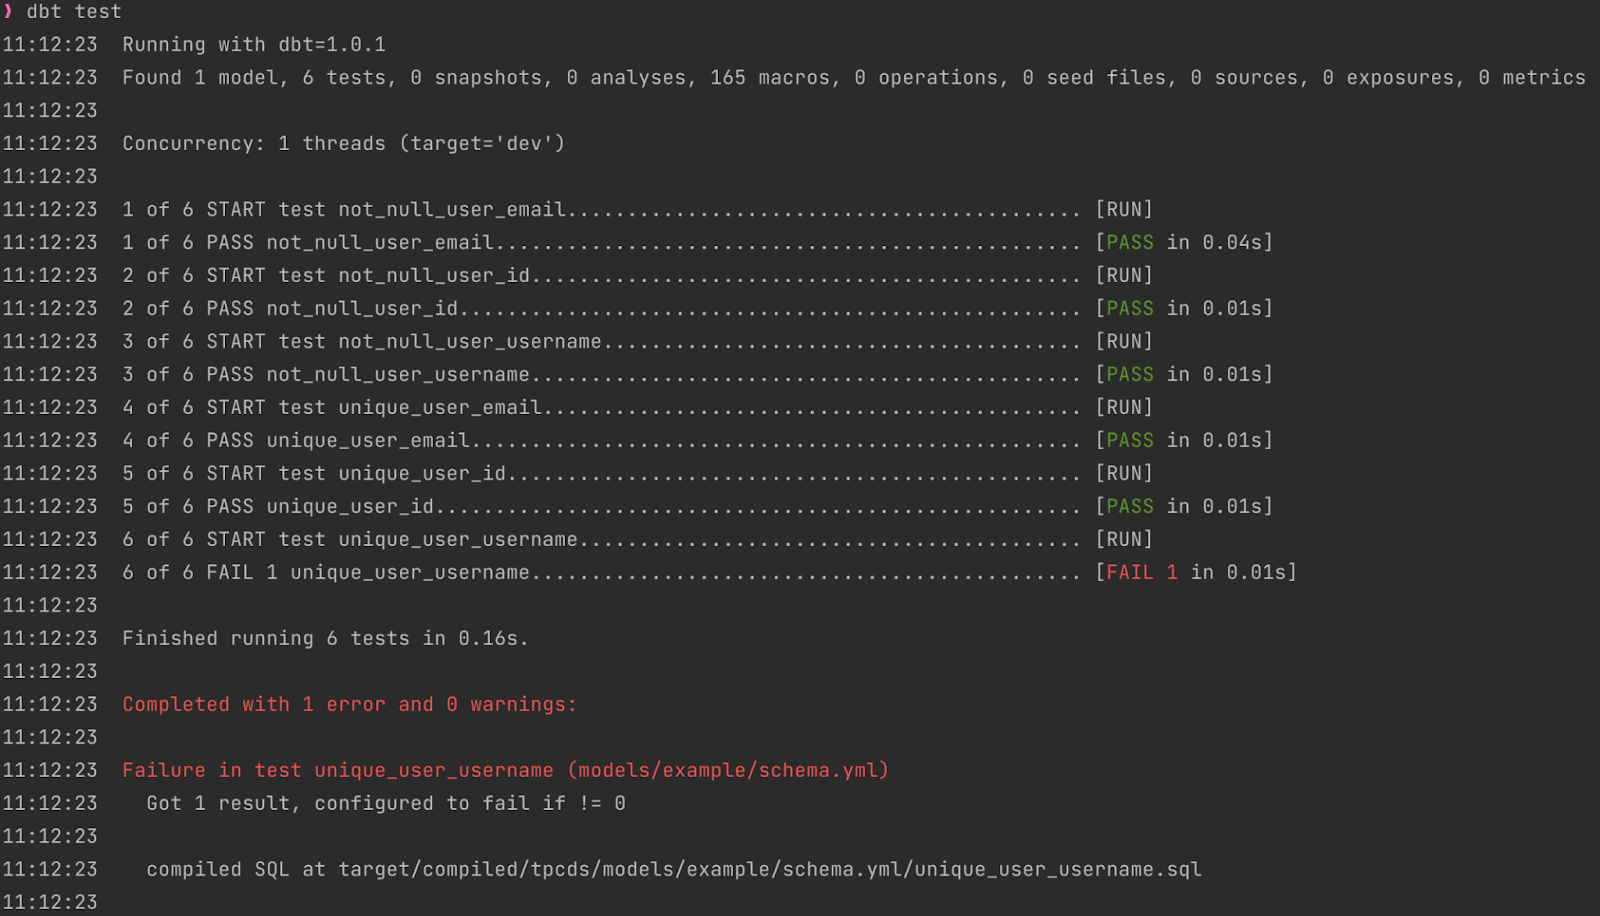
What a surprise – I have a “nonunique” username! And you know what’s cool? It gives me the location of the script executed to perform the check, so let’s open it. Here’s how it looks:
select
  username as unique_field,
  count(*) as n_records

from "demo"."public"."user"
where username is not null
group by username
having count(*) > 1
To check what’s wrong, I can just hit Ctrl+Enter in my IDE and see problematic usernames. Here’s how it looks for me:

Now I know what to do to fix it – I’ll just update my username. pasha.finkelshteyn should do the trick.
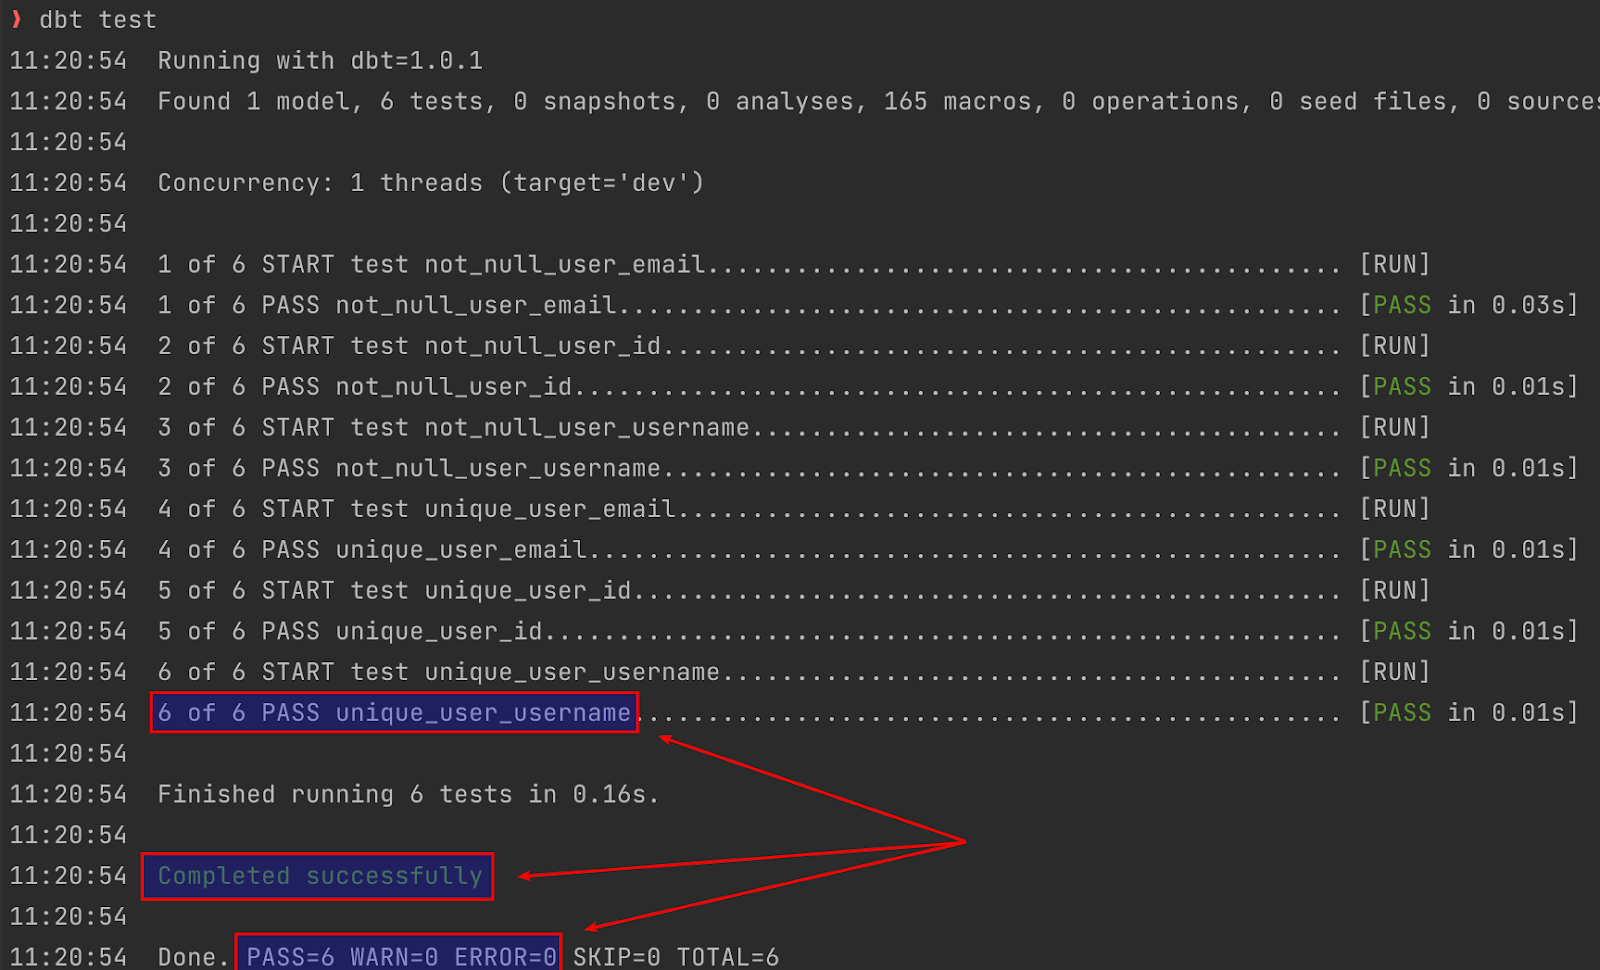
Tests passed!
But now the question arises: what if I want to build a more complex model? A model on top of other models, for example?
Second model
Of course, it’s possible thanks to jinja templating in models.
Jinja is a modern and powerful templating library used in all kinds of projects. There are such well-known tools as Ansible and Django. dbt does not usually utilize the full power of Jinja, but only a tiny subset of it (phew!). We need a dbt-specific function, called ref. It is almost clear from its name that it can refer to one model from another.
Let’s say, for example, that we want to view users with a count of posts they wrote. To perform this task, I’ll create a model.
WITH users AS (
  SELECT u.id user_id, u.username username
  FROM {{ ref('user') }} u
)
SELECT user_id,
      username,
      count(post.id) post_number
FROM users,
    post
WHERE post.author = user_id
GROUP BY user_id, username
Also, I register the model in the schema:
- name: user_post_count
  description: info about users and posts they wrote
  columns:
    - name: user_id
      type: bigint
      tests:
        - unique
        - not_null
        - relationships:
            to: ref('user')
            field: id
    - name: username
      type: text
      tests:
        - unique
        - not_null
        - relationships:
            to: ref('user')
            field: username
    - name: post_number
      description: number of posts user wrote
      type: int
      tests:
        - not_null
In both schema and model, you can see that I reference the already existing view with help of the ref function, and I hope that its usage is self-explanatory. It may be interesting to look at generated model code:
WITH users AS (
  SELECT u.id user_id, u.username username
  FROM "demo"."public"."user" u
)
SELECT user_id,
      username,
      count(post.id) post_number
FROM users,
    post
WHERE post.author = user_id
GROUP BY user_id, username
The exciting thing here is that dbt itself substituted the reference with the current view location in the database.
Updating transform layer
This time dbt build performed a humongous amount of work, checking and recreating two views and running 13 tests.
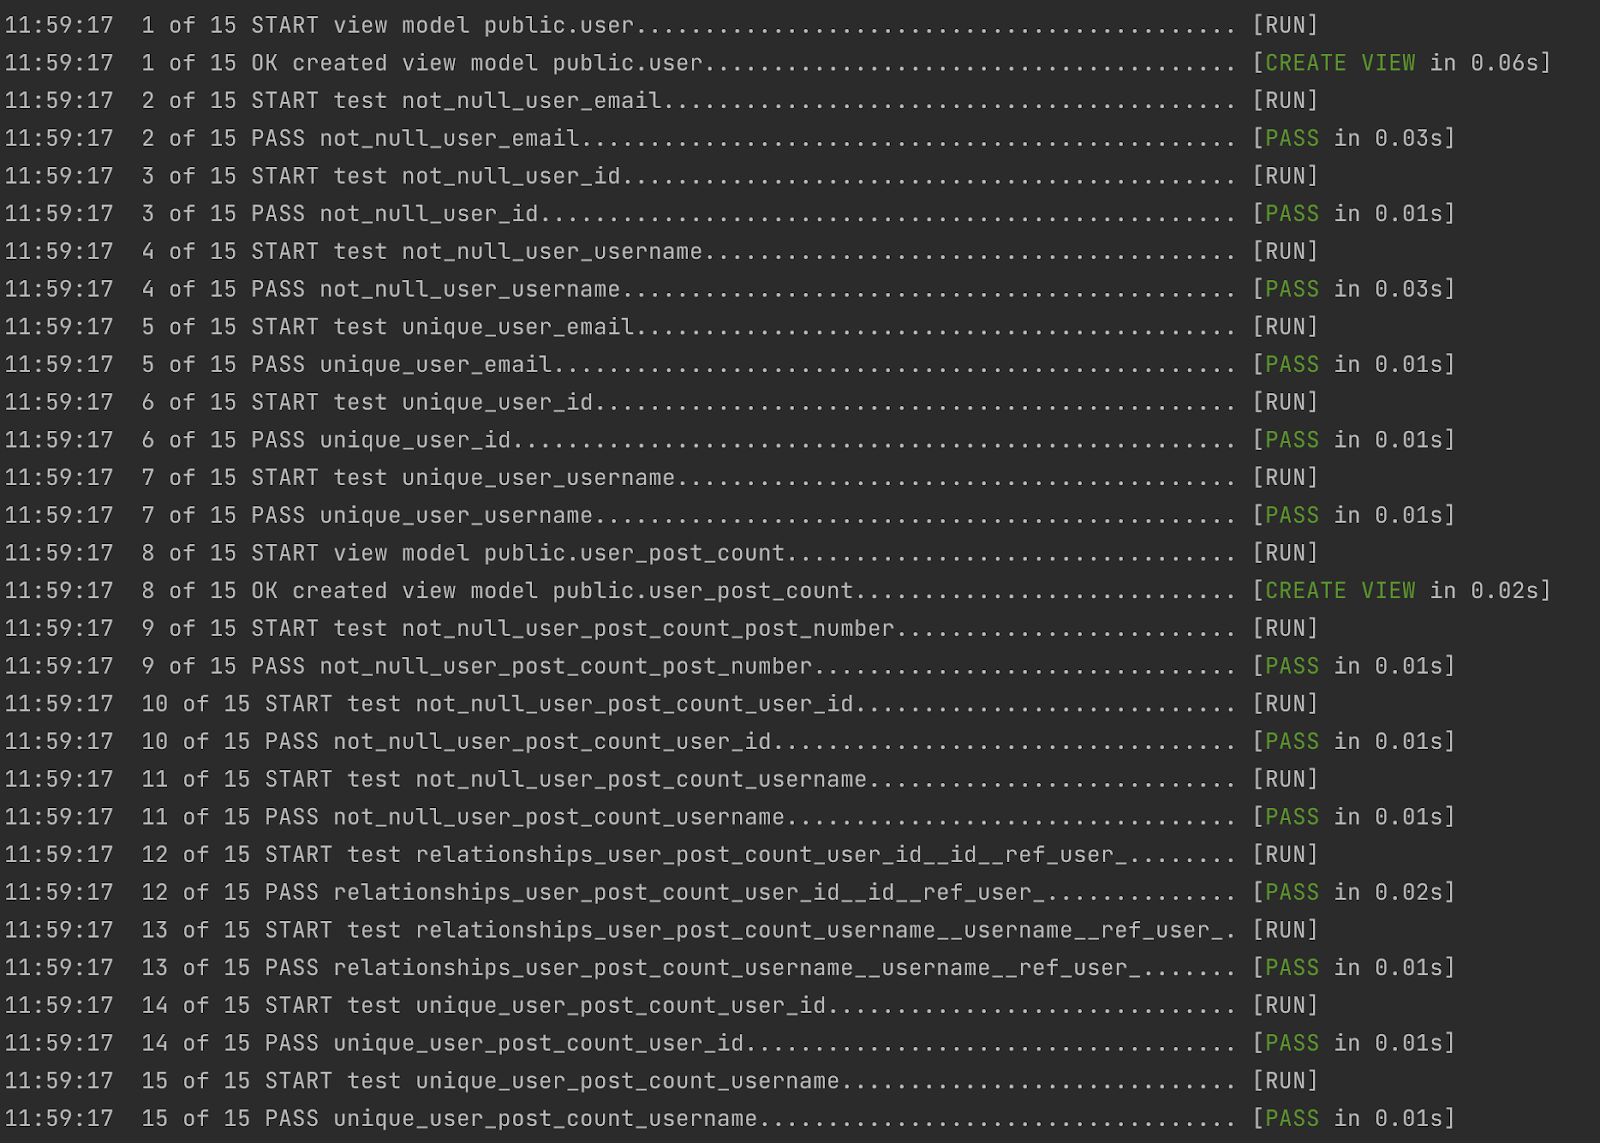
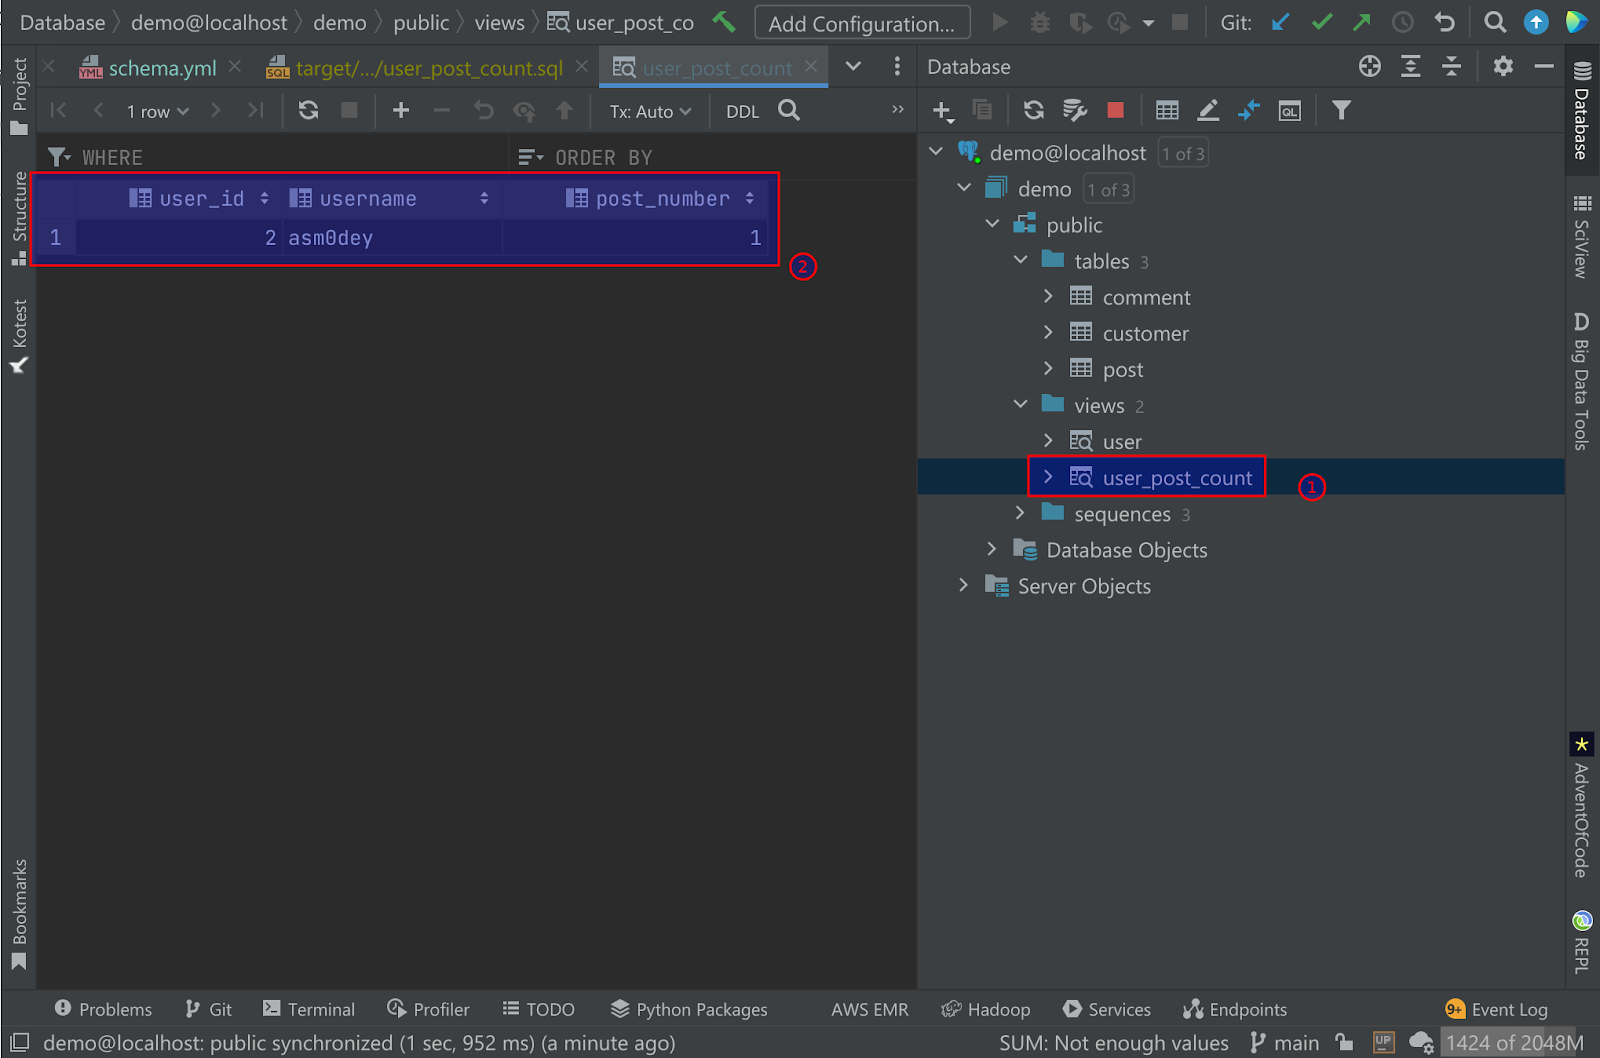
All the tests passed, so we have a new view (1) with a count of posts (2) for each user:
Generating docs on the transform layer
The final thing I want to do is generate documentation on my current view. To accomplish this, I will run the dbt docs serve command.
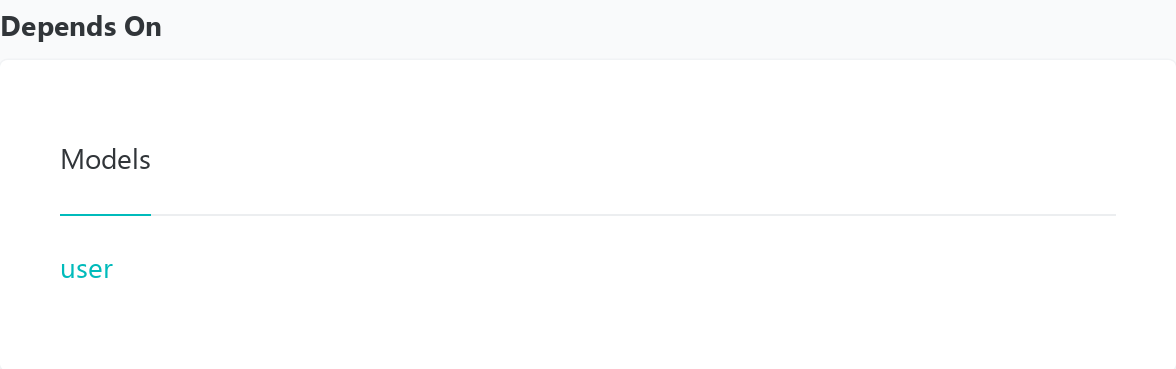
The generated documentation is just beautiful! For example, it contains:
- List of columns in a view
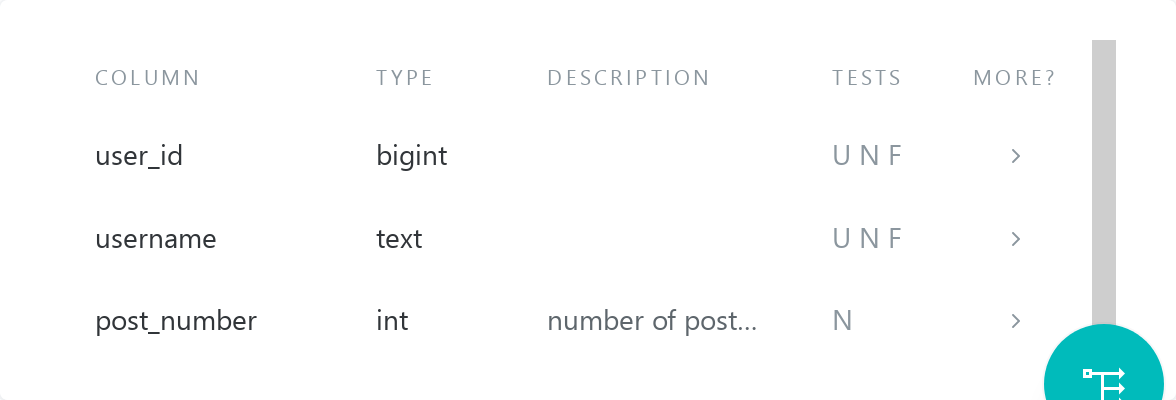
- Dependencies
- Source and compiled code of model:
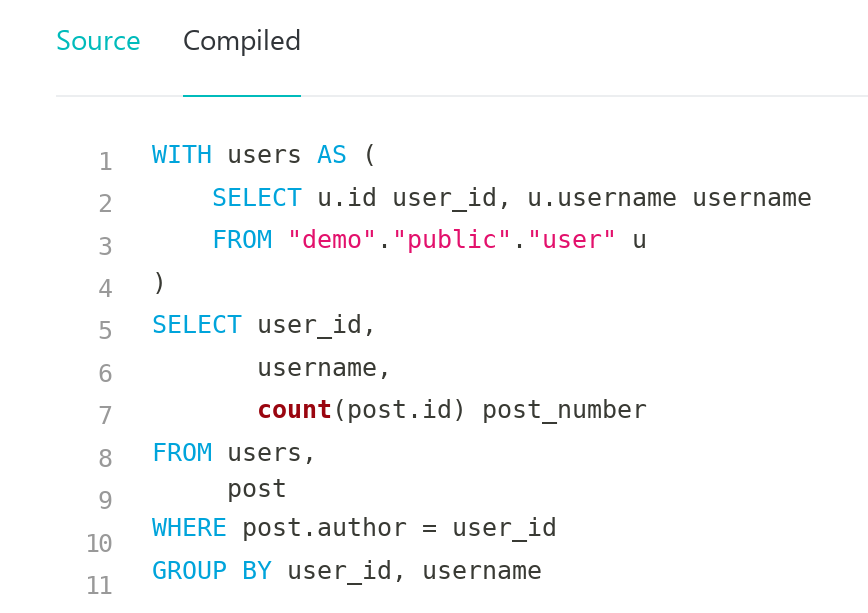
As well as lineage info, view diagram, and many more.
Conclusion
Let’s look at what we accomplished today:
- Created a dbt project.
- Described a couple of models in our exampletoy warehouse.
- Generated docs on our transformation layer.
Quite impressive for a small manual, right?
As you can see, dbt is an extremely easy-to-use tool for anybody familiar with SQL. It allows you to build, test, and document the transformation layer of the warehouse quickly.
Of course, I’ve only covered the essential aspects. I’ve built only a couple of views and we didn’t touch on topics like snapshots and incremental views. With that in mind, stay tuned to learn more!
You can check the source code on my GitHub, and you’re welcome to send me any feedback or improvement proposals.
dbt Mark is a trademark of dbt Labs, Inc.


