

Using AWS Athena from IntelliJ-based IDE

If you use the AWS cloud, then you probably store data on their S3 platform, either for your application data or in the form of logs from services like the AWS Elastic Load Balancing. Amazon offers Athena, a service built on Presto, and allows you to query this S3 data using ANSI SQL syntax.
So how to access this data straight from the IDE?
To do this, we’ll first need to do some configuration to connect the IDE with Athena.
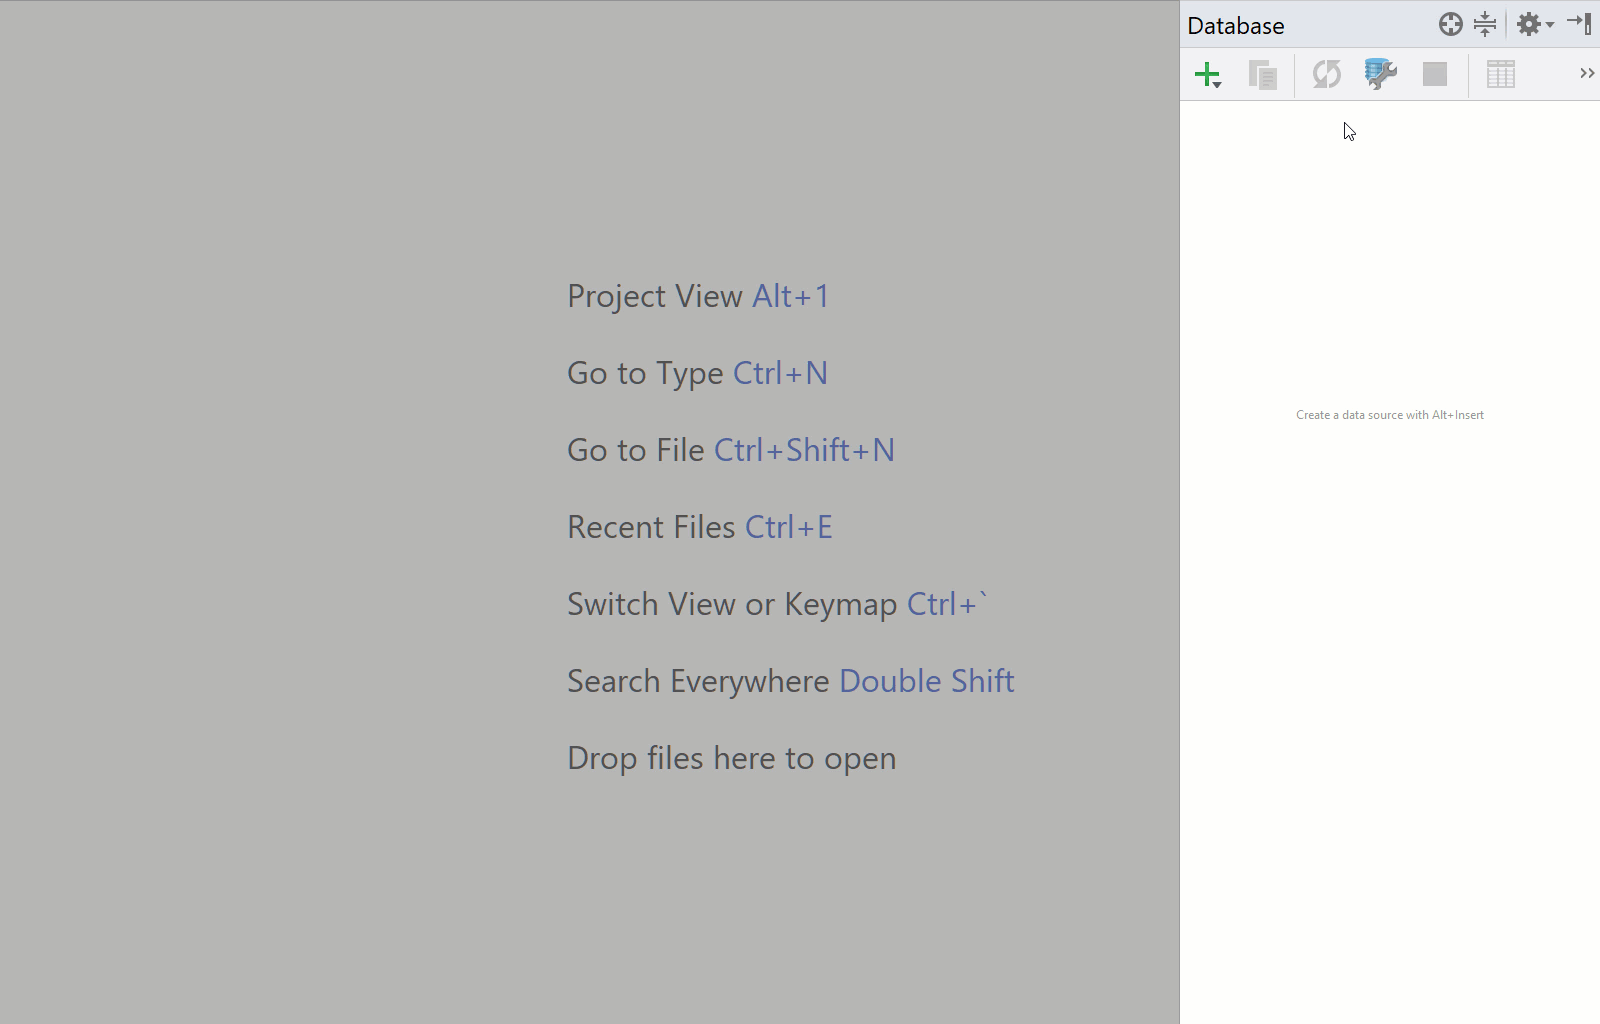
Head towards the Database Tool Window, then select Data Source Properties, click on the “+” button and then, at the bottom of the list you’ll see an entry named Driver, click on this.
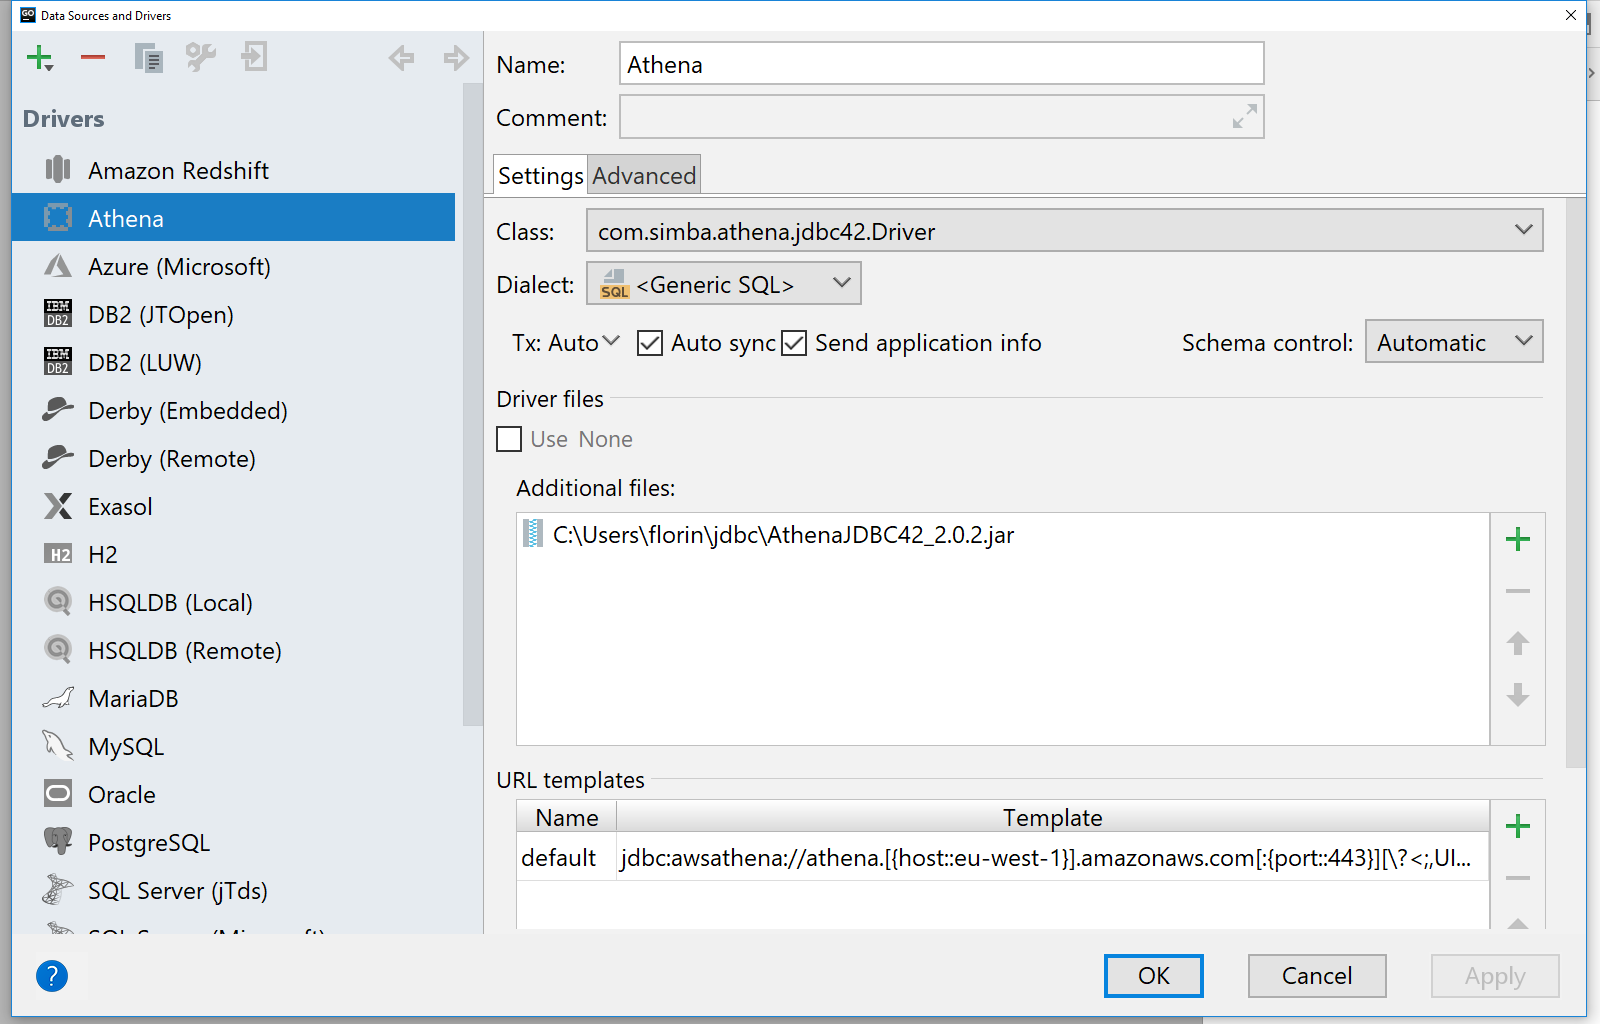
Start by changing the name of the configuration to “Athena”. You will notice that there is a section called Driver files. Here you can import custom JDBC drivers to expand the IDE connectivity capabilities.
AWS provides a JDBC driver for use with Java, which you can download from this page. As our IDEs work on JDK 8, you can download the corresponding jar file, at the time of writing is “AthenaJDBC42-2.0.2.jar”.
Once you downloaded the driver, go back to the IDE, and in the Additional files section, click on “+” and add the file we’ve just downloaded. New options should now be available under the Class drop-down, select “com.simba.athena.jdbc42.Driver” from it. In the Dialect drop-down, select Generic SQL.
In order for the IDE to connect to Athena, we can also define a connection URL template. Click on the “+” button under the URL templates section and add a new entry named default with the value:
jdbc:awsathena://athena.[{host::eu-west-1}].amazonaws.com[:{port::443}][\?<;,UID={user:param},PWD={password:param},{:identifier}={:param}>]
Since the driver is now configured, you can go to the “+” sign at the top left of the Data Sources and Drivers window and select “Athena” as a driver. In the Host field introduce the AWS region you want to make the queries from, “eu-west-1”, in the User section add your AWS Access Key Id, “AKIA…”, and in the Password field the AWS Secret Access Key, “Go2018…”.
You can also mark the connection as Read-only since Athena does not support modifying data on the S3 buckets it queries.
Click on the Advanced tab and type in the location of where the query results will be saved. By default, Athena will save this under a location similar to “s3://aws-athena-query-results-YourAWSAccountID-eu-west-1/” but you can find yours via the Settings section in the Athena Console.
Go back to the General tab and click on the Test Connection button and you should see a “Successful” message. This means you configured everything correctly and you can now connect to AWS Athena.
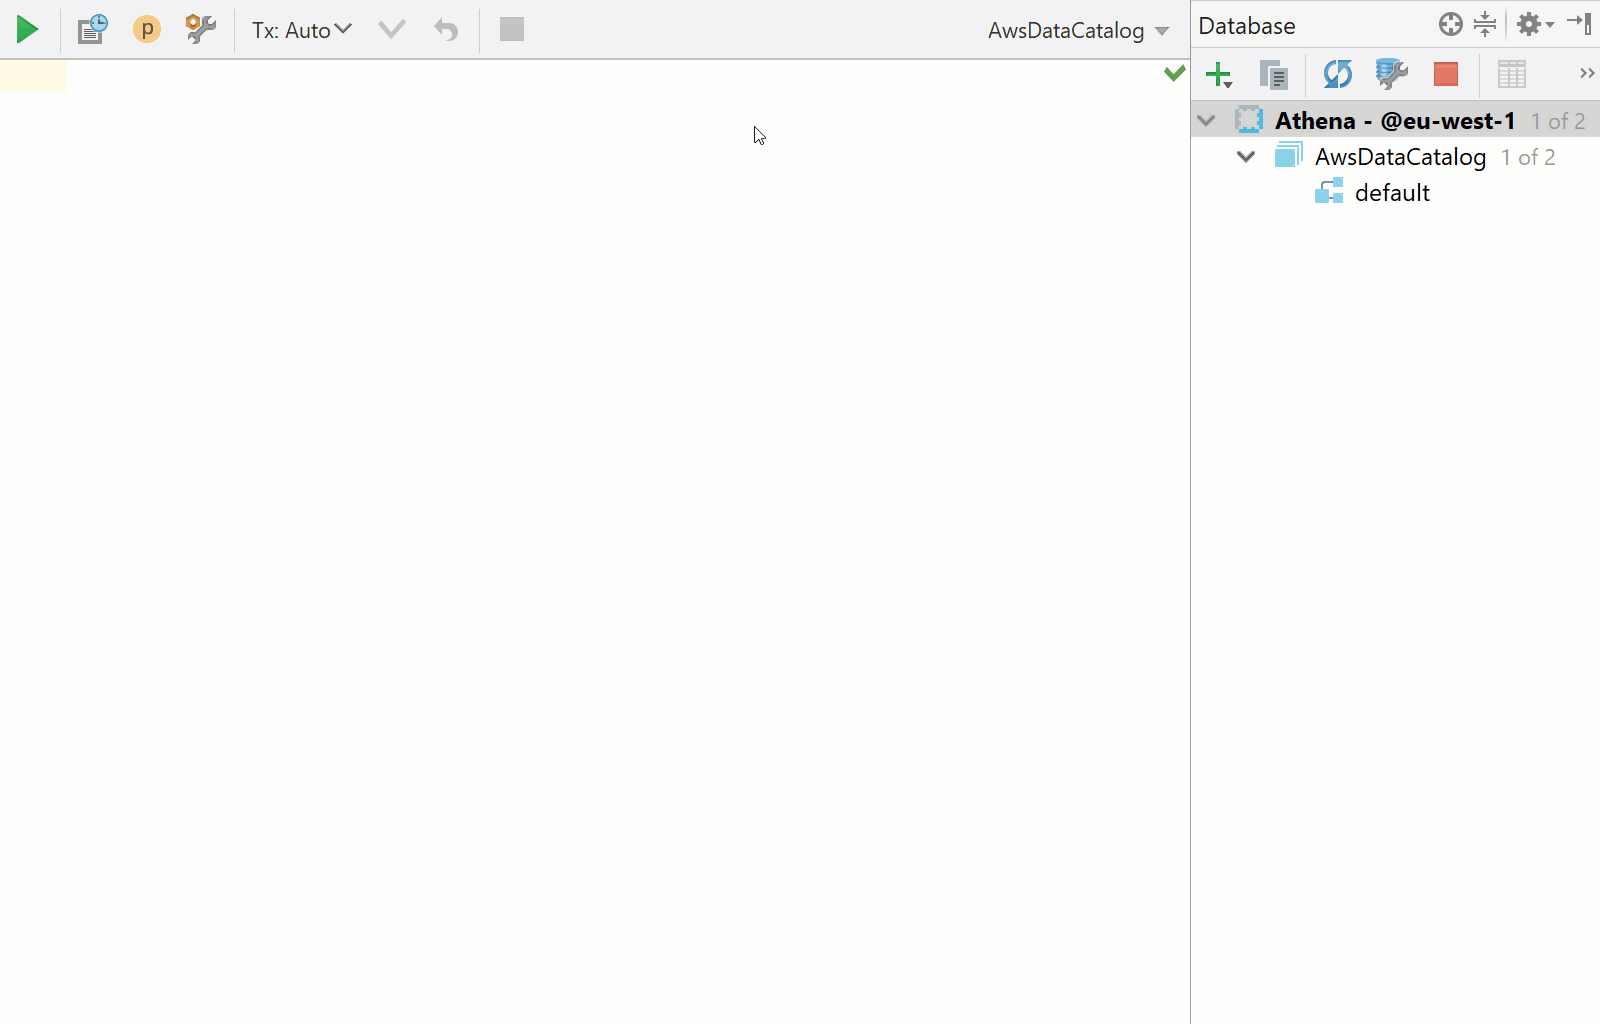
Close the window by pressing the OK button, and now you’ll be presented with a database console ready for use.
Let’s run a few sample queries to see how everything. For this, we’ll use the AWS Athena sample data for AWS ELB logs. If you decide to a different data source, such as your own data in an S3 bucket your account has access to, make sure you also allow Athena to query the data as explained in the official documentation.
First, run this query to create the table that we’ll use:
CREATE EXTERNAL TABLE IF NOT EXISTS default.elb_logs (
`request_timestamp` string,
`elb_name` string,
`request_ip` string,
`request_port` int,
`backend_ip` string,
`backend_port` int,
`request_processing_time` double,
`backend_processing_time` double,
`client_response_time` double,
`elb_response_code` string,
`backend_response_code` string,
`received_bytes` bigint,
`sent_bytes` bigint,
`request_verb` string,
`url` string,
`protocol` string,
`user_agent` string,
`ssl_cipher` string,
`ssl_protocol` string
)
ROW FORMAT SERDE 'org.apache.hadoop.hive.serde2.RegexSerDe'
WITH SERDEPROPERTIES (
'serialization.format' = '1',
'input.regex' = '([^ ]*) ([^ ]*) ([^ ]*):([0-9]*) ([^ ]*):([0-9]*) ([.0-9]*) ([.0-9]*) ([.0-9]*) (-|[0-9]*) (-|[0-9]*) ([-0-9]*) ([-0-9]*) \"([^ ]*) ([^ ]*) (- |[^ ]*)\" (\"[^\"]*\") ([A-Z0-9-]+) ([A-Za-z0-9.-]*)

Select the whole query and press <em>Ctrl/Cmd+Enter</em>. If you selected that this connection is a read-only one, you’d need to confirm you want to execute this query.

Now, let’s pull some data from it using this query:

<pre class="theme:github font:sourcecodepro font-size:14 toolbar:2 show-lang:2 lang:mysql decode:true ">SELECT * FROM "default"."elb_logs" limit 10;
Note: Every time you run a query against Athena which requires it to process data, you will pay for it. Make sure that you understand the data size and the query you are about to run before doing so. For more details about the pricing, please see the official AWS documentation or contact your AWS administrators.
And that’s it. Now you can use AWS Athena just like any other database and have all the IDE power for completion, data export, and visualization. Please let us know in the comments below if you have any questions, or features requests, we look forward to your feedback.
) LOCATION ‘s3://athena-examples-eu-west-1/elb/plaintext/’
TBLPROPERTIES (‘has_encrypted_data’=’false’);
Select the whole query and press Ctrl/Cmd+Enter. If you selected that this connection is a read-only one, you’d need to confirm you want to execute this query.
Now, let’s pull some data from it using this query:
Note: Every time you run a query against Athena which requires it to process data, you will pay for it. Make sure that you understand the data size and the query you are about to run before doing so. For more details about the pricing, please see the official AWS documentation or contact your AWS administrators.
And that’s it. Now you can use AWS Athena just like any other database and have all the IDE power for completion, data export, and visualization. Please let us know in the comments below if you have any questions, or features requests, we look forward to your feedback.


