Increase productivity with Custom Postfix Completion templates
A while ago, we wrote an article about 14 different ways the IDE can assist you with code completion.
Out of those, Postfix Completion stands apart as it lets you continue to type after the identifier name and get suggestions for it, similar to the example below:
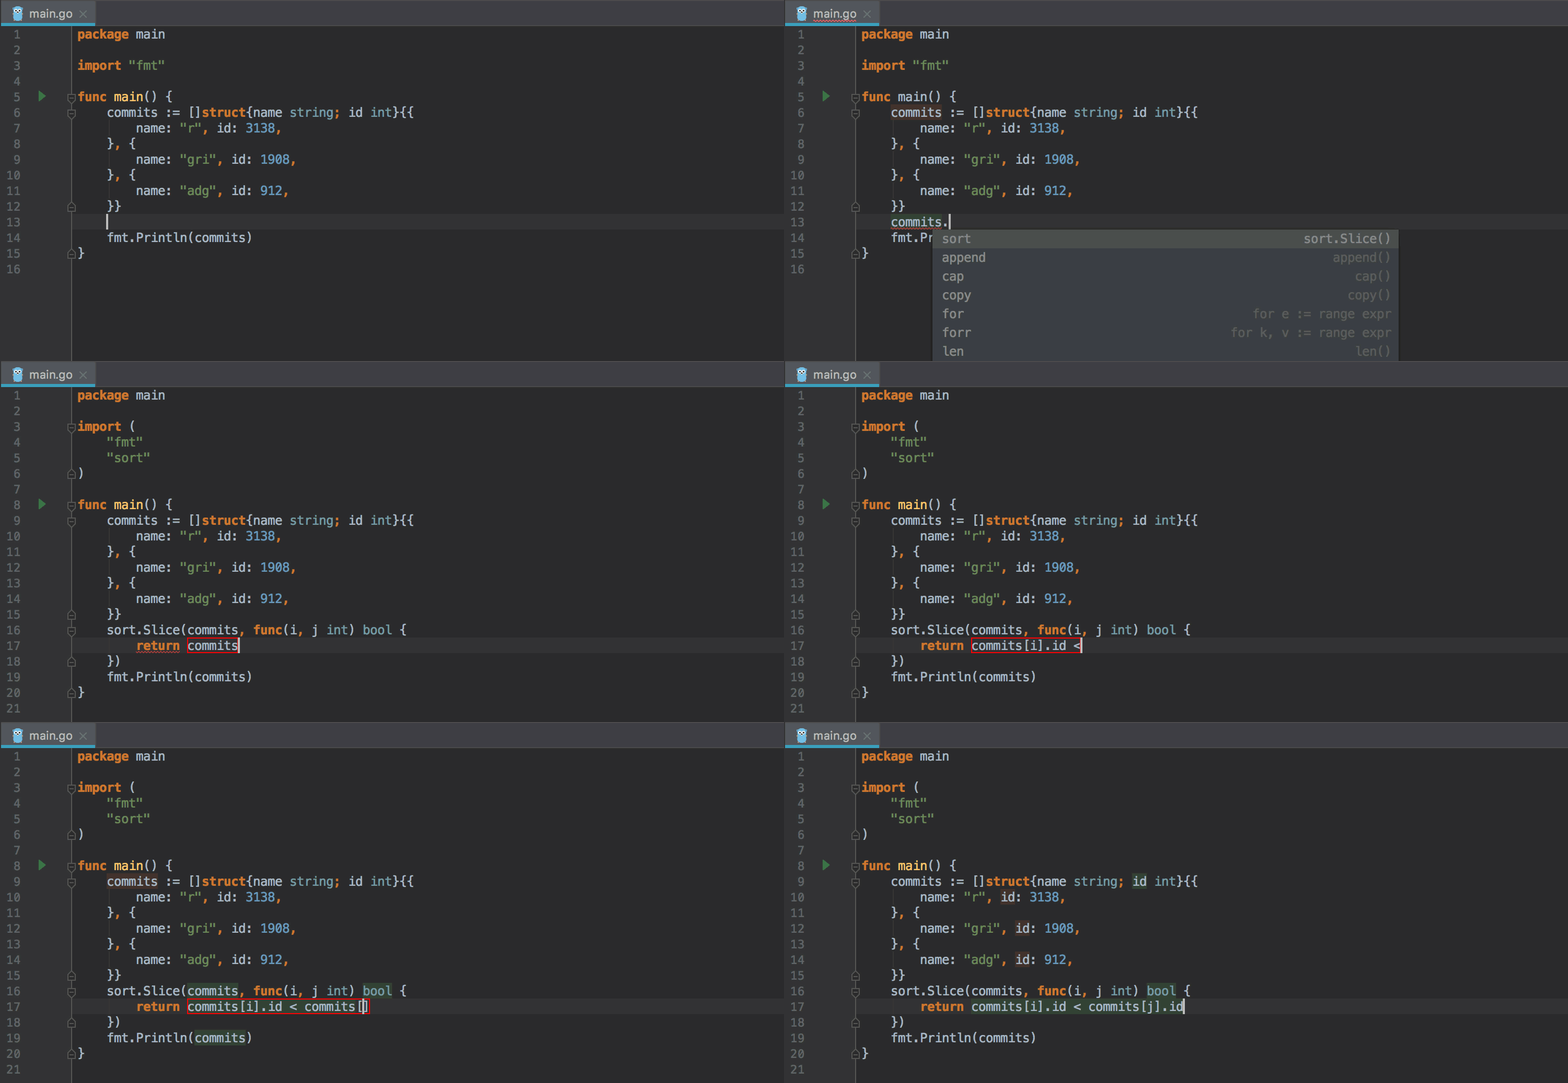
As you can see, using the .sort completion option is much faster than you typing out the whole code snippet for sorting the slice yourself.
Before version 2019.2, however, you were forced to use the Postfix Completion items defined by the IDE. But all of that has now changed, and you can now create your own templates.
Why might this be useful, you ask?
First and foremost, it’s because now you don’t have to wait for a release cycle (at the very minimum) of the IDE to get your favorite completion snippet.
And second, it can be set up for you and save you time and effort specifically with your code.
Take the example in the above picture. It’s not hard to type the whole sort.Slice line, especially given the completion power of the IDE, but it’s a lot quicker to type commits.sort, which also feels natural as you type it.
Let’s look at an example of this in action using a task that might not be that frequent but still requires some typing: removing an element from a slice.
Open up Settings/Preferences | Editor | General | Postfix Completion. Here you’ll be able to view the existing templates and define new ones.
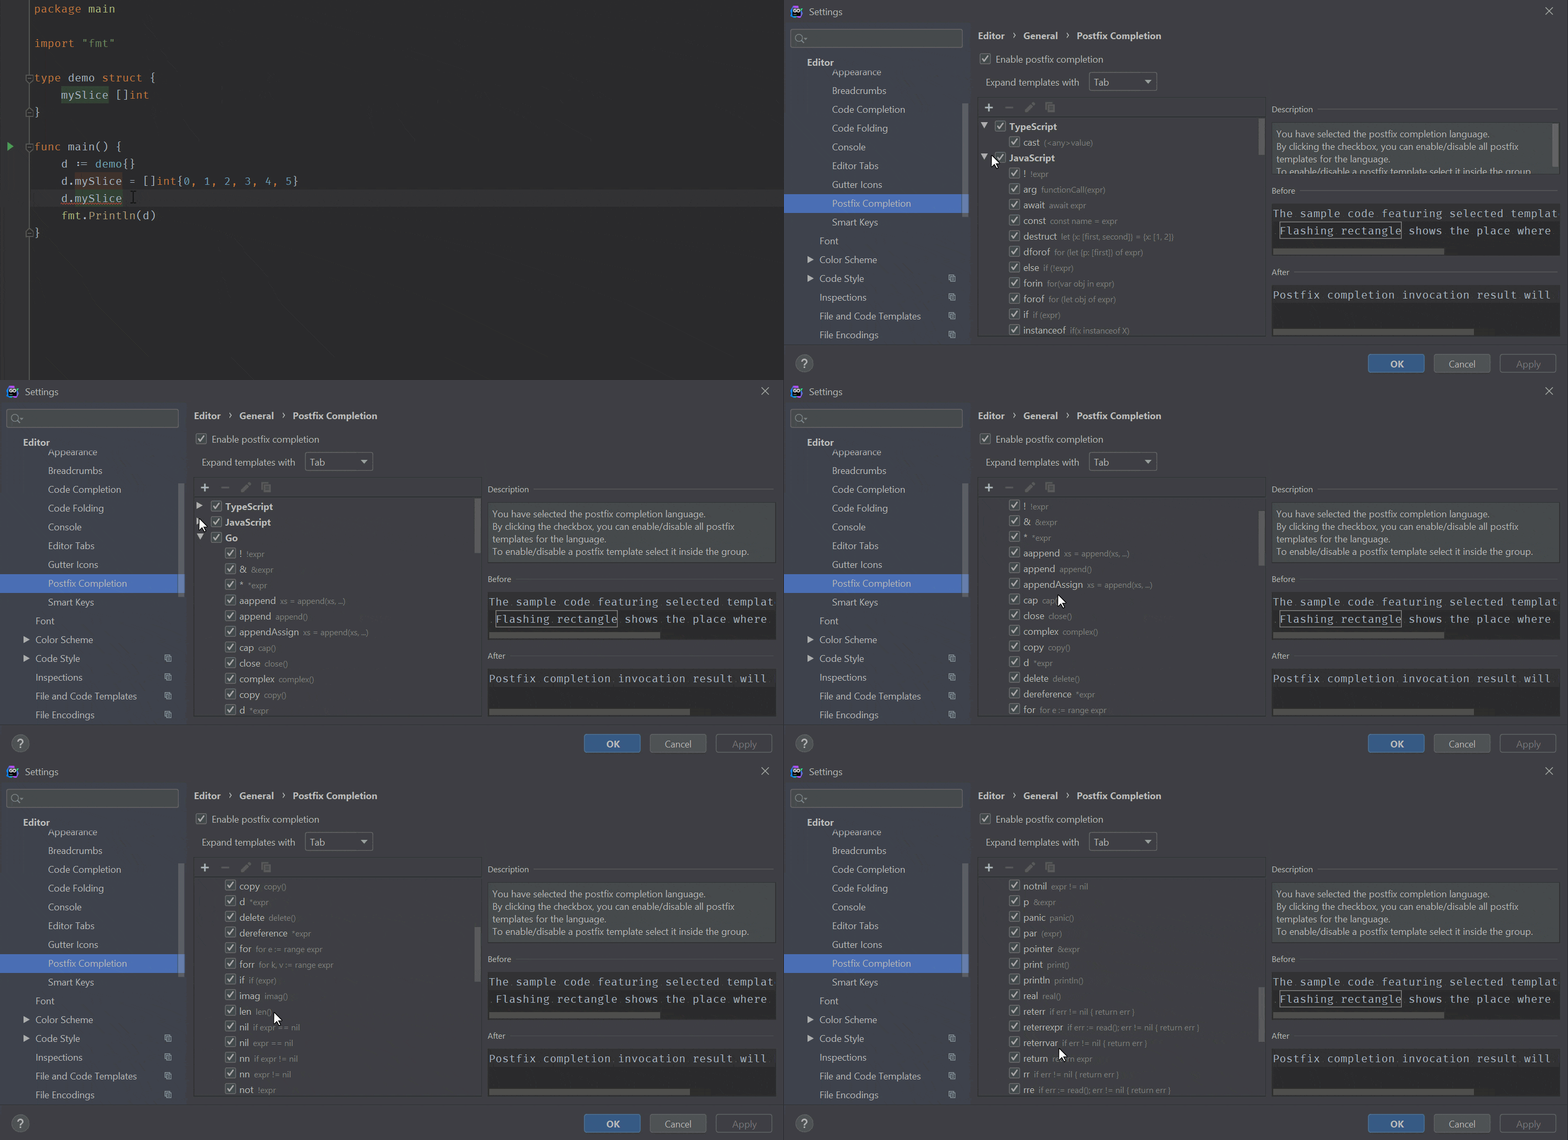
To write our own postfix completion option, let’s use + | Go and then give the completion option a name, or Key as it’s defined in the dialog. This allows us to identify the way the snippet will appear in the completion options.
Under the Applicable expression types section click on the + sign and select slice from the list. You can also see other types in the list. The Postfix Completion items power is that they can be used on specific types from the code, and you can choose from built-in or custom ones, defined by you.
If you don’t want to select the scope for the template each time, then you can use the Apply to the topmost expression checkbox, and it will be applied to the entire expression ignoring the scope.
Then, let’s add the code that uses this option, which will look like this:
“`$EXPR$ = append($EXPR$[:$END$], $EXPR$[+1:]…)“`
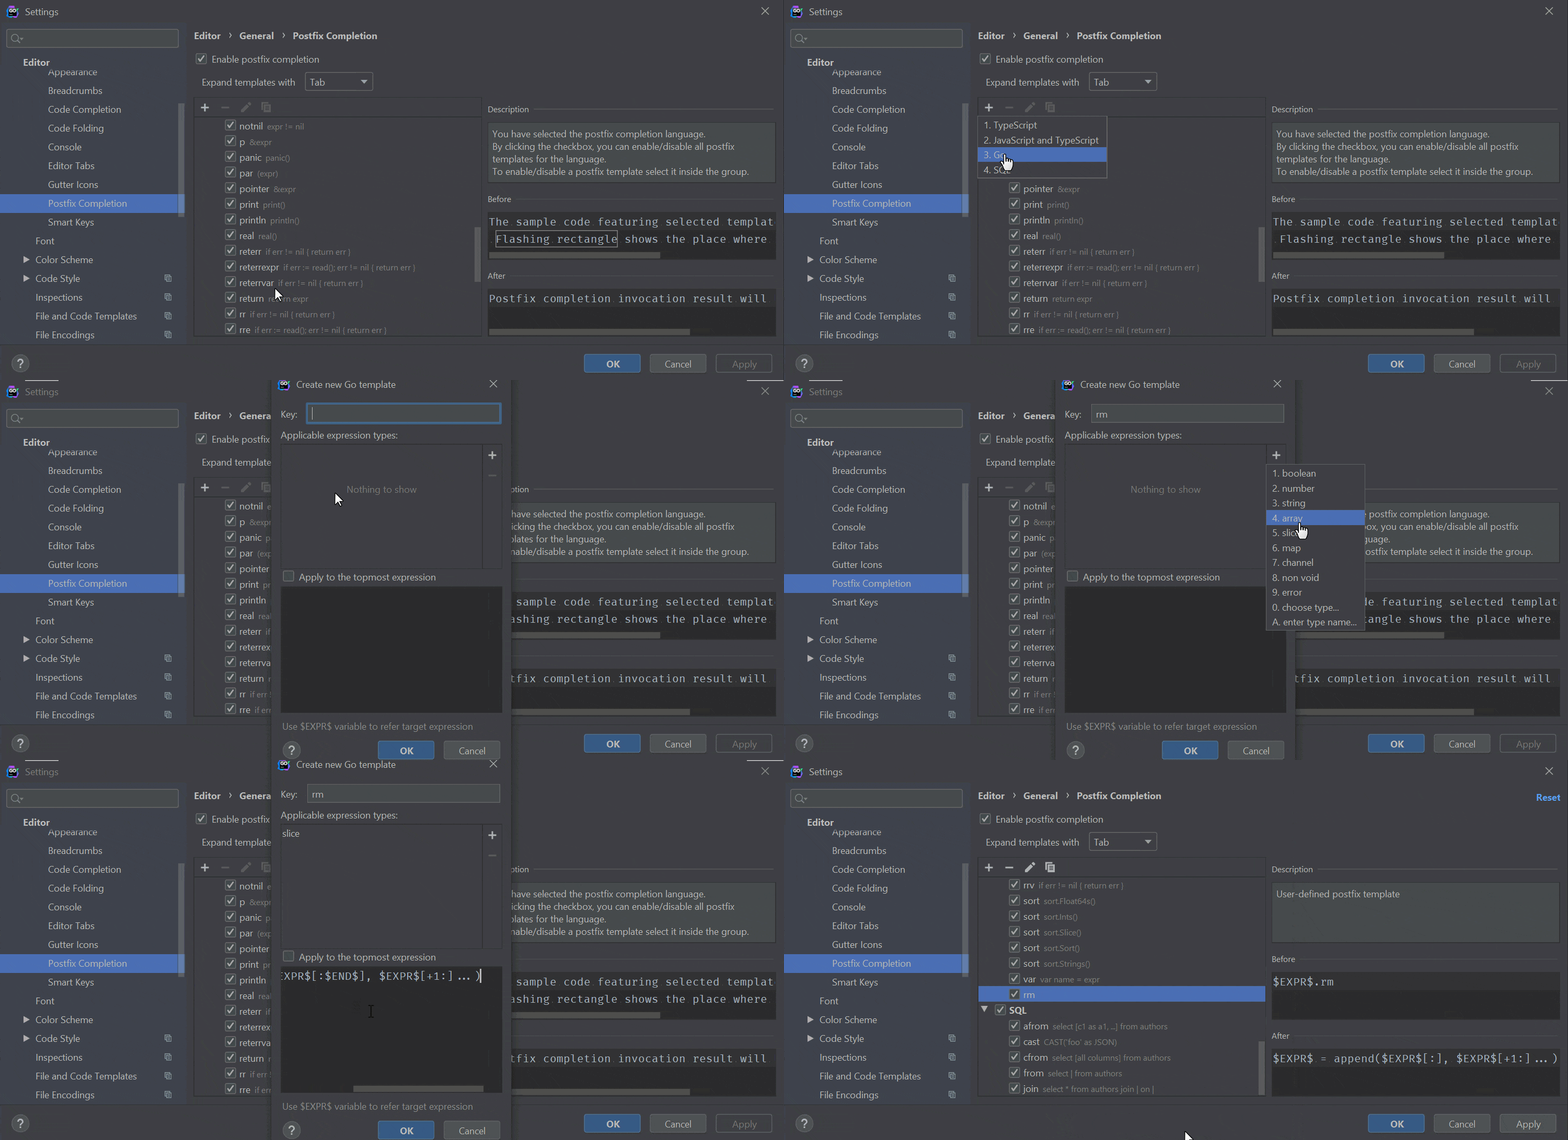
As you might expect, $EXPR$ and $END$ are special variables in the template.
$EXPR$ refers to the expression that this option applies to, in this case, our slice.
$END$ refers to the position where the cursor should be placed after the snippet is used. Currently, it’s only possible to specify these two variables.
Now, let’s take a look at the feature in action.
Use the following code and invoke the postfix completion to show up after the d.mySlice identifier by pressing “.” and then typing rm. The result should look similar to this.
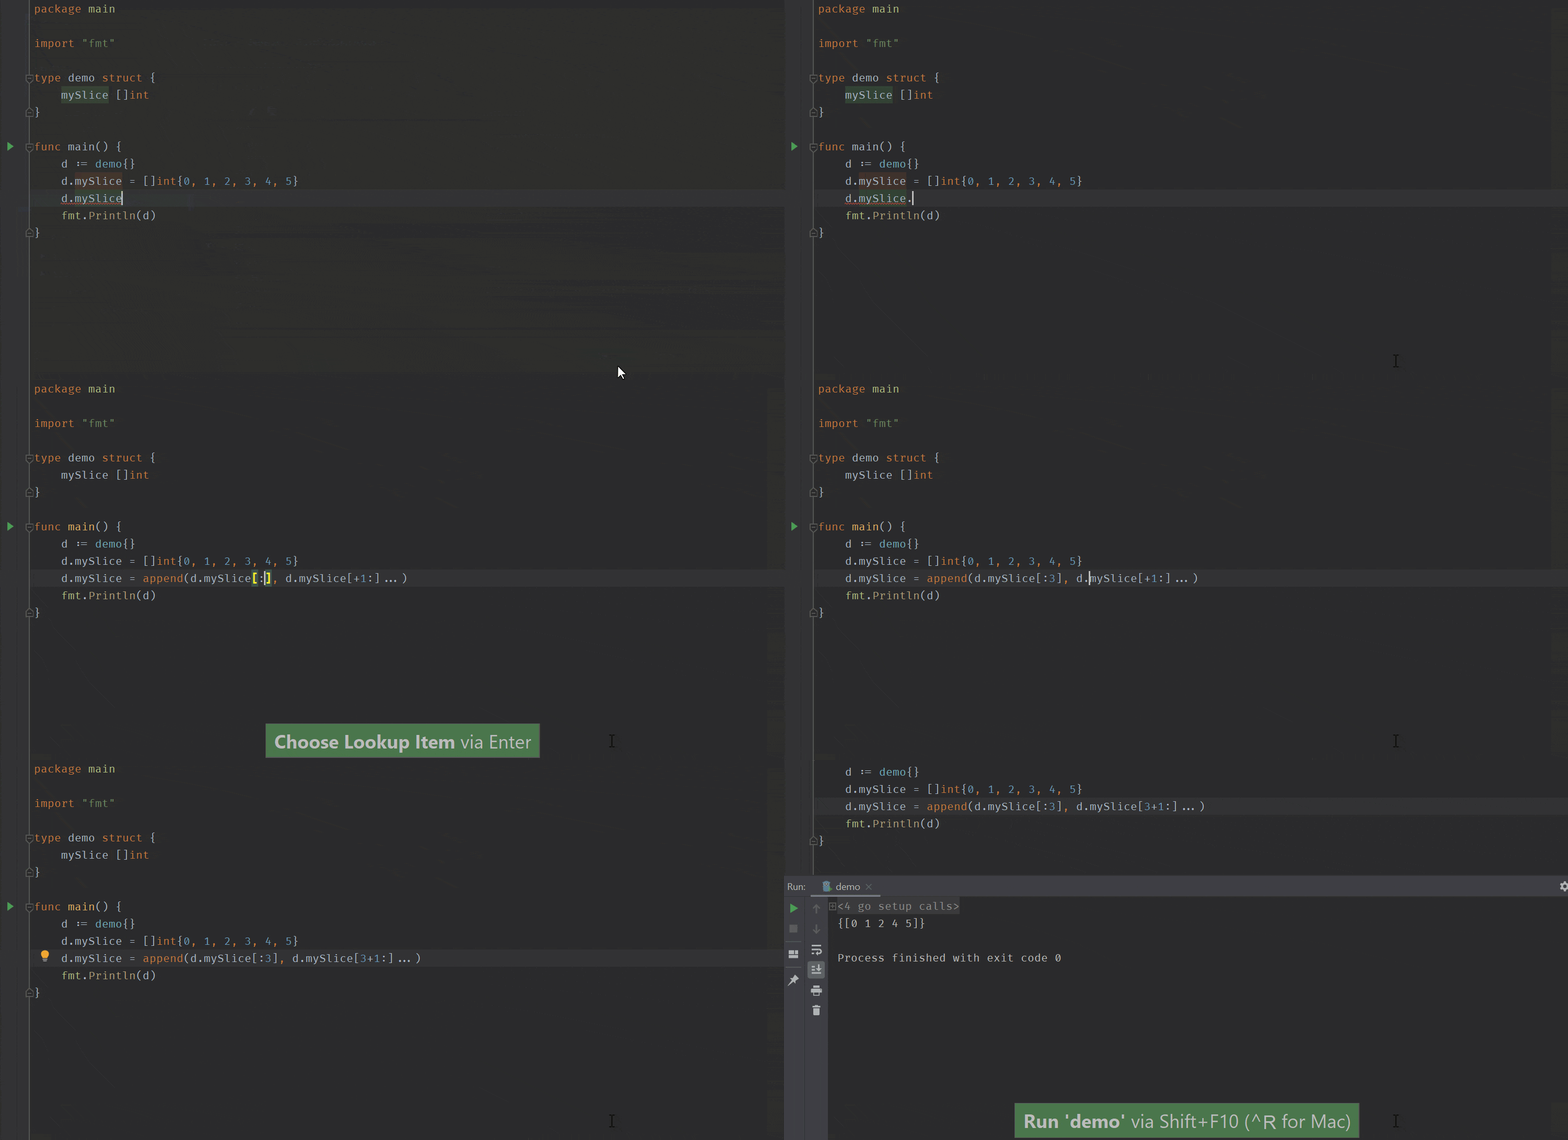
What’s the main advantage of this over using Live Templates, you might ask?
Postfix Completion works in tandem with Live Templates. While Live Templates work with the code before you type it and allows you to surround your code with the template; Postfix Completion will enable you to transform existing code without having to select it.
It can also be applied depending on the type of identifier being invoked on, which means it can present more specific functionality.
Both solutions are designed to complement each other and allow you, the user, to make the most out of your code editing session.
That is it for today. We learned what Postfix Completions are, where they are useful and can be used, what the difference is between them and Live Templates, and how to define them.
As usual, please let us know your thoughts on this in the comments section below, on our issue tracker, or on Twitter.
Subscribe to GoLang Blog updates


