Working with Go Modules – Versioning

Hello again. This is the third, and final, article from our series on Go Modules. In this article, we’ll cover how to version our project and manage the migration to a new major version.
In case you missed the previous posts, here’s a list of articles from the series:
- Starting with a new Go Module from scratch
- Dependencies and how to use them
- Versioning and migrating to a new major version
In our previous posts, we’ve seen how to use dependencies in our code and how to upgrade or downgrade them. Now, it’s time to do the same for our own code.
Non-major version upgrading
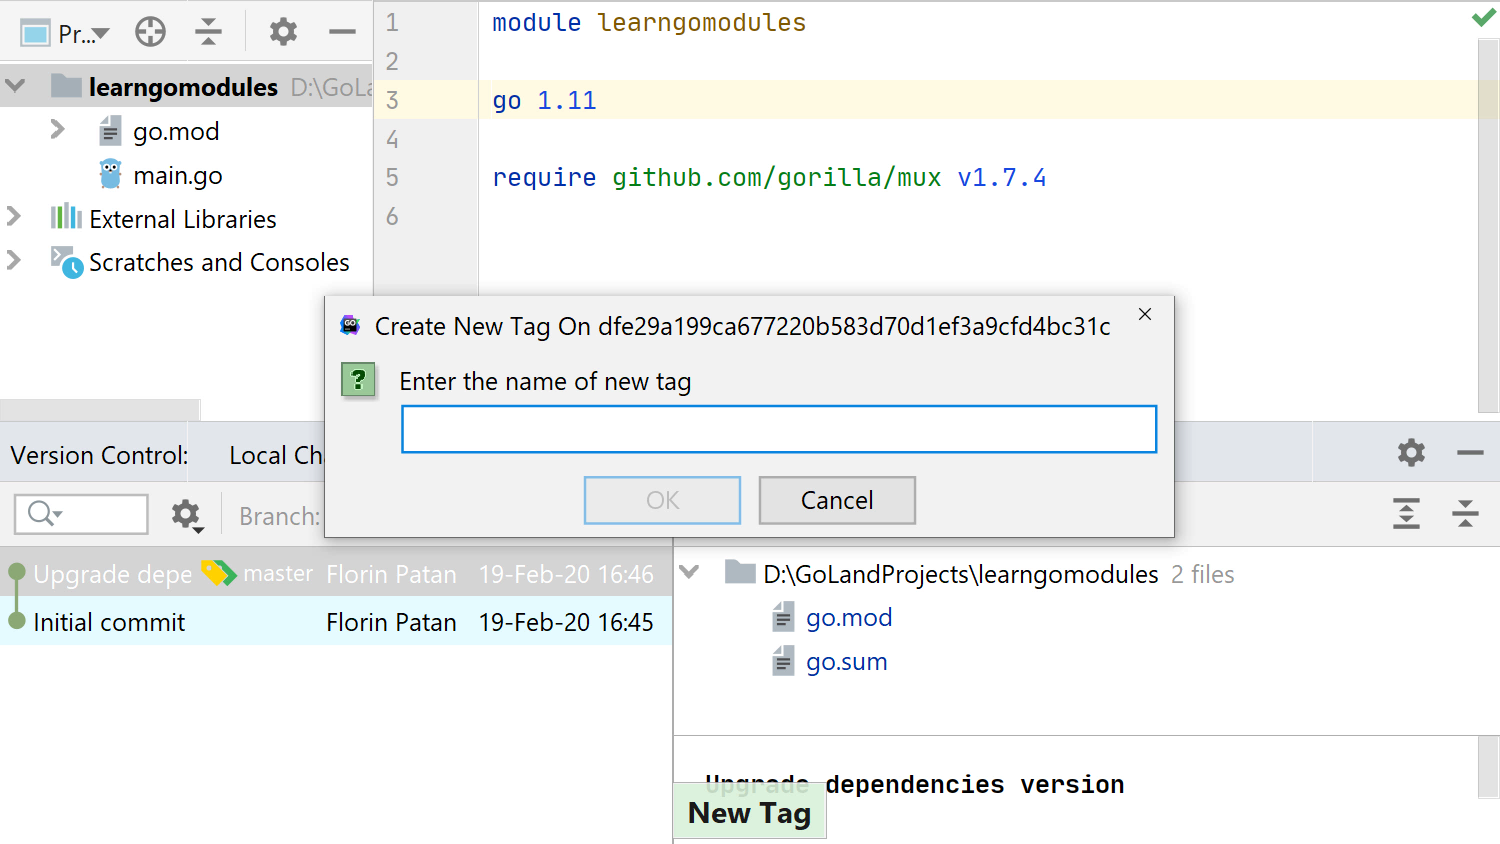
Upgrading non-major versions is relatively straightforward. First, we bring up the Version Control tool window, Alt+9 on Windows/Linux or Option+9 on macOS. Then from the Log tab, we select a commit that we want to consider to be the new version, and then we use Search Everywhere, Shift+Shift, type New Tag… and bring up the dialog to name the tag.
It’s important to keep in mind that we need to give this version a name that is compatible with the SemVer semantics. We can name this v1.0.1, for example.
When doing these upgrades, we don’t need to change anything else in our code.
However, upgrading to major versions implies a more complex change, so, let’s look at our options.
Major version upgrading
As we can see in the Modules Wiki, there are two options for creating a new major version, either use a branch or tag with the v2.x.y or v3.x.y format or use a folder inside the master branch that’s named v2.x.y or v3.x.y
For this article, we’ll use the branch/tag approach.
When our code is ready to be bumped to a major version, as is the case for breaking API changes, we can use the built-in Version Control tools to help us.
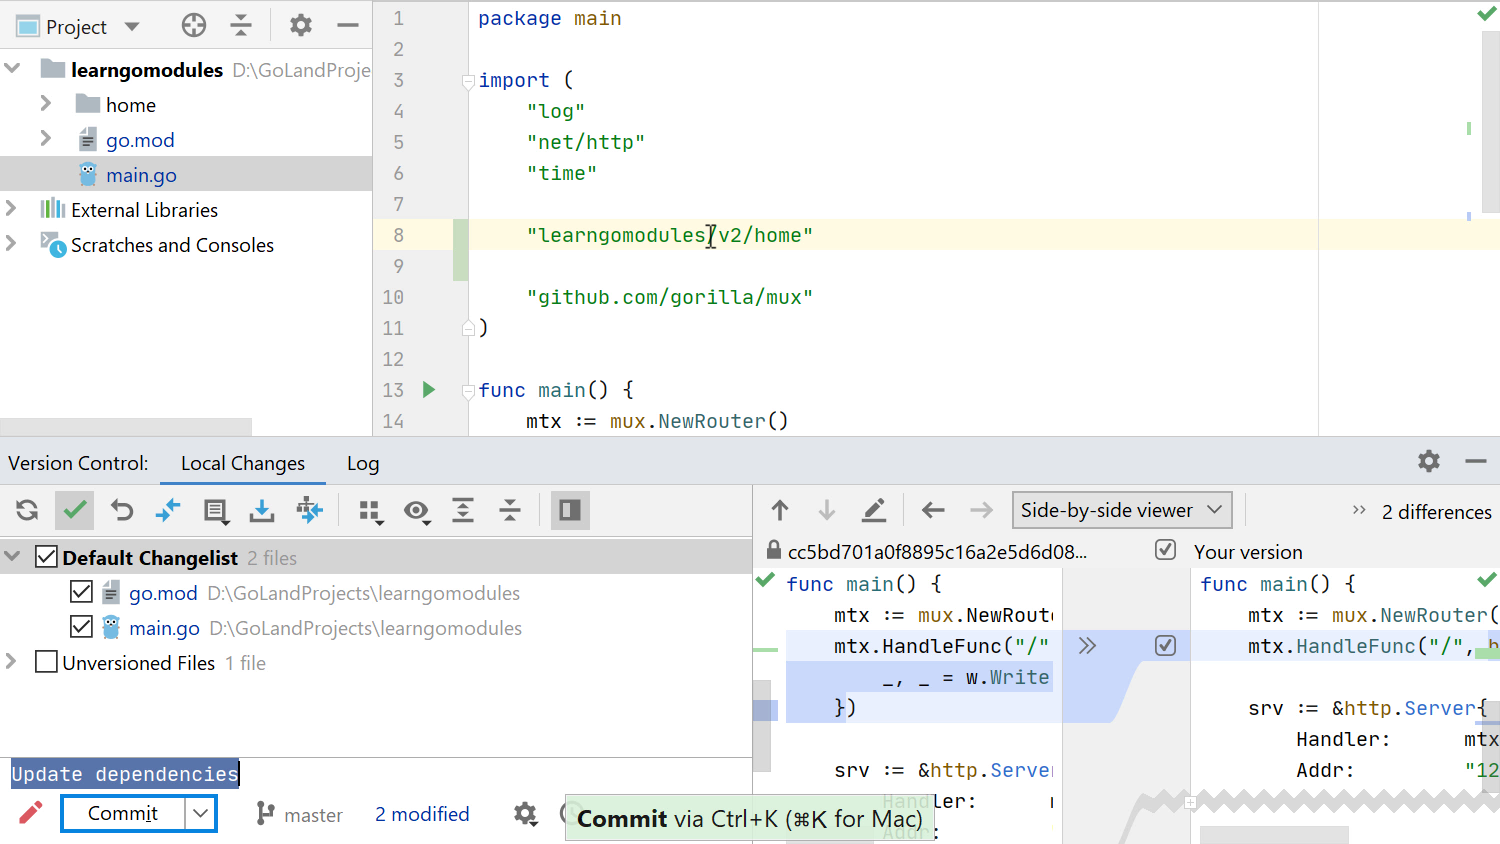
To prepare our code, we need to ensure that we upgrade the module name in the go.mod file, so let’s do this. Change the line:
learngomodules
to
learngomodules/v2
If you share your module on Github or other websites, you need to apply the same change as above:
module github.com/dlsniper/modulesdemo
to
module github.com/dlsniper/modulesdemo/v2
Additionally, if you need to replace all the usages in .go files for the import, you can use the same rule as above.
Next, we commit our code using Ctrl+K on Windows/Linux or Cmd+K on macOS.
To tag this commit and create the new version of our module, let’s go to the Log tab of the Version Control tool window, select our commit and use Search Everywhere, Shift+Shift, to find the New Tag… feature. Type in the new version, e.g., v2.0.0, and that’s it.
Push everything using Ctrl+Shift+K on Windows/Linux or Cmd+Shift+K on macOS, and just make sure that you’ve ticked the Push tags checkbox.
Using a dependency with a new major version
Another possible scenario is to upgrade a dependency to use a new major version.
We briefly mentioned this in the first article of the series, but it is worthy of a quick recap.
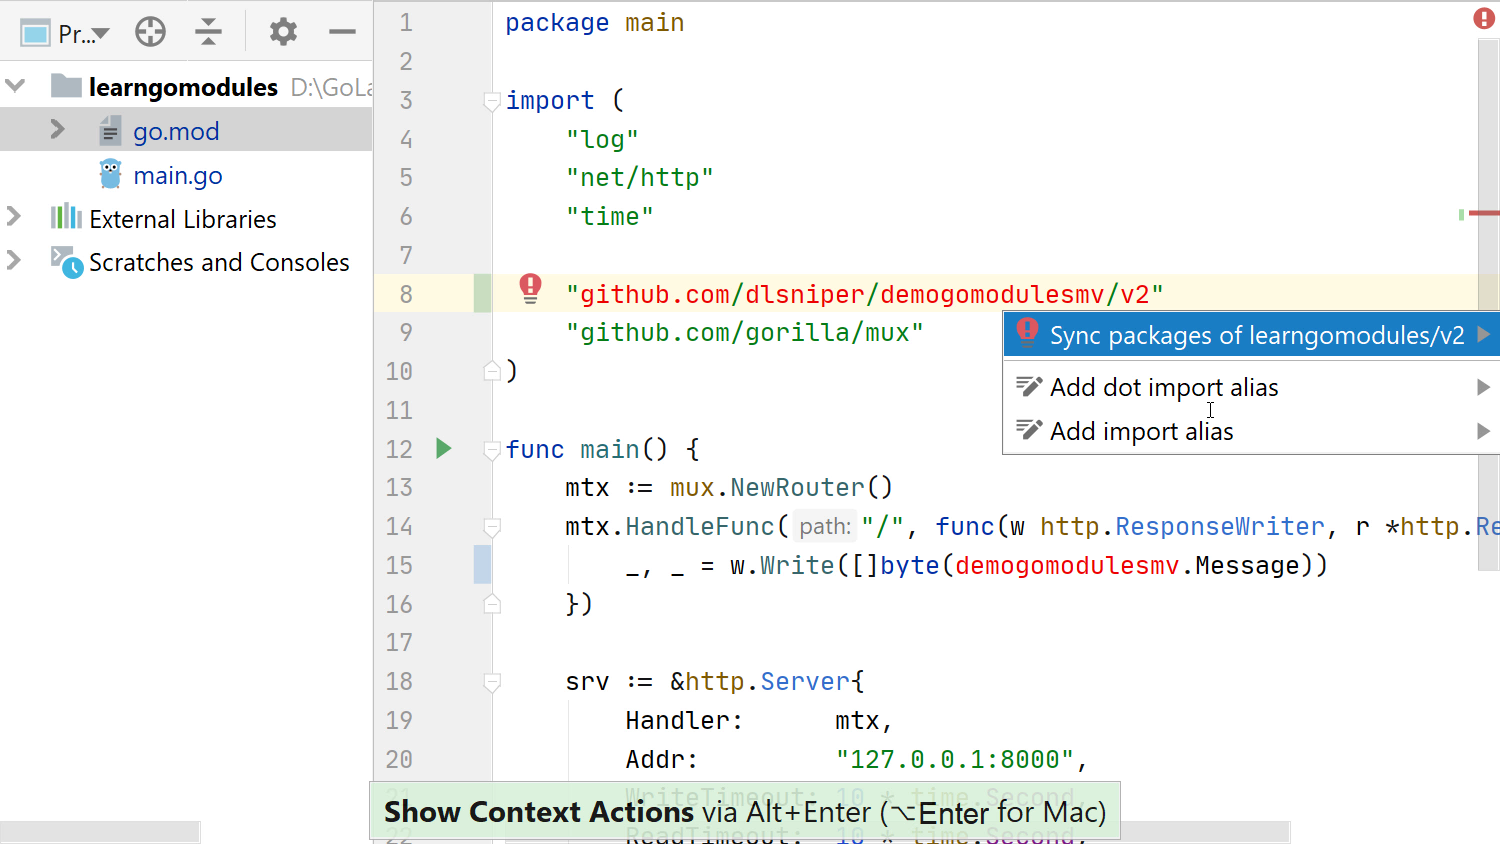
Upgrading a dependency to a new major version requires a bit more than just going to the go.mod file and changing the version from version v1.6.5 to v2.3.4. In addition to that change, you also need to append /v2 at the end of the import path, so that the upgraded module looks like this:
require github.com/dlsniper/demogomodulesmv/v2 v2.0.0
After that, a search and replace needs to be done in all the project files to replace the import path and append the major version to it. Then we need to go to all of the files that have the new import and run the Sync packages of project quick-fix to download and install the newer version of our dependency.
This concludes our third article in the series of Go Modules support. In this post, we learned how to handle migration both to a non-major and to a major version of our package, as well as how to upgrade a newer major version of a dependency.
As usual, if you have any comments or questions, please let us know in the comments section below, on our issue tracker, or on Twitter.