IntelliJ IDEA
IntelliJ IDEA – the IDE for Professional Development in Java and Kotlin
Attaching the sources of Node.js core modules
This is a cross-post from WebStorm & PhpStorm blog, originally posted by Sergey Simonchik.
When developing a Node.js application it can be convenient to have code completion, validation and debugging capabilities for Node core modules (fs, path, http, etc).
Unfortunately, these modules are compiled into the binary. So you have to download the Node.js source code and attach it to the project (all the required sources are located in the lib/ folder). But every time you decide to upgrade your Node installation, you have to repeat these steps – and don’t forget to detach previously attached sources to avoid confusion in code completion and navigation!
Well, from now on there’s an easier way to attach the Node.js sources to your project.
1) Open the Node.js settings dialog by clicking this icon on the toolbar: ![]()

Alternatively, you can open the Settings dialog (File | Settings or IntelliJ IDEA | Preferences) and select JavaScript | Node.js.
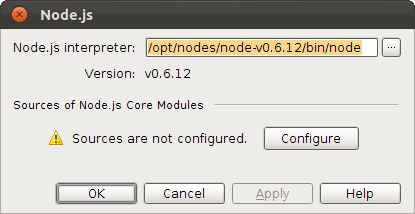
2) Specify the path to Node.js interpreter and the Node.js version will be determined automatically.
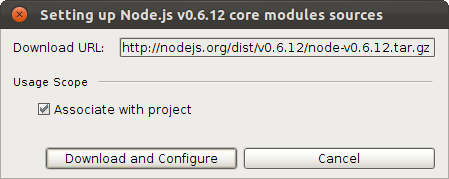
3) Click Configure and the following dialog opens:

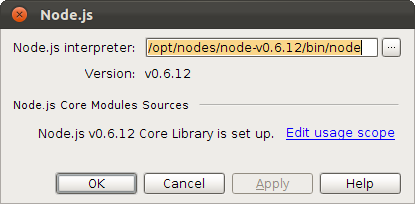
4) Click the ‘Download and Configure’ button to download Node.js sources to the IntelliJ system local folder. A JavaScript library named “Node.js 0.6.12 Core Library” will be created from the extracted source files of core modules.
Now, to make it work the right way, define a usage scope for JavaScript library just created. By default the whole project will be added to the usage scope. You can tune the usage scope by clicking the ‘Edit usage scope’ hyperlink:

OK, now let’s try to code-complete methods from http core module:

Our work is done here.
Attaching the sources of Node core modules from the editor
An alternative way to attach these sources to the project is to invoke a quick-fix:

Please make sure you installed the latest NodeJS plugin from the plugin repository.
Develop your Node.js applications with pleasure!
Subscribe to IntelliJ IDEA Blog updates


