IntelliJ IDEA
IntelliJ IDEA – the Leading IDE for Professional Development in Java and Kotlin
Clone a Project from GitHub

In this blog, we’re going to look at how to create an IntelliJ IDEA project from existing code in a GitHub repository.
This blog post covers the same material as the video with some additional tips and tricks. This provides an easy way for people to skim the content quickly if they prefer reading to watching, and to give the reader/watcher code samples and links to additional information.
Clone a GitHub Repository to Our Local Machine
The first thing we need to do is to clone the git repository to our local machine. In the video, we used this IntelliJ samples repository, but it could be one of your repositories if you prefer.
There are several ways to clone a Git repository to your local machine. You can use HTTPS or SSH, amongst other options. Let’s use HTTPS as it can be the simplest option. When we click the clipboard icon, the URL will be copied to our clipboard.

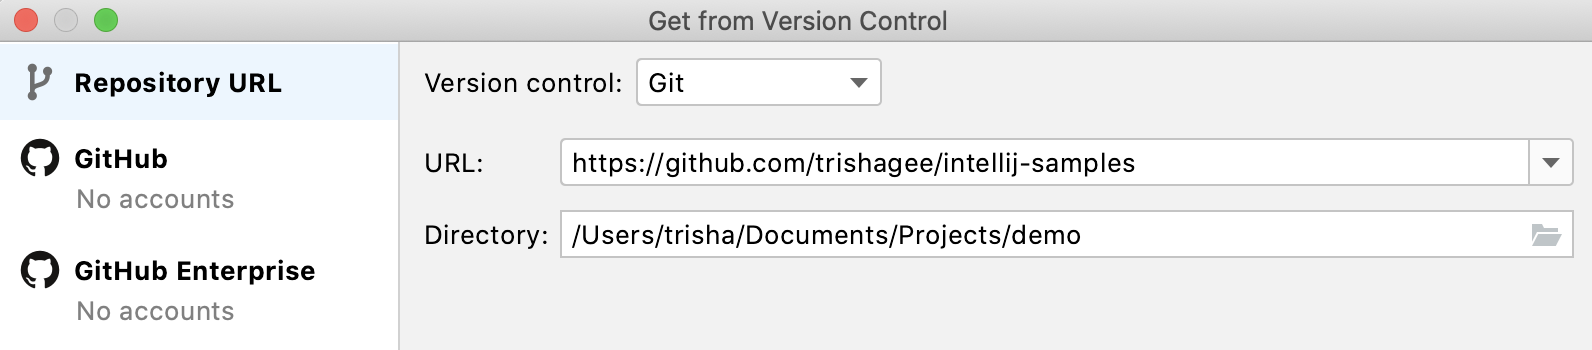
If you don’t have any projects open when you first start IntelliJ IDEA, you’ll see a welcome screen. The welcome screen varies from version to version, the video uses the welcome screen in IntelliJ IDEA 2020.3. Regardless of your version, you’ll have an option to get a project from version control. Clicking on this gives us the Get from Version Control dialog. You can paste the repository URL into the URL input box that we copied from the repository earlier. You can also change the directory that this project is created in on your machine if required.
You can then press Enter, or click Clone, and IntelliJ IDEA will clone the GitHub repository to the directory we selected. IntelliJ IDEA will also pick up common build tools like Gradle or Maven, and automatically download the required dependencies before building the project for you. IntelliJ IDEA will also detect the modules in the project, and correctly set up the test, main and resources folders in a Maven project like the one in the video. You an see the result in the Project window.
There’s more than one way to clone a GitHub project from inside IntelliJ IDEA. If we already have a project like this one open, we can choose to get a new project from GitHub using the VCS menu and selecting Get from Version Control… in version 2020.2, or Clone in version 2020.3. This gives you the same dialog we saw earlier allowing you to enter a URL and project directory.
Tip: You can also use the JetBrains Toolbox extension to clone a GitHub project to IntelliJ IDEA.
Git Tool Window
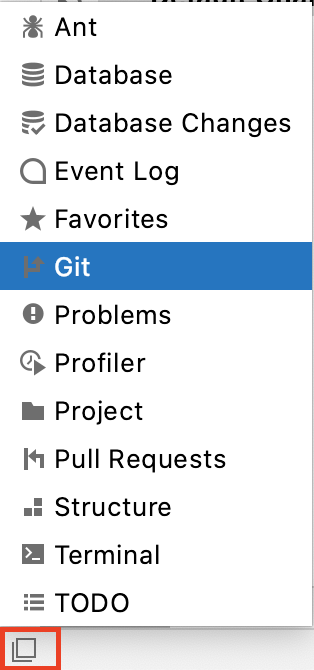
One of the most useful tools when we’re working with a Git project in IntelliJ IDEA is the Git Tool Window. This gives us visibility over the version control status of our project. One way to open the Git Tool window is to hover over the quick access button in the bottom left of the IntelliJ IDEA window, and select Git. This will open the Git log window.
Alternatively, we can use ⌘9 on macOS, or Alt and 9, on Windows and Linux, to open the Git Tool window. This window shows us all the commits for the project. It also shows us a list of local branches, which in our case is just the “main” branch since we just cloned this repository, as well as remote branches. If you find a visual representation of the commit history useful, this window can help you to understand the status of commits, branches, and remotes for your project.

Tip: The Git tool window means you don’t need a third-party application to manage your Git workflow. The Git Tool window means can perform a variety of tasks including merging, creating a new branch, checking out a branch, and undoing changes.
Adding and Updating Remotes
When we’re working with open source projects on GitHub, it’s common to have more than one remote associated with a repository. If we go back to the intellij-samples project that we cloned from GitHub, we can see that this is actually a fork of another repository hosted by JetBrains.
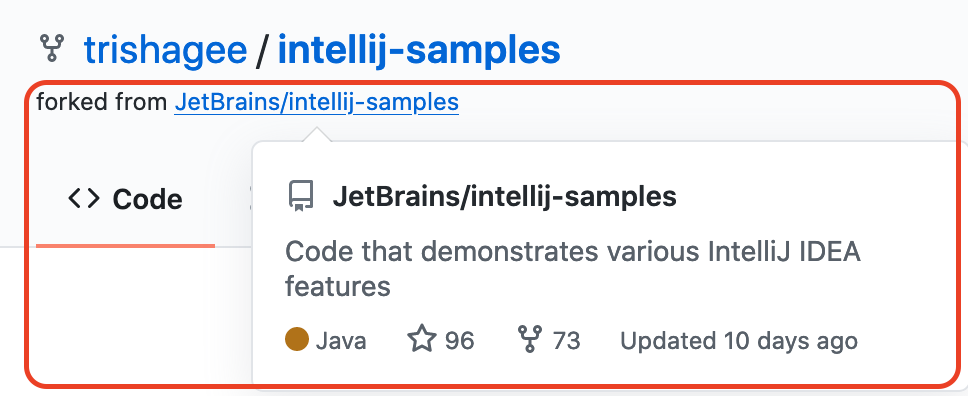
This upstream repository is in the JetBrains organisation, and is likely to be updated by multiple people at a different rate to the fork we cloned. Ideally we want visibility of the upstream repository as well as our own fork in order to get a better idea of what changes have gone in to the upstream repository, and to update our own fork with these changes. To add this upstream repository remote, we first need to copy the URL like we did before.
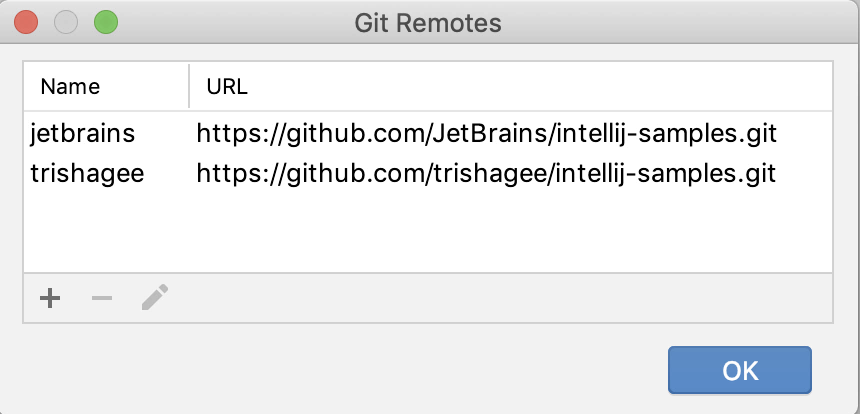
We can manage our remotes in IntelliJ IDEA in a couple of different ways. One way is to use Shift+Shift to bring up the Search Everywhere dialog and type Remotes. One of the search results is the ‘Manage Remotes’ option from Git. Selecting this brings up the Git Remotes dialog. This dialog shows the remote we originally cloned this project from, which is our fork of the intellij-samples repository. We want to add a new repository for the upstream repository, in this case, the original JetBrains repository.
When we press the plus button, we can paste in the path to the JetBrains repository that we copied earlier, and give it a name. There are a number of different conventions that you could use to decide on the name for your remote, for example you could call it “upstream”. I like to use the organisation or profile name to remove any ambiguity. You can also use this dialog to make changes to our existing remotes, for example, we can rename the “origin” remote to “trishagee”, because that makes it clearer to me where this remote is pointing. Now when we look at the Git Tool window, it’s clearer which remote the remote branches belong to.
Like most features in IntelliJ IDEA, there’s more than one way to open the Manage Remotes dialog. You can also right-click on the Remote node in the Branches tree of the Git Log, and select Manage Remotes.

Git Fetch
The last thing we’re going to look at is why and how to invoke a Git fetch in IntelliJ IDEA. We just added a new remote to this project, but it’s not showing in the Git Tool window. This also means that none of its branches or commits are visible because we haven’t fetched the status of the new remote to our local project.
We can select VCS > Git > Fetch in version 2020.2 and Git > Fetch in version 2020.3. When we select this, IntelliJ IDEA will fetch all the relevant details from all the git remotes we have configured for the project, and update our Git Tool log window with these details.

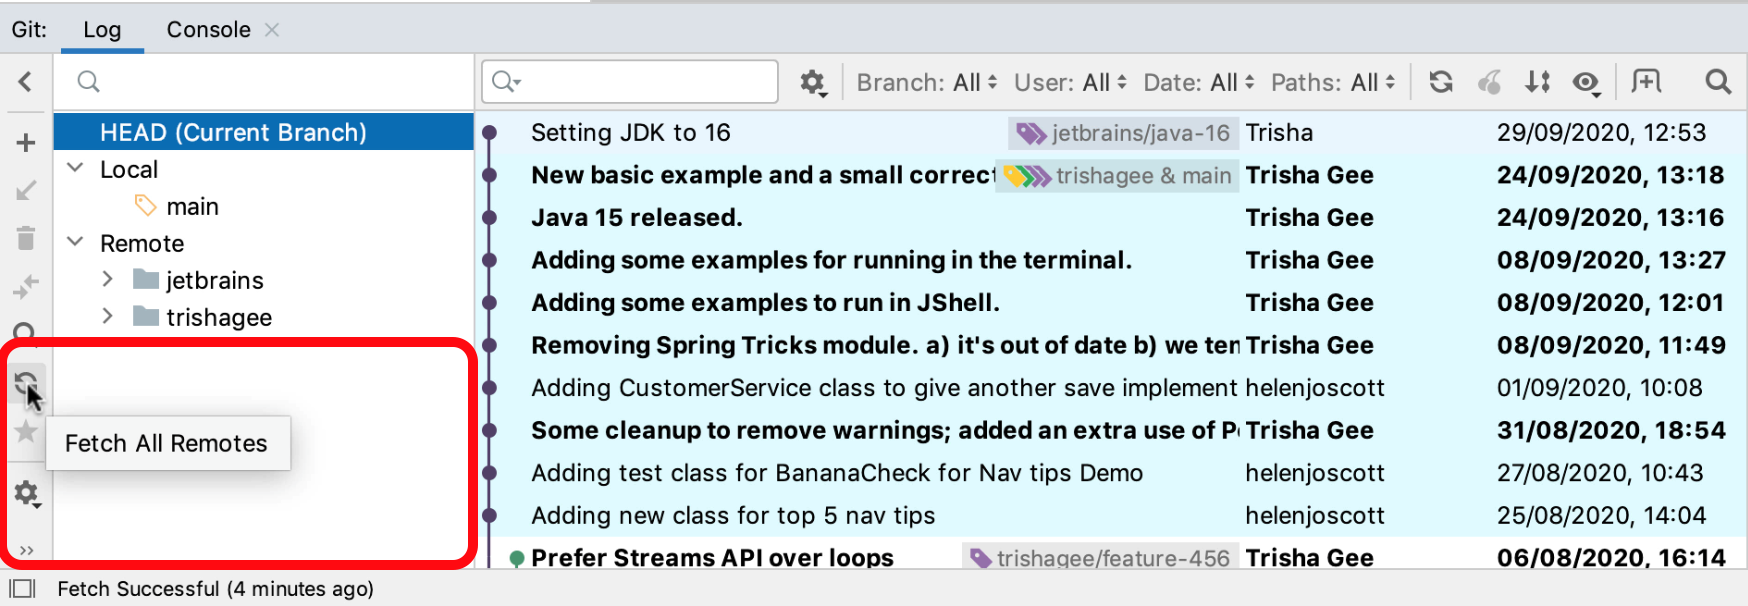
Now we can see a new remote in the Git Tool log window, and we can see all this remote’s branches. We will also be able to see the remote’s branches in the commit list. This gives us a clear idea of which commits are on which branches, and if any branches need updating. Another way of performing a Git fetch is to click the Fetch All Remotes button on the Branches tree toolbar in the Git Log window. This will also update the project.
Now we have a fully configured IntelliJ IDEA project from a GitHub repository, with all the relevant remotes added, and a Git Tool log window that shows the current status of the remote repositories. We’re ready to start making changes to this project and to commit, push, and create pull requests.
See also
- JetBrains Toolbox Extension for Firefox
- JetBrains Toolbox Extension for Chrome
- Git integration with IntelliJ IDEA
- Manage Projects Hosted on GitHub