

IntelliJ IDEA
IntelliJ IDEA – the Leading IDE for Professional Development in Java and Kotlin
IntelliJ IDEA’s Feature Trainer

In this blog, we’re going to take a look at the Feature Trainer in IntelliJ IDEA. New and existing users to IntelliJ IDEA can use this to get more familiar with the shortcuts, features and workflows that the IDE has to offer. You can watch the associated screencast here if you prefer.
We integrated the Feature Trainer into IntelliJ IDEA in version 2020.3. It’s available in both our Community Edition and Ultimate from the Learn IntelliJ IDEA tab on the Welcome screen.

You can press Start Learning to get started. This loads a learning project for you on your machine in the default location for your IntelliJ IDEA projects.
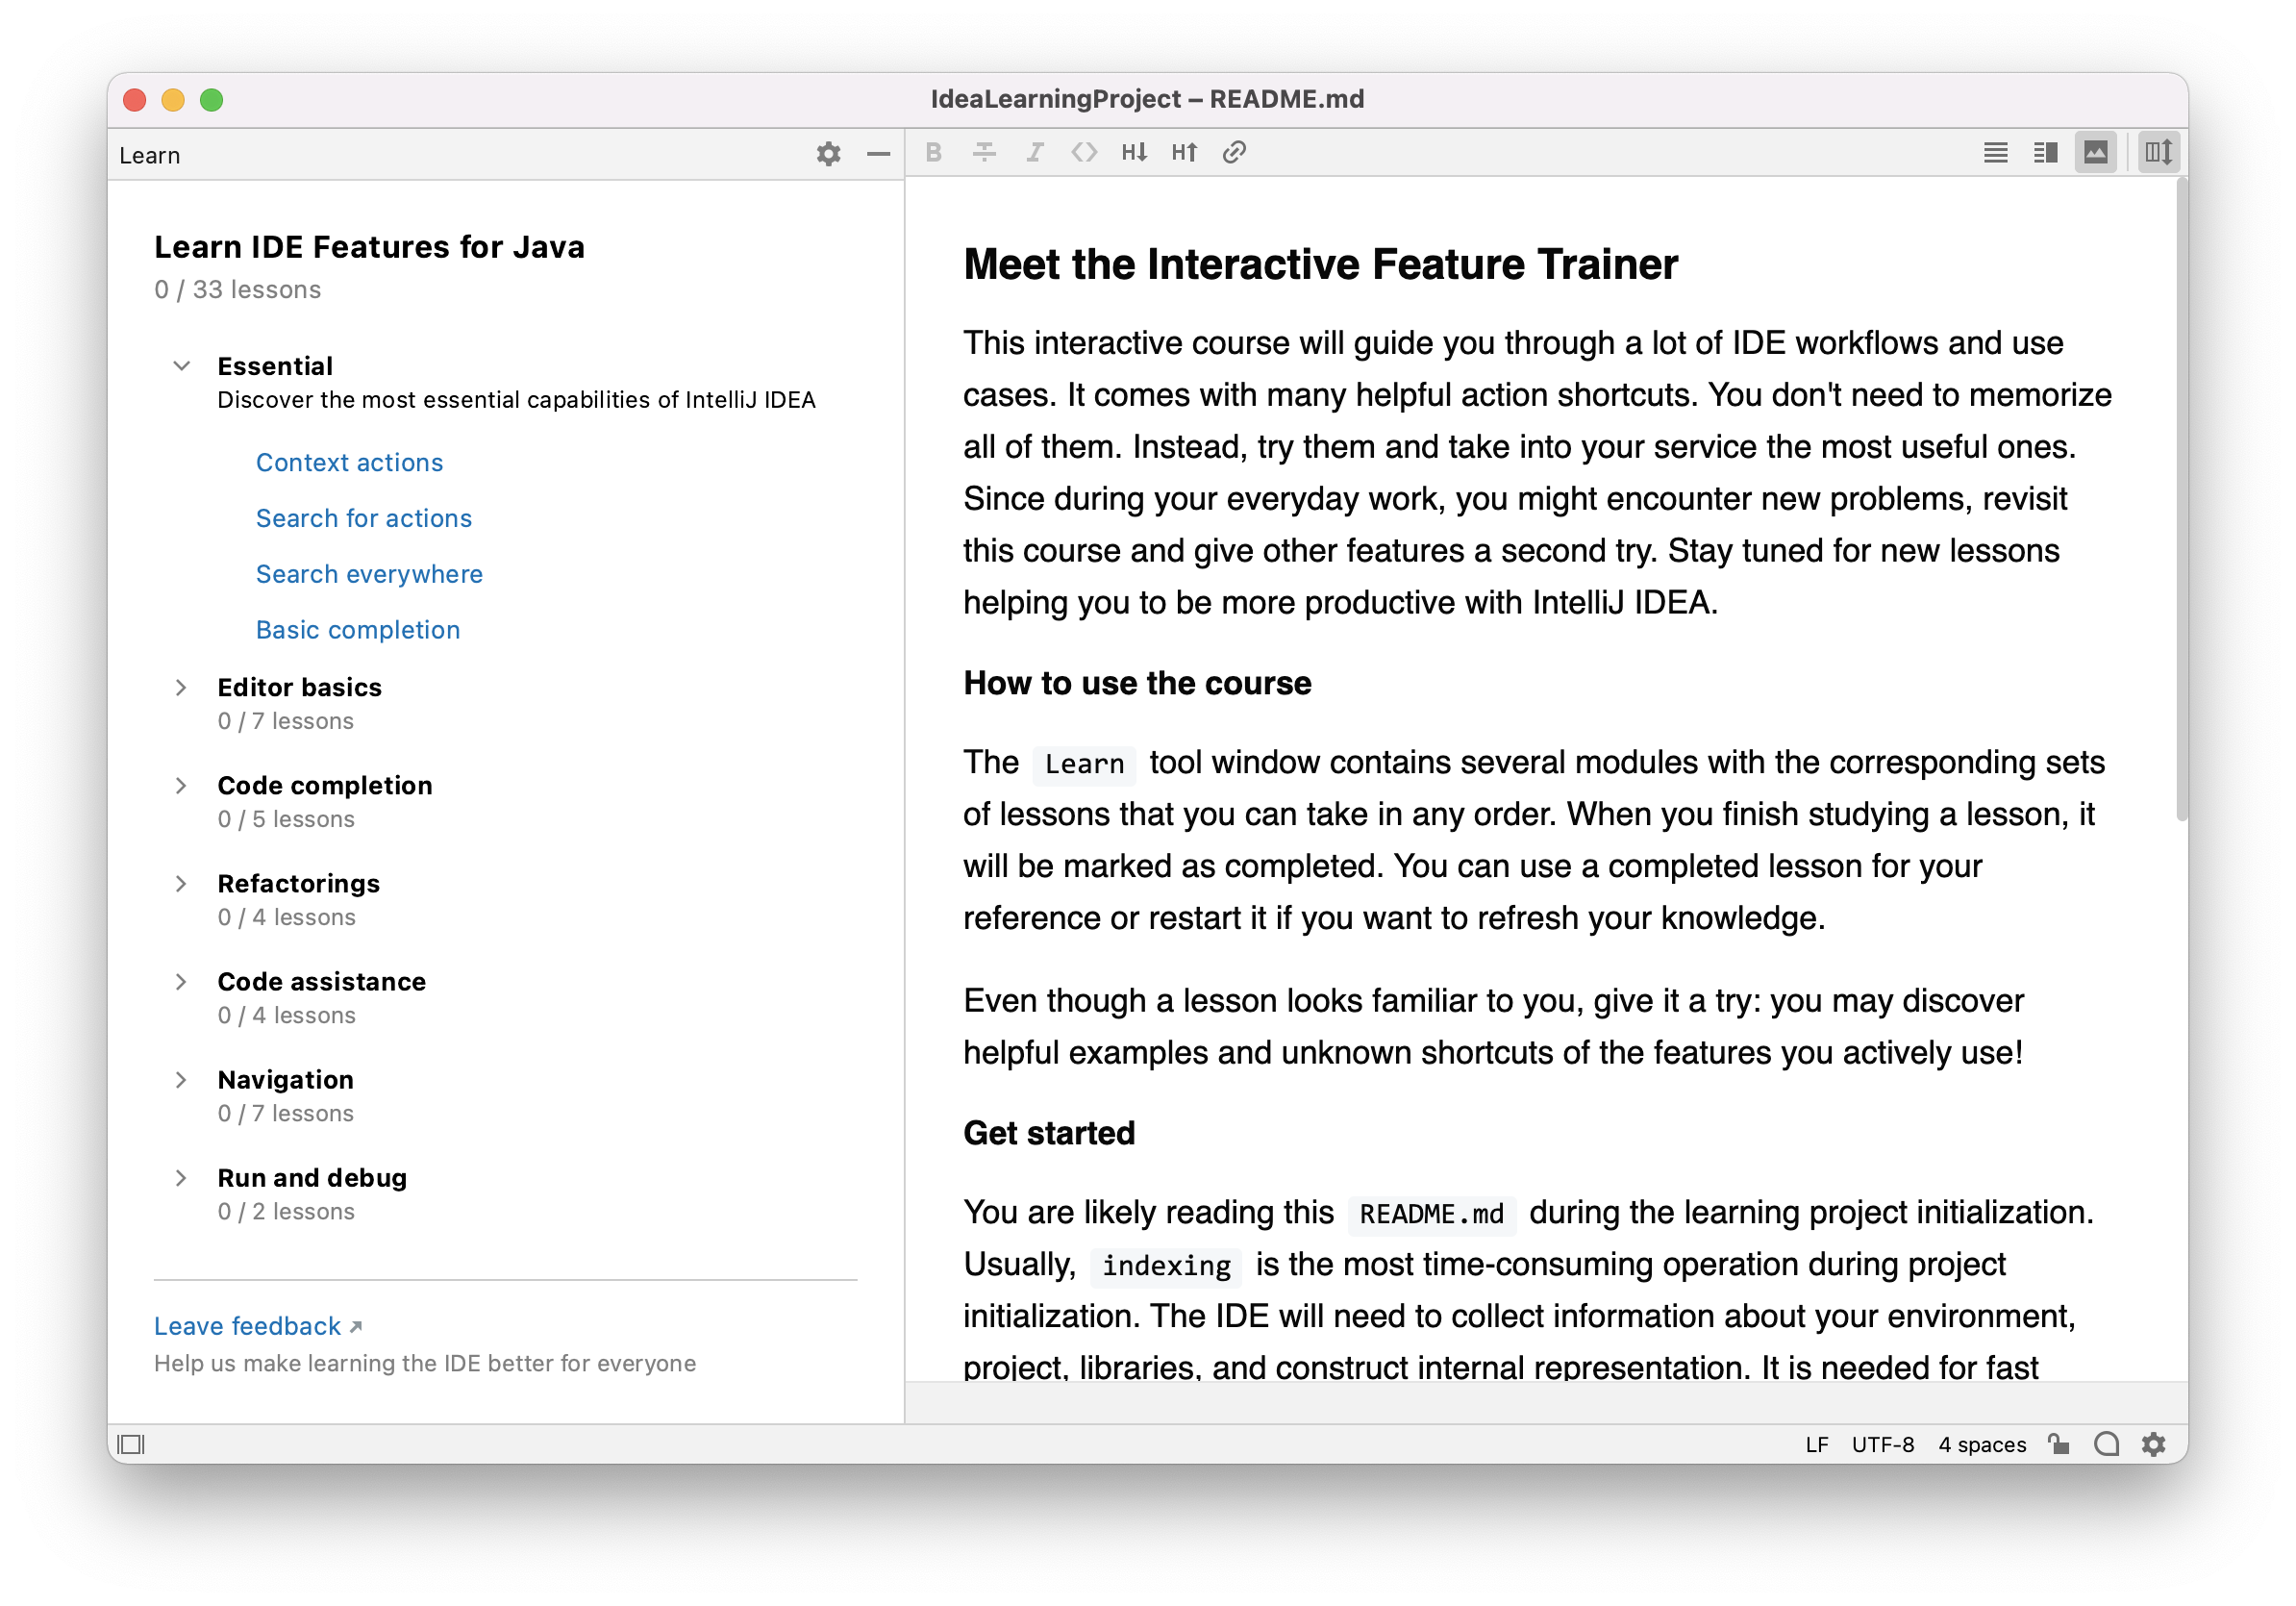
On the left-hand side is a list of Modules. They are Essential, Editor basics, Code completion, Refactorings, Code assistance, Navigation, and Run and debug. Each module contains several lessons, such as Context actions, these are shown in blue. On the right-hand side, you can read all about the Feature Trainer itself and what it offers.
You can click on Context actions in the Essential lesson to get started. The Feature Trainer provides step-by-step guidance for the lesson on the left-hand side. On the right-hand side you’ll see some sample code that you will be guided through.
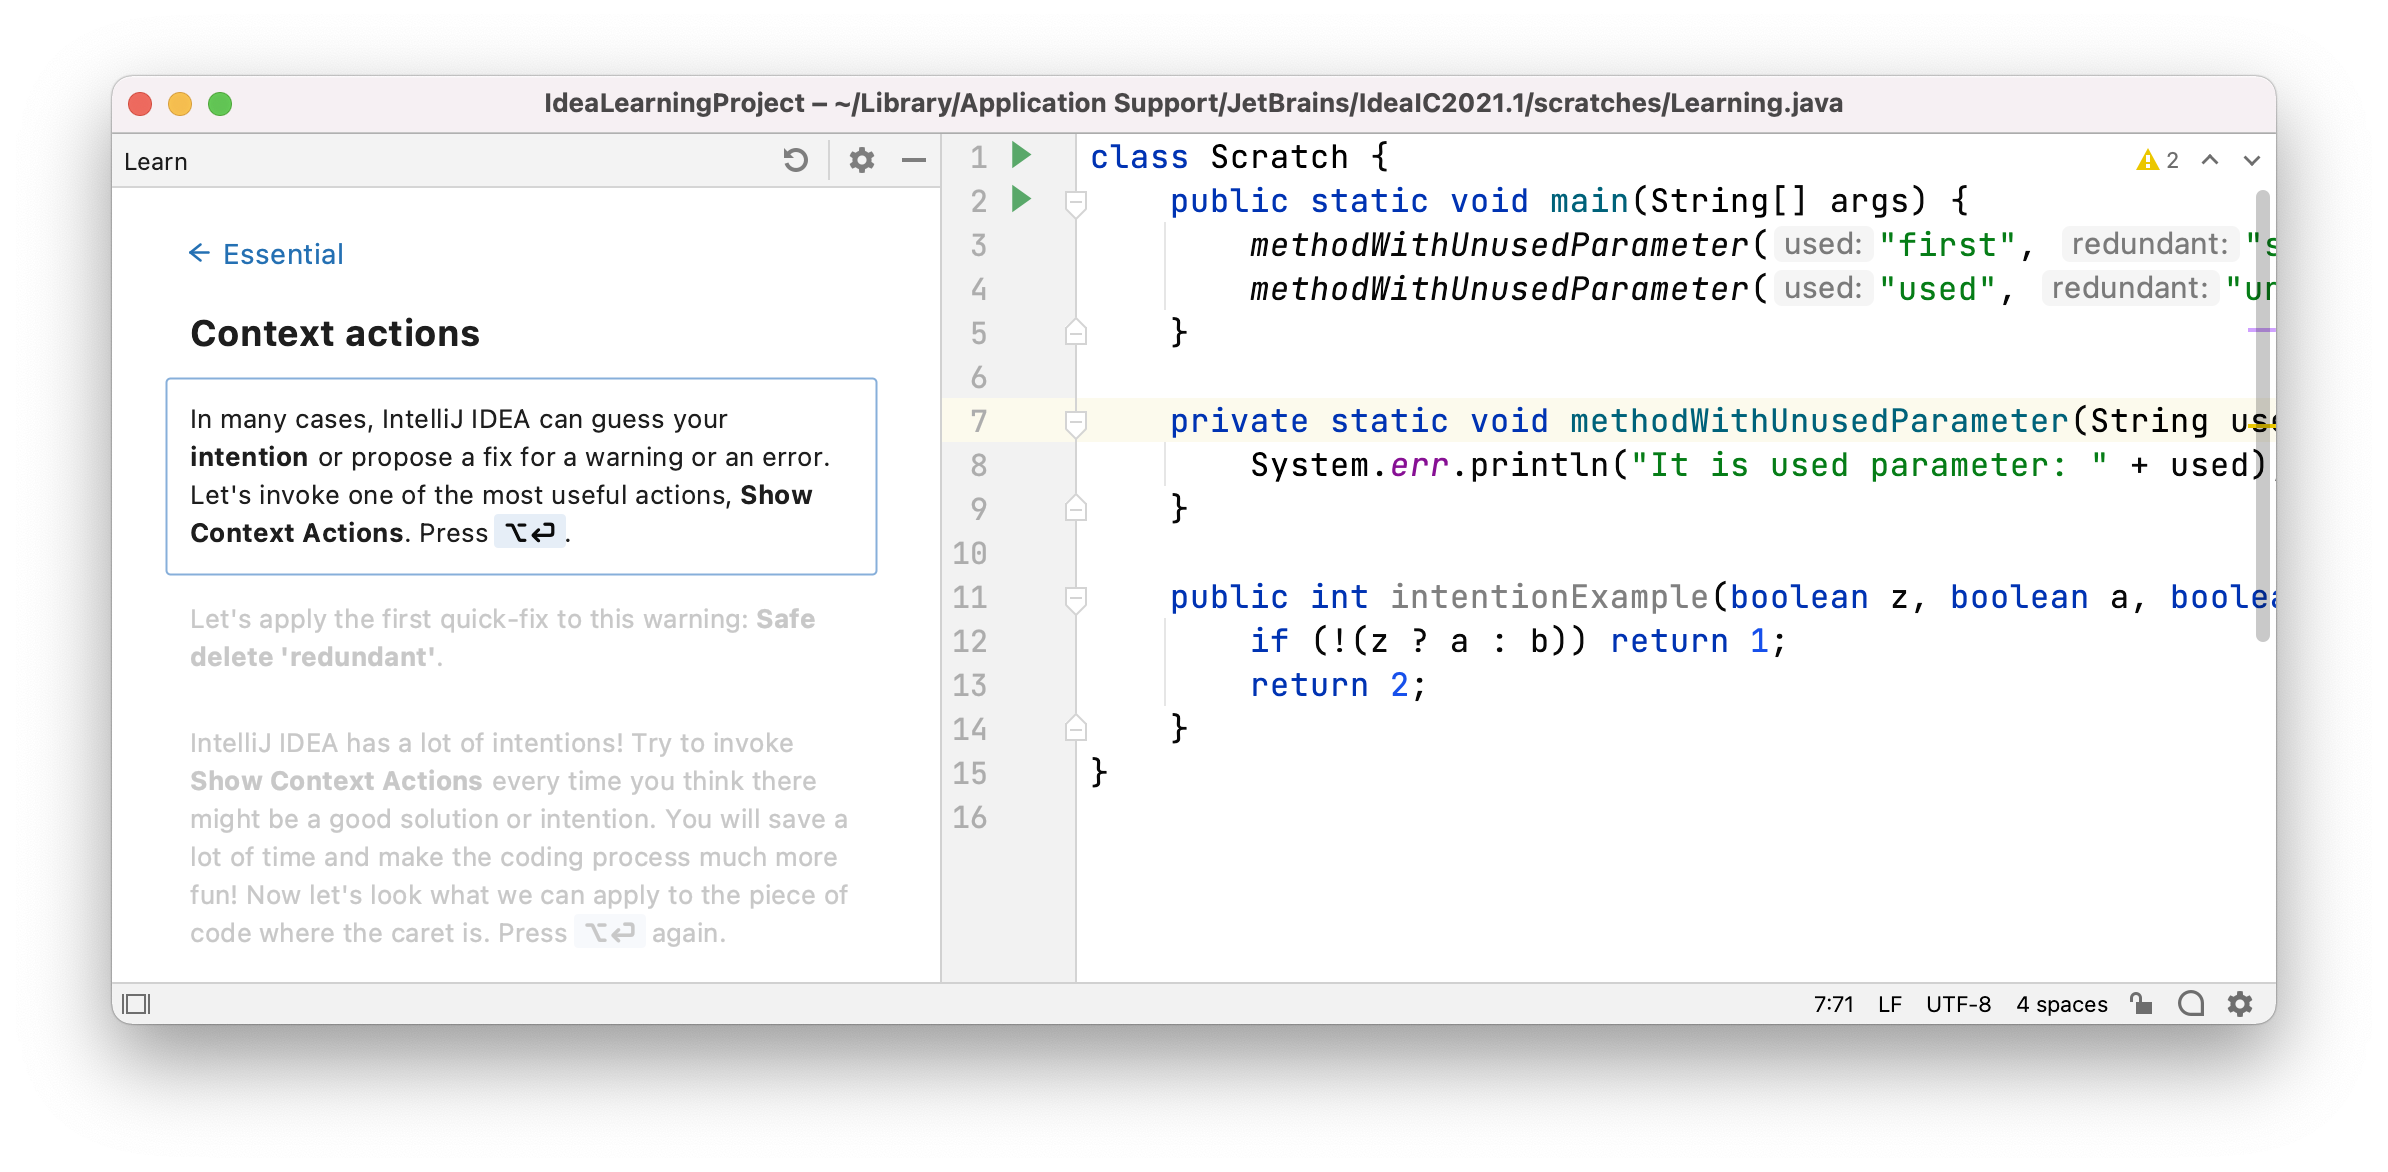
The shortcuts you will see will be those for your operating system. When you press the shortcut, the Feature Trainer will highlight the next step, so you can continue to follow the instructions.
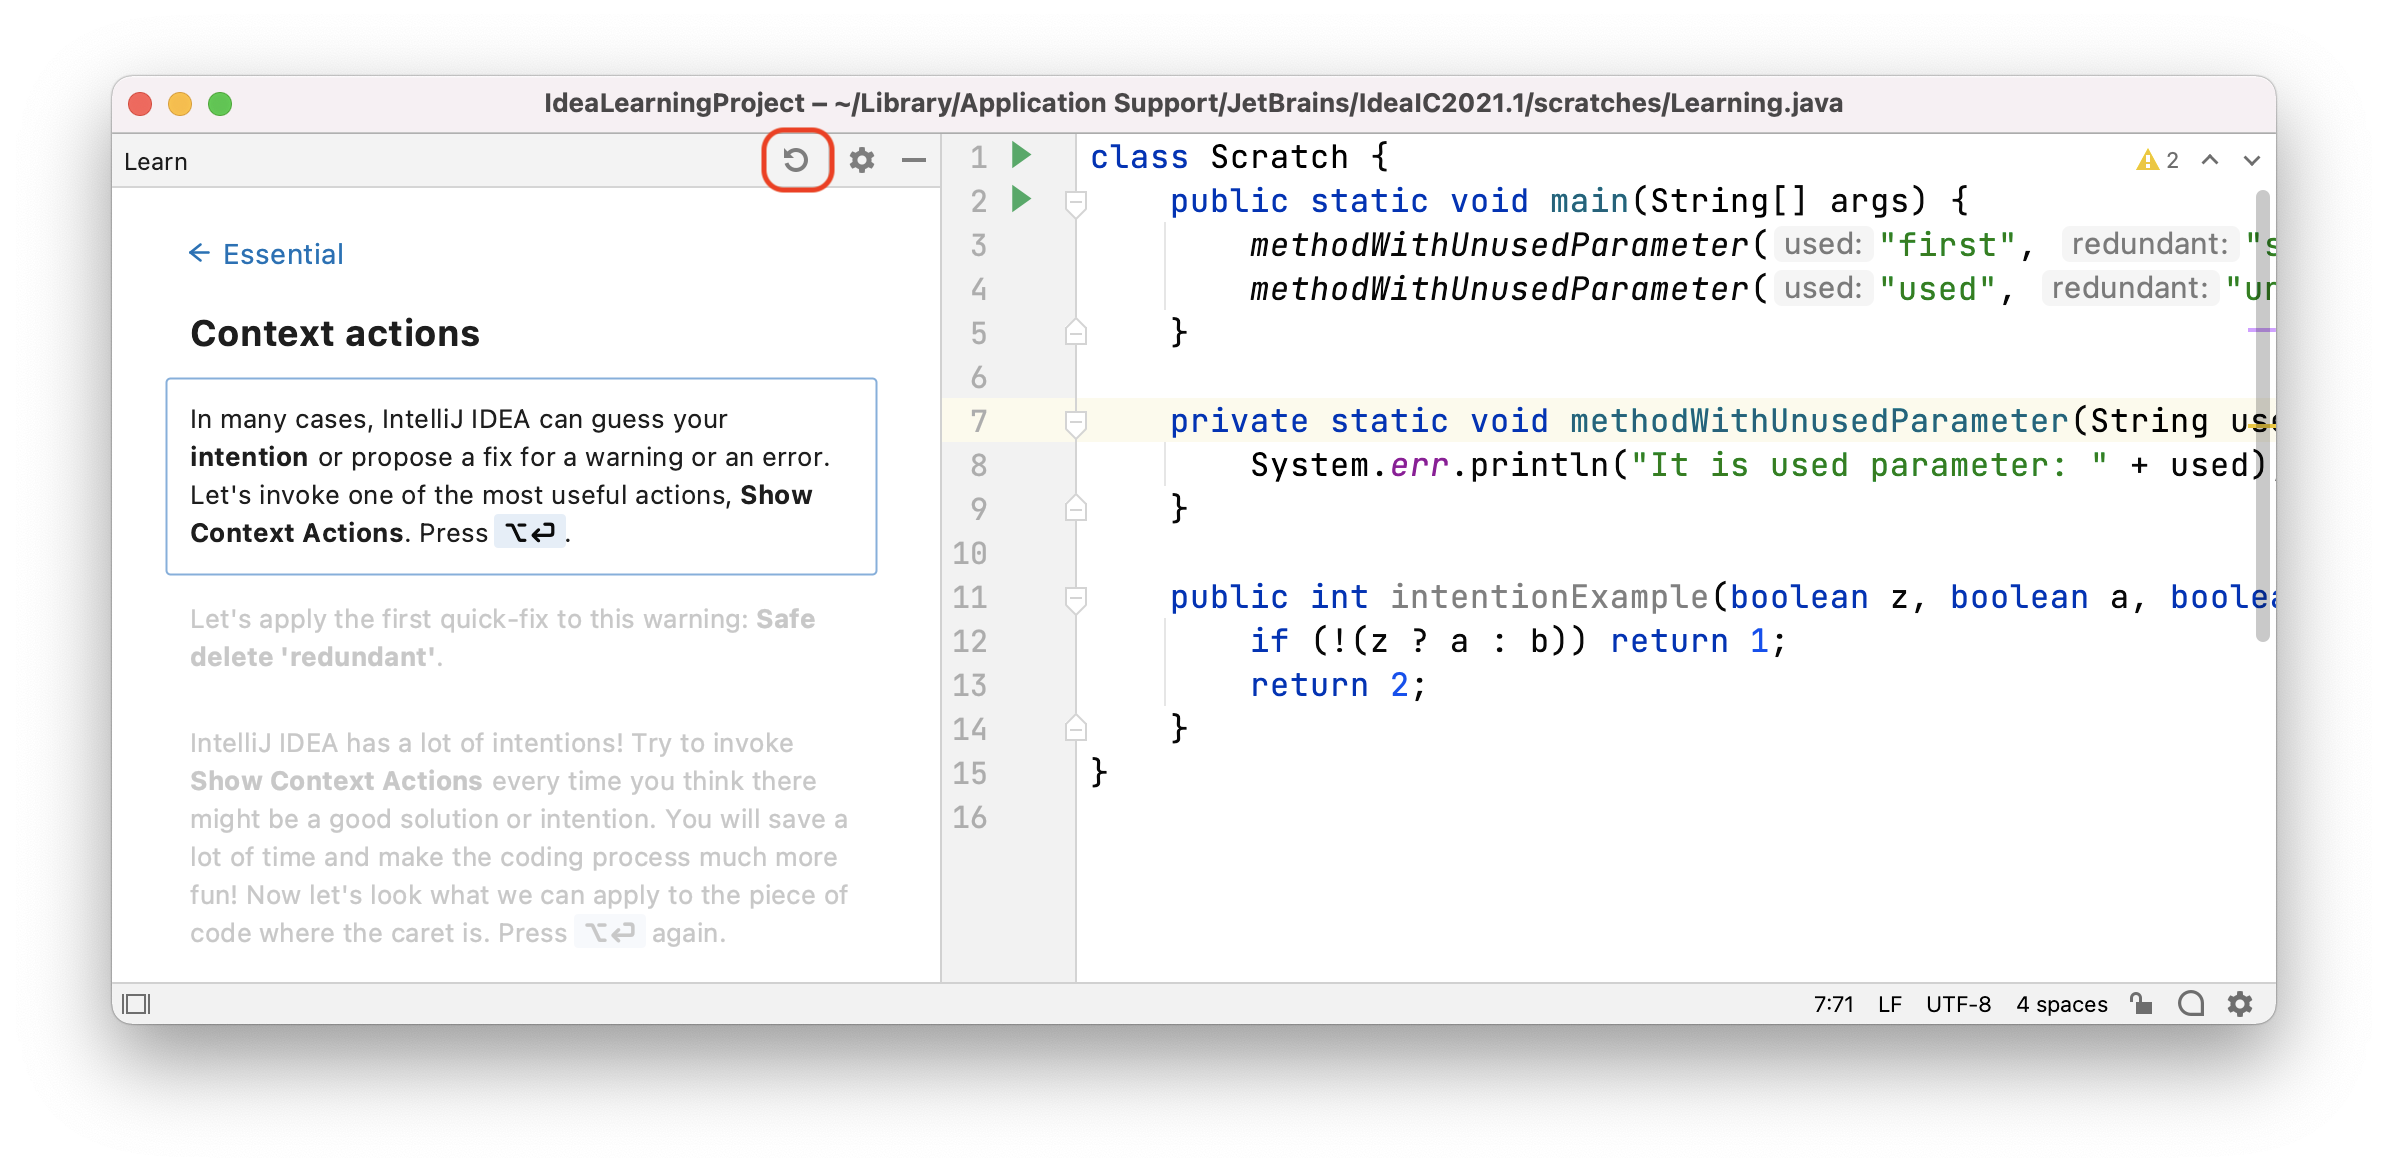
Once you’ve done a lesson once, you can repeat it as many times as you like. You can restart a lesson at any time with the refresh button:
You don’t need to do the modules or lessons in the order they appear in the Feature Trainer. You can complete any lesson from any module in any order. You can also complete the modules in any order.
As you proceed through the lessons you’ve chosen, you are asked to use the shortcuts that pertain to your operating system. For example, ⌘⇧A. You can also click on any shortcut and then click the pop-up link to apply that shortcut or assign it to a different keyboard shortcut if required.
The Feature Trainer also has some workflow lessons that help you to understand the features in more depth. For example, the Debug workflow lesson in the Run and Debug module.
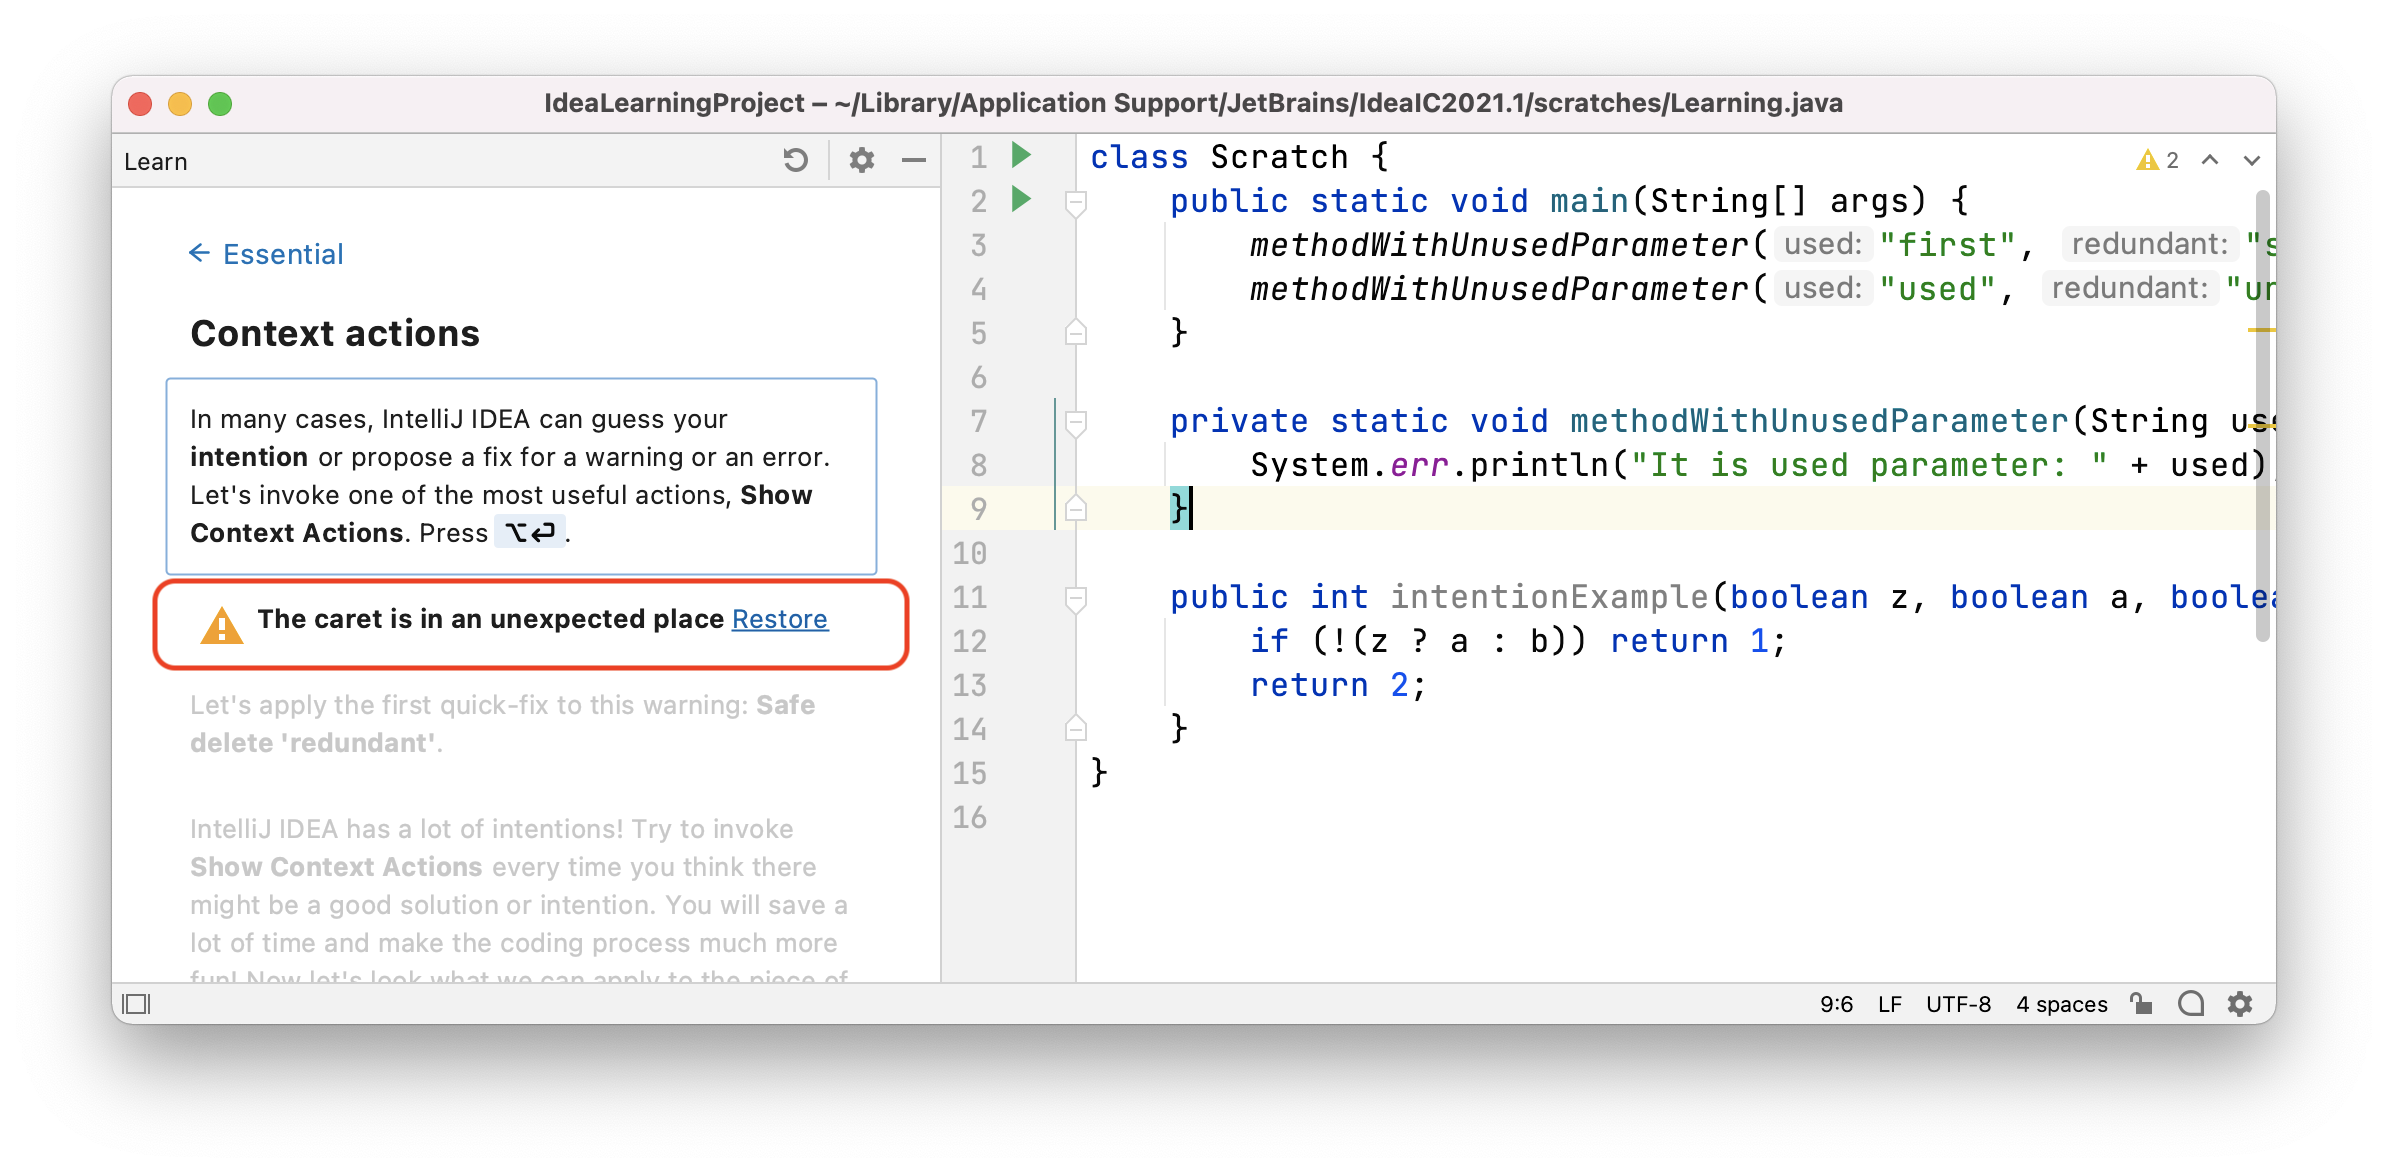
There are a few situations where you might need to reset the position of the caret on the right-hand side. For example, you might accidentally click off the caret position, or type something in the wrong place. In that instance, you will get a prompt to click Restore to restore the lesson to a point where you can continue with it.
There is a link called Leave Feedback at the bottom of the Learn pane on the left-hand side. This will open in your default browser and allow you to share your feedback on the Feature Trainer with JetBrains. We’d love to hear your feedback so please do let us know how you get on using this link.
When you’ve finished with the Feature Trainer you can close it as you would any other IntelliJ IDEA Project. The project is on your machine along with your other IntelliJ IDEA projects. If you’re working on a different project, you can also click Learn IDE Features from the Help menu to access this project.
Finally, there are some helpful resources here that it’s worth being aware of in the Welcome Screen. Help will open the IntelliJ IDEA online documentation. Getting Started will open our resources centre where you can browse the IntelliJ IDEA knowledge base and view videos. Demos and Screencasts will take you to our IntelliJ IDEA YouTube channel where you can watch our screencasts, including the Feature Trainer which formed the base for this blog. The Keymap Reference will load the default keymaps. Finally, Tip of the day is useful for learning new bite-sized pieces of information about IntelliJ IDEA.


