IntelliJ IDEA
IntelliJ IDEA – the Leading IDE for Professional Development in Java and Kotlin
How to Work With Protobuf-Maven Projects in IntelliJ IDEA

Protobuf, short for Protocol Buffers, is a language-agnostic data serialization format developed by Google. It is designed to efficiently and reliably serialize structured data to communicate between different systems and programming languages. Protobuf offers a compact binary representation of data, making it efficient for data storage, transmission over networks, or persistent storage.
Protobuf uses a language called Protocol Buffer Language (proto) to define the structure of the data. The proto files specify the message types, fields, and their data types. These files serve as a contract between the systems involved, ensuring data consistency and compatibility.
Protobuf comes with a code generation tool that generates data access classes or structures in various programming languages based on the proto file.

Let’s explore the possibilities of working with Protobuf in IntelliJ IDEA.
Getting started
Let’s start with a sample Protobuf project that creates an address book.
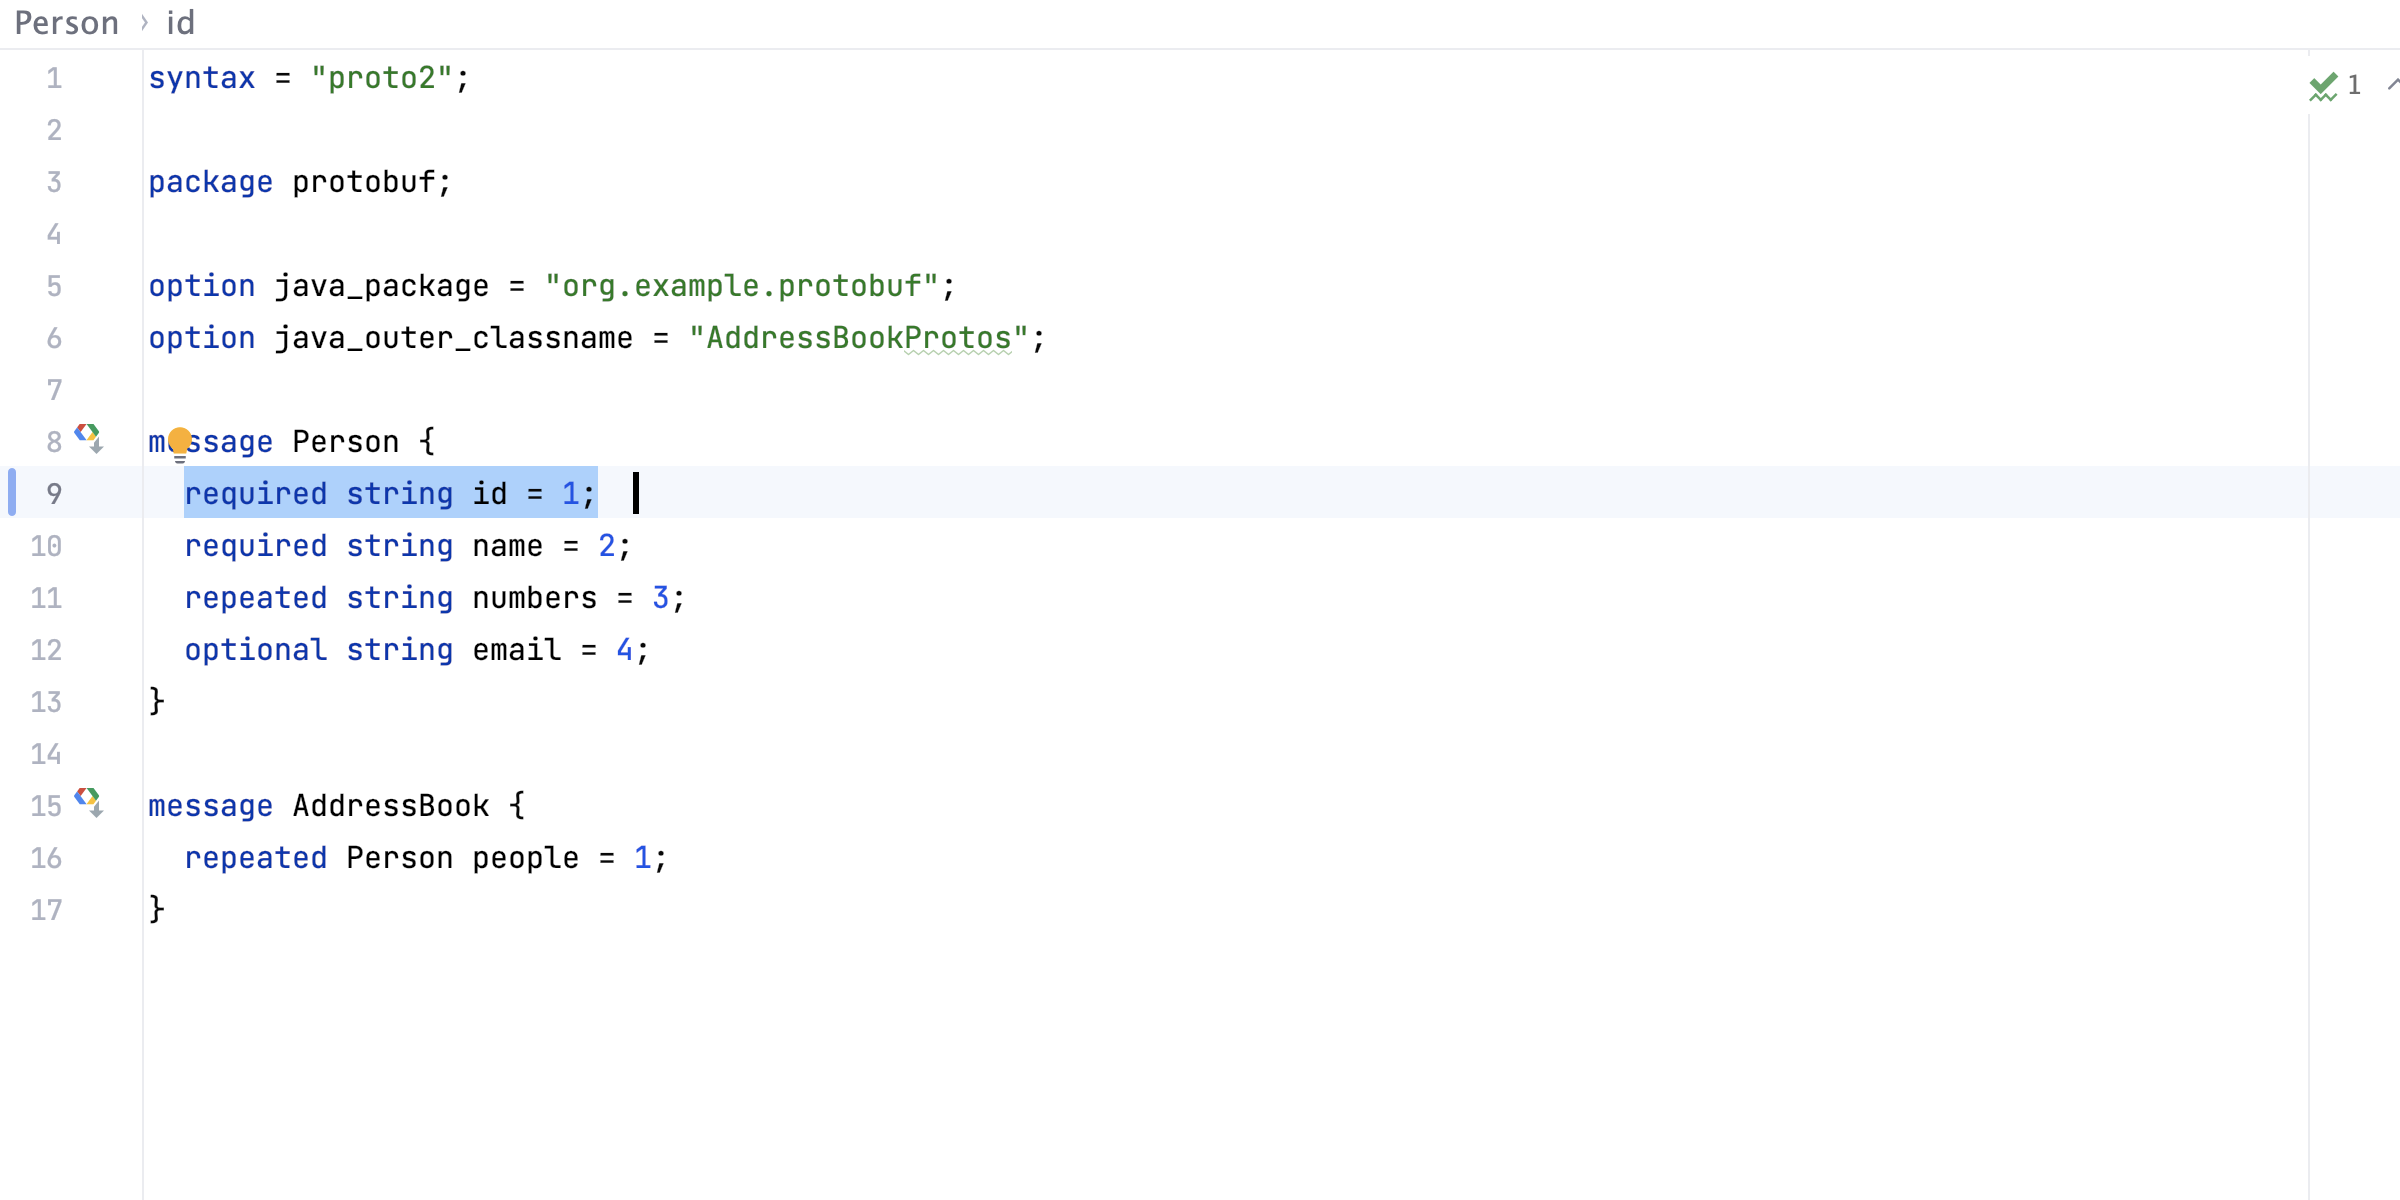
In the project, we have an address.proto file with the following syntax:
syntax = "proto2";
package protobuf;
option java_package = "org.example.protobuf";
option java_outer_classname = "AddressBookProtos";
message Person {
 required int32 id = 1;
 required string name = 2;
 repeated string numbers = 3;
 optional string email = 4;
}
message AddressBook {
 repeated Person people = 1;
}
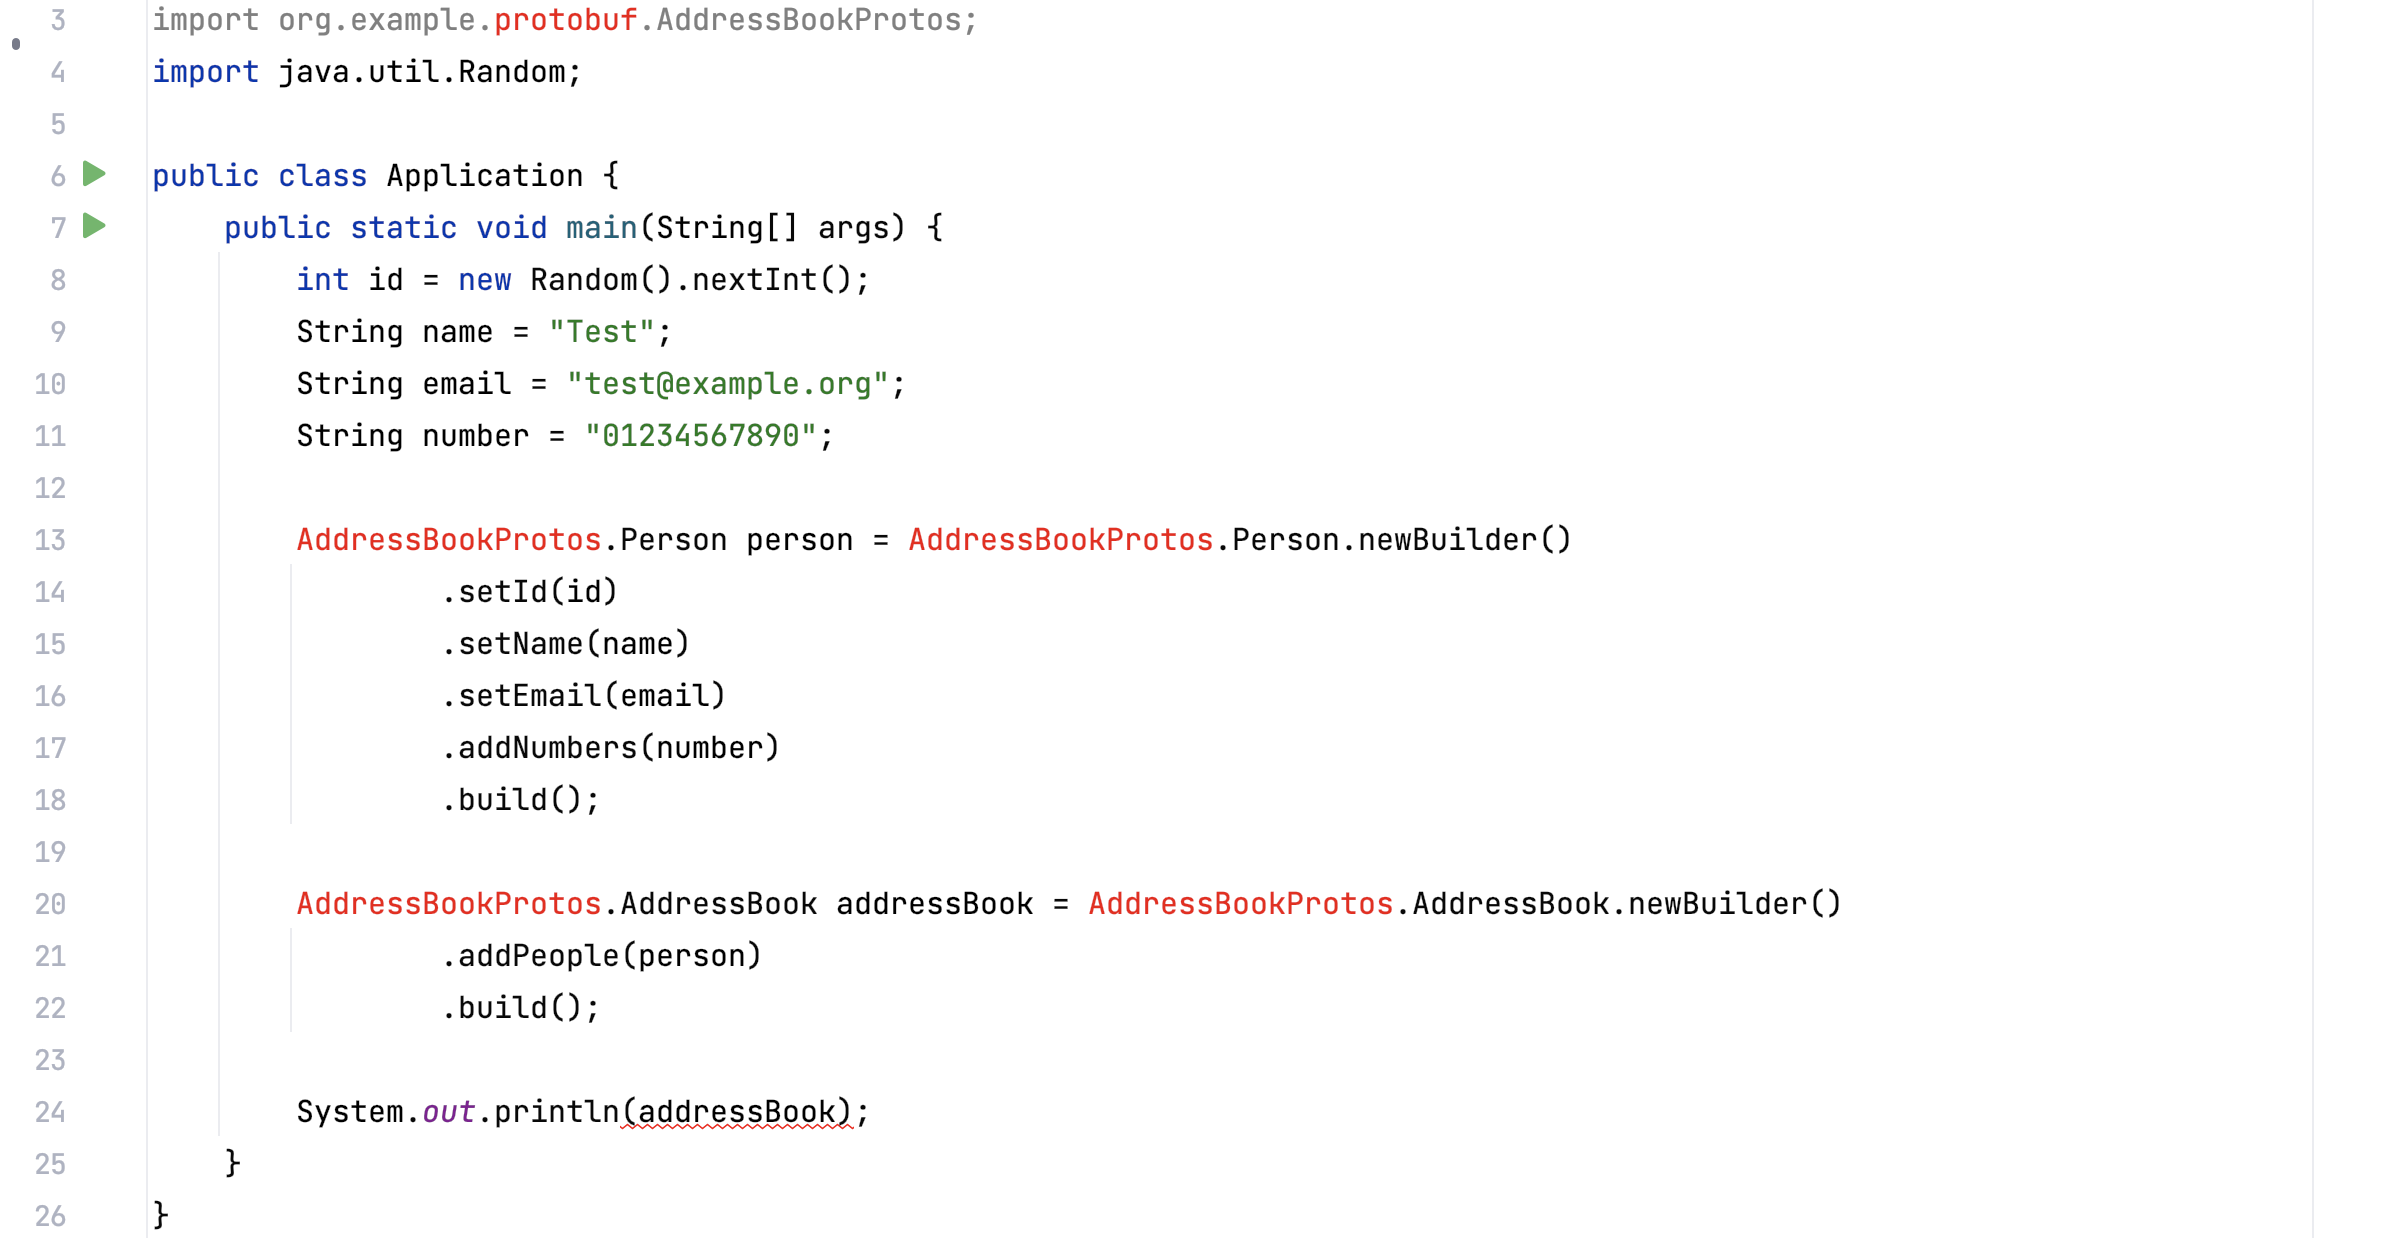
We also have a Java application with the following syntax:
public class Application {
   public static void main(String[] args) {
       int id = new Random().nextInt();
       String name = "Test";
       String email = "test@example.org";
       String number = "01234567890";
       AddressBookProtos.Person person = AddressBookProtos.Person.newBuilder()
               .setId(id)
               .setName(name)
               .setEmail(email)
               .addNumbers(number)
               .build();
       AddressBookProtos.AddressBook addressBook = AddressBookProtos.AddressBook.newBuilder()
               .addPeople(person)
               .build();
       System.out.println(addressBook);
   }
}
We are going to use Maven to build our project. Here is the pom.xml:
<dependencies>
   <dependency>
       <groupId>com.google.protobuf</groupId>
       <artifactId>protobuf-java</artifactId>
       <version>3.23.0</version>
   </dependency>
</dependencies>
<build>
   <plugins>
       <plugin>
           <groupId>com.github.os72</groupId>
           <artifactId>protoc-jar-maven-plugin</artifactId>
           <version>3.11.4</version>
           <executions>
               <execution>
                   <phase>generate-sources</phase>
                   <goals>
                       <goal>run</goal>
                   </goals>
                   <configuration>
                       <optimizeCodegen>false</optimizeCodegen>
                       <protocVersion>3.23.0</protocVersion>
                       <includeStdTypes>true</includeStdTypes>
                   </configuration>
               </execution>
           </executions>
       </plugin>
   </plugins>
</build>
There are several similar Protobuf plugins, and you can choose whichever you prefer. In our case, we are using protoc-jar-maven-plugin.
The <execution> section has the generate-sources phase. During its execution, the plugin will generate a Java model based on the proto file in our project.
Basic setup and execution
Let’s open this project inside IntelliJ IDEA and run our application:
When we look at the Build output, we’ll see errors:
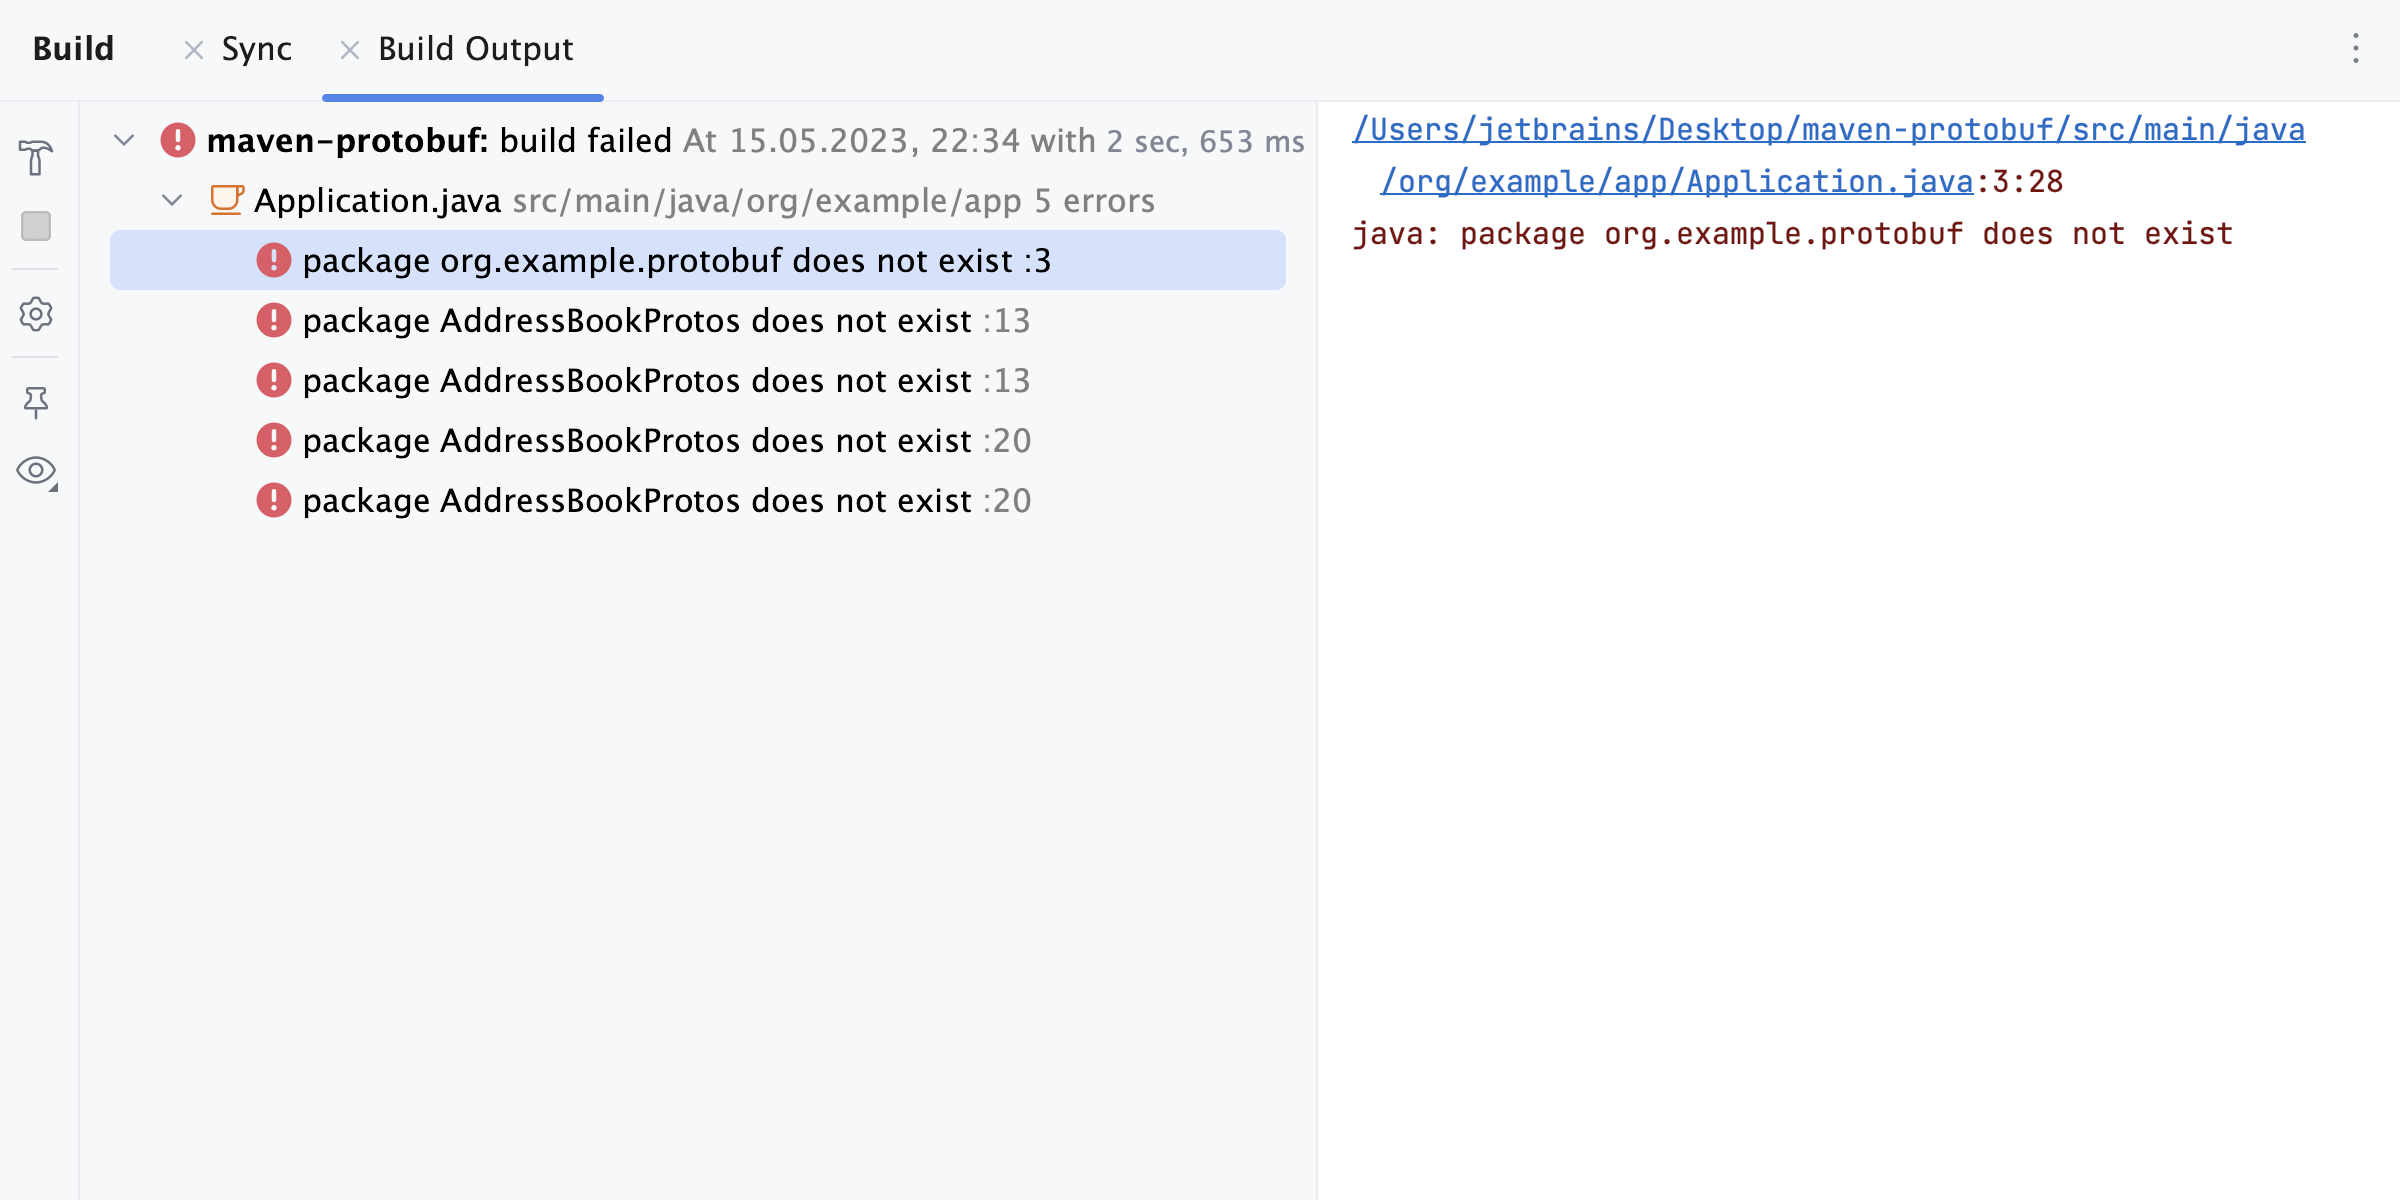
This problem occurred because we didn’t generate the Java model. We can use the Maven tool window to generate our Java model by clicking the Generate Sources and Update Folders for All Projects icon. The application will now run successfully.
Advanced setup
Let’s modify our proto file. For example, let’s change Person.id from required int32 id = 1; to required string id = 1;
If we run the application again, we’ll get an error in our Build Output:
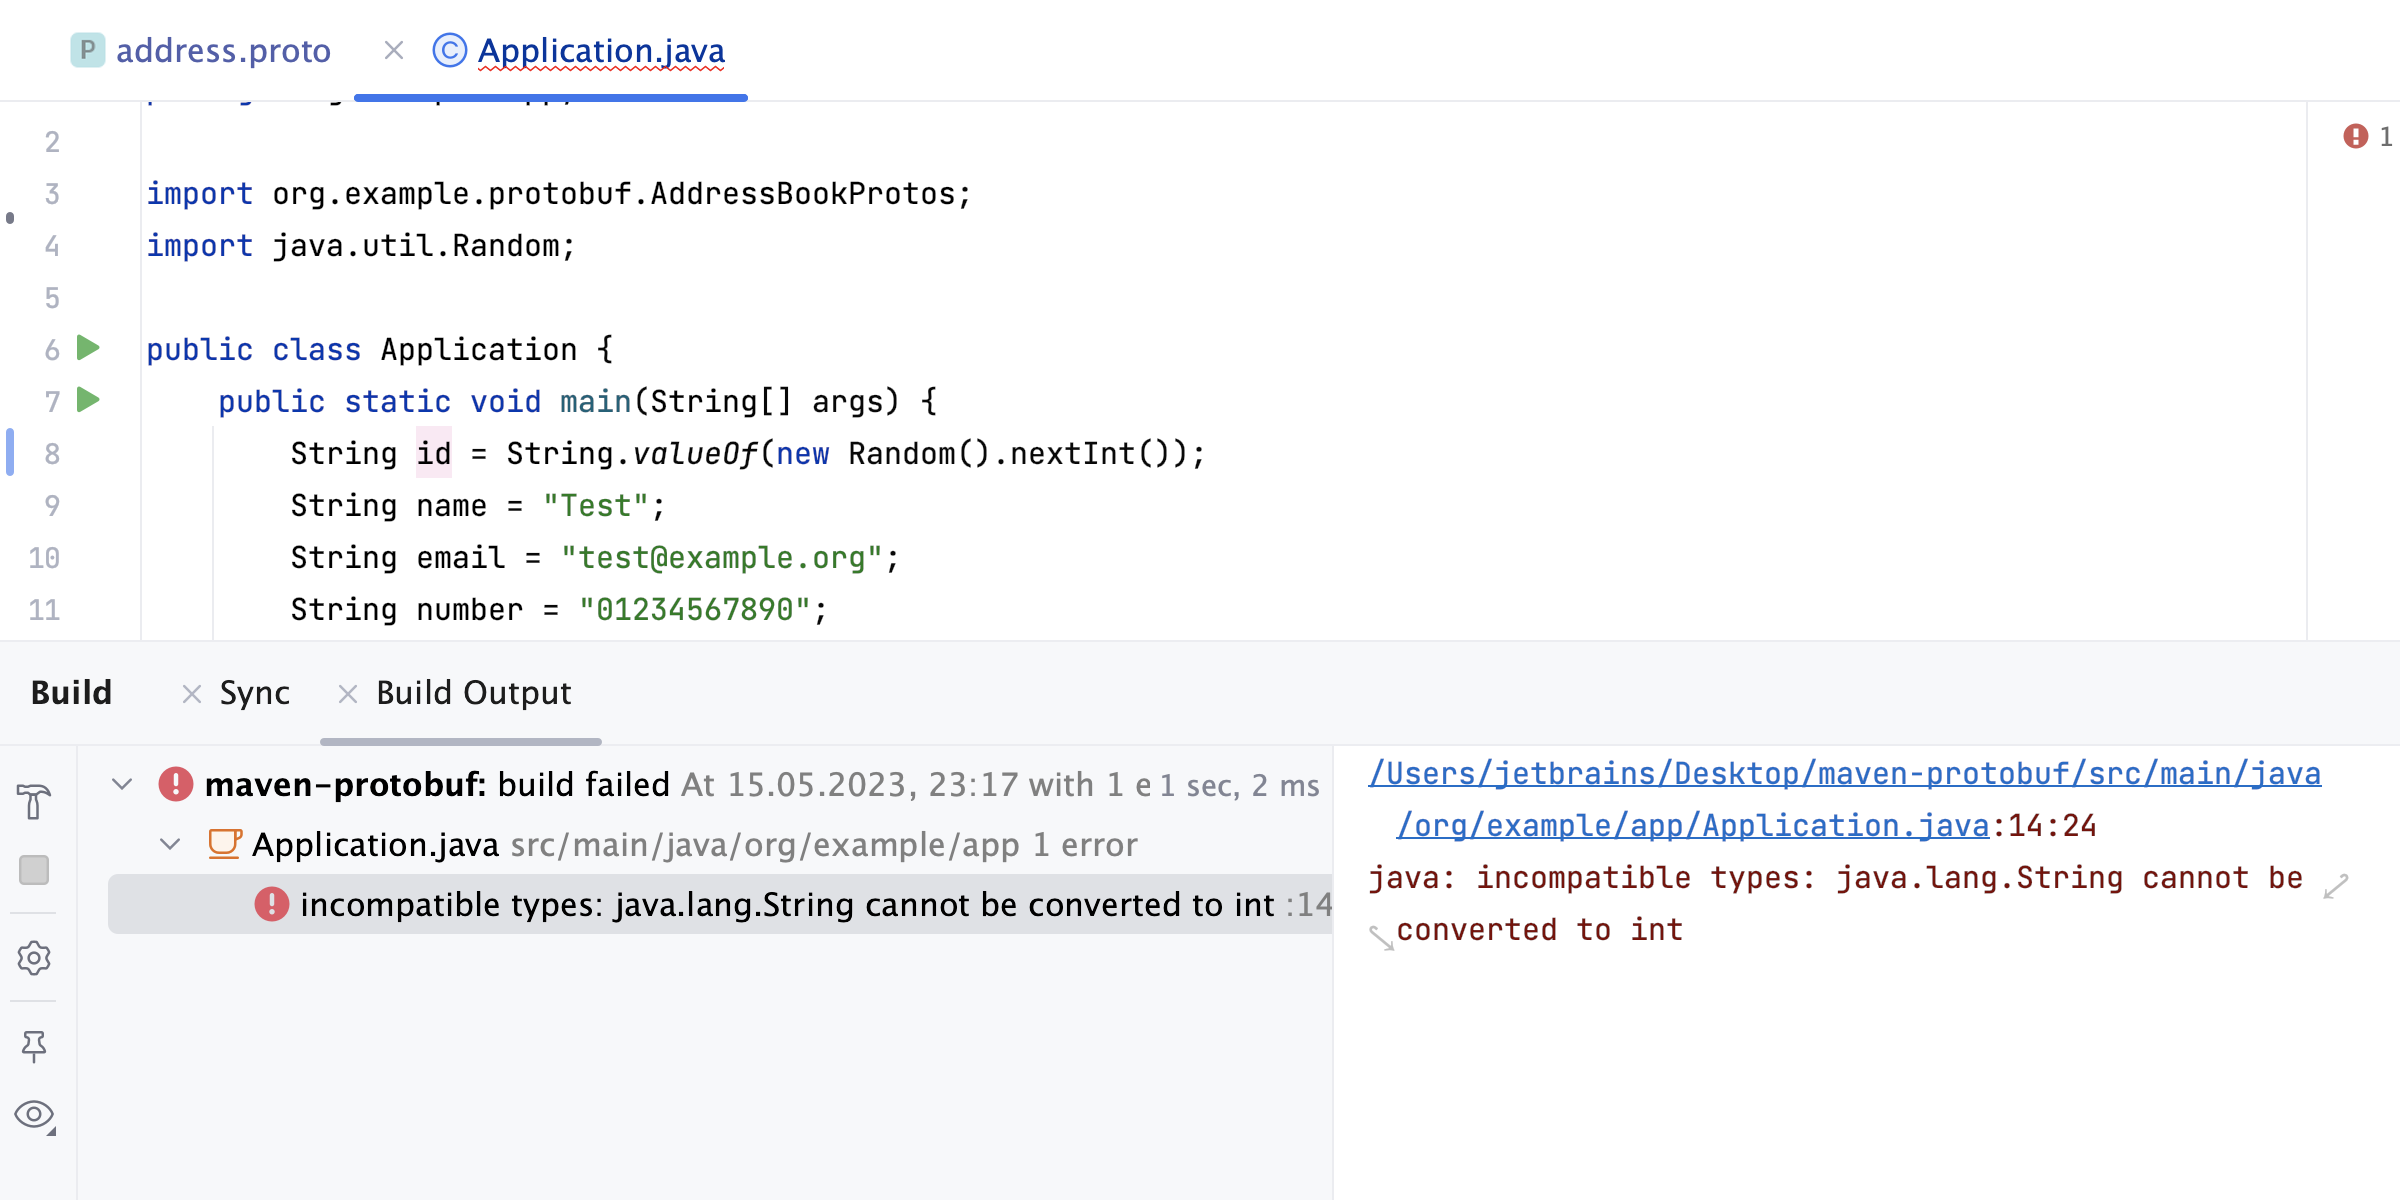
This happens because we didn’t generate the Java model after making our modifications. We can do it again manually, or we can add the Execute Before Build option to the generate-sources phase in the Maven tool window.
The Execute Before Build option sets a trigger and executes the specified phase each time we run our build.
There is one more thing we need to do – add the build-helper-maven-plugin section to our pom.xml:
<plugin>
   <groupId>org.codehaus.mojo</groupId>
   <artifactId>build-helper-maven-plugin</artifactId>
   <version>3.3.0</version>
   <executions>
       <execution>
           <id>test</id>
           <phase>generate-sources</phase>
           <goals>
               <goal>add-source</goal>
           </goals>
           <configuration>
               <sources>
       <source>${project.basedir}/target/generated-sources</source>
               </sources>
           </configuration>
       </execution>
   </executions>
</plugin>
Now, we’re all set and can build our project without any additional manual hassle.
Conclusion
We hope that this has helped you understand how you can use Protobuf in your projects while working in IntelliJ IDEA.
As always, we’d love to hear your feedback. You can leave a comment below or use our issue tracker for feature requests.
Happy developing!