Setting up Sourcery in AppCode

Are you using Sourcery, the fantastic meta-programming tool by Krzysztof Zablocki? In this tutorial we will show how to integrate it in AppCode without even writing a plugin. As a sample project we will use the Sourcery-Example project.
Each step of the tutorial contains prepared settings, which you can download and import into AppCode via File -> Import Settings (scroll down to the end of this post for the full setup link).
Code highlighting and completion
Sourcery uses three types of templates: EJS, Swift, and Stencil. Let’s use Stencil templates as an example and configure the simple code highlighting and completion for Stencil tags and keywords.
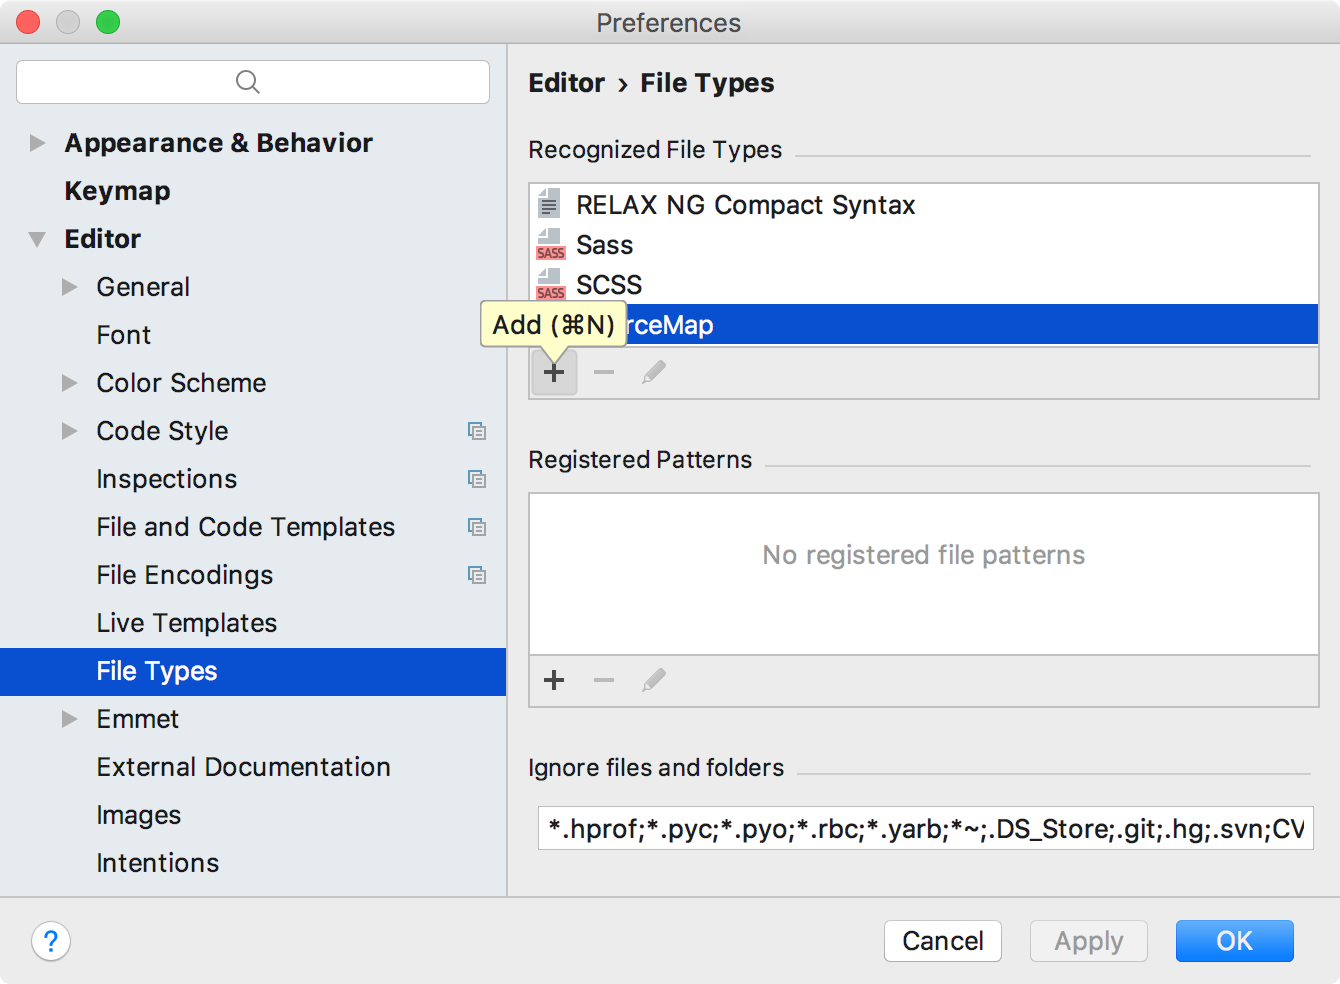
Open Preferences | Editor | File types and click the + button in the Recognized File Types section:
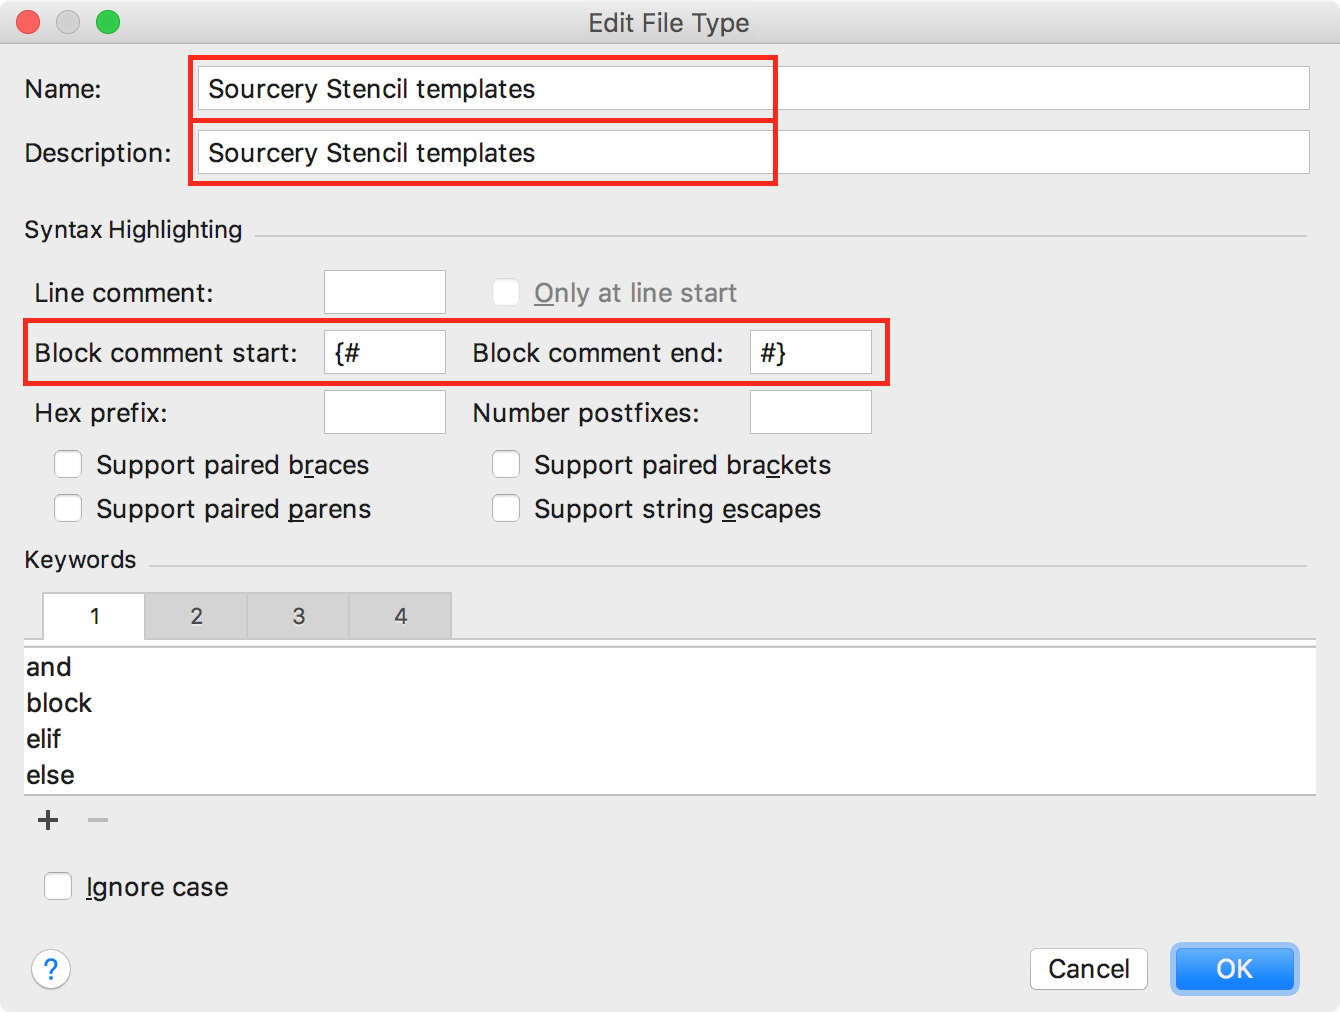
In the Edit File Type dialog, we can add a name and a description for our custom file type and define some settings for the syntax highlighting, such as block comment start/end and some others:
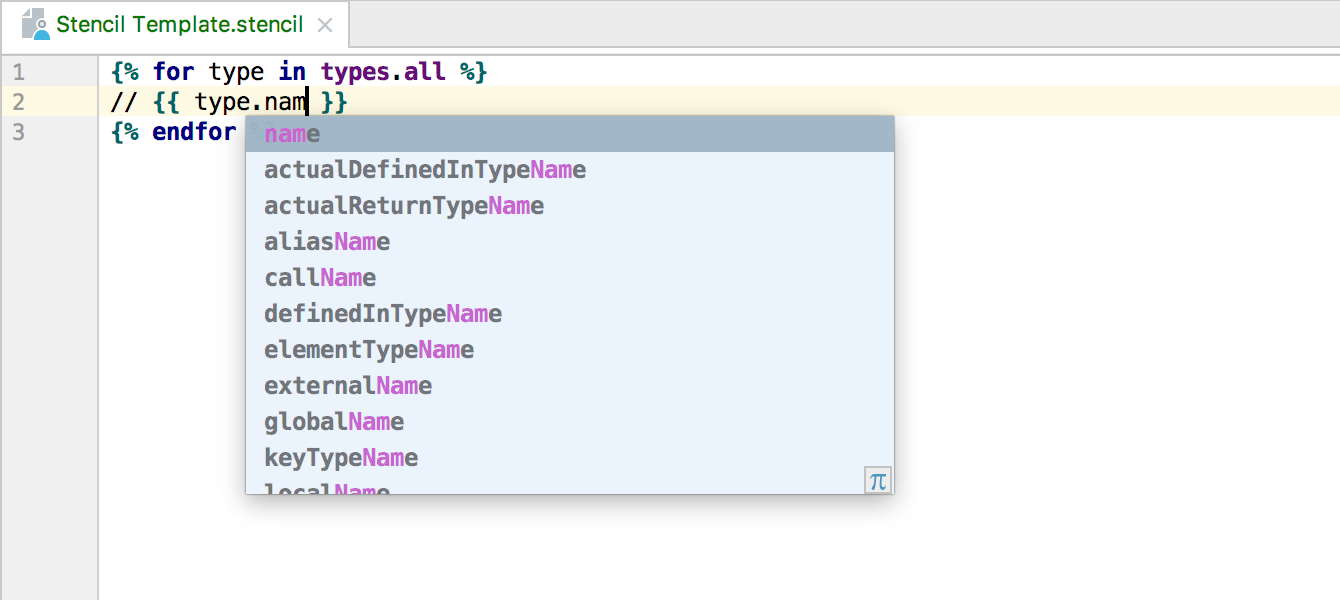
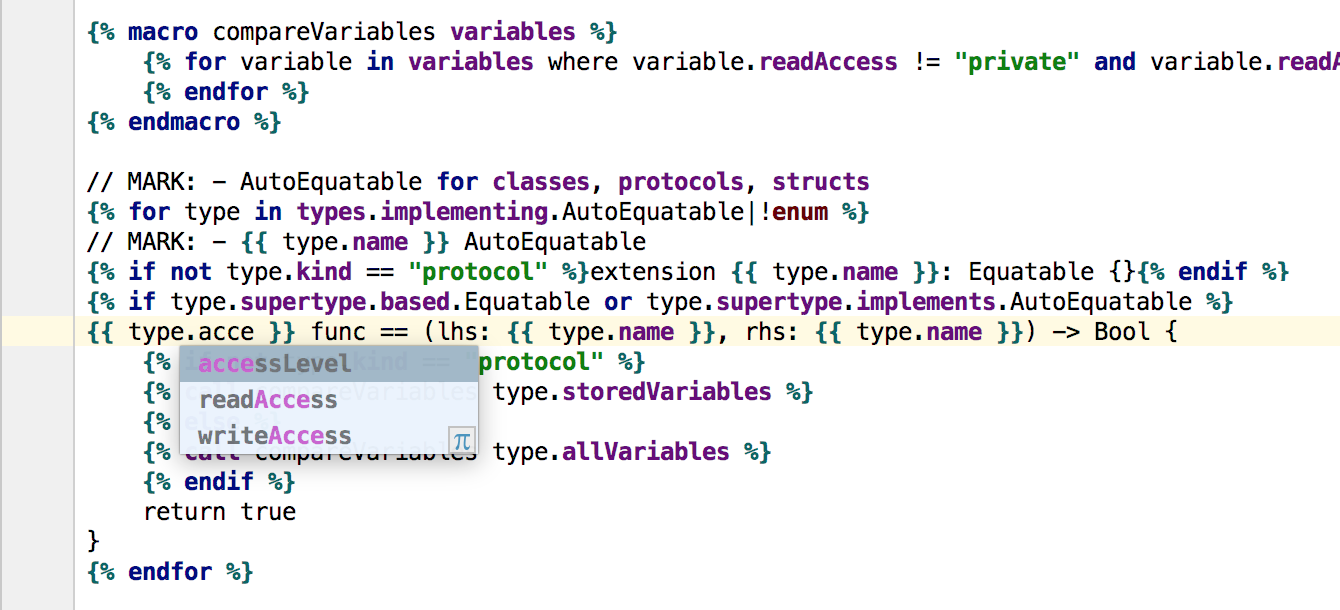
The most important part here is the Keywords section, which allows you to configure four different blocks of keywords. If you add a keyword to any block, AppCode will recognize it inside the custom file type you’ve just created. It will highlight it using one of the four predefined colors and show it in a simple, syntax-unaware completion list:
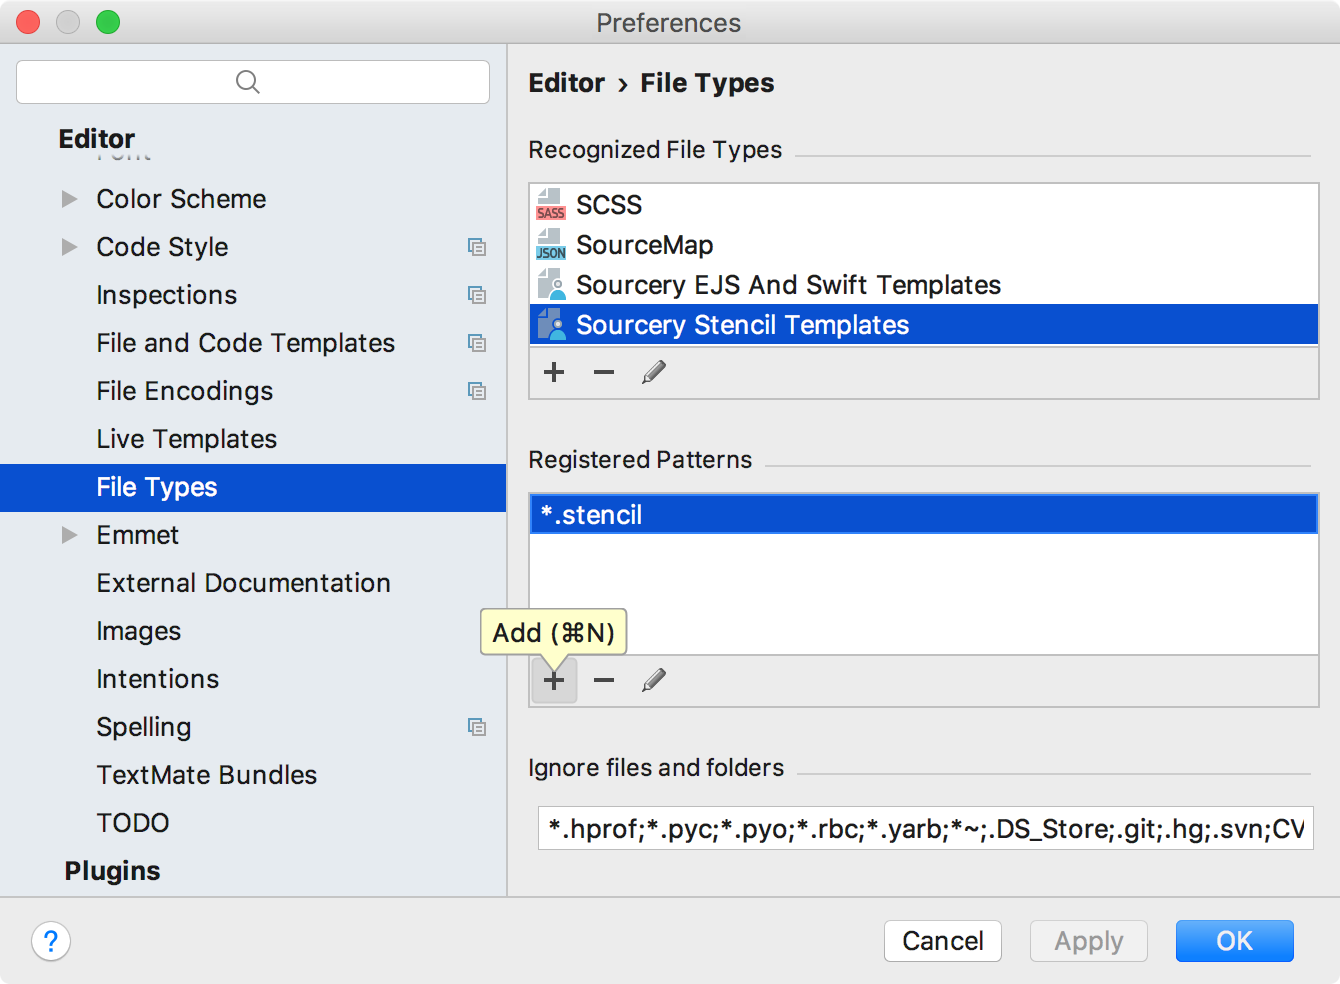
Don’t forget to set the extension for your custom file type in the Registered patterns section:
To have all the tags and keywords highlighted inside Stencil, EJS, and Swift templates, download and import these settings, and then restart AppCode:
Live templates
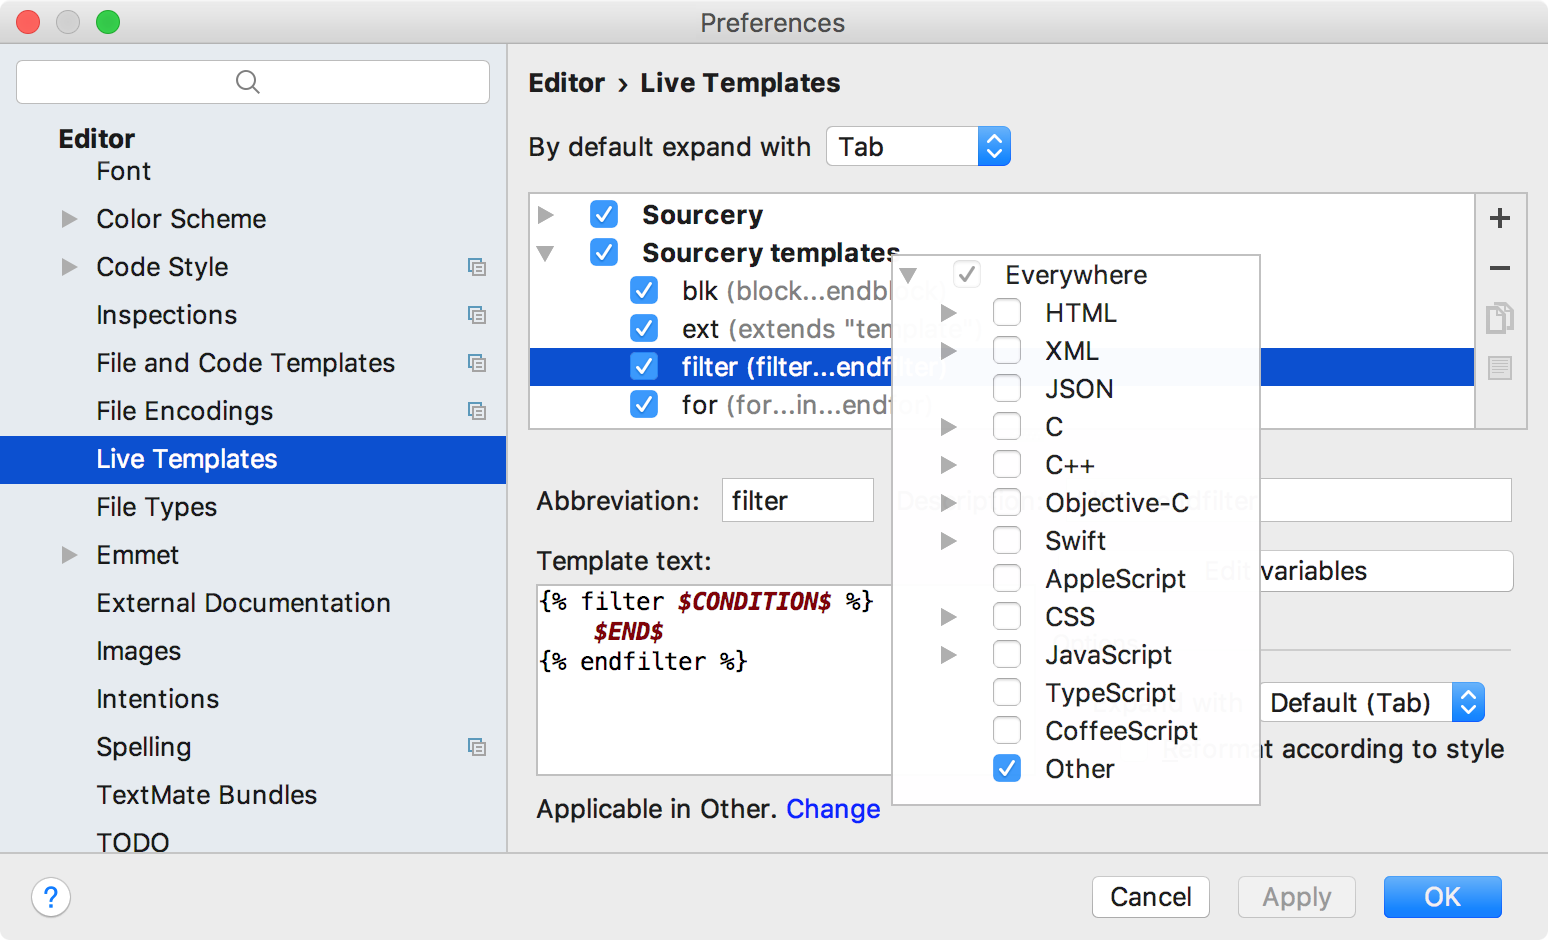
Now that we have some code highlighting and completion, can we speed up writing some common blocks (such as loops or macros)? Let’s configure a few Live Templates and make them available in our custom file types by setting their context to Other:
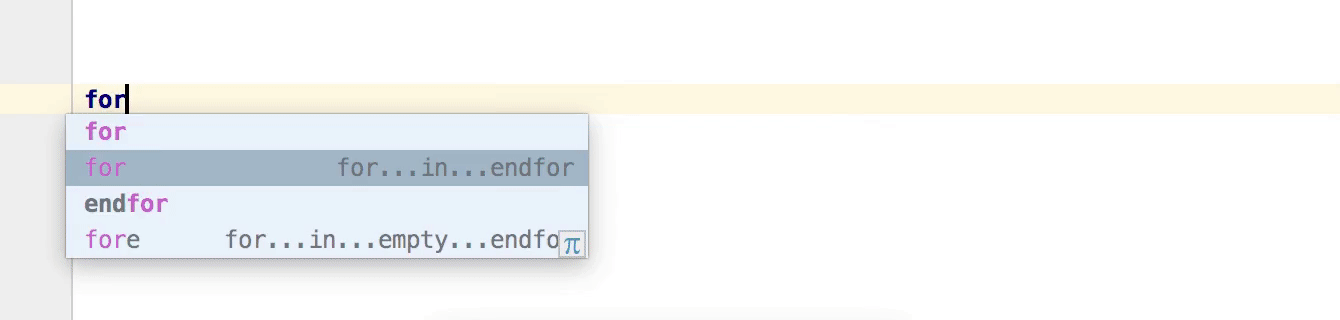
Having done that, we can quickly generate, for example, the for...in loop inside the template:
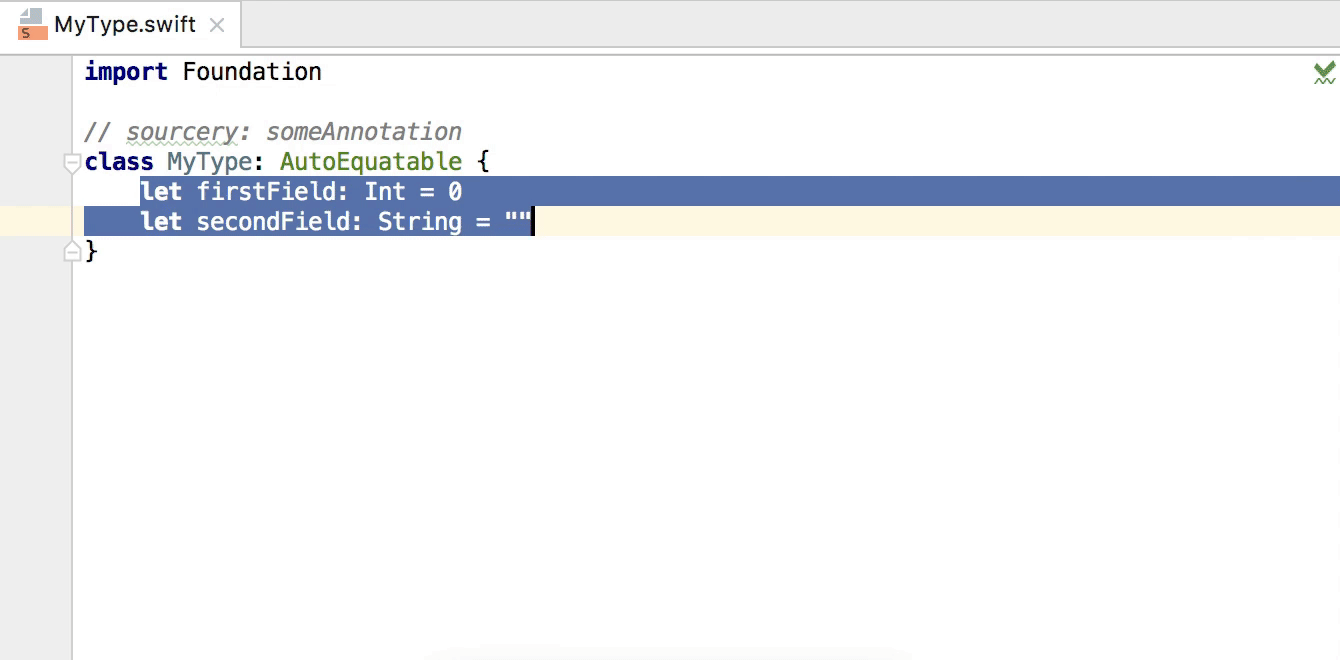
By defining the separate group of Live Templates available in the Swift context, we can also automate writing Sourcery annotations:
Download these settings to have Sourcery Live Templates installed (to change them, open Preferences | Editor | Live Templates and find Sourcery and Sourcery templates groups).
Live preview
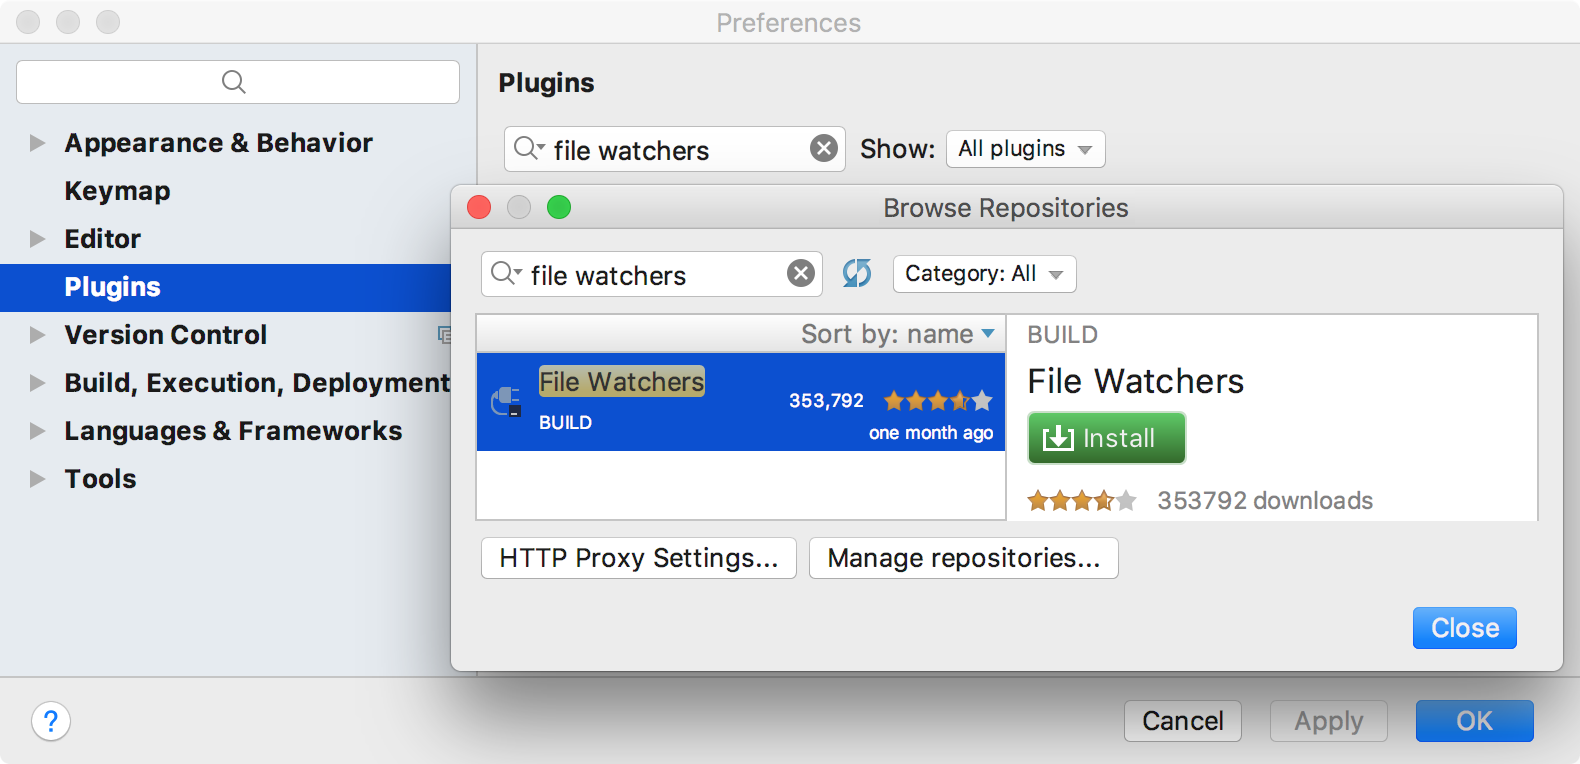
Sourcery has a --watch option for tracking changes in generated source files. In AppCode, we can achieve the same behavior by using the File Watchers plugin. Download it in Preferences | Plugins, install it, and then restart AppCode:
Navigate to Preferences | Tools | File Watchers. Here we can add a file watcher that tracks changes for the specific file type inside the concrete scope, runs a command-line utility with specified arguments, and refreshes the set of output paths:
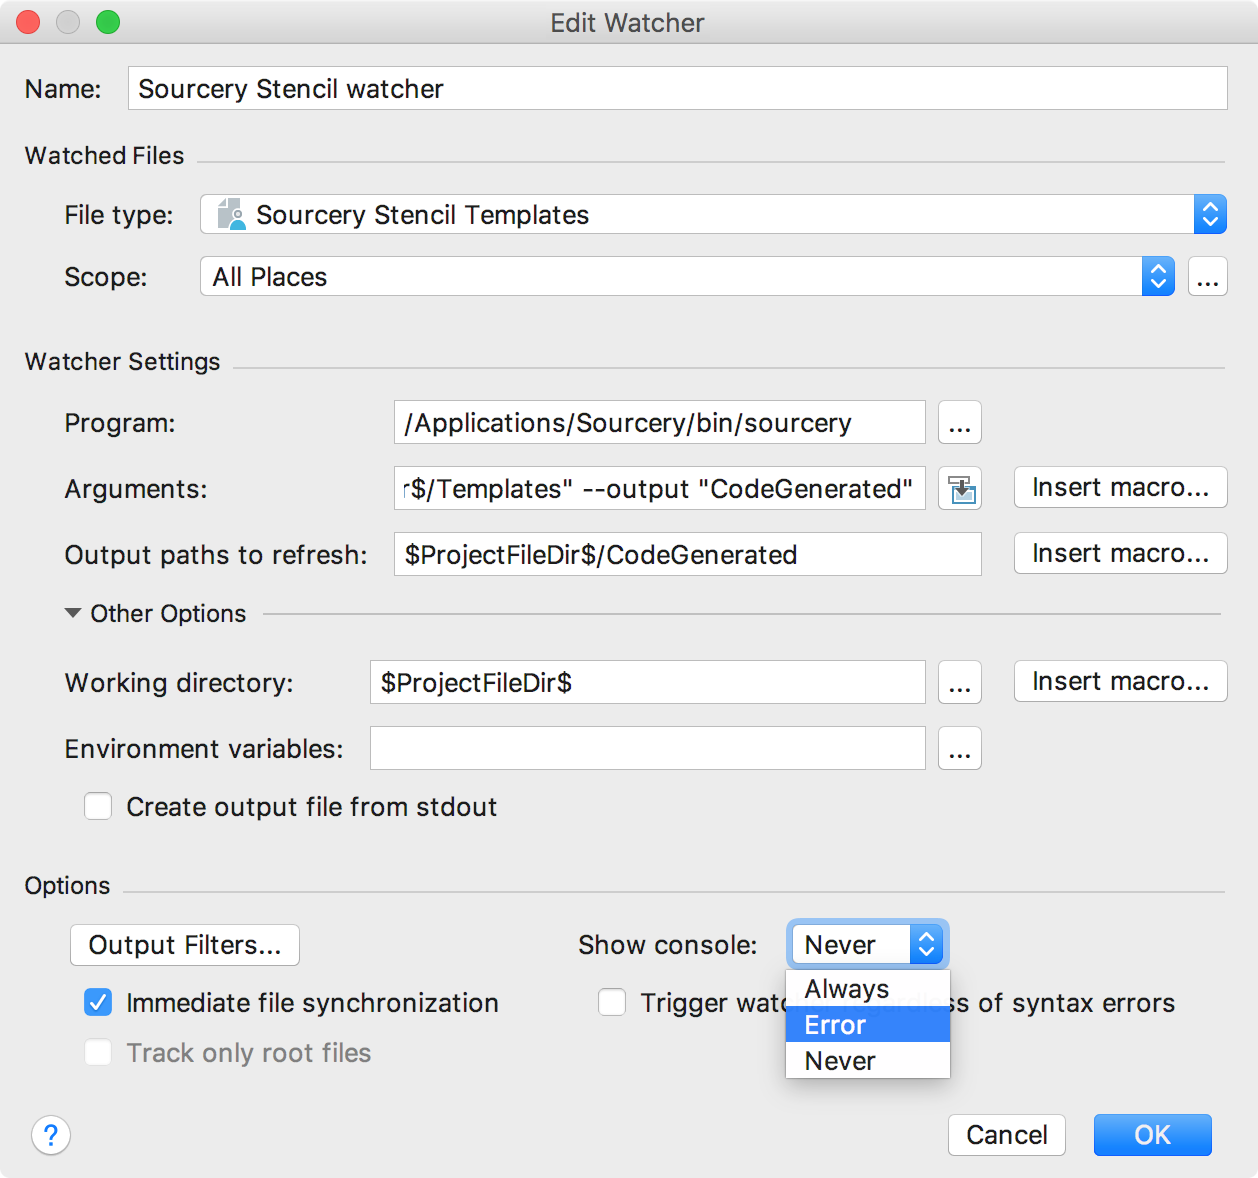
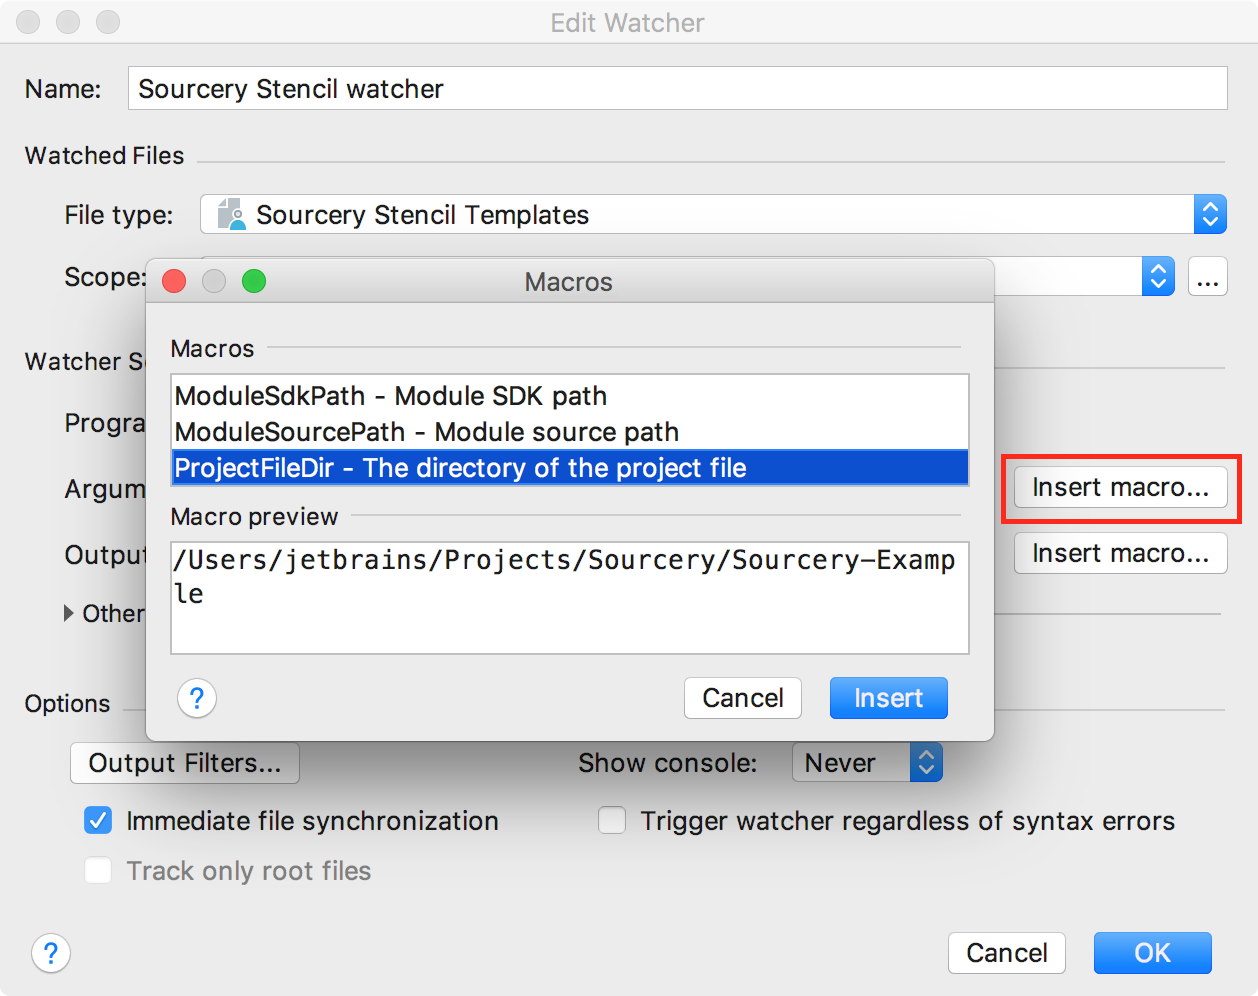
We need to add three file watchers for Sourcery: one for Swift files and two for our custom template types. Note, that to configure different paths, you can use built-in macros such as $ProjectFileDir$:
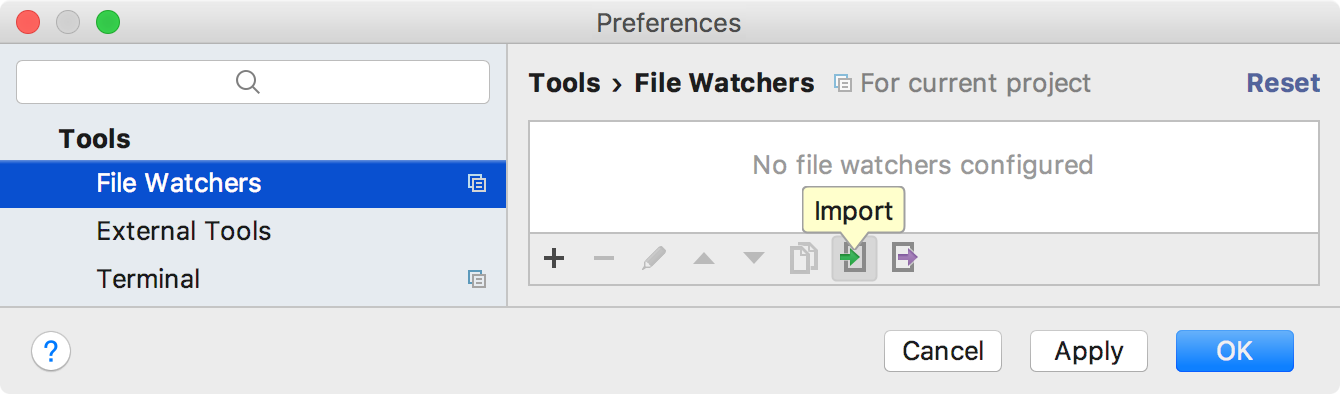
File Watchers are currently configured per project, so we cannot import them for all projects at once. However, we still can import their setup for a specific project.
To have three file watchers mentioned above configured for Sourcery, download this file, open Preferences | Tools | File Watchers, click the Import icon at the bottom of the Preferences window, and then select the downloaded file:
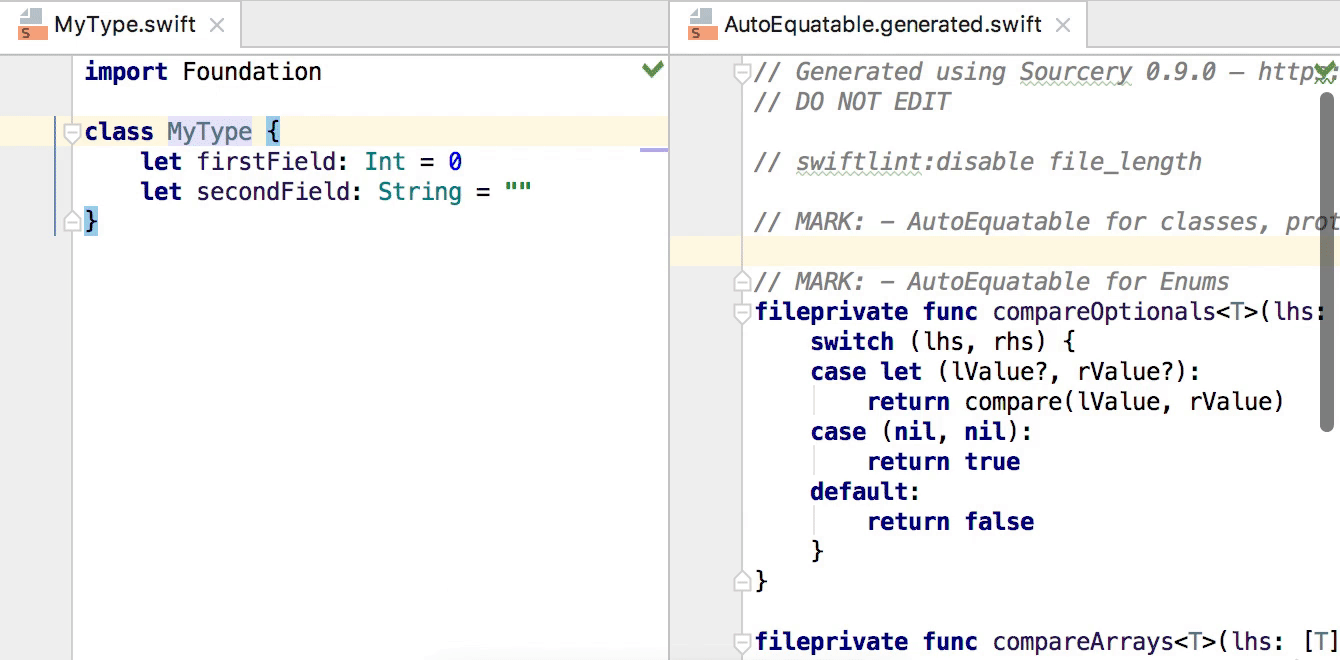
Now generated source files should be reloaded automatically when the template changes:
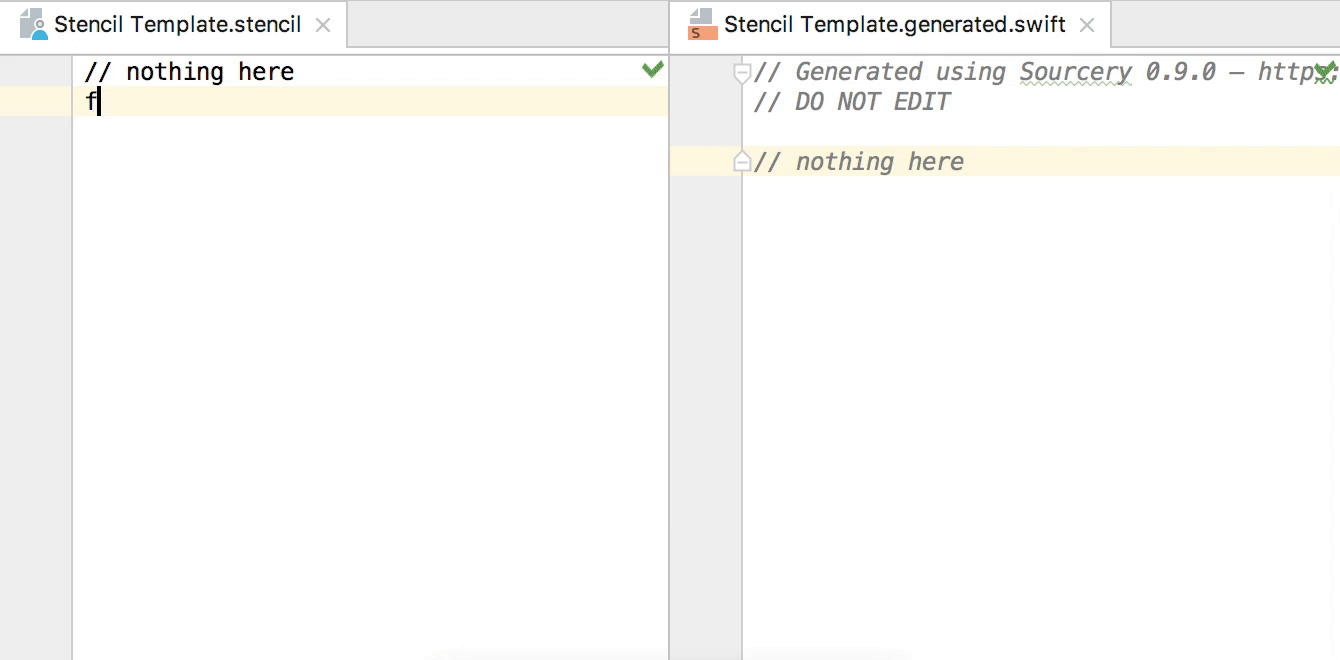
The same happens if we add a Sourcery annotation to Swift source code:
Menus & actions
A common way to integrate some command-line tool in Xcode project is to add it as a Run script build phase. AppCode also executes such phases together with others configured in the Xcode project. However, if we want to run such a tool separately from building the project, or if we need to reuse this tool in other projects, it may be easier to add it to an External tools configuration.
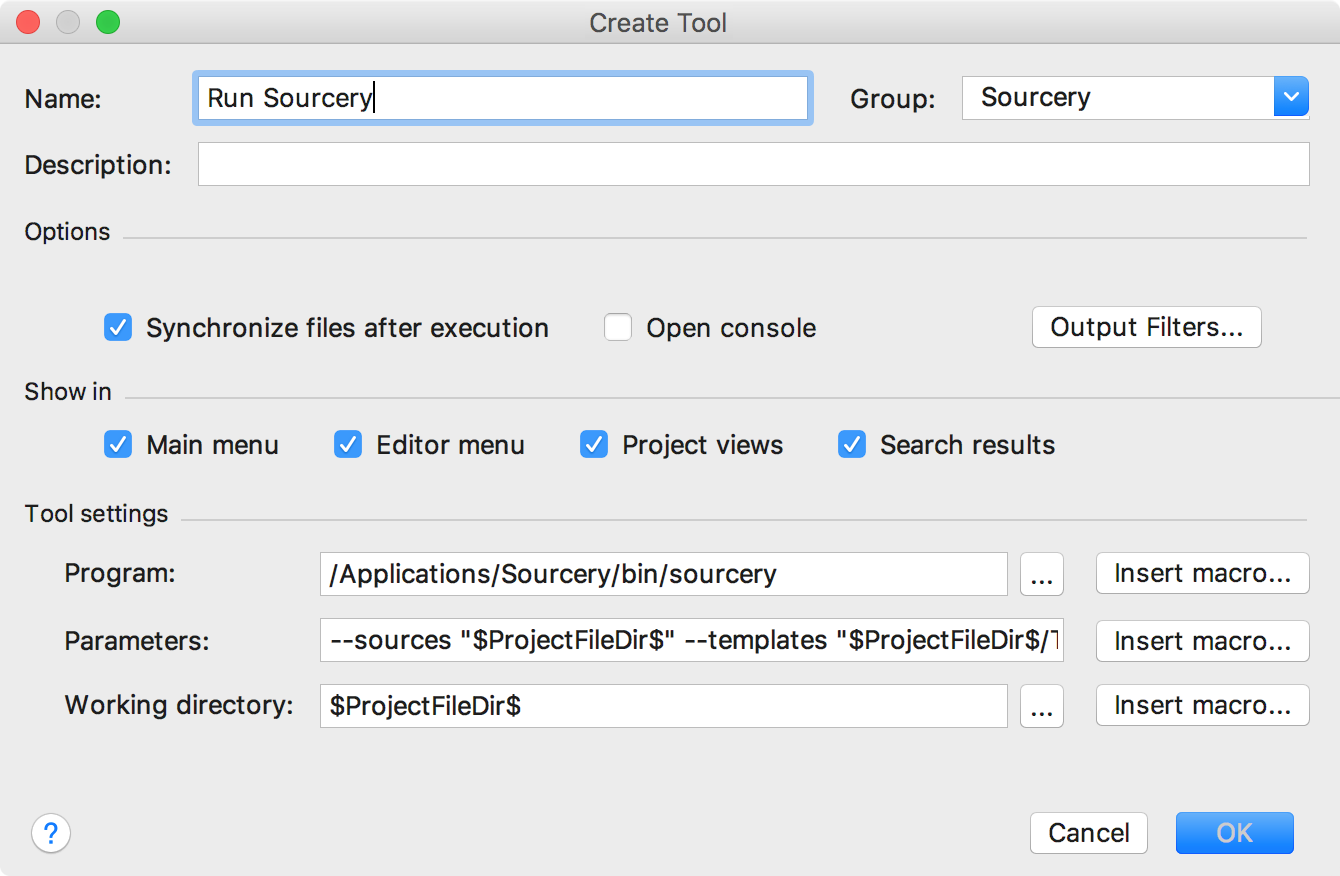
Open Preferences | Tools | External Tools and click + button. Here we can add a command-line tool with the required arguments (similar to the file watcher configuration):
By default, new external tools are created in the External Tools group. The group name is also used for creating a submenu inside the Tools menu, as well as some context menus (configure them in the Show in section). Each external tool will be displayed as a menu item in this submenu. To change the group name, click the Group field and enter the name you need. Following that, the new group of external tools should be displayed like this:
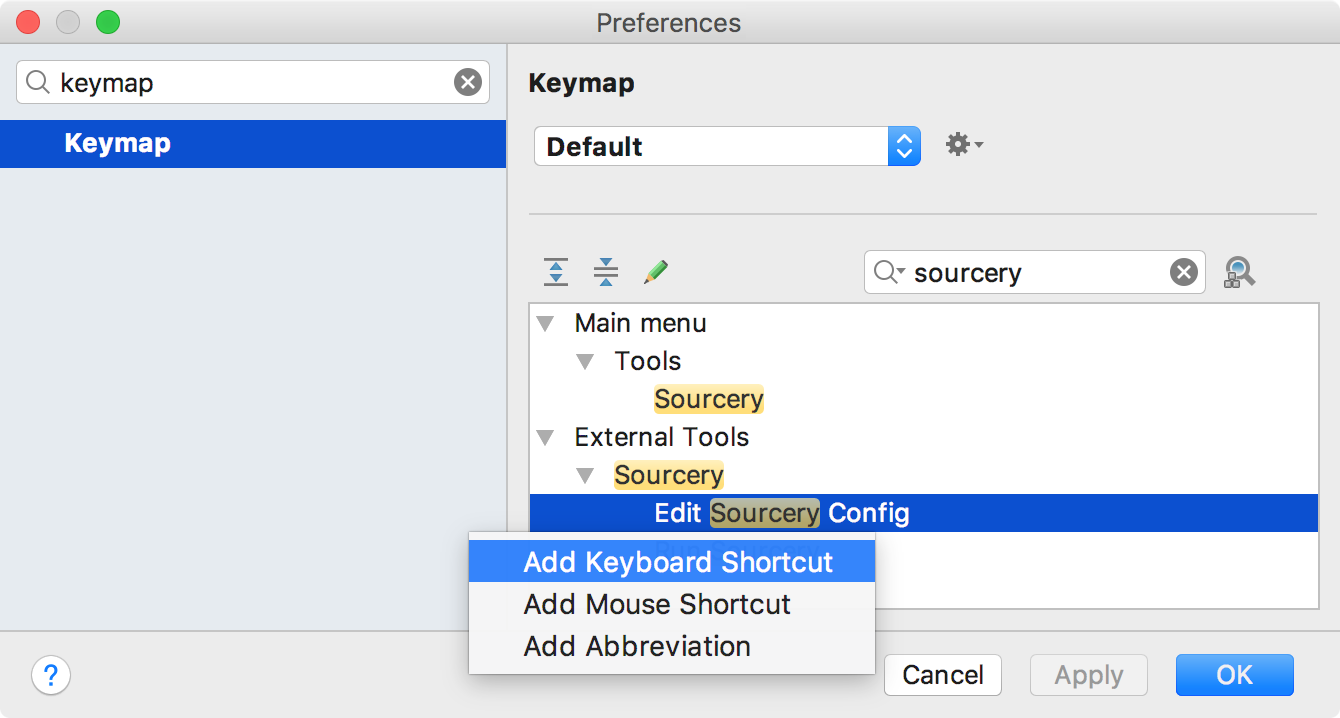
If needed, set the shortcut for each action in Preferences | Keymap:
For Sourcery, we need two actions:
- Run Sourcery, which just runs Sourcery on the desired set of files in our project; and
- Edit Sourcery Config, which opens
.sourcery.ymlin AppCode. Here we can use theappcodecommand (to create it, run Tools | Create Command-line Launcher), which opens a file directly in AppCode.
Download and import this file to create the External Tools mentioned above.
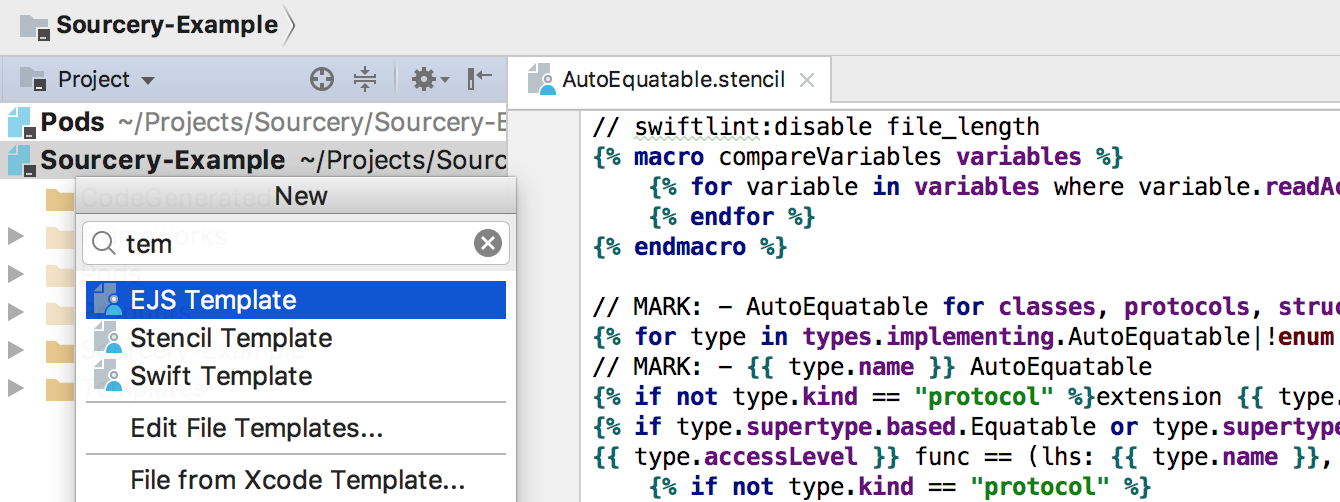
File Templates
To simplify the creation of our custom file types from the Project View, let’s add a file template for each of them. Open Preferences | Editor | File and Code templates, click the + button, and then simply enter the name of the template and the extension needed:
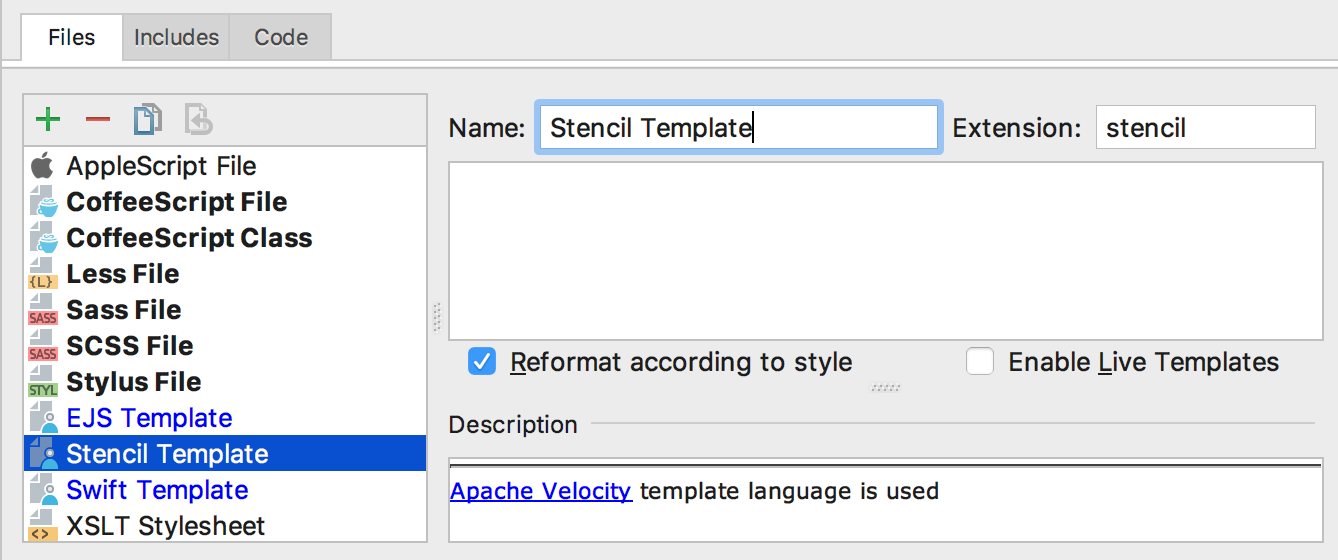
Of course, here you can configure some predefined text for each template. Then press ⌘N, and the templates we’ve just created will appear in the New popup together with others:
Click here for a settings.zip file with preconfigured empty file templates for EJS, Stencil, and Swift templates.
To download the complete settings.zip for this article, together with a File Watchers configuration, click here.
We hope this article was helpful to those who want to use Sourcery in AppCode. Note that the same setup can be created for nearly any command-line utility, which means that sometimes you do not even need a plugin to have it tightly integrated in any JetBrains IDE.
Your AppCode team
JetBrains
The Drive to Develop