Tutorial: Create a SwiftUI application in AppCode

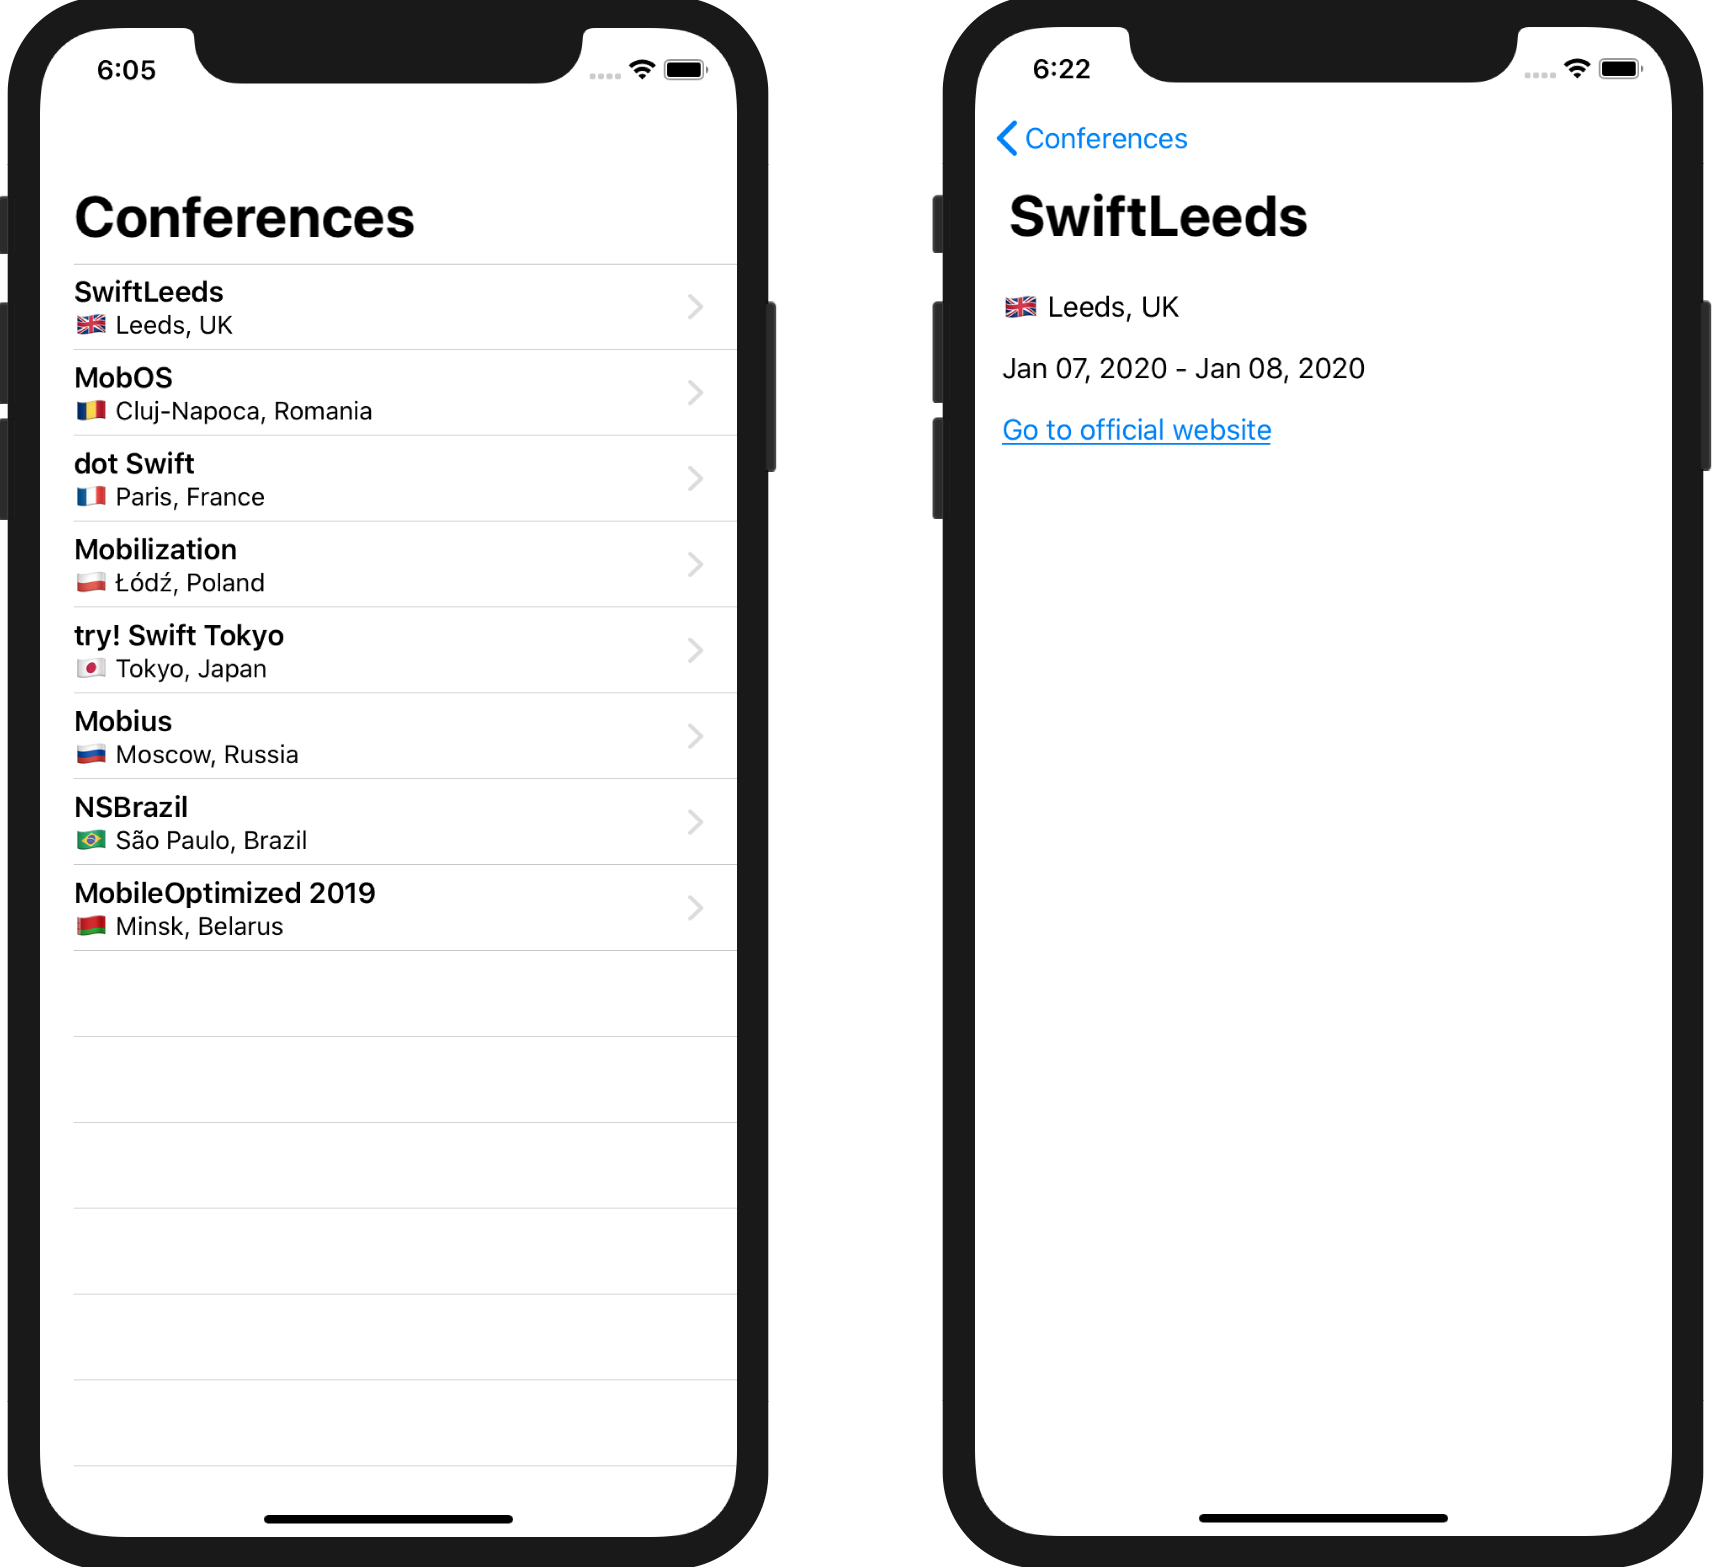
In this tutorial, you’ll create a simple SwiftUI application that shows a list of iOS conferences. The application will consist of two views:
- A list of conferences representing data from the local JSON file.
- Details for each conference
Along the way, you’ll get familiar with the basic AppCode workflow and useful features that help writing code easier and faster.
Requirements:
- AppCode 2019.3 or later
- Xcode 11 or later
Sample project: iOSConferences
Step 1. Create a project
Projects created in AppCode are fully compatible with Xcode and use the same project model. After you create a project in AppCode, you can open and edit it in Xcode and vice versa, and all the data will be synchronized.
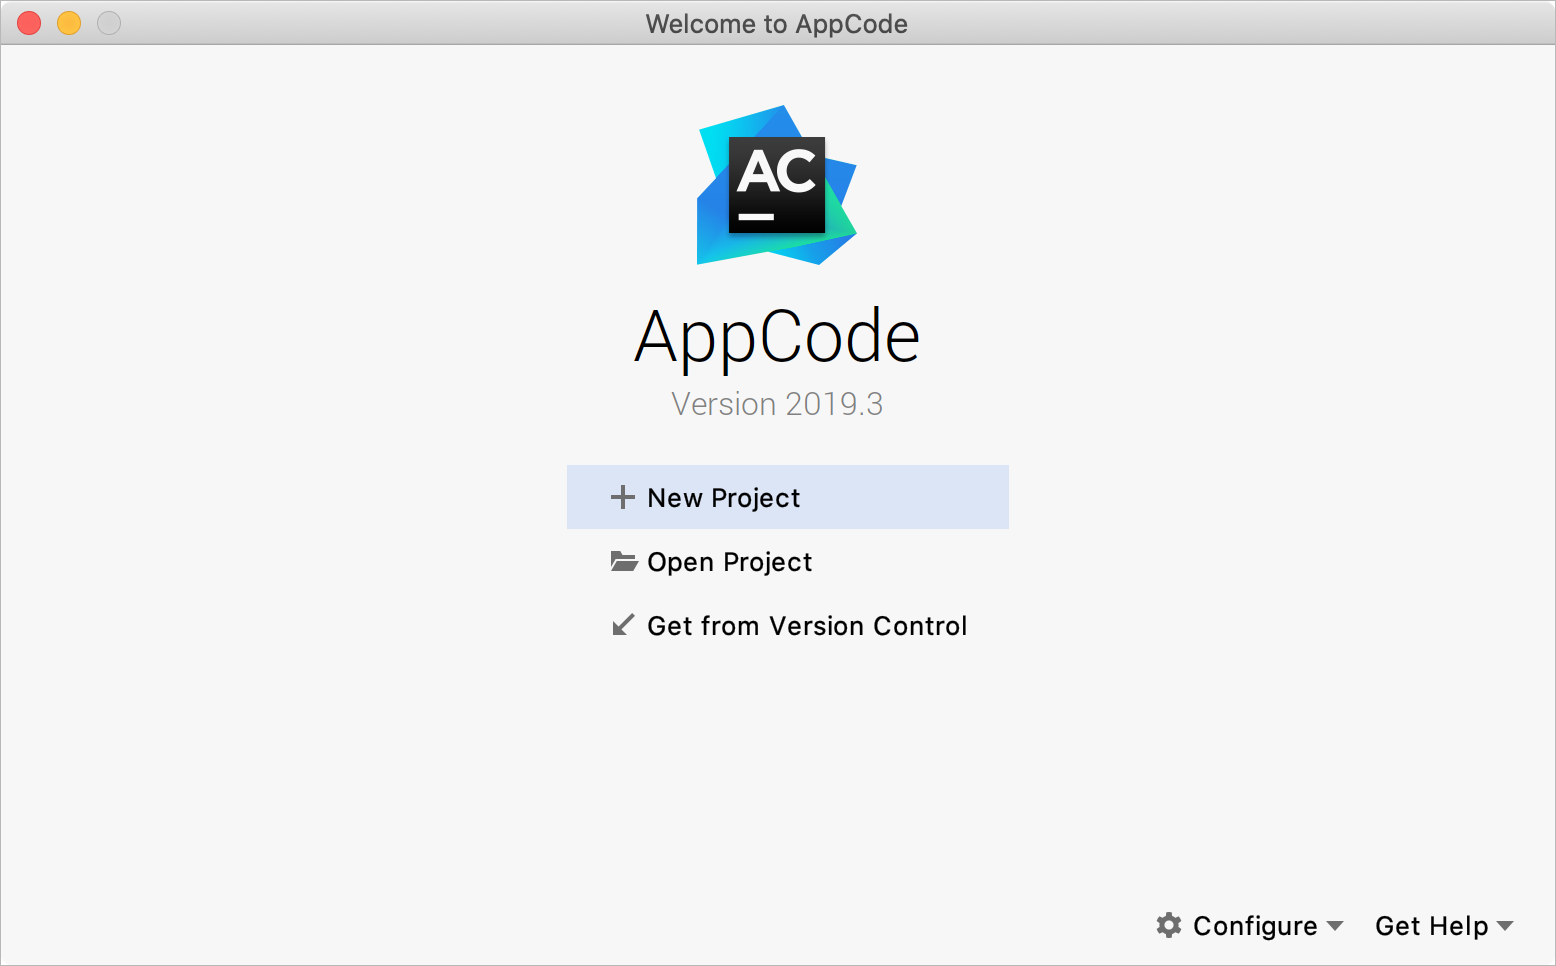
Launch AppCode and click New Project on the Welcome screen:
If you have another project open in AppCode at the moment, select File | New Project from the main menu.
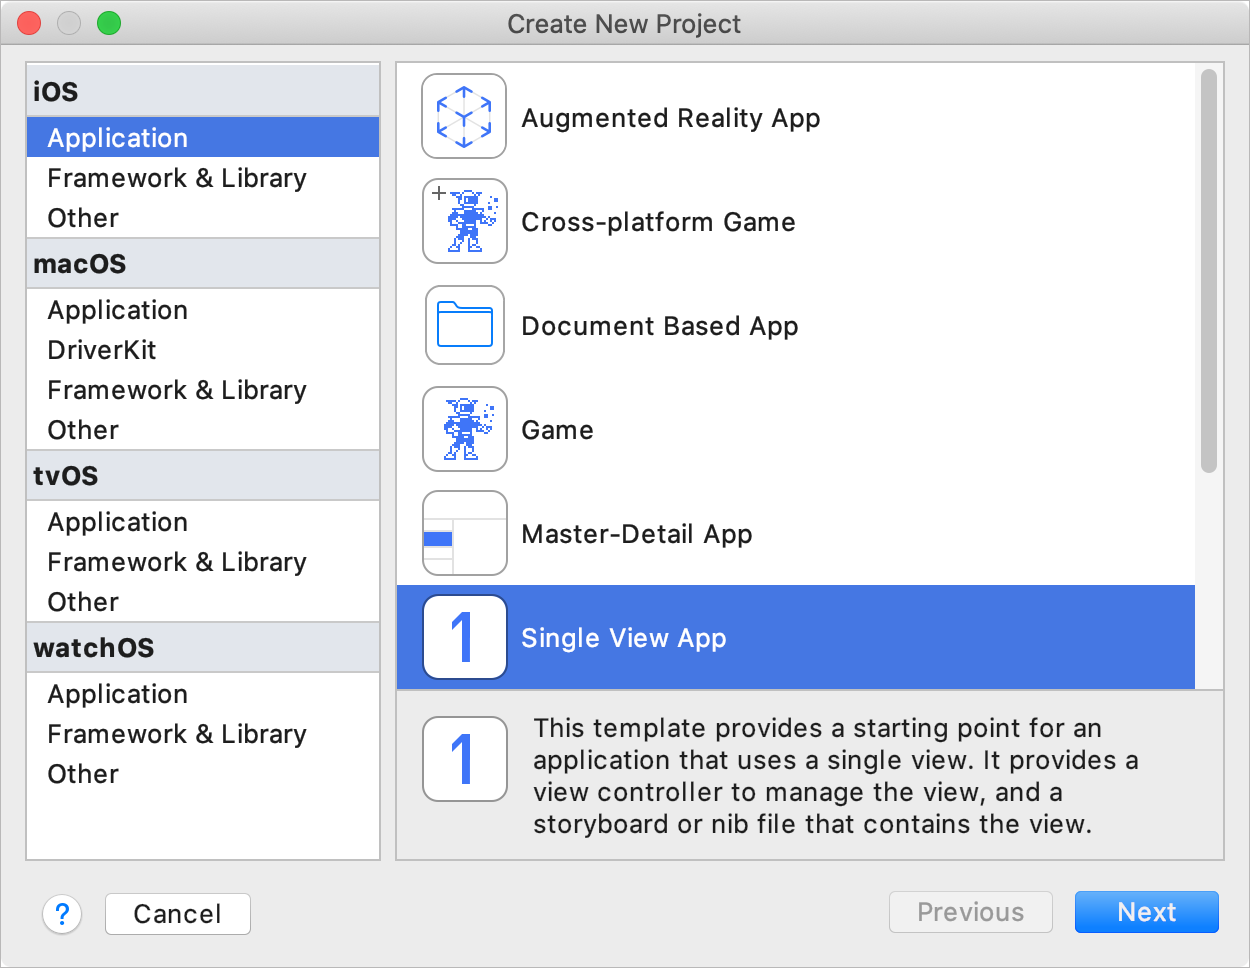
In the dialog that opens, you see a list of Xcode project templates. Select iOS | Application | Single View App and click Next:
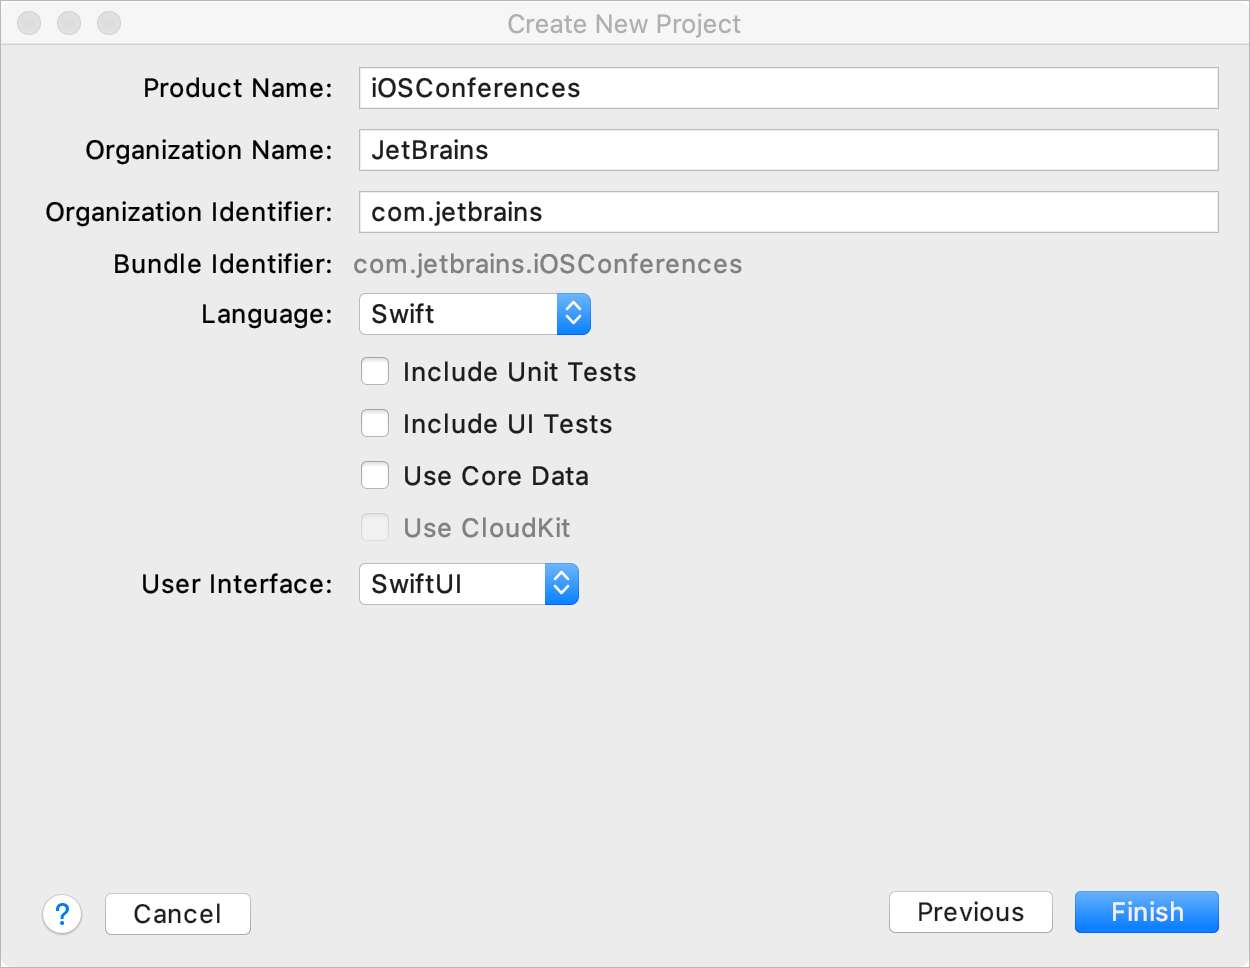
Fill in the following fields:
- Product Name: your project name which will be also the name of your application. Type iOSConferences.
- Organization Name: your or your company’s name.
- Organization Identifier: your company’s identifier in reverse-DNS format, for example,
com.mycompany:

Your project name and organization identifier together build a bundle identifier — an automatically generated string that will identify your application in the operating system.
⌘; or select File | Project Settings from the main menu.
You can also change your project settings in Xcode. Just select File | Open Project in Xcode from the main menu and change the necessary settings there. The changes will appear in AppCode as soon as you apply them in Xcode.
Select Swift in the list of languages and SwiftUI in the User Interface field. Make sure that all checkboxes in the dialog are cleared as using tests or Core Data is outside the scope of this tutorial. Click Finish:
In the Finder window that opens, select a directory where your project will be located.
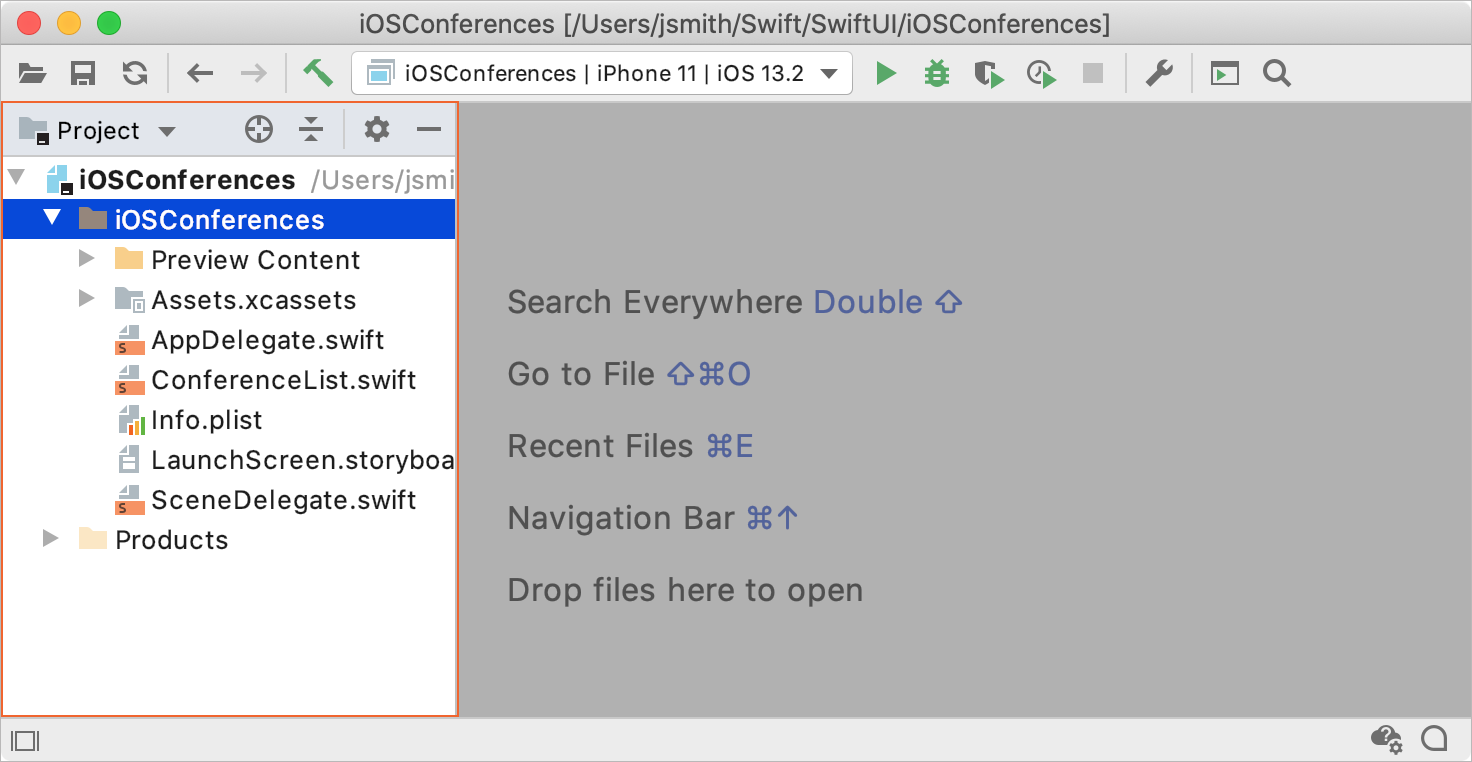
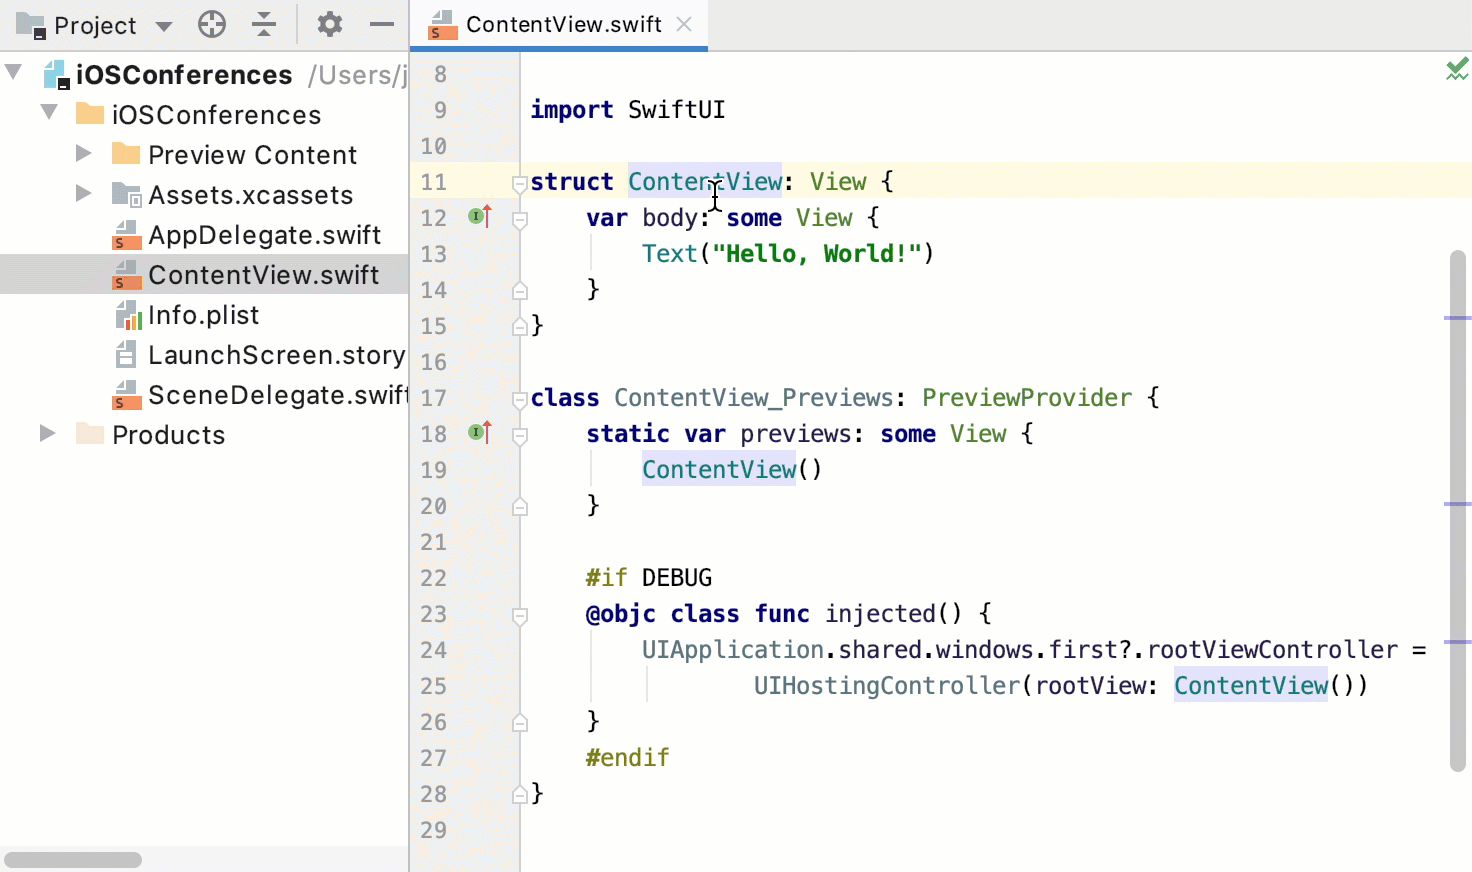
A new Swift project will be created and immediately opened in AppCode. In the left part of the AppCode window, you see the Project tool window. From here, you can navigate to necessary files, add and delete files and folders, exclude files from indexing or from Xcode project, add files to different targets, and so on.
To show and hide the Project tool window, press ⌘1. For more information, see Project tool window:
Step 2. Enable interactive preview
To preview changes in SwiftUI layouts from AppCode, you can use the InjectionIII application.
Install and start InjectionIII
Download InjectionIII from AppStore or from GitHub (version 1.8 or later). Place the InjectionIII application file to the Application folder and start the application. Its icon will appear in the status bar:

Prepare the project for working with InjectionIII
In the AppDelegate.swift file, add the code for loading the InjectionIII bundle into the application(_:didFinishLaunchingWithOptions:) method:
func application(_ application: UIApplication, didFinishLaunchingWithOptions launchOptions: [UIApplication.LaunchOptionsKey: Any]?) -> Bool {
    // Override point for customization after application launch.
    #if DEBUG
    var injectionBundlePath = "/Applications/InjectionIII.app/Contents/Resources"
    #if targetEnvironment(macCatalyst)
    injectionBundlePath = "\(injectionBundlePath)/macOSInjection.bundle"
    #elseif os(iOS)
    injectionBundlePath = "\(injectionBundlePath)/iOSInjection.bundle"
    #endif
    Bundle(path: injectionBundlePath)?.load()
    #endif
    return true
}
For more details, refer to the InjectionIII documentation.
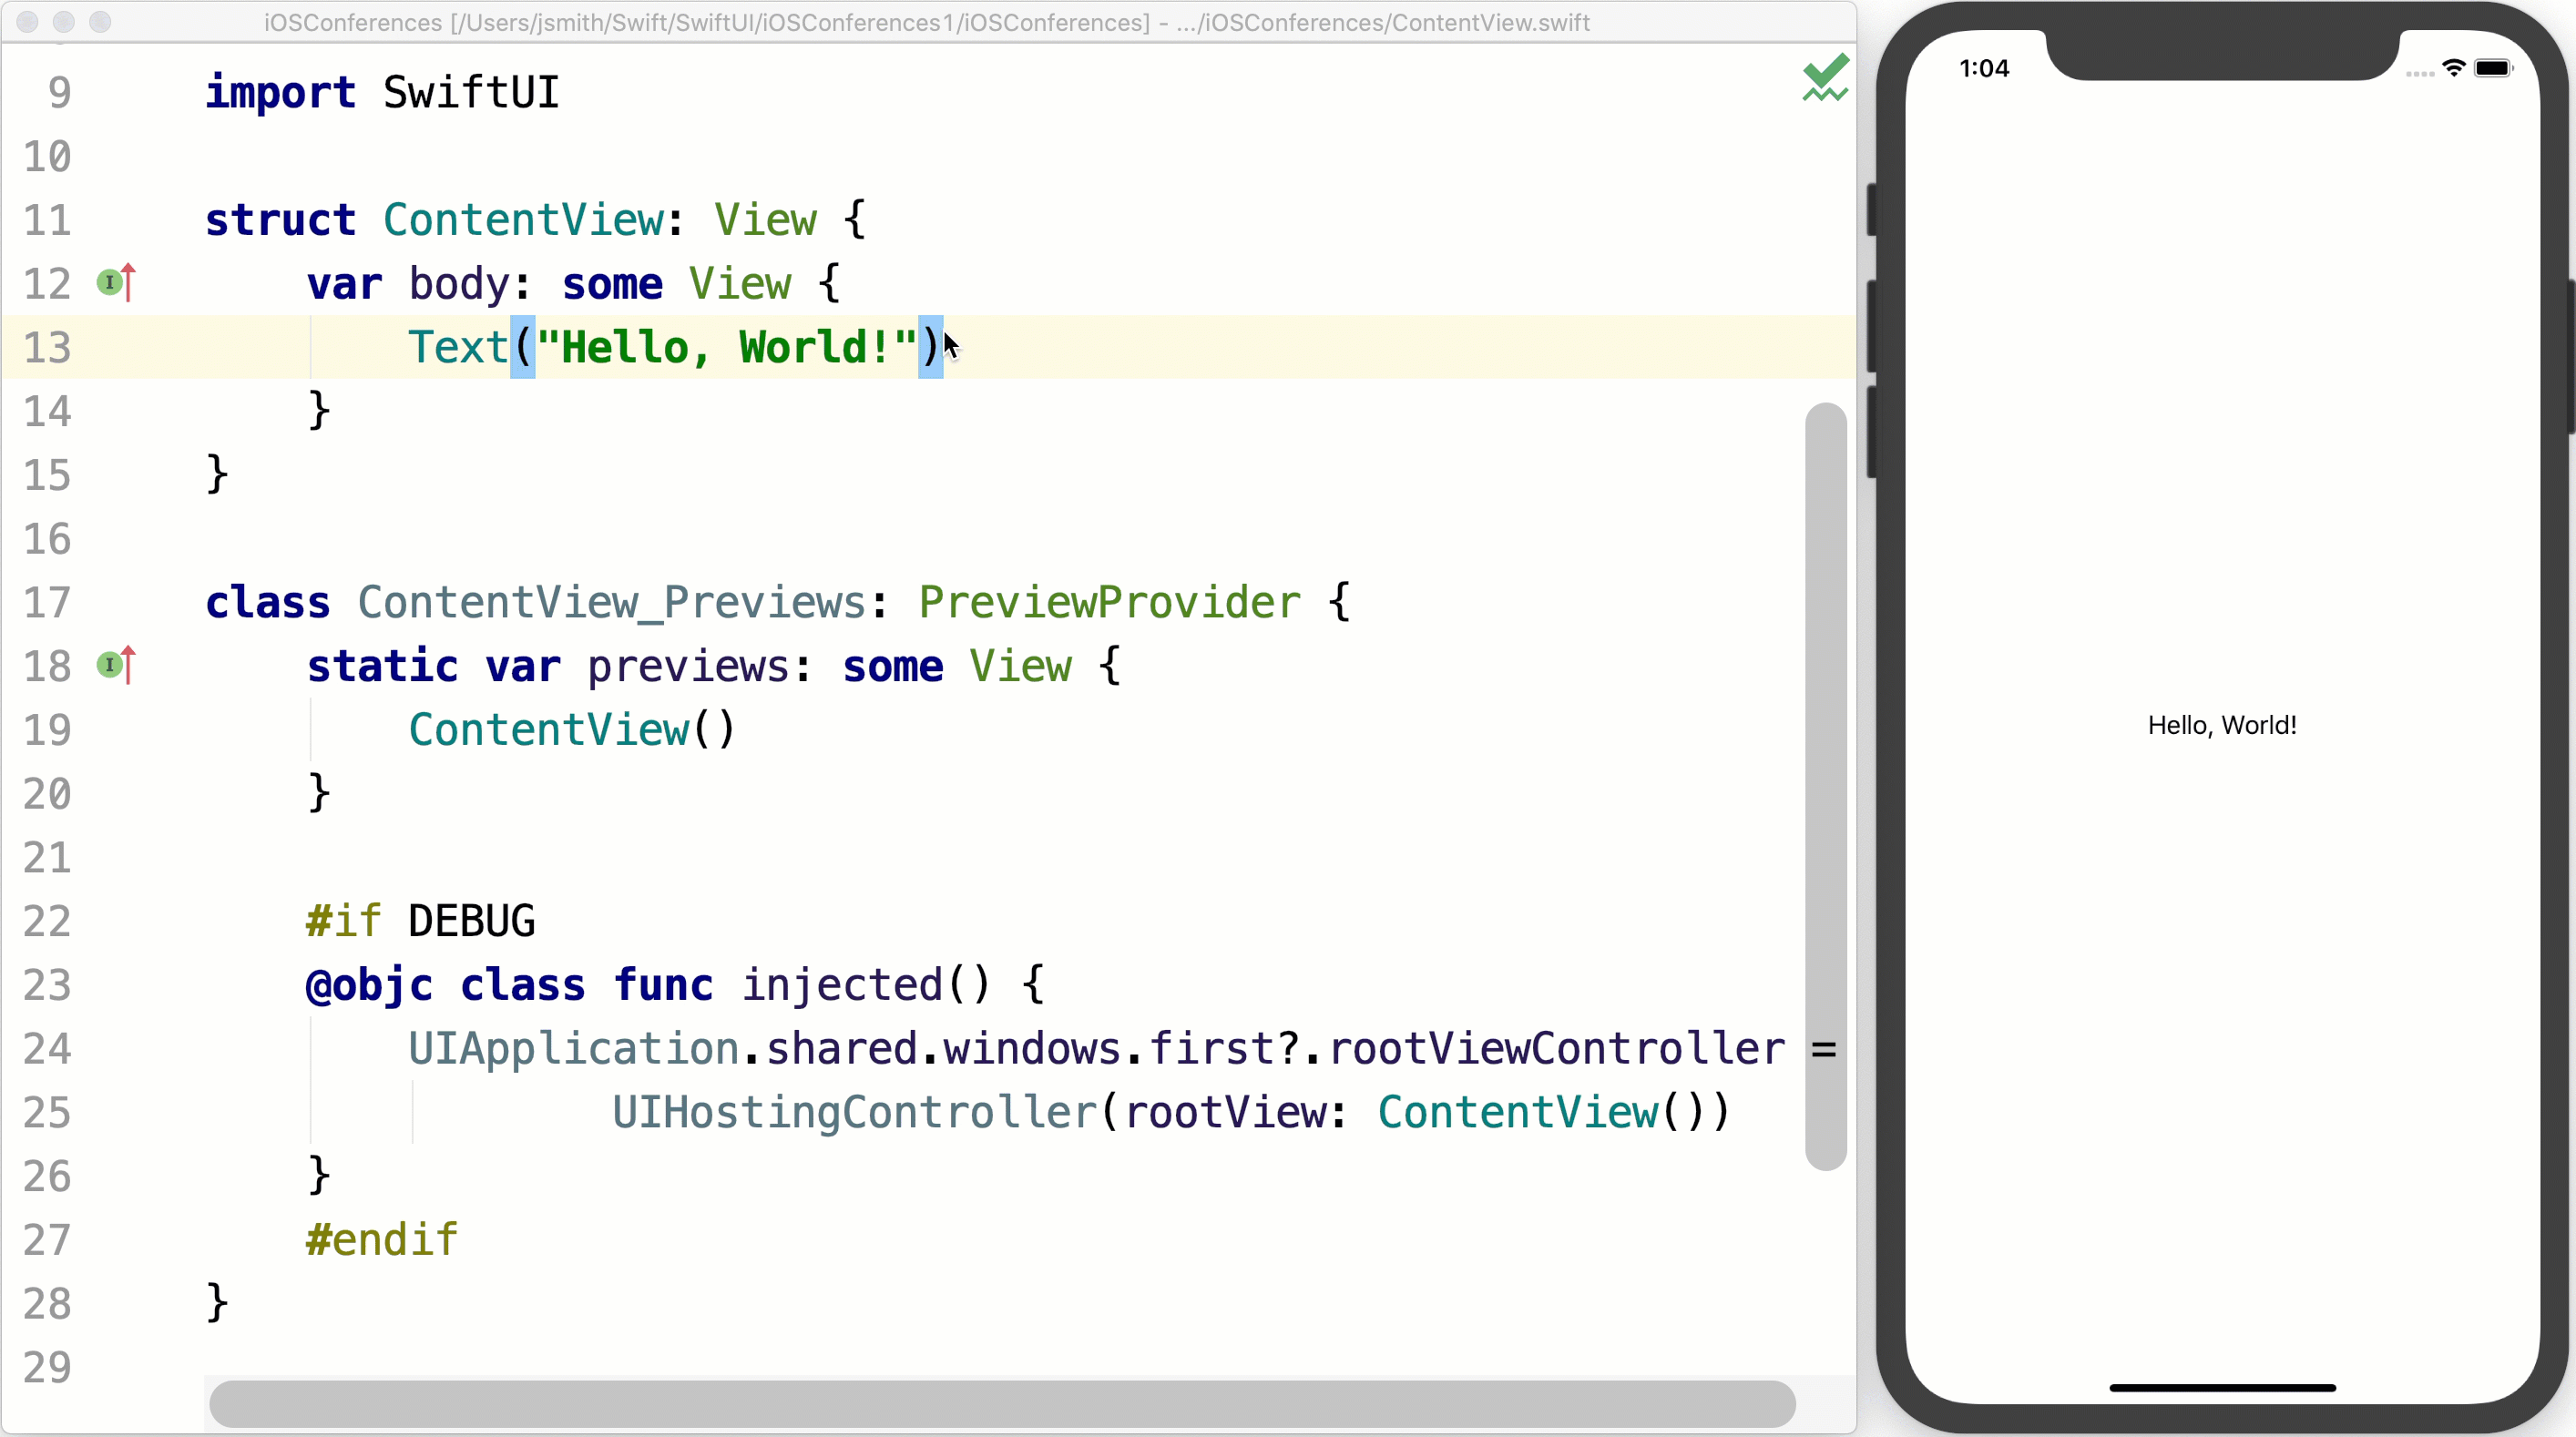
In the ContentView.swift file, go to the ContentView_Previews structure and add the injected() method inside the #if DEBUG block. Also, change struct to class for ContentView_Previews:
class ContentView_Previews: PreviewProvider {
    static var previews: some View {
        ContentView()
    }

    #if DEBUG
    @objc class func injected() {
        UIApplication.shared.windows.first?.rootViewController =
                UIHostingController(rootView: ContentView())
    }
    #endif
}
The injected() method reloads the view on code injection when the application is running in debug mode. Instead of reloading the view, you can have a design-time preview generated on code injection — the same way as Xcode 11 does. In this case, use the previews property of the current PreviewProvider:
@objc class func injected() {
    UIApplication.shared.windows.first?.rootViewController =
            UIHostingController(rootView: ContentView_Previews.previews)
}
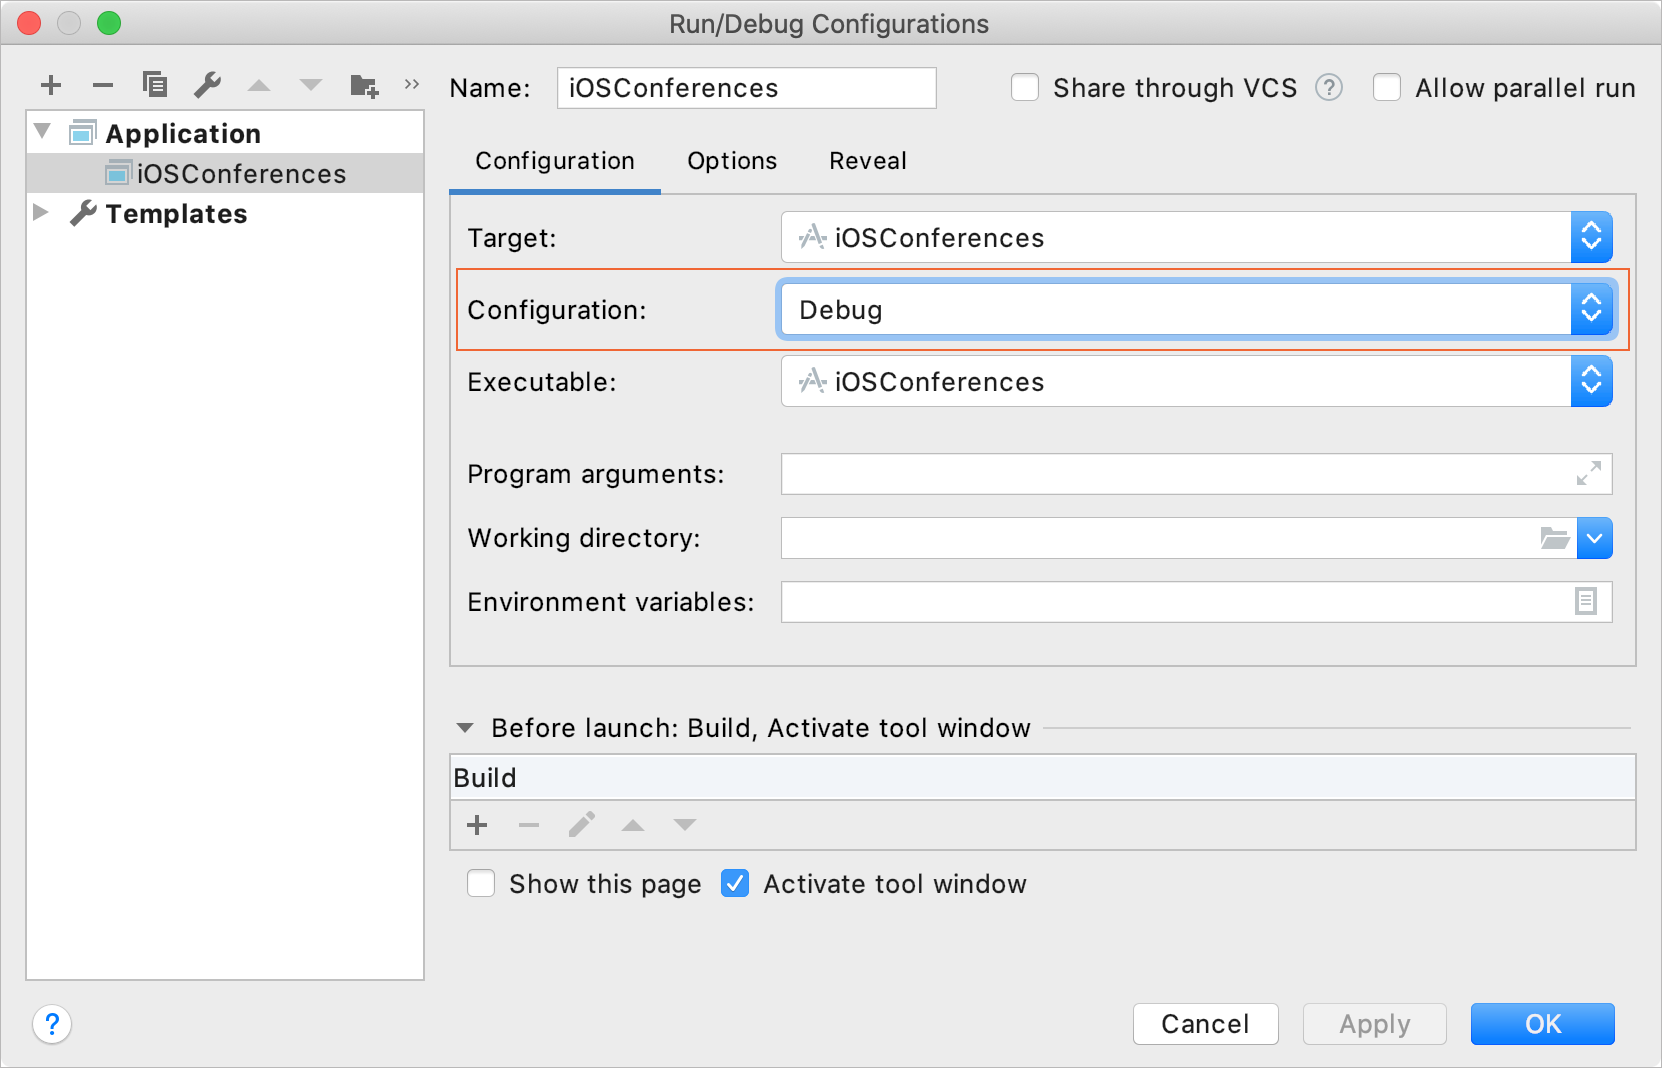
Run the application with preview
Make sure that you have the Debug configuration selected for the current run/debug configuration. To do this, select Run | Edit Configurations from the main menu:
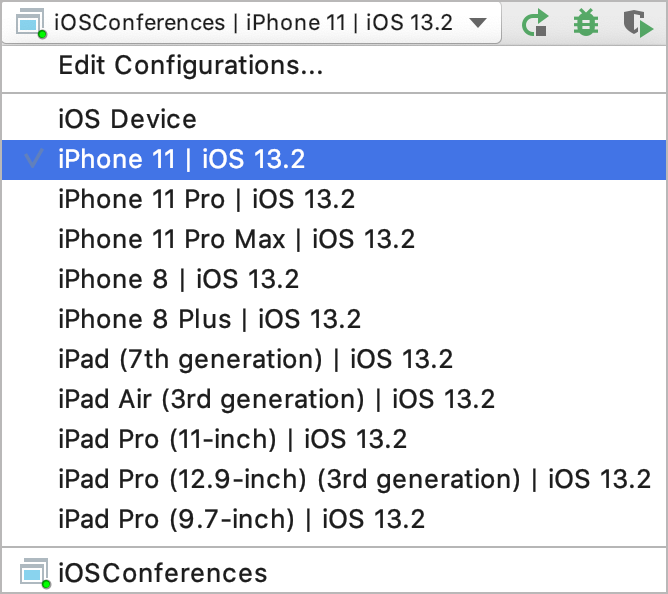
To run the application, select a device or simulator on the toolbar and press ⌃R:
Then, press ⌃R. On the first run, you will be prompted to select the project directory in the Finder window that opens.
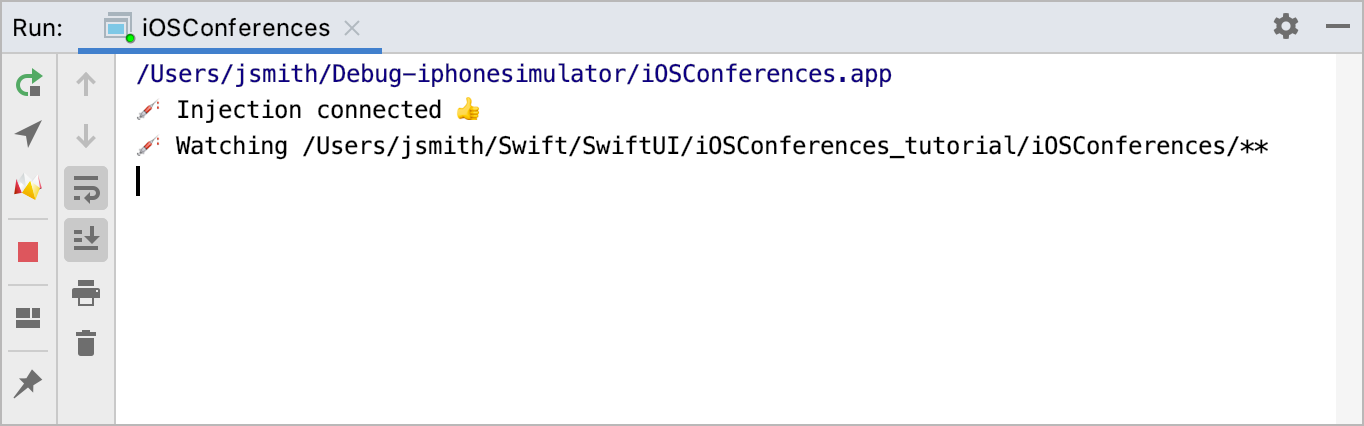
Once InjectionIII is connected and the project directory is specified, you’ll see the following messages in the Run tool window:
Try to change some code in your view and see the changes on the simulator or device screen:
⌘, and go to Appearance & Behavior | System Settings | Synchronization. Select the Save files automatically if application is idle for … sec checkbox and set the value to 1.Step 3. Create a list
In iOSConferences/ContentView.swift, rename ContentView to ConferenceList using the Rename refactoring: place the caret at ContentView, press ⇧F6, type the new name in the highlighted area, and press ⏎:
The file itself will be renamed as well. The same way, rename ContentView_Previews to ConferenceList_Previews.
Rebuild the project to have the interactive preview working after renaming the file by pressing ⌘F9. Instead of the Hello, World! text, add a list of two text elements:
- Select the
Text("Hello, World!")line by pressing⌥↑and add theListelement containingText("Conference1")instead: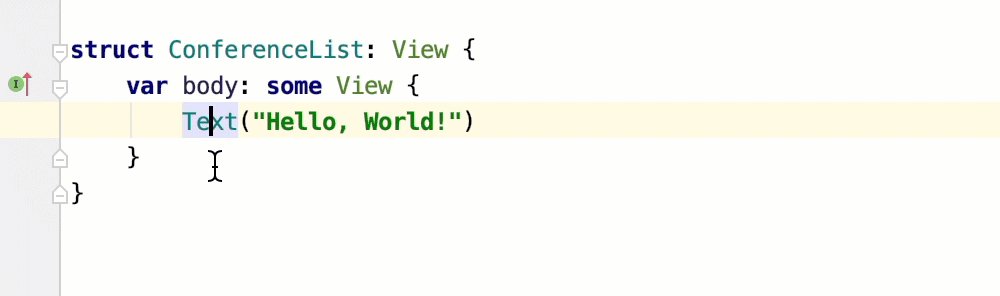
- Add the second text element by duplicating
⌘Dthe first one:
- You may notice that the code misses a space between
Listand{. Just press⌥⌘Lto reformat the code on the whole page according to the guidelines specified in the Preferences | Editor | Code Style | Swift: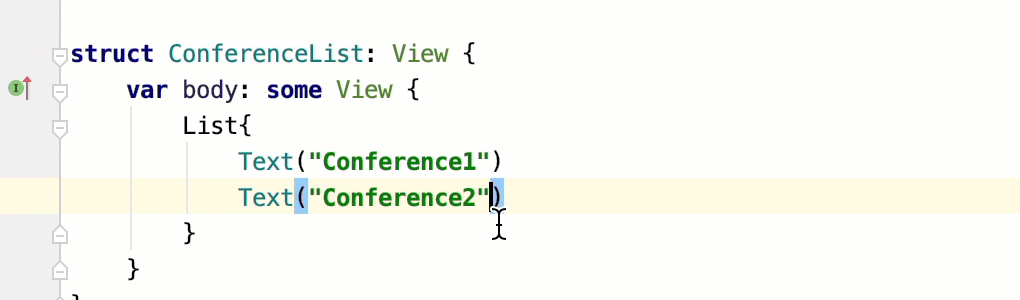
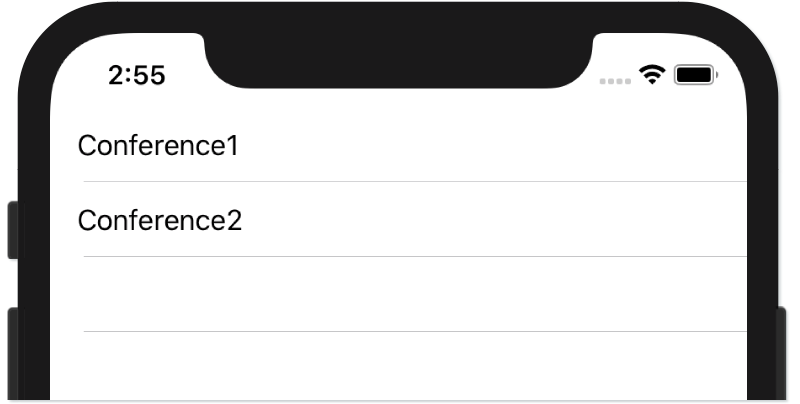
As a result, you will have the following code:
struct ConferenceList: View {
    var body: some View {
        List {
            Text("Conference1")
            Text("Conference2")
        }
    }
}
The application screen will look as follows:
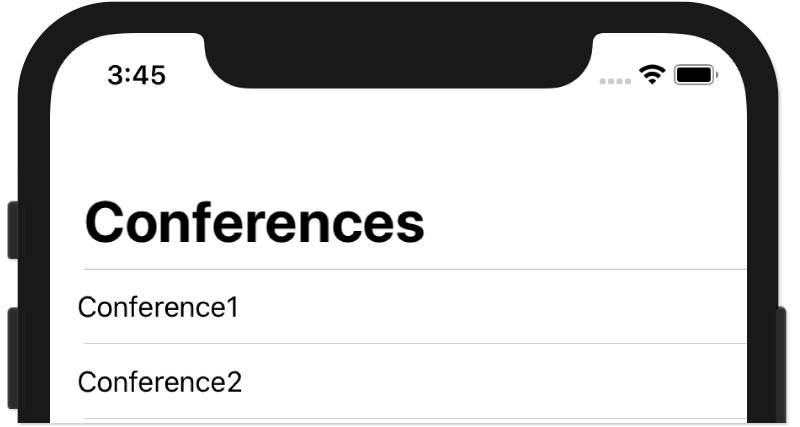
Add a title to the list. To do this, wrap the list with the NavigationView element and then call the navigationBarTitle(_:) method for the list:
struct ConferenceList: View {
    var body: some View {
        NavigationView {
            List {
                Text("Conference1")
                Text("Conference2")
            }.navigationBarTitle("Conferences")
        }
    }
}
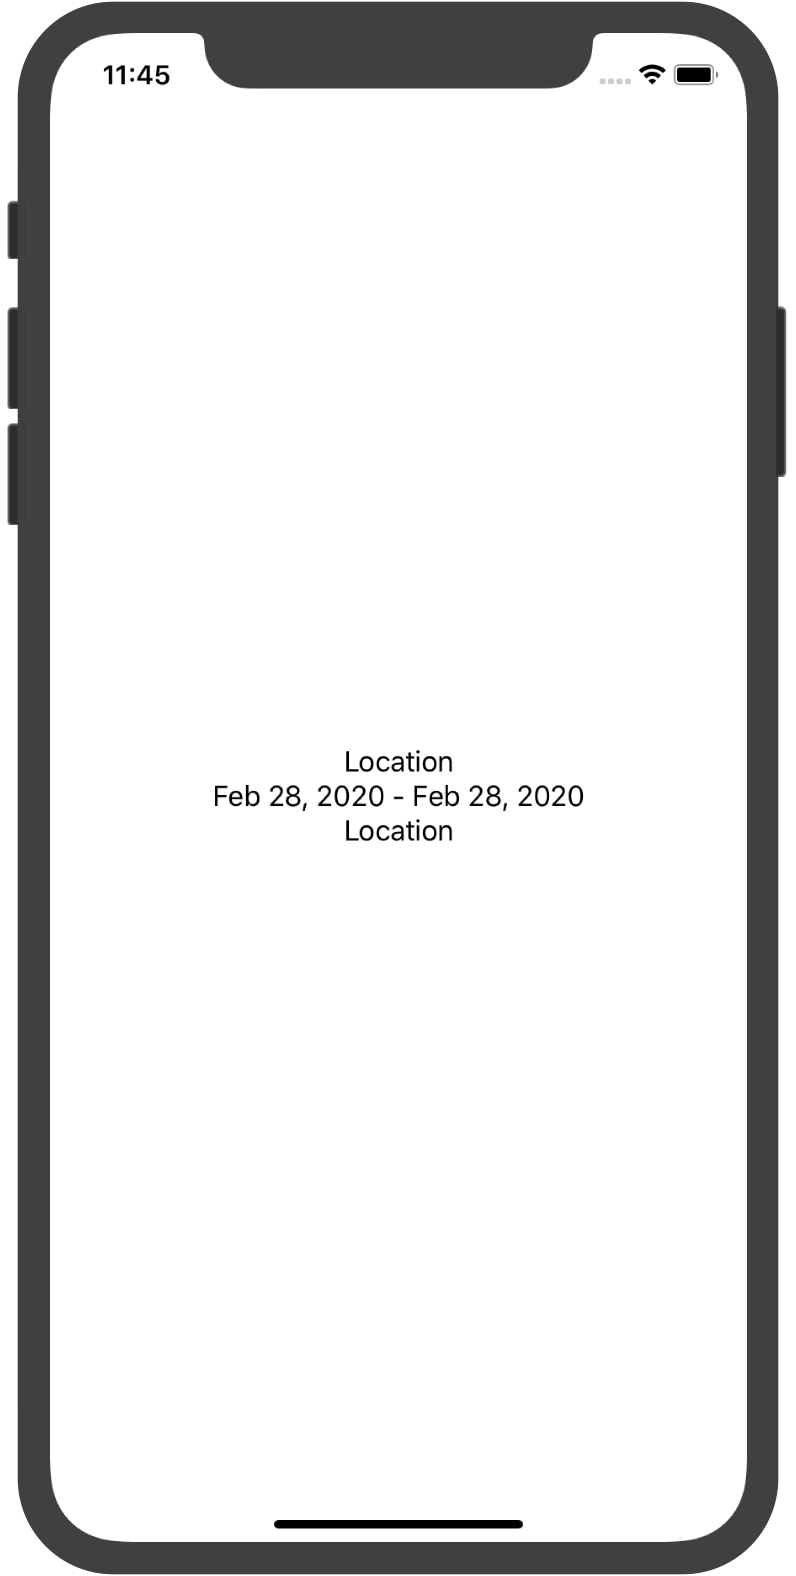
Instead of two list items, let’s create one consisting of a title and subtitle. In the title, let’s display the conference name and in the subtitle — location. To do this, wrap the two Text elements in a VStack container, change their values, and apply the corresponding font styles to them:
VStack {
    Text("Conference").font(.headline)
    Text("Location").font(.subheadline)
}
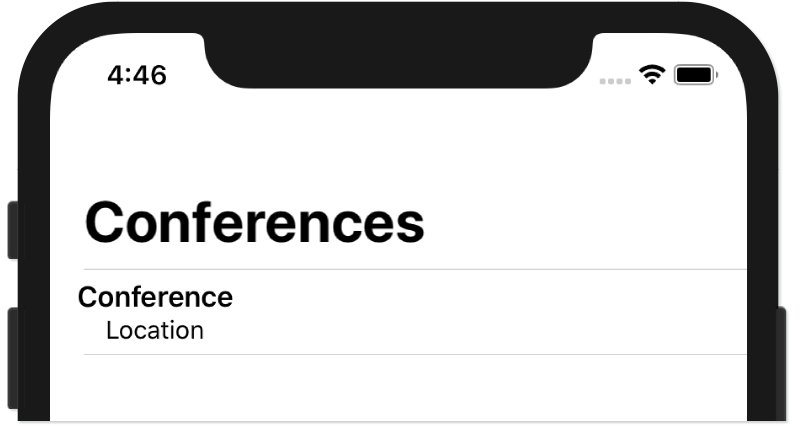 ]
]
Align both Text elements left using the alignment parameter for the VStack container:
VStack(alignment: .leading) {
   // ...
}
F1.Step 4. Load data from JSON
Let’s make our list dynamic by loading data from the local conferencesData.json file.
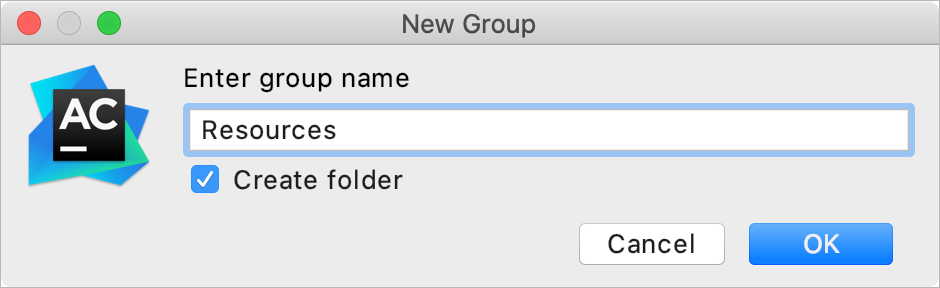
Create a new group Resources where you will keep the JSON file:
- Right-click the
iOSConferencesgroup in the Project tool window and select New | Group. - In the dialog that opens, type
Resources. - Make sure the Create folder checkbox is selected and click OK:
 If you clear the Create folder checkbox, AppCode will create a group without adding the corresponding folder in the file system. See more in Create groups.
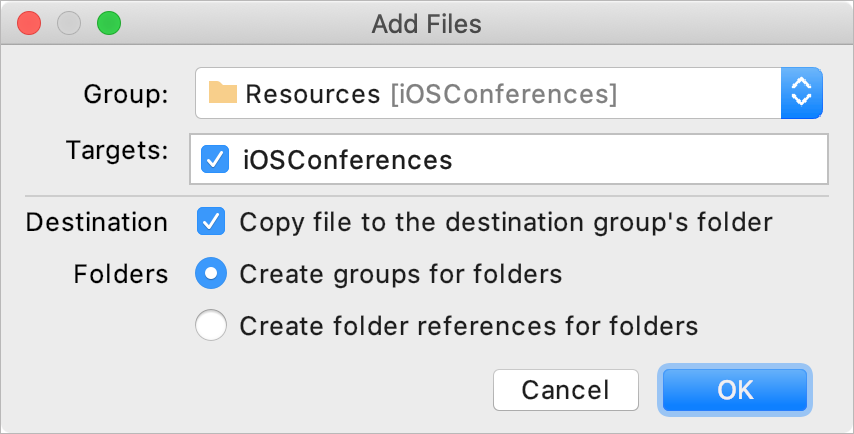
Add the downloaded JSON to the newly created group:
- Right-click the
Resourcesgroup and select Add | Files. - Select the
conferencesData.json file on your Mac. - In the dialog that opens, leave the default settings and click OK:
This file contains a list of iOS conferences. Each conference has a name, link to the official website, start and end dates, and location:
{
    "name": "SwiftLeeds",
    "link": "https://swiftleeds.co.uk/",
    "start": "2020-10-07",
    "end": "2020-10-08",
    "location": "🇬🇧 Leeds, UK"
}
Create a new Data.swift file where you will add a function for parsing the JSON data:
- Create a new group called
Modelas described above. - Select this group, press
⌘N, and select Swift File - In the dialog that opens, type
Datain the Name field and click OK: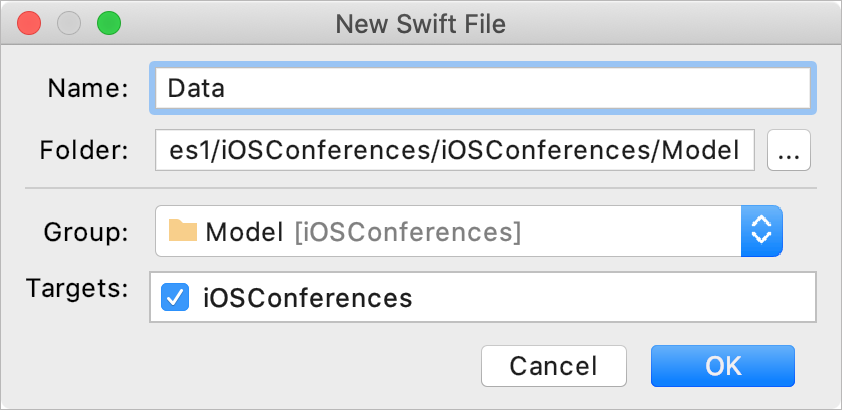
In the Data.swift file, add a function for reading data from JSON:
func loadFile<T: Decodable>(_ filename: String) -> T {
    let data: Data

    guard let file = Bundle.main.url(forResource: filename, withExtension: nil)
            else {
        fatalError("Cannot find \(filename)")
    }
    do {
        data = try Data(contentsOf: file)
    } catch {
        fatalError("Cannot load \(filename):\n\(error)")
    }
    do {
        let decoder = JSONDecoder()
        let format = DateFormatter()
        format.dateFormat = "yyyy-mm-dd"
        decoder.dateDecodingStrategy = .formatted(format)
        return try decoder.decode(T.self, from: data)
    } catch {
        fatalError("Cannot't parse \(filename): \(T.self):\n\(error)")
    }
}
Create a new class for handling the parsed JSON data:
- Select the
Modelgroup. - Press
⌘Nand select Swift Type. - In the dialog that opens, type
Conferencein the Name field and click OK: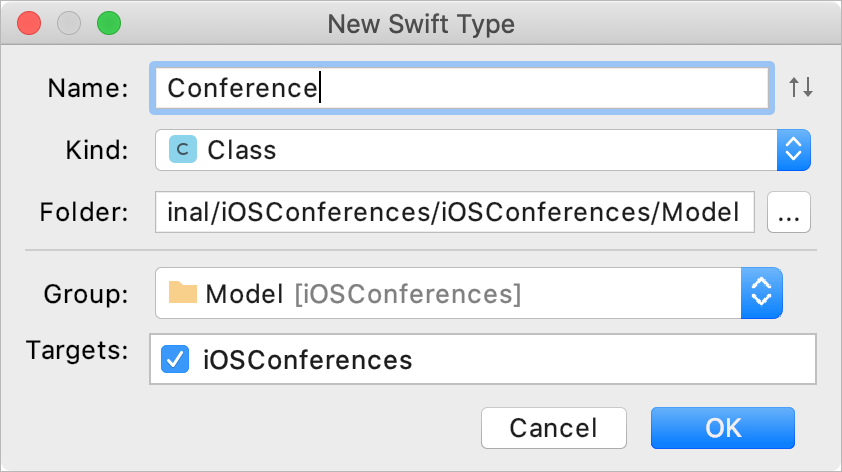
- Declare conformance to the
CodableandIdentifiableprotocols and add a set of properties corresponding to the JSON data:class Conference: Codable,Identifiable {</li></ul> var name: String var location: String var start: Date var end: Date? var link: String }In the
Data.swiftfile, create a variable that will store the parsed data — an array of theConferenceobjects:let conferencesData: [Conference] = loadFile("conferencesData.json")You can use theletlive template to introduce the variable: typeletand press⇥. Press⇥to navigate between the template placeholders. To add the variable type, press⌥⏎and select Add explicit type:
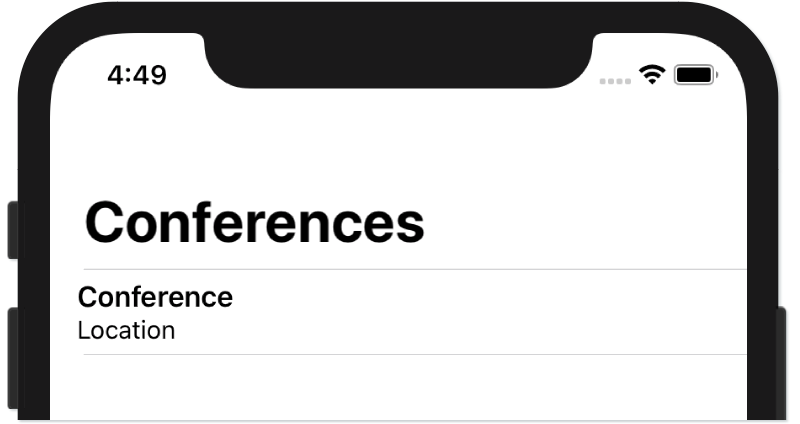
In the
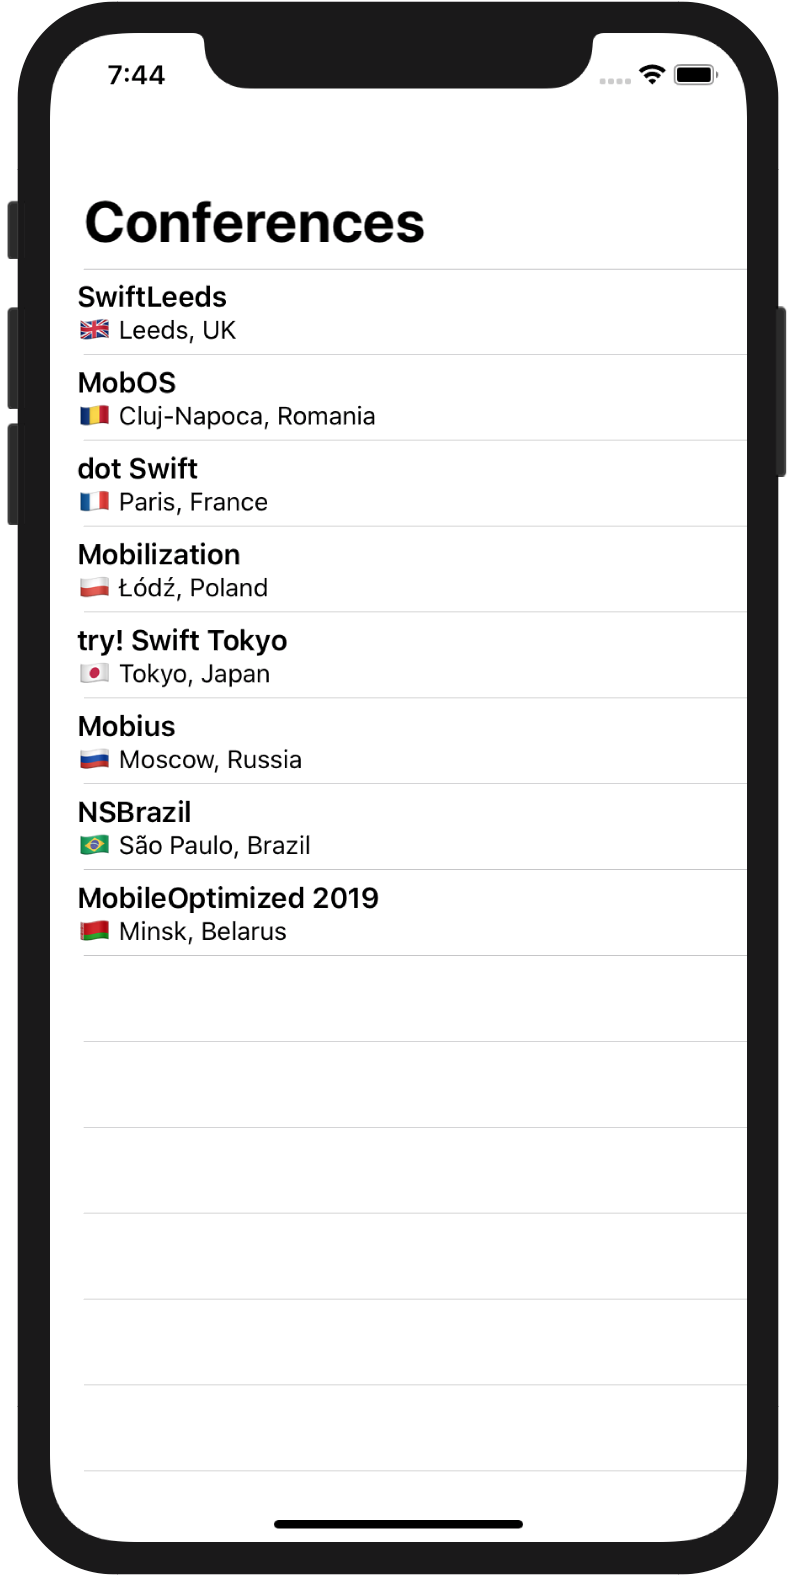
ConferenceList.swiftfile, passconferencesDatato theListinitializer and replace the strings in theTextelements by the values from the loaded JSON:List(conferencesData) {conference in VStack(alignment: .leading) { Text(conference.name).font(.headline) Text(conference.location).font(.subheadline) } }.navigationBarTitle("Conferences")The list of conferences will be displayed:
Step 5. Add the details view
The second view of our application will display the detailed data on each conference.
Create a new SwiftUI file:
- In the Project tool window, press
⌘Nand select File from Xcode Template. - In the dialog that opens, select iOS | User Interface | SwiftUI View and click Next:
- On the next page, type the filename —
ConferenceDetails, make sure that the iOSConferences group and location are selected, and click Finish.
Instead the default
Hello, World!text, add the conference location:struct ConferenceDetails: View { var body: some View { Text(conference.location) } }Since the
conferencevariable is not defined in the current context, it is highlighted red. To define it directly from its usage, do the following:- Place the caret at
conferenceand press⌥⏎. - Select Create local variable ‘conference’ and press
⏎. - In the list that appears, select
var. - To specify the type of the variable, press
⌥⏎again, select Add explicit type, and start typingConference. - Move the code line up by pressing
⌥⇧↑. - Press
⌥⌘Lto fix the code formatting.
As a result, your code will look as follows:
struct ConferenceDetails: View {
    var conference: Conference
    var body: some View {
        Text(conference.location)
    }
}
Now, the
conferenceparameter is missing in theConferenceDetails()initializer within theConferenceDetails_Previewstructure. Place the caret at the highlighted code, press⌥⏎, and select Apply Fix-it. The parameter name and placeholder for its value will appear. PassConference()as a parameter:struct ConferenceDetails_Previews: PreviewProvider { static var previews: some View { ConferenceDetails(conference: Conference()) } }Conference()is highlighted red as the necessary initializer for theConferenceclass is missing. To add it, with the caret placed at the highlighted code, press⌥⏎and select Create initializer. An empty initializer will be added to the Conference class. Set initial values for all the properties there, for example:init() { name = "Conference Name" location = "Location" start = Date() end = Date() link = "https://www.google.com" }Duplicate
⌘DtheText(conference.location)line two times and wrap these threeTextelements in aVStackcontainer.You can create custom live templates to quickly wrap your code with necessary constructs. See details in Create a surround live template.struct ConferenceDetails: View { var conference: Conference var body: some View { VStack { Text(conference.location) Text(conference.location) Text(conference.location) } } }Enable the interactive preview for the
ConferenceDetailsby adding theinjected()method forConferenceDetails_Previewsthe same way you did forConferenceList_Previews:class ConferenceDetails_Previews: PreviewProvider { static var previews: some View { ConferenceDetails(conference: Conference()) } #if DEBUG @objc class func injected() { UIApplication.shared.windows.first?.rootViewController = UIHostingController(rootView: ConferenceDetails(conference: Conference())) } #endif }Rebuild
⌘F9the application to have the preview working after adding the new file. By now, leave theConferenceDetailsview as is. Later, you will display here the conference dates and link.Step 6. Set up navigation between the list and details
In the
ConferenceList.swiftfile, go to theConferenceListstructure and wrap theVStackcontainer in aNavigationLink.NavigationLink { VStack(alignment: .leading) { Text(conference.name).font(.headline) Text(conference.location).font(.subheadline) } }Pass the
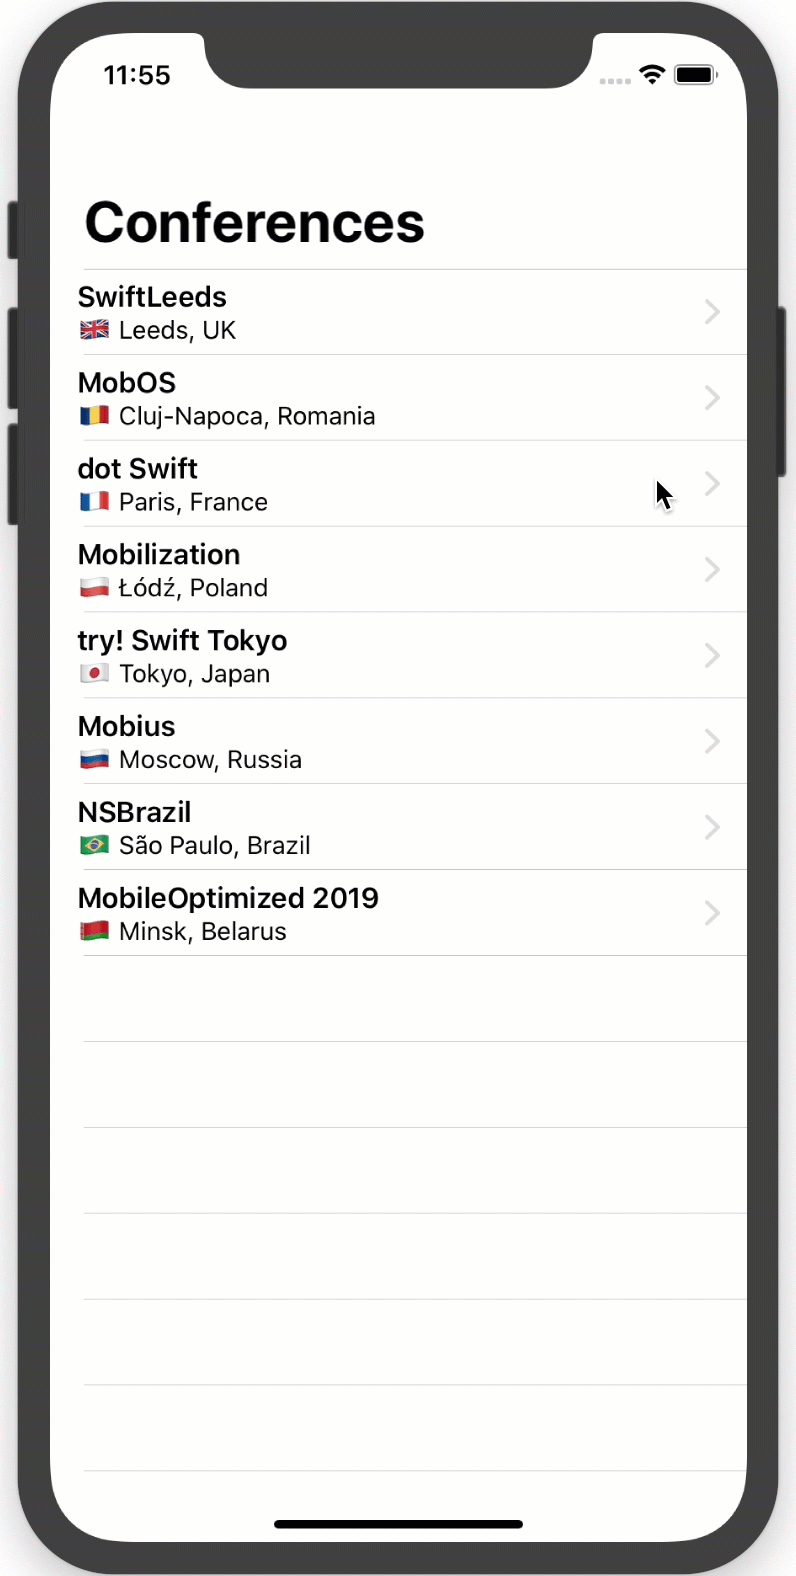
ConferenceDetailsview as the destination parameter for theNavigationLink:NavigationLink(destination: ConferenceDetails(conference: conference)) { VStack(alignment: .leading) { Text(conference.name).font(.headline) Text(conference.location).font(.subheadline) } }The list items are now clickable, and the details view opens on tapping each of them:
Step 7. Display the conference date and link
Display the conference date
In the ConferenceDetails view, the start and end dates should be displayed in format
MMMM dd, yyyy - MMMM dd, yyyy.In the
Data.swiftfile, add a new functiondateToStringas an extension for theDateclass. This function convertsDatetoStringand changes the date format:extension Date { func dateToString() -> String { let format = DateFormatter() format.dateFormat = "MMM dd, yyyy" format.string(from: self) } }The code above won’t be resolved as the function doesn’t return anything. Place the caret within the highlighted symbol and press
⌥⏎: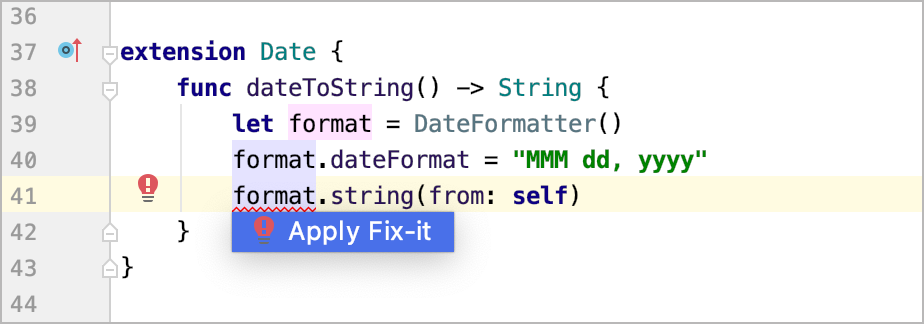
Press
⏎to apply the quick-fix. Thereturnstatement will be added:extension Date { func dateToString() -> String { let format = DateFormatter() format.dateFormat = "MMM dd, yyyy" return format.string(from: self) } }Create a method of the
Conferenceclass that will return the data of a conference in text format. OpenConference.swiftand add the following method after thevar link: Stringline:func textDates() -> String { var result = start.dateToString() if let end = self.end { result = "\(result) - \(end.dateToString())" } return result }In the
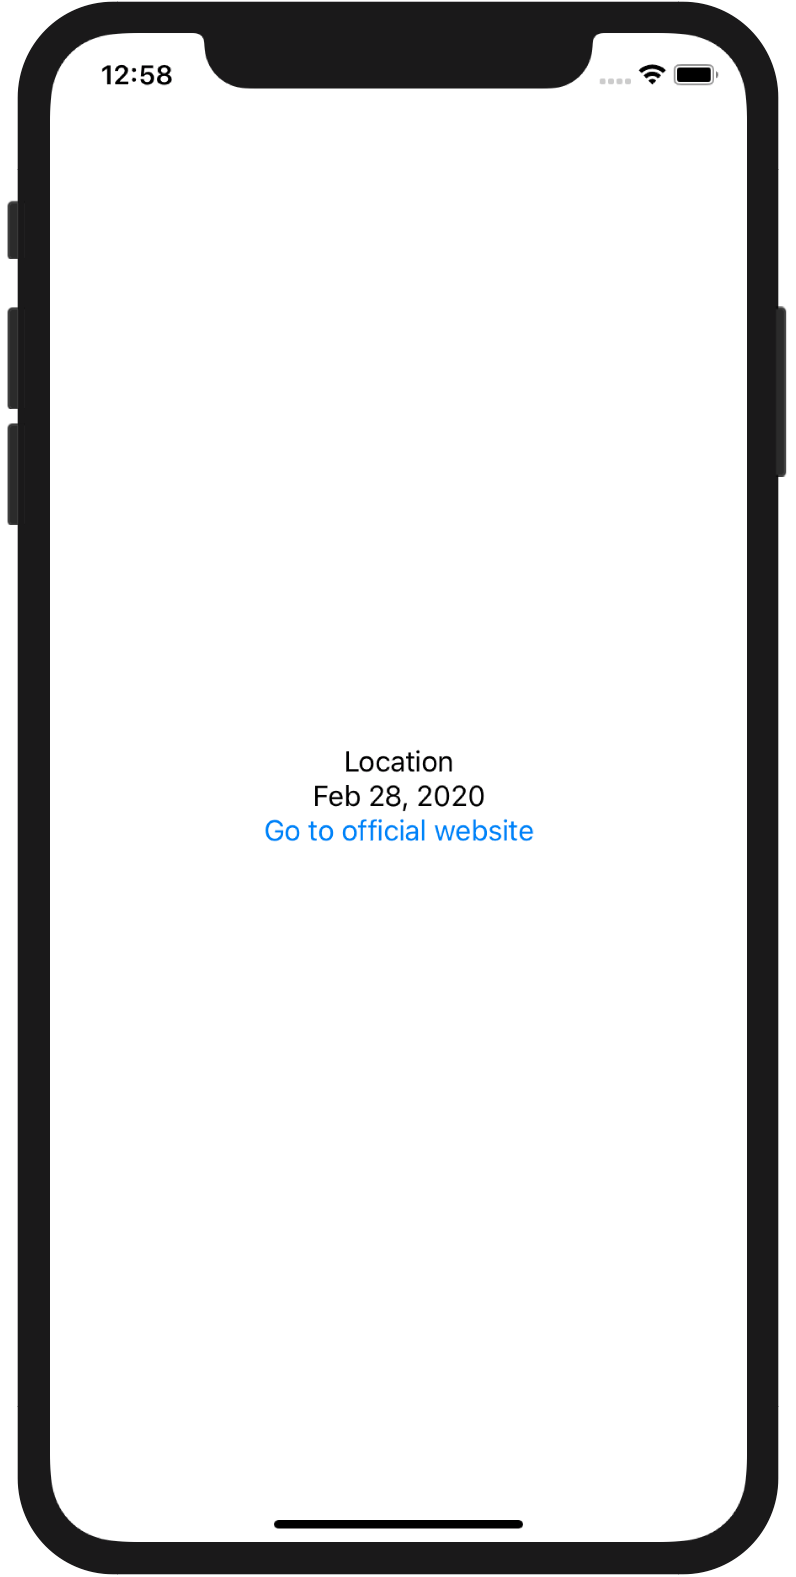
ConferenceDetailsview, replace the value of the secondTextelement with the conference date returned by the newly createdtextDates()method:VStack { Text(conference.location) Text(conference.textDates()) Text(conference.location) }The dates will appear in the preview:
Display the conference link
To make the conference link clickable, you need to add a button and pass a method for opening the URL as its action.
In the
ConferenceDetails.swiftfile, add a new structure namedLinkButtonthat conforms to theViewprotocol and includes aButtonwith theGo to official websitetext:struct LinkButton: View { var body: some View { Button() { Text("Go to official website") } } }You can use thestructlive template for writing the structure code faster: just typestructand press⇥.Add an action for the
Button— opening the conference link with theopen(_:)method:struct LinkButton: View { var link = "" var body: some View { Button(action: { UIApplication.shared.open(URL(string: self.link)!) }) { Text("Go to official website") } } }Put the newly created
LinkButtonin theConferenceDetailsview and pass the conference link as a parameter for theLinkButtoninitializer:struct ConferenceDetails: View { var conference: Conference var body: some View { VStack { Text(conference.location) Text(conference.textDates()) LinkButton(link: conference.link) } } }The link will appear in the preview:
Step 8. Adjust the details view appearance
In the
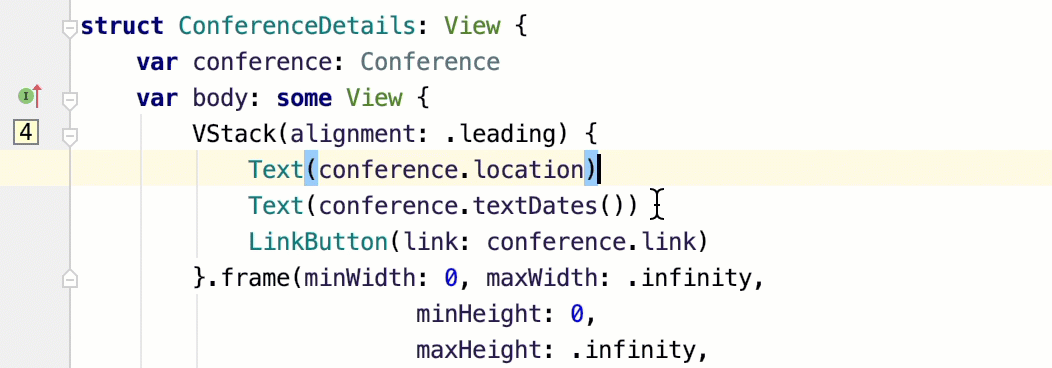
ConferenceDetailsview, place the content of theVStackcontainer to the top left corner of the screen by adjusting its frame width, height, and alignment:struct ConferenceDetails: View { var conference: Conference var body: some View { VStack { Text(conference.location) Text(conference.textDates()) LinkButton(link: conference.link) }.frame(minWidth: 0, maxWidth: .infinity, minHeight: 0, maxHeight: .infinity, alignment: .topLeading) } }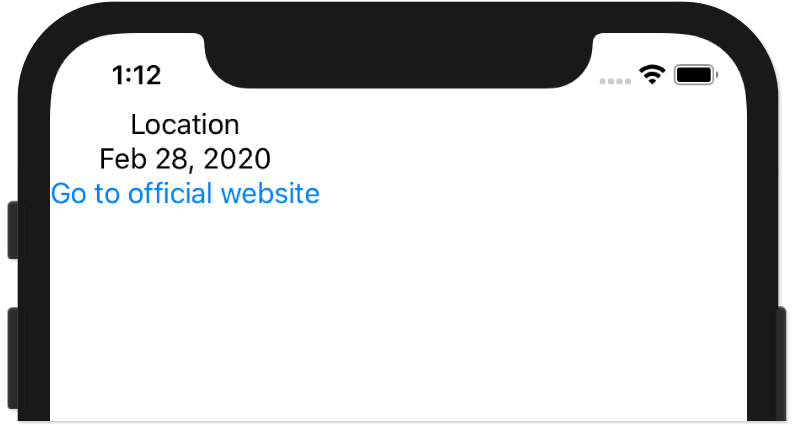
Align the
VStackcontent left by using thealignmentparameter:VStack(alignment: .leading) { // ... }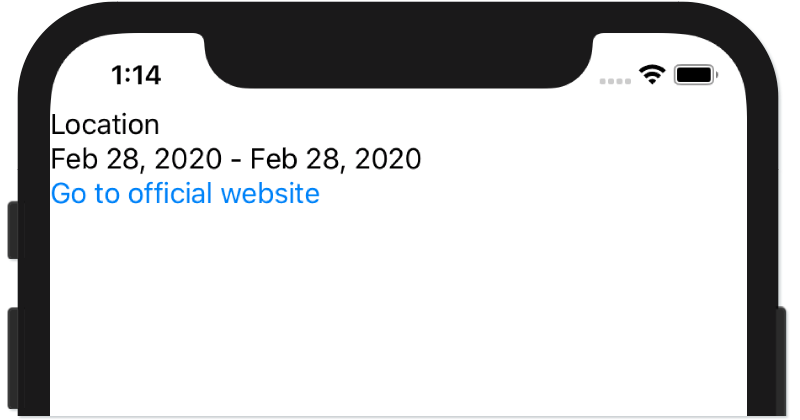
Add the default padding for the
VStackcontainer using thepadding()method:VStack(alignment: .leading) { // ... }.frame(minWidth: 0, maxWidth: .infinity, minHeight: 0, maxHeight: .infinity, alignment: .topLeading) .padding()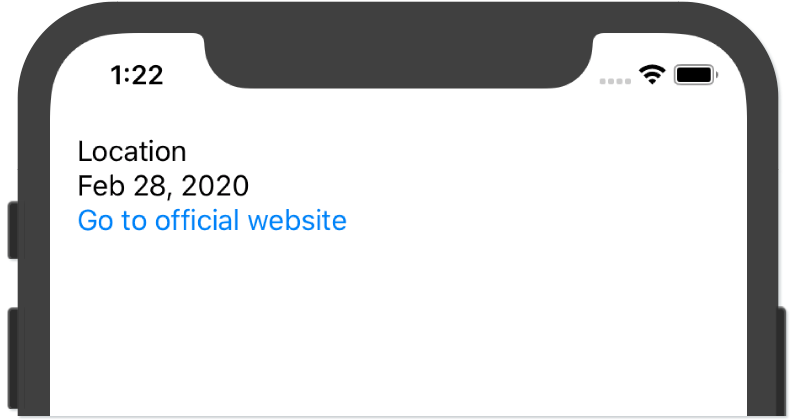
Add the bottom padding for the elements within the
VStackcontainer:VStack(alignment: .leading) { Text(conference.location).padding(.bottom) Text(conference.textDates()).padding(.bottom) LinkButton(link: conference.link).padding(.bottom) }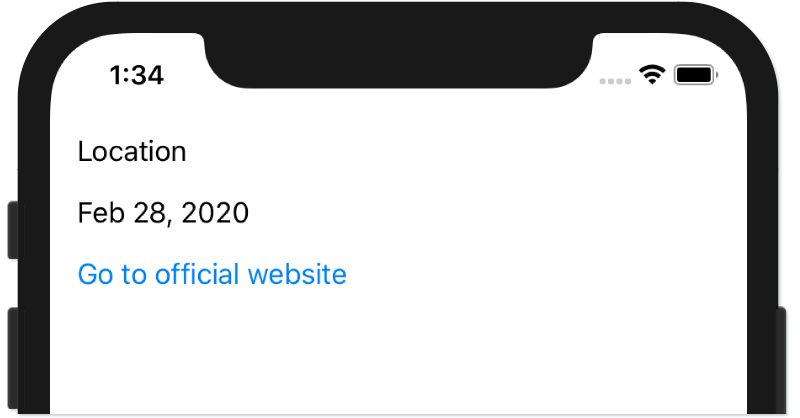 You can place multiple carets and type your code in several lines at the same time. To do this, place the caret where you want to start typing, press and hold
⇧⌥, and place the caret at the other lines:
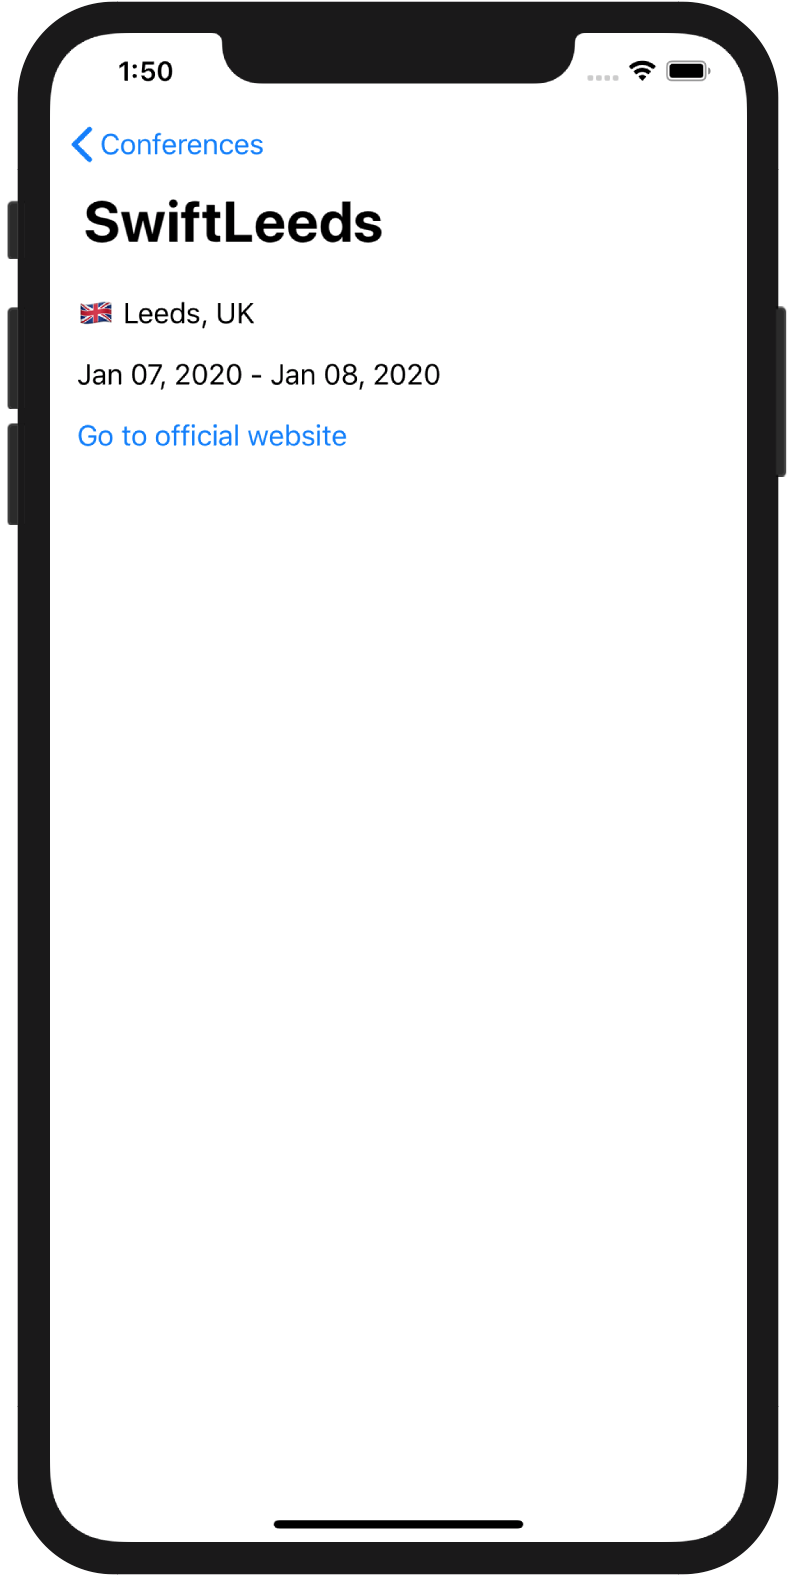
Put the conference name in the view title by using the
navigationBarTitle(_:)method for theVStackcontainer:VStack(alignment: .leading) { // ... }.frame(minWidth: 0, maxWidth: .infinity, minHeight: 0, maxHeight: .infinity, alignment: .topLeading) .padding() .navigationBarTitle(conference.name)This change won’t be available in the interactive preview. Rerun the application to check it:
What’s next
You can elaborate this application by making it load the data from the remote YAML file containing the up-to-date list of iOS/macOS conferences. For parsing the data, you can use the Yams library added to the project by means of the CocoaPods dependency manager. Stay tuned to learn it in action in our future tutorials!
Your AppCode team
JetBrains
The Drive to Develop - In the Project tool window, press