Editor-based Rest Client

Among other features introduced in 2017.3 EAP we mentioned the editor-based REST client, which offers a new approach to working with web APIs.
Earlier, you could run your requests with the REST client built right into PhpStorm, but it required crafting each request by hand with lots of button clicking, adding and completing of fields, and so on.
What if we wanted to leverage the power of the PhpStorm editor for the very same task, with completions, refactorings, navigation, VCS capabilities and what not? That’s where the new editor-based REST client comes in. No more fiddling with tool windows: your HTTP requests are now first-class citizens in PhpStorm.
Working with the Editor-based Rest Client
The new REST client’s interface will be instantly familiar to you, since it’s the code editor itself.
You work with HTTP requests by creating and editing the corresponding HTTP request files (using the .rest or .http extension), which are now supported by PhpStorm. If you worked with web APIs before, the HTTP format syntax will feel common and natural. It generally follows the RFC standard but includes several accommodations to better fit your developer needs.
You can start working with a web API by simply creating a new scratch file, setting its Language to HTTP request, and typing the request.
We’ll use the excellent (and free) service called httpbin to test our example requests.
Let’s start with a very simple request to https://now.httpbin.org/, which should return current time. Notice that as soon as you start typing, the completion mechanism offers completing the request scheme. Note also that you can freely omit the GET method type as it is the default.
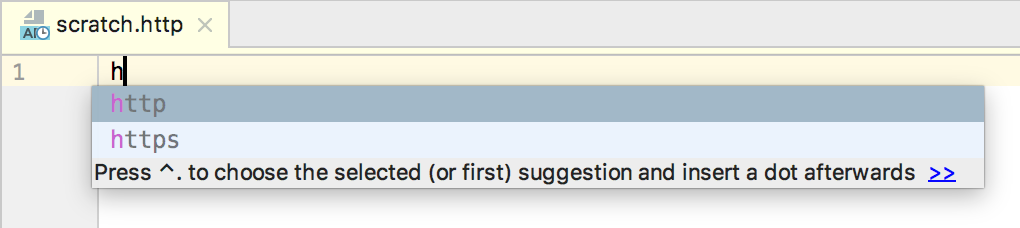
Feel free to use completion while composing the request. Now, it supports message type (GET, POST, etc.), request scheme (http, https), HTTP request version (HTTP/1.1), header names, content types, and encodings. We plan to enhance its capabilities in the future.
As soon as you finalize the request, you can immediately run it by either clicking the Run icon in the left gutter or invoking the Run request intention action with Alt+Enter:

The request’s detailed execution results are displayed in the Run tool window:
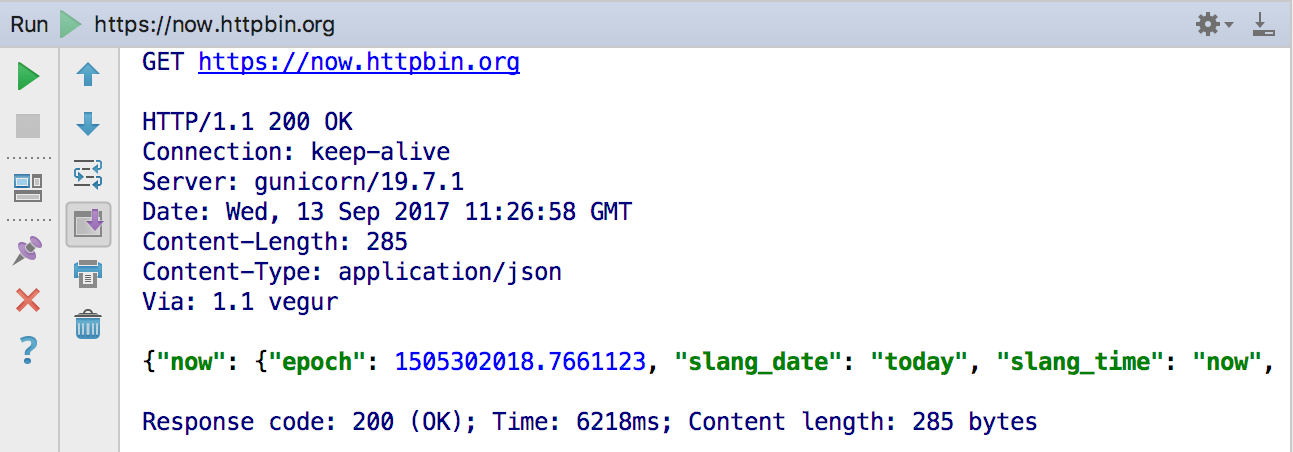
Right after your original request in the editor, you will now see the link to the response output, which is a JSON file in our case.

Since this response actually gets saved to a file, we can use Jump to source (or CMD-click) to open it in a new editor tab.
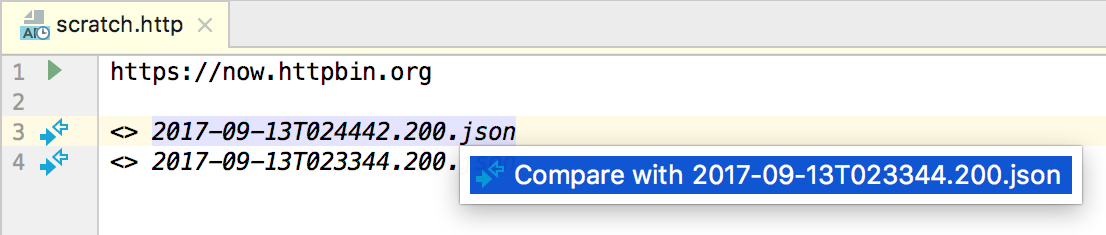
If you run the request again, the link to the second response appears. What if you wanted to compare these responses? Simply click the gutter icon or use the Compare intention action to open the files in the Differences viewer.
Let’s try another example. There’s no need to create a new file for that: simply use ‘###’ as a separator between requests.
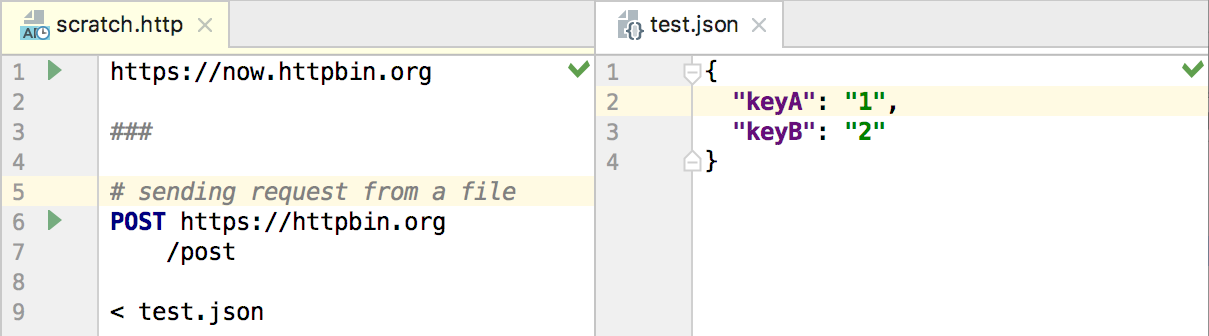
This request will return nothing of particular interest when executed, but it still illustrates several capabilities of HTTP request syntax:
- You can use comments inside your requests – just make sure to start each comment line with ‘#’ or ‘//’.
- You can break long query strings into several lines by indenting all but the first line of the string.
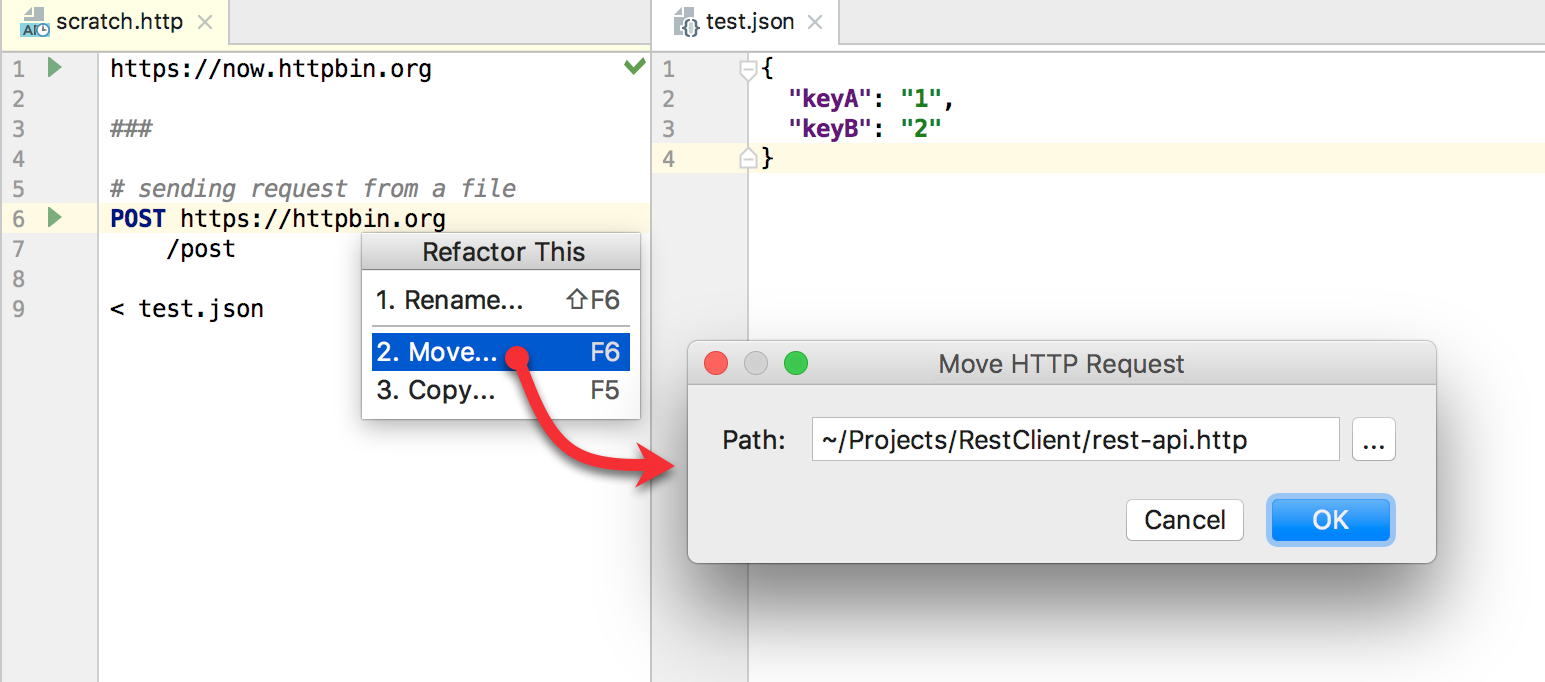
- You can use the left angle bracket (‘<’) and provide the path to a file, test.json in our case. The request body will then be sent from the specified file.
As you may remember, we have been executing our requests from a scratch file. Such files are commonly used in the development process. If you want to include your request inside the project and share it with your team, move it to a physical file. Invoke the Move refactoring and specify the destination:
That’s it! The created file will be stored inside the project. Physical files are primarily used for documenting HTTP requests and are not modified by the IDE. Therefore, when you run a request from a physical file, you will not see the link to the response below the request itself. To view responses, you will need to use Requests history, so let us explore that right away.
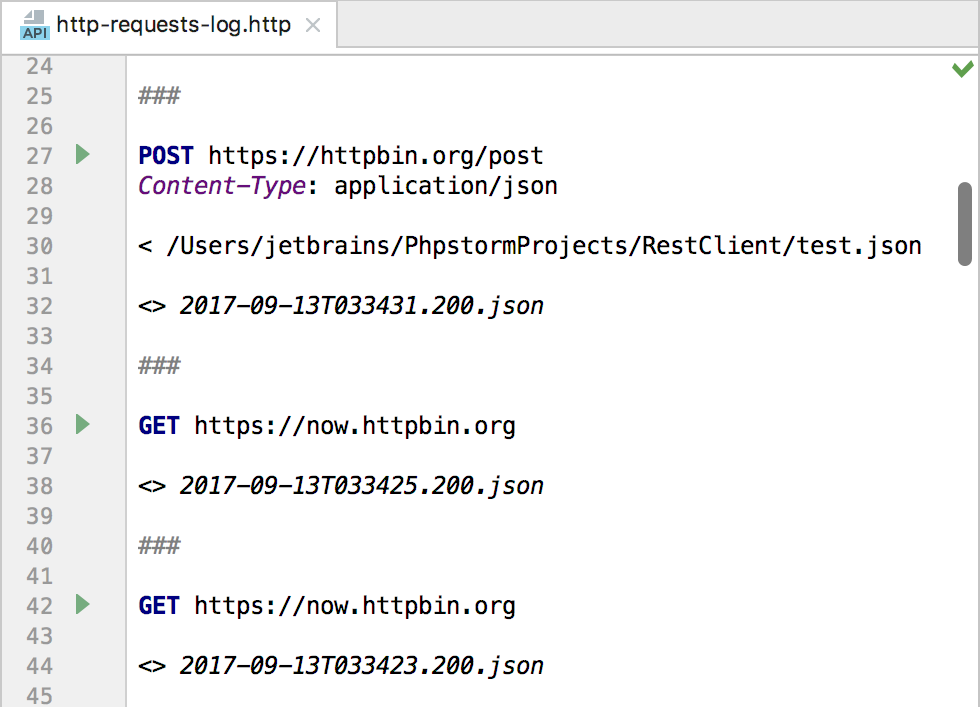
After a hard day’s work, you may want to review the requests that have been run. Simply click the Show HTTP requests history button in the top-right corner of the editor (or use the Tools menu command with the same name). The http-requests-log file will open, showing you the 50 most recently run requests and responses and allowing you to re-run any of them:
Future plans
In this post, we’ve really only scratched the surface of what’s possible with the new REST client. We encourage you to try it and hopefully have an easier time testing and debugging your web services.
Please bear in mind that we’ve only started working on the new REST client. Expect a lot more features to come in future releases, such as variables inside requests, in-place documentation for Header Fields, live templates, refactorings, inspections, importing and exporting requests, and many more.
Stay tuned!