Running Flask with an SSH Remote Python Interpreter

One common cause of bugs in many applications is that development and production environments differ. Although in most cases it’s not possible to provide an exact copy of the production environment for development, pursuing dev-prod parity is a worthwhile cause.
Most web applications are deployed to some sort of Linux VM. If you’re using a traditional web-host, this is referred to as VPS hosting.
If we want to develop in an environment similar to our production environment, how could we approach this? The closest would be to set up a second VM for development purposes. So let’s have a look to see how we can connect PyCharm to a VPS box.
Our Application
I’m lazy, so we’ll use a web-app that I made last year as an example. The application is a very simple old-school guestbook. In last year’s blog post, I used Docker Compose to describe an environment with both the Python service and a PostgreSQL database.
Let’s start by cloning the repository, and then checking out the ‘with-database’ branch. After opening the project, we need to configure our server. I’ll be using an AWS EC2 instance, but you can use any other Linux box (including a Raspberry Pi).
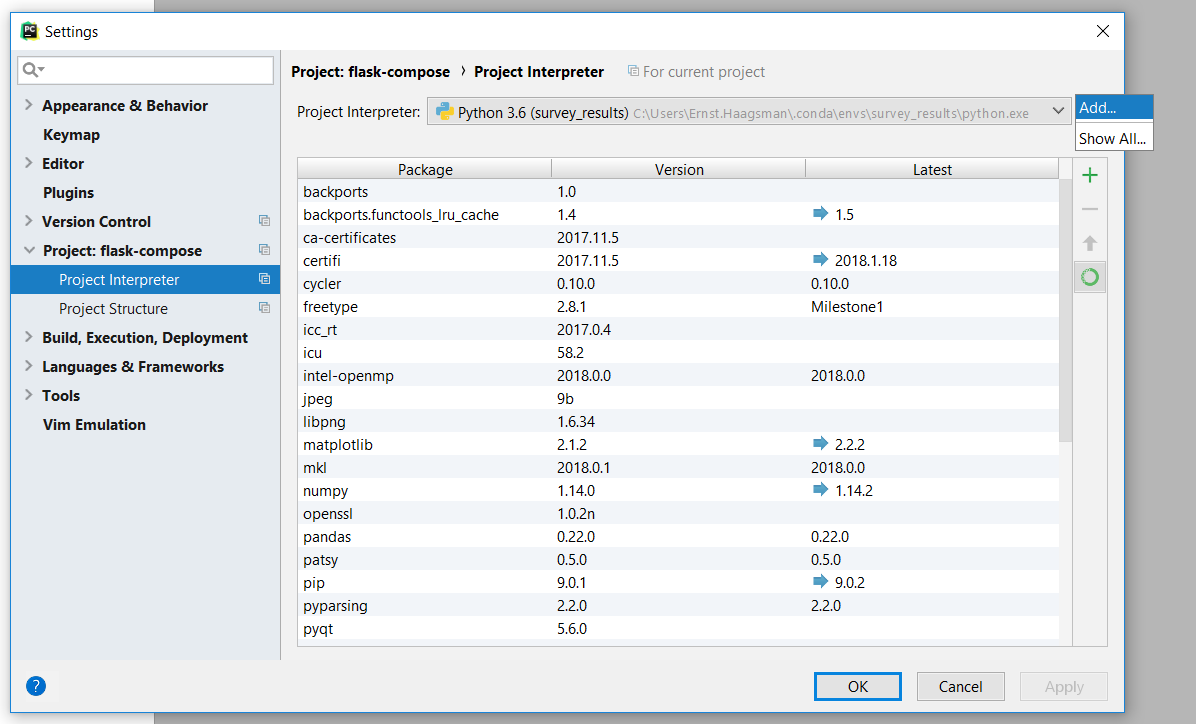
To configure the interpreter, open Settings | Project Settings, and use the gear icon to add an interpreter:
Choose SSH on the left-hand side. If you don’t see SSH, please make sure you’re using PyCharm Professional 2018.1 or later. Then, follow the instructions to connect to your SSH box:
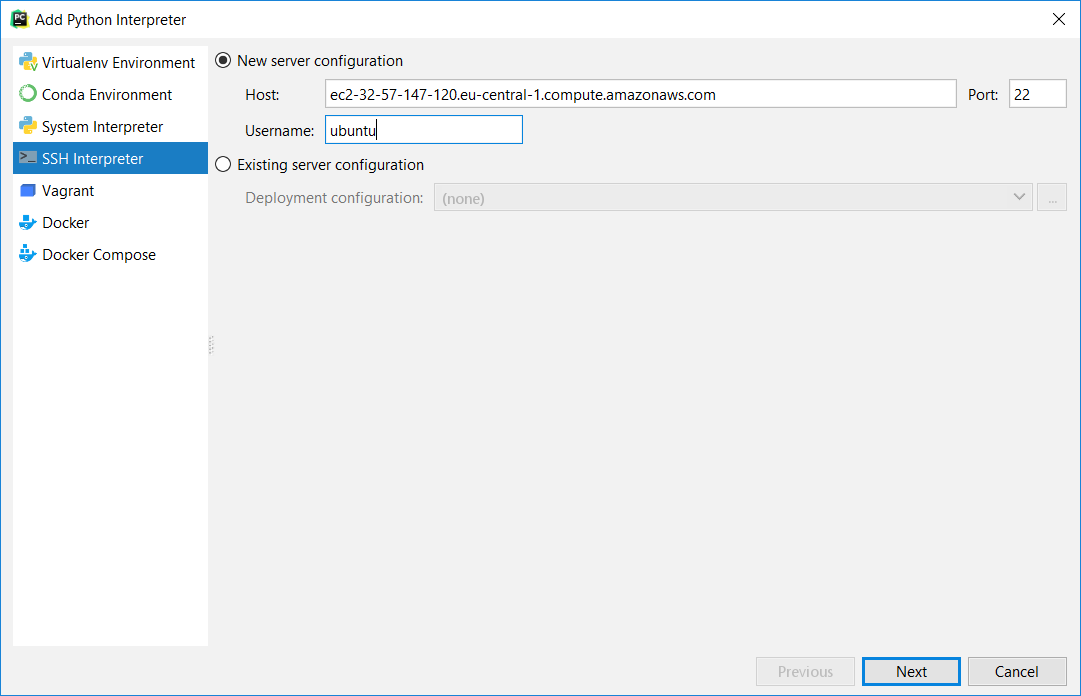
For this tutorial, we’ll mostly accept the default values. The only exception is if your Linux box only has Python 3 installed, and doesn’t link /usr/bin/python to that version. As this is the case for AWS current Ubuntu 16.04 AMI, we’ll make sure to change the interpreter path:

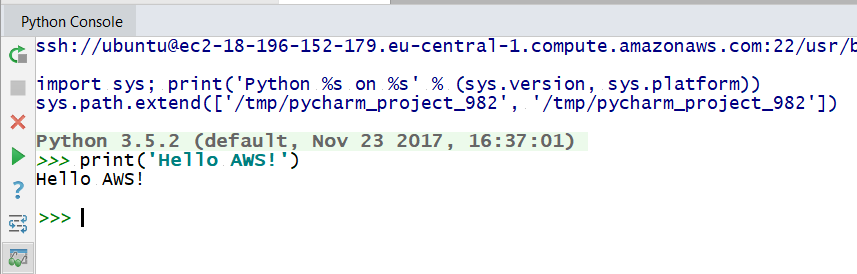
After we finish configuring the interpreter, we’re ready to run code. For example, if you open the Python console, you can run code on your remote box:
Before we can run our Flask script, there are a couple more things we need to take care of.
Configuring Our Box
Docker Compose is very handy, as it allows us to specify and configure services in a very concise way. If we want to make this work on a general Linux machine, we’ll need to handle this configuration ourselves. So let’s start with installing PostgreSQL.
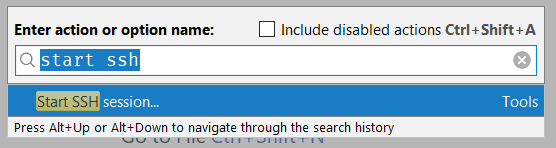
To open an SSH session, either go to Tools | Start SSH session, or use Ctrl+Shift+A to find the ‘Start SSH session’ action:
At this point, we could just run sudo apt-get install postgresql. If you’re experimenting on your Raspberry Pi, that’s the way to go. If we’re developing an application, it makes sense to document what we’re doing and make sure that we can reproduce the environment later.
A great tool for configuring the state of a Linux machine is Ansible. With Ansible, we can describe the desired state of our Linux server in YAML files, and then use the Ansible tooling to apply the desired configuration.
Installing PostgreSQL with Ansible looks like this:
- hosts: localhost
  become: yes
  tasks:
   - name: Install PostgreSQL
     apt:
       name: postgresql-9.5
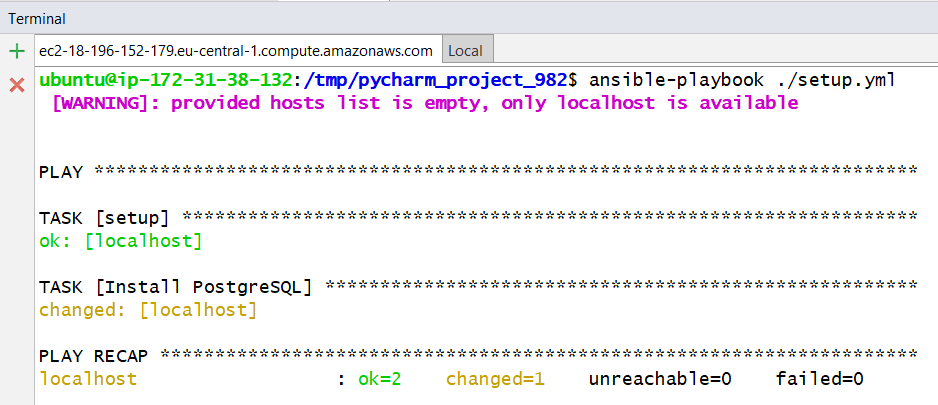
If we create a new file setup.yml with those contents, PyCharm will then automatically upload it to the location we configured during project configuration. By default, this is a subfolder of /tmp/. So let’s install Ansible, navigate to this folder, and run this file (called a playbook in Ansible terminology). You can do this by running these commands on the server (use the SSH session you started earlier):
sudo apt update && sudo apt install -y ansible
cd /tmp/pycharm*
ansible-playbook ./setup.yml
And look at that, PostgreSQL is installed:
We can do some more cool things with Ansible, like configuring our virtualenv:
- name: Install pip
  apt:
    name: python3-pip

- name: Copy requirements
  copy:
    src: requirements.txt
    dest: /tmp/requirements.txt

- name: Install virtualenv
  pip:
    name: virtualenv
    executable: pip3

- name: Set up virtualenv
  become: false
  pip:
    requirements: /tmp/requirements.txt
    virtualenv: /home/ubuntu/venv
    virtualenv_python: python3
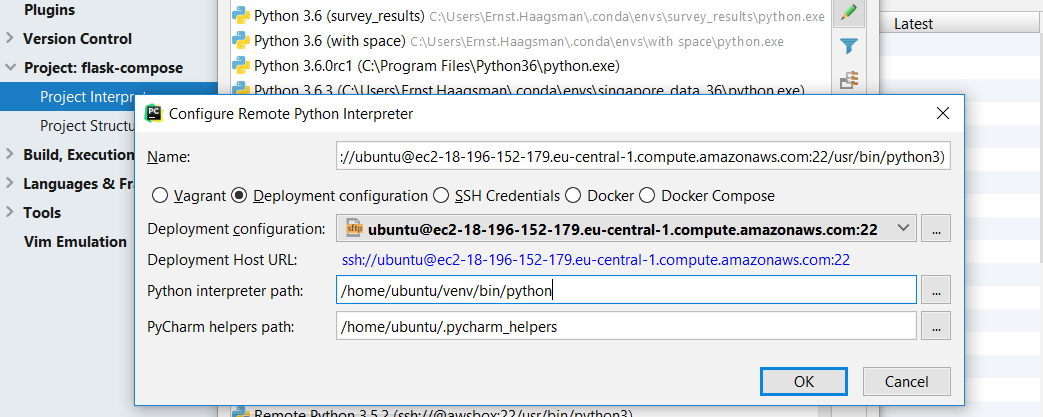
After we add these tasks to our playbook (setup.yml) and re-run them, we can then re-configure PyCharm to use the remote venv rather than our box’s system interpreter. In order to do so, go back to the interpreter settings screen. Use the gear icon to choose ‘Show all’, and then click the pencil to edit the interpreter. Change the path to the Python executable inside the virtualenv (/home/ubuntu/venv/bin/python):
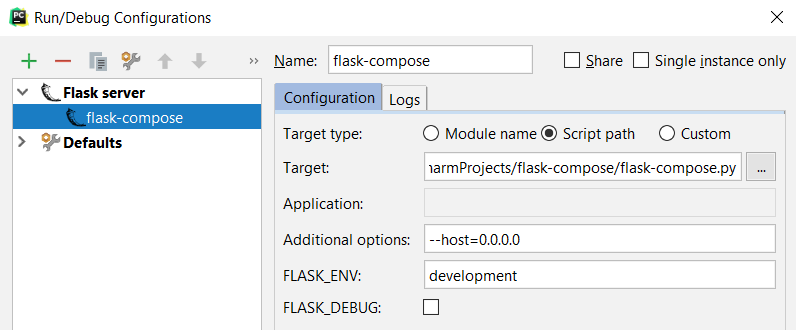
Now that we’ve taken care of that, we can run our Flask run configuration. Let’s edit it first, so it’s accessible from the outside world. We need to provide host=0.0.0.0 as an additional option to Flask:
If you’re running this code on AWS or a similar provider, you may need to open port 5000 in the firewall. On AWS you need to add a new rule to the security group to allow inbound traffic on TCP port 5000 from 0.0.0.0/0.
Now click the debug button to start Flask:
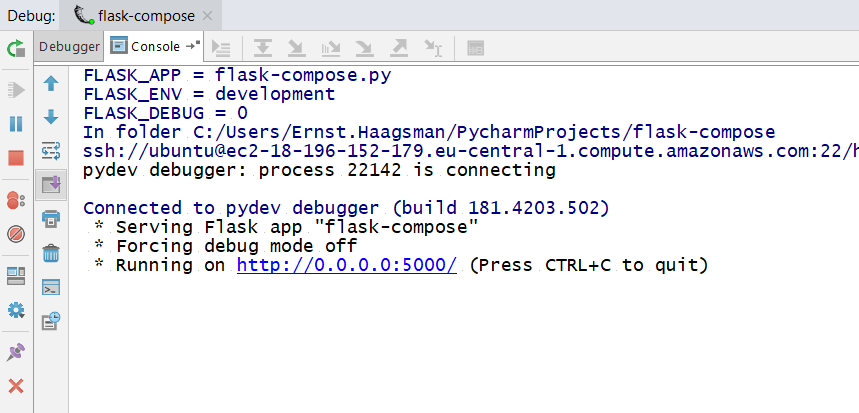
Let’s visit our page!
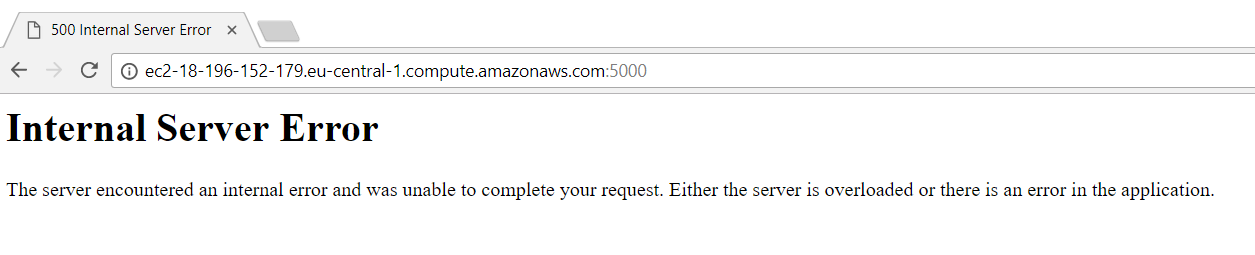
In the wise words of Butters Stotch: oh hamburgers. If we look back at PyCharm, we should see the stack trace in the debug window, which shows us that we still need to finish up the database connection.
In the Flask application, the database host was set to ‘db’ for the Docker Compose configuration. Let’s change that to 127.0.0.1:
g.db = psycopg2.connect(dbname='flaskapp',
                       user='flaskapp',
                       password='hunter2',
                       host='127.0.0.1')
We also need to actually create the database, and create the tables. Thankfully our friend Ansible can help us with that! To keep this blog post a little bit shorter, I’ll skip the details. Just check out the ‘ansible’ branch of the repo. Then run the following SSH commands:
cd /tmp/pycharm*
ansible-playbook setup.yml
ansible-playbook clean-db.yml
The first playbook configures the PostgreSQL user account. The second playbook deletes the database if it exists, and then creates a clean database. In this clean database, the schema.sql file is run to create the table necessary for this application.
You can also use PyCharm to run SQL commands and inspect the database. Read our blog post about running code on a Raspberry Pi to learn how.
The Finish Line
After setting up the database, we should be able to start Flask again with the debug configuration, and check out our cool guestbook:
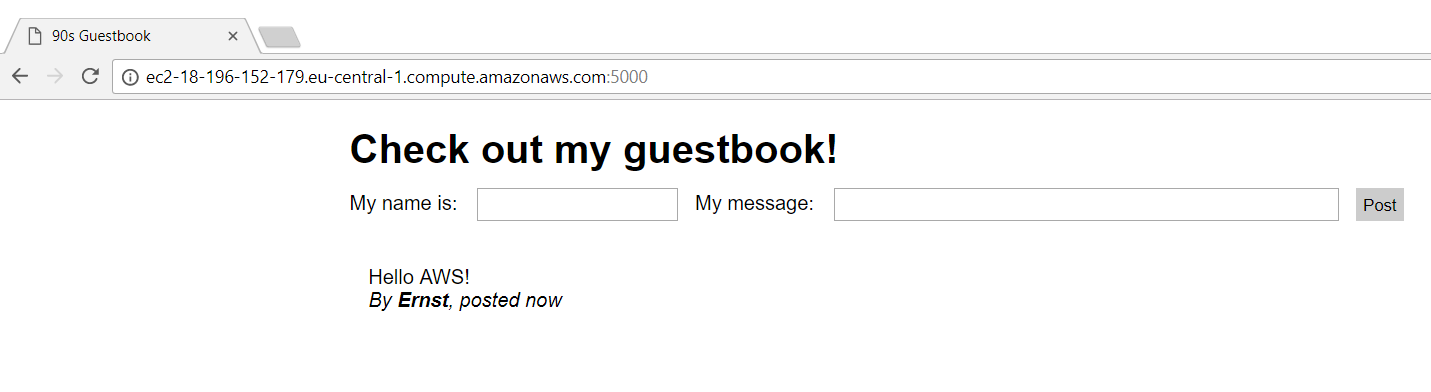
Of course, if we were to put a breakpoint in our code, we’d be able to hit it now. Try it out, and let us know how it went!
If you’re interested in DevOps and you’d like to learn more: check out our advanced AWS tutorial, our Raspberry Pi tutorial, or our Docker Compose tutorial. Let us know in the comments if there’s anything else you’d like to learn about!