ECMAScript 6 in WebStorm: Transpiling

Note: This post was updated in September 2021.
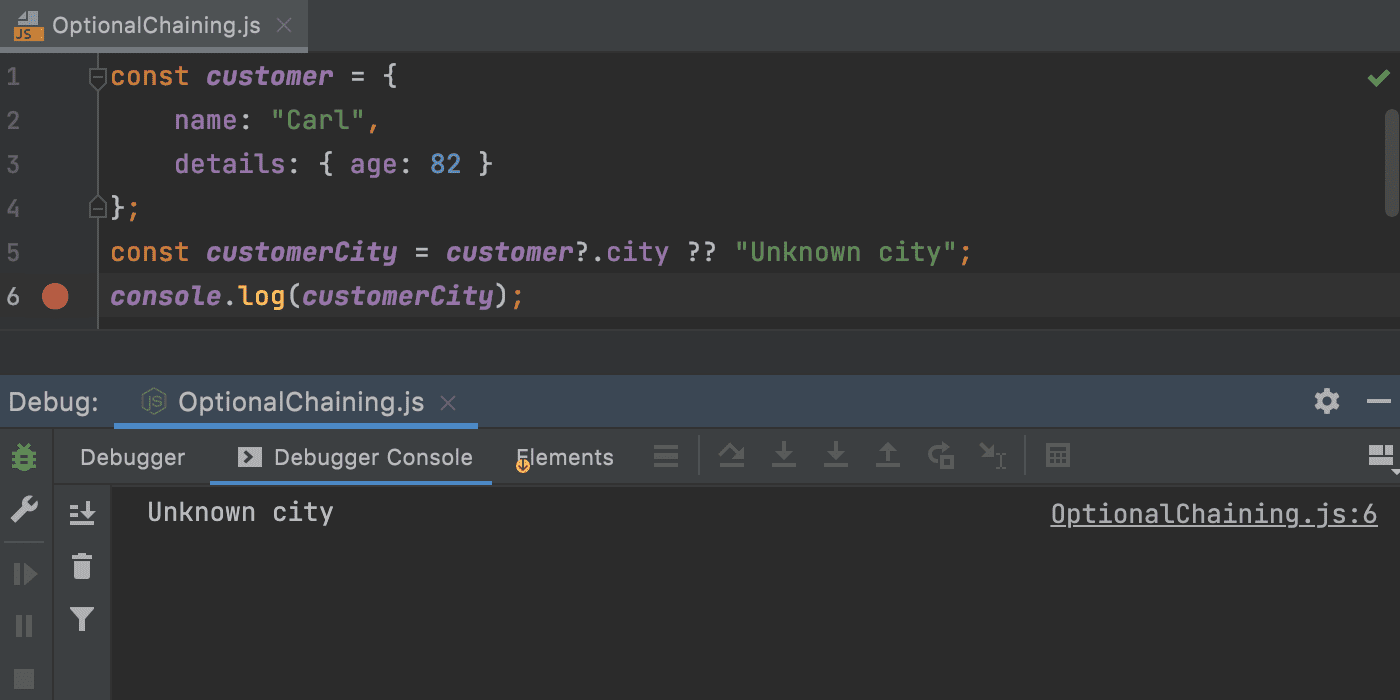
WebStorm supports the ECMAScript 6+ syntax. This support includes ECMAScript 2015 and later standards and even some proposals to the language, such as nullish coalescing operators, private fields, optional chaining, and more.
But even as ECMAScript 6+ features get more and more support in modern browsers and runtimes (see the Kangax compatibility table), to deploy your ES6 code you still often need to compile it to ES5.1, the JavaScript version supported by all browsers.
In this blog post, we’ll take a look at some of the options that WebStorm offers to help you with this task.
ECMAScript 6+ is set as the default JavaScript version in Preferences / Settings | Languages & Frameworks | JavaScript. This setting will work for React applications as well.

With this setting, WebStorm provides smart coding assistance for ES6 and some of the latest proposals, including proper syntax highlighting, code completion, on-the-fly inspections, navigation for modules and classes, and more.
Babel, the most commonly used transpiler, can be configured and used via WebStorm’s File Watchers. This approach is good for compiling files on the fly for some experiments and debugging, though for client-side code you may still need some additional tools, such as module bundlers.
For production-ready code, it might be better to supplement Babel in your build process with webpack, Parcel, Rollup.js, Snowpack, or npm – and WebStorm can also help you here too.
If you created your application with a project template, such as create-react-app, @angular/cli, or @vue/cli, Babel is already installed and configured and works out of the box without any additional setup.
In this blog post we will cover the following important steps:
- Install Babel and its presets
- Set up Babel File Watcher
- Use ES6 in Node.js
- Generate source maps for debugging
Install Babel and its presets
Install Babel and @babel/preset-env in your project using npm (or yarn). Open the built-in terminal and type:
npm install --save-dev @babel/core @babel/cli @babel/preset-env
To use Babel with React and JSX, install @babel/preset-react:
npm install --save-dev @babel/preset-react
Set up Babel File Watcher
A File Watcher is a WebStorm system that tracks changes to your files and launches a third-party standalone application as soon as it detects a file change. WebStorm has a pre-configured File Watcher for Babel. Let’s see how to enable it.
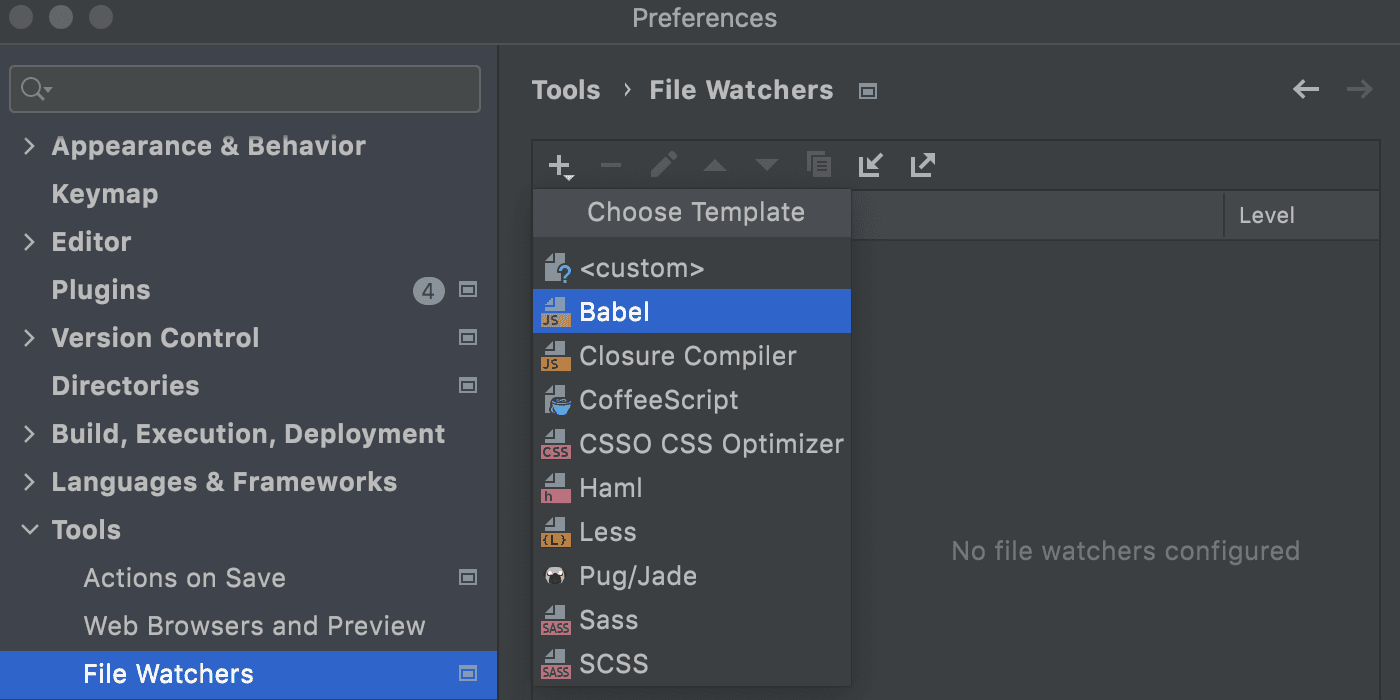
Go to Preferences / Settings | Tools | File Watchers, click + on the toolbar, and select Babel from the list.
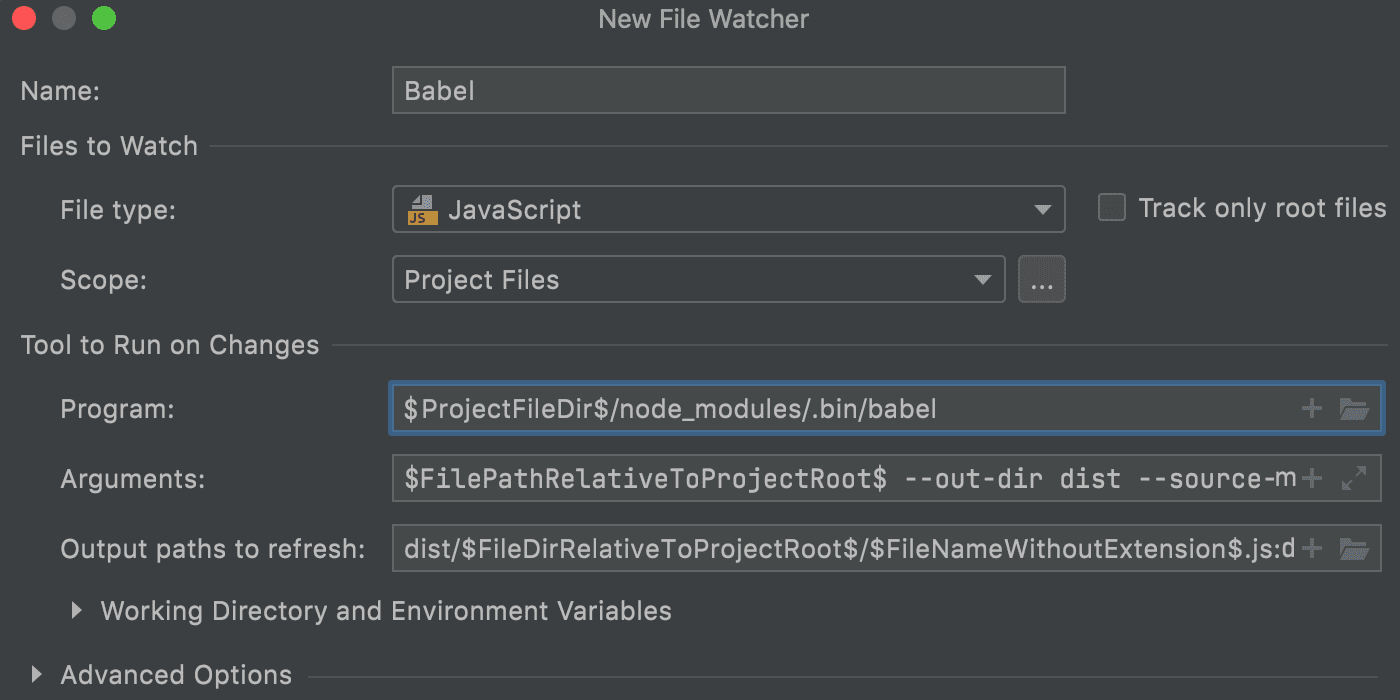
In the File Watcher configuration, check the path to Babel: it should be in the project node_modules folder (e.g. node_modules/.bin/babel on macOS). On Windows it has to be an .exe, .bat, or .cmd file.
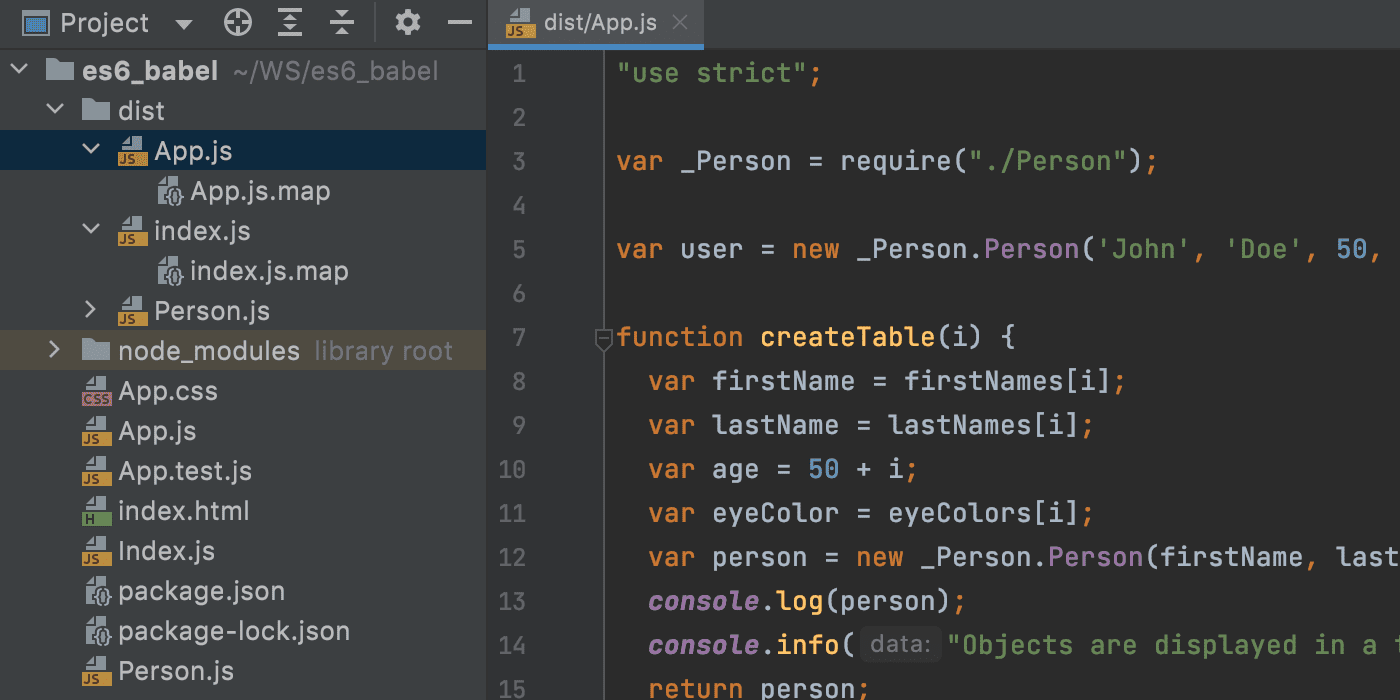
All other File Watcher settings are predefined, so it is now ready to use. With this default setup, compiled files will be located in the dist folder.
Of course, you can modify the configuration or add more compilation options to the Babel configuration file to make it fit your project’s needs better.
Babel File Watcher: additional configuration
Here are the settings that you can modify in the File Watcher:
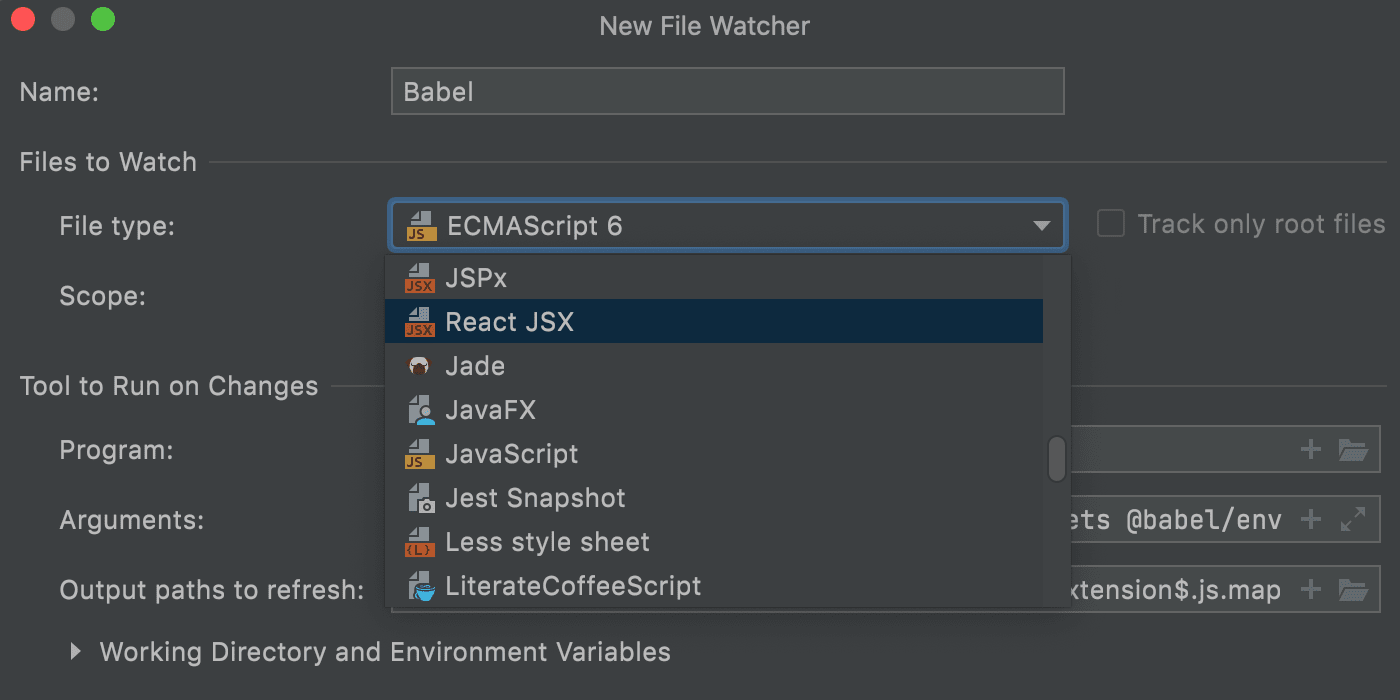
File type — specify the file type that the watcher will “watch” for you and run the program. If you’re using the .jsx file extension, select React JSX from the drop-down list.
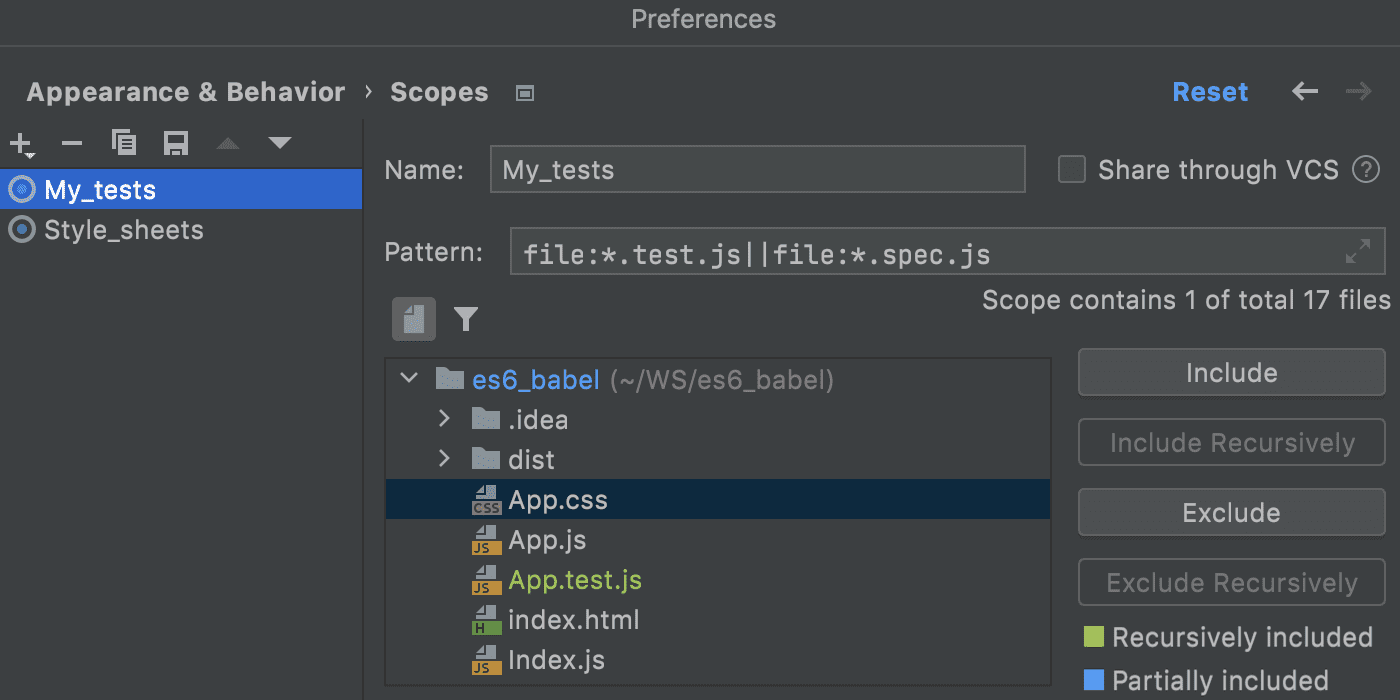
Scope — select the scope to watch. By default, the scope includes all project files.

You may want to exclude your test files or some other files that you want to edit without triggering the watcher. To do so, you can create a new scope and set the exclusion rules in Preferences / Settings | Appearance & Behavior | Scopes.
Arguments — this is where you can specify the options for Babel CLI.
With the default configuration in WebStorm, the generated ES5 files and source maps will be saved in the dist folder in the project root. The file names and their parent directories will be preserved.
Output paths to refresh — in this field, specify the path to the compiled files. You can enter a directory where the files are saved or the files themselves, separated with a colon. The IDE will watch these paths for external changes and make sure that the changes are synchronized with the project.
Working directory (under Working Directory and Environment Variables) — the directory where the program is executed. By default this is the directory of the file.
Auto-save edited files to trigger the watcher (under Advanced Options) — disable this option if you want to run the watcher only when you save the file.
For more details on File Watchers, please visit WebStorm’s Help portal.
Use ES6 in Node.js
When you’re developing a Node.js application in ES6, the recommended way to run and test it is to use @babel/register.
- Make sure you have @babel/cli and @babel/register installed in your project. In the built-in terminal, type:
npm install --save-dev @babel/core @babel/register
- Make sure you have added a Babel configuration file where
@babel/registeris specified in thepresetssection:{ "presets": [ [ "@babel/env" ] ] } - Open your Node.js run/debug configuration and in the Node parameters field, type
-r @babel/register. Don’t forget to specify the path to the JavaScript file to run.
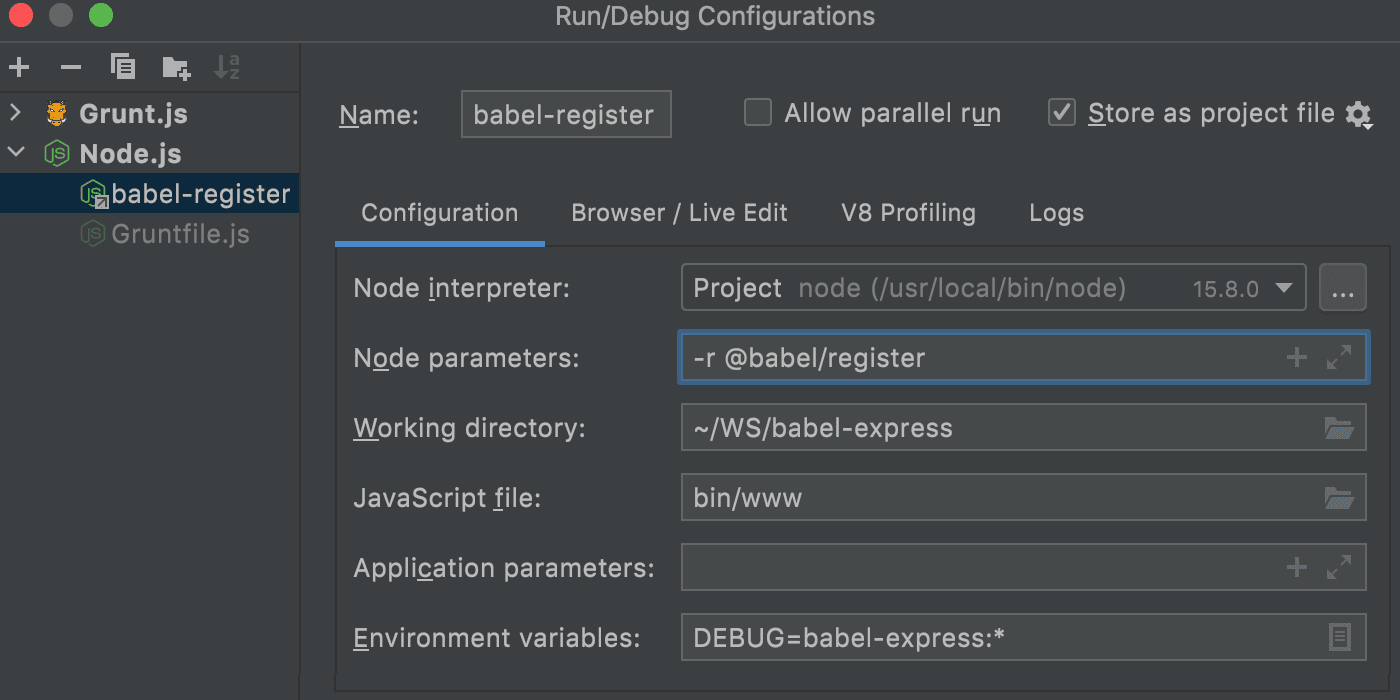
- Save the configuration and click Run or Debug on the toolbar.
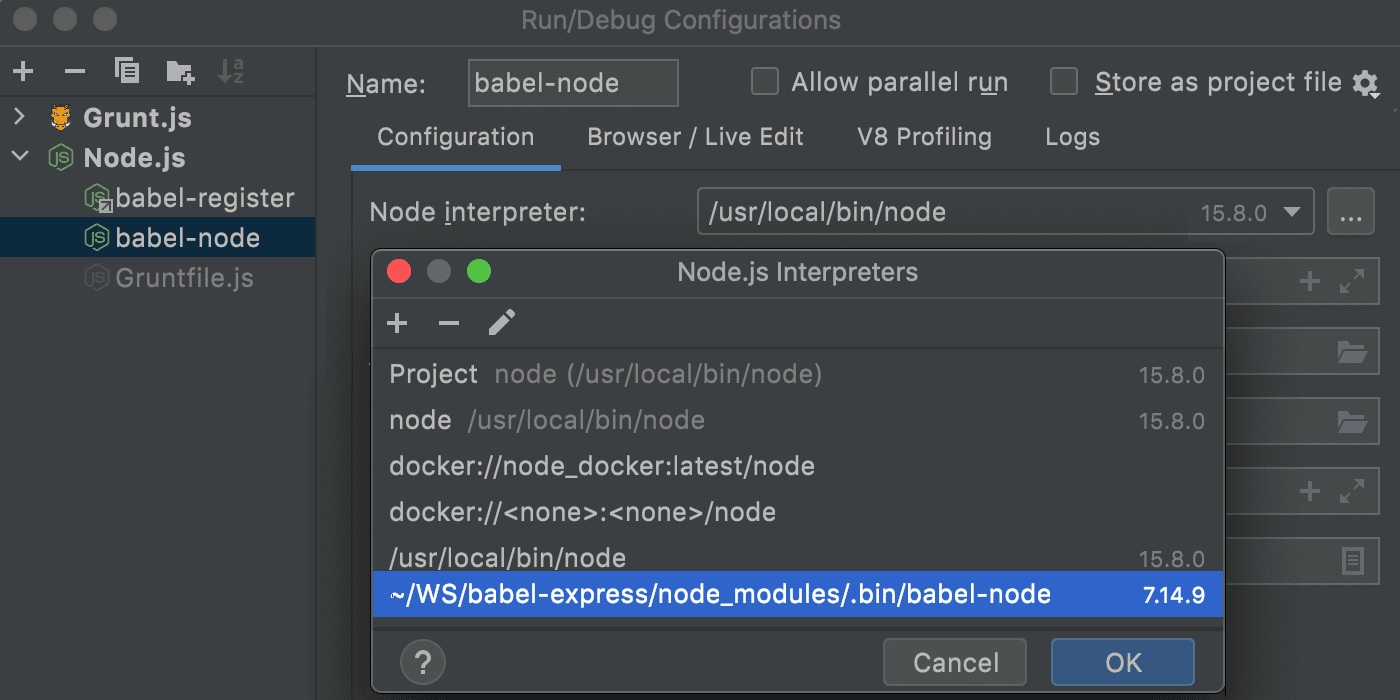
Although @babel/register is strongly recommended, you can alternatively use @babel/node.
- Install @babel/node. In the built-in terminal, type:
npm install --save-dev @babel/core @babel/node
- Open your Node.js run/debug configuration and in the Node interpreter field, specify the path to the babel-node executable in your node_modules folder (.bin/babel-node on macOS, babel-node.cmd or babel-node.exe on Windows).
Generate source maps for debugging
To debug your code in WebStorm or Chrome, make sure the tools you’re using generate source maps. Source maps allow you to put breakpoints in the original source files in the IDE and be sure that they are hit when the compiled code is executed in the browser.
When using Babel only, add the “sourceMaps”: “both” option to your Babel configuration file (for example, .babelrc.json or babel.config.json) or pass it as a command-line argument.
If you’re using Babel as part of a more complex build process, you might need an additional configuration for generating source maps, such as gulp-sourcemaps for working with Gulp or the devtool: “source-map” option when using Webpack.
Apart from choosing a transpiler, there are some other choices you need to make to start using ES6. For example, you need to select a module system. We recommend consulting Axel Rauschmayer’s excellent blog post on Deploying ES6.
The WebStorm team
Subscribe to WebStorm Blog updates