Developing Ionic Apps in WebStorm

Ionic is a framework for developing mobile apps in TypeScript. Since Ionic can use Angular, WebStorm can be of a great help when working on your next Ionic application.
Let’s go through the Ionic tutorial in WebStorm. But first, make sure that you’ve installed Cordova and Ionic and configured your environment for iOS or Android development as described here.
Starting an app
Ionic allows you to create a new project from the command line:
ionic start MyIonicProject
It creates a simple app with all the dev tools already configured. You can also use one of the available templates.
Once you’ve created a project, open a folder with it in WebStorm. You’ll see project files in the Project view, and all available npm tasks in the npm tool window on the left.
Double-click the task named ionic:serve to preview the app in the browser.
Check the output of the command in the Run tool window. If there are no errors, the app will be opened in the browser automatically.

Debugging the app
Once our app is running in the browser, we can start debugging it.
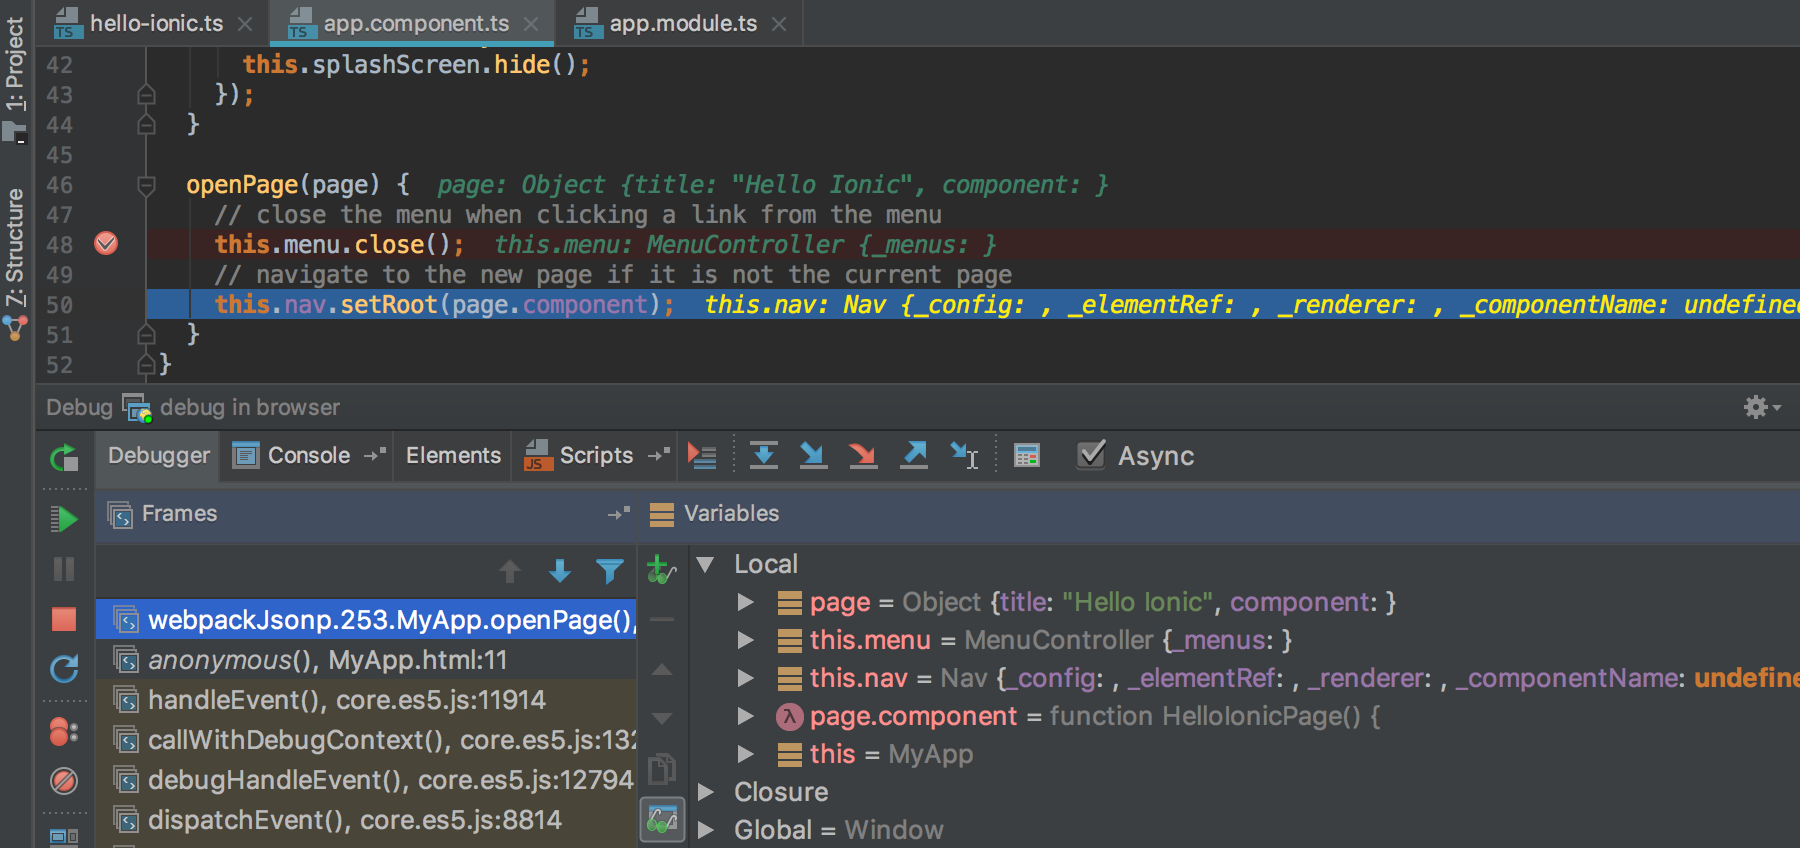
Create a new JavaScript debug configuration in WebStorm (menu Run – Edit Configurations… – Add – JavaScript Debug) and paste the URL the app is running at (in our project it’s http://localhost:8100/). Save the configuration, and then click the green bug-like icon to start debugging.
Now you can put the breakpoints right in the app’s TypeScript source code, and debug the code without leaving the IDE. Thanks to source maps, the debugger will map the compiled code that runs in the browser to the source code in the editor, and the breakpoints will be hit.
At the moment, it’s not possible to debug apps running in the emulator. Please let us know if you debug your apps that way and would like to do it in WebStorm.
Working with the code
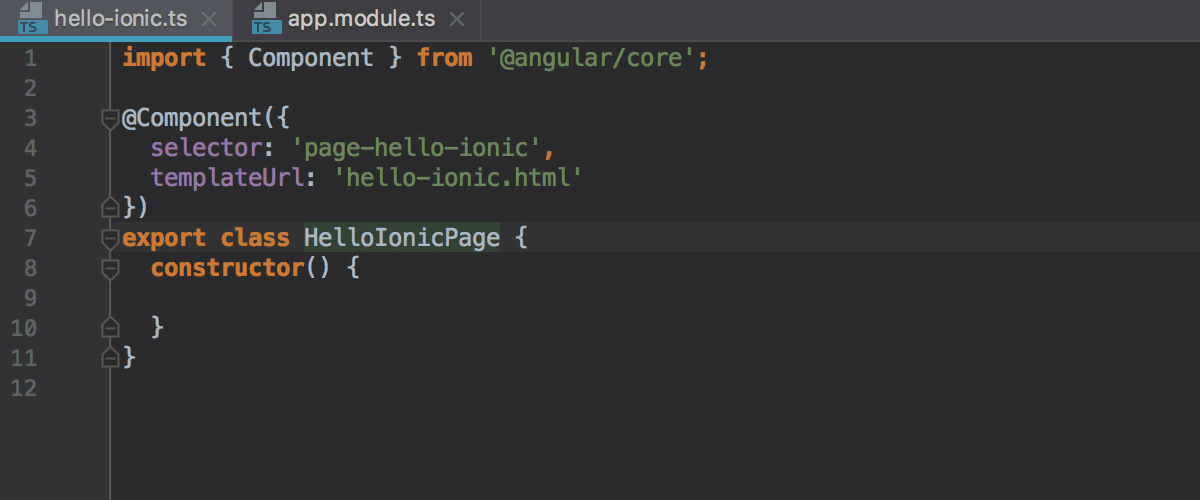
The application code is located in the src folder. Since Ionic uses Angular, the app structure will look familiar to Angular developers.
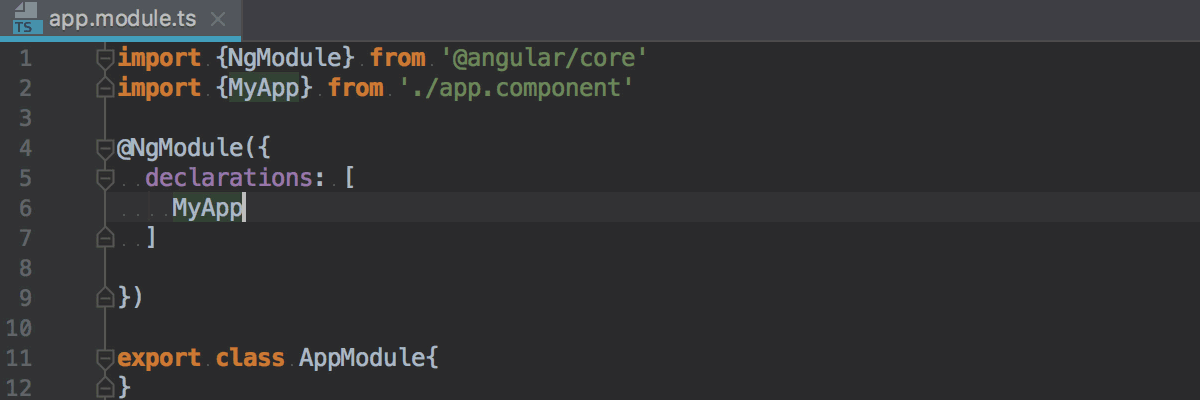
src/app/app.module.ts is the entry point of the app. The root component is app.component.ts. Every other component is located in a separate folder.
Navigating around the project
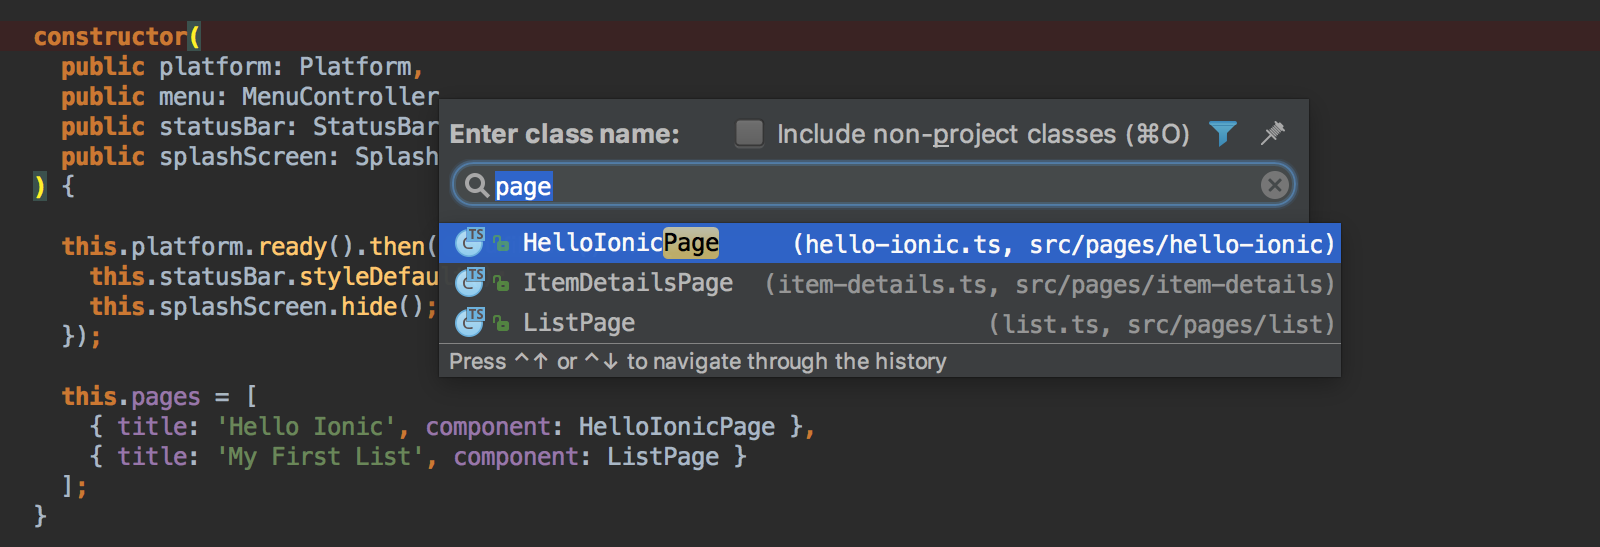
All our components are classes, which is why you can quickly navigate from one to another using the Go to class action (Cmd-O on macOS or Ctrl+N on Windows and Linux).
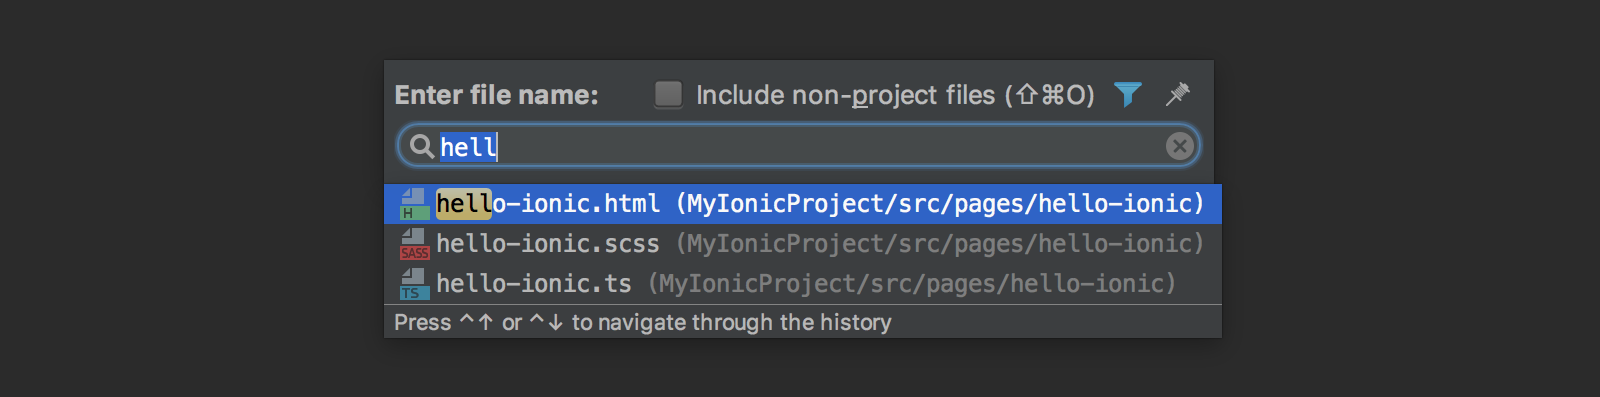
Using just the keyboard, there are two fast ways to go from a component’s *.ts file to *.html or *.css file in the same directory. One is to use Go to file (Shift-Cmd-O / Ctrl+Shift+N) and them start typing the component name.
Another is to use the Navigation bar: press Cmd-Up / Alt+Home to jump to the navigation bar, and from there find your way to the nearby files.

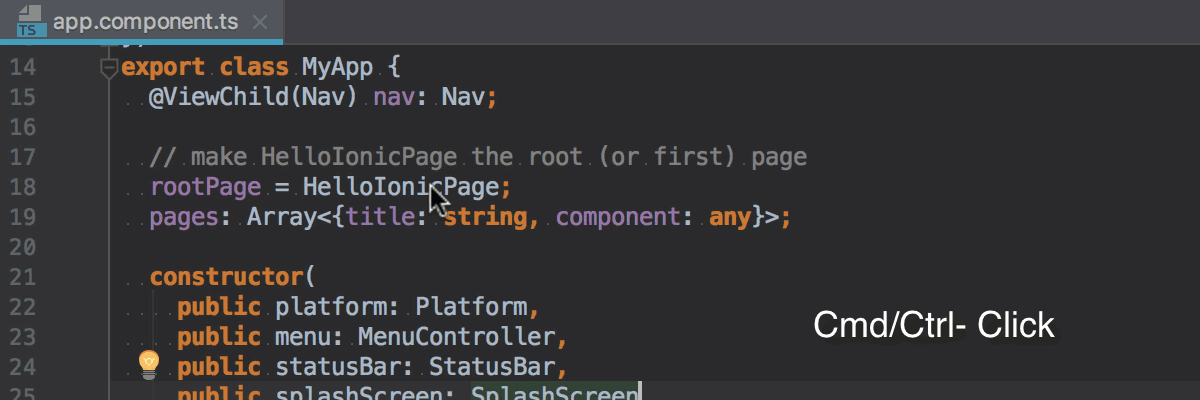
And surely you can always use Go to definition (Cmd-Click / Ctrl+Click) to jump from a component, class, method or symbol usage to their declaration.
Editing the code
As you start writing code, WebStorm will provide you with code completion suggestions.
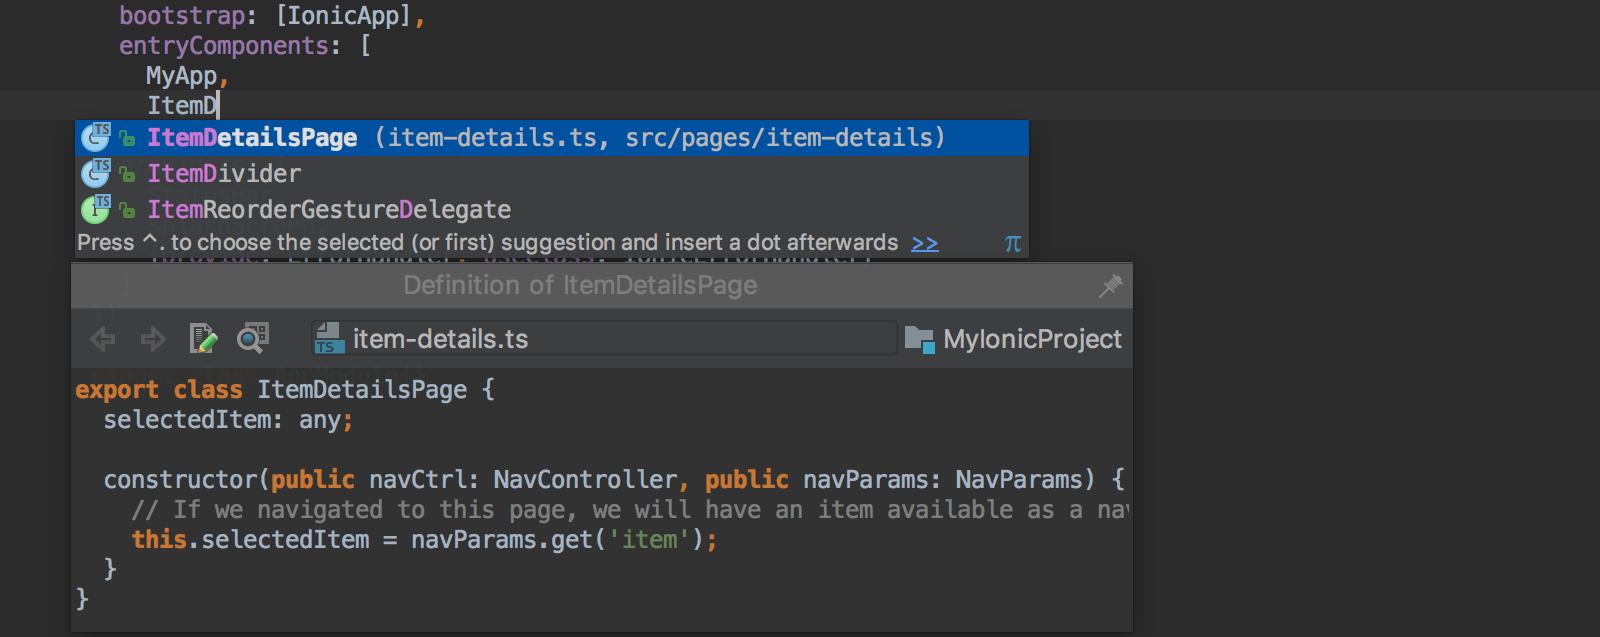
For example, you’ll get completion for various symbols from Ionic and Angular packages. After you select an item from the list of suggestions, the import for the symbol will be added automatically.
Similarly, you will get suggestions in the code completion popup and auto imports for all classes, methods, and symbols defined in your application.
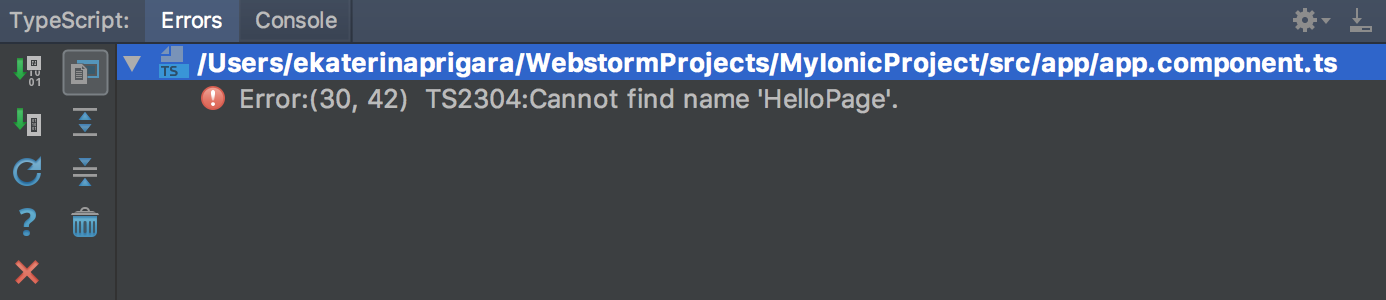
When using TypeScript, you can catch many errors before you actually compile the code. They will be highlighted in the editor and also listed in the TypeScript tool window in the IDE.
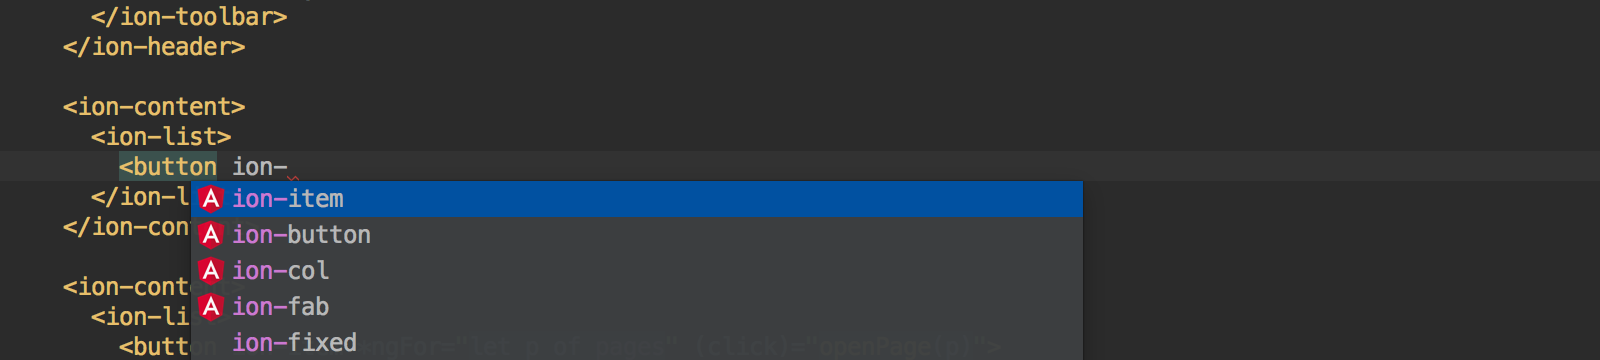
In template files, WebStorm will help you by suggesting the names of components defined both in Ionic and in your app.

And the attributes.
Refactoring
With the refactorings available for TypeScript and Angular in WebStorm, you can quickly make safe changes throughout your whole project. No more Find & Replace!
For example, you can use the Rename refactoring to update the component‘s class name, and all its usages in all project files will be updated automatically.
Or, if you rename the component’s selector, the tags for this component in .html files will also be changed.
To see the list of available refactorings for any selected code, use the Refactor This popup (Ctrl-T on macOs or Ctrl+Alt+Shift+T on Windows and Linux).
Previewing the app
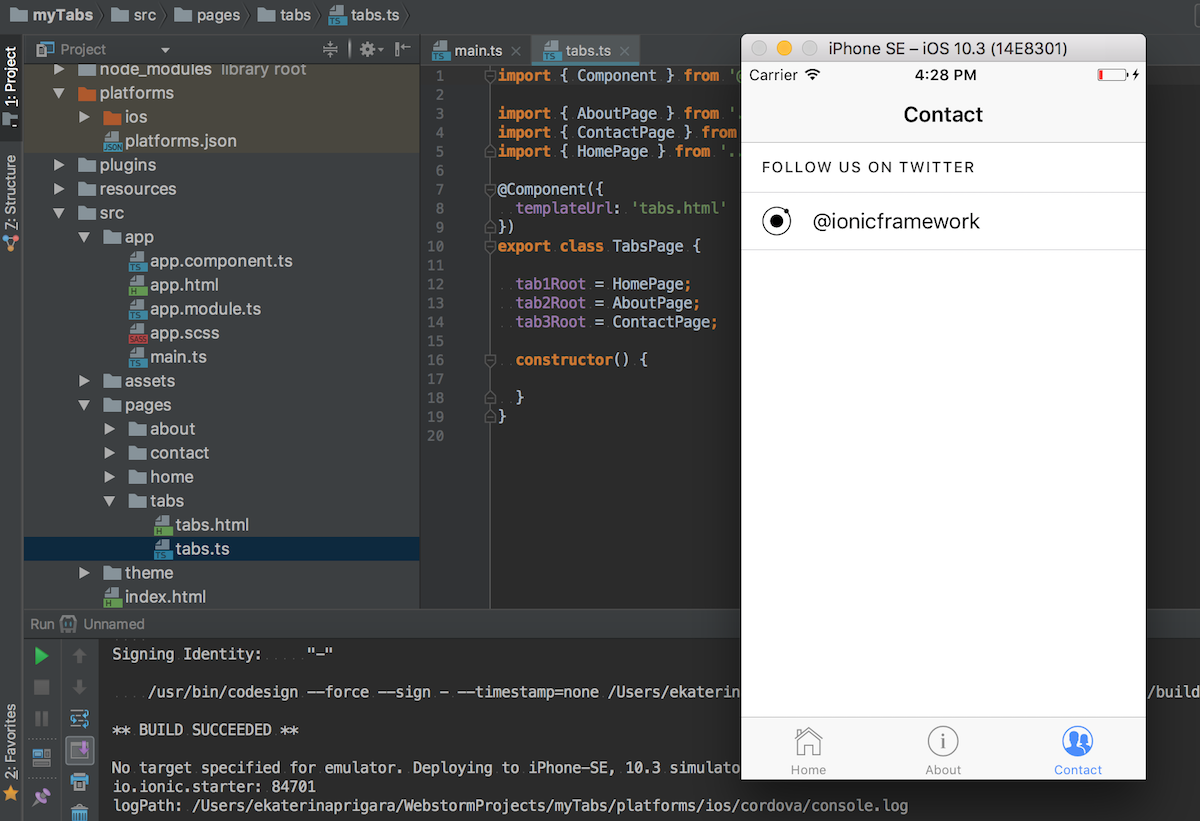
Ionic allows you to run the app in the phone emulator or on a real device connected to your computer. In WebStorm, you can automate this with a special PhoneGap/Cordova run configuration – then you won’t need to type the command in the Terminal every time you want to run the app in the emulator.
In the Run menu, select Edit configurations…, then click Add and select PhoneGap/Cordova.
Specify the path to the Ionic executable, the command you’d like to run (e.g. run or emulate), and the platform you’re targeting (iOS or Android). Additionally, you can specify the exact target (for example, the iPhone 6 emulator) and some extra arguments.
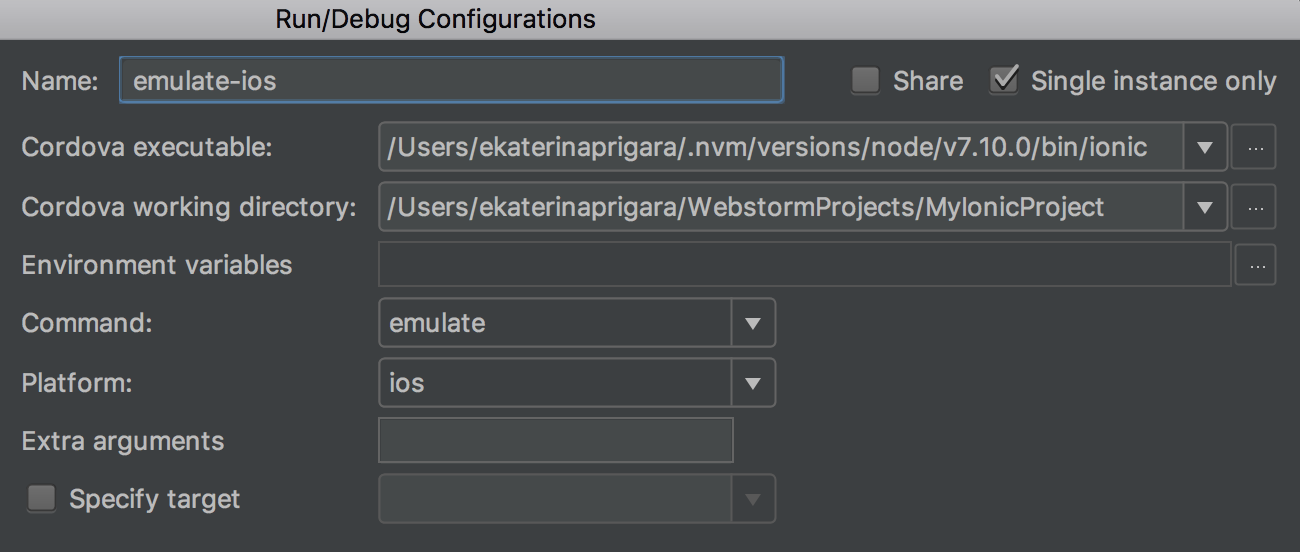
After you name and save the configuration, you can run it anytime from the IDE.
Please note that to do that, you have to additionally configure your dev environment for iOS or Android.
WebStorm Team