Datalore
Collaborative data science platform for teams
10 Tips for Working With Data in Datalore
Greetings from the Datalore team! In this blog post we’ll show you 10 tricks you can use to help you work more productively with data files in Datalore.

Before we start
In Datalore, files are persistently attached to notebooks. After you create a notebook and upload some data, you will have access to the data even after you restart the kernel or close and reopen Datalore.
Tip №1: Drag and drop files and folders
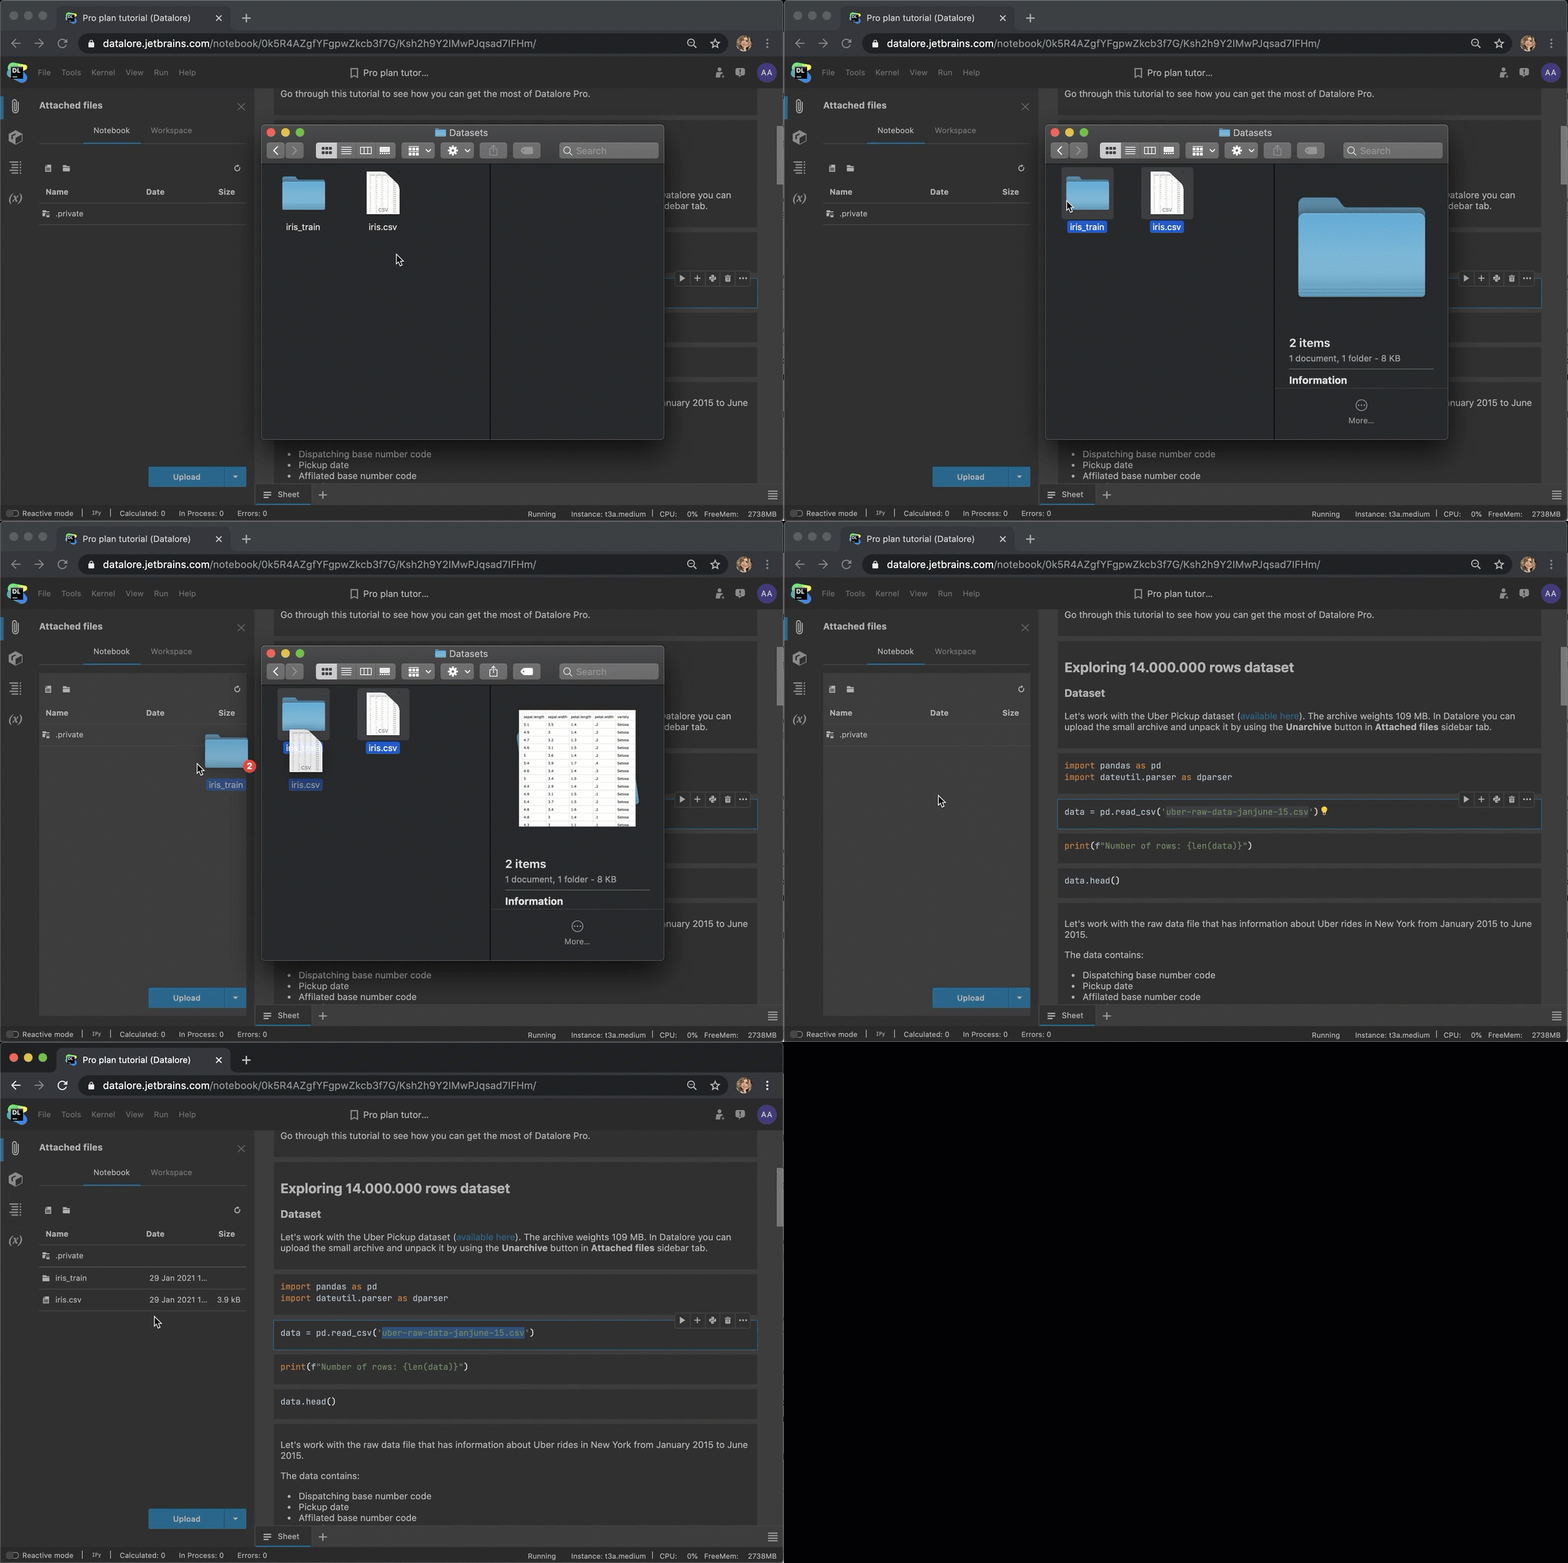
Quickly add new files and folders in Datalore by opening the Attached files sidebar tab and dragging and dropping your files and folders there.
Tip №2: Unzip files using the GUI
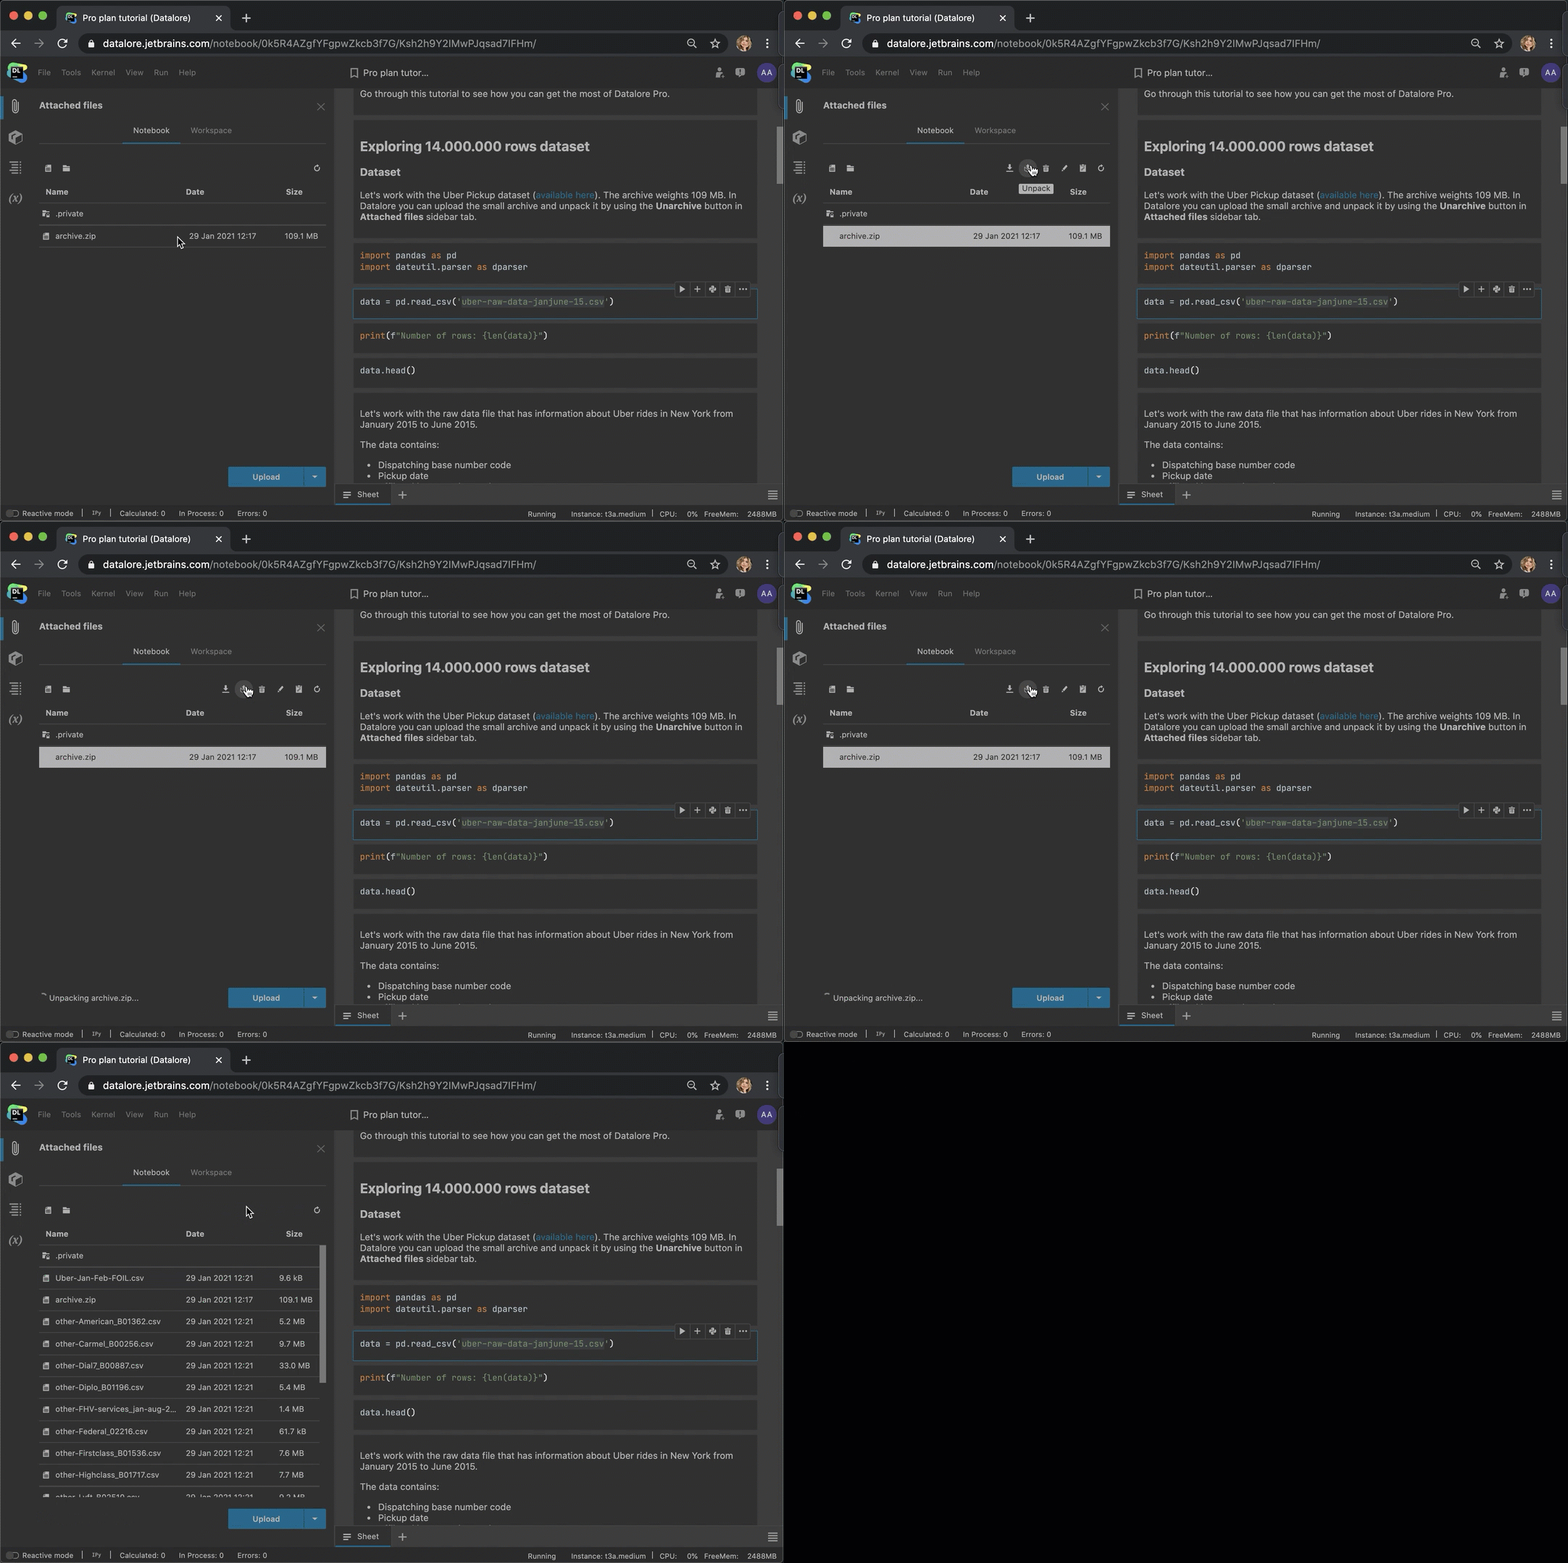
Uploading files and/or folders in compressed archives is faster because the file size is reduced. After uploading the archive, click the “Unpack” button and it will create a folder and extract the files. Datalore supports .zip, .tar and .tar.gz file extensions.
Tip №3: Sharing notebooks with attached data
When you share a notebook with collaborators, the datasets are shared automatically. You don’t need to give any extra access rights to your colleagues.
Tip №4: Moving and cloning notebooks
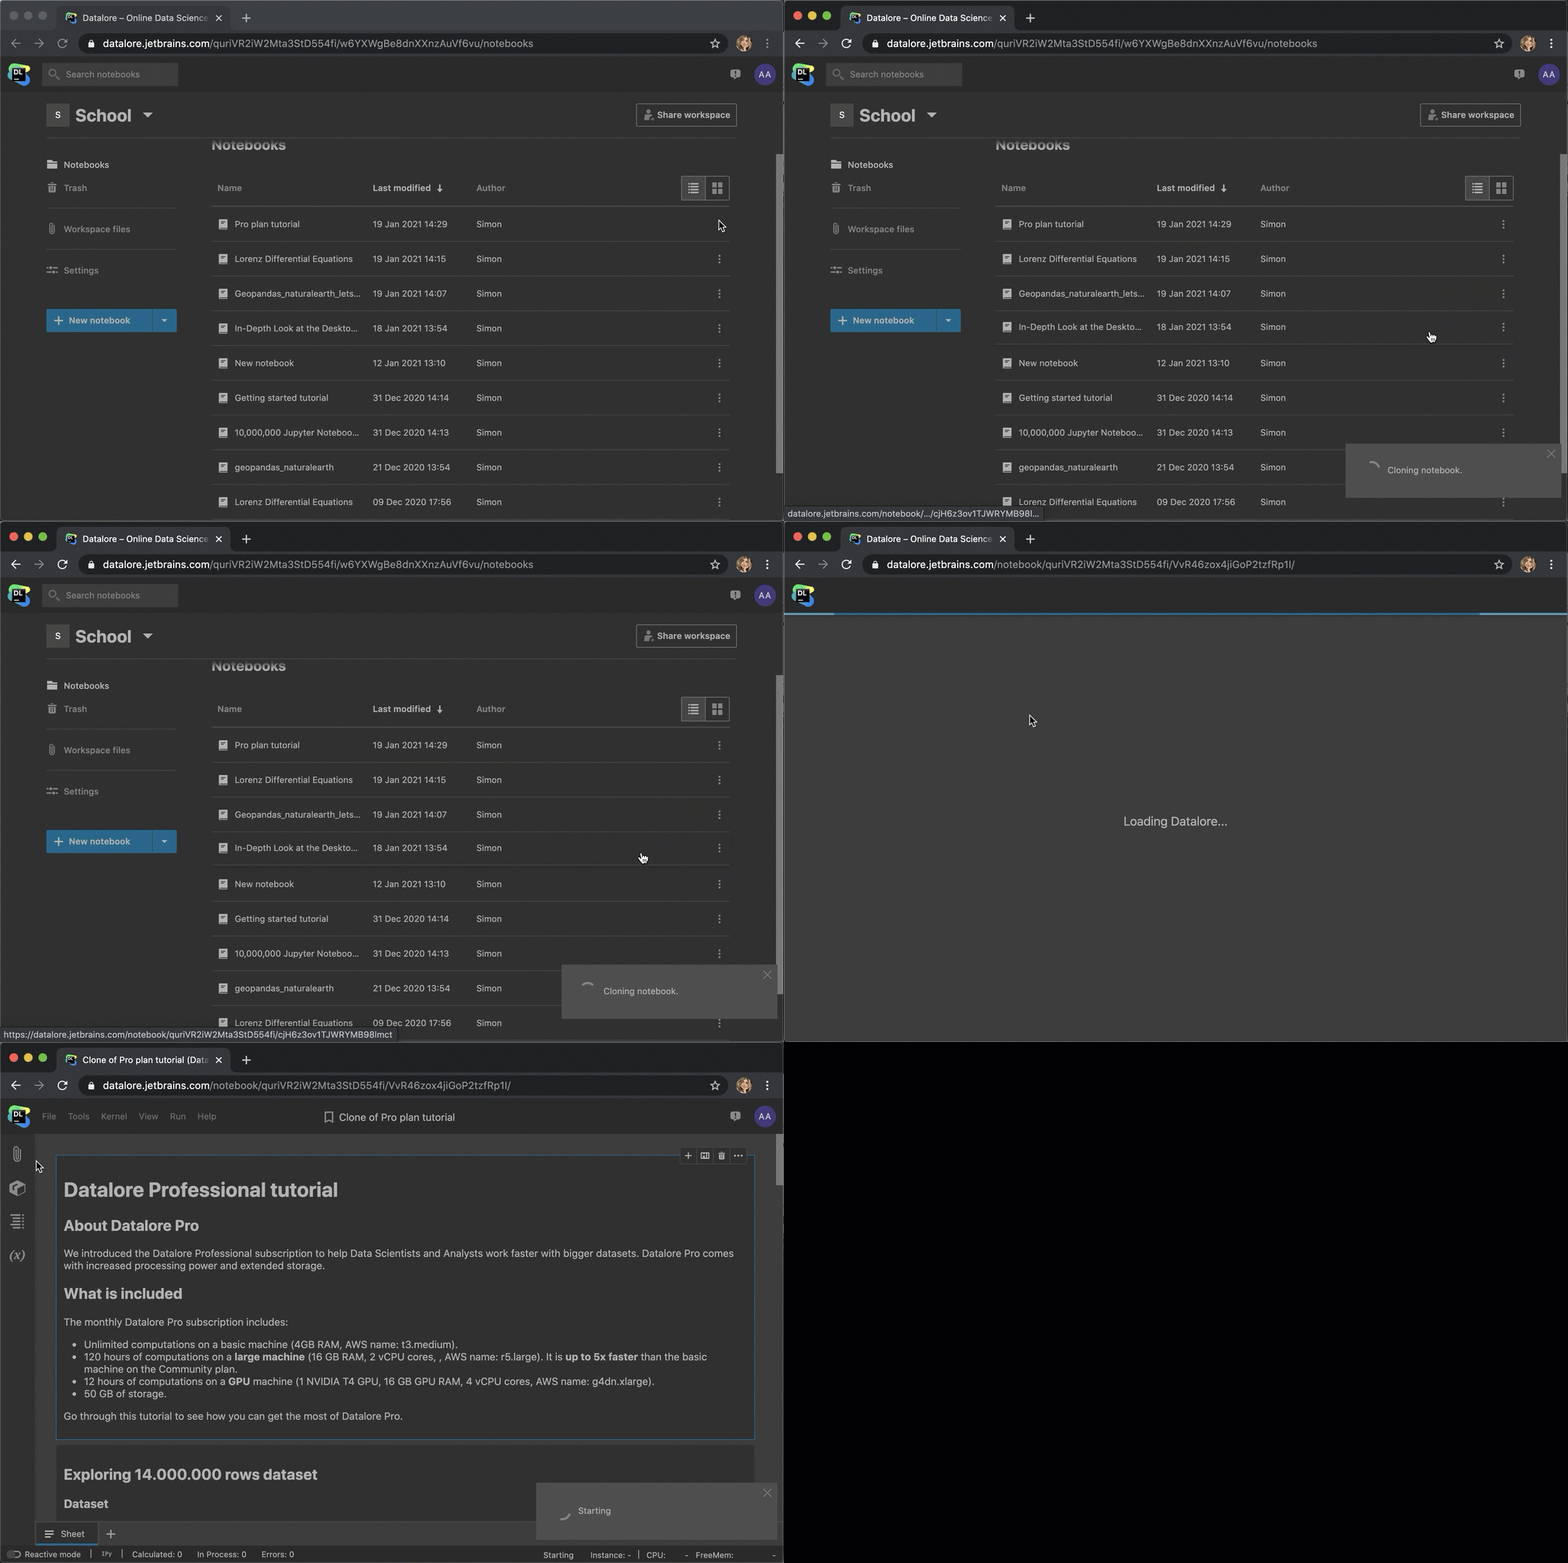
If you want to organize your work, you can move, copy, or clone notebooks to different folders and workspaces. The data is copied automatically, so you won’t need to re-upload anything. You can move, copy, and clone the notebook in the file system.
Tip №5: Workspace files
Workspace files help you work with the same data files across several different notebooks without having to upload the files multiple times.
To get started with your workspace, follow these steps:
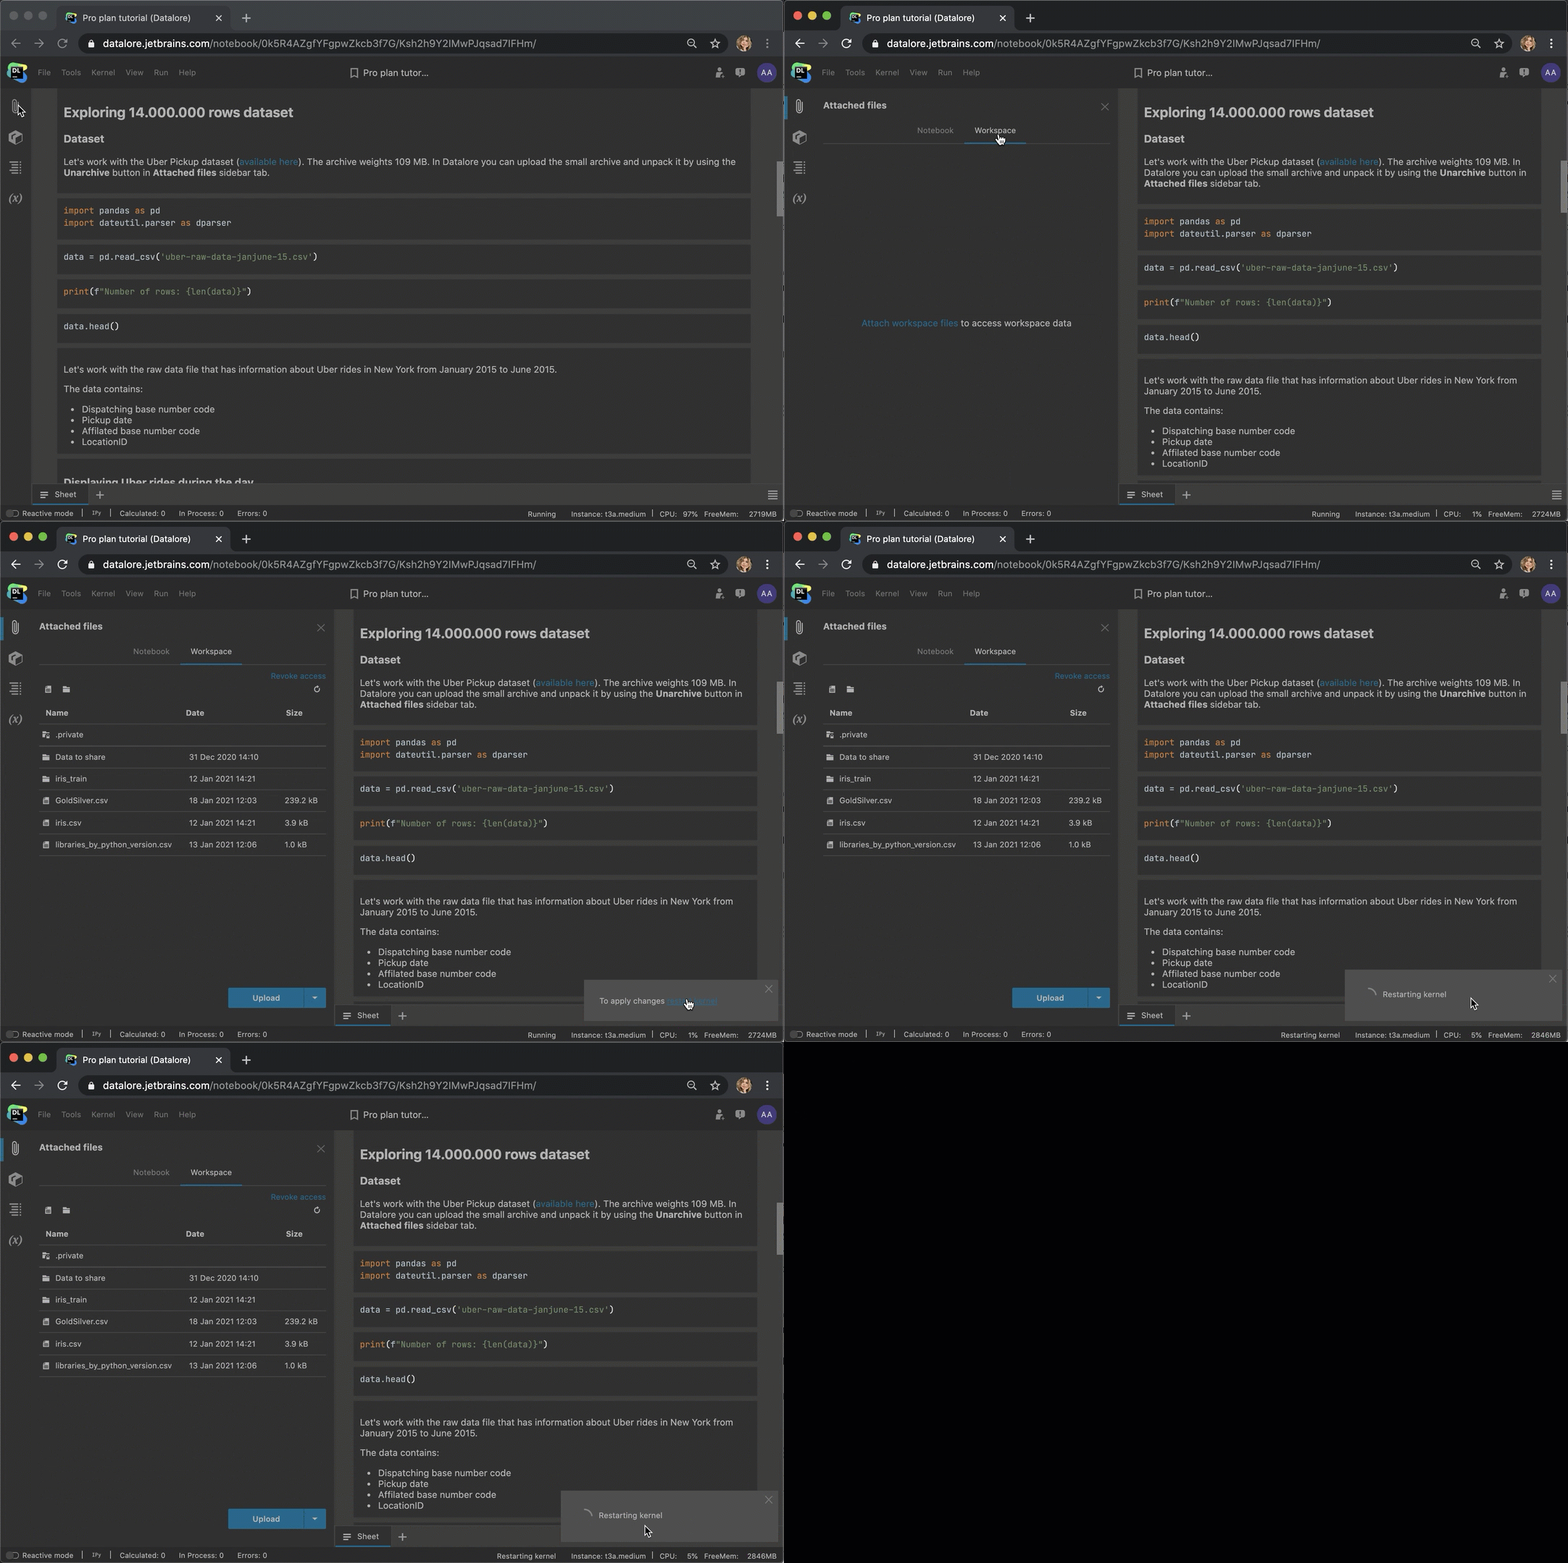
- Upload files to the whole workspace in the Workspace files tab in the File system.
- Go to the Workspace tab inside the Attached files sidebar menu and click Attach workspace files.
- Don’t forget to follow the prompt to restart the kernel.
- Access files in the notebook code from the
/data/workspace_files/directory or select the file you need and click Copy file path to clipboard.
Tip №6: Extending your cloud storage
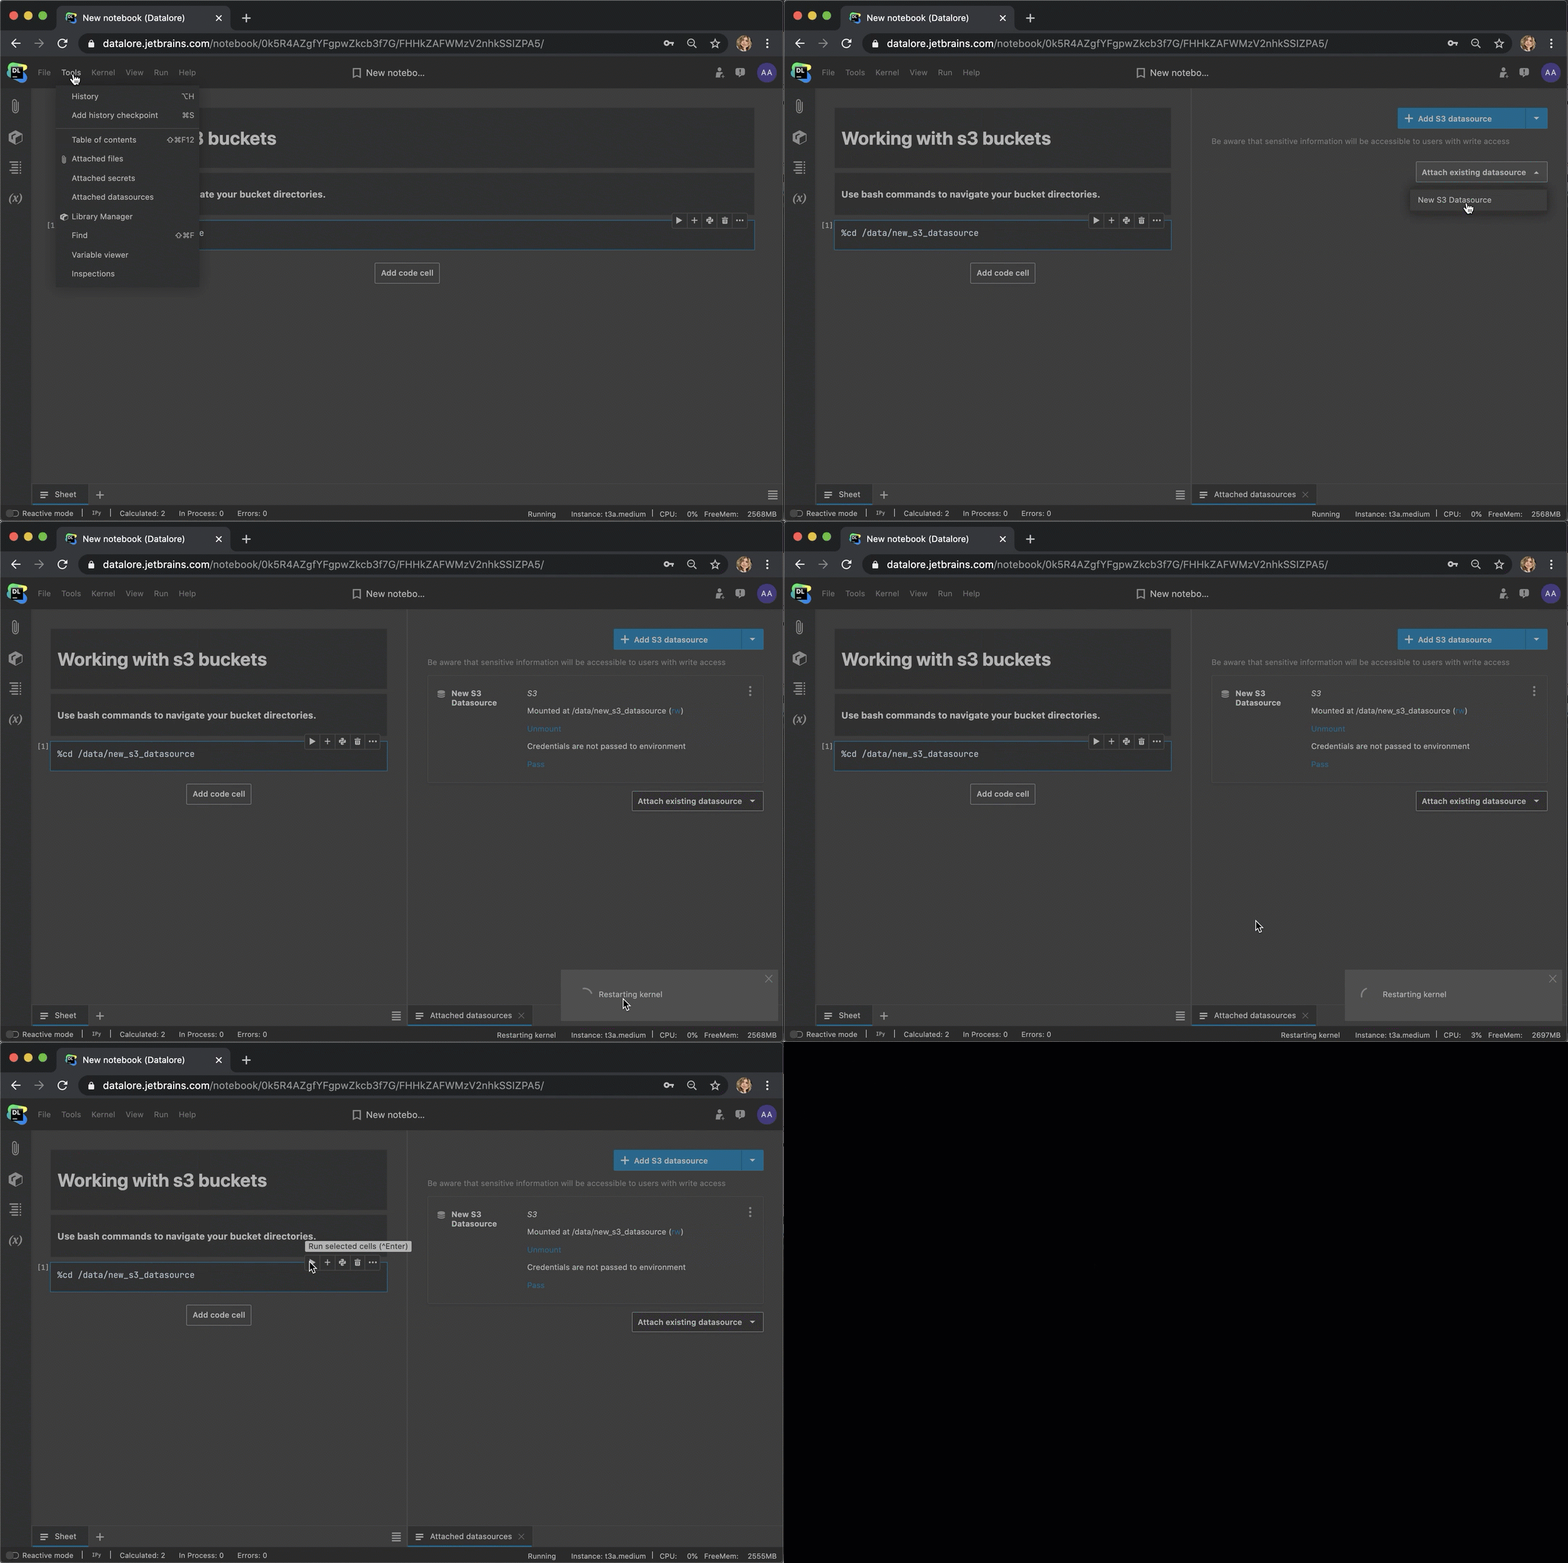
In Datalore you can mount S3 buckets to extend internal cloud storage. There’s a detailed guide about how to do it in this blog post.
Tip №7: Upload files by URL
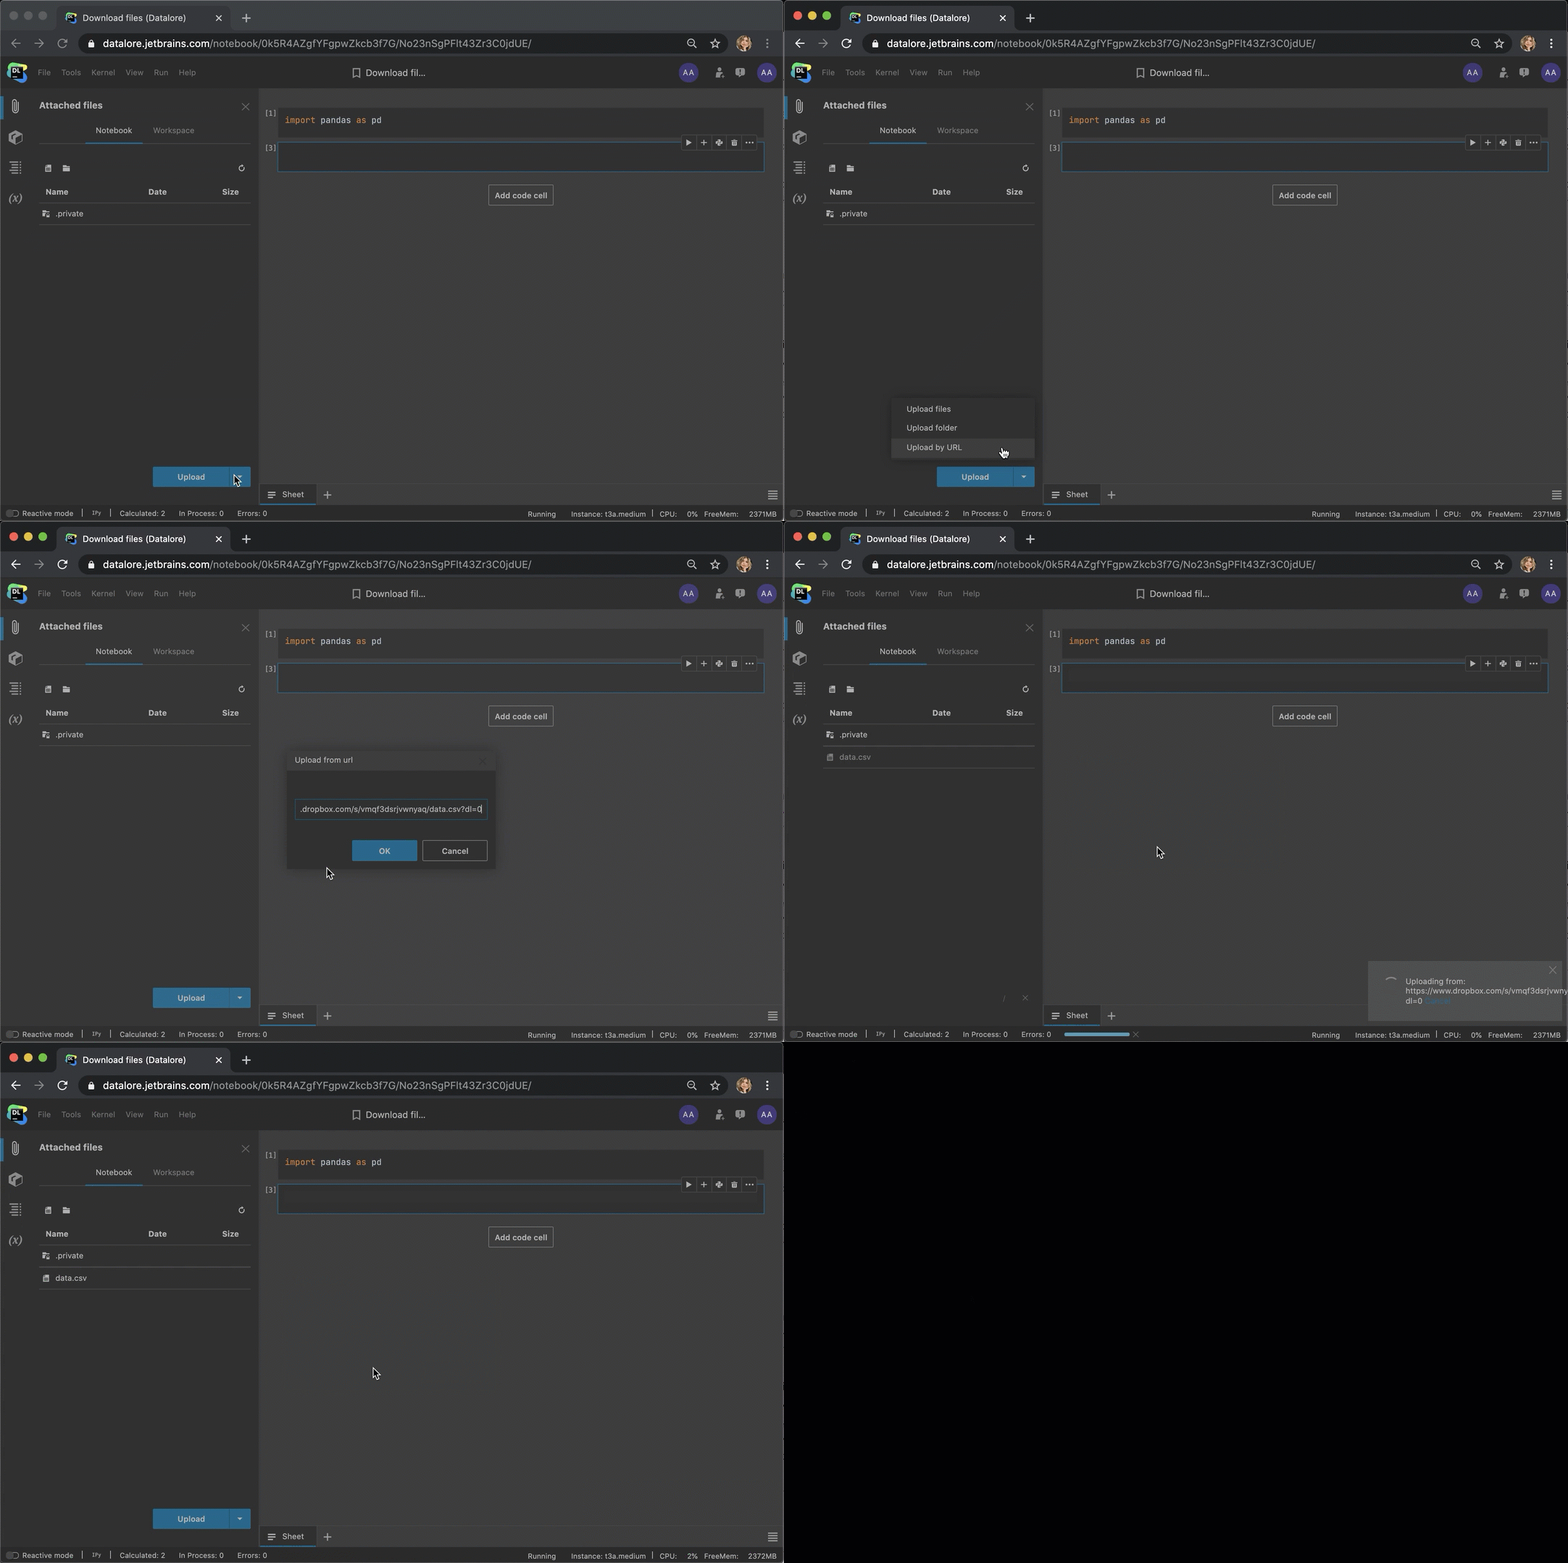
If you have a direct link to a file hosted publicly on the internet, you can upload it to a notebook using its URL. Make sure you use the direct link to the data file and not to an .html page. Open Attached files and сlick the dropdown on the “Upload” button and choose the “Upload by link” option.
Tip №8: Create files inside Datalore
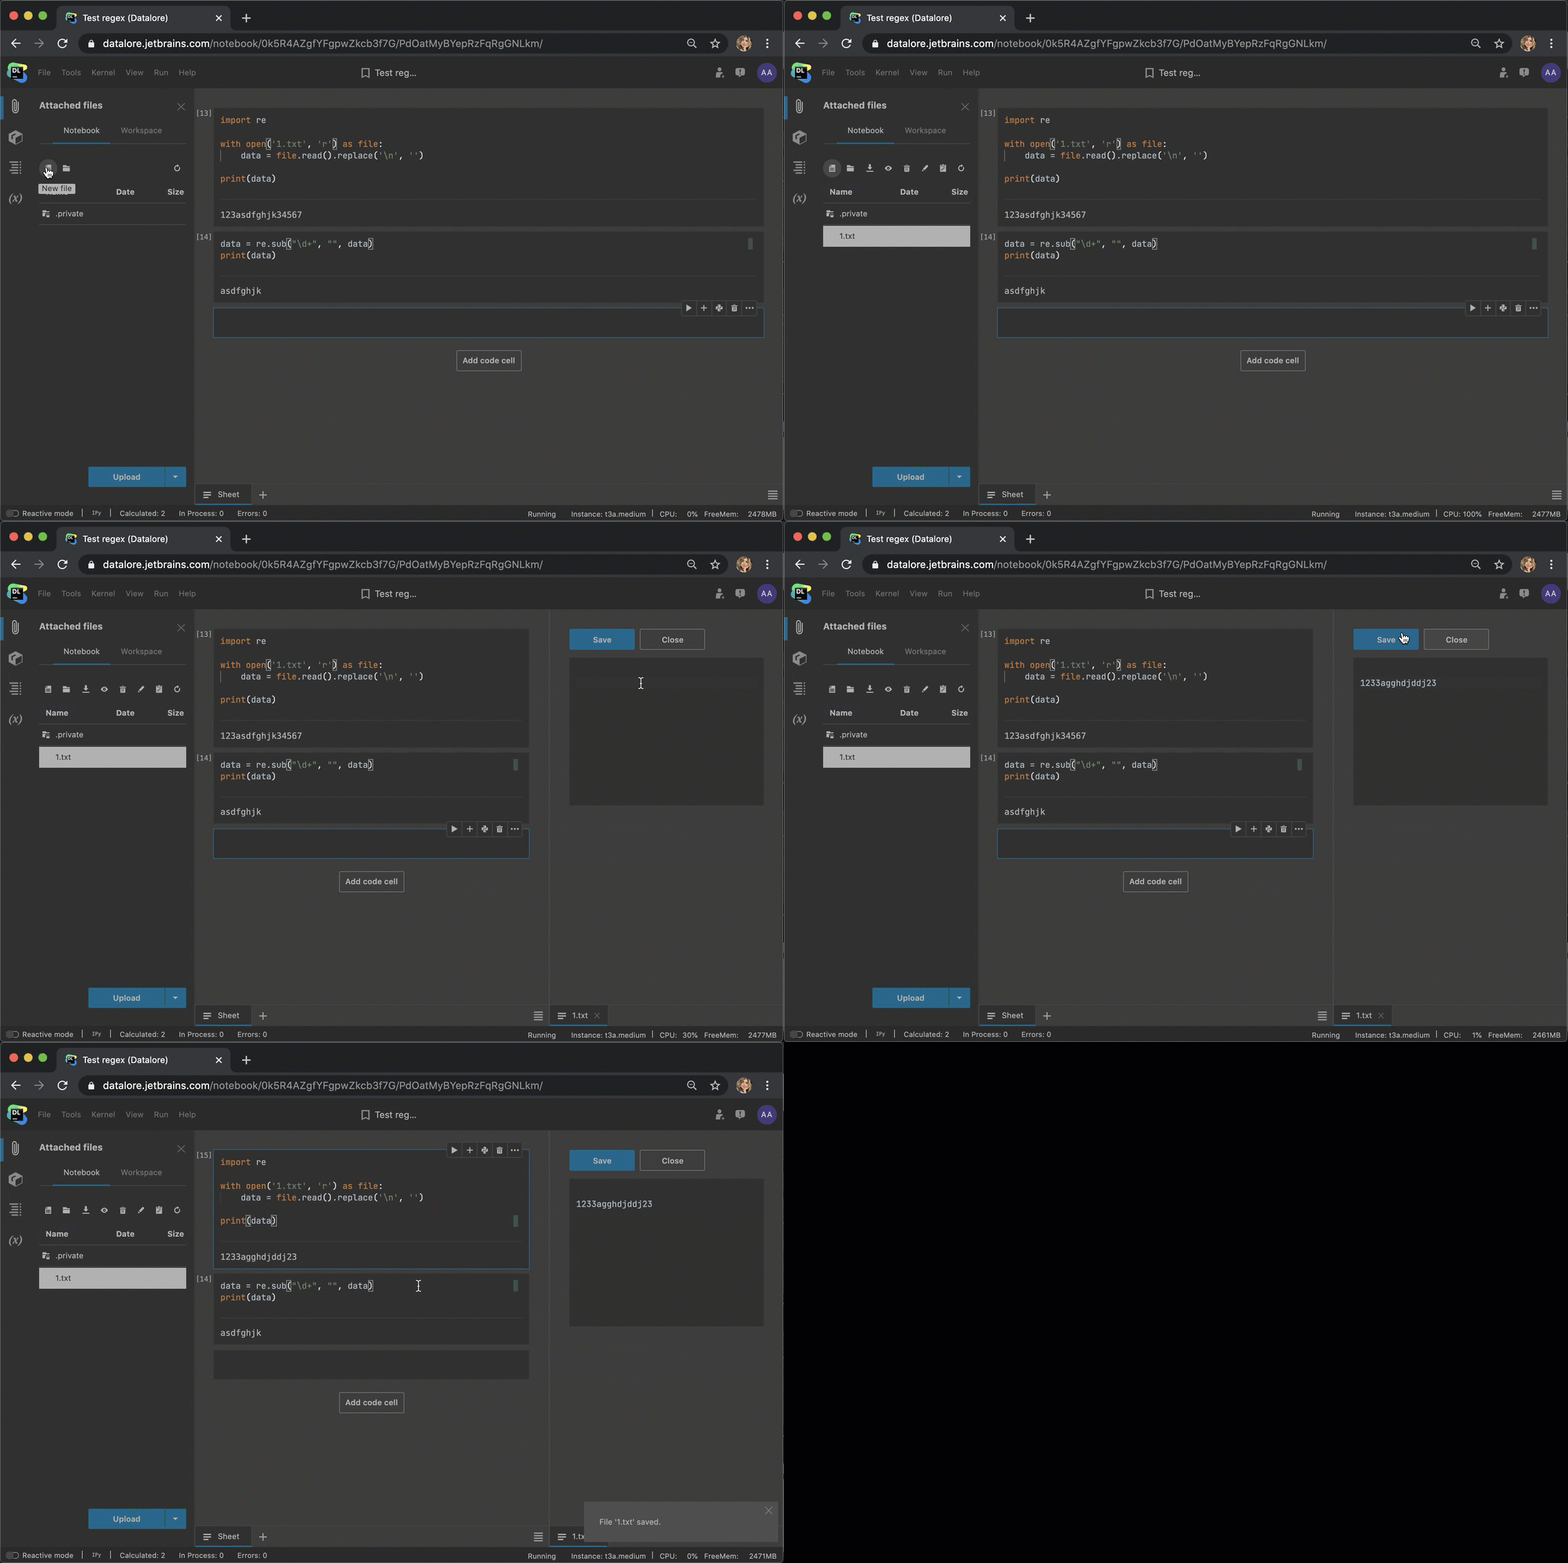
In Datalore you can create files by clicking “New file” in the upper left corner of the Attached files sidebar. This lets you quickly create files and paste content into them.
Tip №9: Preview and edit files inside Datalore
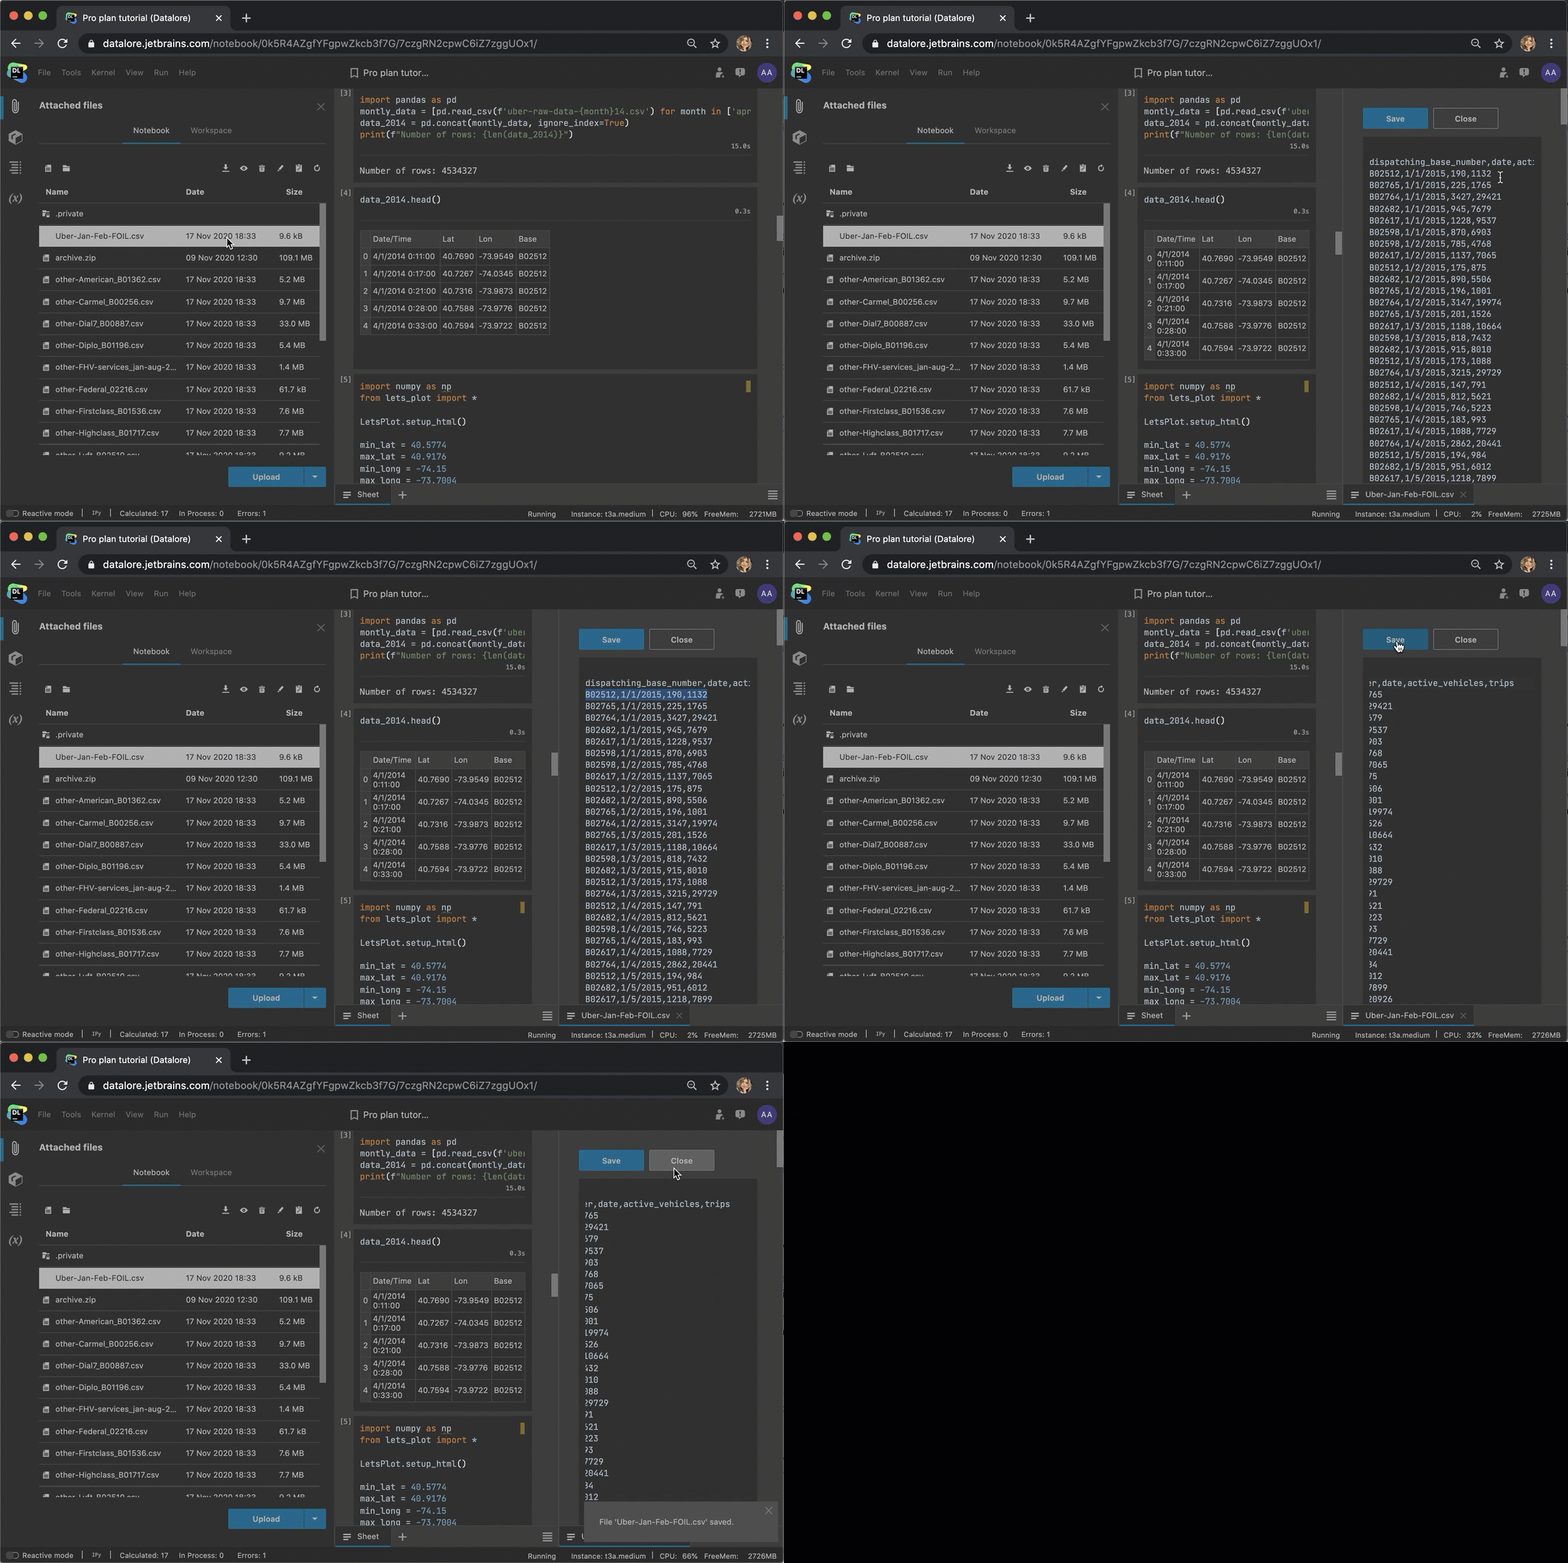
You can preview and edit small text files (less than 100 KB) right inside the editor. Double click the file and the contents will open in a separate editor tab.
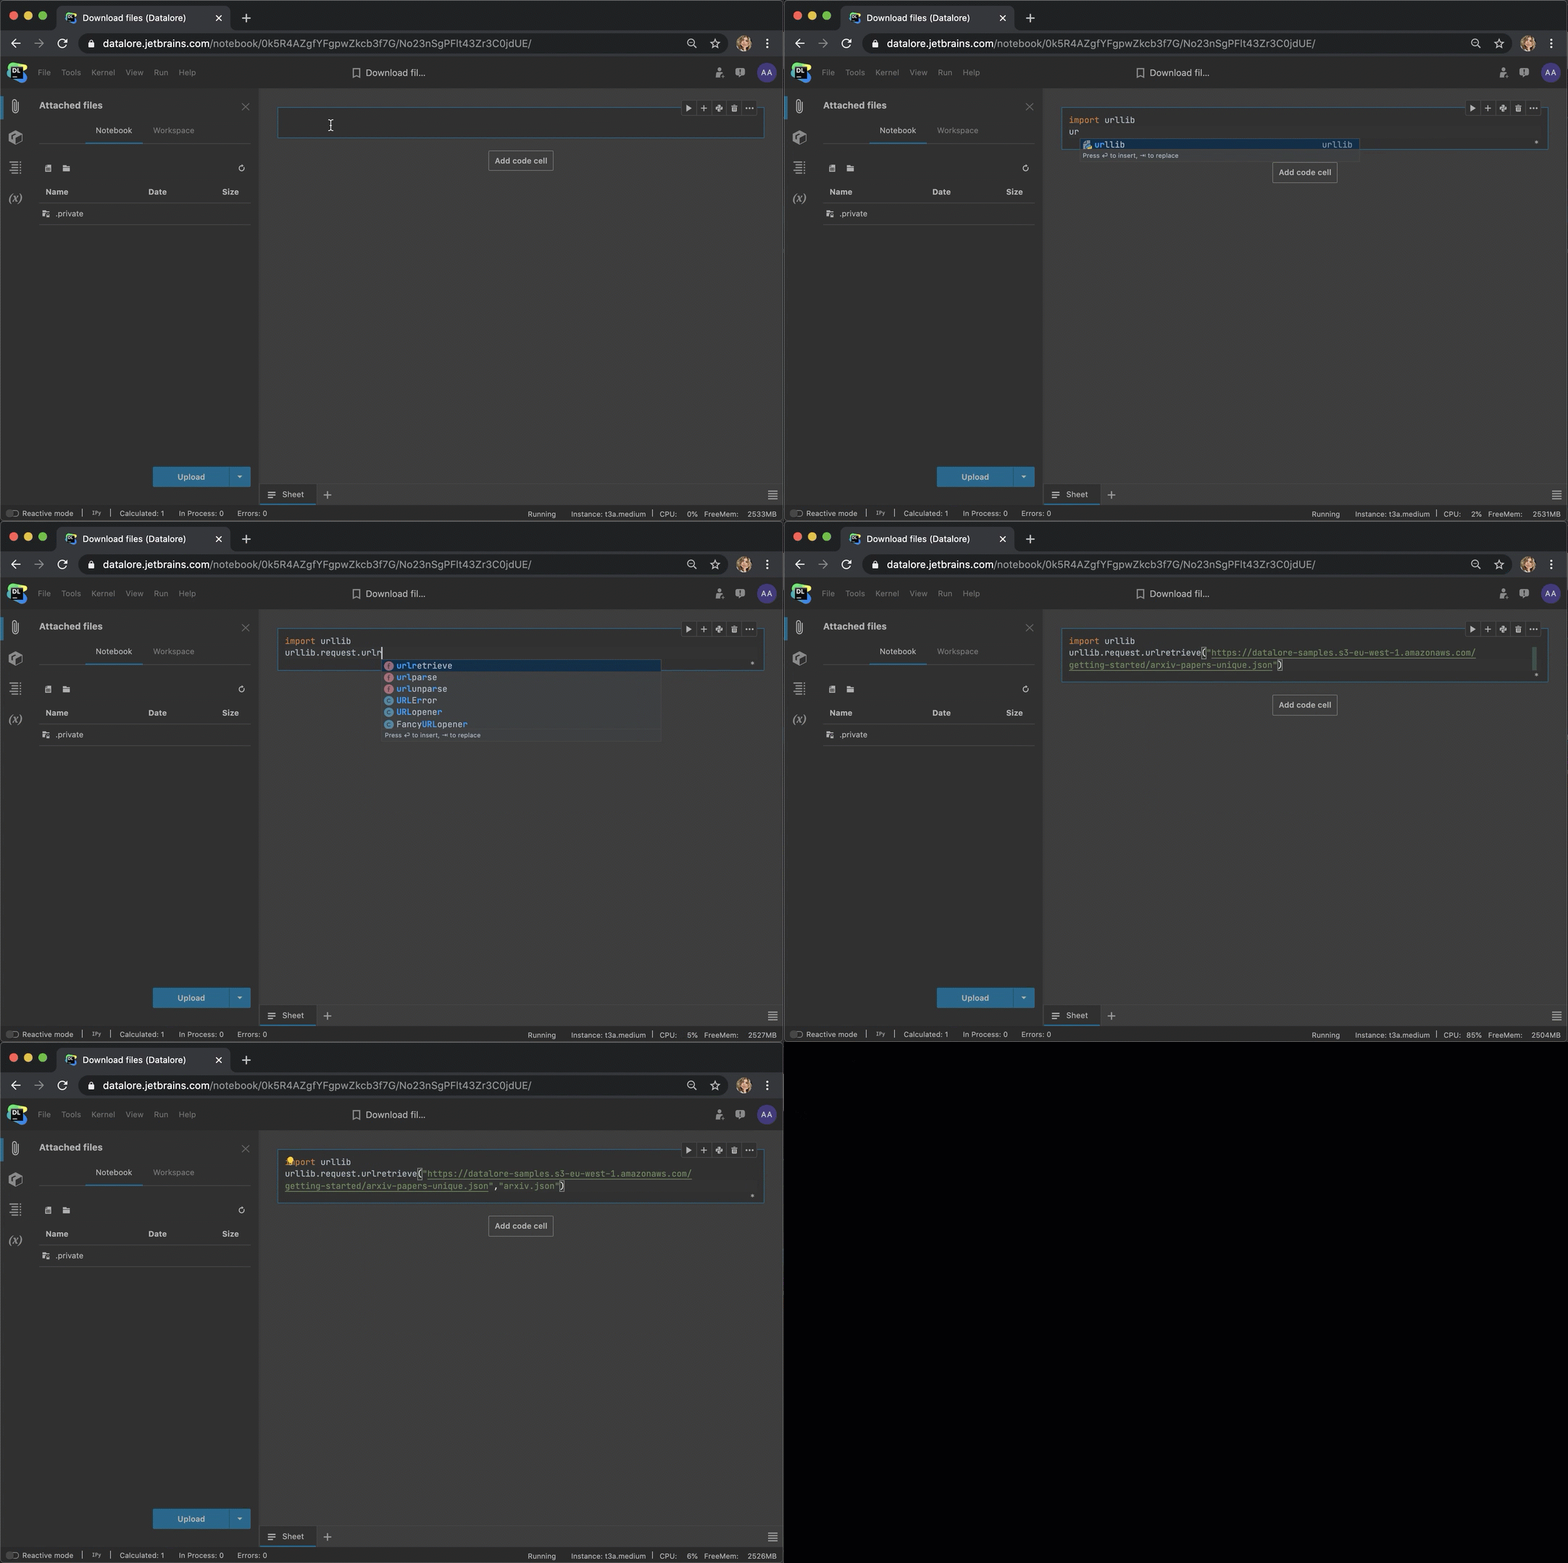
Tip №10: Download files using the urllib library
You can easily download files from a specified URL. The urllib library is already pre-installed in Datalore so you can import it and execute code like this:
When you want to publish a notebook and allow others to edit a copy of it, we recommend that you download the dataset inside the code. This will help others to reproduce your calculations in their own notebook copies.
We hope these tips for working with data were helpful and gave you some ideas to speed up your current workflow. Let us know in the comments if you have any other tips for working with data in Datalore!
Kind regards,
The Datalore team
Subscribe to Datalore News and Updates


