

Datalore
Collaborative data science platform for teams
How to Run SQL from Jupyter Notebook – Two Easy Ways
Why you need to combine SQL and Python inside Jupyter notebooks
SQL is extremely good for data retrieval and calculating basic statistics, whereas Python comes into its own when you need in-depth, flexible exploratory data analysis or data science. What if you could use both programming languages inside of one tool?

In this post you will learn two easy ways to use Python and SQL from the Jupyter notebooks interface and create SQL queries with a few lines of code. These two methods are almost database-agnostic, so you can use them for any SQL database of your choice: MySQL, Postgres, Snowflake, MariaDB, Azure, etc.
Method 1: Using Pandas Read SQL Query
Step 1: Install a Python package to connect to your database
We suggest installing the following packages:
- PostgreSQL database:
! pip install psycopg2-binary. Make sure to install psycopg2-binary, because it will also take care of the dependencies required.
- Snowflake database:
! pip install snowflake-connector-python. - MySQL database:
! pip install mysql-connector-python.
To install packages in Datalore you can also use the Environment manager, which will make the packages persistent when you reopen the notebook later.
Datalore is a collaborative data science notebook in the cloud, tailored for data science and machine learning. You can start with a free Community plan and upgrade as you go!
Step 2: Create a database connection in Jupyter
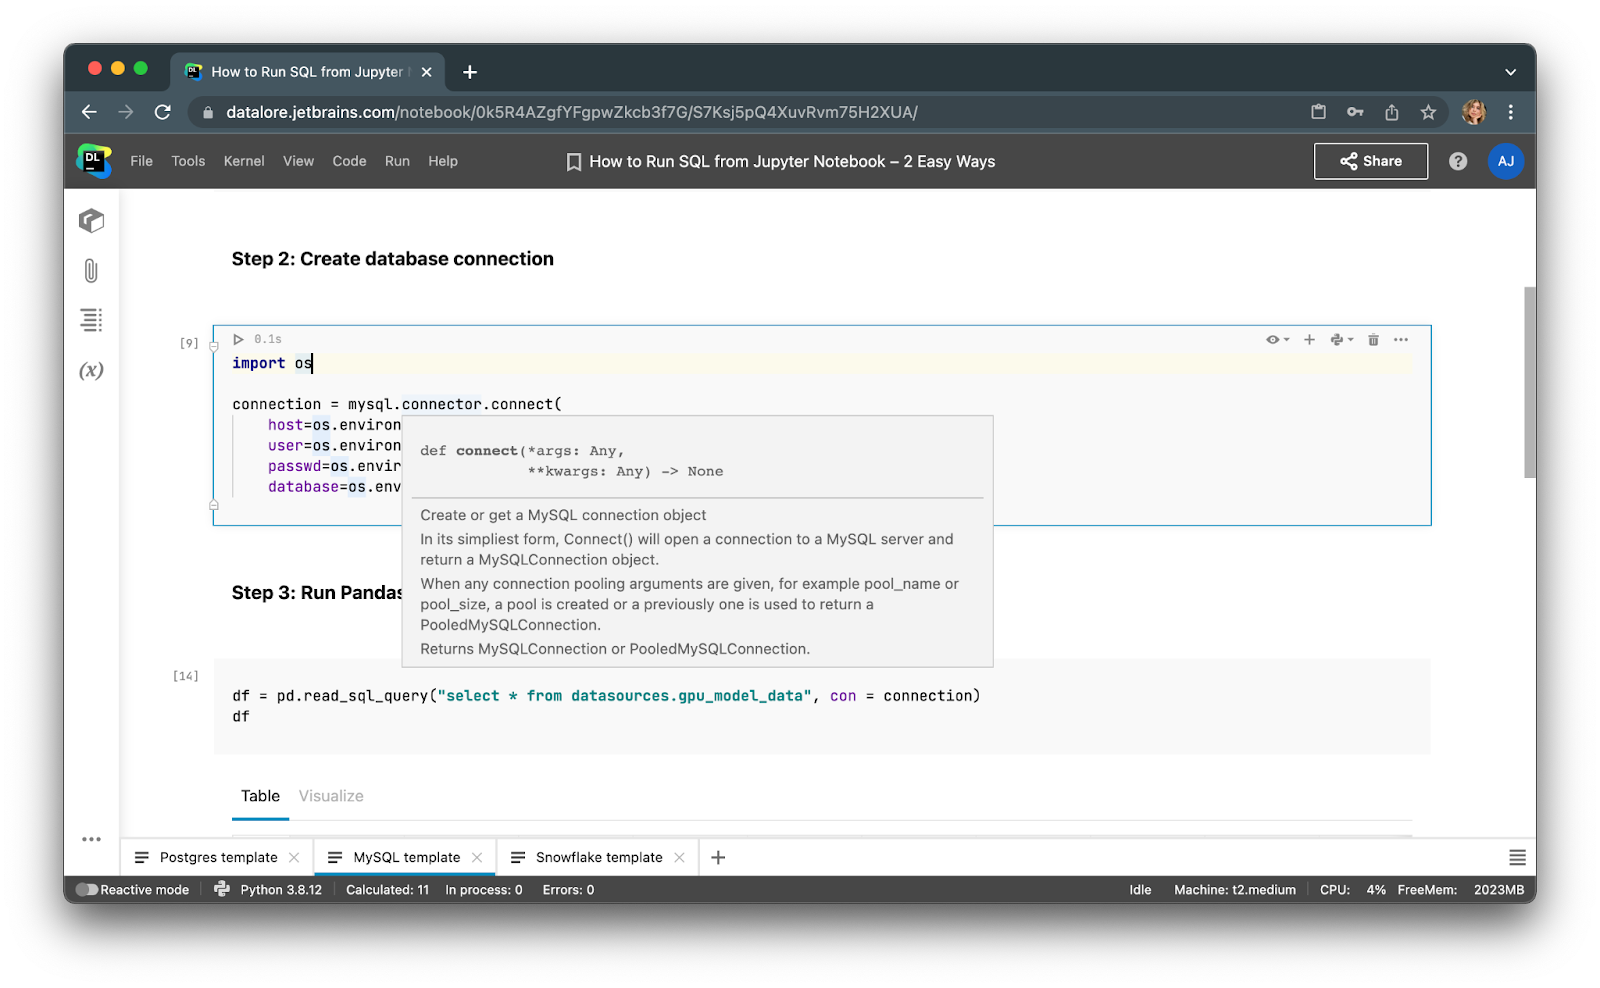
Run the sample code below to connect to the MySQL database. You can find sample code for connecting to PostgreSQL and Snowflake databases in this tutorial.
import os
import psycopg2 as ps
import pandas as pd

conn = ps.connect(
    host=os.environ["db_host"],
    port=os.environ["db_port"],
    dbname=os.environ["db_name"],
    user=os.environ["db_user"],
    password=os.environ["db_password"])
Tip: To store the credentials, we are using environment variables, called Secrets in Datalore. This helps prevent unintentional leaks of your credentials when you share your Jupyter notebooks or your screen with someone.
If you can’t connect to your company’s databases from cloud tools, consider installing Datalore in a private cloud or on-premises.
Step 3: Run SQL queries using pandas
After you create a database connection you can execute your SQL select queries right away!
See the code sample below:
df = pd.read_sql_query("select * from <table>", con=conn)
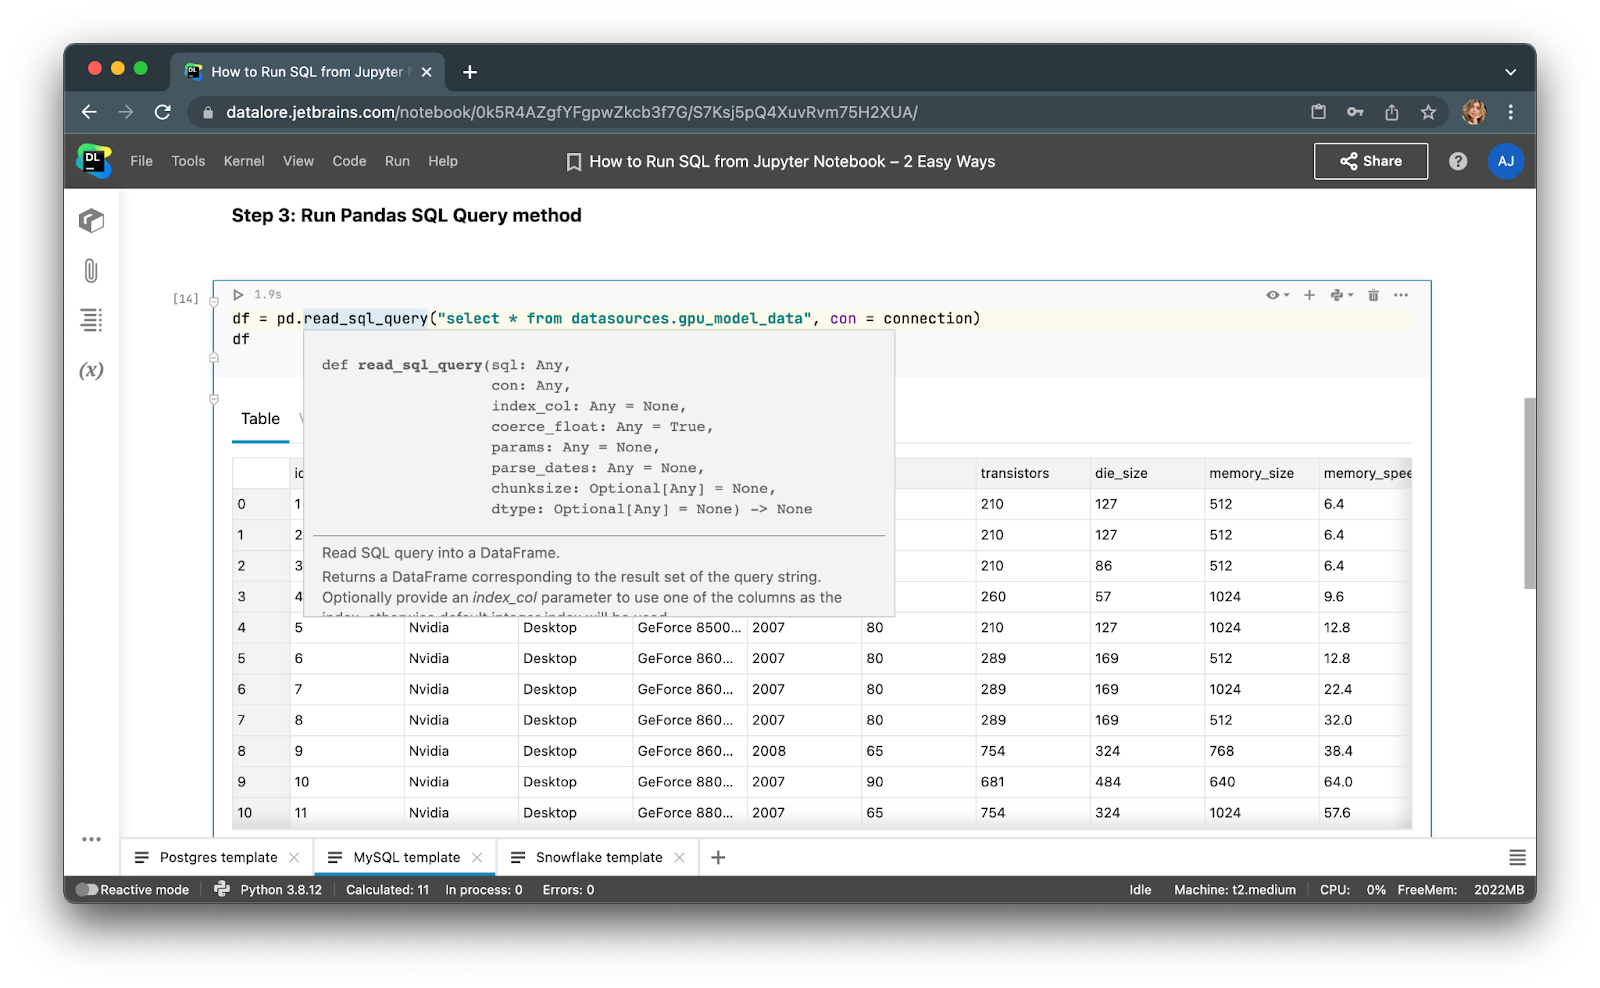
Voila! Just run the code cells and you will get the results saved to a pandas dataframe that you can continue working on with Python.
Method 2: Using SQL cells in Datalore notebooks
Recently we integrated native SQL cells and database connections inside Python notebooks in Datalore.
Instead of writing boilerplate Python code to connect to a database, you can now create a connection once from the UI and then reuse it in multiple notebooks. After creating a connection, you’ll be able to browse the database schema, which can be extremely helpful for writing SQL queries.

When typing SQL code, you will get smart code completion for SQL syntaxes and table/column names.
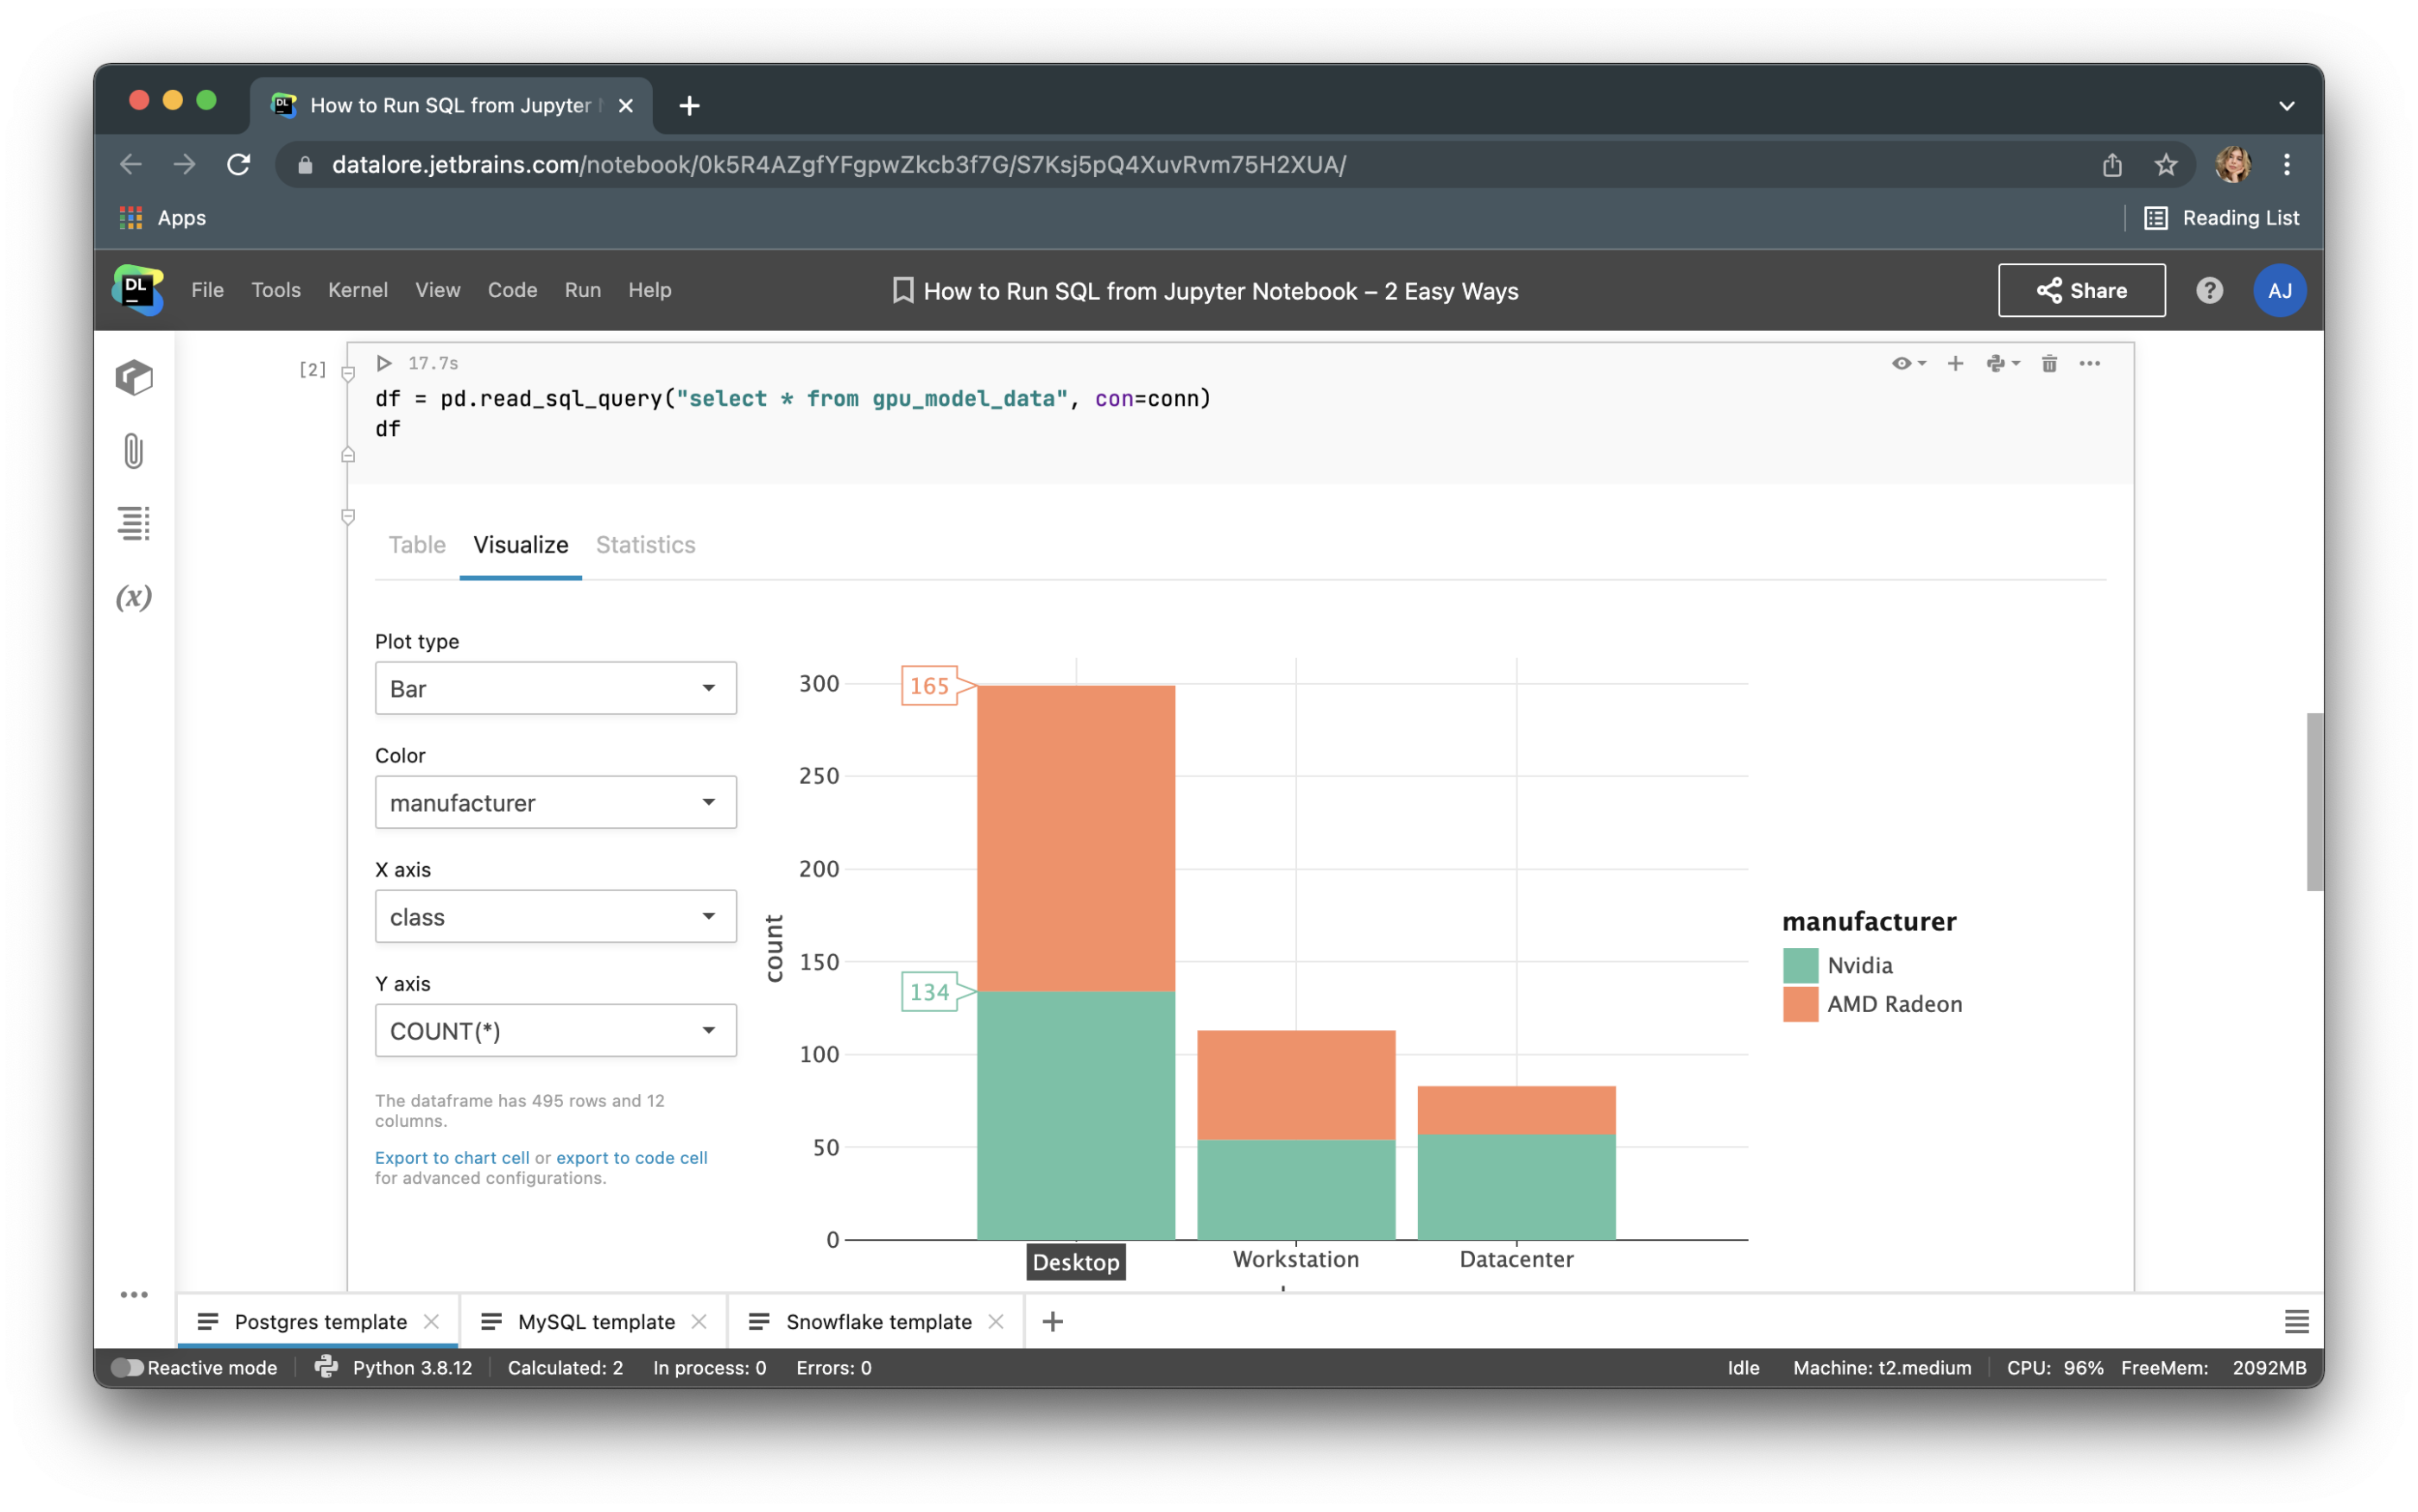
After executing the code cell, the result will be automatically saved to a pandas dataframe and you can seamlessly continue working on it with Python.
Have we mentioned that you can collaborate on SQL code in real time in Datalore?
When you are done you can publish results as a report and share your data story via link with the whole world.
That’s all for now! We hope your life as a data scientist becomes slightly easier with these simple methods to use SQL inside Jupyter notebooks. To get more tips on using Jupyter notebooks, make sure to subscribe to our blog updates and follow us on Twitter!
Happy data-sciencing!
The Datalore team
Links:


