.NET Tools
Essential productivity kit for .NET and game developers
Code Navigation: ReSharper 8 vs. Visual Studio 2013
It’s no secret that on large projects, developers spend a lot of time simply navigating through their code. The bigger the project, the more time you need to find a certain class/object/file/anything. That’s why fast and easy code navigation is an essential feature of any IDE as it directly affects developer’s productivity.
Visual Studio and ReSharper both offer tools that help you not get lost in your code: the Navigate to feature in Visual Studio and the Go to set of tools in ReSharper.
In this post, we’ll try to compare these navigation features of Visual Studio 2013 and ReSharper 8.x. This can be especially interesting as both products contain a number of improvements compared to their previous versions.
Navigation Within a Solution
With Visual Studio 2013
Visual Studio’s Navigate to feature allows you to find and navigate to a specific element in your solution. Once you press the Ctrl+, combination and start typing your query*, Visual Studio will display all found elements matching your query, regardless of their type and location. To navigate to a certain element, either select it with cursor keys and press Enter or double click the element.
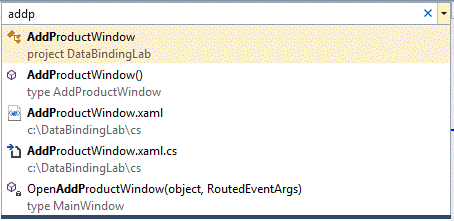
In the example above, Visual Studio shows all elements that have an occurrence of ‘addp’: two files, one class and its constructor, and one method.
Note that the search scope of Navigate to is always the entire solution. Such an approach works well in small-to-medium projects, but what if you work on a much bigger one? In this case, the list of discovered elements would be much longer and you would have to refine your search.
*In Visual Studio 2013, the modal Navigate to dialog is replaced with a new non-modal window with search-as-you-type support.
With ReSharper 8
Comparing to Visual Studio, ReSharper’s set of Go to tools is much more flexible. In addition to searching for all occurrences through the entire solution, it allows you to narrow down your search by specifying the kind of element you’re looking for: a certain type, file, or any symbol in a file.
Go to Everything
To make ReSharper show all elements regardless of their type, press Ctrl+T and start typing your query. To navigate to a certain element, either select it with cursor keys and press Enter or click the element:

As you can see, search results in ReSharper slightly differ from the ones in Visual Studio. There is no AddProductWindow() class constructor (it is hidden for conciseness) and there is one more element – the OpenAddProduct button, which appears here thanks to ReSharper’s wider search scope (see the Search Scope section).
Go to Type
Press Ctrl+T (twice) and navigate to any type (class, interface, and so on) within your solution:

As you can see, ReSharper narrows results by displaying the AddProductWindow class only.
Go to File
Press Ctrl+Shift+T to navigate to any file within your solution:

Go to Symbol
Go to Symbol (Shift+Alt+T) is the most far-reaching of the Go to set of commands. This powerful feature searches by name, solution-wide, for any file member:

Navigation Within a File
With Visual Studio 2013
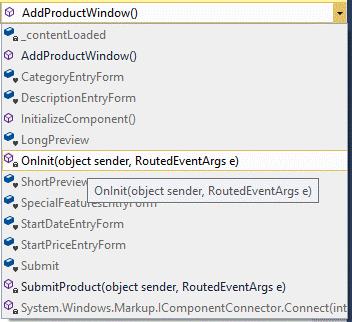
The Navigate to feature of Visual Studio doesn’t support navigation between members of a file. Instead, you can use the list of members in the upper left corner of the main window. Unfortunately, there are no keyboard shortcuts for quick access to the list.
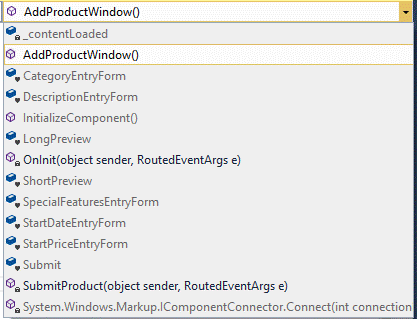
Note that members from related files are also shown (they are greyed out).
With ReSharper 8
Using Go to File Member, you can quickly navigate within a source file.
Once you press Alt+ \ , ReSharper will show you all members (classes, constructors, properties, methods, and so on) available in the currently opened file. To find an exact file member, start typing its name.
You can also narrow your search by specifying the accessibility level of the member you’re looking for. For example, to show only private members, type ‘private’. If you want to search only for constructors, use the ‘new’ keyword.

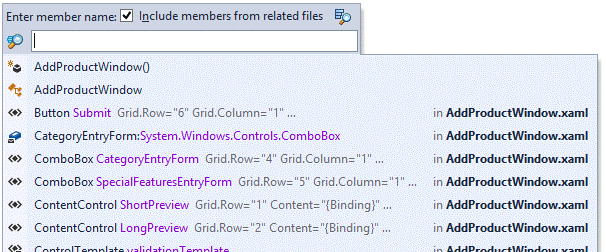
To make ReSharper show you all members from related files (base types, partial classes, so on), press Alt+N:
Fast Navigation to Type Members
With Visual Studio 2013
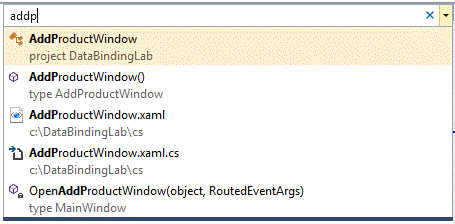
The Navigate to feature doesn’t quite provide fast navigation to a certain type member (for example, a method of a class). In Visual Studio, this operation requires a couple of steps. For example, to get to the OnInit method of the AddProductWindow class, you must:
- Using Navigate to, go to a file containing the class:
- Using the list of members in the main window, navigate to the OnInit method:
With ReSharper 8
To let you get to a certain type member in one step, ReSharper has so-called “combos.” To use them, first specify the type you’re looking for and then specify a member using a whitespace* as a separator:

Since ReSharper 8, you can use combos to navigate to a particular line in your code:

* You can also use the dot (.), plus (+), or backslash (\) characters.
Highlighting of Characters
With Visual Studio 2013
Visual Studio automatically highlights characters in search results (making them bold) as you type them.*

Note that the character highlighting feature doesn’t work with CamelCase.
*New in Visual Studio 2013
With ReSharper 8
ReSharper highlights characters as well. The feature doesn’t have any limitations.

Support for CamelCase
With Visual Studio 2013
The Navigate to feature provides support for CamelCase. For example, to find the AddProductWindow elements, you can simply type ‘APW’. Note that this feature is case-sensitive. To perform the search using CamelCase, you must specify the ‘humps’ only in upper case. Another limitation of СamelCase support in Visual Studio is that you can’t use it to find files.

With ReSharper 8
To support CamelCase, ReSharper uses the advanced CamelHumps™ technology. Due to this, ReSharper has a number of advantages compared to Visual Studio:
- CamelHumps is a case-insensitive mechanism:

- CamelHumps lets you mix element names and ‘humps’:

- CamelHumps supports underscores (_) in identifier names:

Support for Wildcards
With Visual Studio 2013
Although MSDN states that the Navigate to feature doesn’t support wildcards, in actual fact, at least one wildcard symbol is supported. The asterisk (*) can be used anywhere in your query as a substitute for zero or more symbols.

With ReSharper 8
ReSharper also allows you to use the asterisk (*) wildcard for zero or more symbols:

Word Order in Search Queries
With Visual Studio 2013
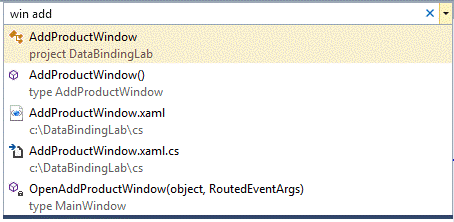
Visual Studio allows you to change the order of words in queries quite freely. For example, from Visual Studio’s perspective, the add win and win add queries are treated in a virtually identical manner.
With ReSharper 8
In ReSharper, you must specify words in a query in the same order as they appear in your code. This means that, for example, win add will not return AddProductWindow.
Search Scope
With Visual Studio 2013
In Visual Studio, search scope is limited by your solution only. This means that Navigate to doesn’t search in libraries that are referenced by your solution.
Besides, Navigate to is unable to perform searching in the following type of files even if they are included in your solution:
- XAML
- JavaScript
- HTML
- CSS
With ReSharper 8
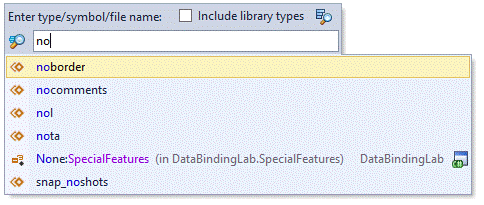
ReSharper’s search scope is much wider and includes members of libraries referenced by your solution as well.
Note that in order to avoid cluttering up search results, ReSharper will show you library members only in case there are no members matching your query in the solution. To force ReSharper to show library members, you can press Alt+N.

Unlike in Visual Studio, searching in XAML, JavaScript, HTML, and CSS files is supported:
Navigating to a Folder
With Visual Studio 2013
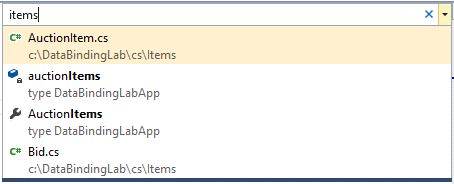
When you enter a folder name into the Navigate to field, all files located in this folder will be shown among other search results. This may be inconvenient when you’re just looking up for a particular folder.
With ReSharper 8
In ReSharper, a folder is a separate solution member that can be navigated to. Once you select it in the search results, you will be taken to the folder in Solution Explorer.

Saving Results
With Visual Studio 2013
Visual Studio doesn’t provide any way for you to save the results of your searches. Information about your query is lost once you close the Navigate to window.
With ReSharper 8
To save the search results after performing your query, press the Num+ button instead of Enter. This will flush the results to a separate Find Results window. You can keep this window open for quick navigation between different search results.
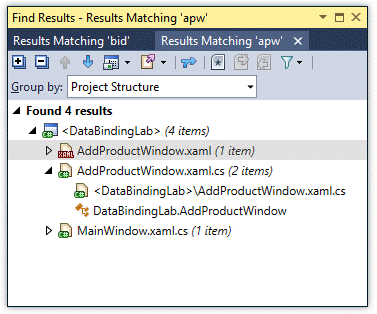
The results of all your search queries are retained until you close the solution.
Subscribe to a monthly digest curated from the .NET Tools blog:


