.NET Tools
Essential productivity kit for .NET and game developers
Markdown-Powered Slides in JetBrains IDEs

At JetBrains, we have a JetBrains Community Contributor (JBCC) program aimed at helping community content creators get the most out of their JetBrains tools when creating articles, social media posts, videos, and public presentations. It’s a fantastic program where we try to provide help and feedback and learn from each other.
One innovative idea we’ve been exploring and are thrilled to share with you is integrating your presentation slides into your IDE. This approach eliminates the need for constant context-switching between your code and visuals. By the end of this post, you’ll be equipped with the knowledge to craft your presentation slides using Markdown, convert them into HTML artifacts, and preview the presentation using your IDE’s in-editor preview, all with a sense of excitement for the possibilities this opens up.
MARP: Markdown Presentation Ecosystem
While dedicated presentation tools such as PowerPoint and Keynote have advantages, they can be cumbersome and come with unique challenges. In the developer community, we see a prevalence of text-to-presentation tools that aim to transform simple files into visually striking presentations.
One such approach is MARP, which allows you to author an entire presentation in a single Markdown file. Let’s look at a presentation we’ll be showing in our IDE.
---
theme: uncover
---

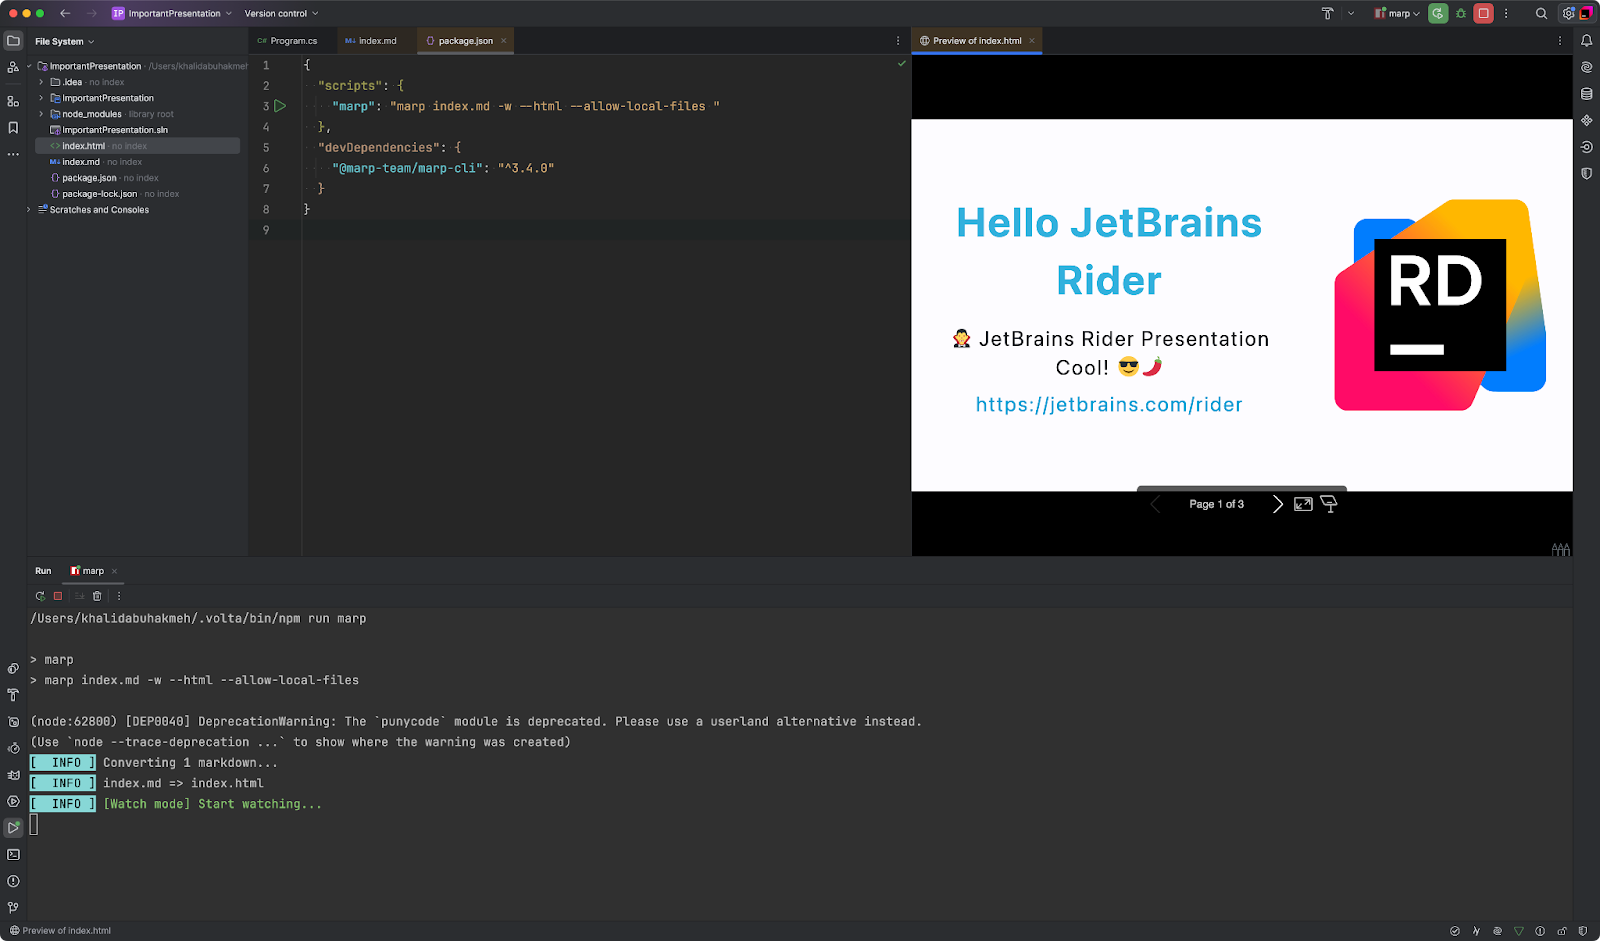
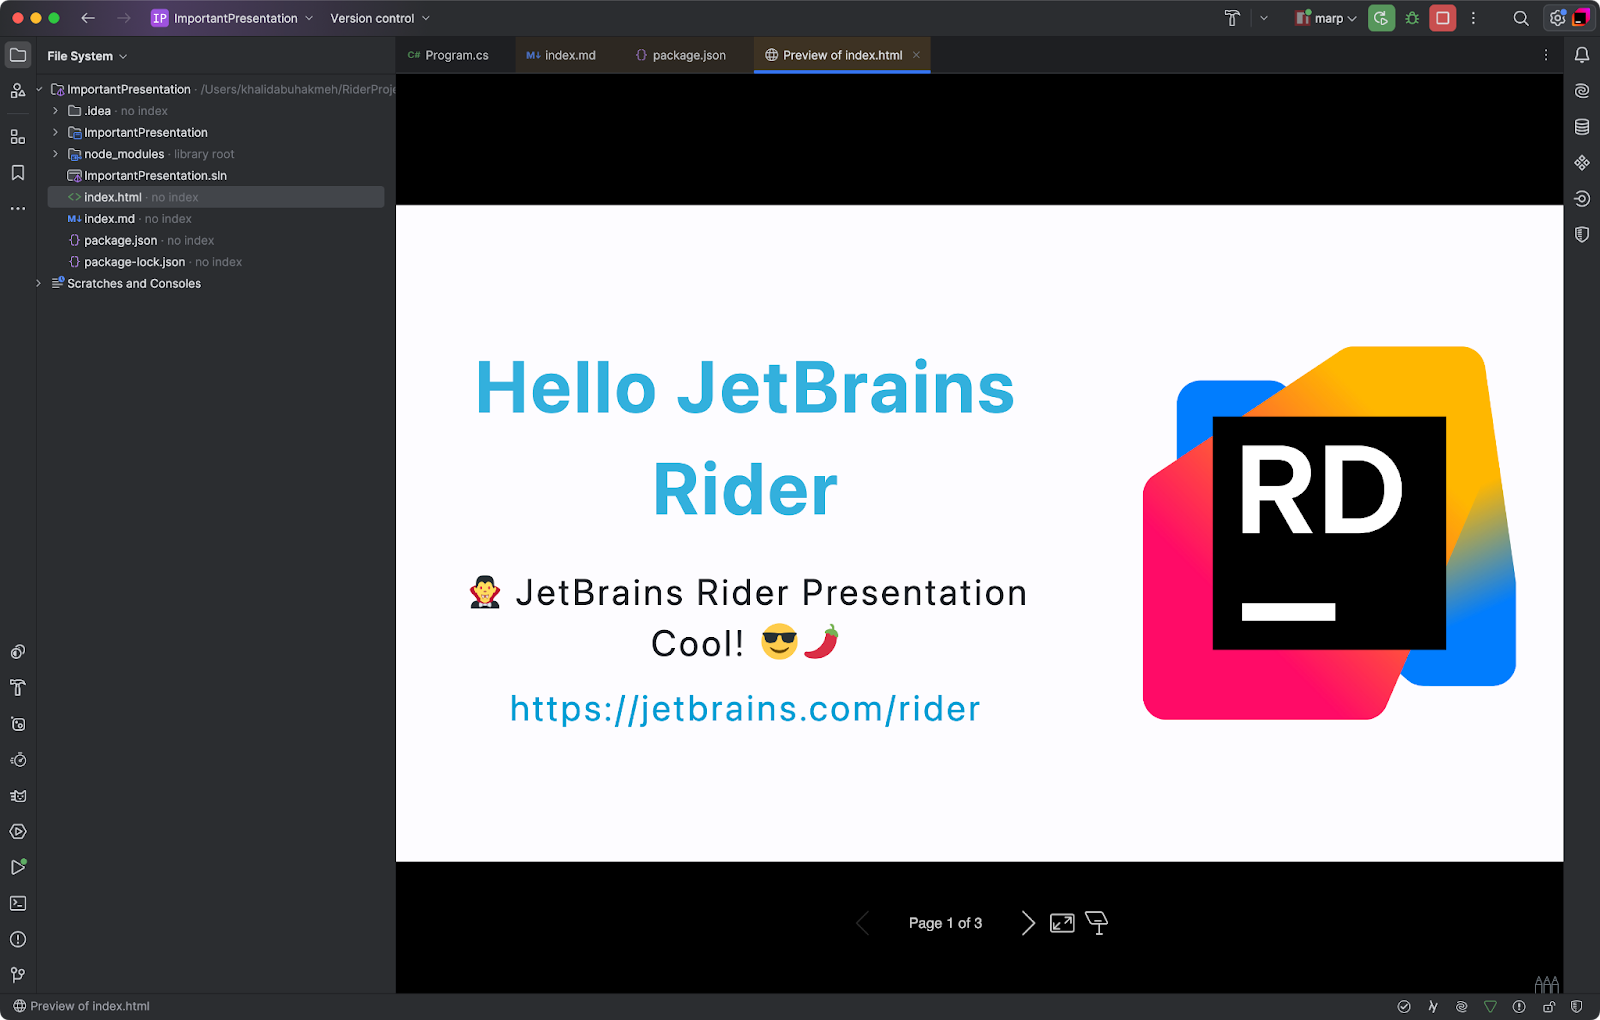
# **Hello JetBrains Rider**
?♂️ JetBrains Rider Presentation Cool! ??️
https://jetbrains.com/rider
---
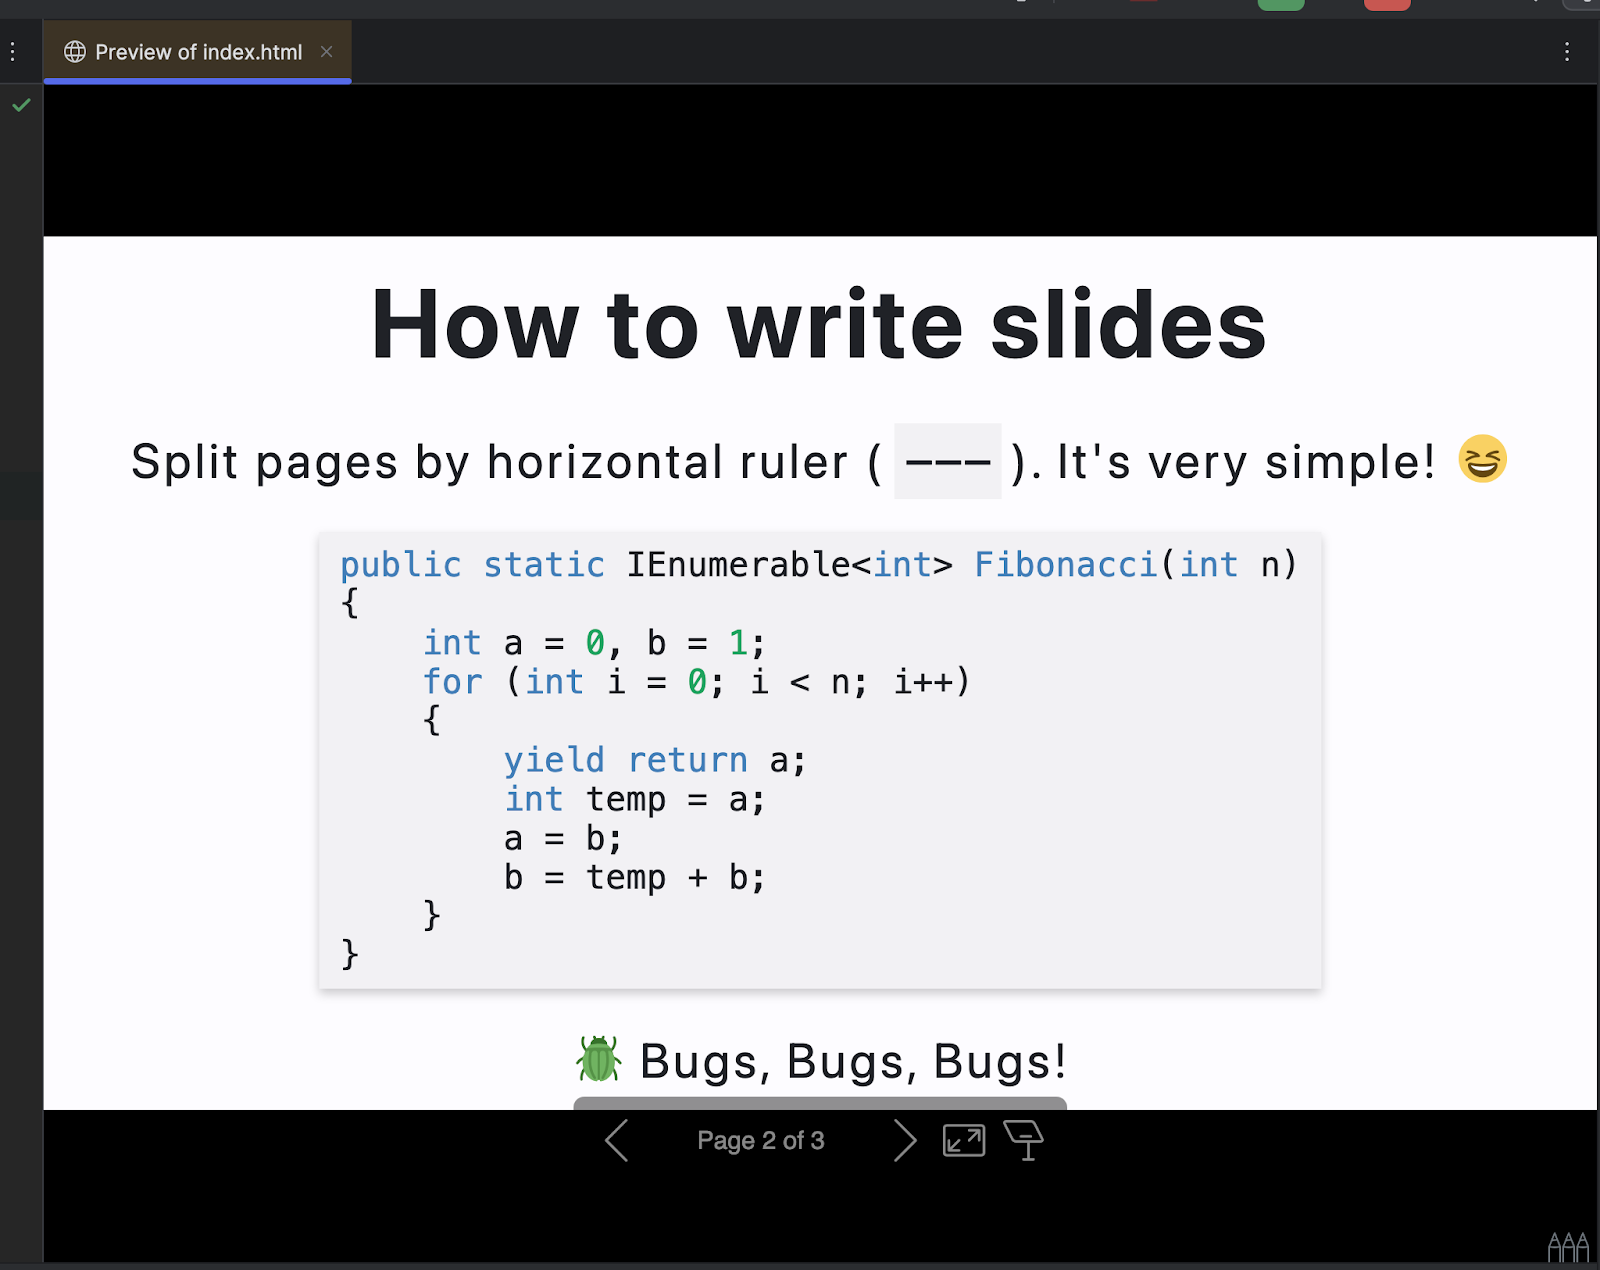
# How to write slides
Split pages by horizontal ruler (`---`). It's very simple! :satisfied:
```csharp
public static IEnumerable<int> Fibonacci(int n)
{
int a = 0, b = 1;
for (int i = 0; i < n; i++)
{
yield return a;
int temp = a;
a = b;
b = temp + b;
}
}
```
? Bugs, Bugs, Bugs!
---
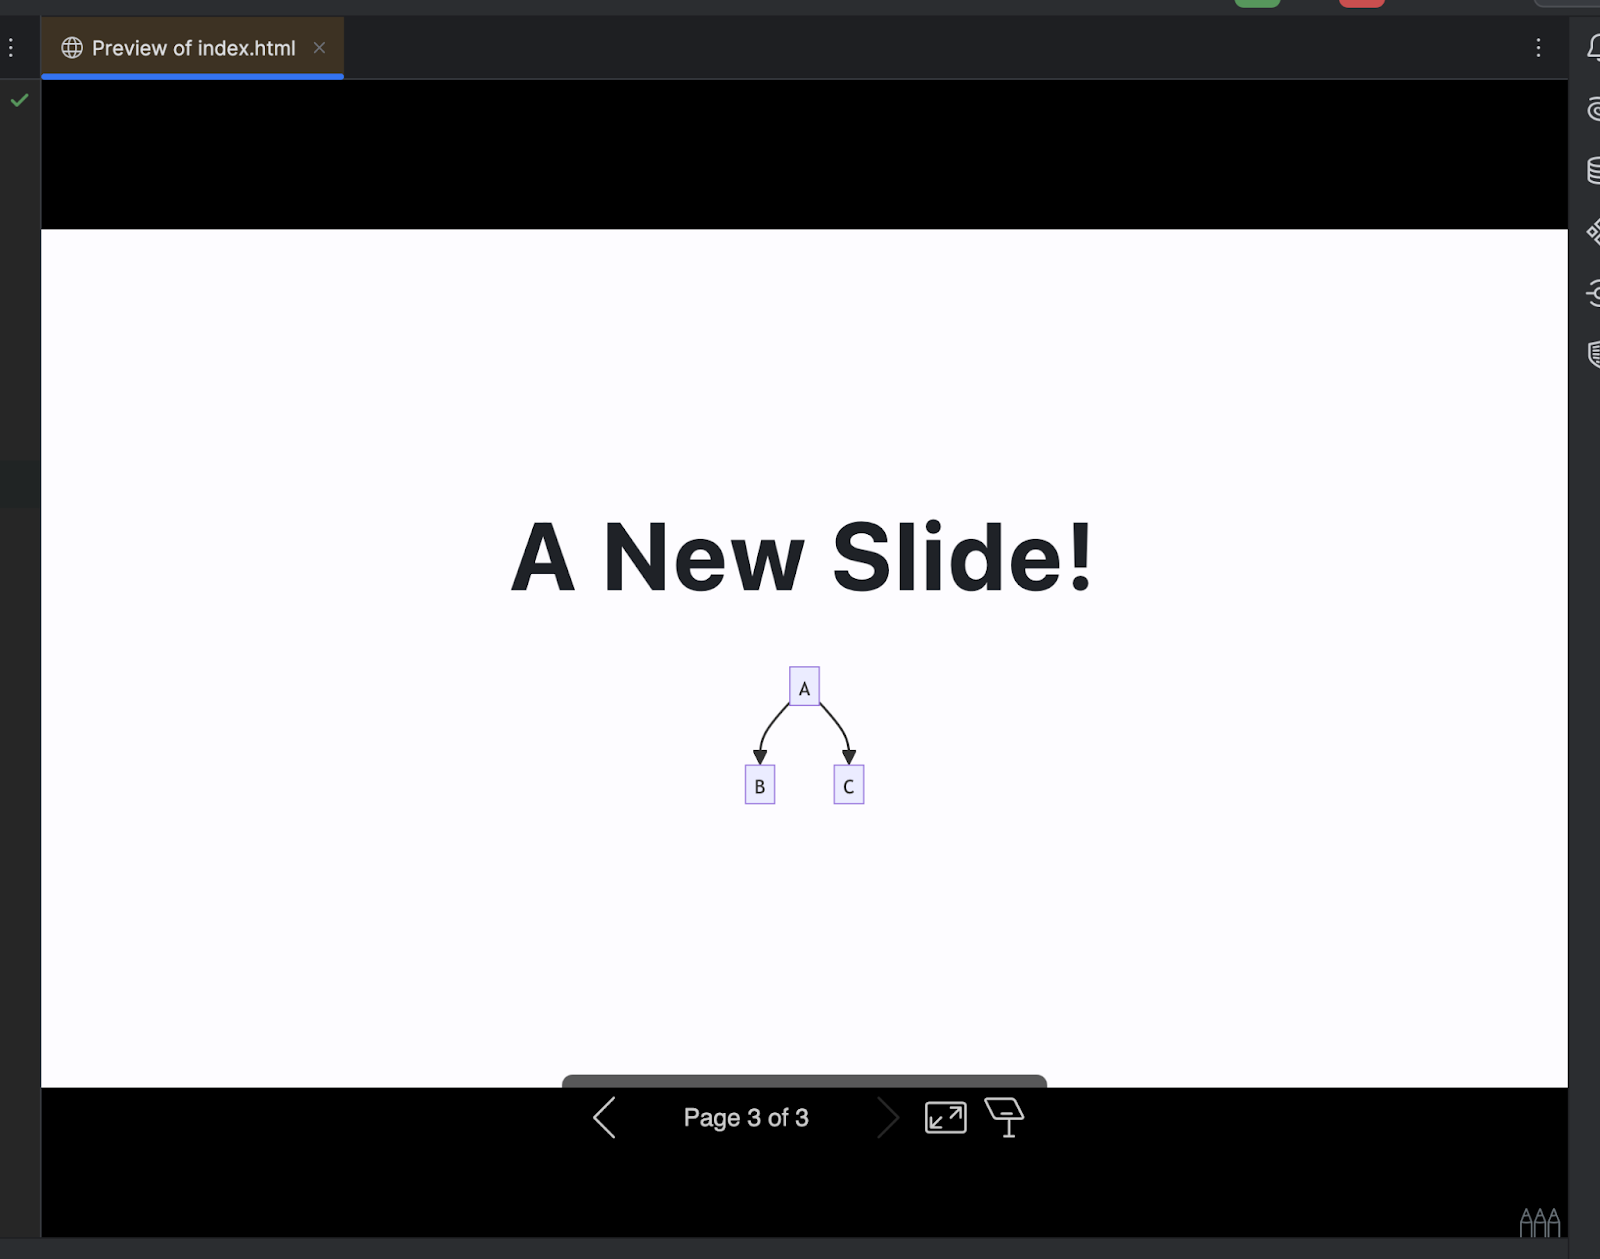
# A New Slide!
<div class="mermaid">
graph TD;
A-->B;
A-->C;
</div>
<!-- Add this anywhere in your Markdown file -->
<script type="module">
import mermaid from 'https://cdn.jsdelivr.net/npm/mermaid@10/dist/mermaid.esm.min.mjs';
mermaid.initialize({ startOnLoad: true });
</script>
Each slide is separated by the --- delimiter, with the contents of each slide appearing between each section. You can use all the Markdown techniques you’ve learned in writing documentation, including headers, links, code blocks, emphasis, math syntax, and emojis.
Check out the Marpit documentation to learn how to author your presentation. Marpit is the framework that transforms Markdown and CSS themes into slide decks composed of HTML/CSS. It is optimized to output only the minimum set of assets required. It has a detailed breakdown of all the options available to presentation authors.
Let’s move on to the next section, where we’ll set up the MARP CLI in our projects so that our presentation can live side-by-side with our demo project.
MARP CLI with your Project
The MARP CLI allows us to use all of MARP’s capabilities from a command-line interface. You’ll need npm installed on your local development environment to do this. Once installed, add the following package.json to the root of your project or in any folder where you’ll write your presentation.
{
  "scripts": {
    "marp": "marp index.md -w --html --allow-local-files "
  },
  "devDependencies": {
    "@marp-team/marp-cli": "^3.4.0"
  }
}
You’ll notice the marp script passes a few flags and arguments. The most important is the -w flag, which lets the CLI monitor and update the file as we create our presentation.
Next, let’s create an index.md file next to the package.json file. You can use the previous Markdown above or experiment with writing your own.
Now run npm install to install the @marp-team/marp-cli dependency. You’ll notice in your package.json file that you now have a run button in the editor’s gutter.

Run the new script, and you’ll see a new run window showing the MARP CLI output, which says that you now have an index.html file in the same directory as your Markdown.
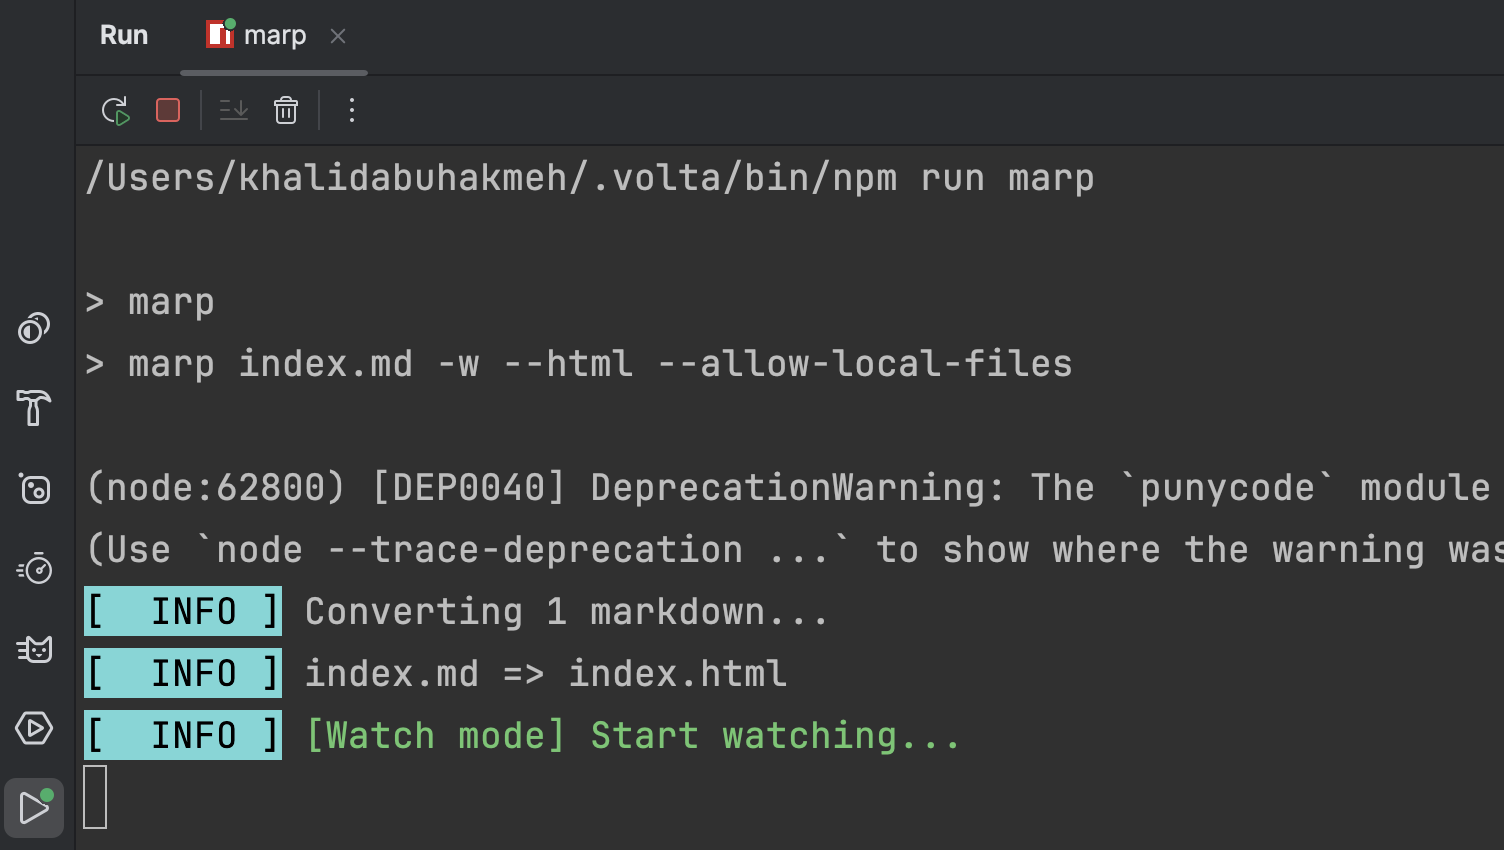
Changes to the Markdown file will now update the HTML file in real-time. The advantage is that you’ll only need to run the marp script when editing your Markdown file. Once your presentation is complete, you can commit the HTML file to source control alongside your demo code.
Previewing the Presentation
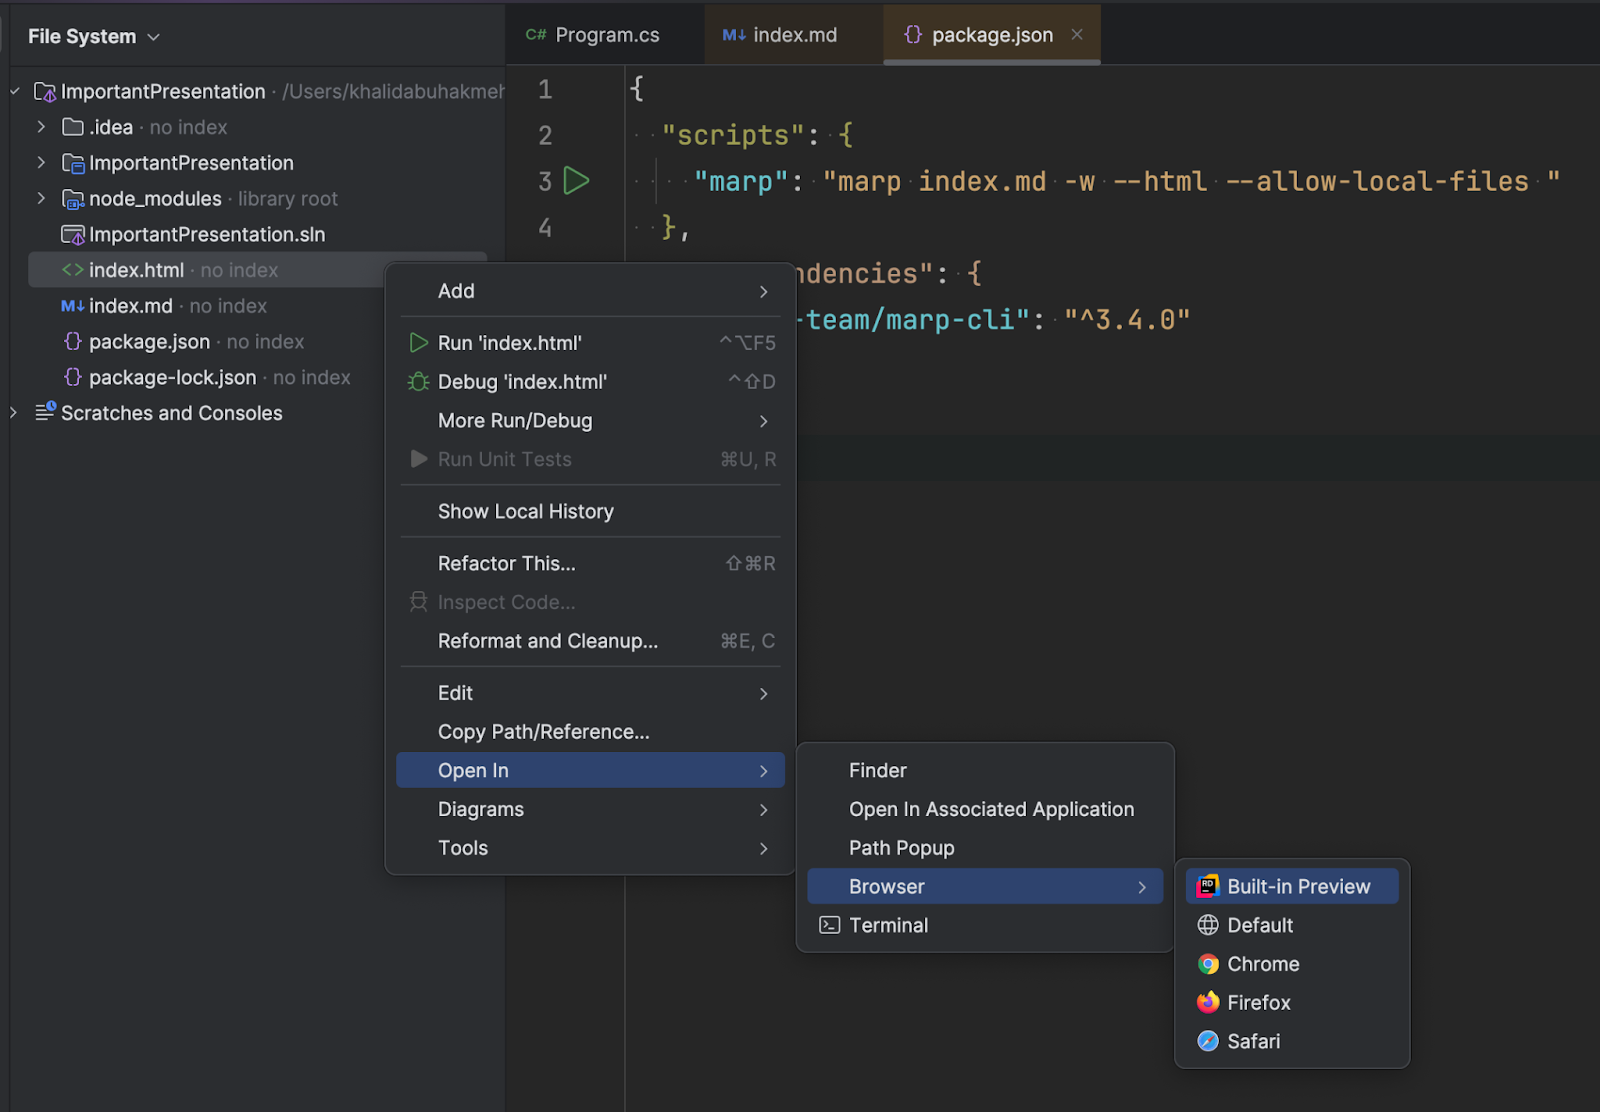
Now, for the easy part, show the presentation to your audience. Start by right-clicking the newly created HTML file and choosing Open In | Browser | Built-in Preview.
The new presentation will appear inside your IDE using MARP’s presentation engine, which lets you move slides back and forth.
MARP also supports syntax highlighting, so we can present code blocks, but you also have the IDE for that.
As part of our marp script, we passed the --html flag, allowing raw HTML to render in our presentations. This will enable us to embed any HTML, including scripts for Mermaid rendering. This is very powerful. For folks looking to be extra, you could also write custom JavaScript components and use them in the presentation.
For those needing speaker notes, you can press P on your keyboard to open an additional presentation window with all your notes. This extra window can be on a secondary display and control the presentation displayed in the IDE.
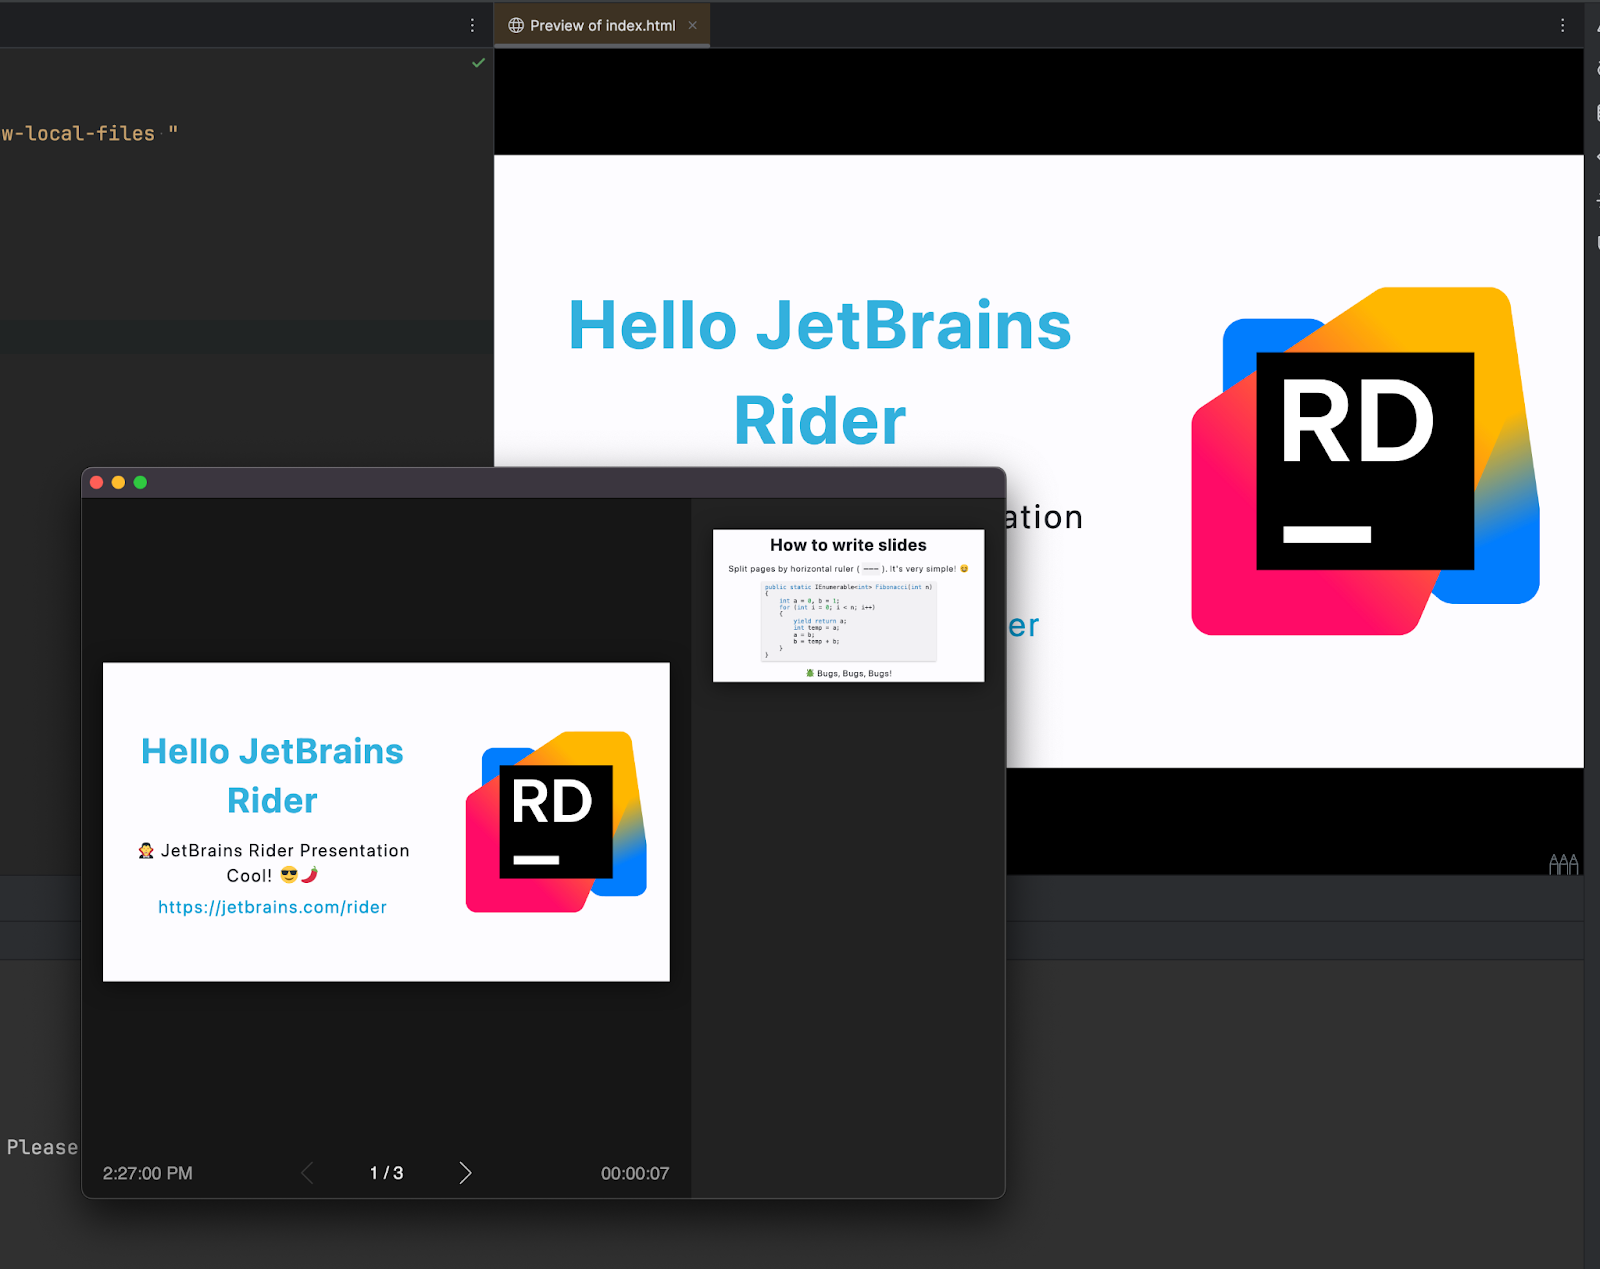
While previews default to a side-by-side display in the IDE, you can also drag the tab into a group for a full-sized viewing experience.
In this mode, you can also use your IDE’s tab-switching shortcuts to switch back and forth between the slides and the IDE.
Conclusion
As you can see, with ingenuity and the features already found in the IDE, we can create a new style of presenting important technical content to our community. MARP is an excellent open-source project, and this article scratches the surface of what’s possible. Please try this out next time you’re building a presentation.
Also, if you’re a JetBrains user creating technical community content around the JetBrains line of products, please check out the JetBrains Community Contributor program. You’ll be able to connect with other JetBrains content creators, get valuable feedback, and get a broader platform for your work.
Comment below and let us know if you like this article.