Understanding Fuzz Testing in Go

This article was written by an external contributor.

Attempting to manually create test cases for all possible user interactions with your software can be daunting, if not impossible. Fuzz testing, or fuzzing, is a type of automated software testing that can assist in the discovery of potential bugs and security vulnerabilities.
The testing involves injecting random data (or “fuzz”) into the software being tested. This testing framework can help uncover undefined behavior that could lead to crashes or other security issues. While it’s not possible to find all bugs with fuzz testing, it can be an effective way to find and fix many common types of issues. It is frequently used to test programs that handle input from untrusted sources or that are likely to have unexpected inputs.
Fuzz tests are typically automated and can be used to test for both functional and security defects. Functional fuzz testing involves feeding invalid data to a program to check for unexpected behavior. Security fuzz testing involves feeding malicious data to a program to uncover security vulnerabilities.
Go has a fantastic ecosystem of packages, such as the open source fuzz testing packages gofuzz and go-fuzz, which are simple to use and can be integrated into your testing workflow. However, since Go 1.18, native fuzz support is present in the language, which means you no longer need to import any external packages. This post will cover the advantages and disadvantages of fuzzing, how it can be implemented in Go, and different fuzzing techniques.
Use Cases of Fuzzing
Fuzzing can be used anywhere you have input from an untrusted source, whether that’s on the open internet or somewhere security sensitive. Fuzzing can be used to test software, files, network policies, applications, and libraries.
For example, say you have an application that requires the user’s name as input, and you have to test the application for invalid data. You can create a test case with fuzzing that uses input with special characters or values that can lead to crashes or result in a memory or buffer overflow.
Other use cases include:
- Server-client inspection, in which both the client and the server are fuzzed to find vulnerabilities.
- Packet inspection, in which network sniffers are tested for their ability to identify vulnerabilities in packet inspection devices.
- Testing APIs by running tests on each parameter and method in the interface to identify weak points.
This list is just a subset of the thousands of use cases. Anything that consumes complex input can benefit from fuzz testing.
How to Fuzz Test in Go
Let’s look at how to fuzz test a simple application. To follow along with this tutorial, you’ll need a working knowledge of Go and a local installation of the latest stable version of Go. You’ll also need a common or integrated terminal, an environment that supports fuzzing (AMD64 or ARM64 architecture), and GoLand installed on your machine.
Function
You can use fuzz testing on modules, simple functions, or anything you believe requires fuzzing. In this tutorial, you’ll use a simple function that compares two-byte slices and returns false if the slices aren’t equal:
func Equal(a []byte, b []byte) bool {
   // Check if the slices are of the same length
   if len(a) != len(b) {
      return false
   }
   for i := range a {
      // Check if the elements in the same index are the same
      if a[i] != b[i] {
         return false
      }
   }
   return true
}
Generate Test Cases
GoLand offers a very powerful utility that allows you to generate tests automatically. It also offers an intelligent way to generate tests based on what you’re trying to achieve. You can use the feature to create robust test cases, and the steps are as easy as creating a function, file, or package and then clicking buttons to generate the test.
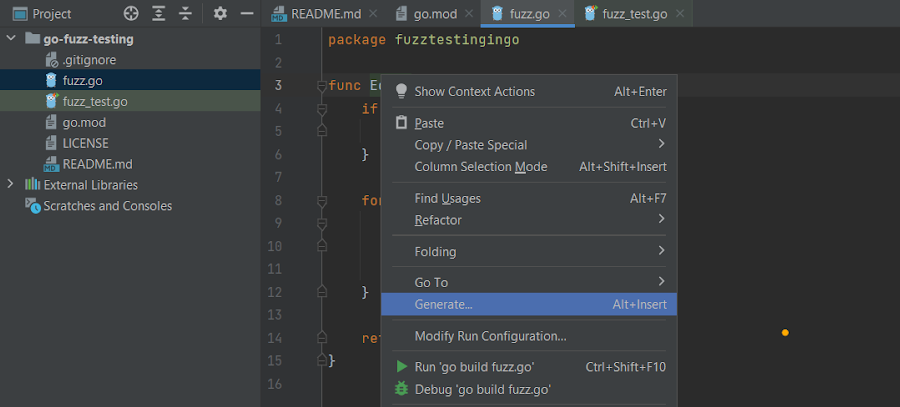
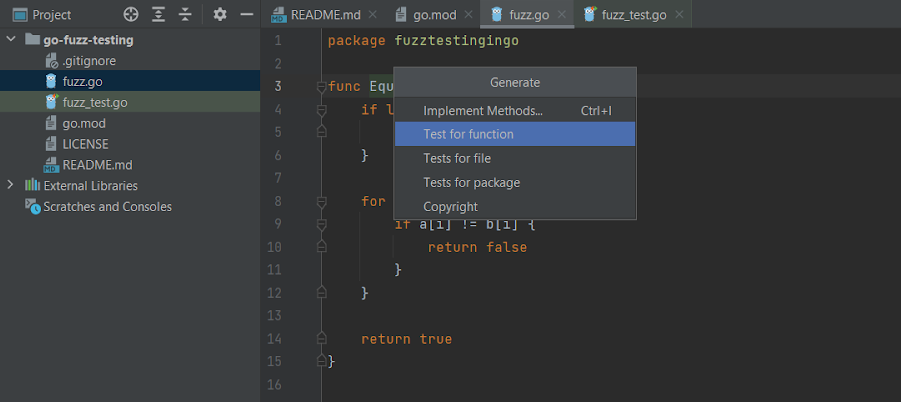
First, press Alt+Insert (⌘N) and select Test for function to generate the unit test cases. Alternatively, you can right-click the function name and select Generate:
Then, click Test for function to generate your test cases:
After GoLand generates the first unit test, you can add your own tests if desired. You can also skip the intelligent test generation and create all the tests on your own, though this option is potentially less effective.
func TestEqual(t *testing.T) {
    type args struct {
        a []byte
        b []byte
    }
    tests := []struct {
        name string
        args args
        want bool
    }{
        {
            name: "Slices have the same length",
            args: args{a: []byte{102, 97, 108, 99}, b: []byte{102, 97, 108, 99}},
            want: true,
        },
        {
            name: "Slices don’t have the  same length",
            args: args{a: []byte{102, 97, 99}, b: []byte{102, 97, 108, 99}},
            want: false,
        },
    }
    for _, tt := range tests {
        t.Run(tt.name, func(t *testing.T) {
            if got := Equal(tt.args.a, tt.args.b); got != tt.want {
                t.Errorf("Equal() = %v, want %v", got, tt.want)
            }
        })
    }
}
Once the tests have been created, there are two ways to run them. You can use the command go test in the integrated terminal, which will result in a success or failure status:
hrittik@hrittik:~/go-fuzz-testing$ go test
PASS
ok      github.com/hrittikhere/go-fuzz-testing  0.003s
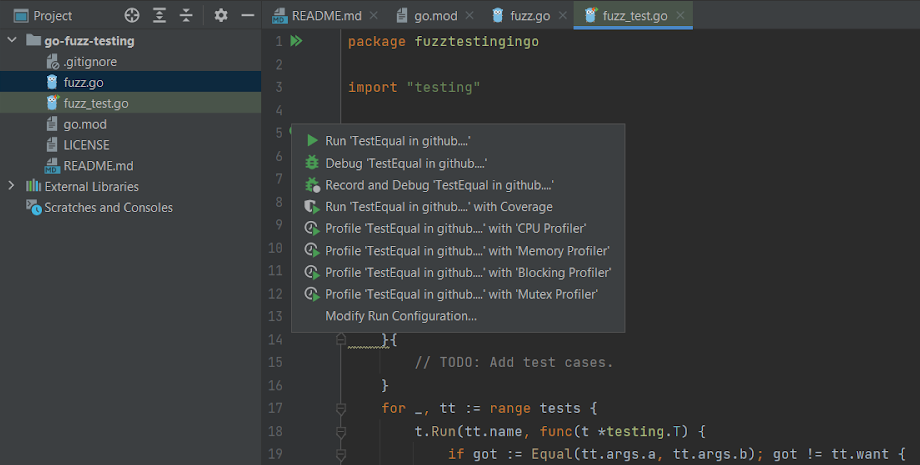
Alternatively, you can use GoLand to run the tests by clicking the green triangle icon in the gutter. The benefit of this approach is that it also provides you with debugging and recording (available on Linux machines) capabilities, which are helpful if you’re trying to find and understand a failing test:
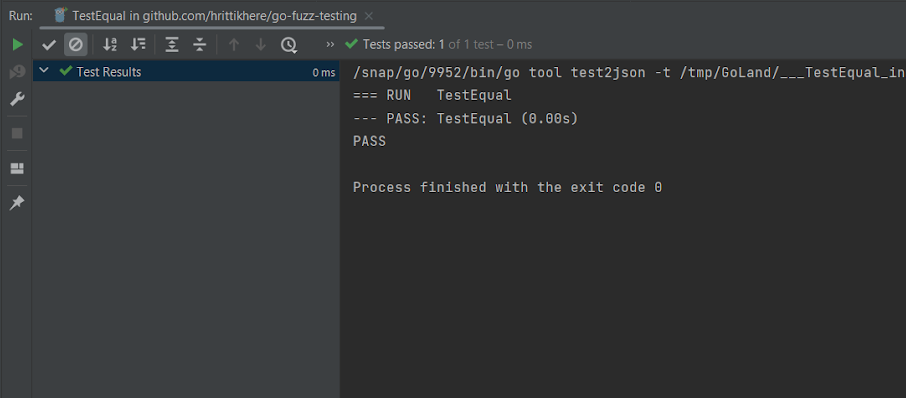
When you use GoLand for testing, the results are shown in a dedicated pane with details about all tests that were run:
Generate Fuzz Tests
Now that your code has passed a unit test, let’s create a fuzz test. Your test should be included in the file you created, and for fuzz tests you should maintain the following rules:
- Your function name needs to begin with
Fuzz. - You should accept the
*testing.Ftype to your function. - You should only target one function.
You can use the following code:
func FuzzEqual(f *testing.F) {
// Only one function to be tested
   f.Fuzz(func(t *testing.T, a []byte, b []byte) {
// Value of a, b will be auto generated and passed
      Equal(a, b)
// Equal matches if both auto generated values match and returns False when they don't
   })
}
Here, a and b are the fuzzing arguments, which will be compared with Equal to yield test results. To run the test, you can again click the sidebar to open the Run tab, or you can click the test function and press Ctrl+Shift+F10 (⌃⇧R).
As fuzz is not a standard testing methodology, you’ll want to choose the second option, which has the -fuzz flag, to start the fuzz test on your IDE:
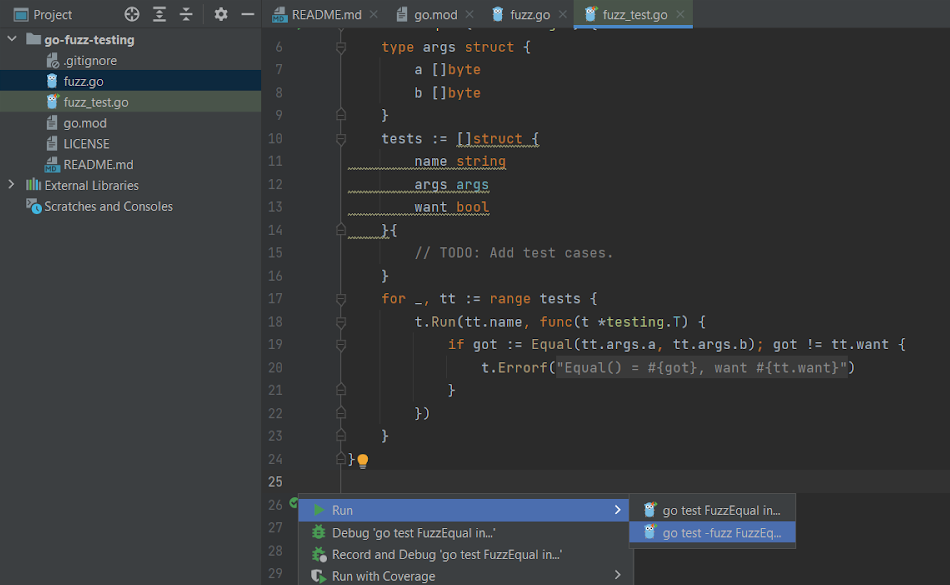
Alternatively, you can use go test -fuzz ., though that method doesn’t offer debugging.
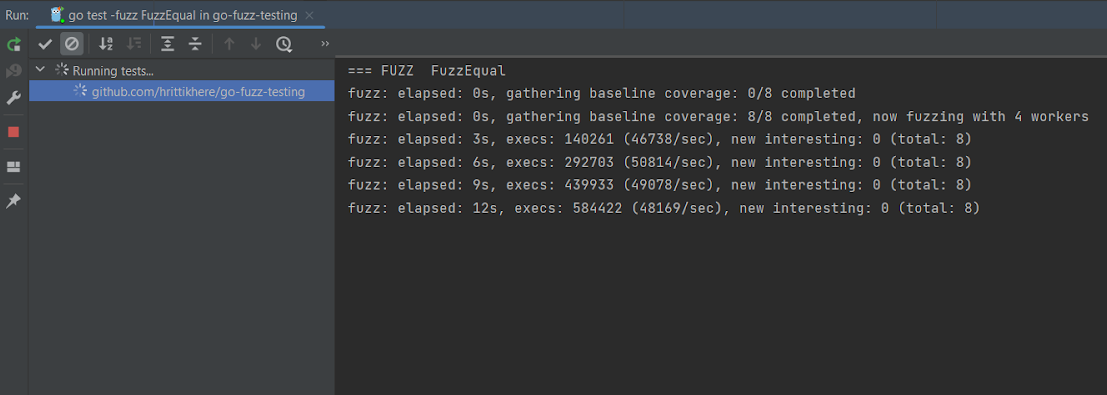
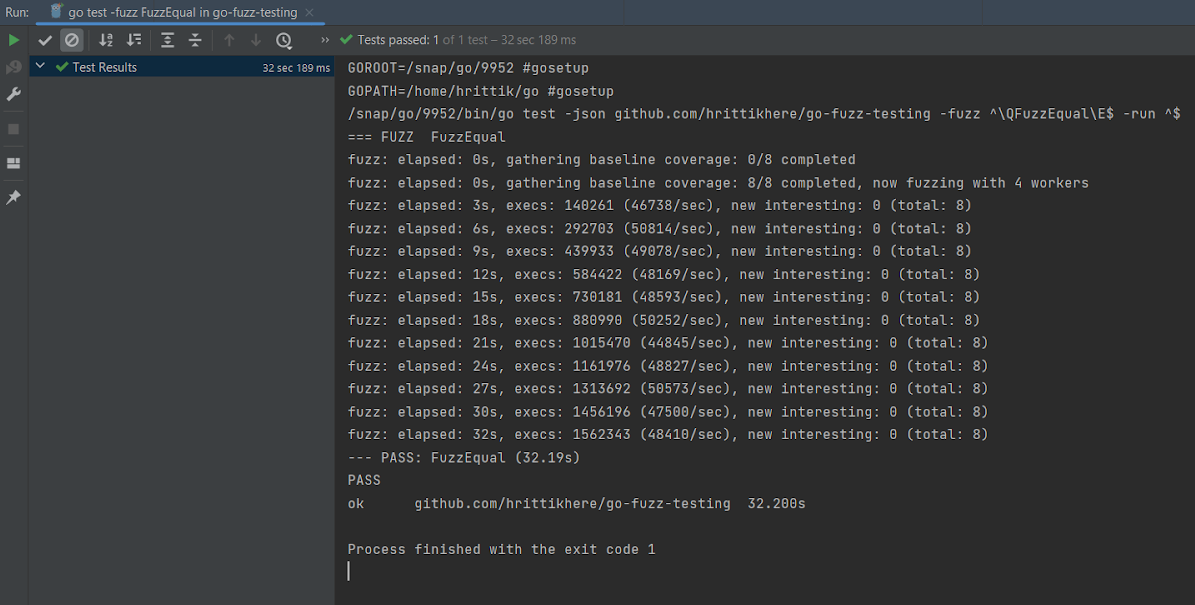
Once started, fuzz testing will continue until you manually stop the test. After several executions, stop your test by pressing the square red stop button on the right-hand panel:
In the screenshot below, after the stop, the test was assessed and reported as having passed, which means that all iterations of the test were successful:
As far as notes go, elapsed is the amount of time the test ran for, new interesting is the number of inputs added to the corpus that provide unique results, and execs is the number of individual tests that were run.
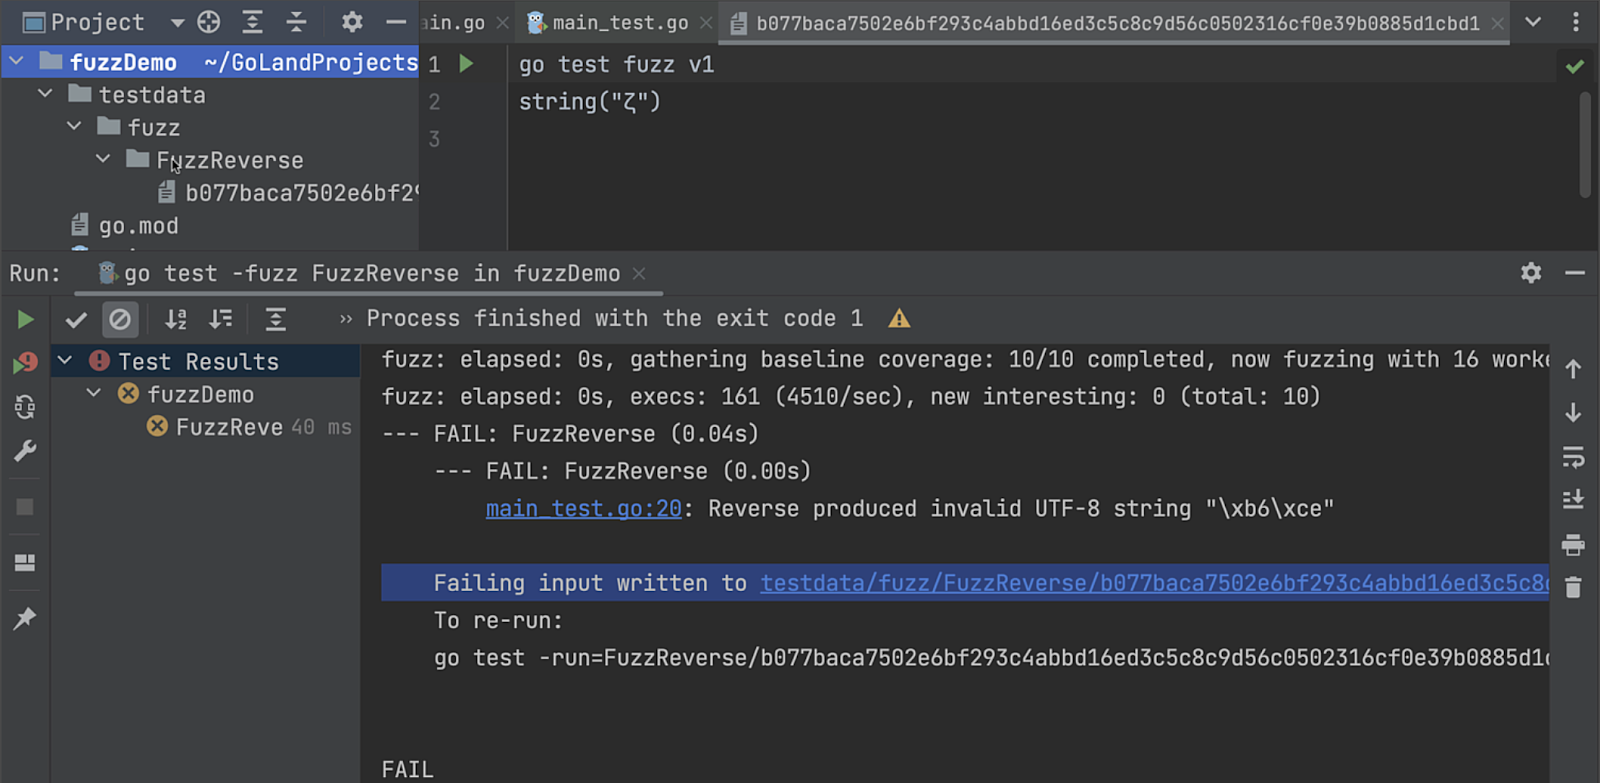
If your test fails, you can use Test Runner to track your test execution and find the specific test case that failed, then make changes to fix your code.
If you want to see what happens when your fuzz test in GoLand fails use this example. If the test fails, the failing seed corpus entry will be written to a file and placed in your package directory in the testdata folder. The path to this file will also appear in the console as a clickable link. If you click on the link, the file will be opened in the IDE, and you will see a green triangle icon at the top of the file. Clicking on this icon will run go test with the failing seed corpus entry.
If required, you can also export the test results to HTML, XML, or a custom XSL template through the Test Runner toolbar.
Advanced Techniques
In the previous section, you looked at a simple fuzz test, but that won’t be sufficient in most production situations. For scenarios that require more thorough testing, you can use the following techniques.
Differential Fuzzing
Differential fuzzing is a fuzzing technique that compares the outcomes of two different implementations of a program, each of which receives different inputs, to detect bugs that only occur in certain conditions.
One of the biggest advantages of differential fuzzing is that it can help you uncover bugs that might be hidden when using other fuzzing techniques. A notable example of this is the ability to detect novel HTTP request smuggling techniques.
The main disadvantage is that setting up two different implementations of the program can be difficult. It can also be hard to determine what counts as a “difference” between them. Furthermore, the technique may be ineffective if the implementations are not identical, such as if one is a debug build and the other is a release build.
Round-Trip Fuzzing
Round-trip fuzzing operates on the premise that if two functions with opposing operations exist, the accuracy and integrity of data can be tested by passing the output of the primary function as the input to the secondary function, then comparing the results to the primary input or the original data.
The benefit of this testing technique is that it can help find errors that isolated inputs can miss, like in the case of currency conversion, where a floating point error might not be obvious. However, it can also introduce new errors if the two functions are not perfectly inverse, as is often the case with rounding errors. In general, round-trip fuzzing is most effective when the two functions are simple and well understood.
The drawback to round-trip fuzzing is that because you have to convert the data twice, it can be difficult to set up, and architecting for complex systems takes time. Furthermore, the different data formats must be compatible with both functions.
Advantages of Fuzz Testing
Fuzzing’s ease of use and simple implementation make it an essential testing technique. It expedites the software development lifecycle, making errors easier to fix and reducing them in the final product.
This is because, unlike other testing techniques such as integration, fuzz testing can be performed early in development, as soon as any portion of the target code is written. Fuzz testing allows you to target individual functions regardless of the state of the overall codebase. It’s also distinguished by its ability to test multiple components of an application at the same time, which is not possible with traditional testing techniques.
Finally, with modern libraries, it’s very easy to implement and catches a lot of bugs and security flaws, making it a necessary testing technique to have in your arsenal.
Disadvantages of Fuzzing
Fuzz testing is a powerful technique for finding software defects or vulnerabilities, but it has some limitations. It’s not a substitute for traditional testing techniques such as unit testing, integration testing, and regression testing and should be used as a complement to these techniques, not a replacement. Similarly, security updates, pentesting, and compliance with security standards must be continued. Fuzzing is not the “silver bullet” of software security.
Another disadvantage is that fuzz testing can only find defects that result in crashes or other detectable failures.
Finally, fuzzing tells you that there’s an error, but the tester or developer is responsible for debugging and finding the root cause. This can be simplified by using GoLand, which provides debugger sessions, breakpoints, and core dumps that can help you.
While this isn’t necessarily a drawback, you should also remember that fuzzing is memory- and CPU-intensive, so running fuzz tests in your software delivery pipelines is not recommended.
Conclusion
In this article, you learned about fuzz testing. Fuzzing is a very useful testing technique and is easy to get started with. The testing methodology is used throughout the industry and has assisted Google in catching over fifteen thousand bugs across thousands of tools and applications.
Fuzzing is a very effective and low-cost testing process. The built-in support for fuzzing from GoLand makes the implementation even simpler.
So what’s next? More information about fuzzing can be found on the Go Security blog.