

IntelliJ IDEA
IntelliJ IDEA – the Leading IDE for Professional Development in Java and Kotlin
AWS in IntelliJ IDEA

In this blog, we’re going to explore how to work with Amazon Web Services (AWS) in IntelliJ IDEA. We’ll start by setting up IntelliJ IDEA to connect to AWS. Then, we’ll highlight a few features that are beneficial when working with AWS from your IDE.
This blog post covers the same material as the video. This provides an easy way for people to skim the content quickly if they prefer reading to watching, and to give the reader/watcher links to additional information.
Setup
To configure IntelliJ IDEA to work with AWS, we need to install the AWS Toolkit for IntelliJ IDEA plugin and configure the AWS credentials required to connect our IDE to AWS.
Installing AWS Toolkit Plugin
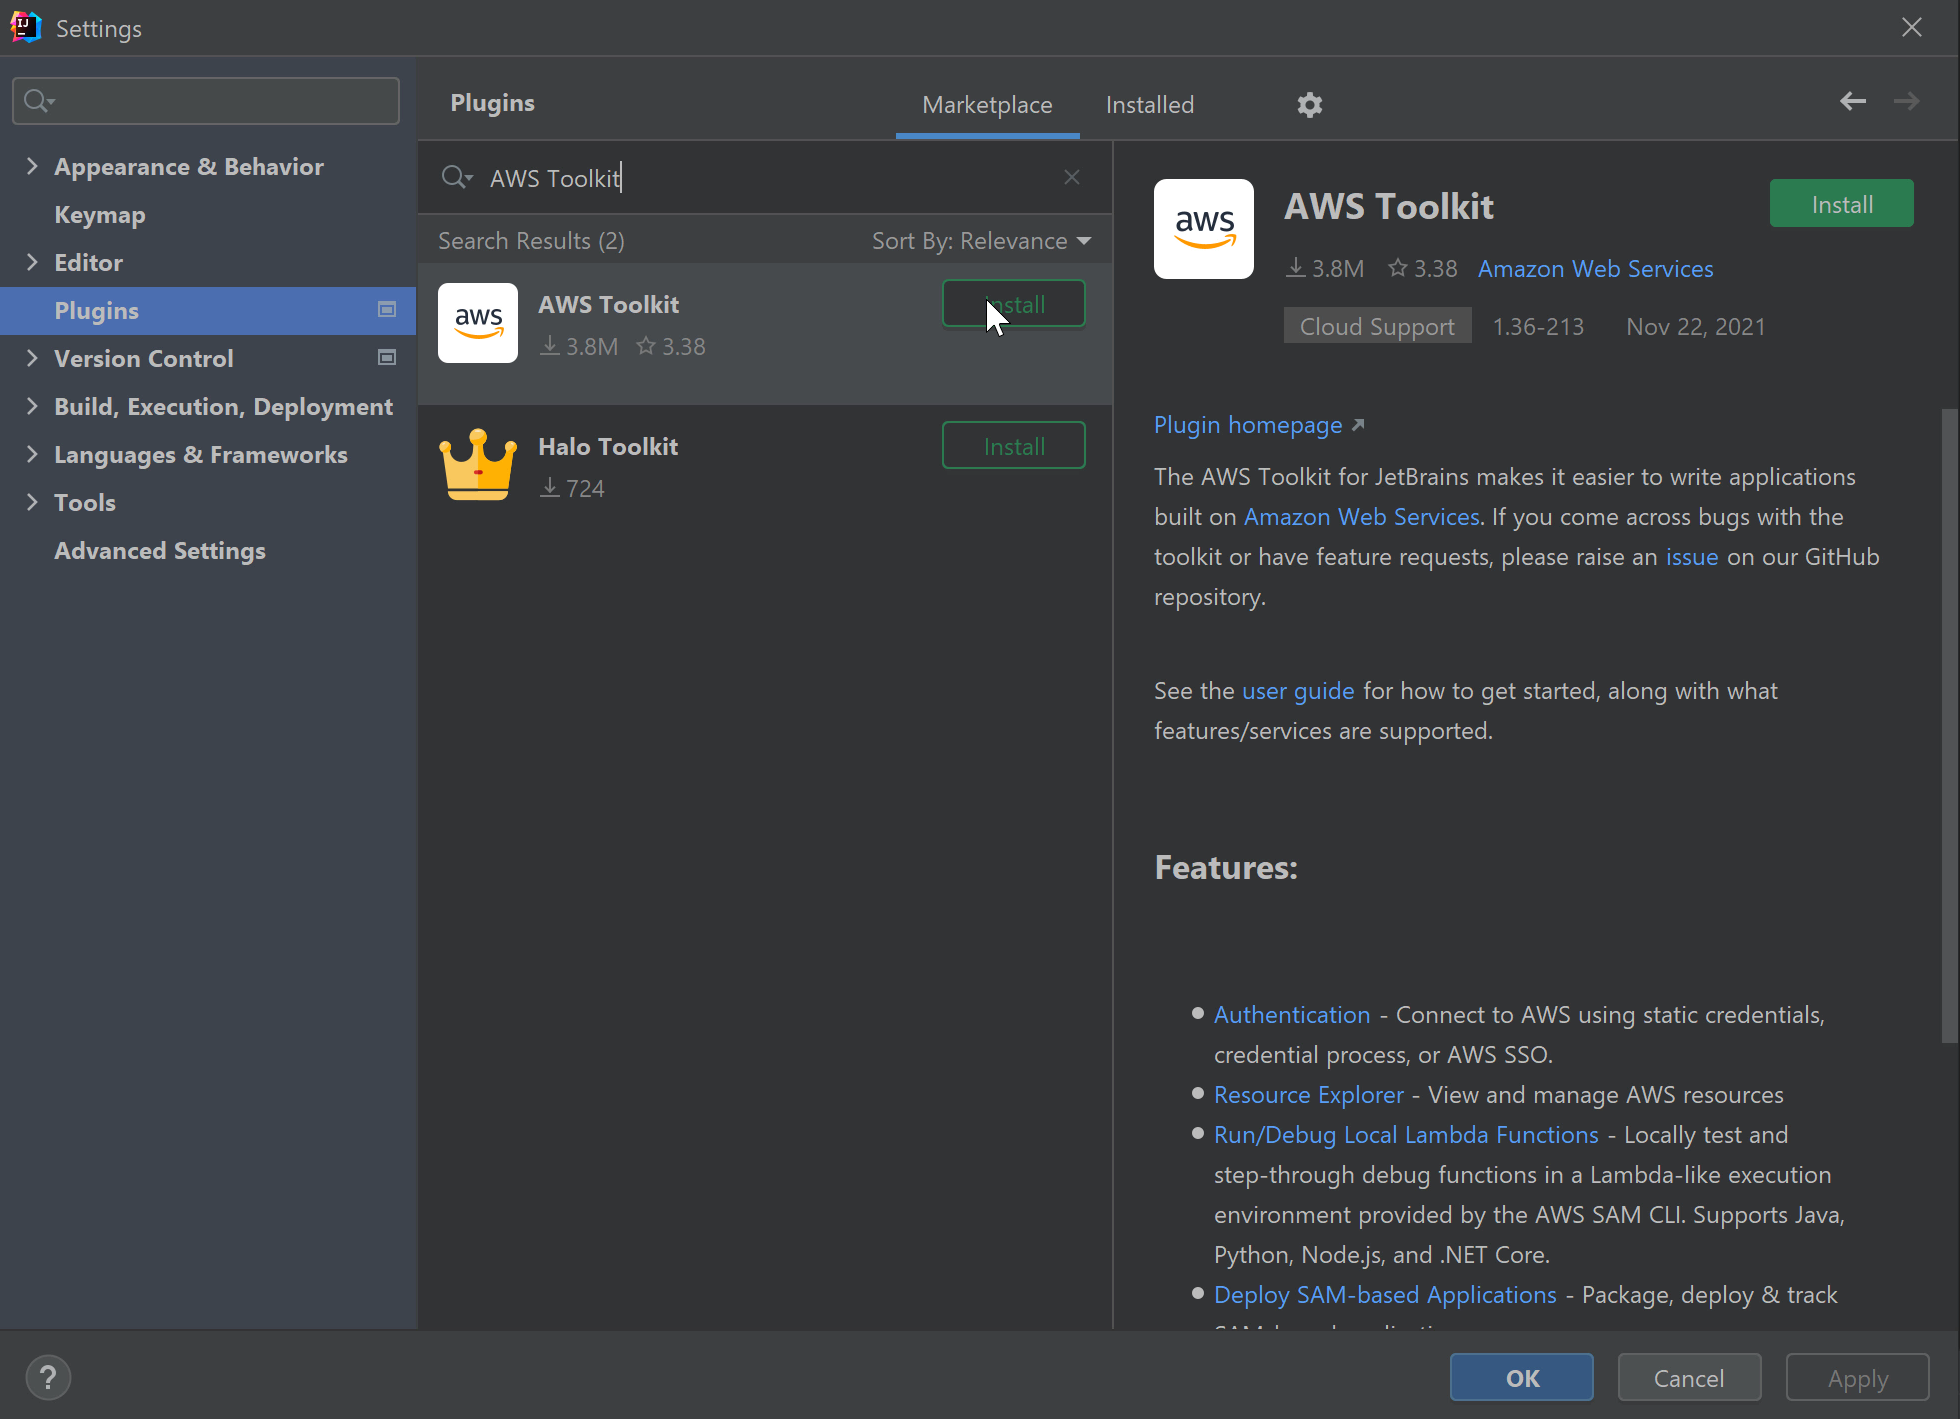
In your IntelliJ IDEA Community or Ultimate edition, install the AWS Toolkit plugin by going to your IDE Settings (File -> Settings for Windows/Linux or IntelliJ IDEA -> Preferences for macOS) and navigating to Plugins. Make sure the Marketplace tab is selected then search for AWS Toolkit. Click on the Install button next to the AWS Toolkit search result.
After the plugin is finished installing, restart your IDE.
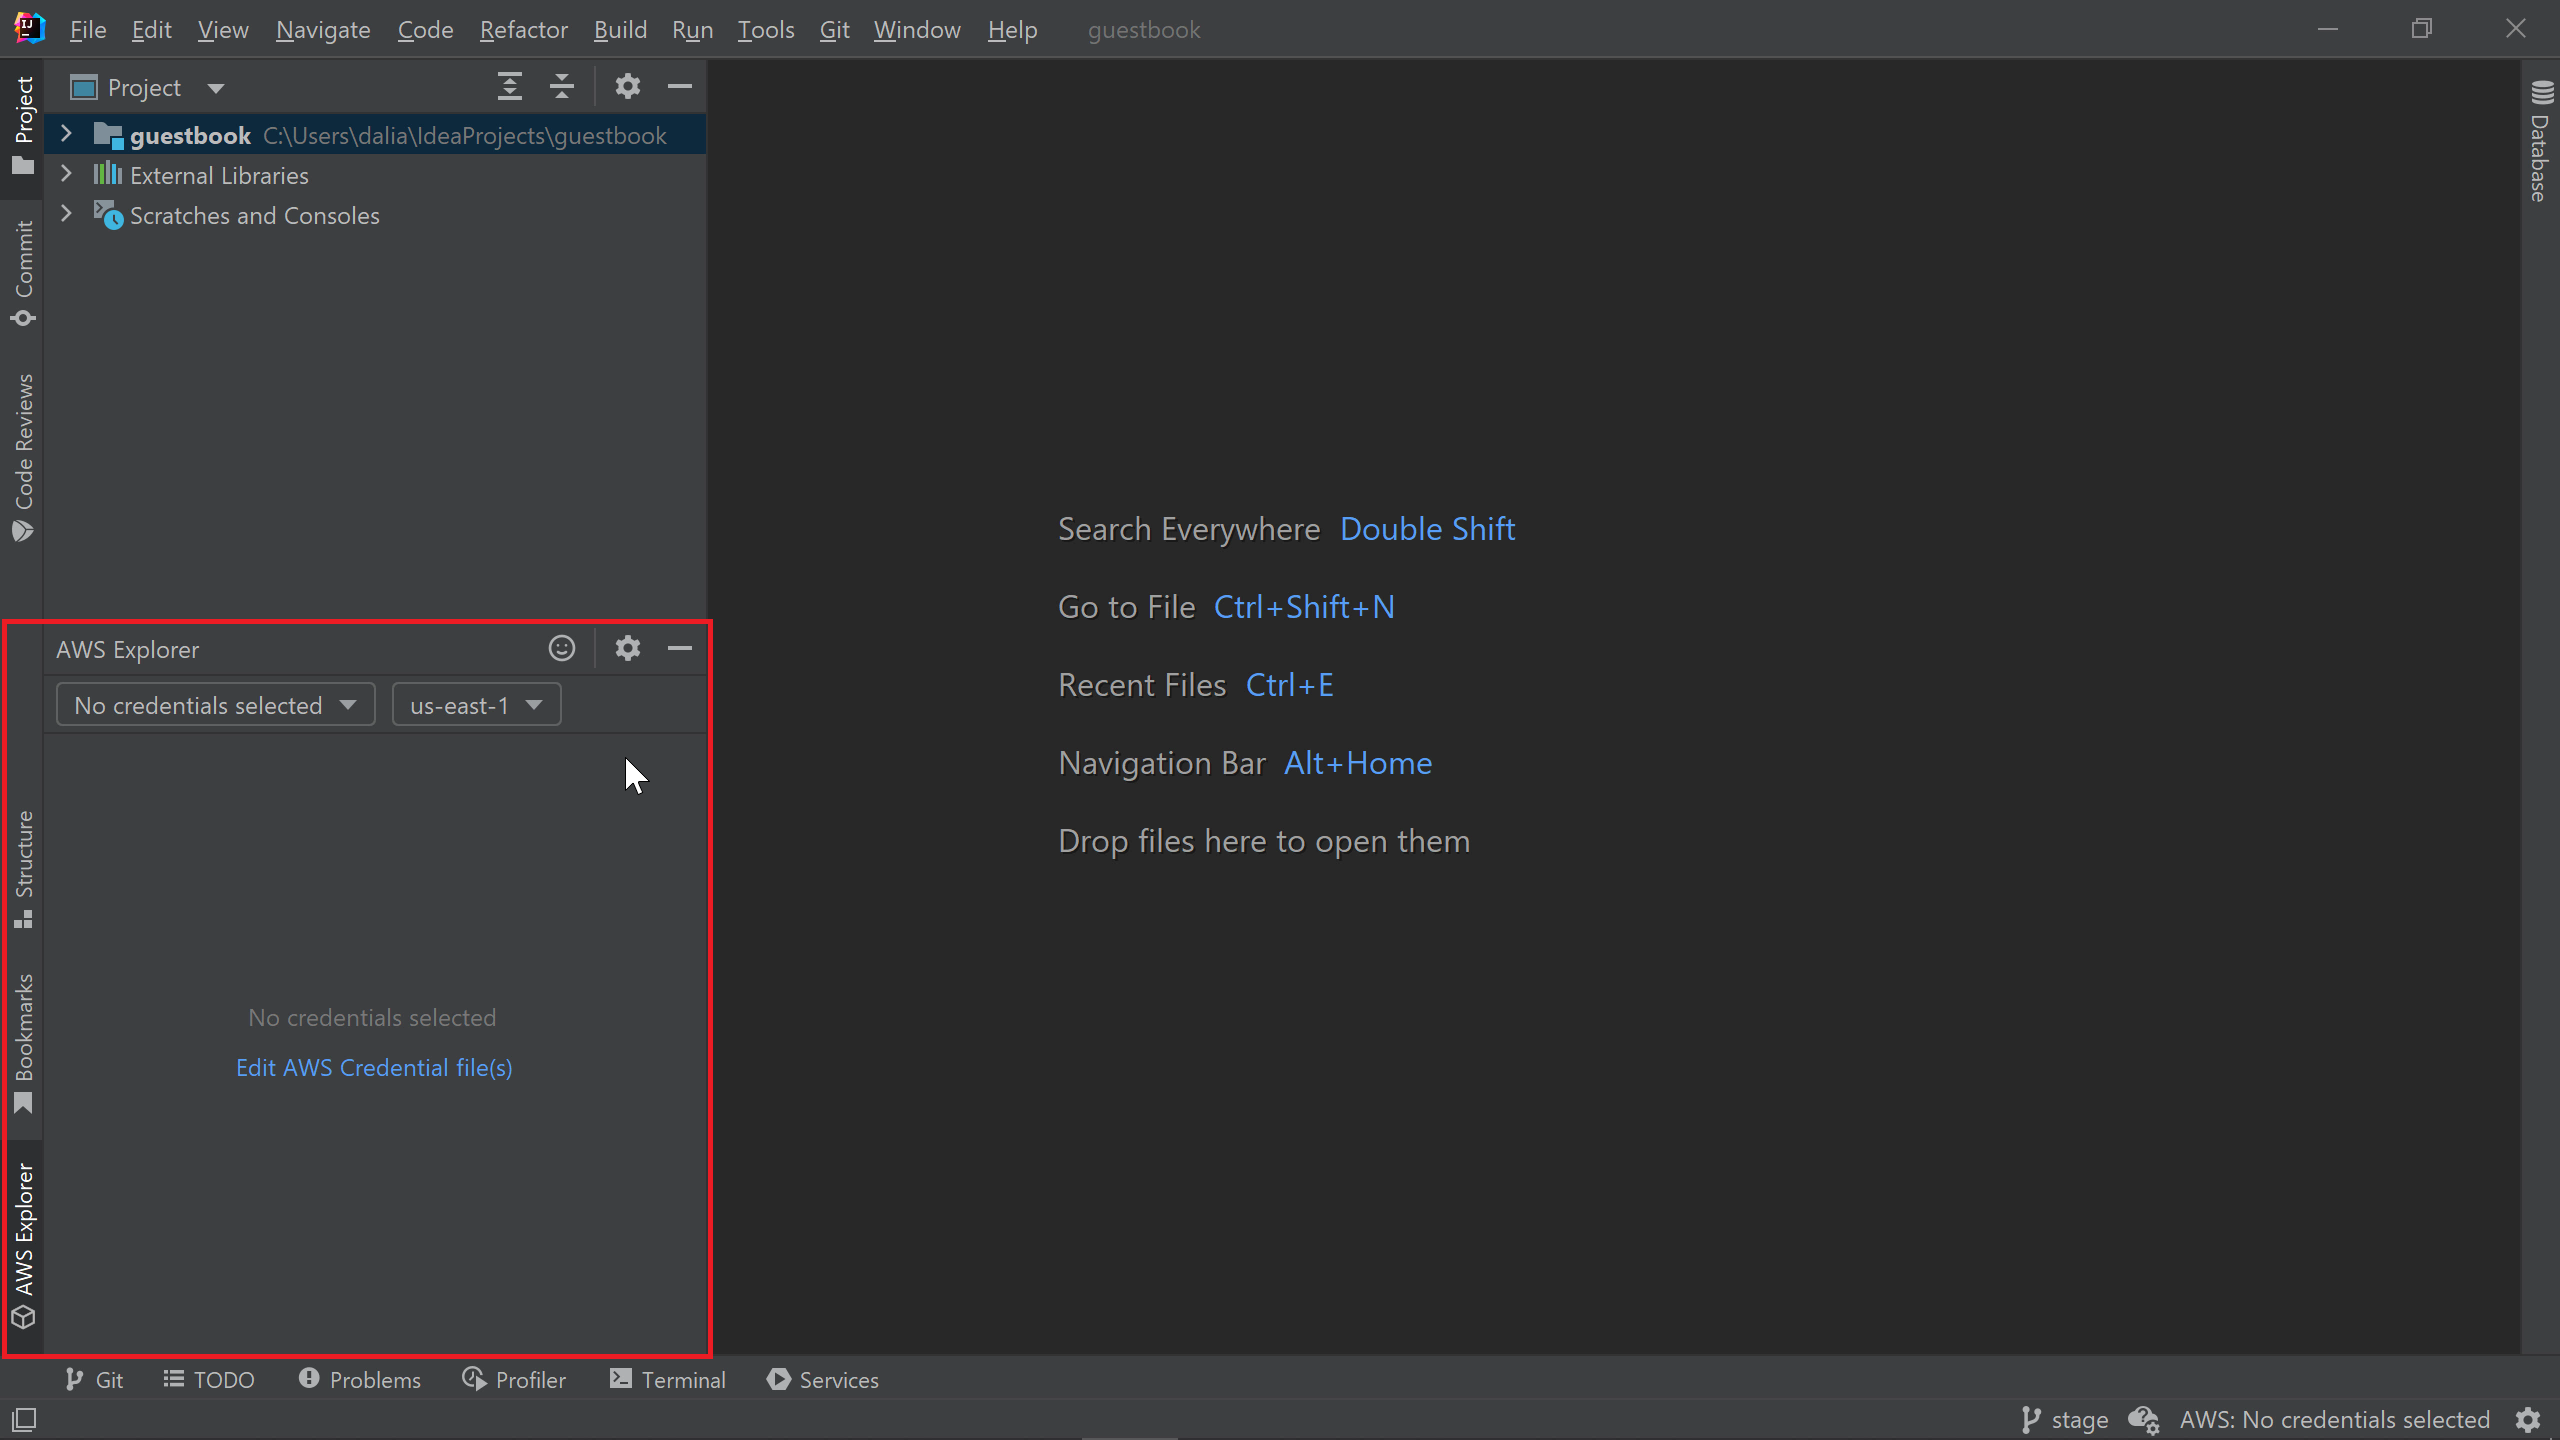
After the IDE restarts, you will see a new AWS Explorer tool window. You can also access this window by going to View -> Tool Windows -> AWS Explorer.
Now that the AWS Toolkit plugin is installed, we need to connect the IDE to our AWS account.
Connecting IntelliJ IDEA to AWS
IntelliJ IDEA uses credential files to connect to an AWS account similar to the AWS Command Line Interface (CLI). If you already have AWS CLI or other AWS tools configured on your machine, IntelliJ IDEA may detect your configuration file and automatically connect to your account. If that’s the case and you see a list of your AWS resources listed in the AWS Explorer window, you can skip to the next section of this tutorial.
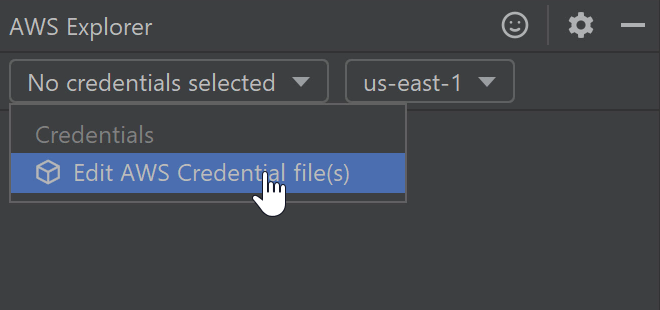
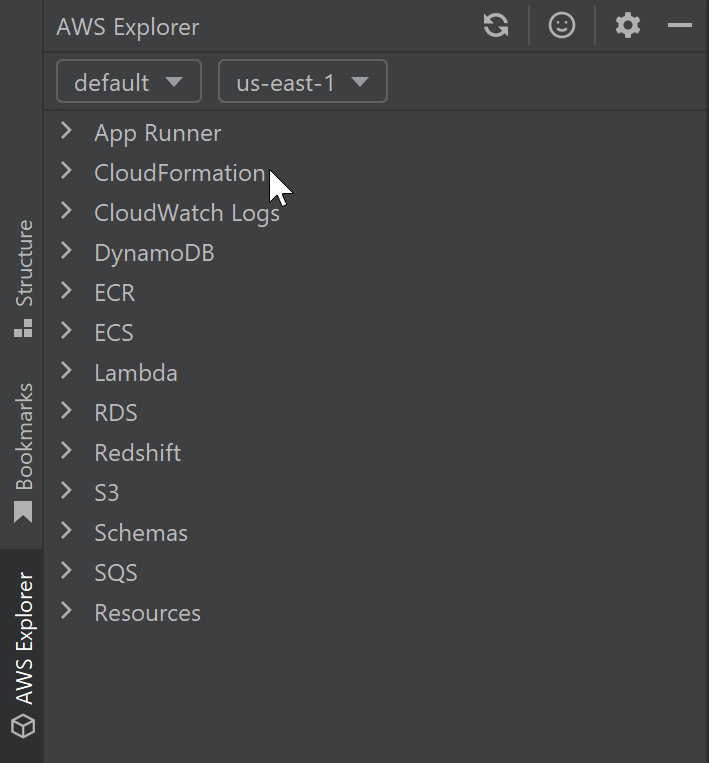
On the other hand, if your machine has no credential files and you don’t have any AWS credentials to choose from in the credentials drop-down menu, like the image shown below, click on Edit AWS Credential file(s).
Since we currently have no credential files, IntelliJ IDEA will prompt us to create a credential file. We’ll click Create.
A new configuration file is created containing comments at the top describing the contents of the files and fields where we can enter our aws_access_key_id and aws_secret_access_key.
There are a few ways to set up access to AWS. You can find detailed instructions on the different methods in the AWS Toolkit User Guide’s page on connecting the AWS Toolkit to AWS accounts. If your company has an admin team that manages access to AWS, you may need to consult them on how to get command line access. The IDE uses the same credential files as the CLI, so if AWS access works from the command line, it will work in the IDE as well.
In this blog, I’d like to show you how I configured my IDE to connect to AWS in case you’re starting from scratch on your own personal AWS account.
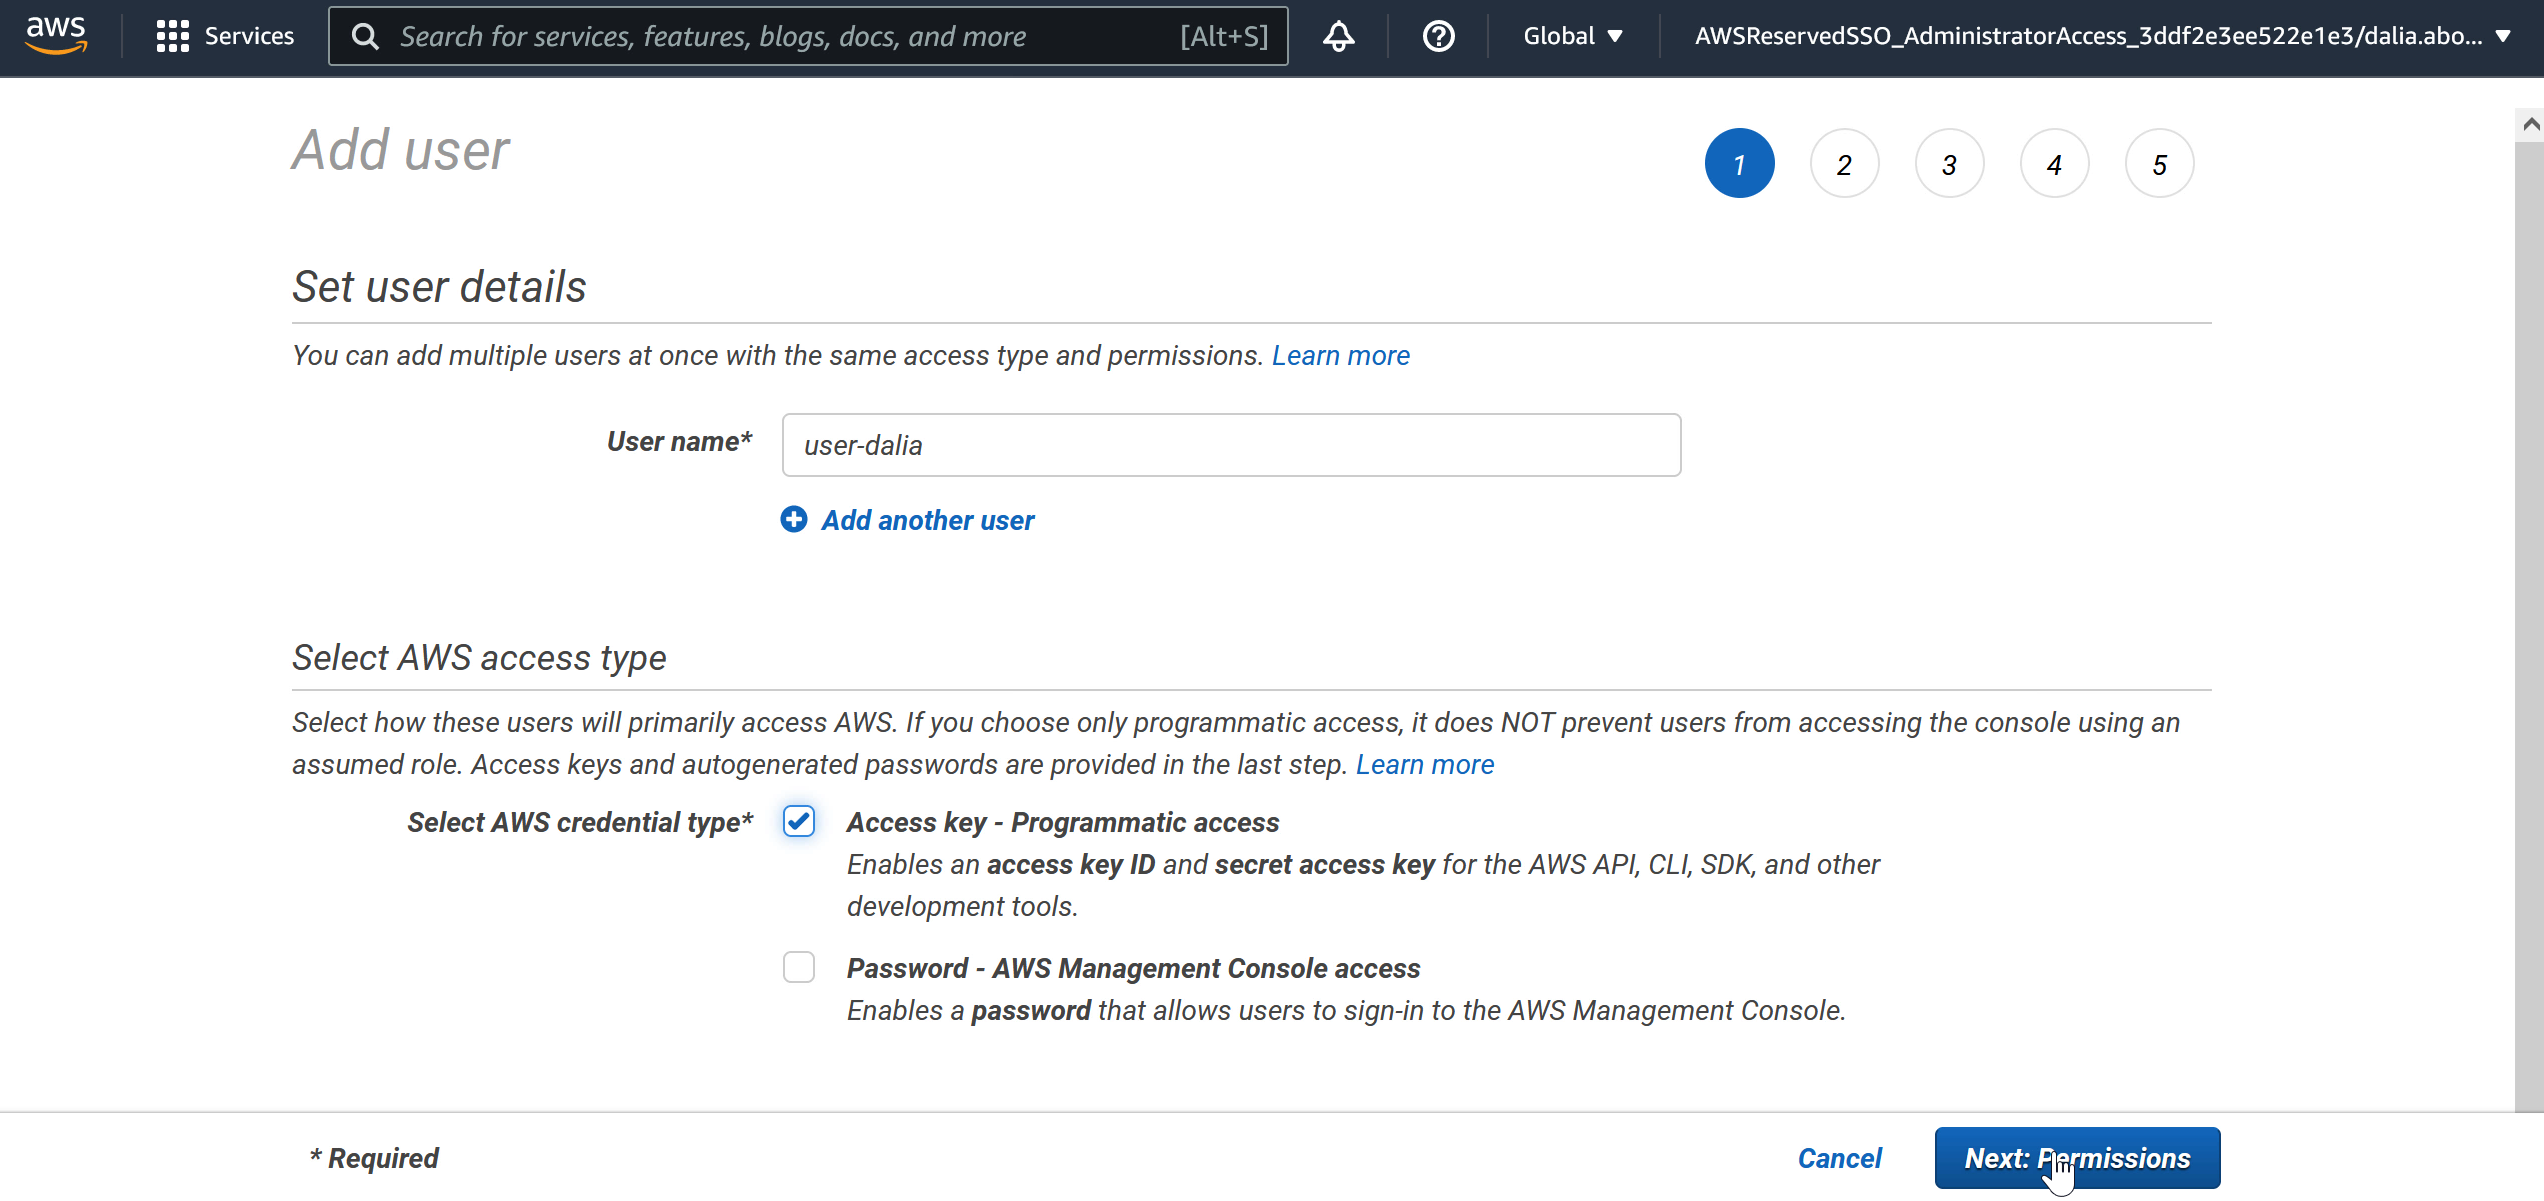
In my browser, I’ll login to my AWS Management Console. Then, I’ll navigate to the Identity and Access Management (IAM) service. In the IAM service page, I will select Users from the left-hand menu. I’ll click the Add users button on the right. Then, fill in the User name. Then, I’ll check the Access key – Programmatic access checkbox which will allow me to use the access key ID and secret access key to connect IntelliJ IDEA and any other command line tools to AWS. Then, I’ll click Next: Permissions.
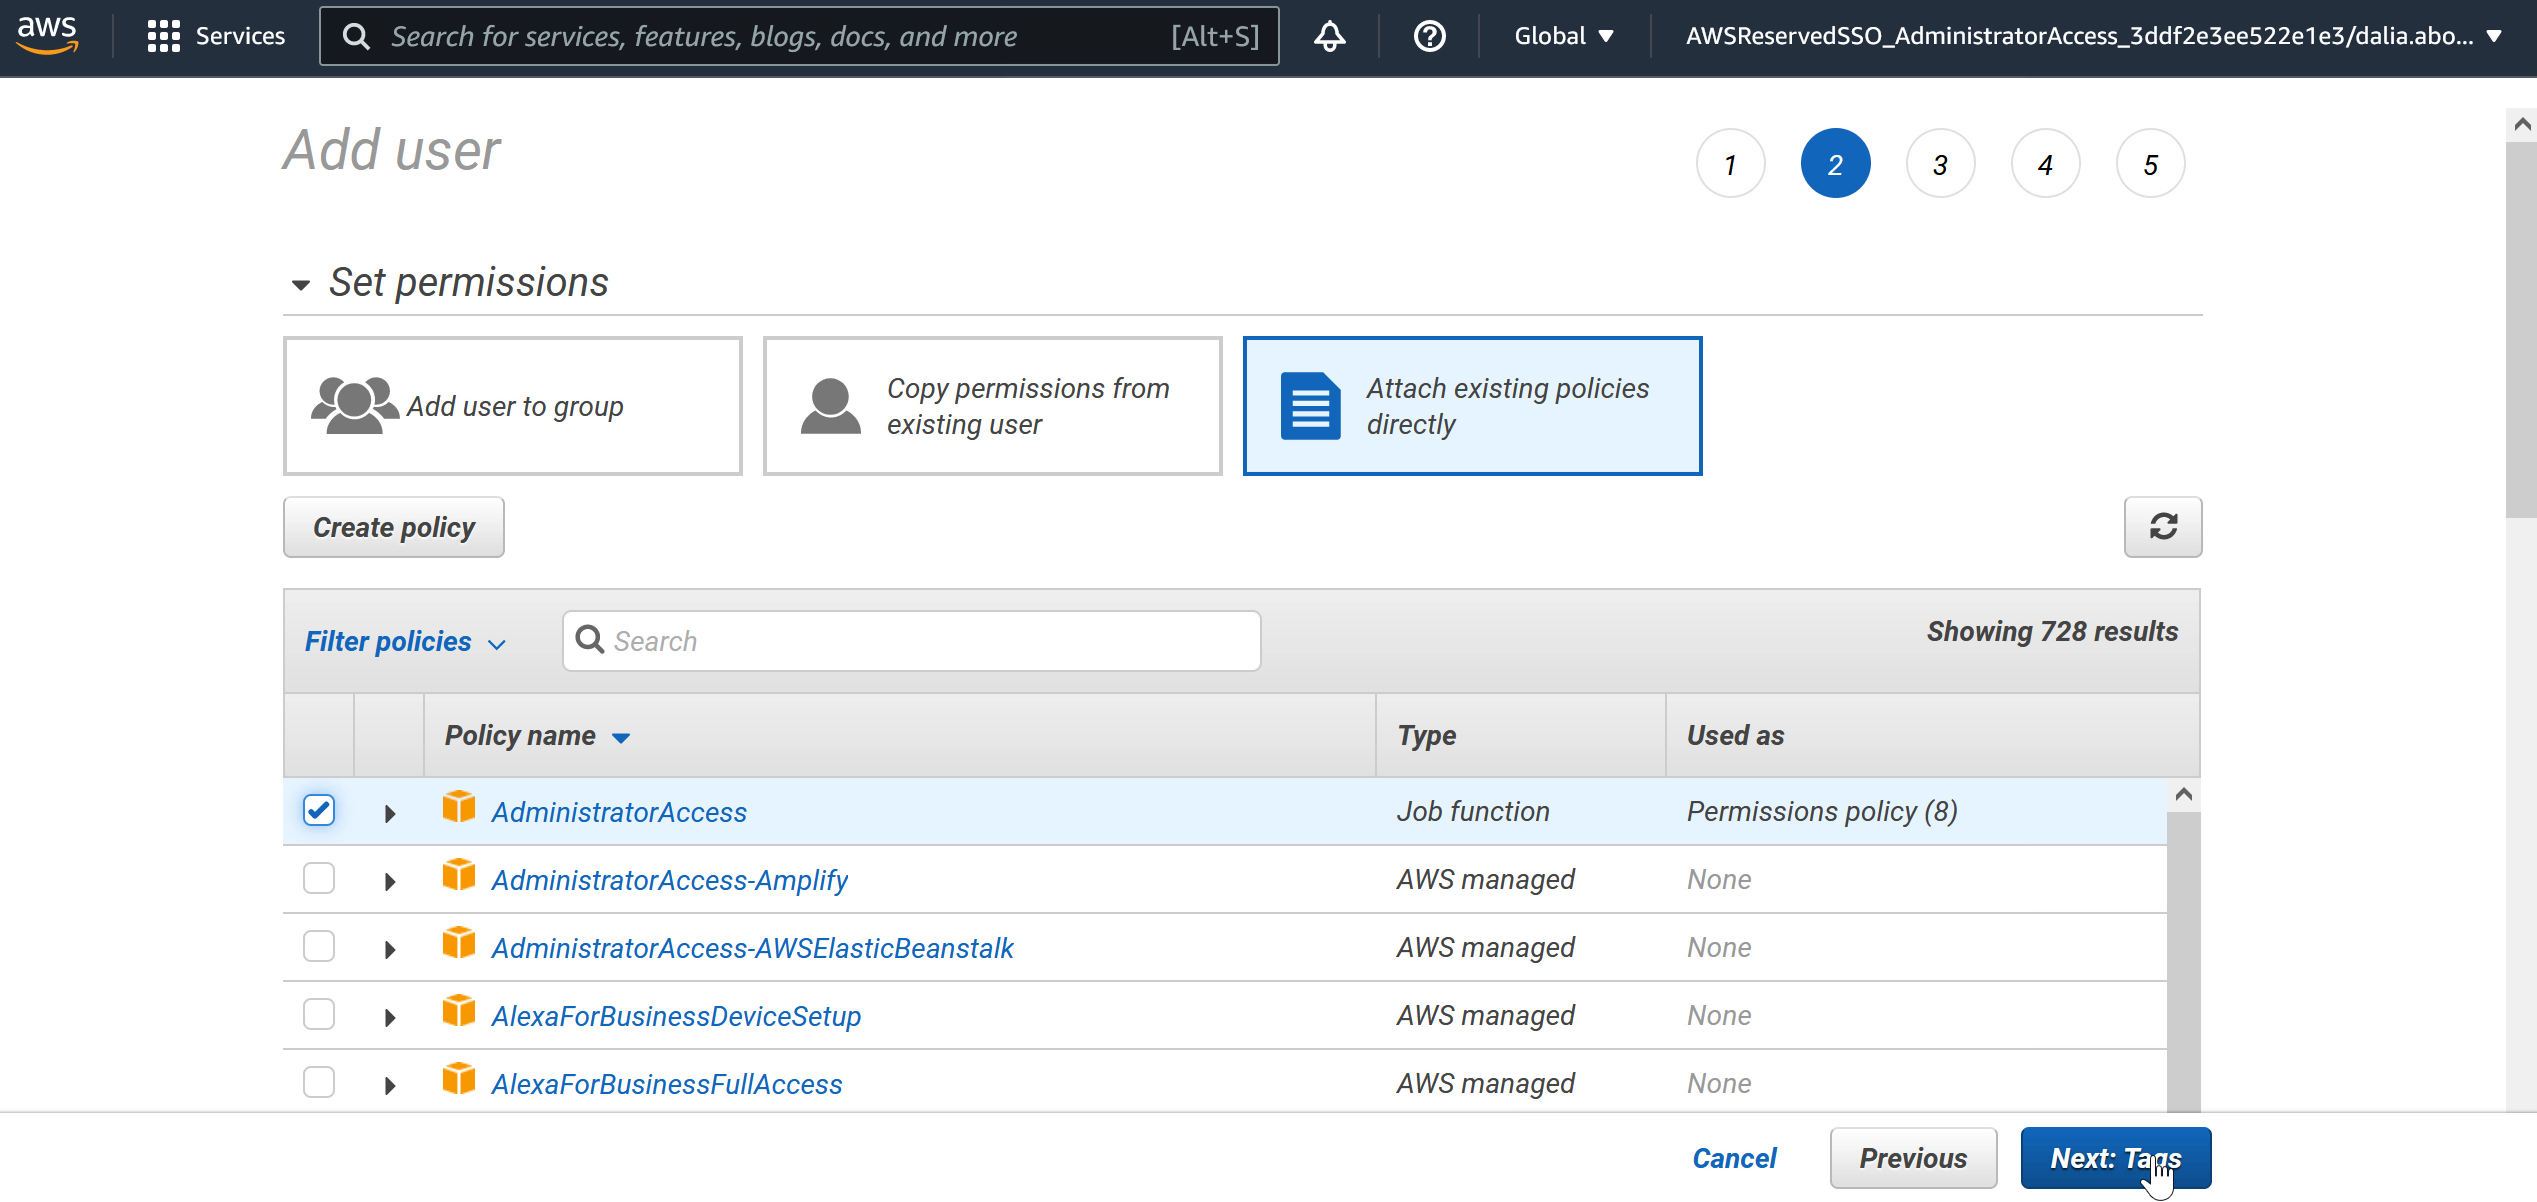
In the permissions page, I’ll select Attach existing policies directly and check the AdministratorAccess box. Then, I’ll click Next: Tags.
I don’t need any tags so I’ll click Next: Review.
I’ll review my summary and ensure that all the user details are correct. Then, I’ll click Create user.
Once I do that, I can see that the new IAM user was created. I now have a generated Access key ID and Secret access key to use to connect IntelliJ IDEA to AWS. I’ll copy the Access Key ID and paste it into my config file in the IDE. For the Secret access key, I’ll click on the Show button and copy it over as well.
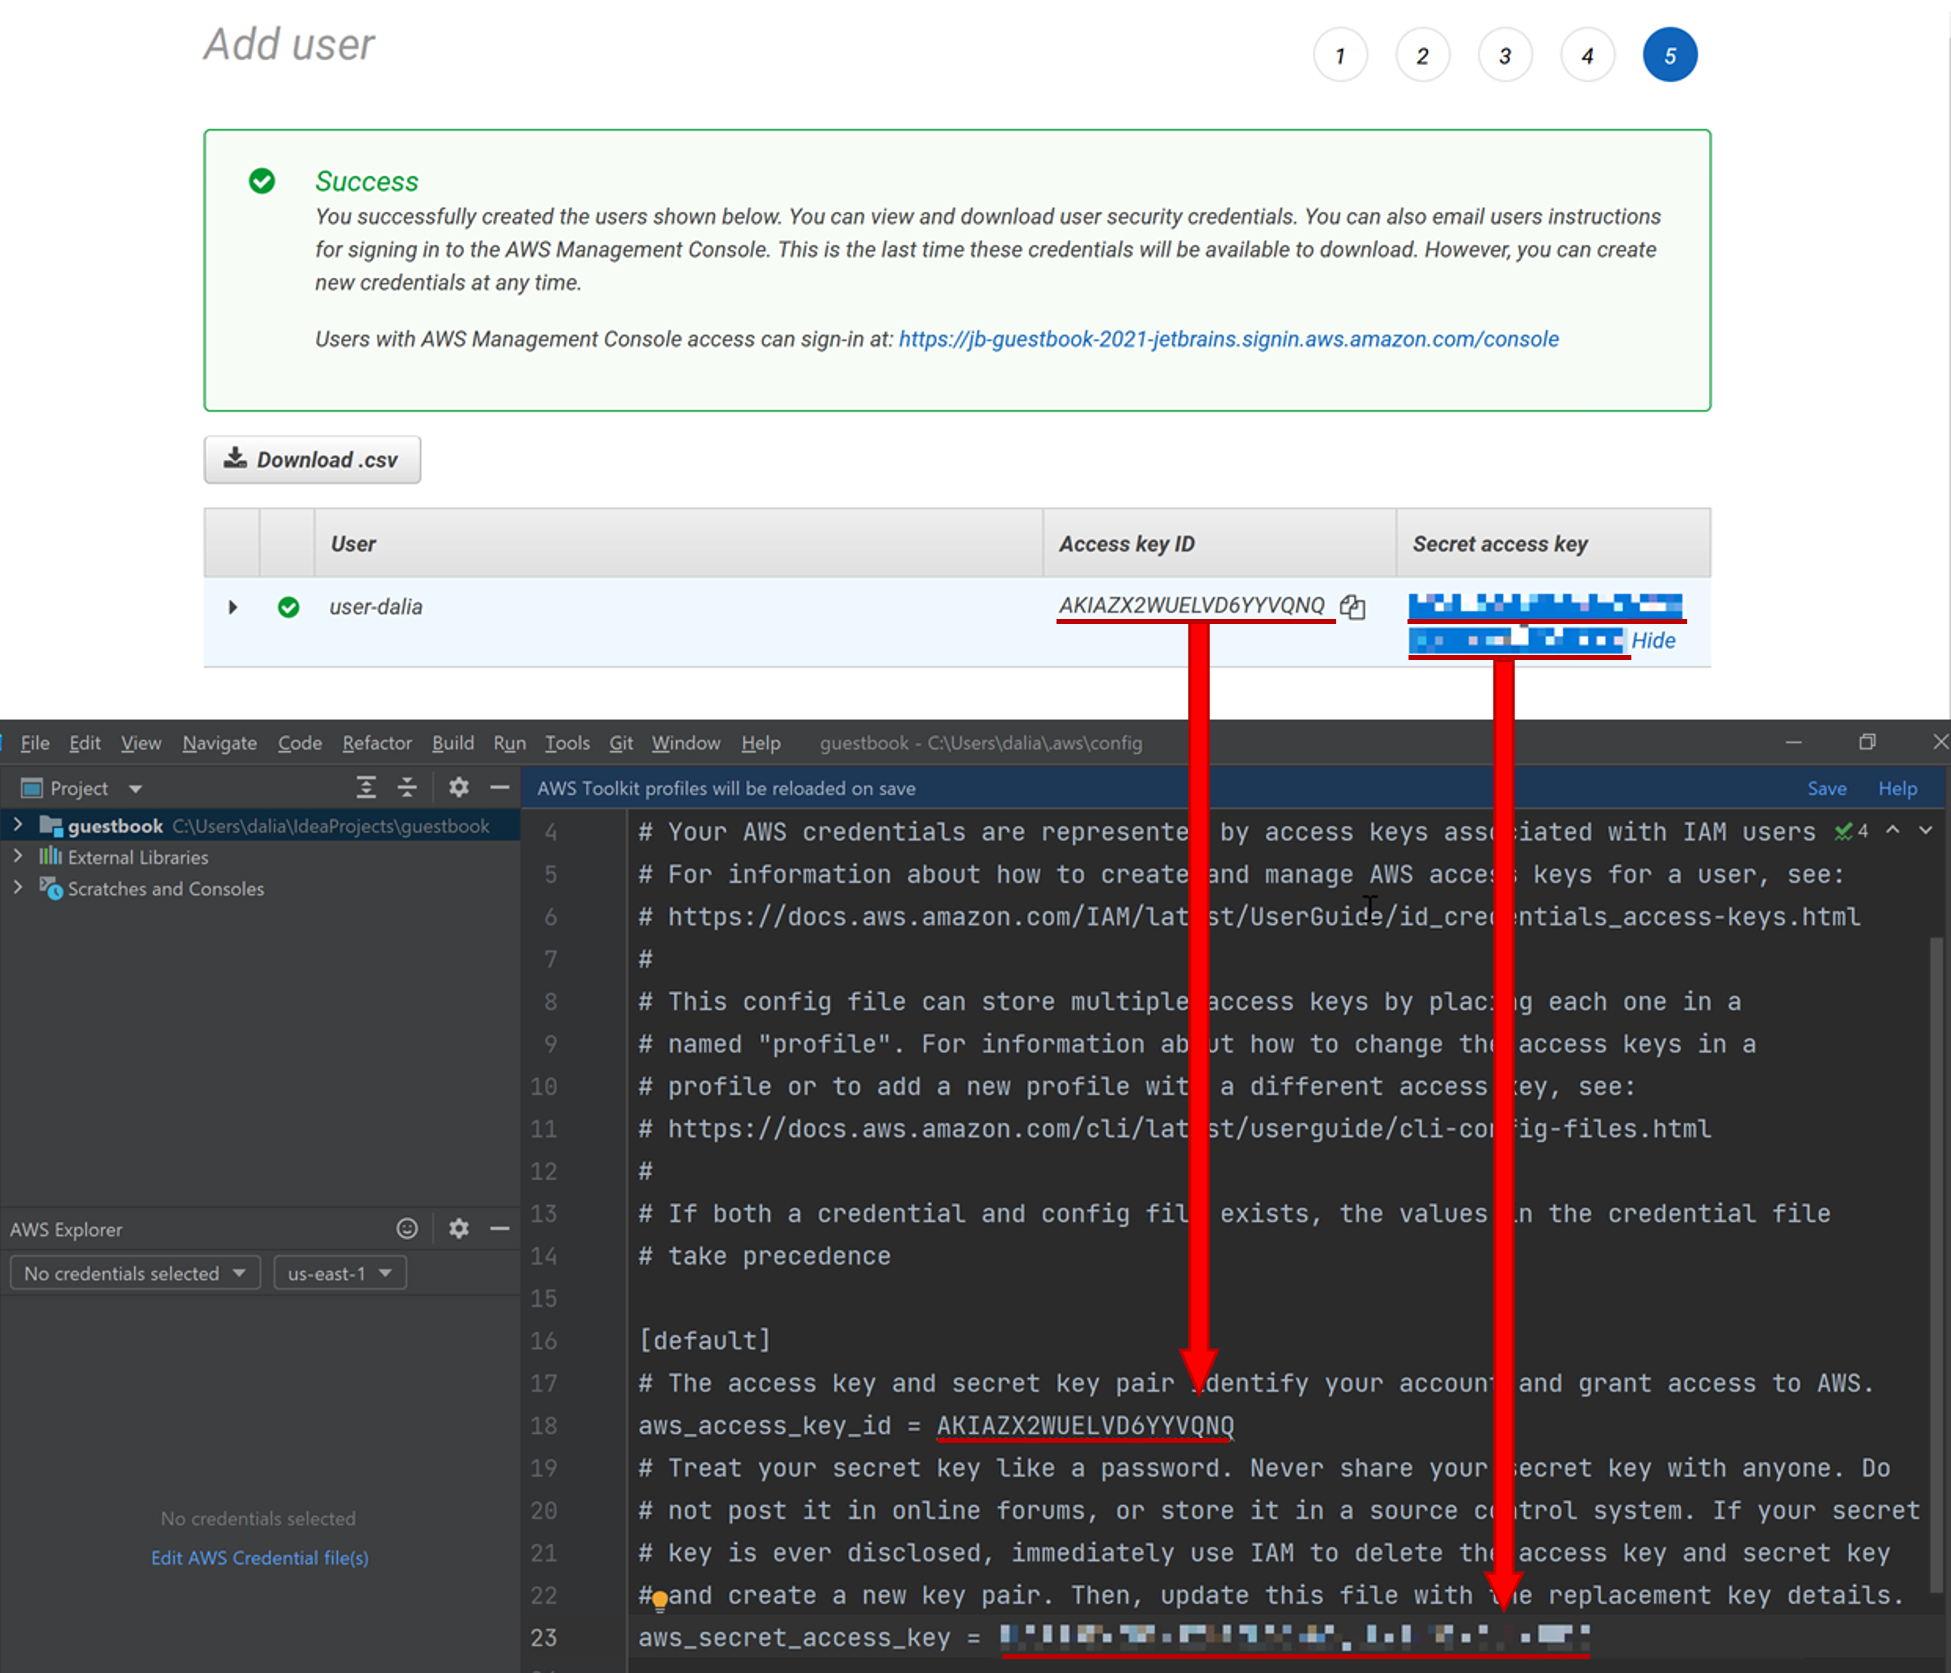
Note: be careful with your secret access key and don’t share it with anyone since it gives full administrator access to your AWS account.
In IntelliJ IDEA, I’ll click on the Save blue button. Then, in the AWS Explorer window, I’ll click on the credentials drop-down menu. I can now see the Profile:default associated with my credentials. Once I select the default profile, IntelliJ IDEA will load a list of AWS services associated with my AWS account.
If you run into any issues during this step, consult the setup instructions in the AWS Toolkit User Guide.
Now that our AWS Toolkit is configured and ready to go, let’s take a look at how to use it.
Working with the AWS Toolkit
AWS connection information can be viewed and modified from two locations: the AWS Explorer window or the status bar.

In the AWS Explorer window, the first drop-down menu will let you select between connections which is useful when you have multiple AWS accounts and you want to switch between them.
The second drop-down menu will let you choose the region you’d like to work with. Select All Regions to see the full list of regions to choose from.
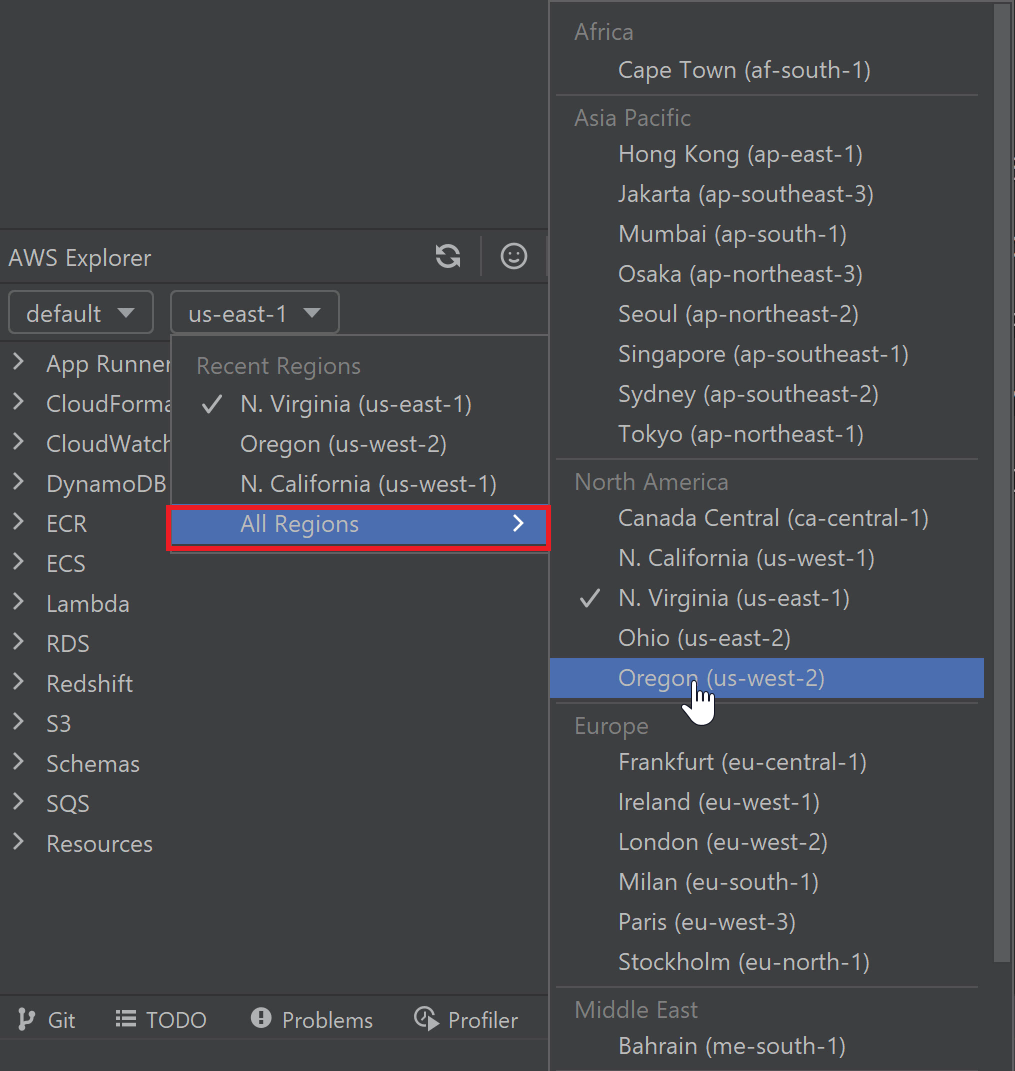
Note: make sure you have the right region selected when browsing your resources in your IDE. There has been a few times when I couldn’t see a certain resource I was expecting and it turned out it was because I didn’t have the right region selected.
AWS Services
In the AWS Explorer window, you’ll see a list of different AWS services that you can interact with from IntelliJ IDEA. Let’s take a look at a few.
CloudWatch Logs
One of the most useful features of the toolkit is the ability to see your CloudWatch Logs right within your IDE. You can do so by expanding the CloudWatch Logs node which will give you a list of your log groups.
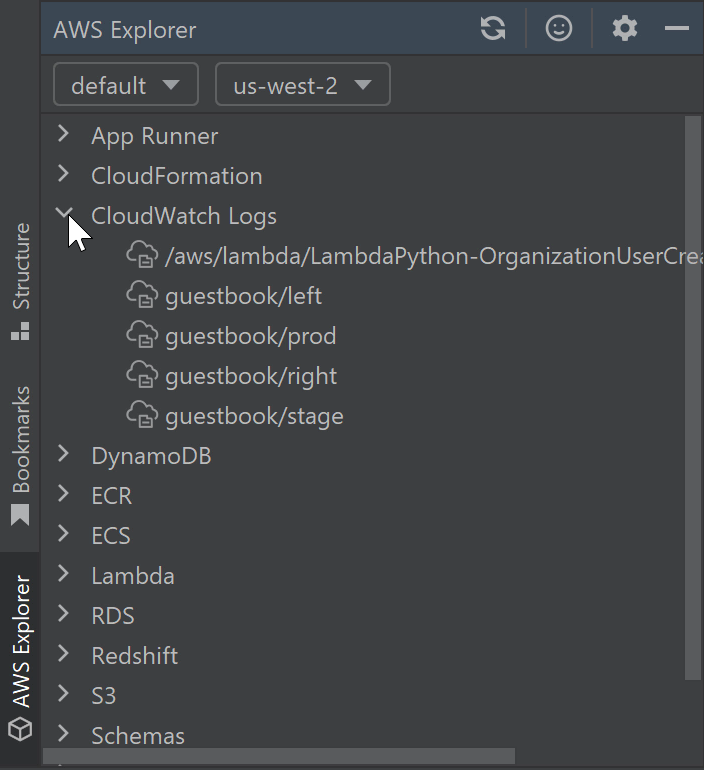
I’d like to see the logs associated with my guestbook application running in production so I’ll double-click on guestbook/prod which will show me a list of log streams to choose from. Once I select the log stream I’m interested in, I can now see the logs for my application.

My application is a Spring Boot app so I see the Spring Boot logs showing the application starting. I can also filter events by entering in a string in the Filter events window and clicking Enter.
Another option for searching through the logs is to click on one of the log messages and start typing a string to look for in the logs. You can navigate between the different hits using the arrow keys.
ECR
Another AWS service you can interact with in your IDE is Amazon Elastic Container Registry (ECR).
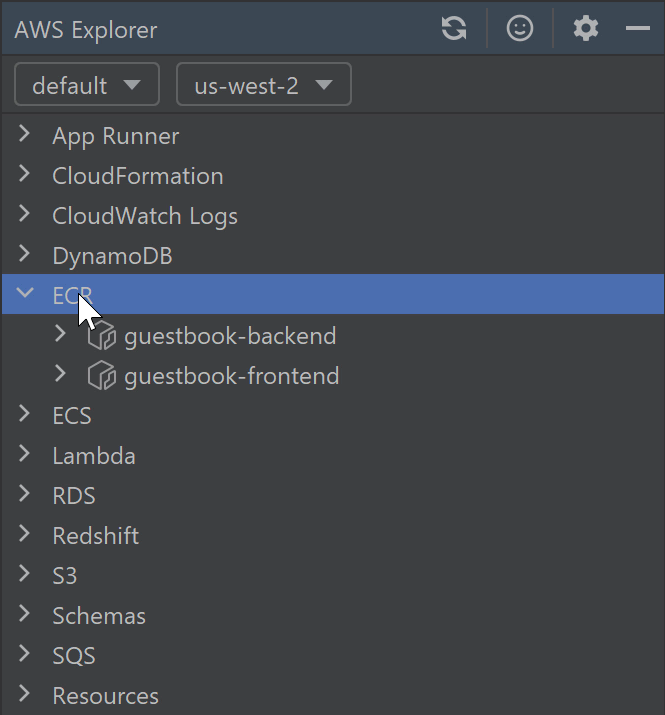
You can easily create a new repository by right-clicking on the ECR node.
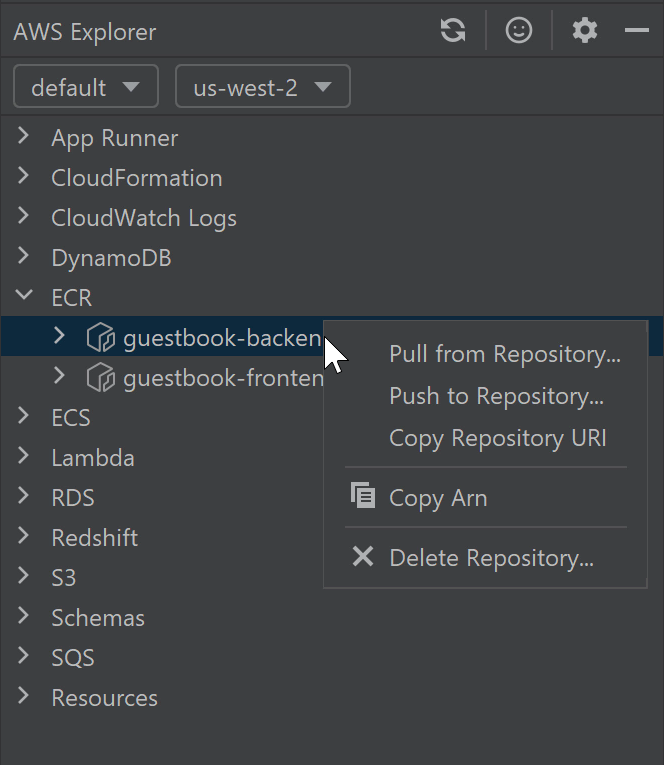
For existing repositories, you can right-click on your repository to pull or push images.
Lambda
One of the main features of the AWS Toolkit in IntelliJ IDEA is the ability to work with AWS Lambda.
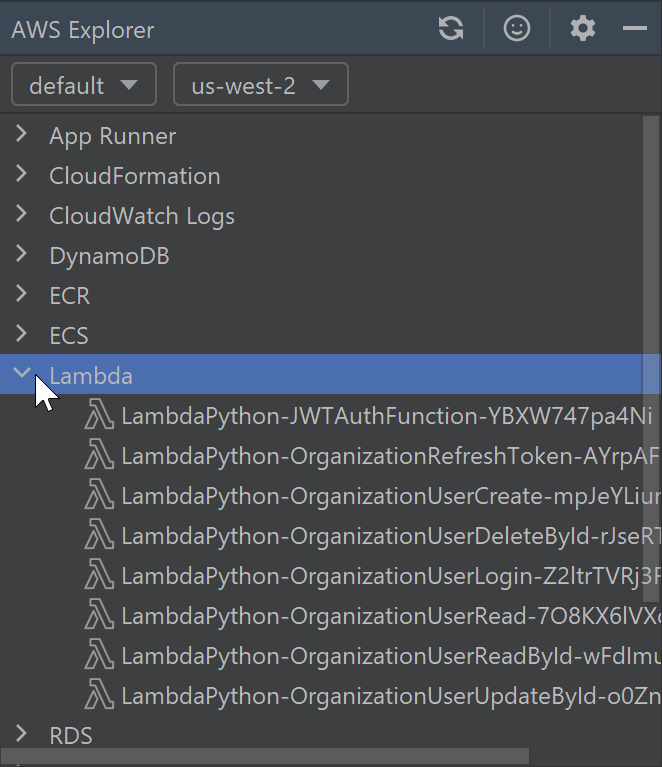
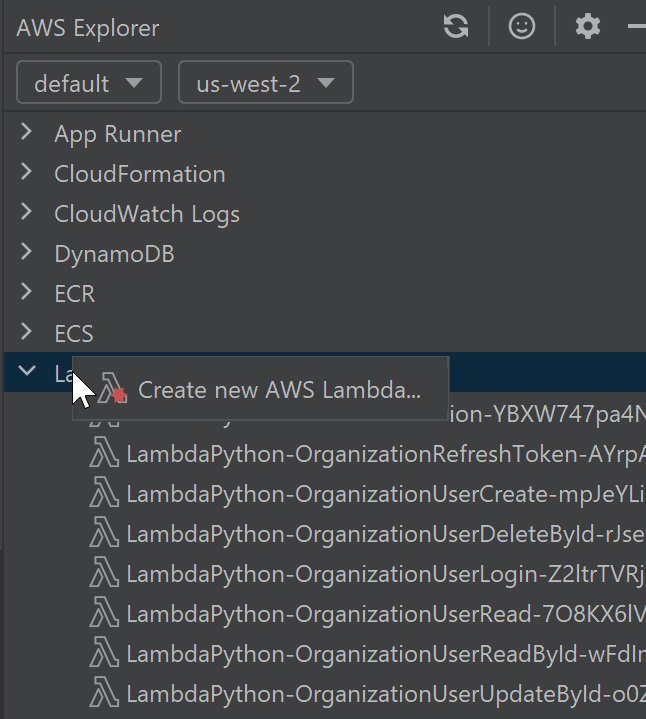
You can create a new Lambda function by itself by right-clicking on the Lambda node.
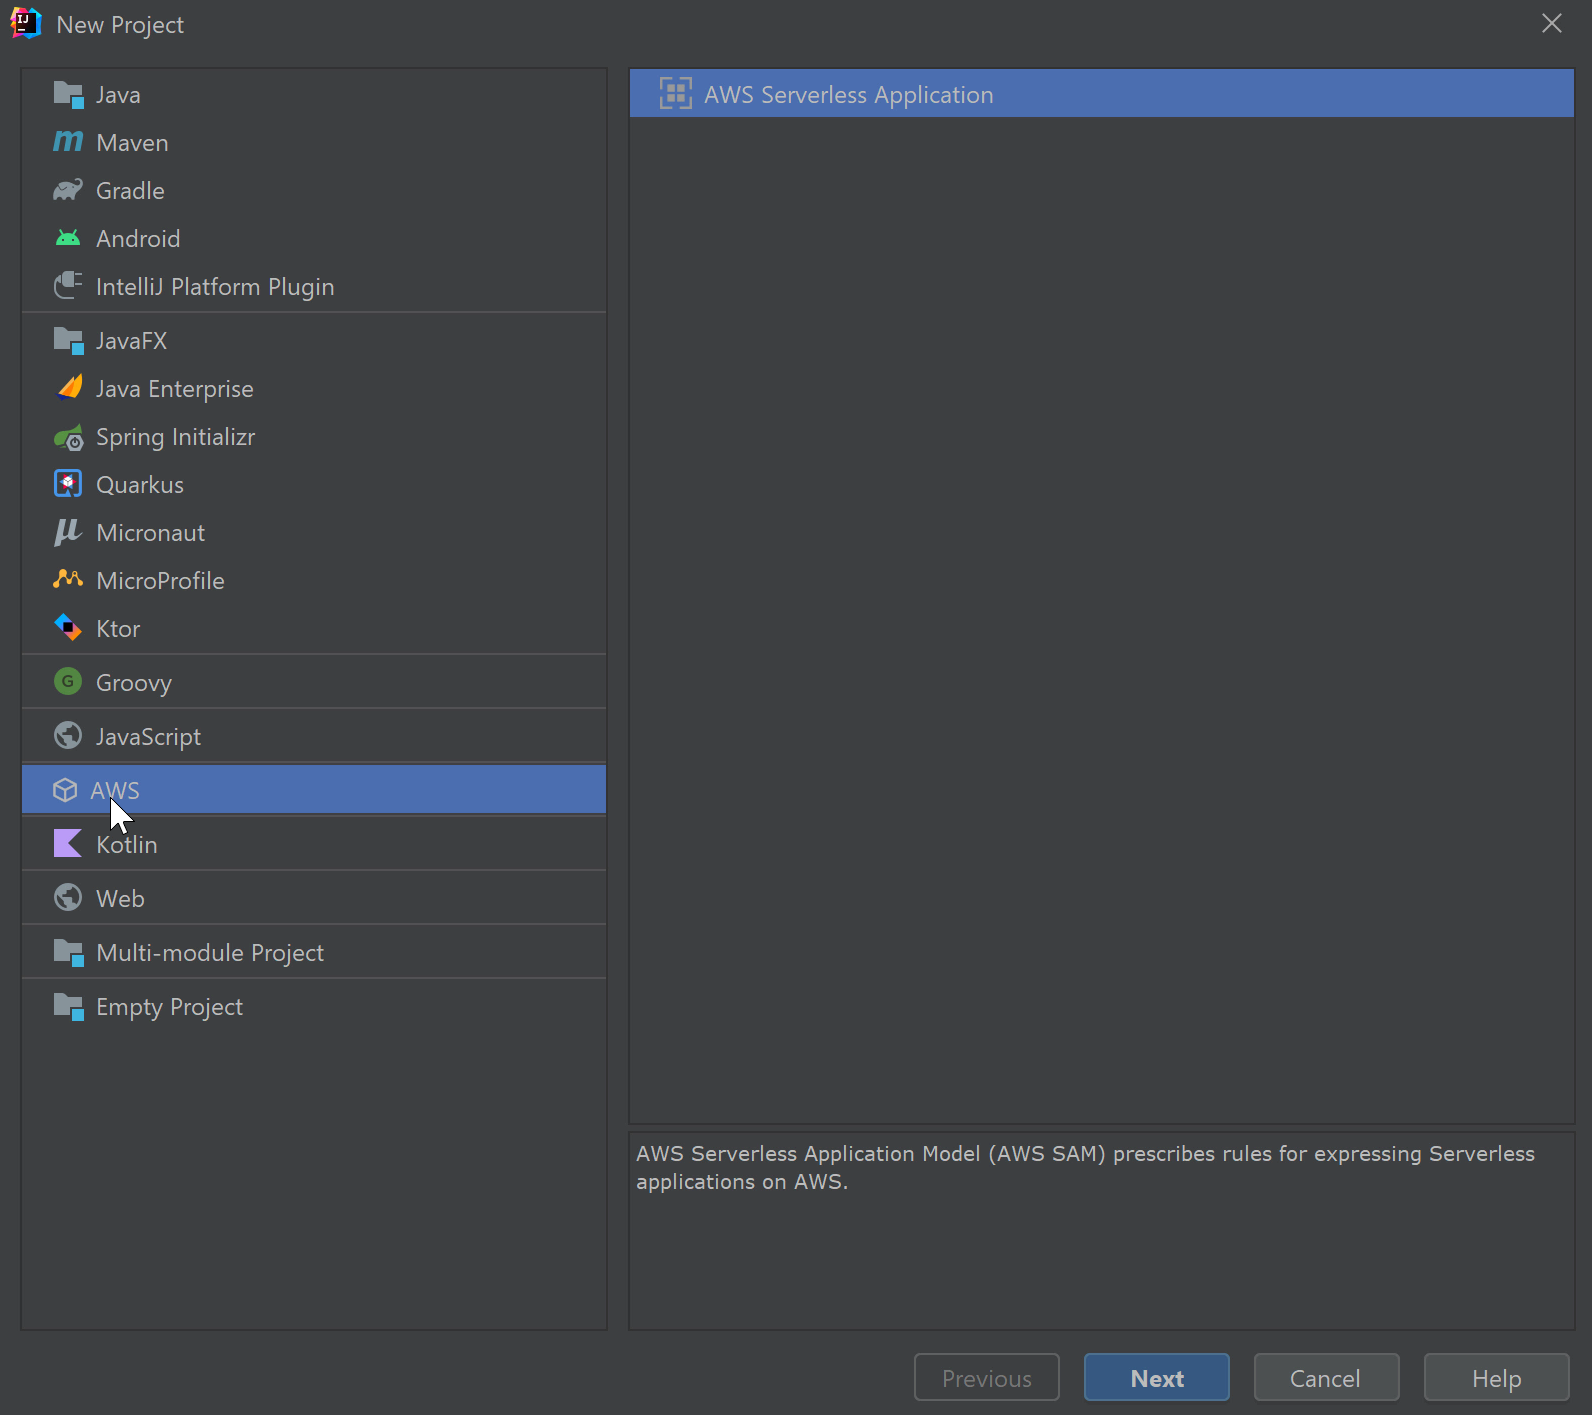
You can also create a Lambda function that is part of an AWS serverless application by going to the New Project menu and selecting AWS from the left-hand menu.
Checkout this video to learn about building serverless applications in IntelliJ IDEA.
S3
One of my favorite features of the AWS Toolkit is the ability to browse my S3 buckets right within my IDE. I can do that by expanding the S3 node.
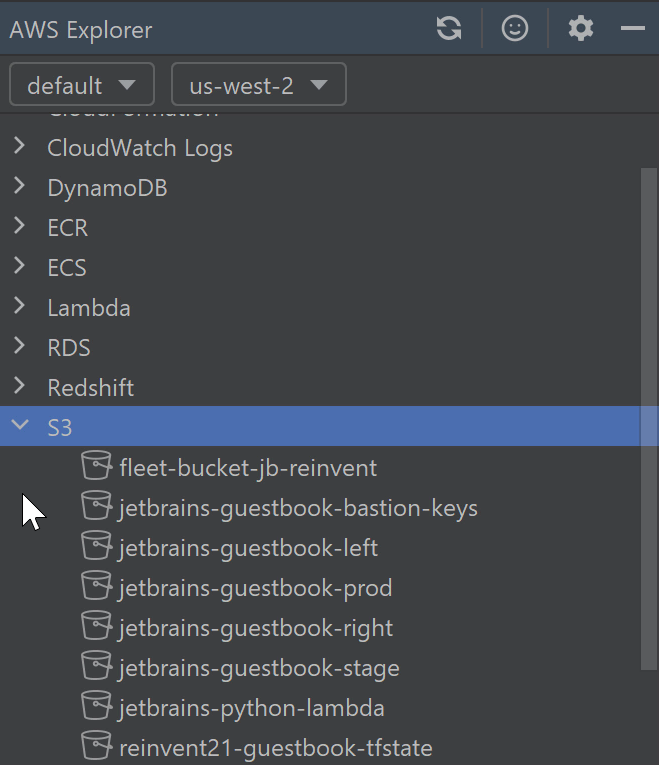
I can create a new S3 bucket by right-clicking on the S3 node and clicking Create S3 bucket.
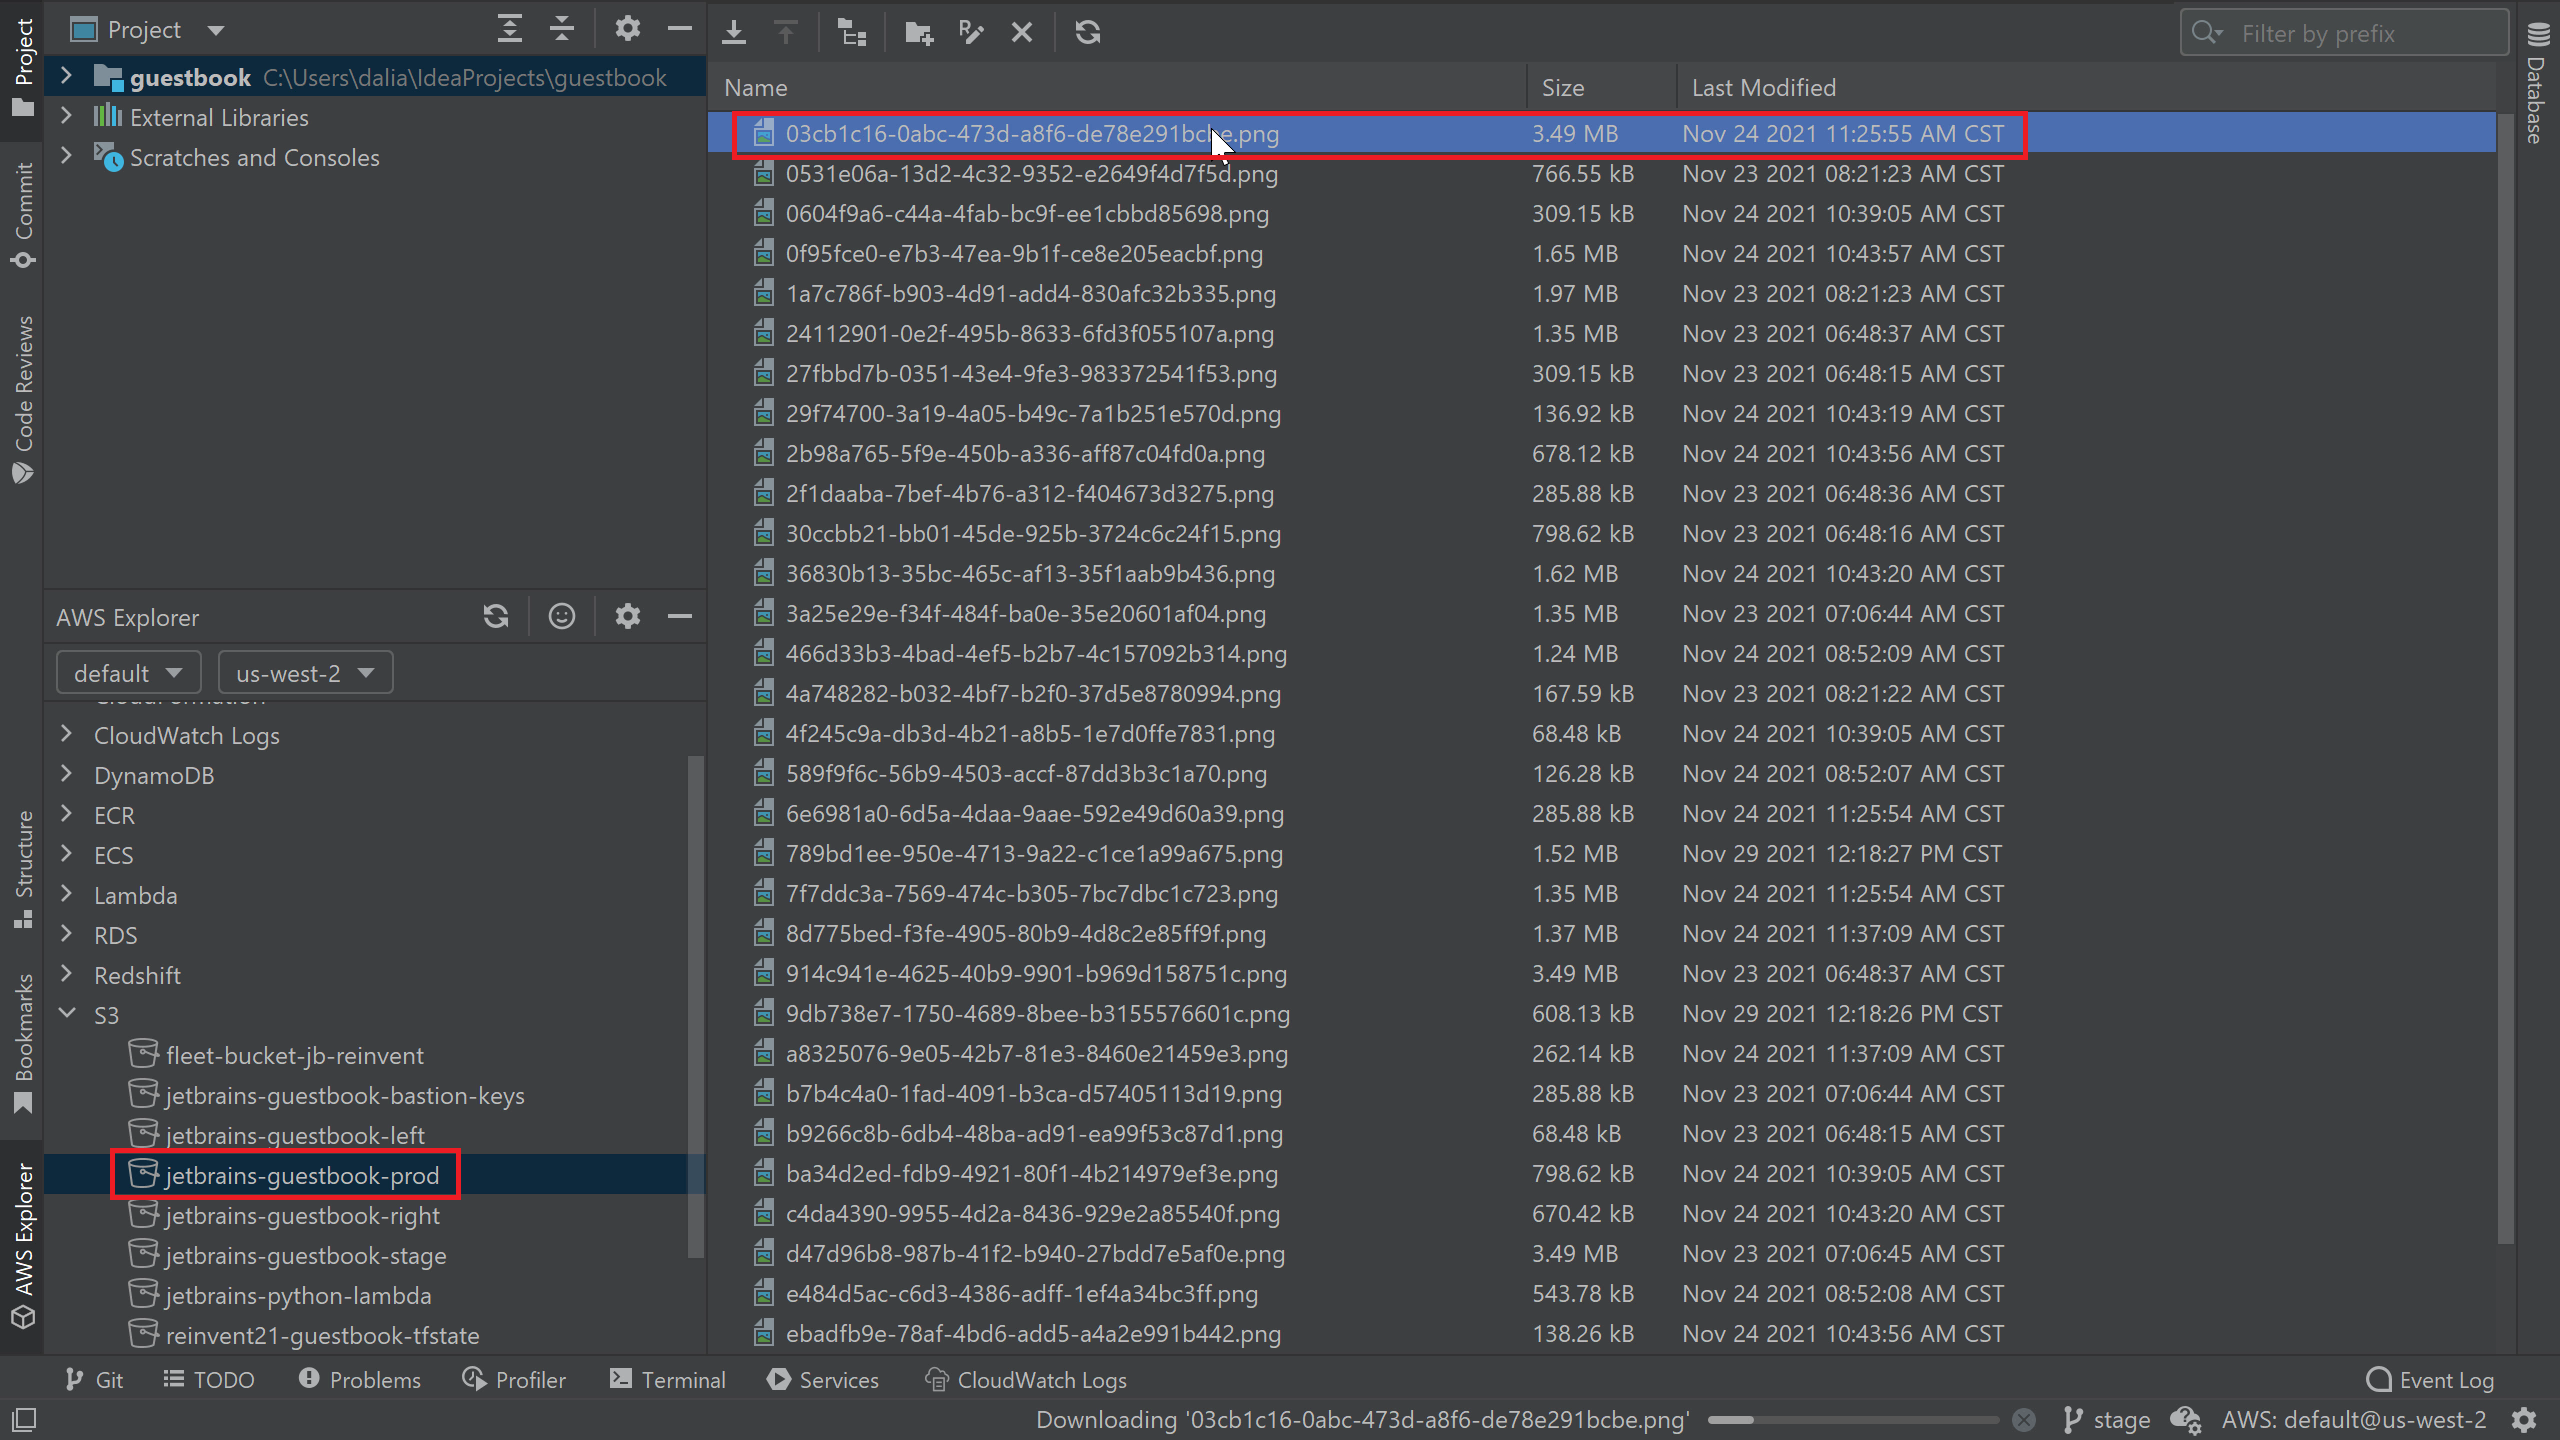
For my existing buckets, I can view the contents by double-clicking on my bucket. From there, I select the files in my bucket to download and view them.

Other Services
The services we’ve highlighted so far are just a few of many services that you can interact with from your IDE. Once you have your AWS Toolkit connected to your IDE, I recommend that you browse through the services you’re using for your application and see what you can do with them.
You can also use the Resources node to choose from hundreds of additional resource types and interact with them from your IDE.
AWS Toolkit Settings
We can view additional settings for the AWS Toolkit using the Settings icon in the AWS Explorer window. If you click on the icon, you’ll see some helpful links including a documentation link which points you to the AWS Toolkit User Guide as well as a link to the AWS Toolkit GitHub repository.
![]()
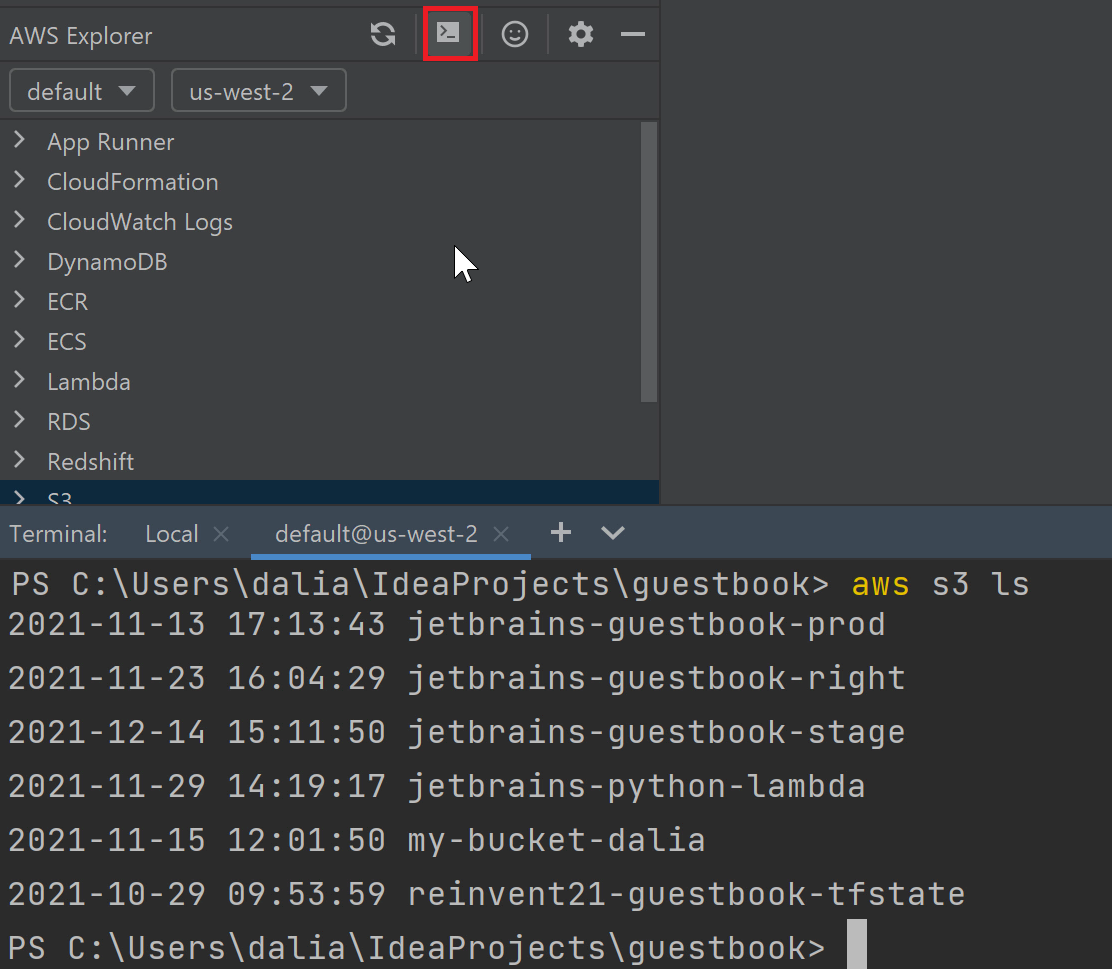
An interesting option available in the settings menu is the ability to enable experimental features. For example, one feature that I’ve heard great feedback on is the ability to open an AWS local terminal within your IDE. You can enable this feature by selecting Experimental Features -> Open AWS local terminal. Once you do that, a new terminal icon will appear in the AWS Explorer. If you click on the new terminal icon, IntelliJ IDEA will start a local terminal session with your current AWS credentials which means you can run commands like aws s3 ls to list all your S3 buckets.
In this tutorial, we explored some of the IntelliJ IDEA features that make it easier for you to work with AWS. I hope you install the AWS Toolkit for IntelliJ IDEA plugin and try it out!
See also:

Subscribe to IntelliJ IDEA Blog updates
Discover more


IntelliJ IDEA 中的 AWS

安装
要配置 IntelliJ IDEA 以使用 AWS,我们需要安装 AWS Toolkit for IntelliJ IDEA 插件,并配置将 IDE 连接到 AWS 所需的 AWS 凭据。
安装 AWS Toolkit 插件
AWS Toolkit。点击 AWS Toolkit 搜索结果旁边的 Install(安装)按钮。
将 IntelliJ IDEA 连接到 AWS
aws_access_key_id 和 aws_secret_access_key。不需要任何标签,因此点击 Next: Review(下一步:检查)。
检查摘要,并确保所有用户详细信息正确。然后点击 Create user(创建用户)。
Access Key ID 并将其粘贴到 IDE 的配置文件中。对于 Secret access key,点击 Show(显示)按钮并复制。
使用 AWS Toolkit
可以从两个位置查看和修改 AWS 连接信息:AWS Explorer 窗口或状态栏。
AWS 服务
CloudWatch 日志
guestbook/prod,这将显示一个可供选择的日志流列表。在选择感兴趣的日志流后,就可以看到我的应用程序的日志了。
ECR
Lambda
您可以通过右键点击 Lambda 节点来创建一个新的 Lambda 函数。
您还可以通过转到 New Project(新建项目)菜单并从左侧菜单中选择 AWS 来创建作为 AWS 无服务器应用程序一部分的 Lambda 函数。
S3
其他服务
AWS Toolkit 设置
![]()
AWS s3 ls 这样的命令来列出您所有的 S3 存储桶。
英文博文原作者: