Server-side Swift in CLion

Hi everyone,
In this article, we will take a look at the CLion and AppCode features which are especially useful for server-side Swift development. You can either read through to the end of this article to learn about them all or watch the short demo below to see them in action:
Before you begin
- Download the latest CLion 2018.3 EAP.
- Start CLion and go to
Preferences | Plugins. - Install the following plugins:
- Restart CLion to activate the plugins.
- Checkout the Kitura-Sample project and open it in CLion.
- Wait for the cache/index phase to finish.
- Install PostgreSQL via
brew install postgresql.
HTML/JavaScript
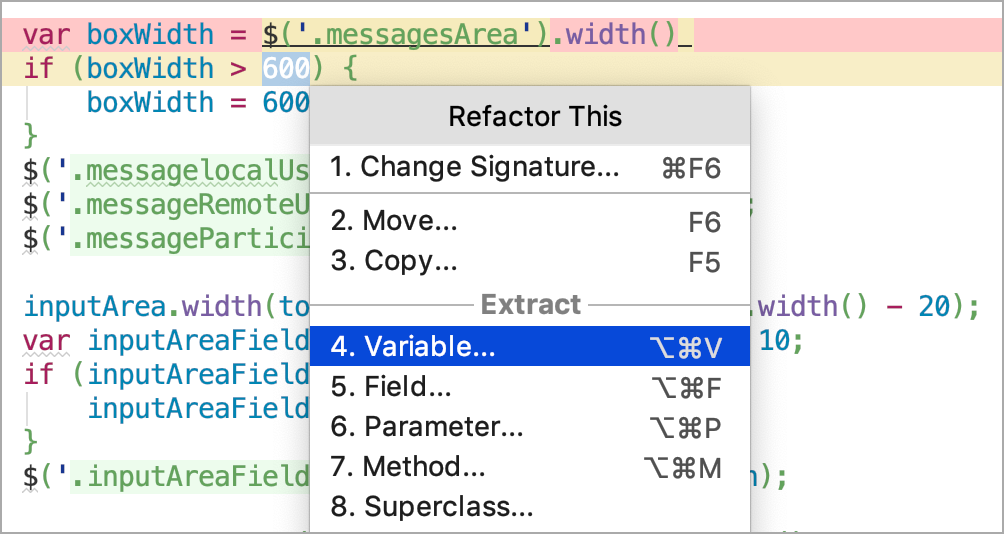
Get the same functionality for editing HTML and JavaScript files as WebStorm, including all the code generation and refactoring actions:
Debug your JavaScript code as easily as this:
Web Templates
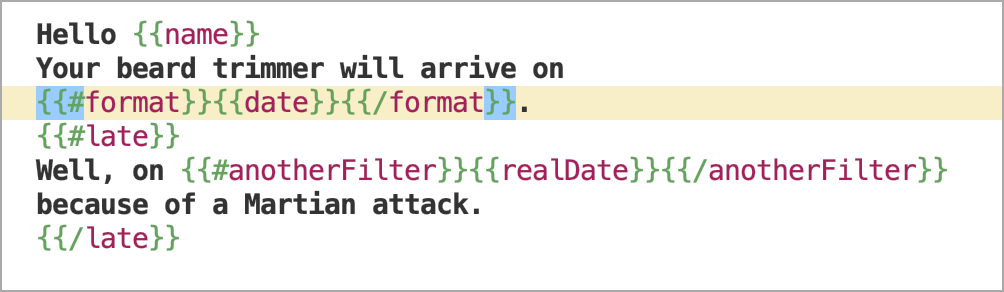
Get Handlebars/Mustache, Markdown, and other template languages with support from our dedicated plugins:
There is no plugin for Stencil templates, so it’s not possible to have all the code assistance features working both for Stencil and HTML syntax together. We can set up some code assistance for Stencil files and syntax using one of the following approaches:
- Open
Preferences | Editor | File Types, find HTML file type and add*.stencilto the Registered patterns sections. After these steps CLion will recognize any Stencil template as an HTML file, providing code assistance for HTML and showing Stencil parts as plain text. - Use the Stencil settings from this article. In this case, only the Stencil syntax will be highlighted and no HTML code assistance will be available.
Build and Run
Press ⌃R to build and run the project. Kitura server will start on localhost:8080. Let’s set up CLion to open this link automatically when we finish building the project:
- Click Edit Configurations… in the Run Configurations popup.
- Select Kitura-Sample Run Configuration.
- Expand the Before Launch section and click the + button:
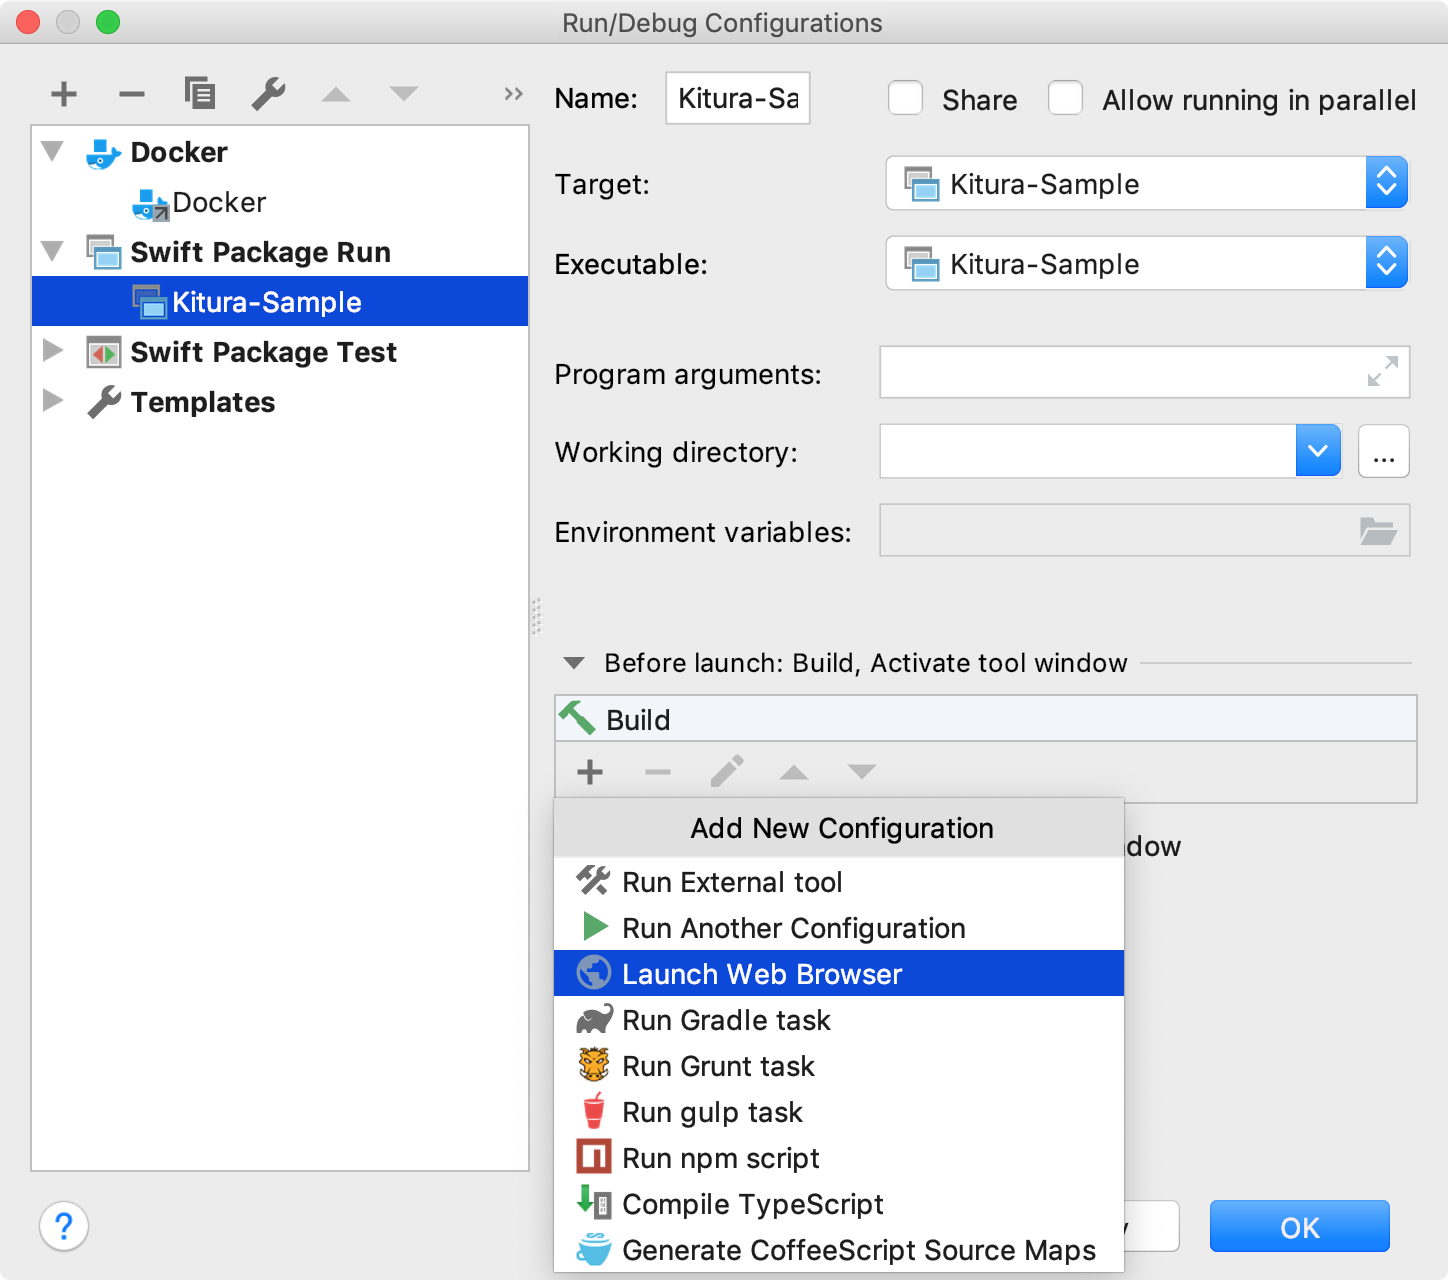
- Choose Launch Web Browser.
- Select Safari as browser and set Url field to
http://localhost:8080: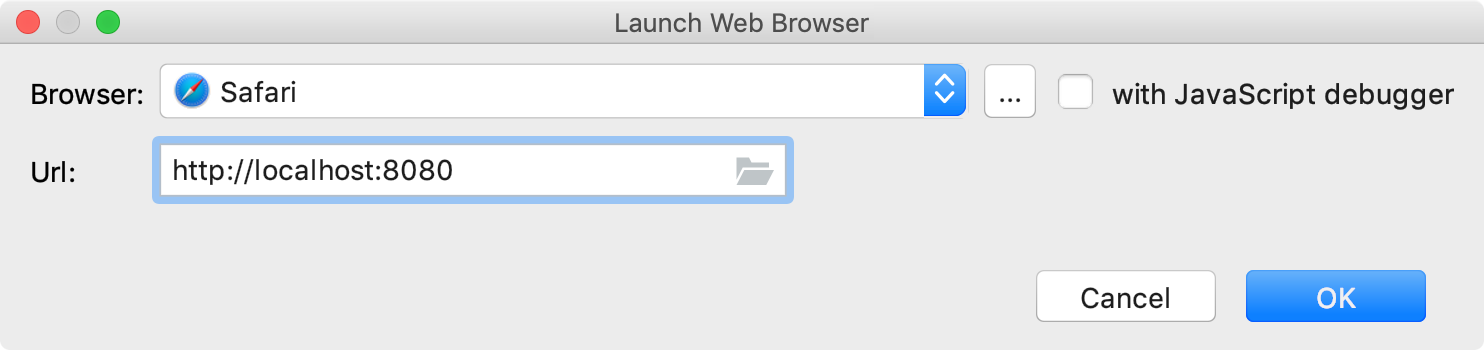
- Click OK.
Run the project again and have http://localhost:8080 opened in Safari automatically.
Databases
For this sample project to work, we need a school database. Open Terminal via ⌥F12 and execute createdb school. Connect to the database using the following steps:
- Open
View | Tool Windows | Database. - Press
⌘Nand add a new PostgreSQL datasource: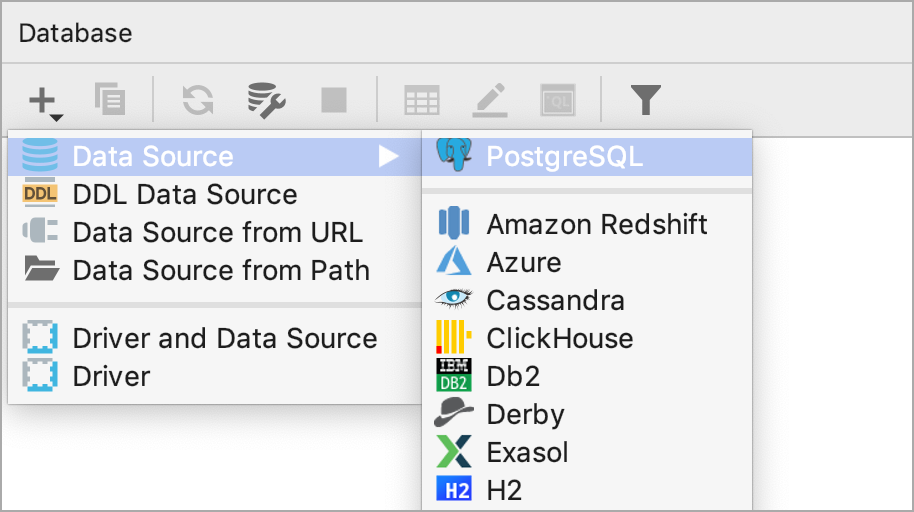
- Enter the database name and test the connection:
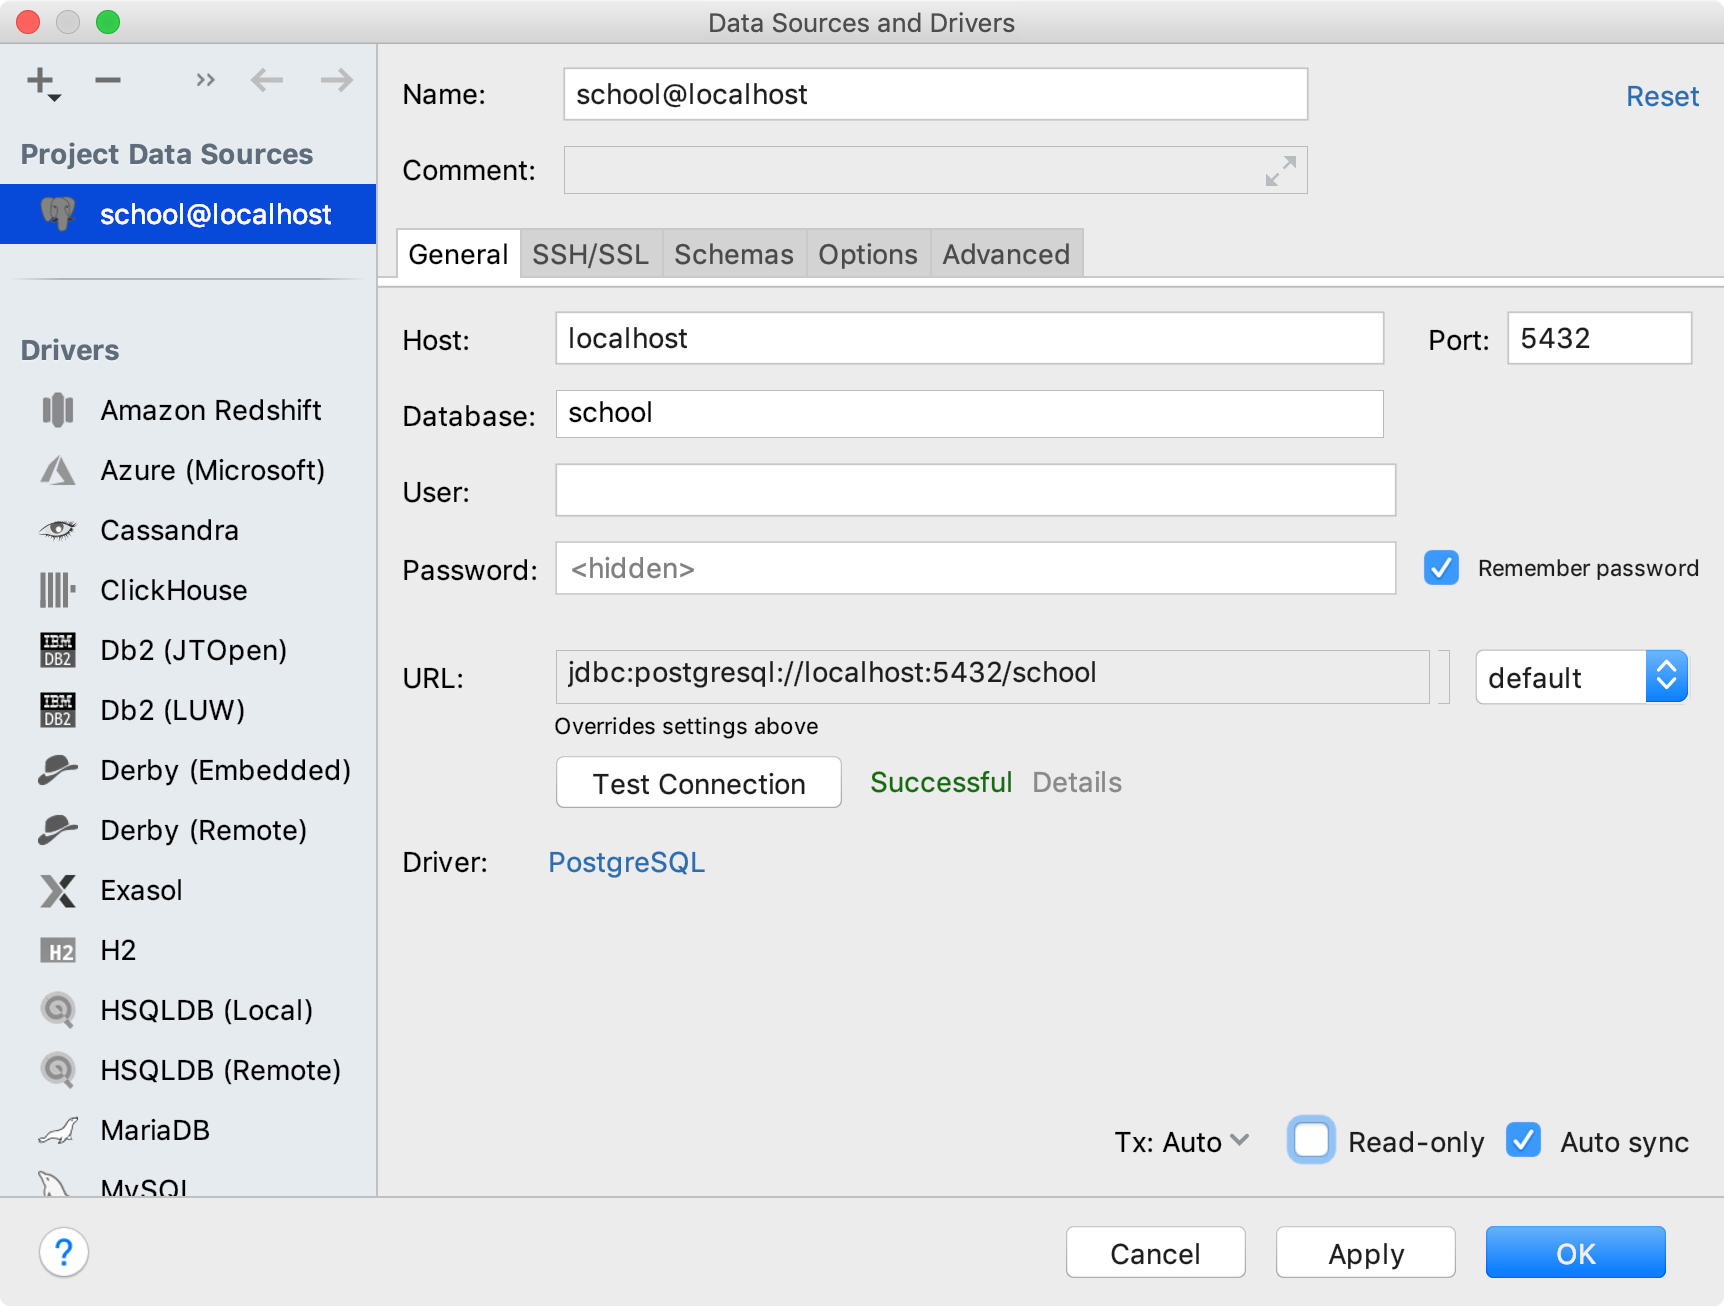
- Click OK to save the connection.
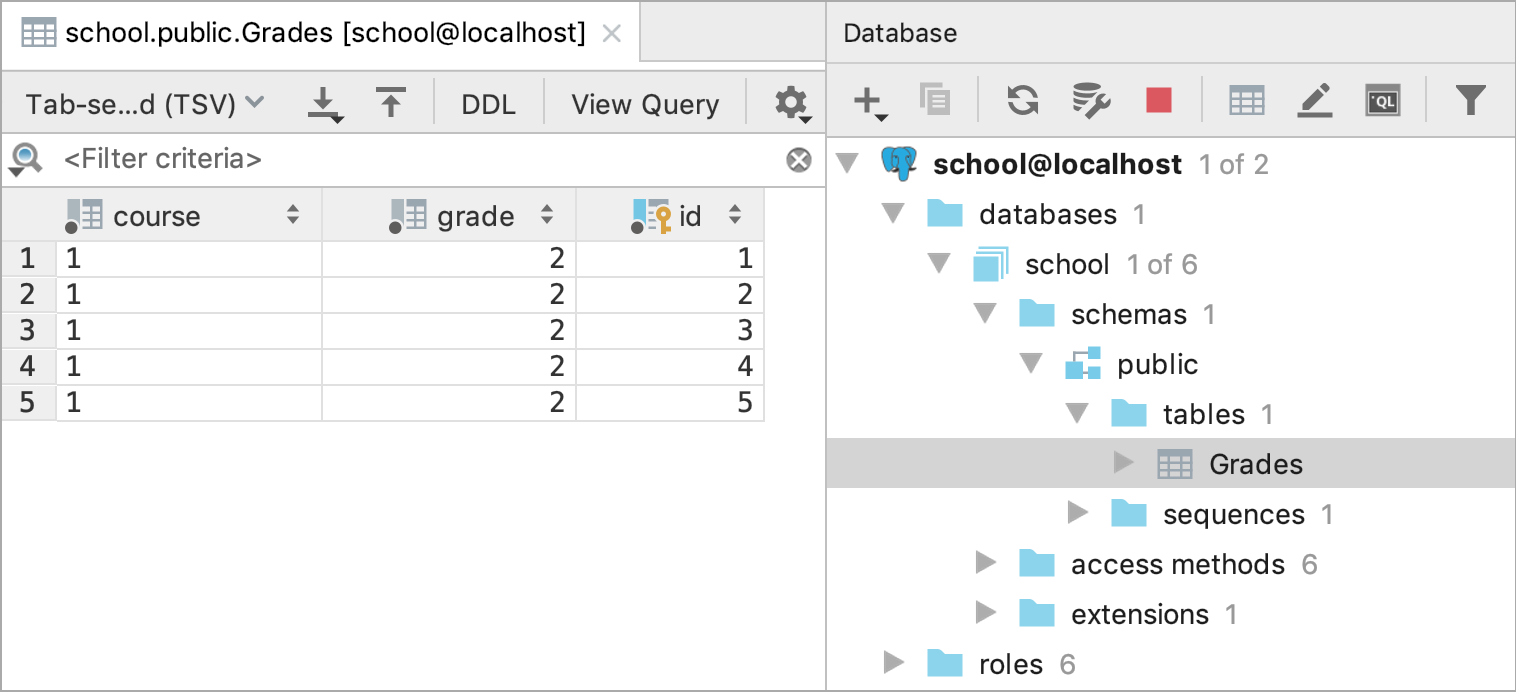
View the contents of the school database and see how it’s changed when adding a new entity:
Deployment
Docker
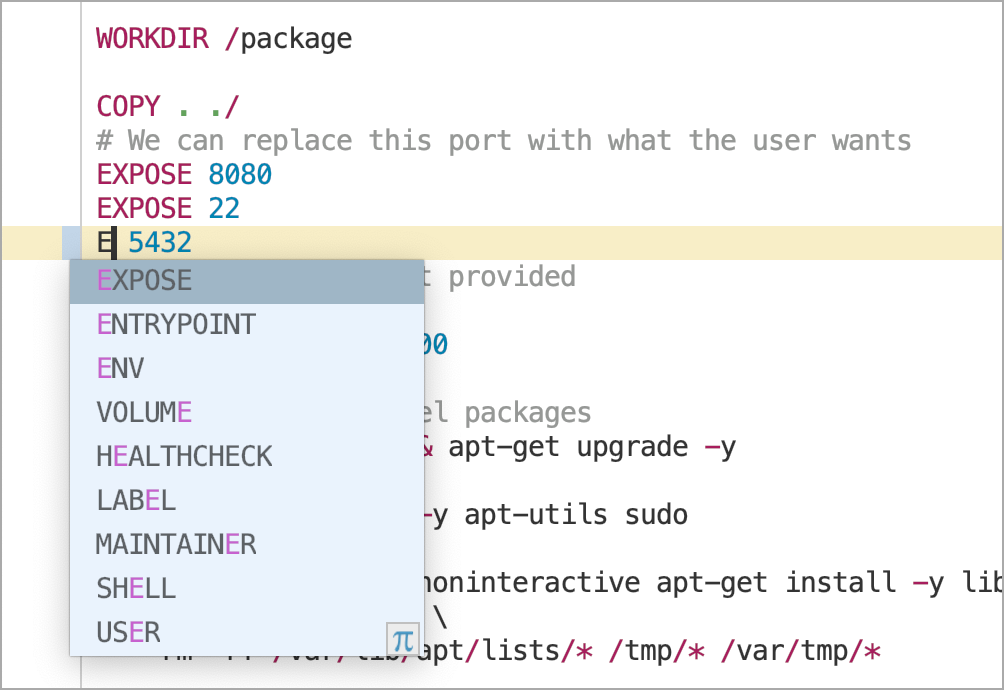
The Docker integration plugin provides full code assistance for Docker configuration files:
The Dockerfile in our sample project contains everything we need to run our application in a Docker container. Select the Docker Run Configuration and run it via ⌃R.
Wait for the container to be started and open http://localhost:8080 in your favorite browser. Kitura sample should be up and running.
Remote Hosts
We can now sync our sources to the Docker container via SFTP:
- Open
View | Tool Windows | Remote host. - Select the Docker remote host configuration in the drop-down:
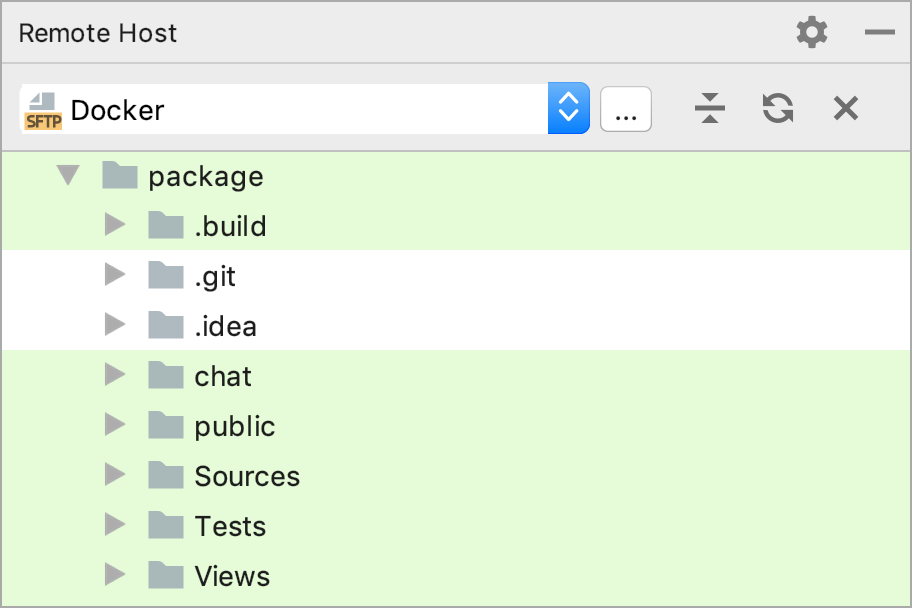
- Switch to Remote Host tool window and expand package/Views/docs directory.
- Open
doc1.mdvia⌘↓. - Navigate to
Rendering Markdown | First chaptersection of the sample Kitura application in the browser. - Change the contents of
doc1.md, press⇧⌘⌥X(Upload to…), and select the Docker server - As soon as the file is uploaded to the Docker server, repeat step 5 to see changes instantly
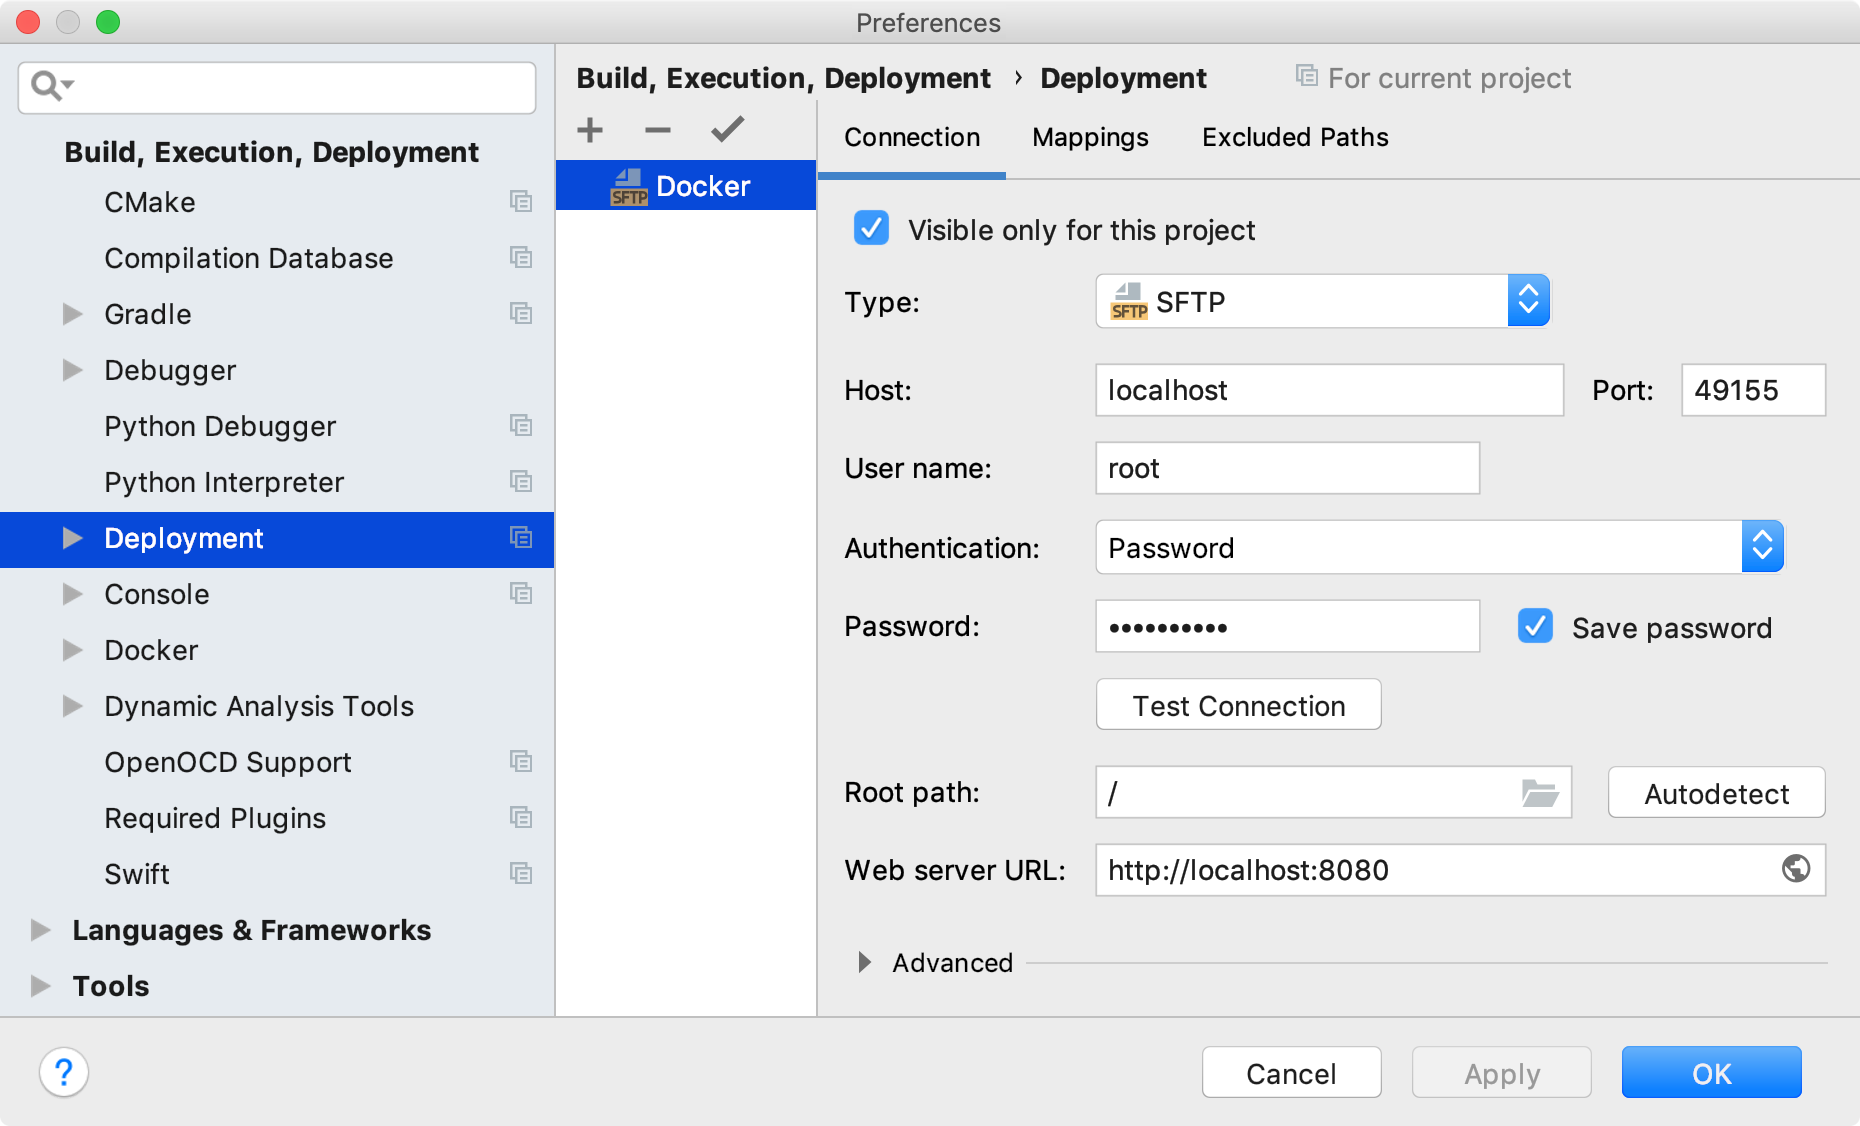
Define any remote server in Preferences | Build, Execution, Deployment | Deployment and synchronize the whole project or specific files to test your changes:
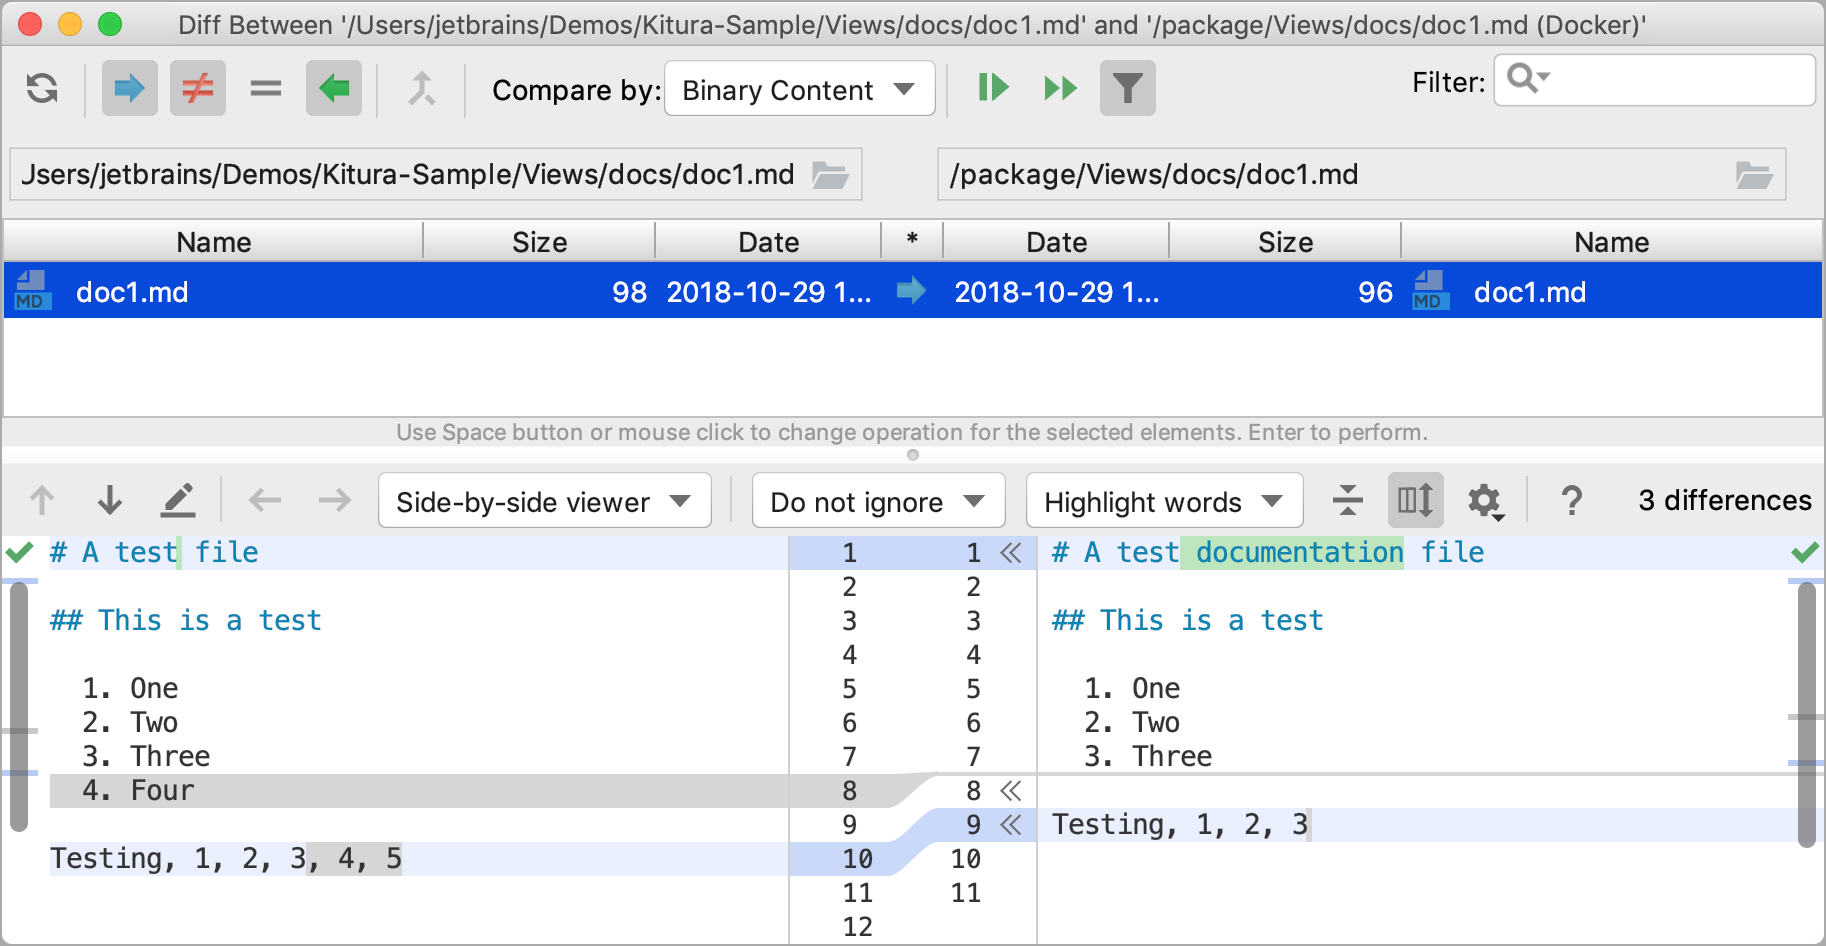
Select Tools | Deployment | Sync with Deployed to... to see the difference between the local and remote versions before they are synchronized:
Testing requests
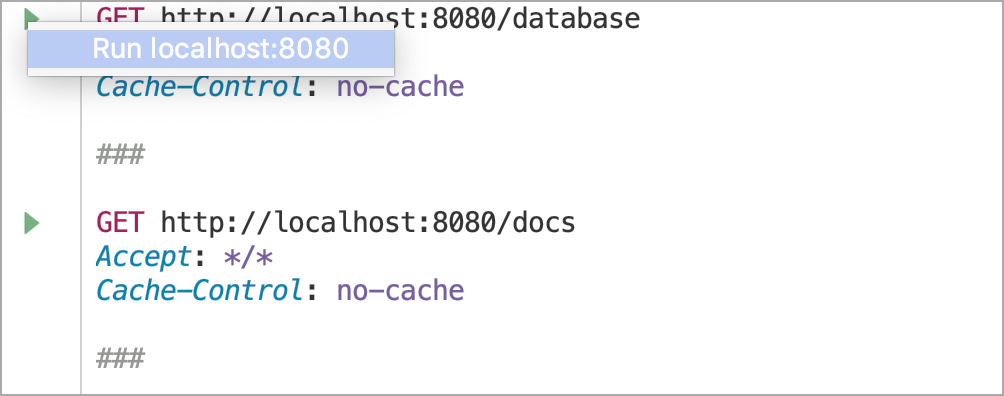
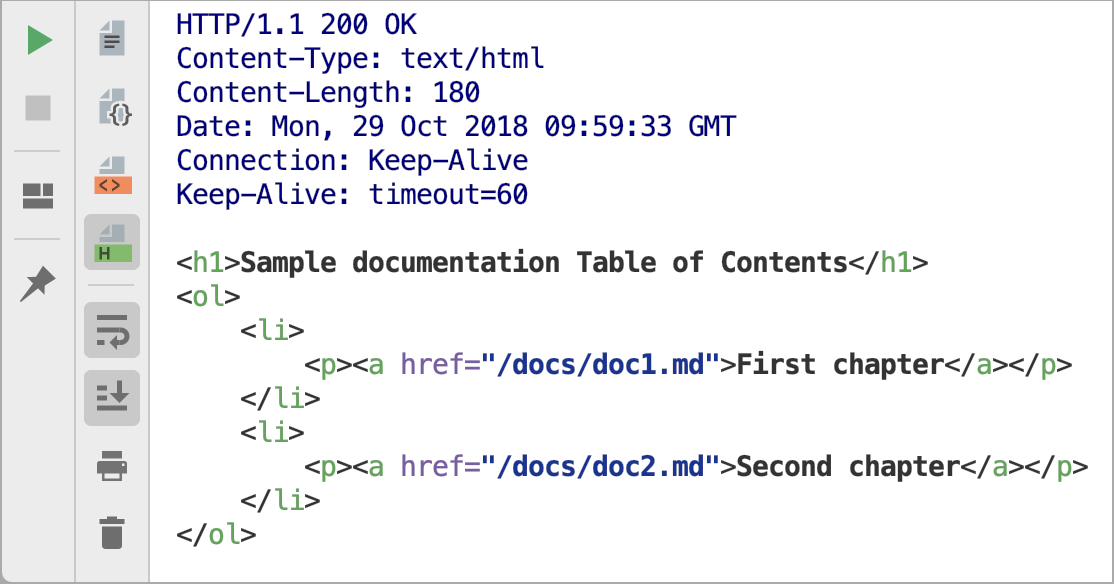
Open the requests.http file and click the Run button on the left gutter:
Have the formatted response displayed in the dedicated tool window:
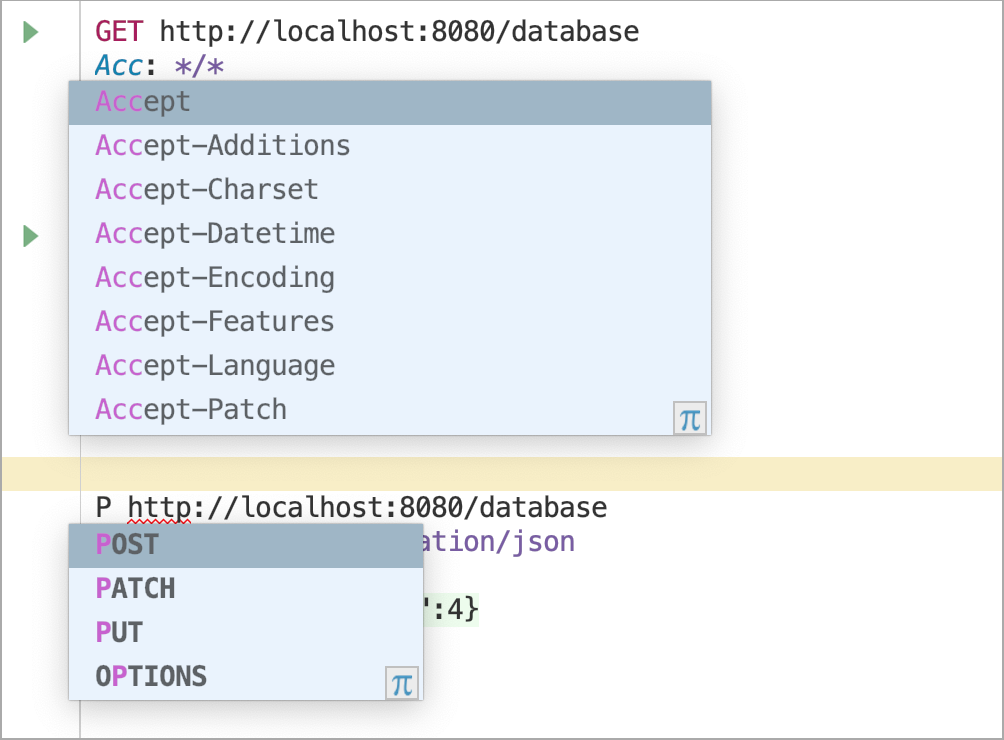
Take advantage of code assistance for .rest and .http files when creating your own requests:
That’s it! We hope all these features, together with Swift Package Manager support in CLion 2018.3 EAP, will help you create better web apps using Swift!
Your AppCode Team
JetBrains
The Drive to Develop