Flask tutorial: Create a Flask application in PyCharm

If you are looking into building a simple web application with Python, the Flask microframework is probably one of the best choices. With Flask you can build a real web application with just a single Python file and extend it if you need to.
It’s even easier to build a Flask application in PyCharm Professional. PyCharm takes care of creating the specific (proper) directory structure and settings, and makes sure that Flask, Jinja, and the Werkzeug WSGI toolkit are successfully installed.
Try PyCharm Professional for free

In this very short Flask tutorial, Nafiul Islam sets up a simple Flask application in just a minute and showcases the PyCharm toolkit you can benefit from.
This tutorial will show you how to:
- Create a Flask project in PyCharm.
- Set up a virtual environment to work with your project.
- Set up a run configuration for your Flask application.
- Work efficiently with templates in PyCharm.
How to create a new Flask project in PyCharm
There are two ways to create a new Flask project in PyCharm Professional:
You can navigate to the main menu and select File | New Project.

You can also click “New Project” on the Welcome screen.

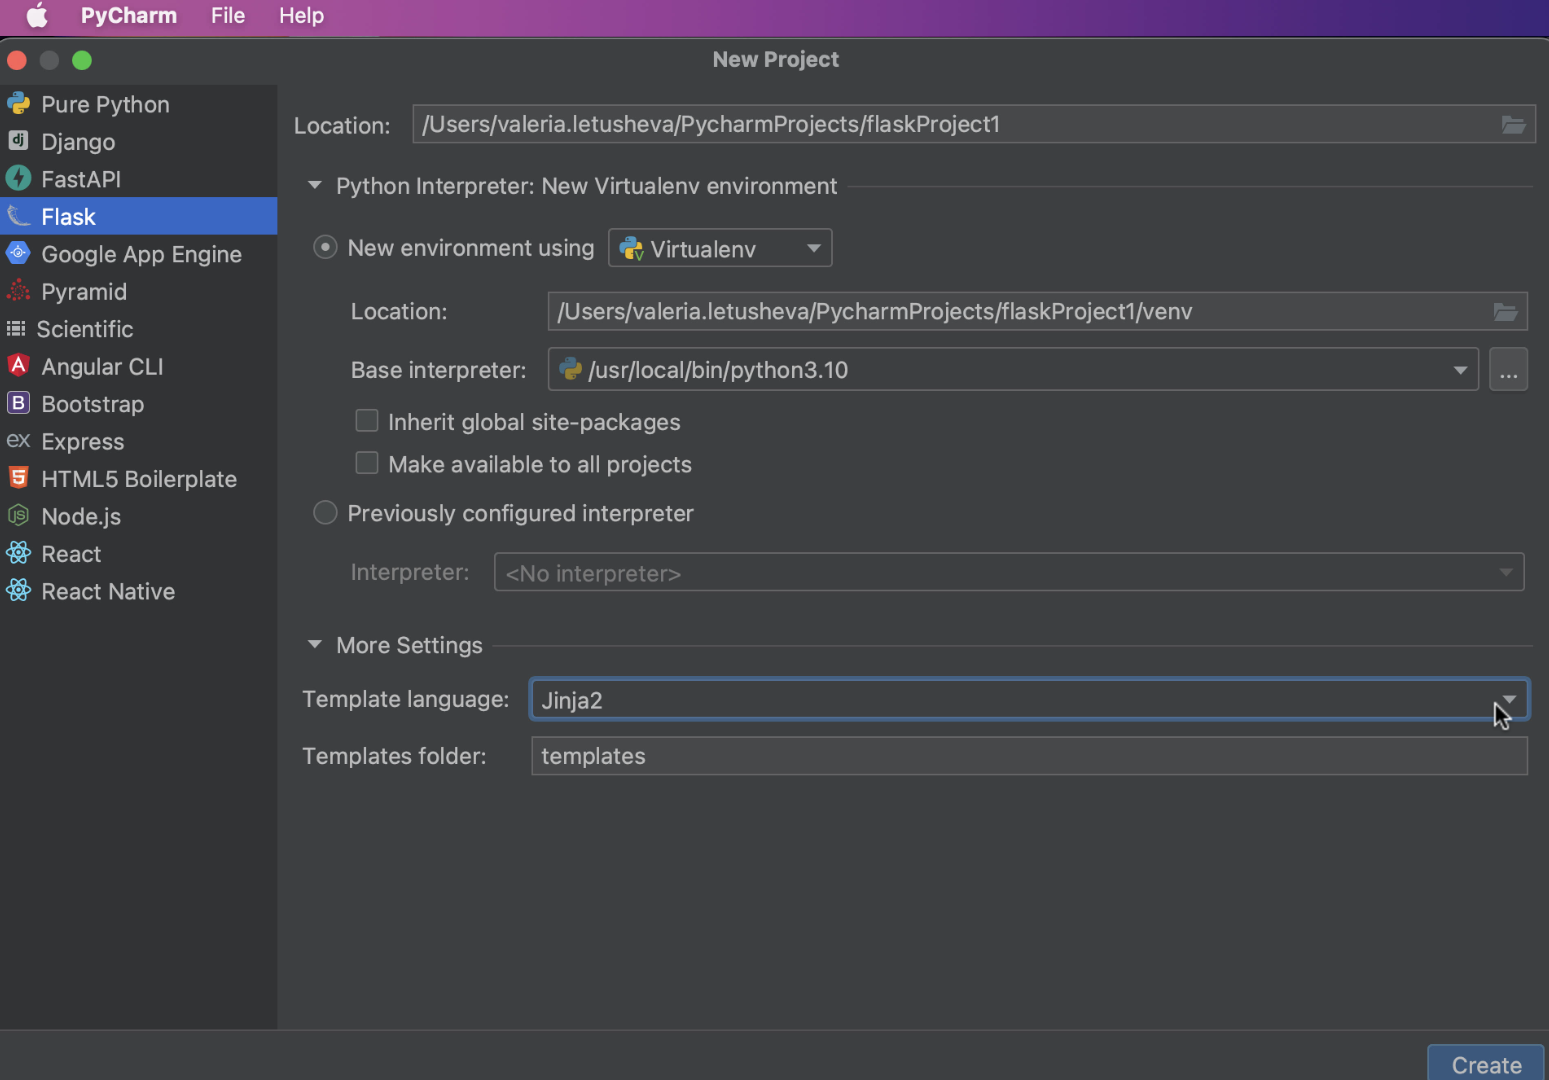
In both cases, PyCharm will bring you to the New Project dialog, where you can select Flask from the list of Project types on the left panel.

In the New Project dialog, you need to specify the project location path in the Location.
How to set up an environment for your project
The next step is to choose the interpreter you want to use for this particular project. You can use an existing interpreter that you’ve already set up for another project or create a new one. When setting up a new interpreter, you can select an environment of your choice, whether a Virtual environment, Pipenv, Poetry, or Conda.

You also need to specify the desired location and base interpreter of a new virtual environment.
If you’d like to add all packages that are already installed in the global Python on your machine to your virtual environment, check the Inherit global site-packages checkbox.
If you are going to use this environment for other projects, tick the Make available to all projects checkbox and you will be able to select this environment the next time you set up a Python interpreter for your new project.
How to setup a template language
After you are done with the environment setup, you may want to specify the Template language and the name for your Templates folder. This can be done from the New Project dialog. By default, PyCharm sets Jinja as the template language and names the template folder “templates”.
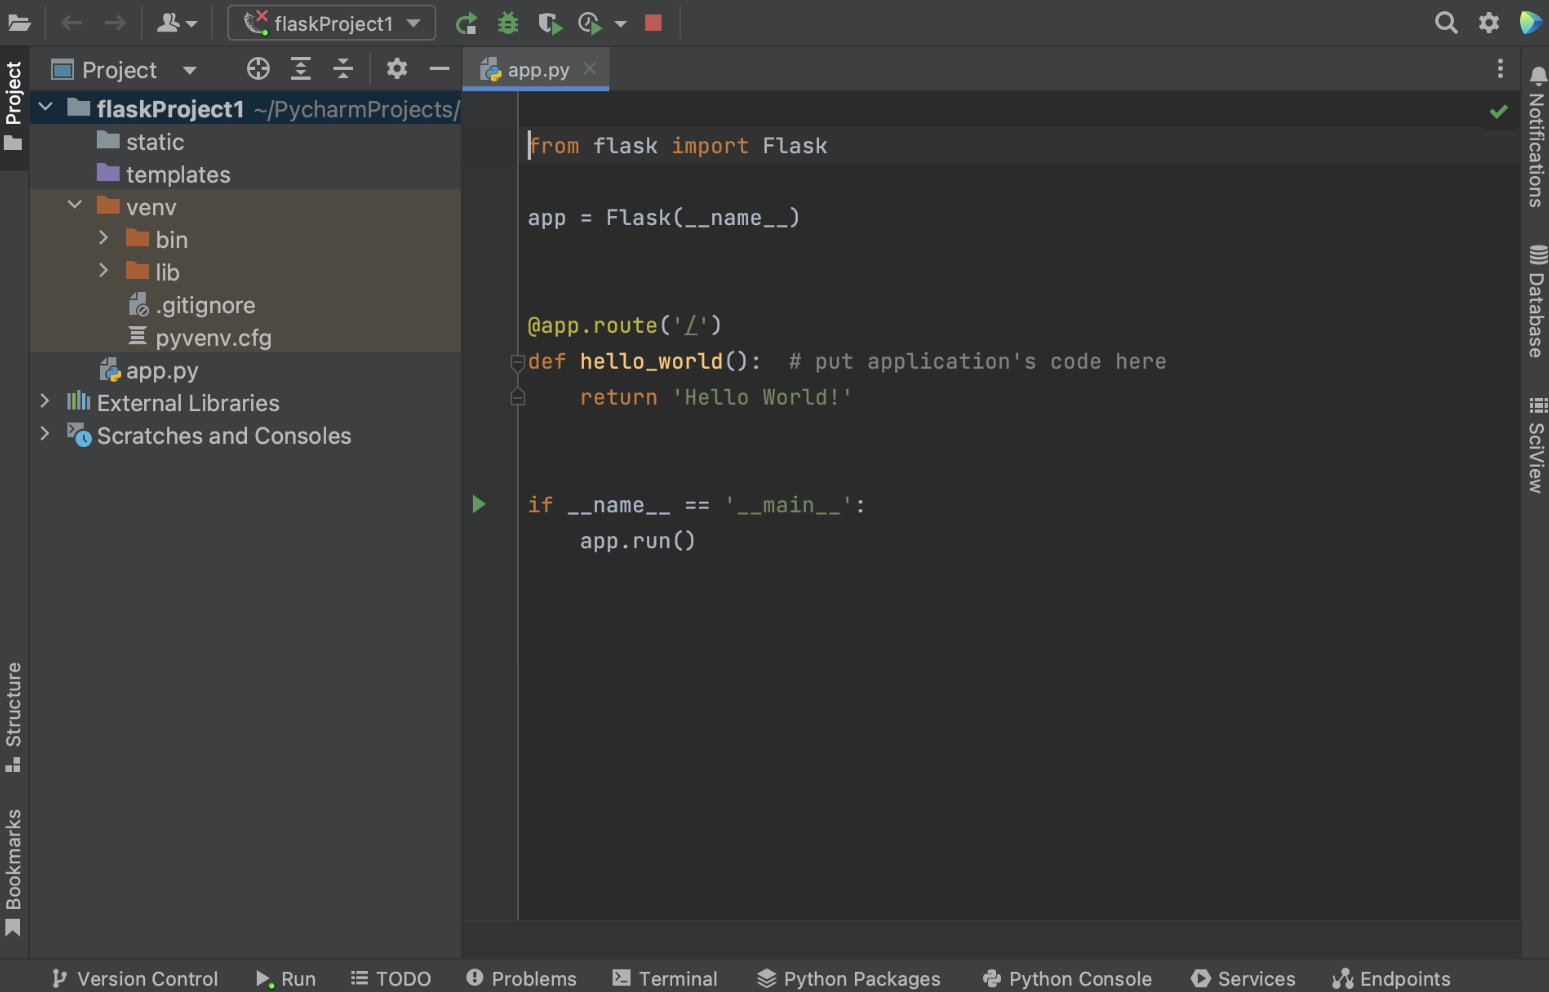
Now you are all set to get started with your new Flask project! Don’t forget to click the “Create” button at the right bottom corner of the dialog. PyCharm will create a Flask application for you with a specific directory structure and dedicated templates folder, and install Flask on your machine if it is not already.
How to set up a run configuration for your Flask application
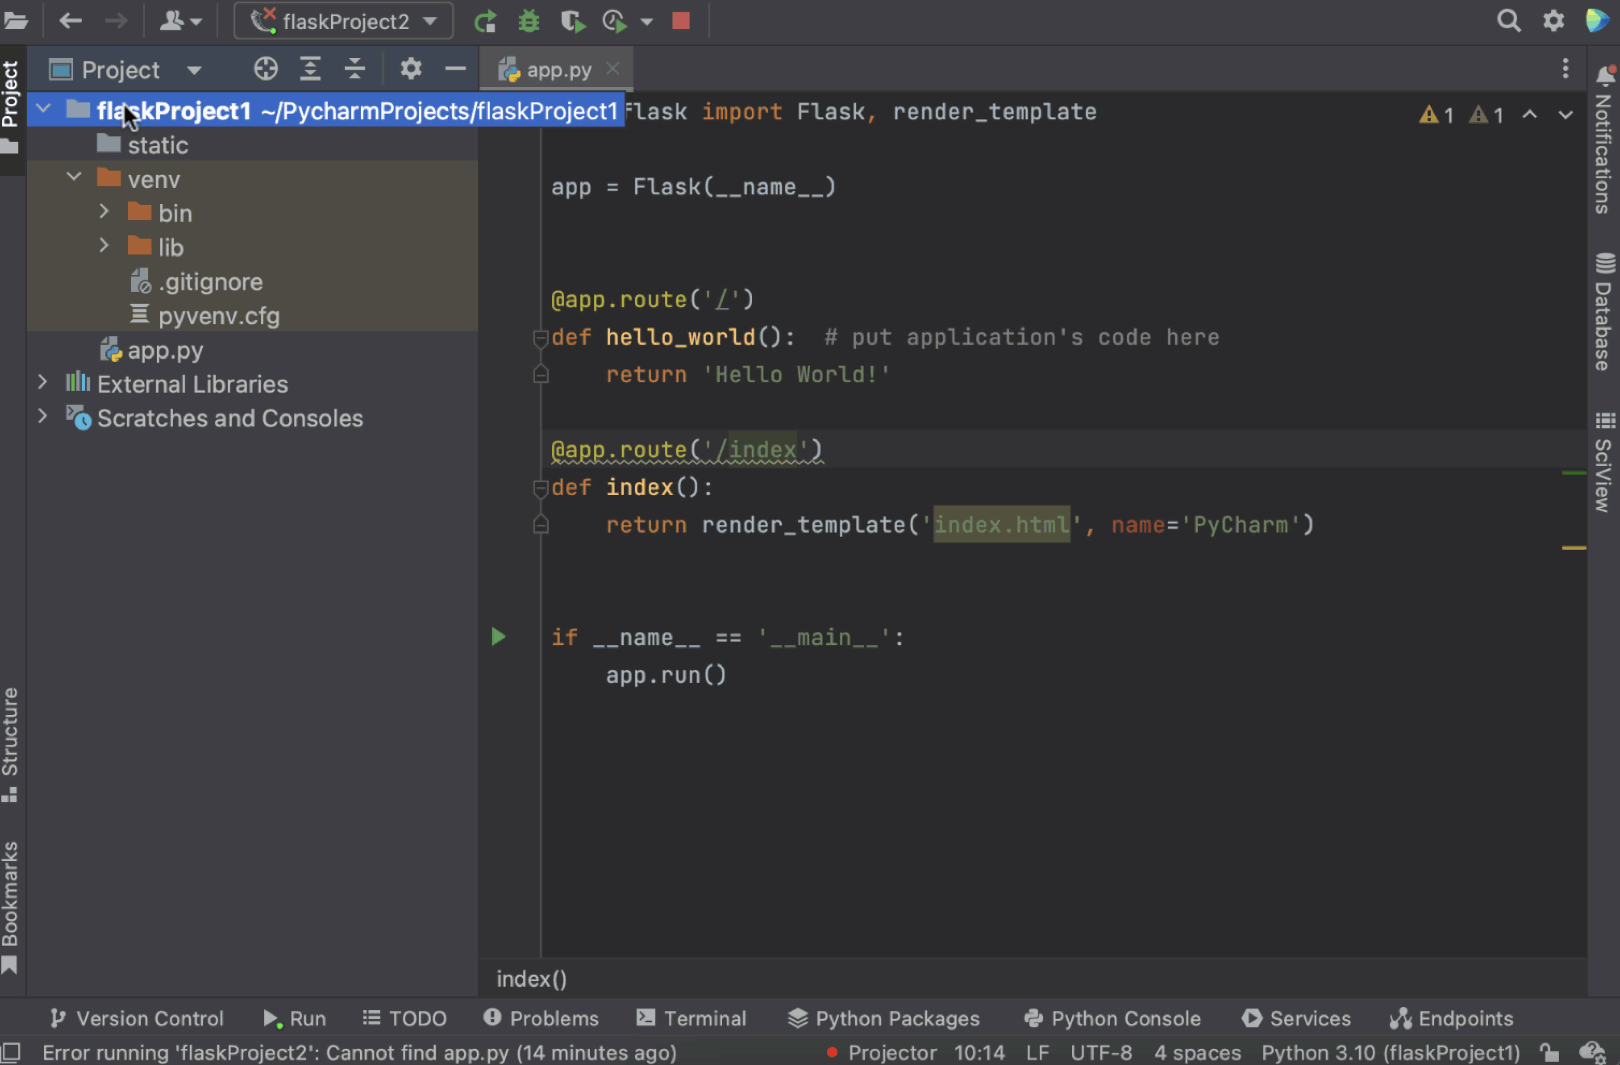
Once your new Flask application is preconfigured for you by PyCharm, you will see an open app.py file, which is a stub Python script that can be used to test whether your application is working and your settings are correct.

Note that if you are using macOS Monterey, you will likely need to change the default port to run app.py, otherwise you’ll get an error. Read on to see how you can change the port.
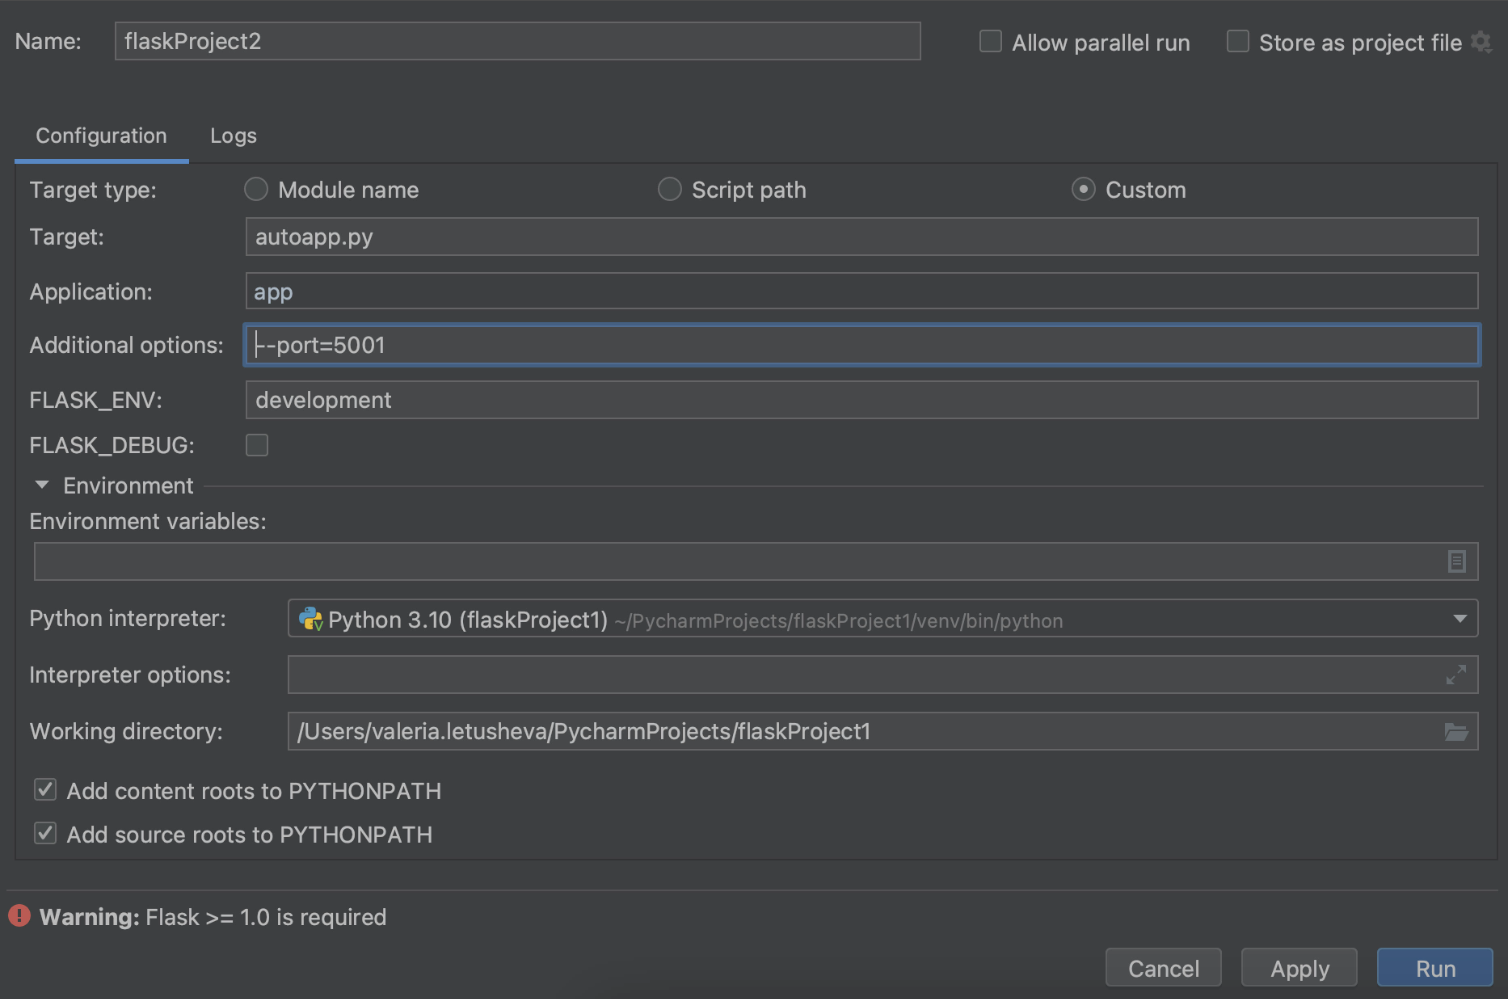
To configure a Run configuration manually, you can select Edit run configuration in the dropdown menu next to the run button in the gutter.

In the Run / Debug Configurations dialog, you need to click Add new run configuration (or just press plus in the left upper corner of the dialog window) and select Flask server from the list of Configurations.
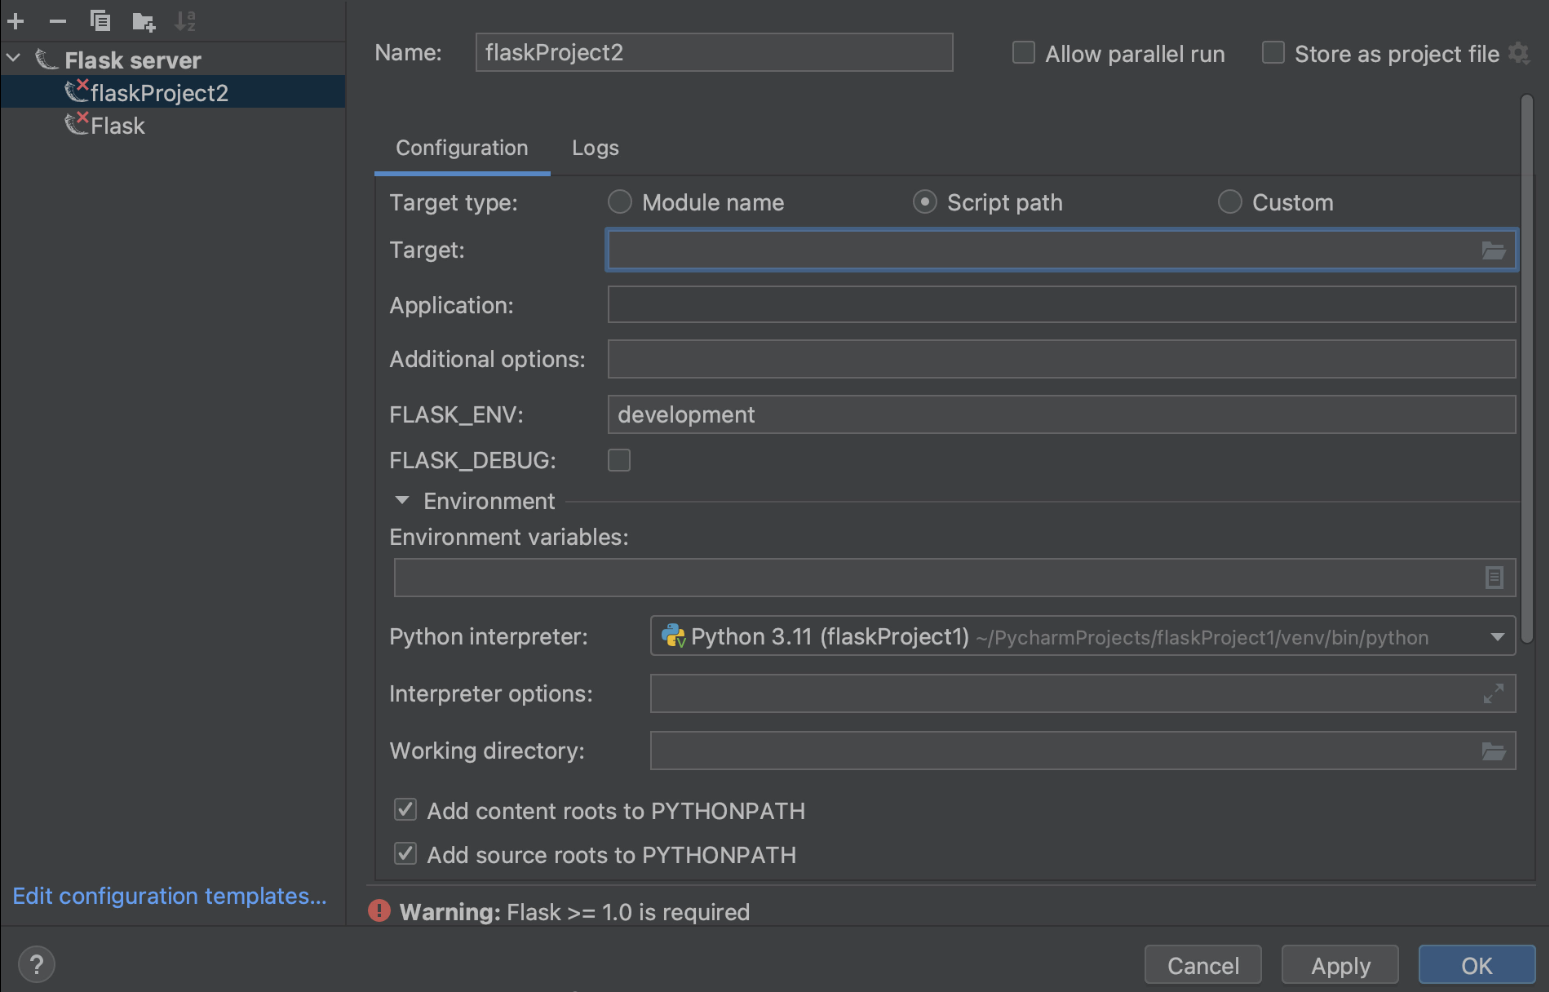
You need to specify the values for Target and Application fields.
You can specify different Target types in the Target field, depending on what you would like to run: a path to the Python file, a module in your Flask project, or even a custom combination of modules, scripts, and Flask instances. For our example, we would like to run a file called autoapp.py.
In the Application field we will need to define the name of the application we are going to execute. In our case it will just be “app”.

If you want to learn more about these and other Run Configuration settings, please visit the dedicated Help page.
How you can change the default port
If you need to change the default port, you can also do it in the Run / Debug Configurations dialog. Print --port=[number of port] in the Additional options field.
Working with templates
How to create a template file from usage
As a part of Flask support, PyCharm provides the ability to automatically create a template file while you are working on the code. So if you happen to mention a non-existing template in your route, PyCharm will highlight the name of the template file. Use the quick-fix Create template <name> by placing a caret at the highlighted template name, press ⌥ ⏎, and choose Create template <name> from the list of available intention actions.
Alternatively, you can click the yellow light bulb and choose Create template <name> from there.

In the Create Template dialog, select the template directory, where the new template will be created. Note that this quick-fix will create an empty template.

On the contrary, if you create a new template by right-clicking on the templates folder in the project view and choosing New / HTML file, you will get a file prefilled with generic HTML code.
You can learn more about how PyCharm can help with templates on our Help page.
How to use a live template
To optimize your work, you can create live templates instead of writing the same pieces of code multiple times. To expand a code snippet, type the corresponding template abbreviation and press ⇥. Keep pressing ⇥ to jump from one variable in the template to the next one. Press ⇧ ⇥ to move to the previous variable.
In our case, we will use a pre-built live template with html: 5 typing and press ⇥. We will get basic HTML code that we can modify further.

There are many predefined live templates available for you in PyCharm. To view and customize the one you would like to use, go to Settings | Preferences / Editor / Live Templates. The live template that we used here is under Zen HTML. You can click on it and see detailed information about the template, including abbreviations and template text. You can modify the template according to your needs.

Coming back to our template file, we will add Hello {{ name }} to the <body> and run our app to check if the template is working.

We get a url on our localhost that we can paste into the browser. Add /index to the url and we see “Hello PyCharm” text – everything is working!

How to add a templates folder to your project
If you are willing to have a templates folder under a different name (not “templates”), you can delete the existing templates folder from the project view and then right-click on the project name, select New / Directory, and define the folder’s name in the dialog window.
Don’t forget to mark the folder as a Template folder by right-clicking on it and choosing Mark Directory as / Template Folder. Now you have a template folder with a name of your choice!
How to associate an SQL database with your Flask project (and why you might do so)
If your project has an SQL database, you can associate it with the project in PyCharm by simply dragging it from the project structure to the Database tool window on the right panel.

Associating a database with your project will provide you with proper code insight both for SQL statements and across the whole project. PyCharm will be able to introspect the whole project, including the associated database, and will recognize it when you need the table name from the database in your code.

Now you are all set for productive work on your new Flask application. If you have any further questions, please leave a comment or ping us on Twitter.
Try PyCharm Professional for free
If you’re in the mood to learn more than this Flask tutorial, here are some resources you might find useful:
To read:
- Tutorial on creating live templates in PyCharm
- Tutorial on creating a web application with Flask
- PyCharm Help pages on database management
To watch:
- Building Search Functionality with Python, Flask, and Elasticsearch
- Developing Flask Apps on Google Cloud