How to Write Your First Rust Web App with Rocket and RustRover

If you’re like me and you’re just starting your Rust journey, you likely have some or most of your experience from another ecosystem. That’s great, but you’re hearing a lot about this new technology stack called Rust and are wondering where to start. Have no fear. We’ve got the tutorial just for you. In this post, we’ll build a simple HTML web application running on a Rust backend using the Rocket library.
If you haven’t already, now is a great time to download RustRover, our latest IDE explicitly designed for the Rust community. You’ll also want to install Rust using RustRover or by using the community getting started guide.
By the end of this tutorial, we’ll have a web application hosting static files, an application with multiple endpoints, server-side template rendering, flash messaging, and request/response flows. First, let’s look at the library we’ll be using, then dive into the specifics of building our sample application.
What is Rocket?
Rocket is a web framework built for Rust that makes writing fast, type-safe, secure web applications simple. Like many modern web frameworks, Rocket expresses its application-building philosophy by adding endpoints accessible at unique paths. Rocket has out-of-the-box support for routing, data handling, validation, responders, cookies, web sockets, and database access. It is a fully-featured framework built on top of what makes Rust unique: type safety and macros.
Now that you have a high-level understanding of Rocket, let’s start building our application.
A New Rocket Project
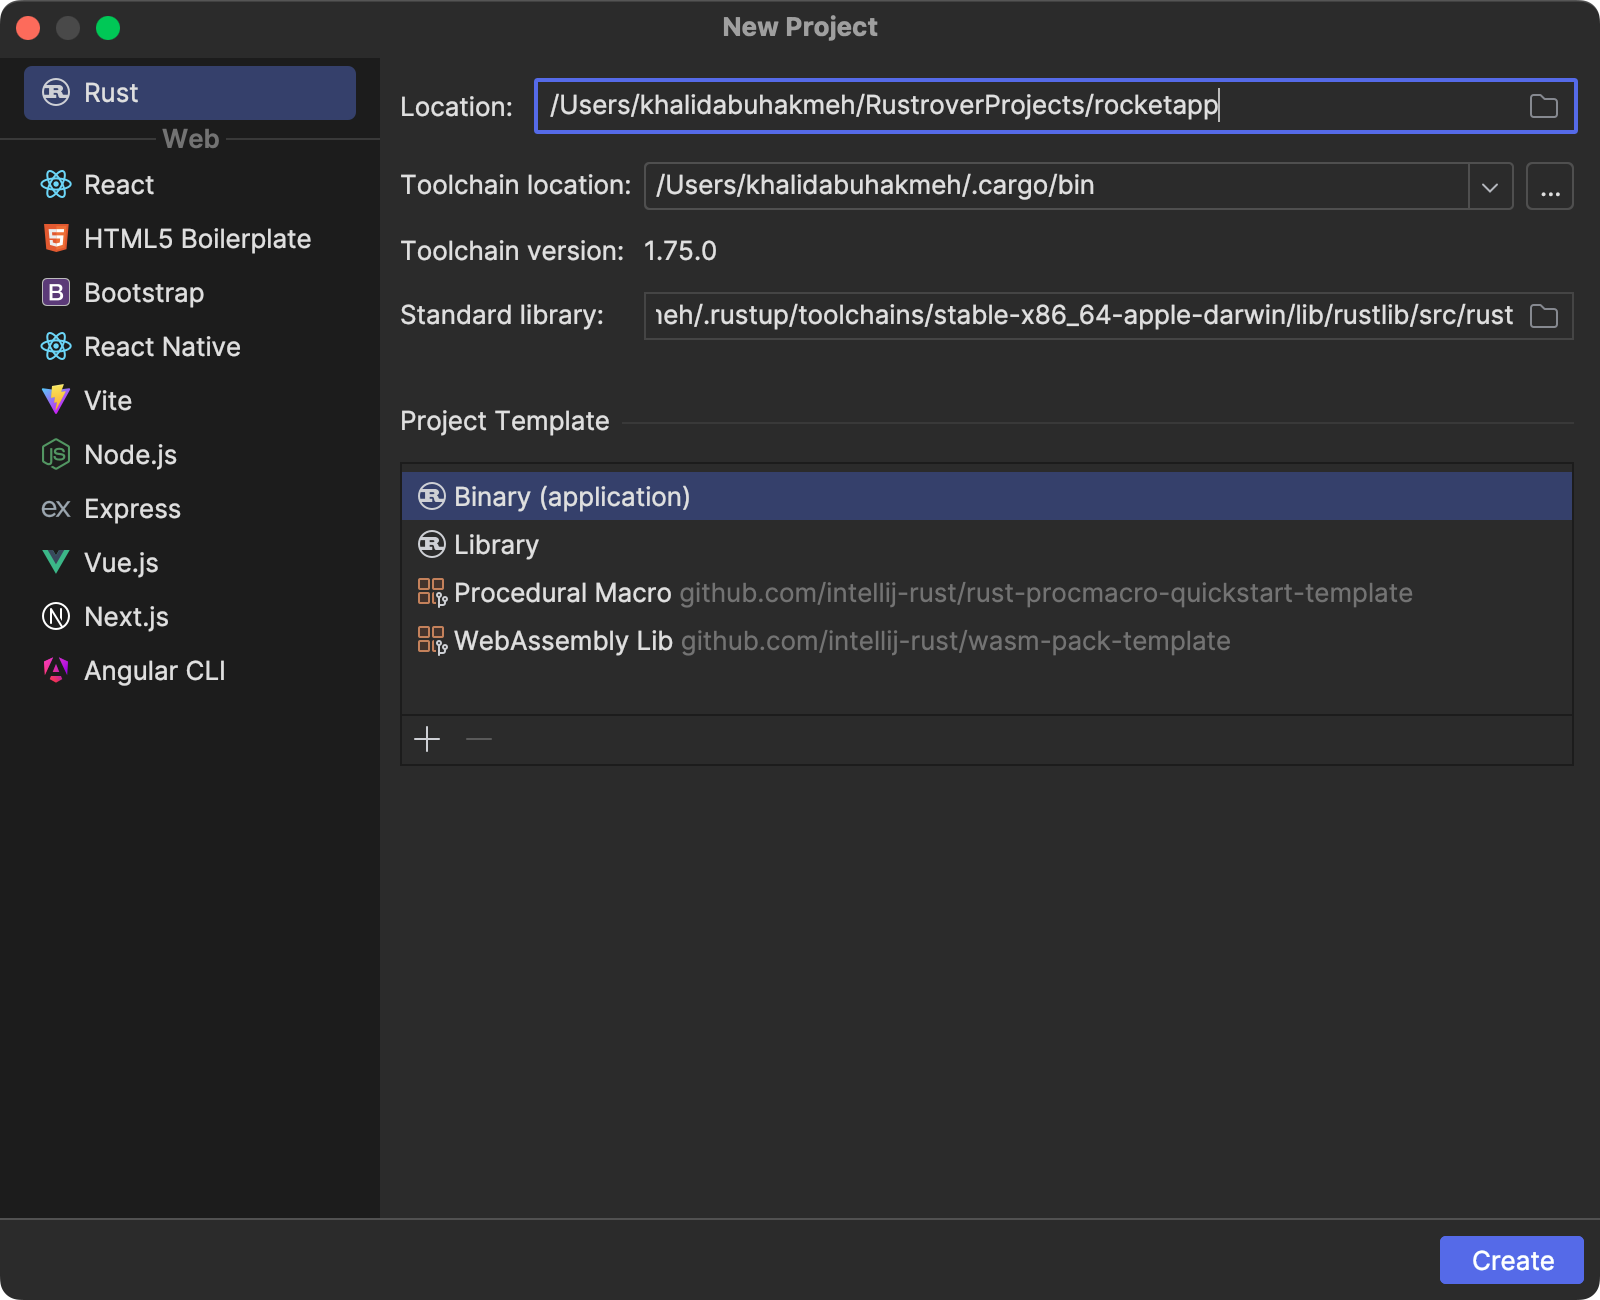
After starting RustRover, you’ll want to create a new project from the New Project dialog.
You can call your project anything you’d like, but I’ll call mine “rocketapp” for this tutorial. Be sure to select the “Binary (application)” option and then click the Create button.
Let’s set up the project’s dependencies. In your Cargo.toml file, add the rocket and rocket_dyn_templates dependencies. RustRover will automatically download and update your crates whenever you add new dependencies, which is a fantastic feature.
[package]
name = "rocketapp"
version = "0.1.0"
edition = "2021"

[dependencies]
rocket = "0.5.0"
rocket_dyn_templates = { version = "0.1.0", features = ["handlebars", "tera"] }
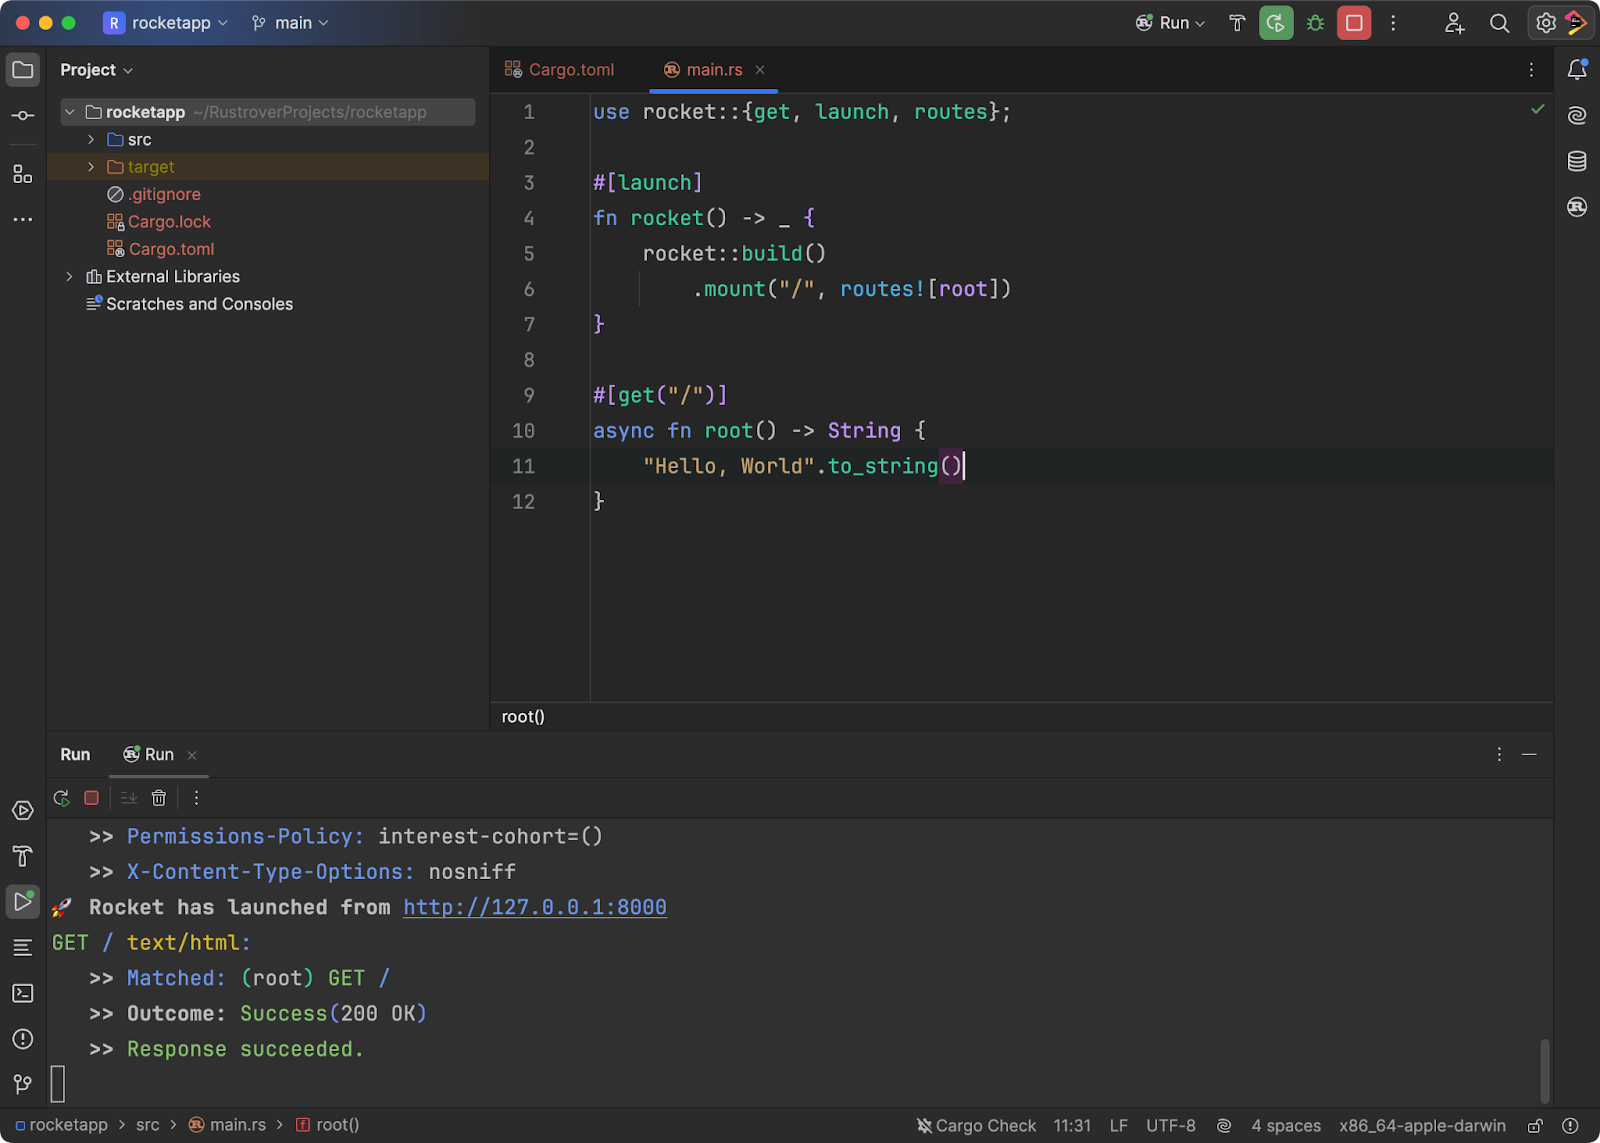
Next, in your main.rs file, paste the following code. Here, we’ll add a new endpoint that responds with a String value. Take note of the #[get(“/”)] attribute, which tells the Rust compiler about additional metadata for our newly created endpoint. In this case, a new endpoint responds to a user HTTP GET request at the / path.
use rocket::{get, launch, routes};

#[launch]
fn rocket() -> _ {
    rocket::build()
        .mount("/", routes![root])
}

#[get("/")]
async fn root() -> String {
    "Hello, World".to_string()
}
You should be able to run your application now using the Run Toolbar to initiate a new instance of your web application.
Congratulations! You have successfully built your first Rust-powered application. Next, let’s modify our application to include static file hosting, template rendering, and practice some response flow.
Level-up The Rocket Application
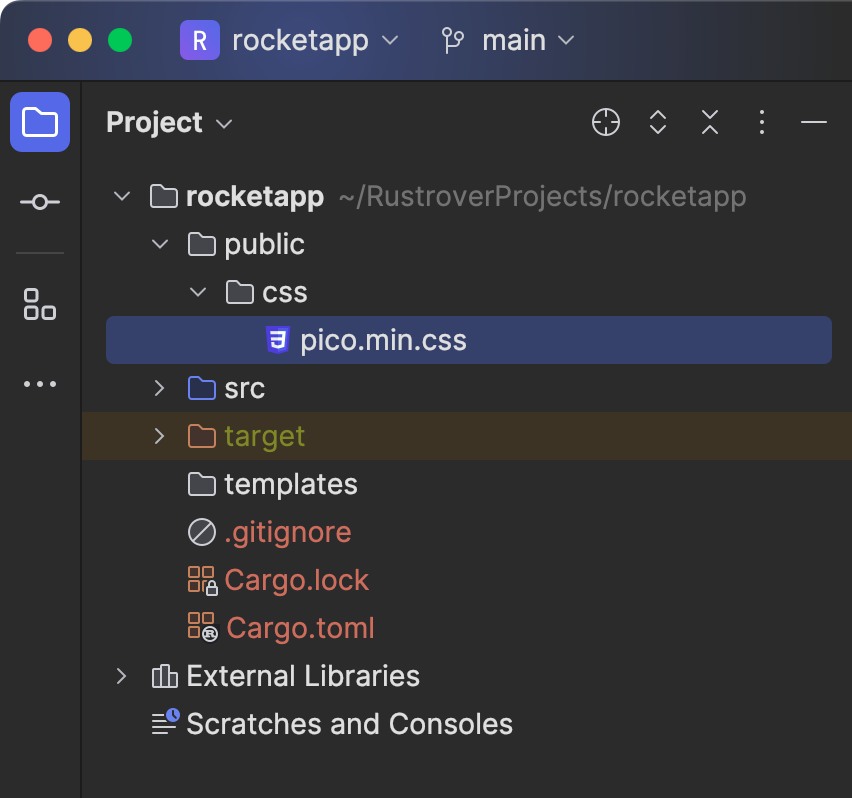
As a first step, let’s add two new directories to the project’s root: templates and public. The templates directory will hold our view templates, while the public directory will hold static artifacts such as CSS, images, or JavaScript files.
I’ve copied the Pico CSS library to a css folder, giving me some basic styling, which I’ll use later in my HTML templates.
Now, let’s update our application to render a new Handlebars template. Add a new root.html.hbs file to the templates directory with the following HTML.
<html lang="">
<head>
    <meta charset="UTF-8">
    <meta name="viewport"
          content="width=device-width, user-scalable=no, initial-scale=1.0, maximum-scale=1.0, minimum-scale=1.0">
    <meta http-equiv="X-UA-Compatible" content="ie=edge">
    <link href="/public/css/pico.min.css" rel="stylesheet">
    <title>Hello Rust</title>
</head>
<body>
<main class="container">
    <h1>{{message}}</h1>
</main>
</body>
</html>
You can install the Handlebars plug-in from the JetBrains Marketplace to make working with this syntax much more enjoyable. We need to modify our main.rs file again, but this time, we’ll register the template system and map our static file directory to a path.
use rocket::{get, launch, routes};
use rocket::fs::{FileServer, Options, relative};
use rocket_dyn_templates::{context, Template};

#[launch]
fn rocket() -> _ {
    rocket::build()
        // add templating system
        .attach(Template::fairing())
        // serve content from disk
        .mount("/public", FileServer::new(relative!("/public"), Options::Missing | Options::NormalizeDirs))
        // register routes
        .mount("/", routes![root])
}

#[get("/")]
async fn root() -> Template {
    Template::render("root", context! { message: "Hello, Rust"})
}
Now we’re getting somewhere. You’ll notice the use of the symbols amongst the code, mostly # and !. The usage is known as “macros” and is a fundamental part of the Rust language. Macros allow you to write declarative code while giving the Rust compiler hints as to what code to generate at compile time to make your application work. While other languages may lean on runtime discovery, Rust can determine how parts interact with each other at compile time, thus reducing wasted CPU cycles and unnecessary memory allocations.
Let’s start handling user data from HTML forms.
Data Handling in Rocket
We’ve already established that Rust is about type and memory safety, so it should be no surprise that memory structures are an essential part of the language. You can think of structures as places in memory where our data lives, preferably in the fastest parts. Rocket lets us use a struct to represent form requests coming from HTML. Add the following data type in a new models.rs file in your src directory.
use rocket::{FromForm};

#[derive(FromForm, Debug)]
pub struct Person {
    #[field(validate=len(1..))]
    pub(crate) first_name: String,
    #[field(validate=len(1..))]
    pub(crate) last_name: String,
}
A few things are happening in this small snippet of code.
- We are using the
fieldmacro andderiveimplementation for two different traits,FromFormandDebug - The keyword
pubdenotes that thestructand its fields are publicly accessible. - Each field uses built-in Rocket validators for length; many more are available.
Let’s update our root template to handle submitting a form using this Person structure.
<!doctype html>
<html lang="en">
<head>
    <meta charset="utf-8">
    <meta name="viewport" content="width=device-width, initial-scale=1">
    <meta name="color-scheme" content="light dark"/>
    <link rel="stylesheet" href="/public/css/pico.min.css">
    <title>Hello world!</title>
</head>
<body>
<main class="container">
    <h1>Hello Rust!</h1>

    {{#if errors }}
        <article>
            <header>🥺Oh No!</header>
            <p>There are some invalid fields in the form</p>
            <ul>
                {{#each errors}}
                    <li>{{this}}</li>
                {{/each}}
            </ul>
        </article>
    {{/if}}

    <form method="POST" enctype="multipart/form-data" action="/">
        <input type="text"
               name="first_name"
               placeholder="First Name"
               aria-label="First Name"
               value="{{ first_name }}"
               aria-invalid="{{ first_name_error}}"
        />

        <input type="text" name="last_name"
               placeholder="Last Name"
               aria-label="Last Name"
               value="{{ last_name }}"
               aria-invalid="{{ last_name_error}}"
        />

        <button type="submit">Say Hello</button>
    </form>
</main>
</body>
</html>
You’ll likely notice a few Handlebars placeholders, which we will use in subsequent endpoints, so hold tight.
Before returning to Rust, add one more template for our success page. I’ve called it hello.html.hbs in the templates directory.
<!doctype html>
<html lang="en">
<head>
    <meta charset="utf-8">
    <meta name="viewport" content="width=device-width, initial-scale=1">
    <meta name="color-scheme" content="light dark" />
    <link rel="stylesheet" href="/public/css/pico.min.css">
    <title>Hello {{ name }}!</title>
</head>
<body>
<main class="container">
    <dialog open>
        <article>
            <header>
                <a href="/" aria-label="Close" rel="prev"></a>
                <p>
                    <strong>🗓️ {{ message }}!</strong>
                </p>
            </header>
            <p>
                Hello {{ name }}
            </p>
        </article>
    </dialog>
</main>
</body>
</html>
We need to write two endpoints now, one to handle the user request and the other to redirect to when the form is valid. Let’s do the “easy” one first, the success page.
#[get("/hi?<name>")]
async fn hello(name: String, flash: Option<FlashMessage<'_>>) -> Template {
    let message = flash.map_or_else(|| String::default(), |msg| msg.message().to_string());
    Template::render("hello", context! { name , message })
}
A few important things are happening in this function.
- We are receiving a
FlashMessage, information stored in a cookie from the previous endpoint. We’ll see how you can set this value soon. - We are pulling the
namevalue from the query string.
Note that this is a demonstration of what Rocket provides as essential features of a web framework. You can experiment with this and pass all the values through the FlashMessage or the query string.
Next, we’ll delve into the most complex part of this sample application, the POST endpoint. Before looking at the code, let’s discuss the behavior we want.
- When the response is valid, we want to redirect to the path
/hi?name=and set aFlashMessage. - If the response is invalid, we want to render the
roottemplate and set values in the template context to display messages to the user.
Let’s see the code and talk about response flow.
#[post("/", data = "<form>")]
async fn create(form: Form<Contextual<'_, Person>>) -> Result<Flash<Redirect>, Template> {
    if let Some(ref person) = form.value {
        let name = format!("{} {}", person.first_name, person.last_name);
        let message = Flash::success(Redirect::to(uri!(hello(name))), "It Worked");
        return Ok(message);
    }

    let error_messages: Vec<String> = form.context.errors().map(|error| {
        let name = error.name.as_ref().unwrap().to_string();
        let description = error.to_string();
        format!("'{}' {}", name, description)
    }).collect();

    Err(Template::render("root", context! {
        first_name : form.context.field_value("first_name"),
        last_name : form.context.field_value("last_name"),
        first_name_error : form.context.field_errors("first_name").count() > 0,
        last_name_error : form.context.field_errors("last_name").count() > 0,
        errors: error_messages
    }))
}
Rocket recognizes Rust’s Result type. The Result type enables us to produce a tuple, a structure that contains multiple options. In our case, we have a successful and failed state. In the branching logic here, we handle the states of Rocket’s Form<Contextual<>> type, which provides us with the state of the user’s form submission. Here, we can use Rust’s pattern matching to handle the two most important states of Some and Err. Response flow is essential to building web applications, as you may need to redirect or render elements based on user input, and with Rust, it’s never been easier.
For the last time, let’s update our main.rs to wire up the new endpoints and import our Person structure from our model.rs module.
As a side note, RustRover is excellent at finding types in modules and updating your use statements. RustRover features allow you to focus on writing code rather than hunting down modules.
mod models;

use rocket::{get, launch, post, routes, uri};
use rocket::form::{Contextual, Form};
use rocket::fs::{FileServer, Options, relative};
use rocket::request::FlashMessage;
use rocket::response::{Flash, Redirect};
use rocket_dyn_templates::{context, Template};
use crate::models::Person;

#[launch]
fn rocket() -> _ {
    rocket::build()
        // add templating system
        .attach(Template::fairing())
        // serve content from disk
        .mount("/public", FileServer::new(relative!("/public"), Options::Missing | Options::NormalizeDirs))
        // register routes
        .mount("/", routes![root, create, hello])
}

#[get("/")]
async fn root() -> Template {
    Template::render("root", context! { message: "Hello, Rust"})
}

#[post("/", data = "<form>")]
async fn create(form: Form<Contextual<'_, Person>>) -> Result<Flash<Redirect>, Template> {
    if let Some(ref person) = form.value {
        let name = format!("{} {}", person.first_name, person.last_name);
        let message = Flash::success(Redirect::to(uri!(hello(name))), "It Worked");
        return Ok(message);
    }

    let error_messages: Vec<String> = form.context.errors().map(|error| {
        let name = error.name.as_ref().unwrap().to_string();
        let description = error.to_string();
        format!("'{}' {}", name, description)
    }).collect();

    Err(Template::render("root", context! {
        first_name : form.context.field_value("first_name"),
        last_name : form.context.field_value("last_name"),
        first_name_error : form.context.field_errors("first_name").count() > 0,
        last_name_error : form.context.field_errors("last_name").count() > 0,
        errors: error_messages
    }))
}

#[get("/hi?<name>")]
async fn hello(name: String, flash: Option<FlashMessage<'_>>) -> Template {
    let message = flash.map_or_else(|| String::default(), |msg| msg.message().to_string());
    Template::render("hello", context! { name , message })
}
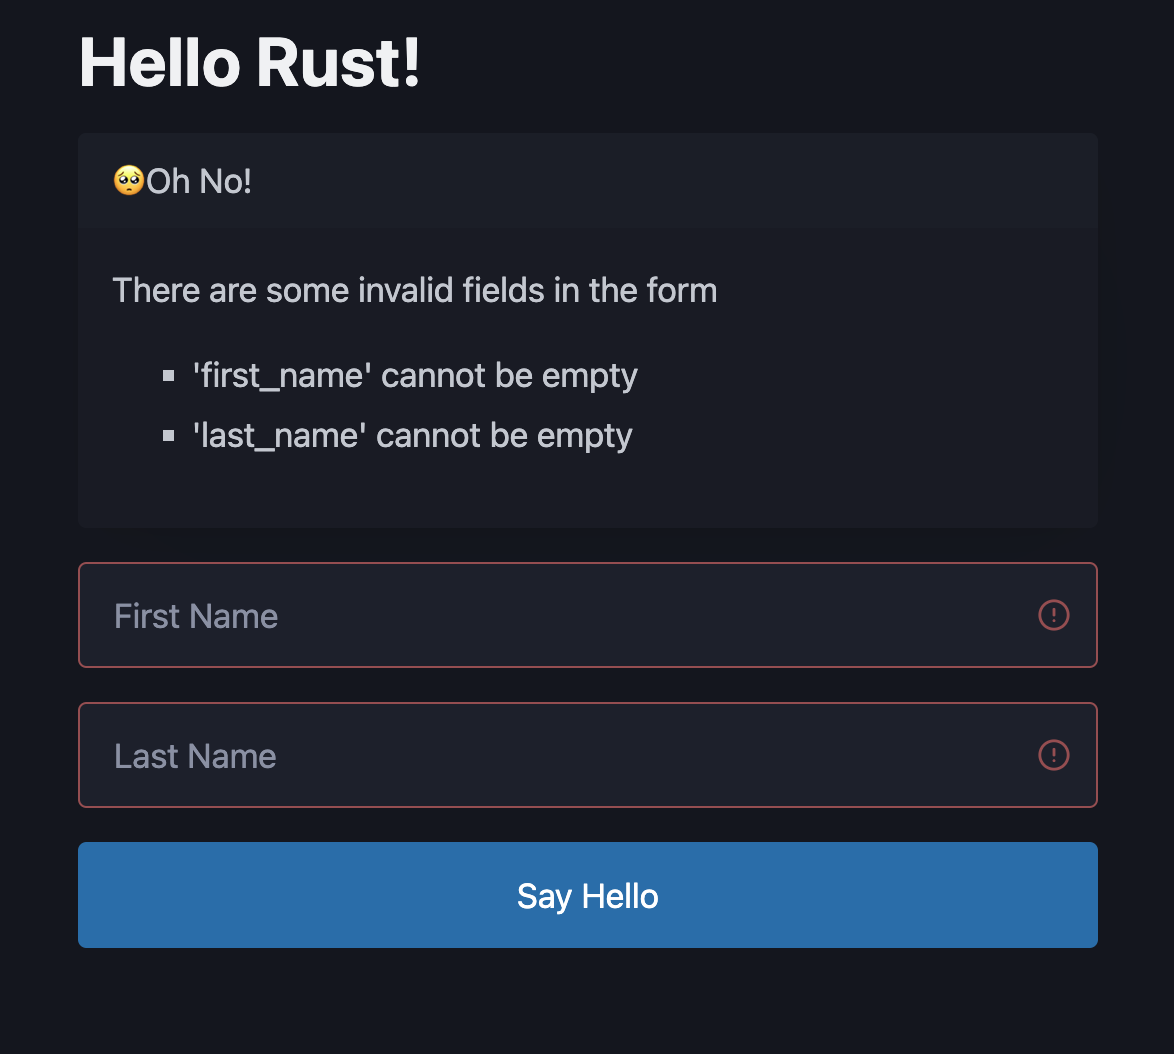
Running the application, we can see our form, and that validation works.
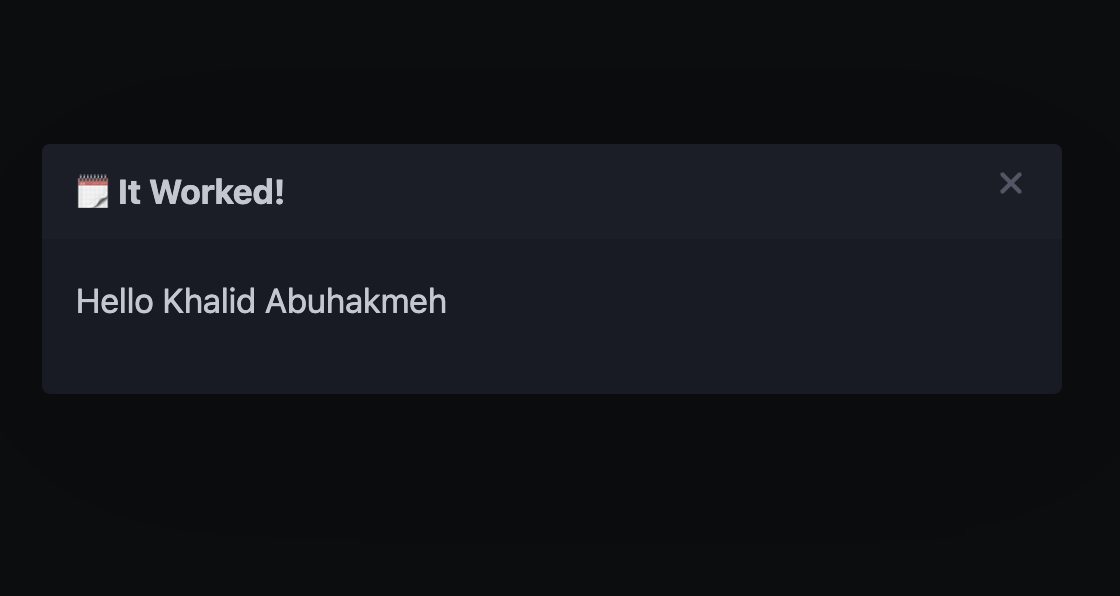
We can also submit our first and last names, letting our app redirect us to the success page.
Conclusion
This tutorial came about because I was curious about what a type-safe language like Rust has to offer folks interested in web development, and to my surprise, the answer is a lot.
The Rust development experience is fast and straightforward once you understand some of the basics of the language. The syntax may seem intimidating at first, but RustRover does a great job surfacing the Rocket documentation, and combined with JetBrains AI Assistant, I found the hints I needed along the way to make this demo. I also want to thank the Rust community for being helpful over on Mastodon.
If you’d like to try this sample, I’ve made it available as a GitHub repository. I’d also love to hear about your experience with Rust, Rocket, RustRover, and other Rust-based web frameworks in the ecosystem.