TeamCity
Powerful CI/CD for DevOps-centric teams
The official TeamCity Azure Resource Manager template
We are happy to announce the Azure Resource Manager template for TeamCity. You can now deploy TeamCity to Azure cloud services and save time on configuration tasks. Get ready to start using TeamCity in several minutes!
Deploy TeamCity to Azure Cloud Services
The template performs the following tasks:
- Setting up of an external database
- Creating a virtual machine for the TeamCity server
- Configuring the TeamCity server machine
- Installing the TeamCity server
- Installing a TeamCity build agent
Depending on your team size, you can select the appropriate TeamCity installation size for evaluation or production usage:
- Small – suitable for small teams, typically 3 users, 100 builds/day.
- Medium – suitable for medium sized teams, typically 5 users, 300 builds/day.
- Large – is intended for large teams, typically 20 users, 1000 builds/day.
To get started, perform the following steps:
- Specify the resource group name
- Enter a public SSH key for the TeamCity server machine
- Enter a password for the database
- Click Purchase.
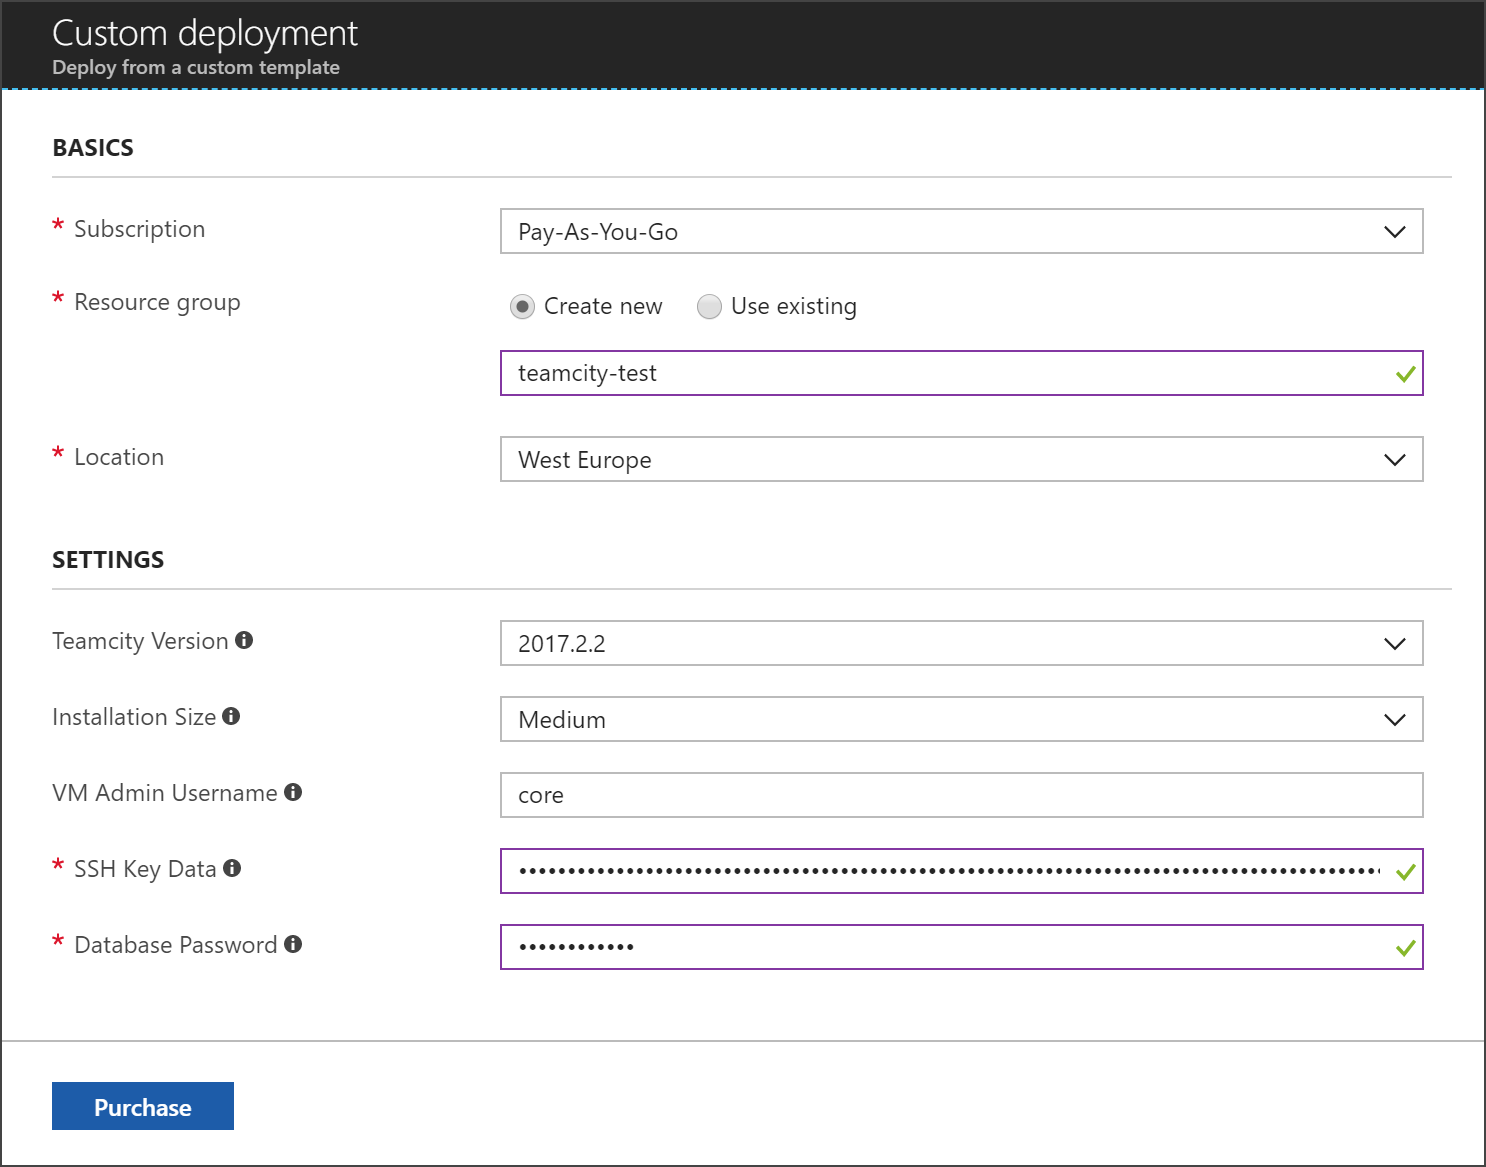
Wait for about 10 minutes and you will be able to navigate to the TeamCity URL received from the template outputs:
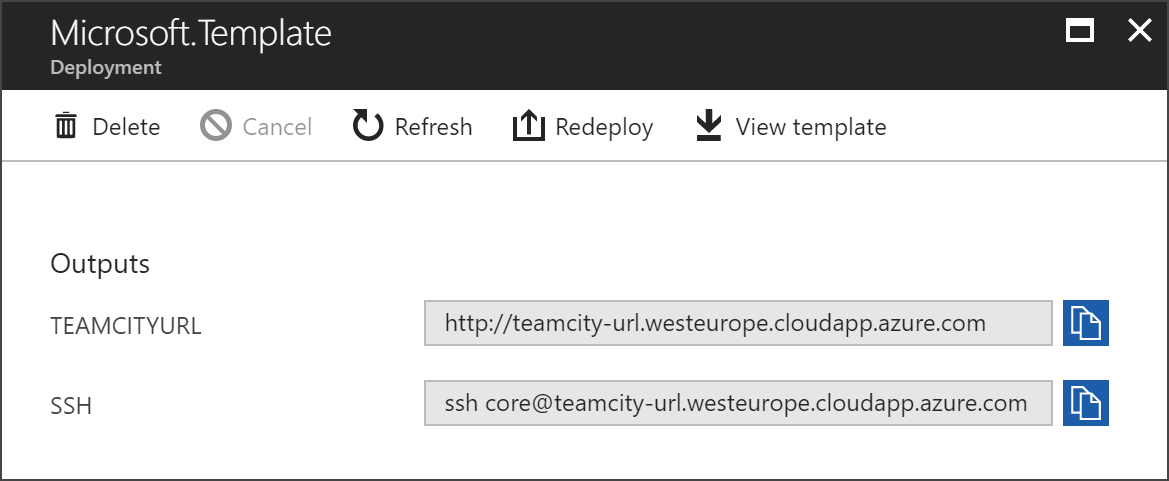
After opening the TeamCity page, you’ll need to accept the license agreement and set the root account credentials. Now you are ready to use TeamCity.
Configure additional Azure integrations
Your TeamCity server comes with preinstalled plugins which can be used to configure tighter integration with Azure services:
- Azure Cloud Agents allows scaling the pool of TeamCity build agents by leveraging Azure virtual machines.
- Azure Artifacts Storage allows storing build artifacts in Azure Cloud Storage Blobs.
- Azure Active Directory allows using Azure AD authentication in TeamCity.
How it works
During the deployment process, the service allocates a Linux virtual machine. The VM is powered by CoreOS with Docker support enabled. It exposes port 80 for the web access and 22 for maintenance in the network security group, so you’ll be able to connect to it via SSH.
Configuration and data files are stored on the disk attached to this VM. The TeamCity server and build agent are started from the official Docker images.
An instance of the Azure database for MySQL is created with the teamcitydb schema. Network security rules are set to make the database accessible from the TeamCity server machine.
In the virtual machine, the TeamCity operation is controlled by the following systemd services:
teamcity-server.servicecontrols the lifecycle of TeamCity serverteamcity-agent.servicecontrols the lifecycle of TeamCity build agentteamcity-update.servicehandles the TeamCity updates.
TeamCity upgrade
When a TeamCity VM is created, it has a teamcity-version tag. By updating its value, you can control the current version of the TeamCity server and build agent. After the update, you need to restart the VM entirely or restart the server and agent services via the following commands:
> sudo systemctl restart teamcity-server.service
> sudo systemctl restart teamcity-agent.service
Note: The update could take a few minutes to pull the new version of TeamCity Docker images.
How to diagnose problems
You can connect to the VM and use default systemd tools to control TeamCity services. For instance, during the upgrade you can view the server log using the following command:
> sudo systemctl status teamcity-server.service
Feedback
Please feel free to leave a comment to this post or file an issue in the TeamCity issue tracker.
Happy building in Azure Cloud!
Subscribe to TeamCity Blog updates


