Transition from SSMS to DataGrip: 10 tips

This post is for people familiar with SQL Server Management Studio who have decided to try DataGrip with SQL Server. Some concepts, pieces of the user interface, and shortcuts differ between these two tools. We’d like to try and help you with this transition!
TLDR: table
| SSMS | DataGrip |
| Connects to any running server | TCP/IP and SQL Server Browser should be enabled |
| All databases and schemas are shown by default | You need to manually select which databases and schemas are visible |
| Default SQL editor: a file that needs to be saved | Default SQL editor: a query console that is saved automatically |
| Run query: F5 | Run query: Ctrl/Cmd+Enter |
| To edit the source code, you need to generate an ALTER script, modify it, and then run it | To edit the source code, you can open the source code editor, modify the source, and press Submit |
Connection
The main thing you need to know is that DataGrip can only connect via a TCP/IP protocol, so it needs to be enabled on the server side. Also, the SQL Server Browser service should be started. There is an extensive article about this and other issues you may face during connection to the SQL Server. Please refer to it if you have any difficulties.
Generally, here is how the connection window looks in both tools.
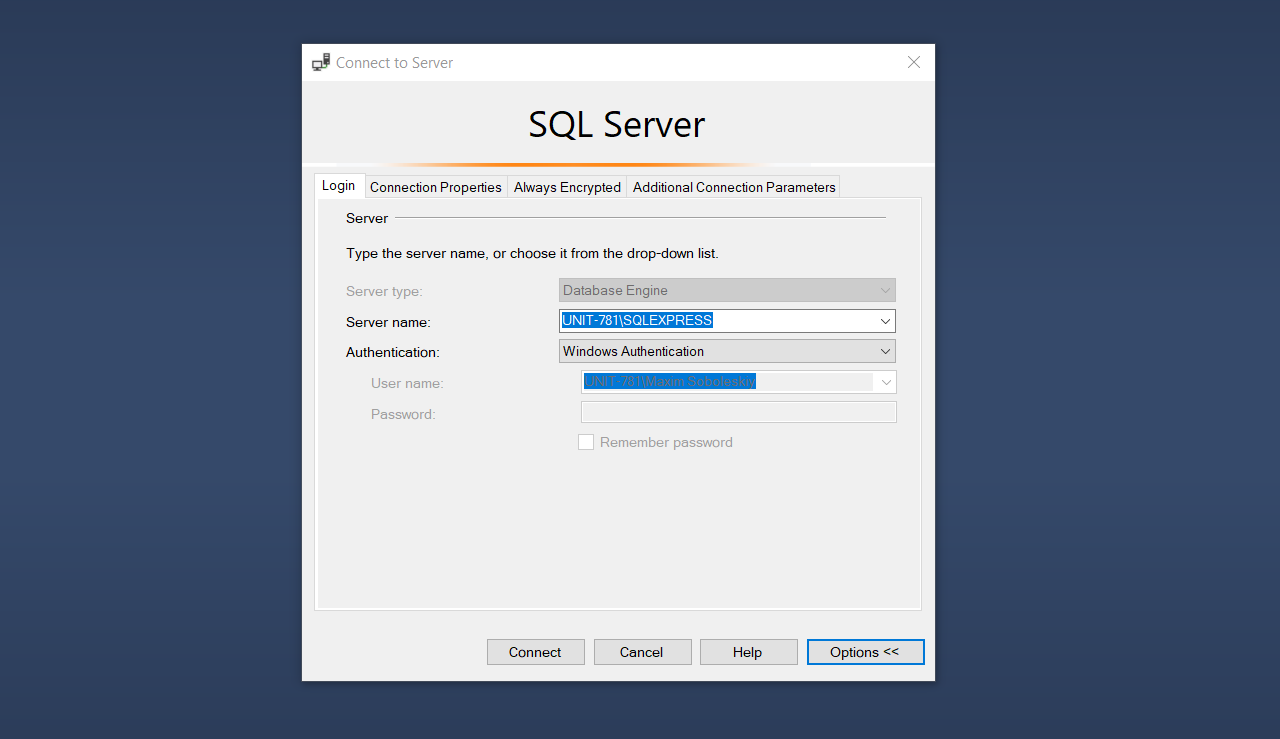
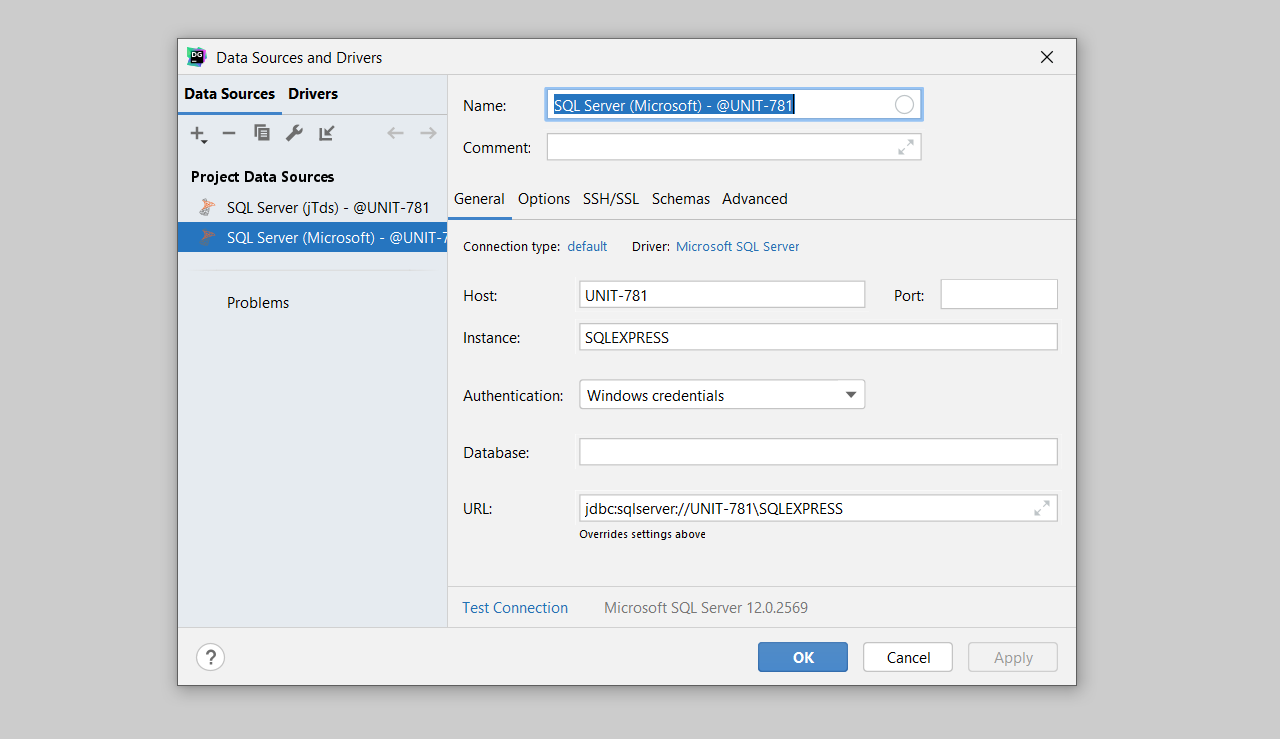
What you call a connection in SSMS is called a data source in DataGrip.
Database and schemas in the database explorer
In DataGrip, not all schemas and databases are displayed in the database explorer by default. While it can be confusing for new users, there is some reasoning behind this:
- We cache all the objects we display, a process called introspection. It’s required for fast code completion (our term for intellisense) and navigation. Introspecting all the objects, even if they are not needed, is not the best idea. Also, we cannot control the number of objects in the database – this operation can be resource-consuming.
- The ability to select only required databases and schemas provides better usability. You will see only the schemas you use without any visual noise.
We have the dedicated article on that question here: Not All Databases/Schemas Are Displayed by Default. Why?
There are two places where you can select the objects for being displayed in the database explorer:
- The schemas tab of the data source properties.

- The pop-up window invoked by clicking on M of N near the data source in the db explorer.

Keep in mind that in SSMS all the schemas are shown as table prefixes. In DataGrip they are shown (or can be hidden) as separate nodes.
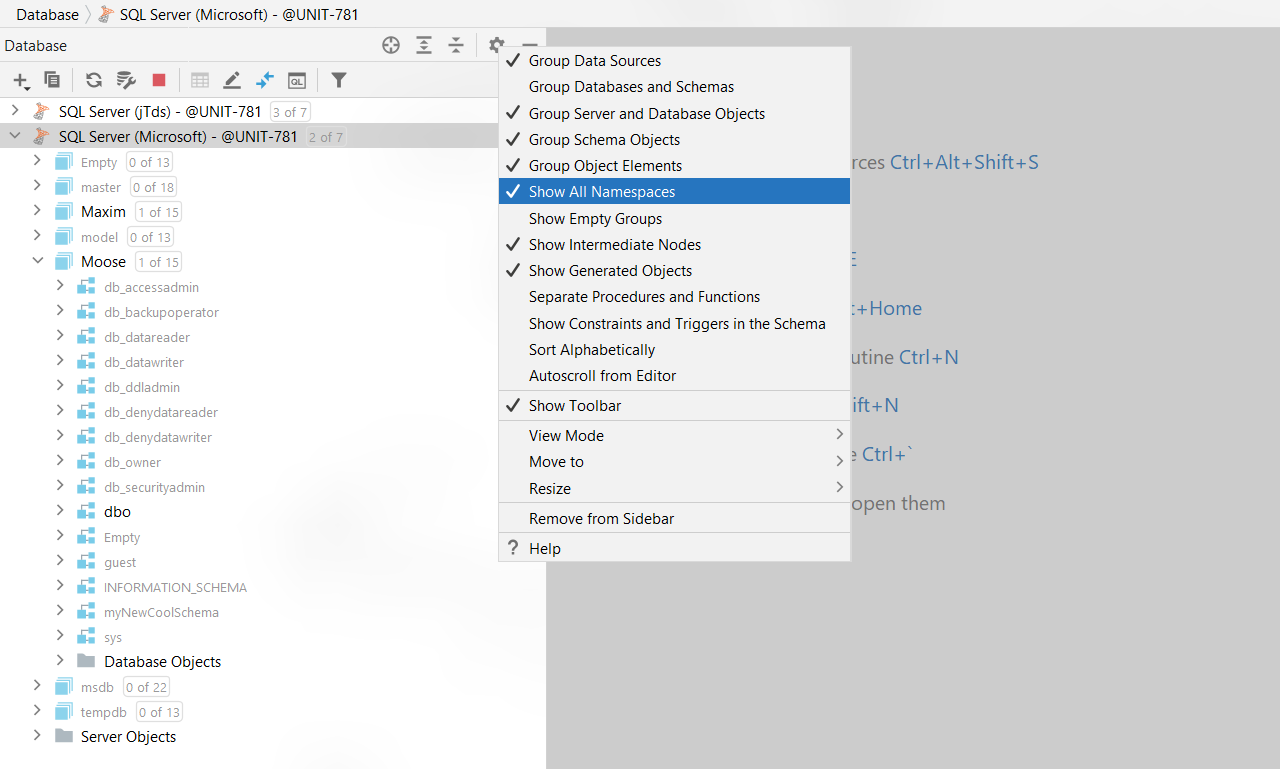
If you want DataGrip to display all the available databases and schemas as empty nodes, check the Show All Namespaces in the database explorer settings. In this mode, databases and schemas that are not introspected are grayed out.
Query editor
In SSMS, you right click the database and press New Query.
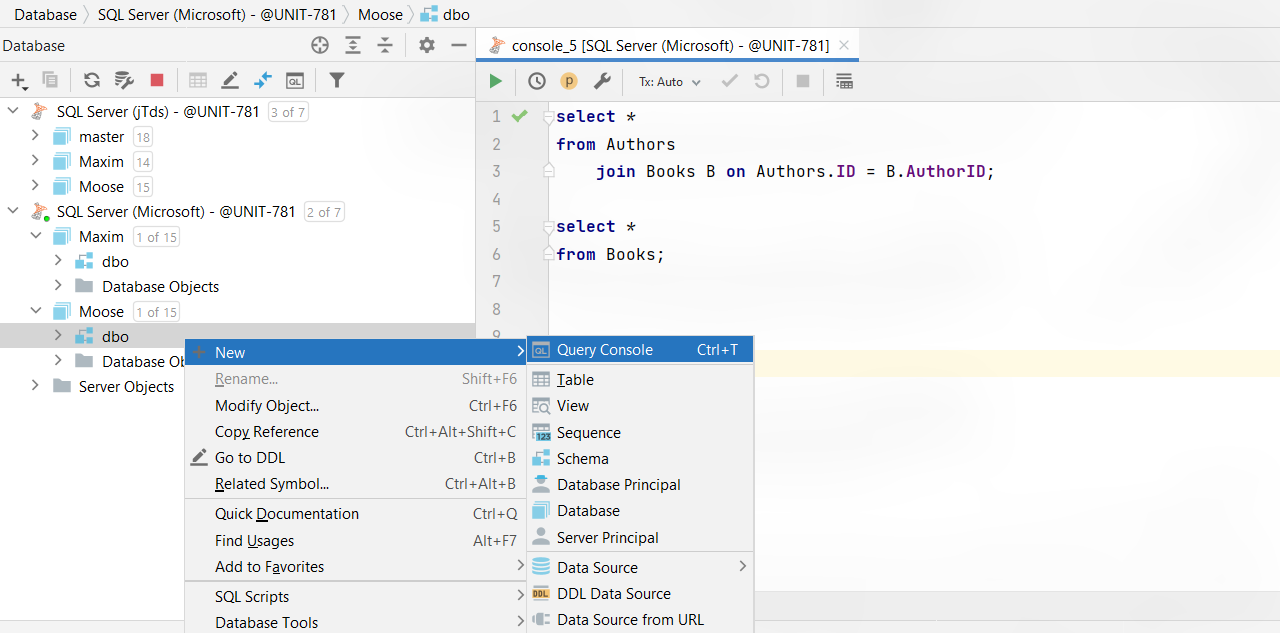
In DataGrip, you right click the database or any object inside it and press New | Query Console.
The results are pretty similar – the query editor is open. But you need to be aware of a few important things:
- The Query Console is a file associated with the particular data source that is stored inside the DataGrip project. You will have access to it via Scratches and Consoles in the Files tool window.
- The Query Console is saved automatically with no need to press Ctrl+S. If you accidentally close it, you can always reopen it via Ctrl/Cmd+E.
- If you want to save the Query Console as a user file in a selected place, you can do so via File | Save as. Then you can open this file in DataGrip and run it against any data source.
Running queries
In SSMS, you run SQL via F5. If nothing is selected, the whole script is executed.
In DataGrip, you run SQL via Ctrl/Cmd+Enter. If nothing is selected, the chooser appears, offering to run the query under the caret or the whole script. The behavior of this is customizable – you can turn the chooser off and make the default Execute action run what you need. It should be done in Settings | Database | General | Query execution.
Shortcuts can be remapped. Are you a fan of F5? You can make it your hotkey for running SQL!
Explain plan
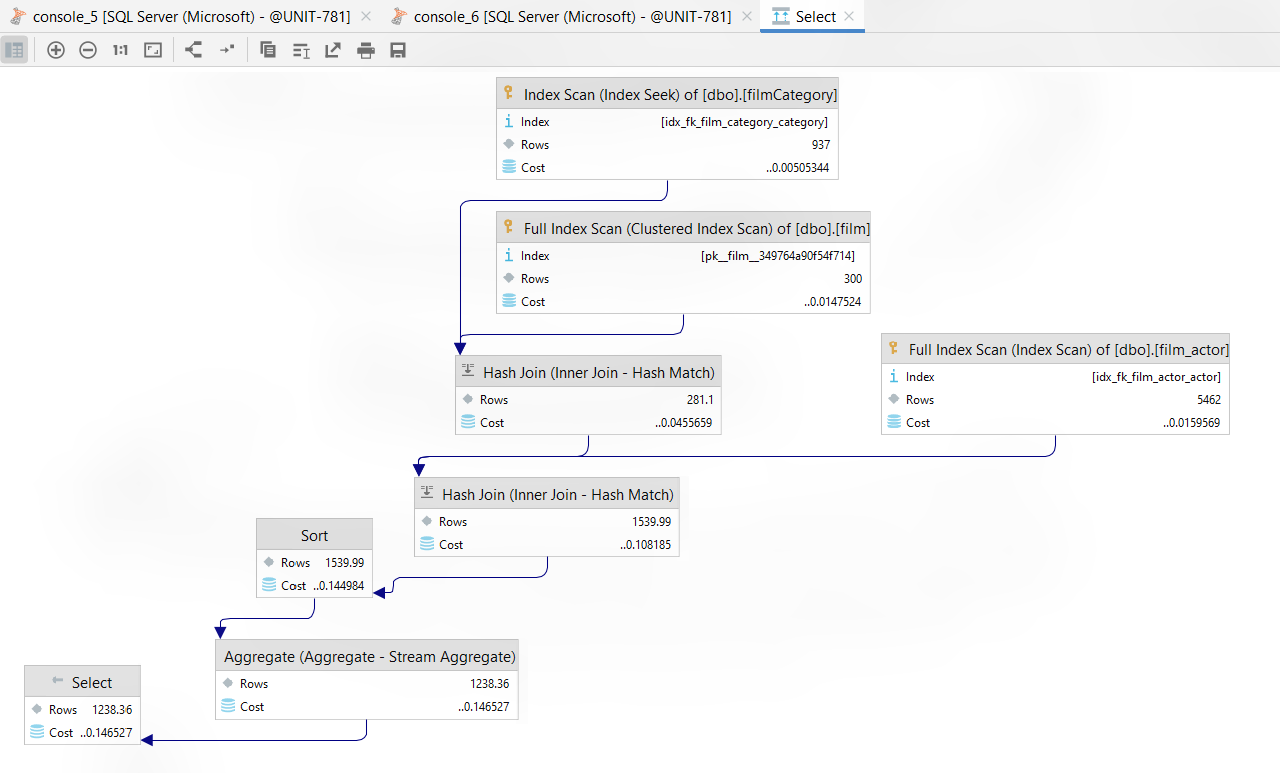
In DataGrip, the result of the Explain Plan is represented in the tree mode by default. SSMS users are more used to the graphical representation. To see it, click the Show Visualization button on the toolbar after you invoke Explain Plan.
Query generation
One of the most frequently used features of SSMS is Context menu | Script Table as…
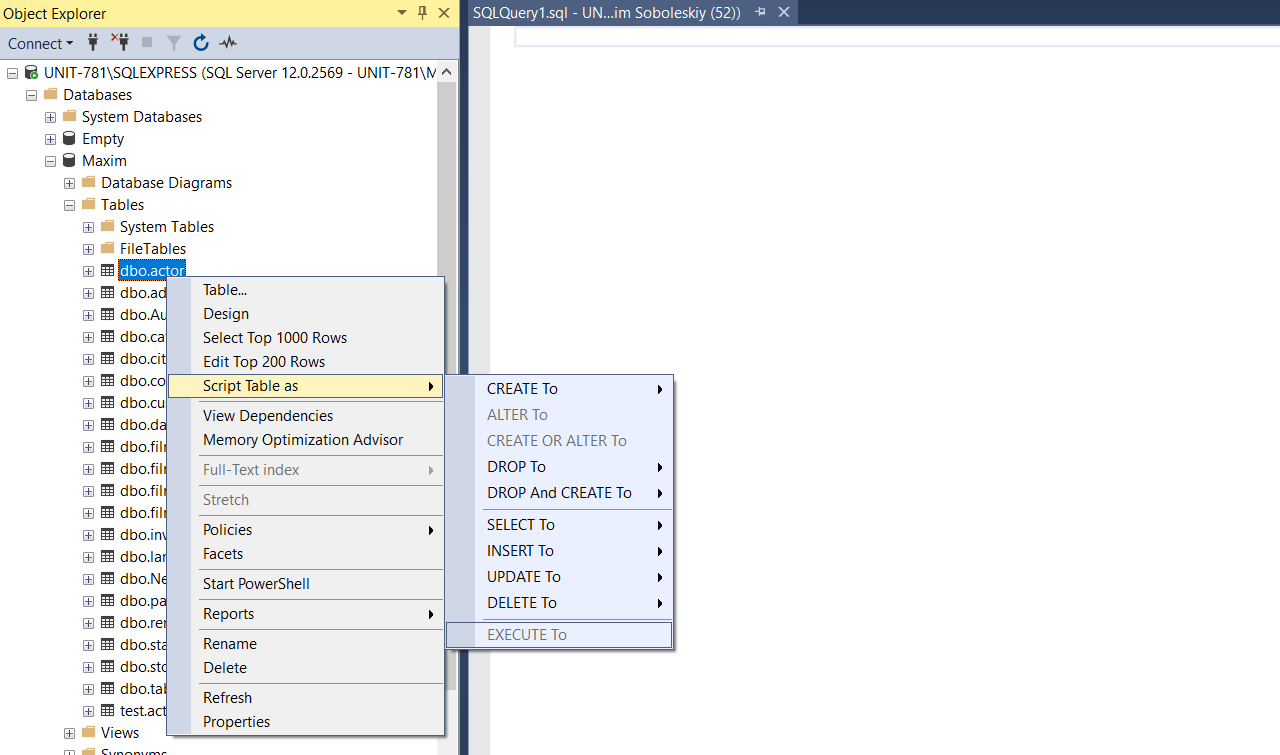
In DataGrip, use Context Live Templates. They should be invoked via Context menu | SQL Scripts.
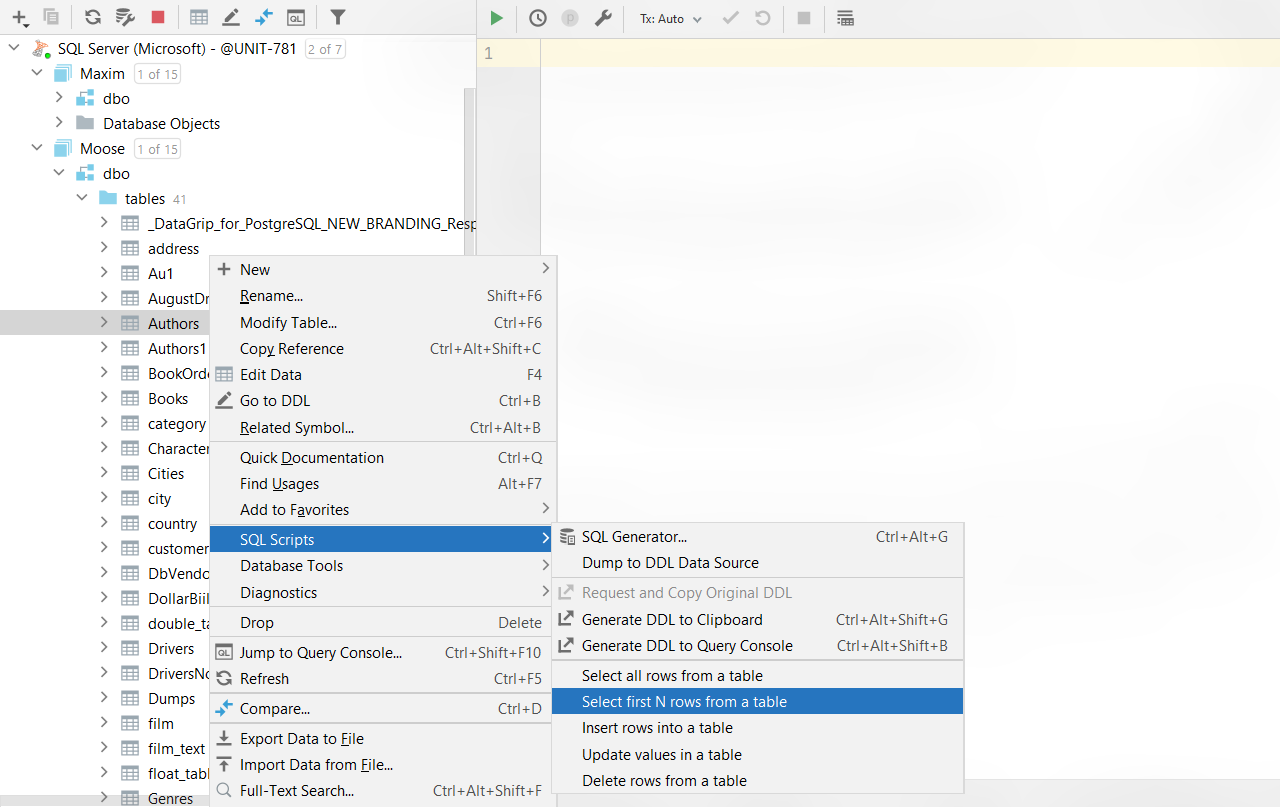
Context Live Templates actually are more powerful than the Script as in SSMS, as you can create any template and use it.
Result sets
The result sets pop up in the Services tool window. In Services you see all the sessions/connections, their clients, and the output of these clients. In our case, the query console is a client (it uses a session) and the results are the output of this query console.
The most frequent question from people with a SSMS background is:
How do I observe several result sets simultaneously?
By default, if you run two statements in SSMS, the results will appear under one another. The default layout in DataGrip is a bit different – each result has its own tab in the Services tool window.
What you can do in DataGrip:
- First, you can drag-and-drop any result set to any area of the Services tool window and get a layout similar to SSMS.

- Usually, seeing several results is necessary to compare them. In DataGrip, we have the dedicated Compare feature for any two data grids. You can use the corresponding button on the toolbar.

- The In-editor results mode can also come in handy. Each result will appear under the corresponding query.

Editing sources
In SSMS, when you need to update the view or procedure, you generate the ALTER script to the SQL editor, make the required changes, and run the script.
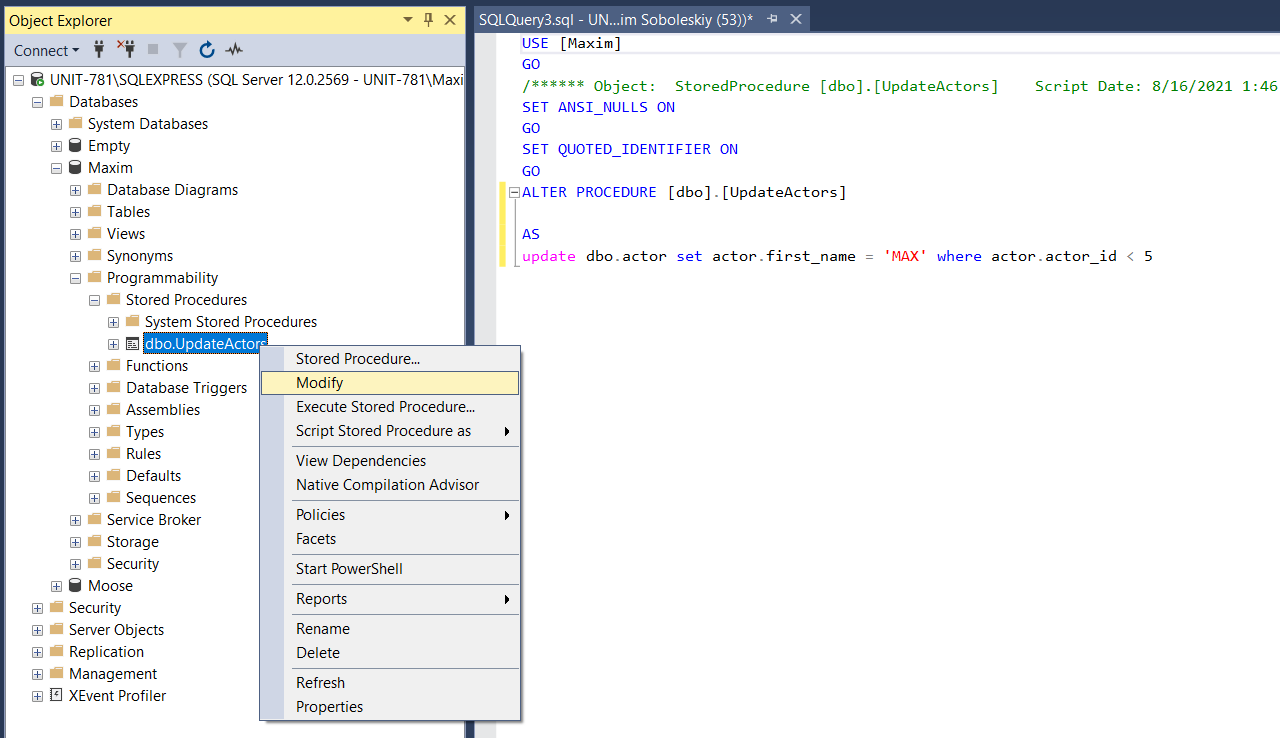
While it is possible to do that in DataGrip, we provide a better and more convenient way to edit sources. Every object has its own source code editor.
When you double-click on the procedure or open the DDL tab of the view, the source code editor is opened. You don’t need to worry that just the CREATE statement is used there. Update the code and press Submit. The script which updates the object will be generated for you.

If you don’t press submit, your local changes will be automatically saved in the source editor until you submit them. You can also change as many objects as you like and submit all of the changes in bulk. To do that, use the Database Changes tool window.
The comprehensive tutorial about editing sources in DataGrip is here.
Table data
In SSMS, if you need to quickly see the table data, you invoke the context menu and click on Edit top 200 rows
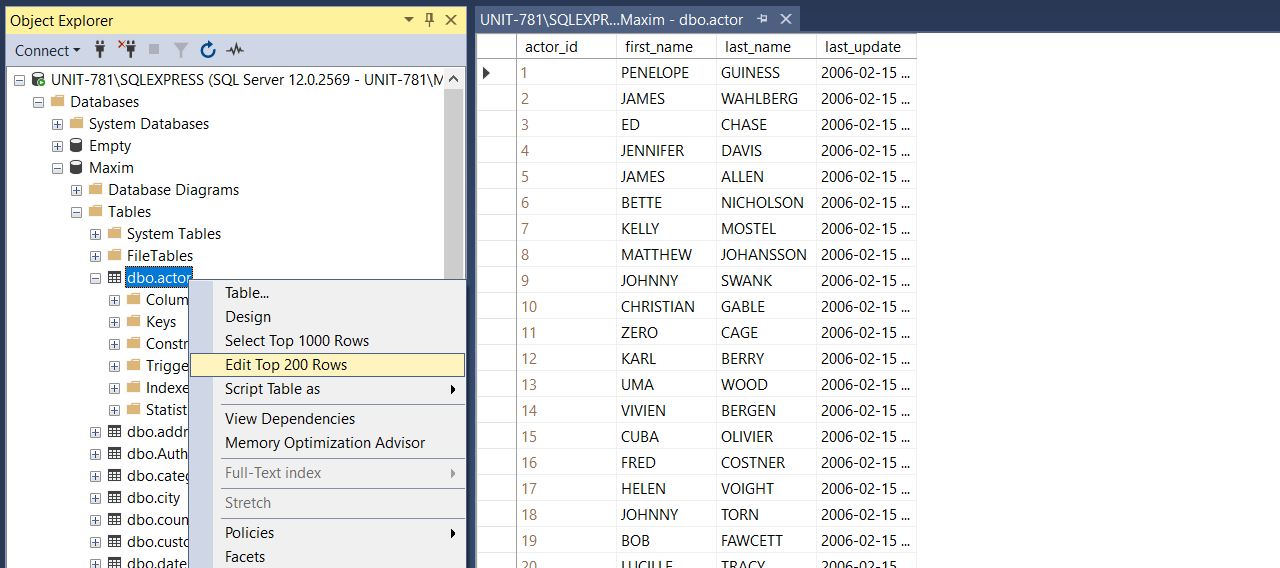
In DataGrip, the corresponding item in the context menu is called Edit Data. Conveniently, you can just double-click the table to get there!
What DataGrip lacks
Compared to SSMS, some functionality is still missing in DataGrip. The main features for which SSMS can still be necessary:
- Managing and restoring backups.
- Debugging stored procedures.
- SQL Server Agent functionality: job list, schedules, activity monitor, etc.
- Object list for linked servers. DataGrip currently only shows the linked server itself.
That’s all! We hope this tutorial was useful to you. If you wish to continue exploring what DataGrip can do and how it can help you be more productive, please check our overview video.
Questions?
- Please comment here
- Contact our support
- Tweet us!
- Email us at datagrip@jetbrains.com
- Report bugs to our issue tracker
The DataGrip team