

.NET Tools
Essential productivity kit for .NET and game developers
Navigation and search updates in ReSharper 2017.3

In ReSharper 2017.3, we made a number of improvements to the navigation experience. There’s the new navigate to breakpoints and a couple of other debugger-related navigation features, several UI and usability updates to the Find Results tool window making it easier to visualize multi-line code fragments, Search Everywhere displays Go to Text results in a different place, and more! Here’s an overview.
Navigate to breakpoints/tracepoints
ReSharper 2017.3 adds a new Go to Breakpoint action (Ctrl+Alt+F9) which shows us all available breakpoints/tracepoints in our solution. We can use it to quickly jump between breakpoints, as well as search or delete existing breakpoints.
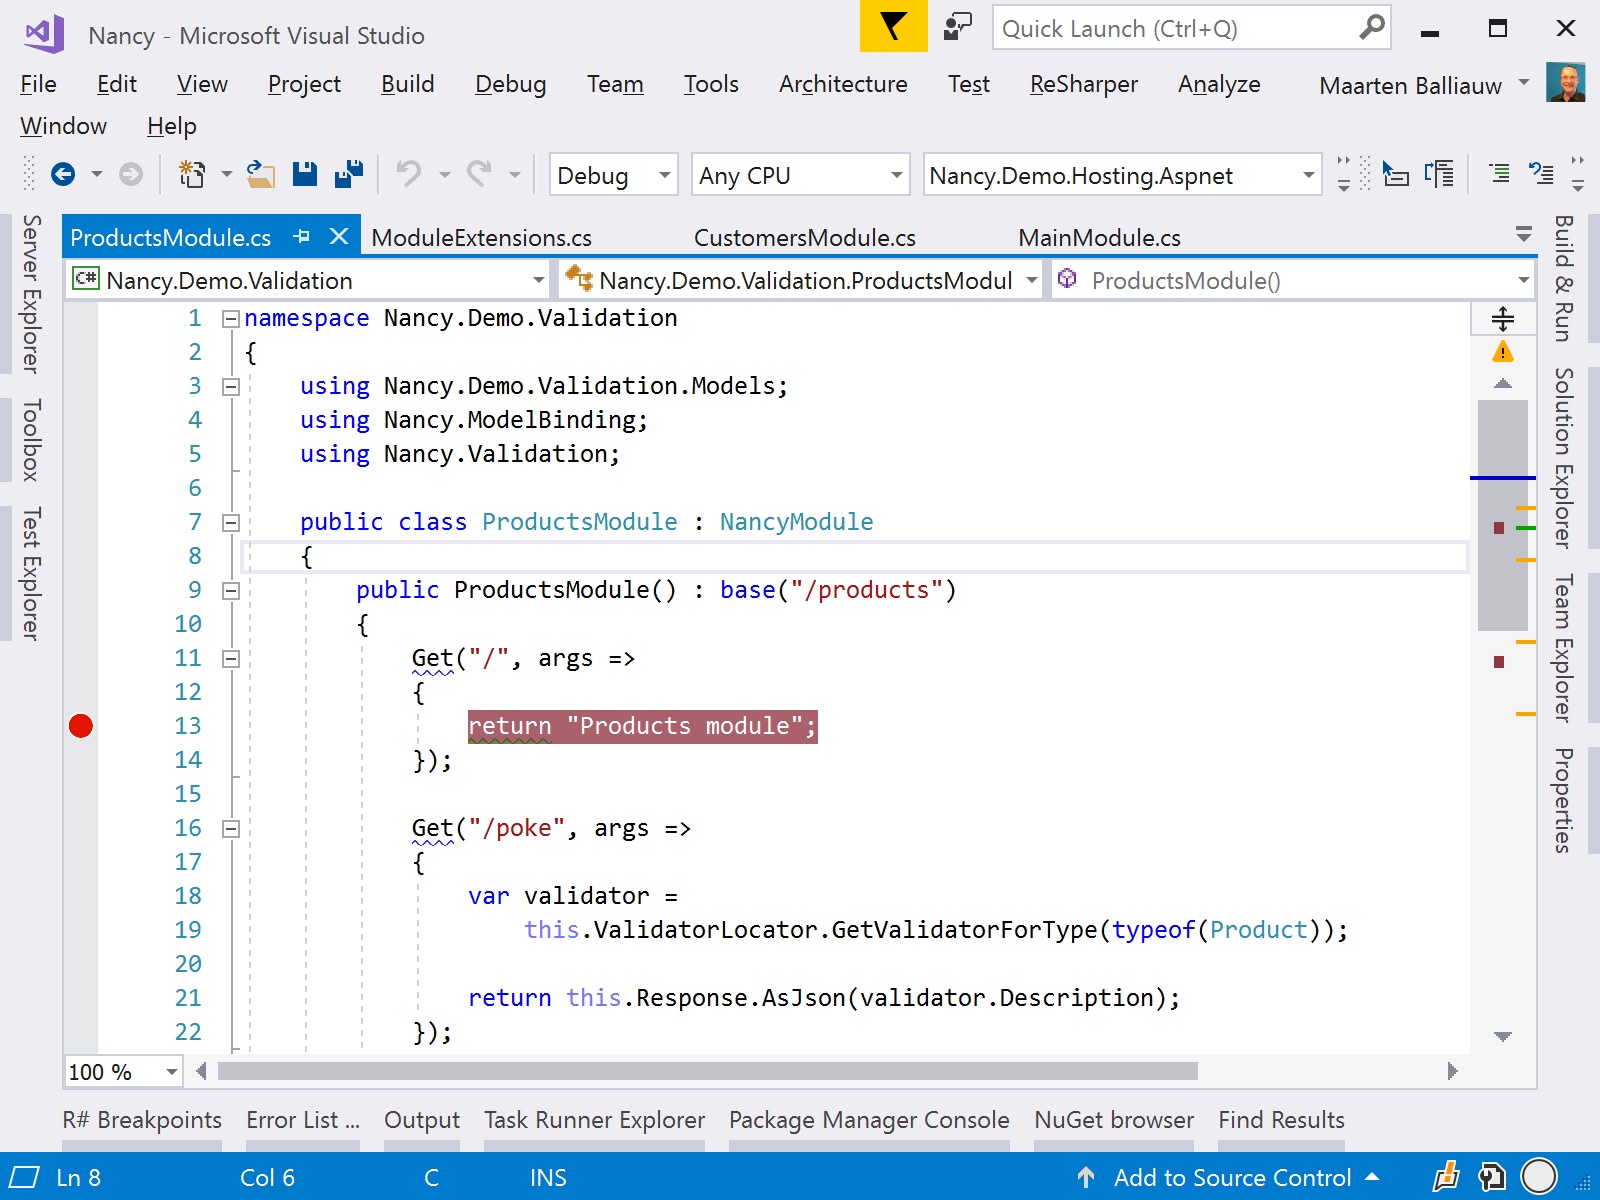
A new R# Breakpoints tool window (Shift+Enter from the Go to Breakpoint popup) was added as well, which gives us a more elaborate overview of breakpoints and lets us group, preview, navigate and enable/disable any breakpoints in our solution. Read more about ReSharper 2017.3 navigate to breakpoints in a previous blog post.
Usability updates to the Find Results tool window
Any navigation in ReSharper, such as Find Usages (Shift+F12) or Search Everywhere (Ctrl+T), provides the possibility to open results in the Find Results tool window (click the icon in the popup or use Shift+Enter). A number of user interface and usability improvements were made to this tool window.
Add/remove breakpoints and tracepoints
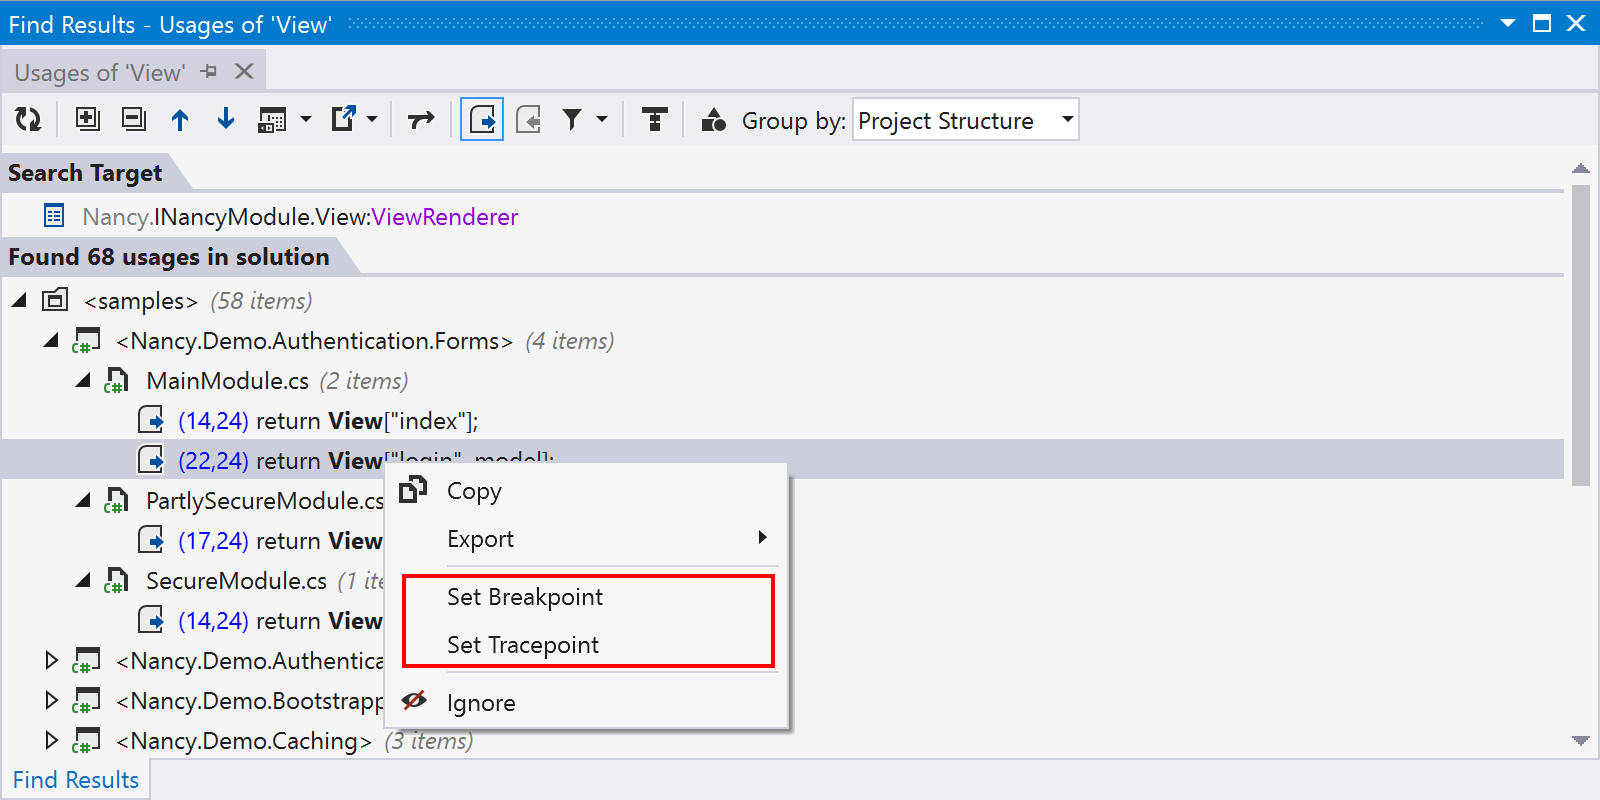
Usually when we want to set a breakpoint or tracepoint, we have to open the editor and find the relevant line of code. The Find Results tool window now lets us create a breakpoint/tracepoint directly:
Better presentation for multi-line results
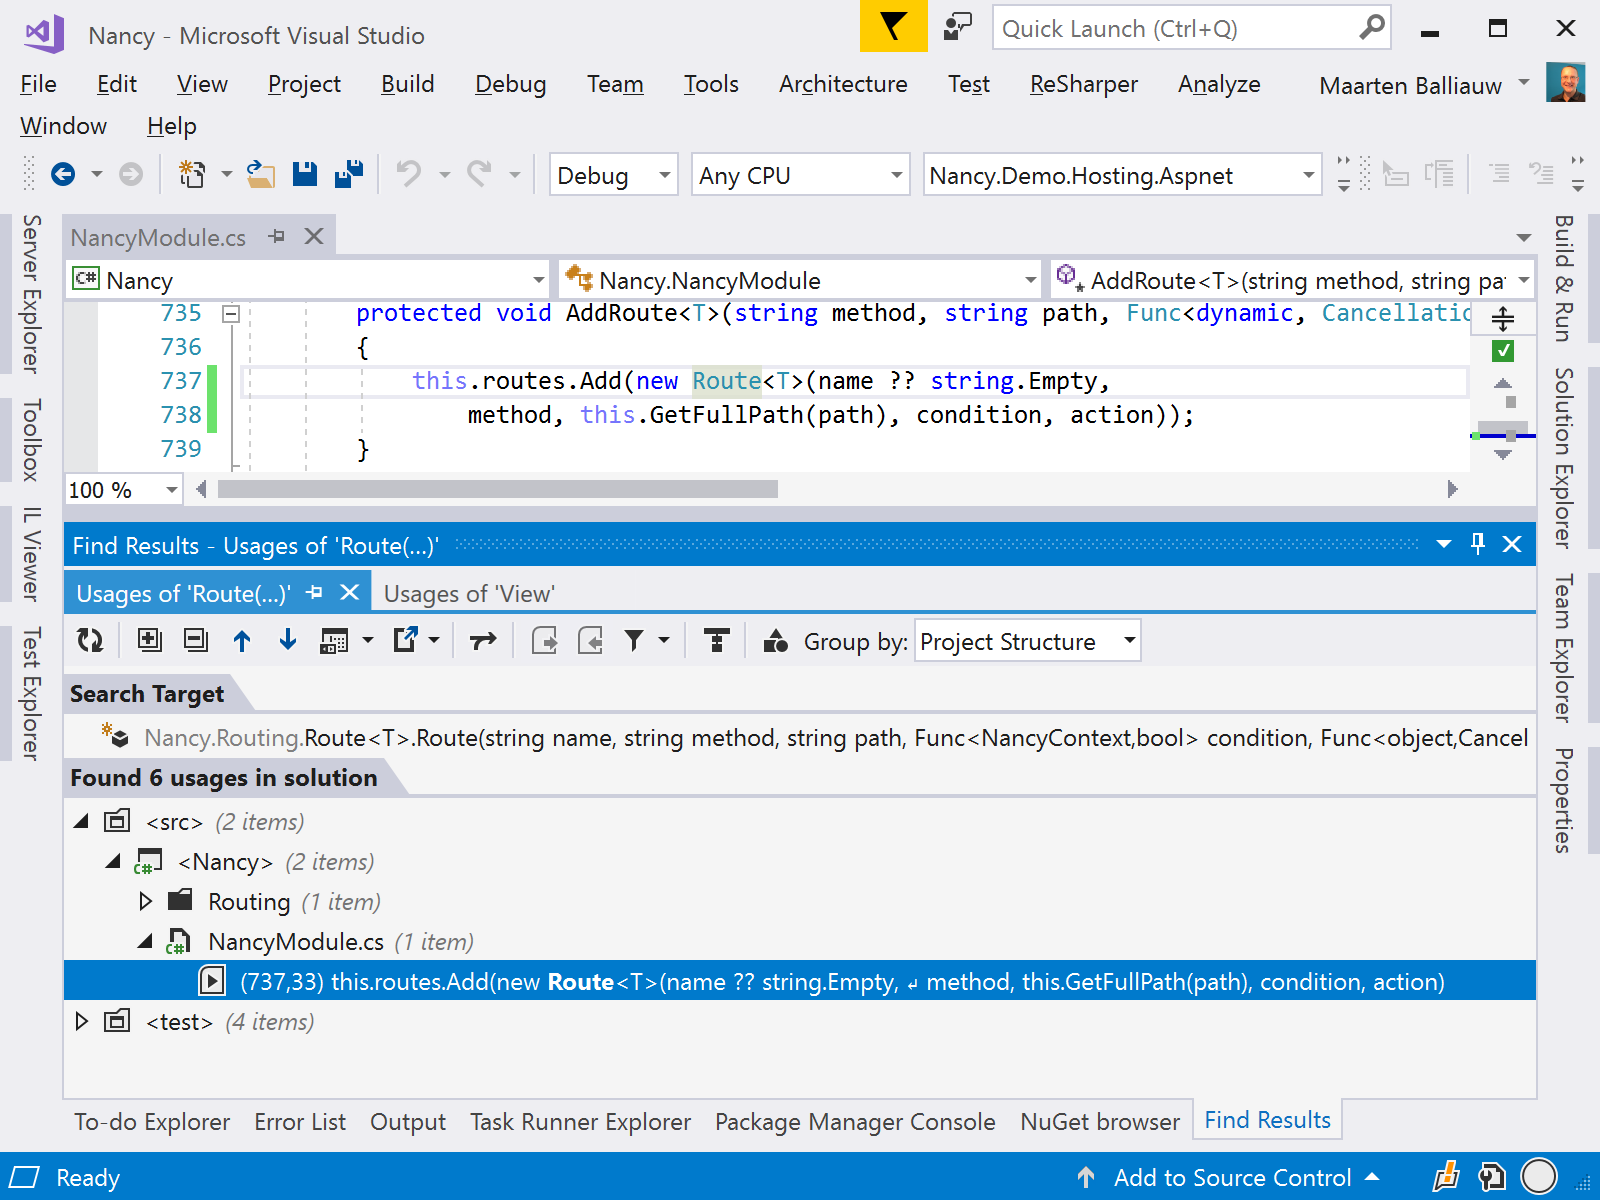
Many development teams have a code style where newlines are added when line length would be too long. For example in method calls, often parameters are moved to a new line. Such formatting is now respected by the Find Results tool window! The full code context is now displayed in the result tree, making it much easier to work with multi-line formatted search results.
Keep focus by removing calls that are already reviewed
The Find Results tool window is often used during large-scale code updates. For example one could search for usages of a given method and go through all of the results one by one. To keep track of which calls we’ve already inspected, we can now ignore results using the context menu or by simply pressing Del. This will gray out the active item and give us a visual clue we’ve handled the occurence.

Note that in the toolbar we can show/hide these ignored entries in the list..
Go to Text and Search Everywhere results
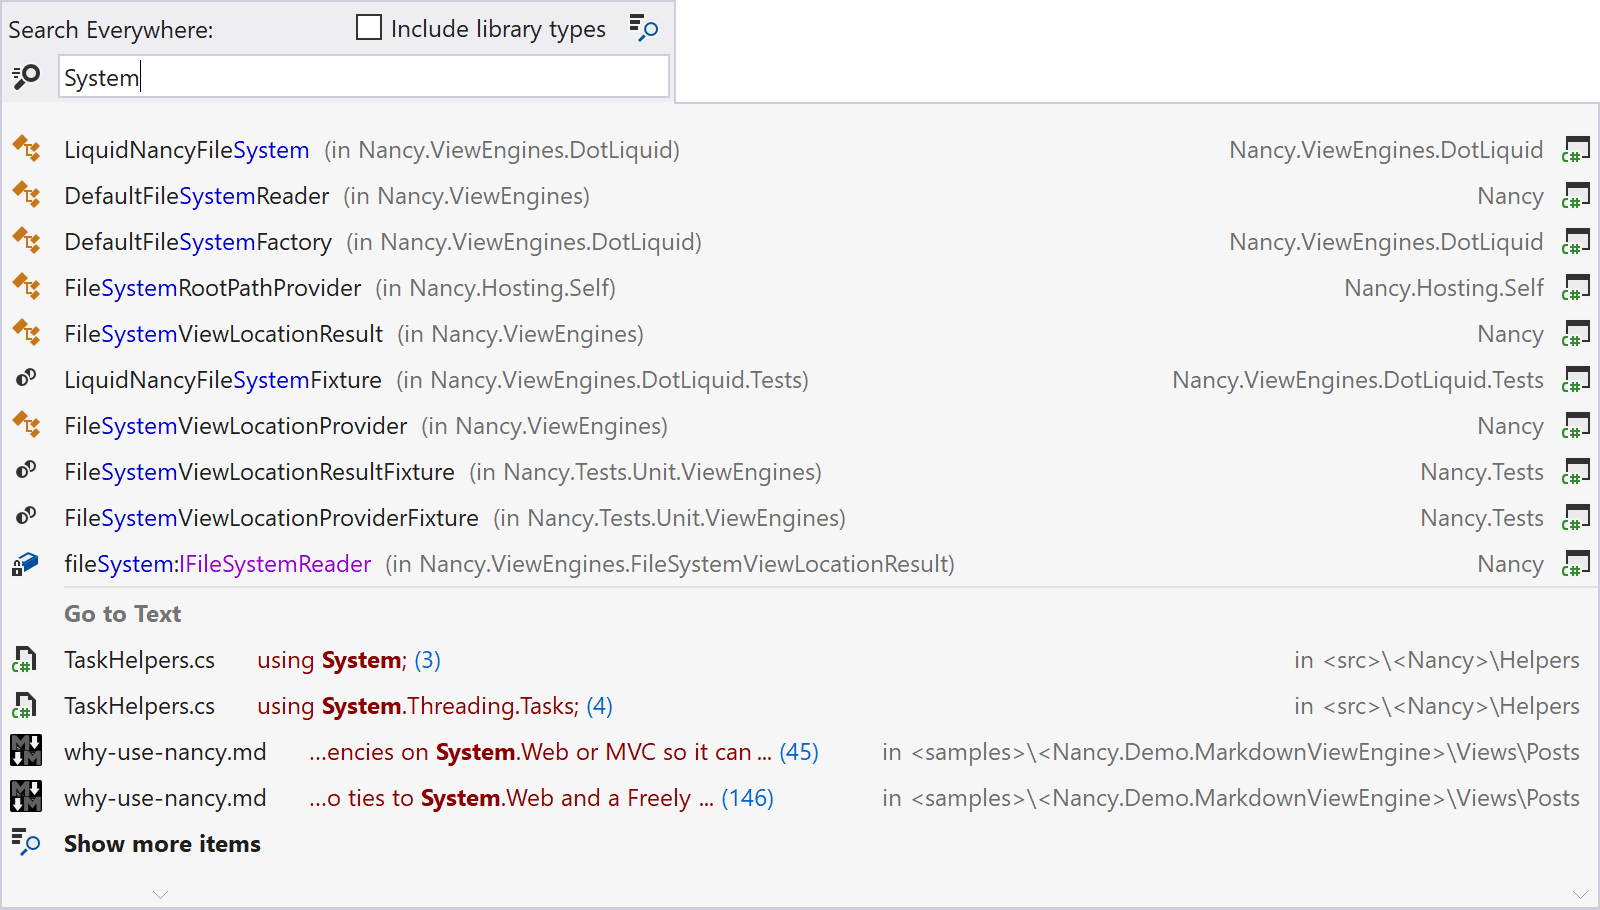
Using Go to Text (Ctrl+T,T,T), we can quickly find and navigate to any text in source code and textual files in our solution. This navigation is also part of Go to Everything (Ctrl+T), making it easy to find anything in our solution.
Unfortunately, for some searches the results can be confusing. In previous ReSharper versions, Search Everywhere would display results from Go to Text when no other data could be found. When results were found, Go to Text results would often be omitted.
ReSharper 2017.3 helps avoid confusion and ensures we have a good overview: Go to Text results are displayed in a separate section.
Download ReSharper 2017.3 and give these new navigation features a try!

Subscribe to a monthly digest curated from the .NET Tools blog:


