

.NET Tools
Essential productivity kit for .NET and game developers
Working with NPM and Yarn in Rider

Many developers are working with both .NET technologies as well as JavaScript or TypeScript. All of these ecosystems come with their own package managers to install (third-party) dependencies.
Developers using Rider have probably already made use of built-in NuGet support to cover the .NET side, but did you know Rider also supports NPM and Yarn to help us work with JavaScript library dependencies? Let’s have a closer look at that and see how we can work with ASP.NET Core and JavaScript libraries!
Working with Javascript libraries in Rider
Similar to how ASP.NET and ASP.NET Core use NuGet for working with dependencies, development with client-side frameworks like Angular and React involves JavaScript libraries packaged using NPM (the Node Package Manager that runs on Node.js).
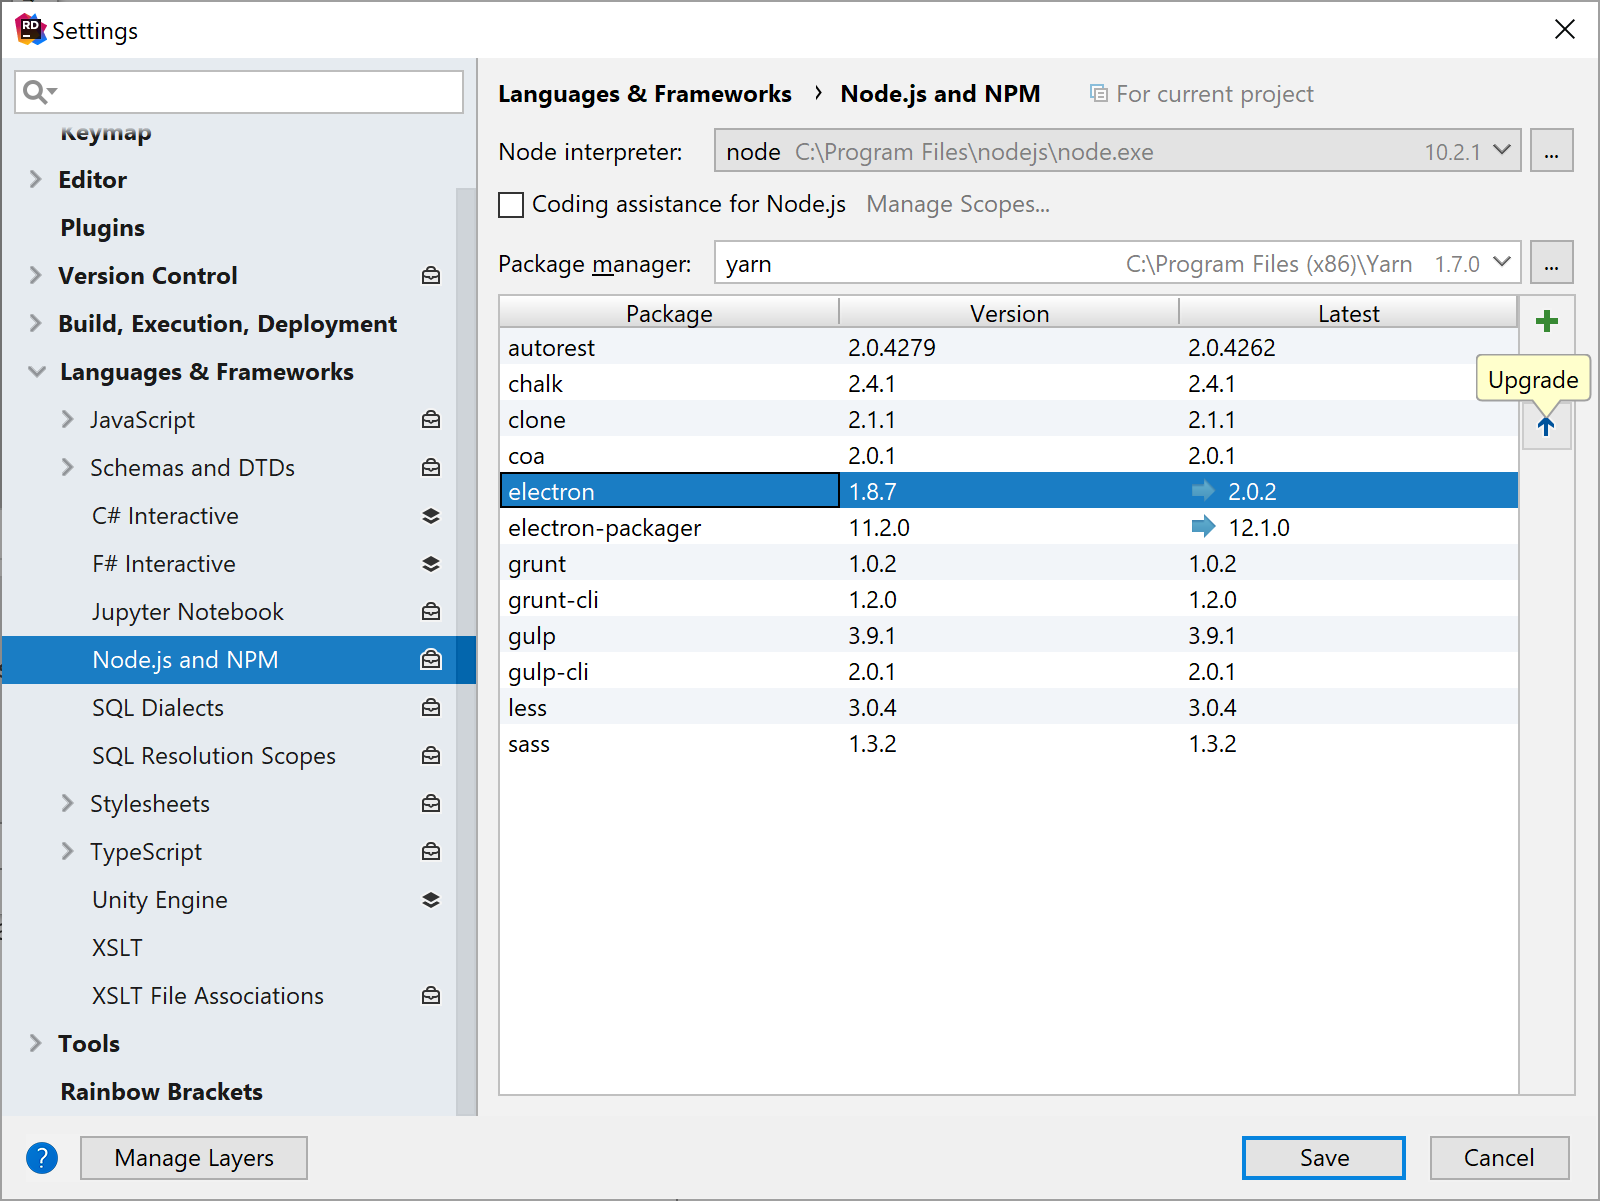
To use NPM with ASP.NET (Core) projects, we must have Node.js installed on our machine. We can verify correct installation from Rider’s settings under Languages & Frameworks | Node.js and NPM.
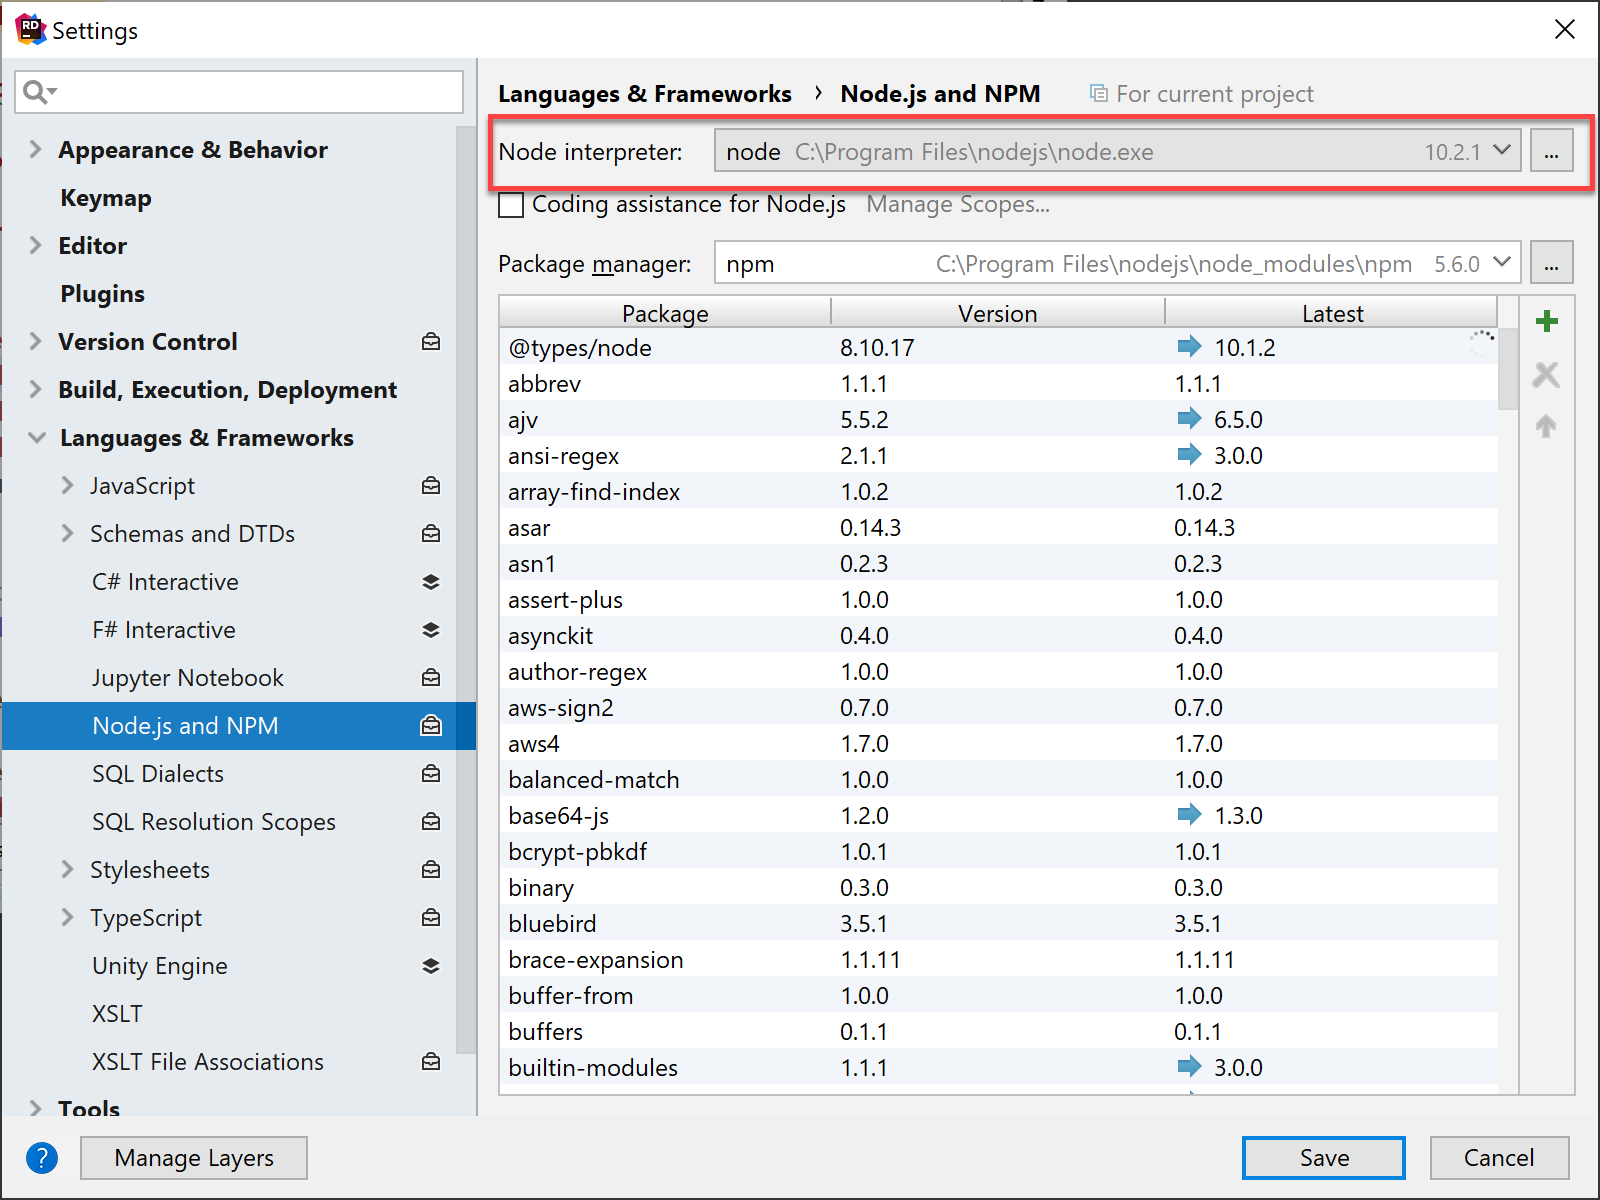
While Node.js comes with NPM as its package manager many are using Yarn as an alternative. While both work with the same package formats and the NPM registry, many developers favor one or the other.
Rider supports both package managers and lets us pick our own favorite from the settings under Languages and Frameworks | Node.js and NPM, under package manager.

Rider will use our preference when installing or updating dependencies, and when running scripts. When opening a project that contains a yarn.lock file, Rider will use Yarn (when installed) to install any missing dependencies in our project.
Working with NPM packages
There are two places where we can install NPM packages. The first is within our project where package contents are stored directly inside our project directly. The second is where we store packages in a global location on our computer. We will look at working with NPM package on a global basis later, so let’s dig into project-based packages first.
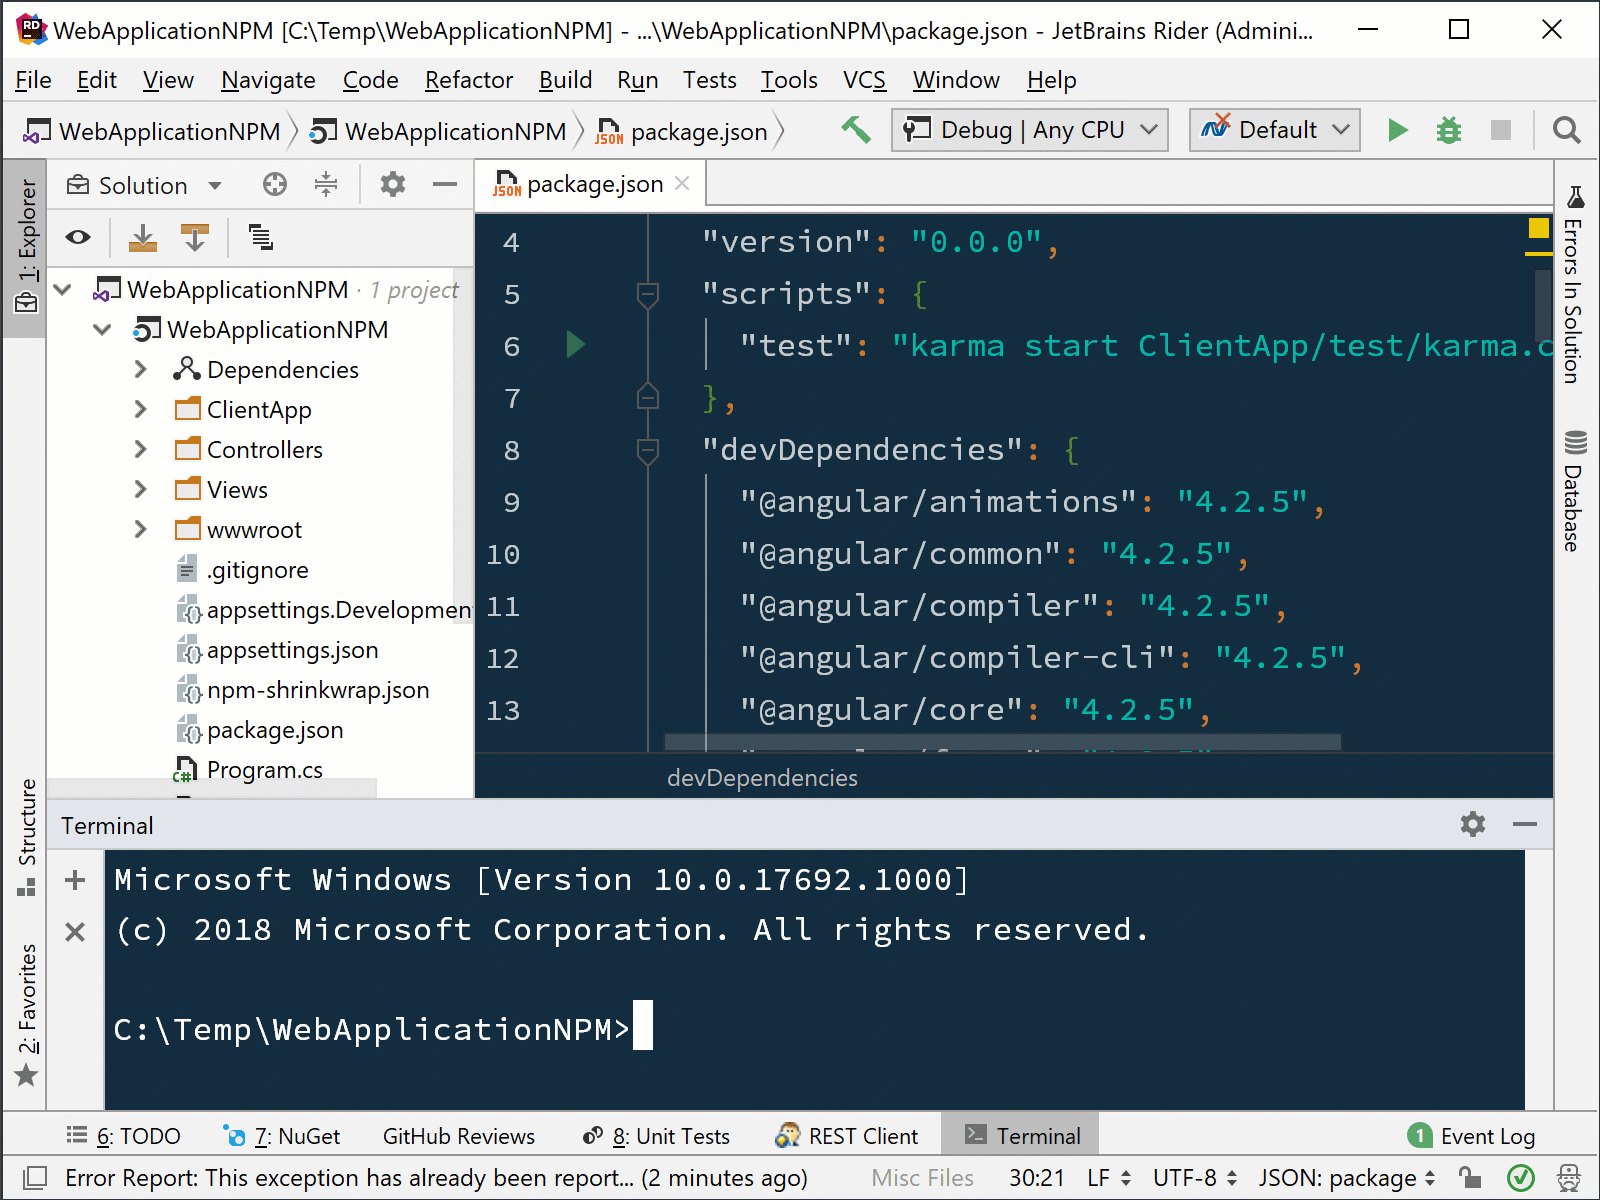
We can install new packages for our projects through the Terminal window (open it using the View | Tool Windows | Terminal menu or using Ctrl+Alt+1).
If you are using NPM for project dependencies, you can run the following command:
npm install --save <package_name>
For a development dependency, you can use the following command:
npm install --save-dev <package_name>
Instead if you are using Yarn, you can install the same package using any of these commands (project dependency and development dependency):
yarn add <package_name>
yarn add <package_name> --dev
The following is an example of installing the package for angular-translate to the project’s development dependency.
Similarly, NPM packages can be upgraded using the command line.
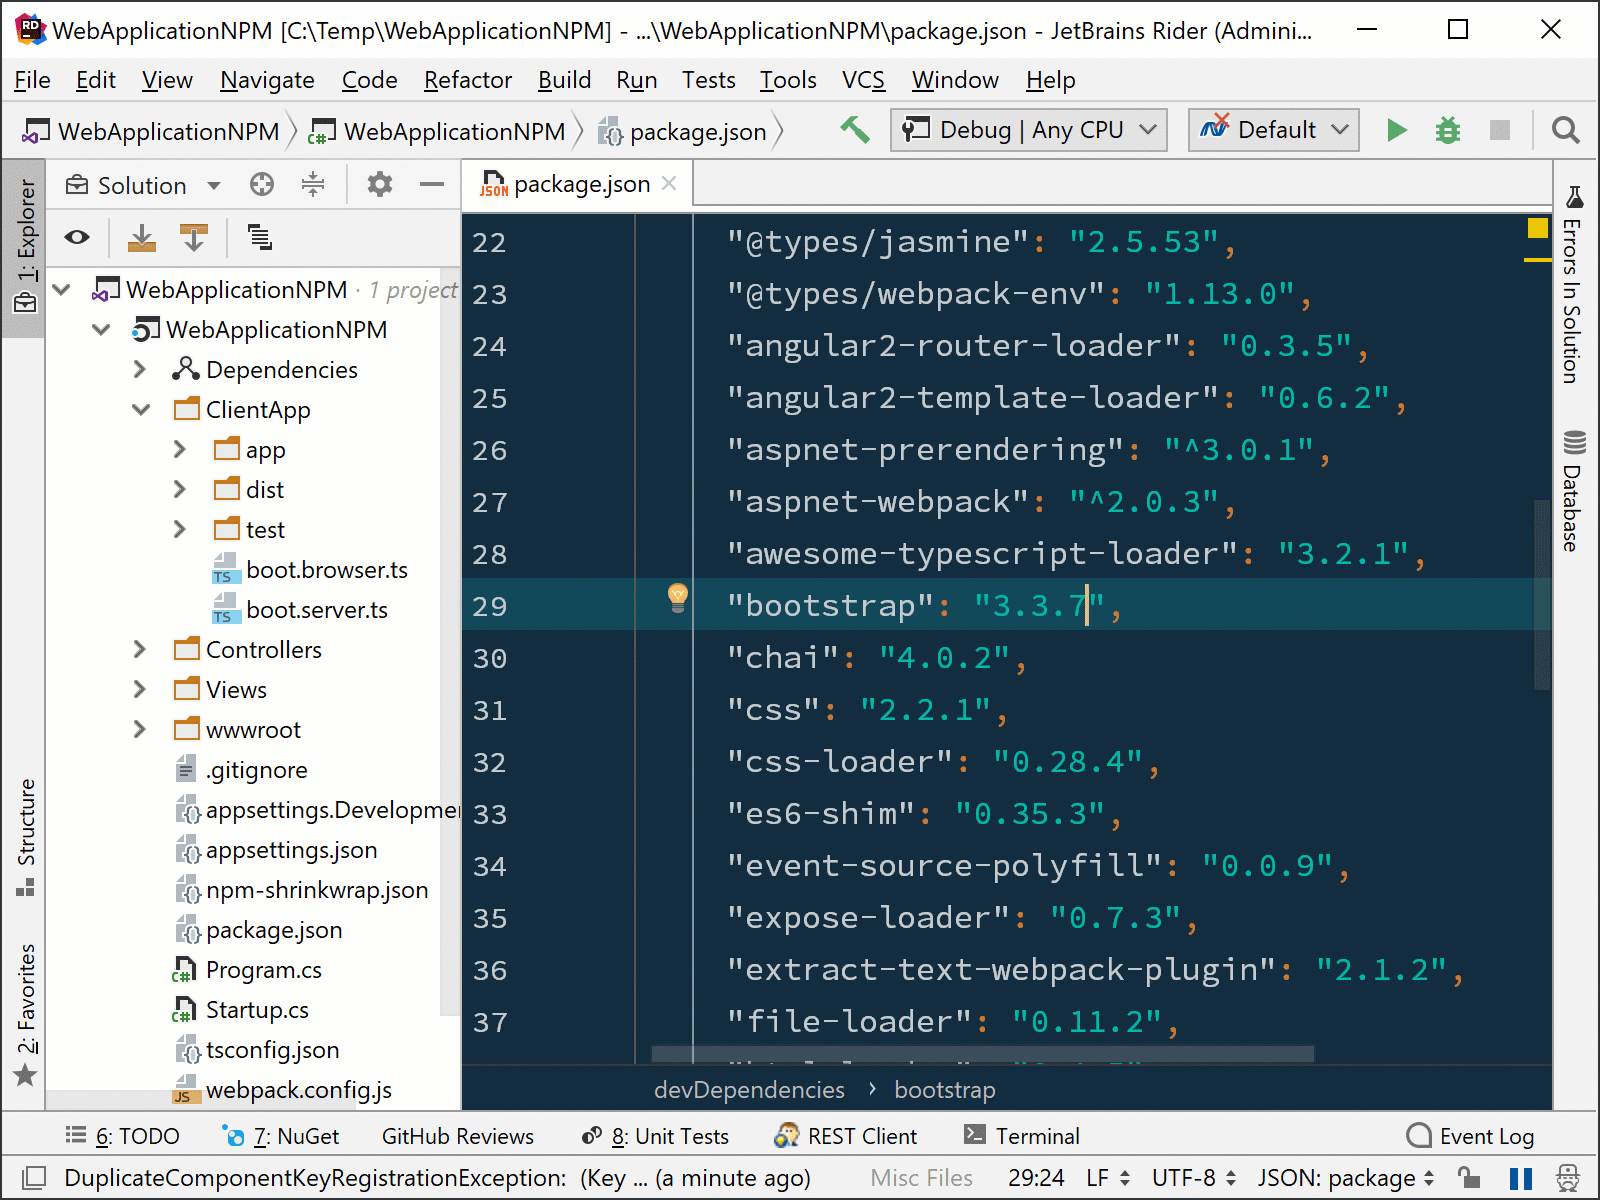
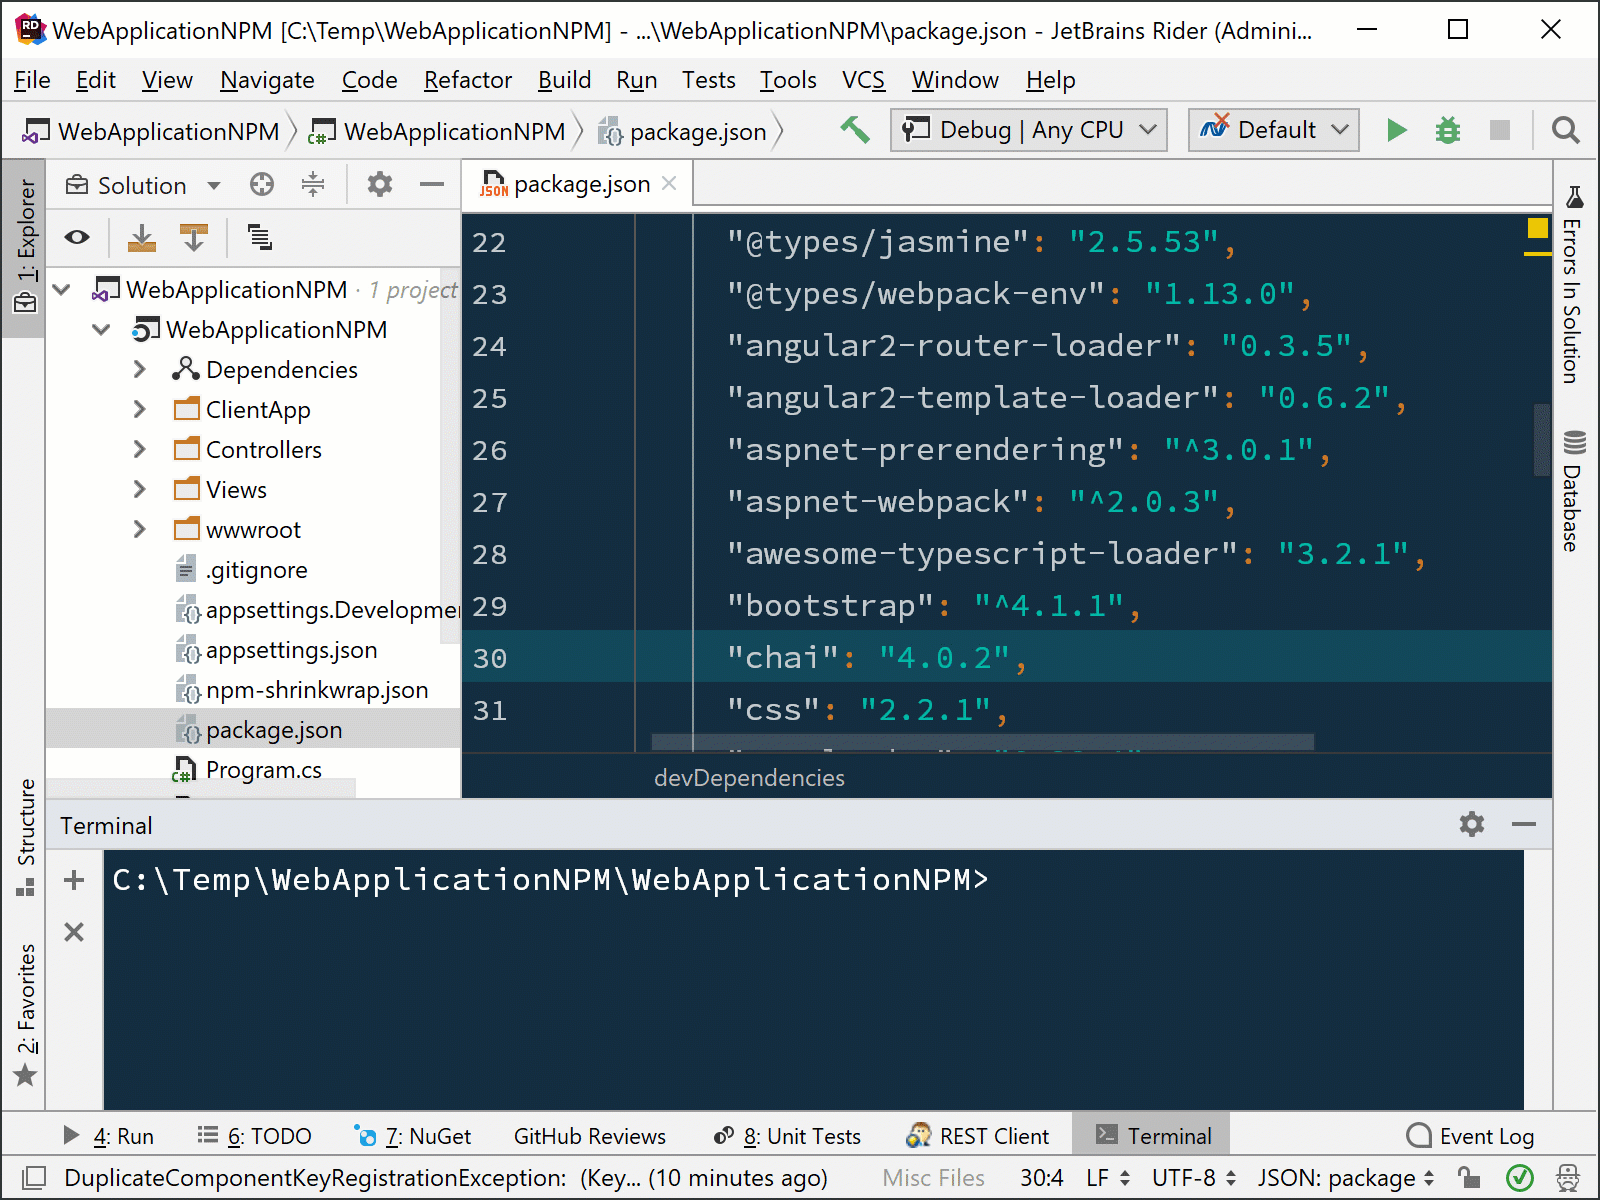
Another way of installing (or upgrading/uninstalling) NPM packages is by editing the package.json file and adding or removing dependencies here. Rider provides completion for both package names as well as versions.
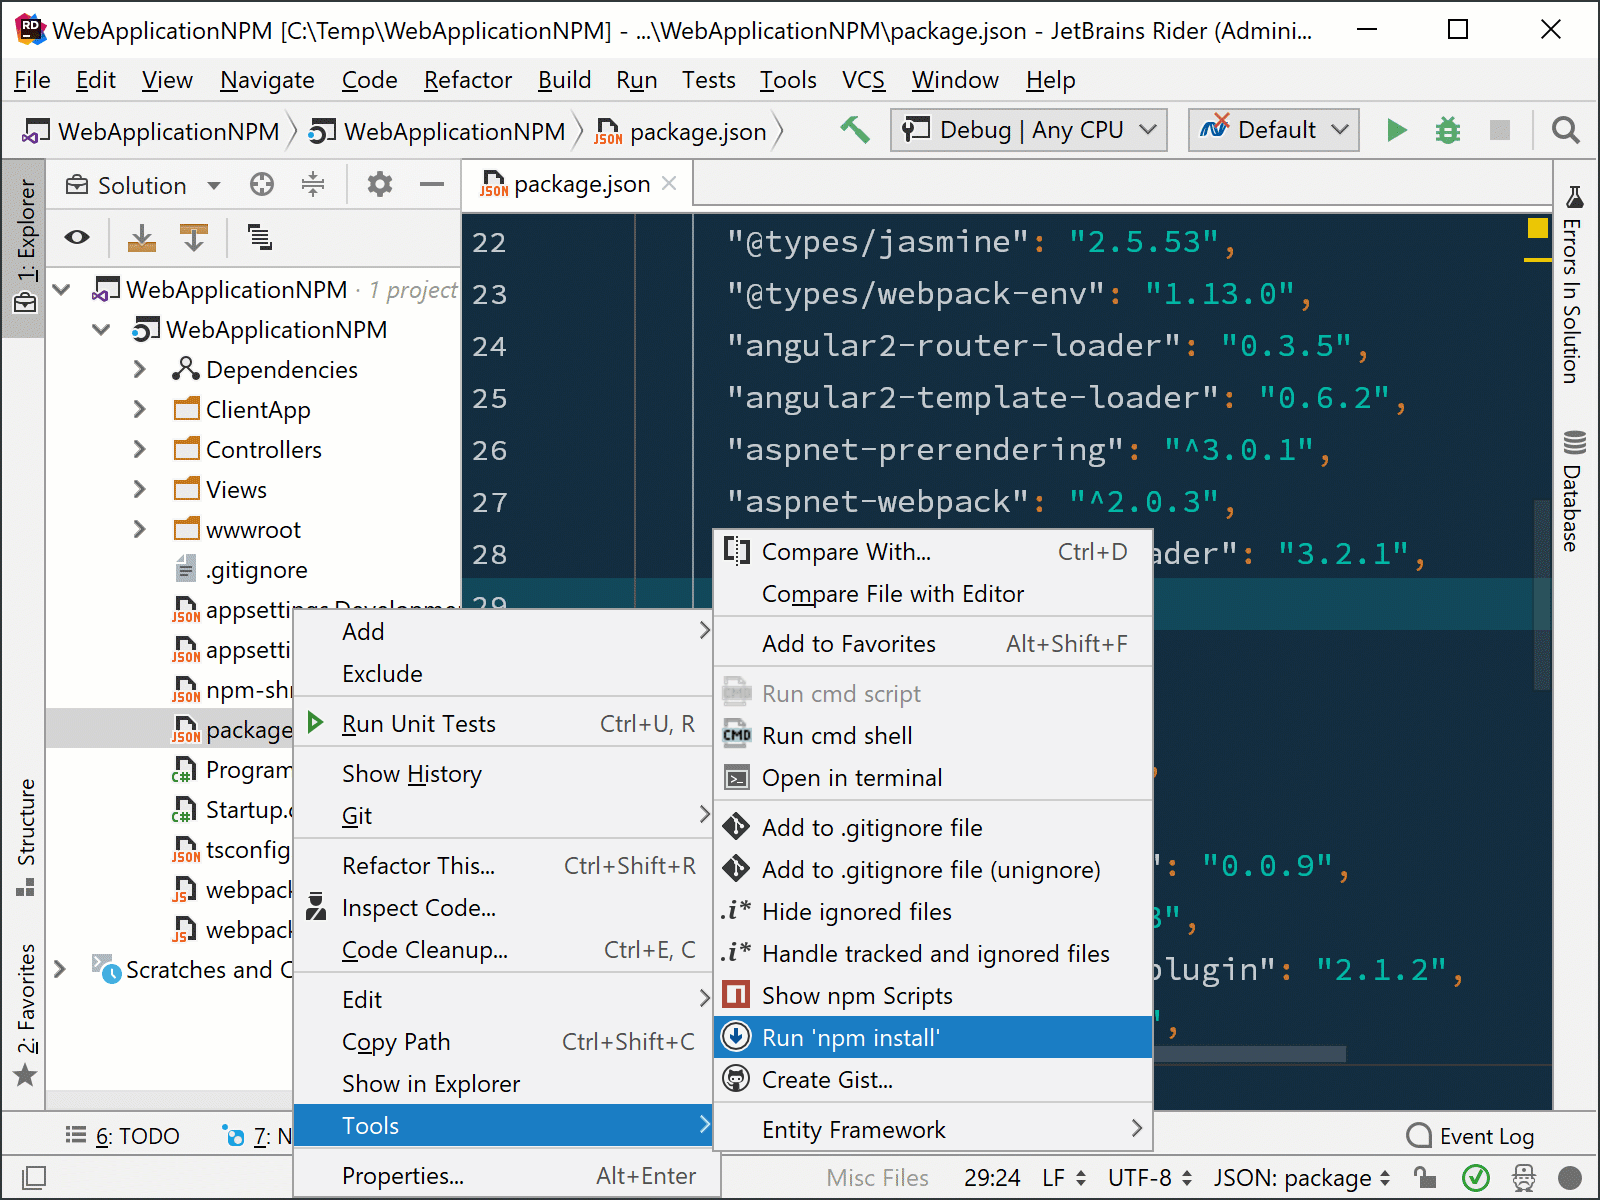
At any time, we can then use the Tools | Run ‘npm install’ context menu on our package.json file and invoke the underlying package manager to ensure the expected dependencies are available for us to work with.
Working with (global) NPM packages
Let’s look at installing global packages using Rider. Global packages are packages that will be installed machine-wide. They are typically used to install command-line tools, such as Grunt or Gulp and others.
From the settings under Languages and Frameworks | Node.js and NPM, we can see the global packages that are currently installed on our machine. Using the plus symbol (+), we can install additional packages into our project.

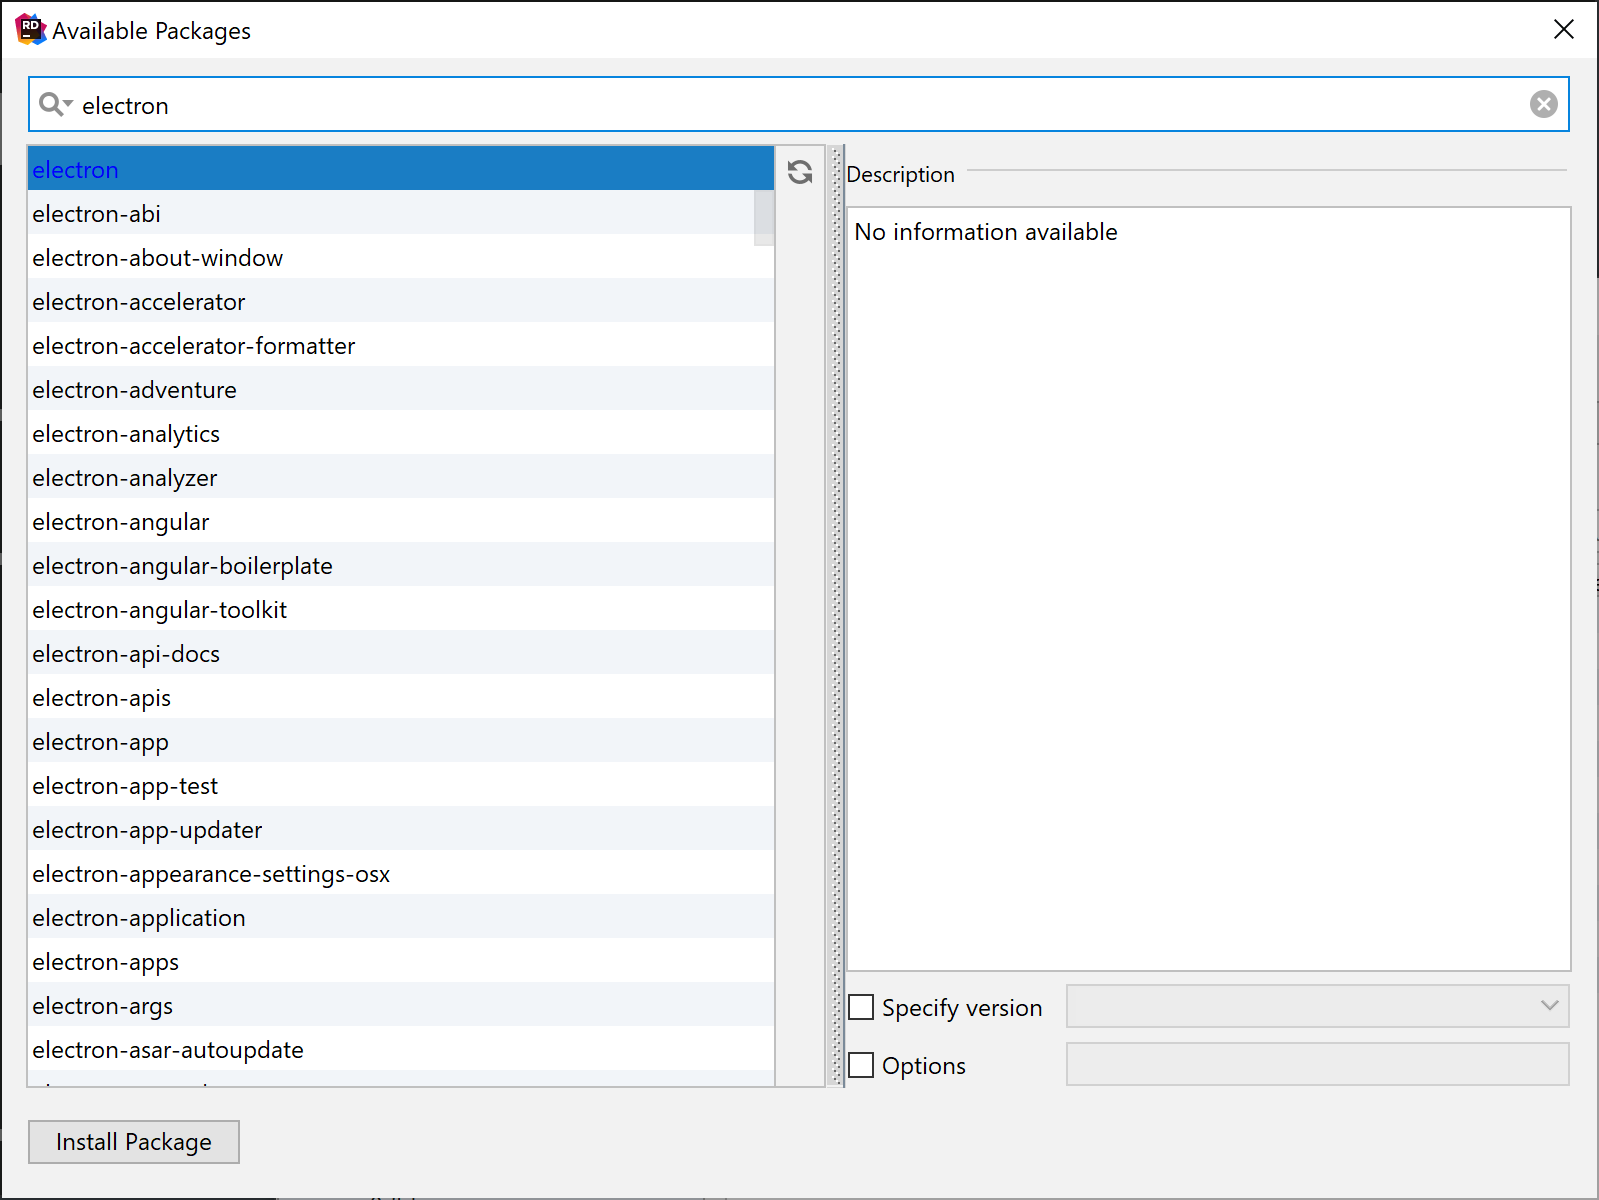
In the Available Packages dialog that opens, Rider will present us an overview of all packages available from the NPM registry. We can search, find and finally install the packages on our machine, optionally picking the version and additional install options.
Similar to installing packages, we can also upgrade packages here. When updates for installed packages are available, Rider will let us know here. We can use the Upgrade button to install the latest version of the package.
Removing or uninstalling a package can be done here as well, using the uninstall button.
Migrating a project from NPM to Yarn
To migrate a project that is currently using NPM to use Yarn, we will need to open a Terminal window in Rider (from the View | Tool Windows | Terminal menu or using Ctrl+Alt+1).
We need to issue the yarn command to migrate the project and to create the required yarn.lock file in our project directory.
That’s it, folks! We have covered the various ways Rider allows us to work with JavaScript libraries using NPM and Yarn. This should help get us on track to leveraging JavaScript in our ASP.NET and ASP.NET Core apps.
We’d love to hear your feedback on these features! Give Rider 2018.1.2 a try!


