

.NET Tools
Essential productivity kit for .NET and game developers
Developing Xamarin applications in Rider

With Rider, we can create and work with Xamarin projects to develop applications targeting Android and/or iOS devices. We can write code and make use of code analysis, coding assistance, refactoring and debugging features, built-in tools like Version Control and the NuGet client, and deploy and debug our apps on emulated or real devices.
In this blog post, we want to provide an overview of how to get started and what tooling is available. And while we’ll be targeting Android, keep in mind that targeting iOS is very similar.
What is Rider for Android and iOS development?
You may already know Rider is based on ReSharper to provide coding intelligence for our C# and VB.NET code. It also shares technology and tooling with the IntelliJ platform, more specifically Android Studio (Android) and AppCode (iOS/macOS).
So if you’re used to working with Android Studio, you will recognize many tools that ship with Rider. The same goes for AppCode – if you’ve ever used that IDE, many things in Rider will feel familiar. In a sense, Rider is Android Studio and AppCode.
Rider also provides C#, VB.NET and XAML editing support, making it easy to develop Xamarin.Android and Xamarin.iOS using a single IDE. And if you’re building mobile games, Rider comes with tooling for Unity as well.
What do we need to install?
First of all, we’ll need the Xamarin Android support plugin installed. If it was somehow excluded during Rider installation, we can find it in the settings under Plugins.
To develop Xamarin applications, we will need the Xamarin SDK installed. The SDK provides the necessary build targets and libraries, as well as some tooling. To target Android devices, well need the Xamarin SDK for Android. To target iOS, we’ll need the Xamarin SDK for iOS/Mac.
Rider supports the Xamarin SDKs that are installed with Visual Studio (Android, iOS). Since not everyone has a Visual Studio license, the JetBrains Xamarin SDK can be used. This is a custom build of the Xamarin GitHub sources, with some improvements and additional code.
Rider will verify available tooling and help install any missing components. From the settings under Environment, we can install/update the Xamarin SDK’s.
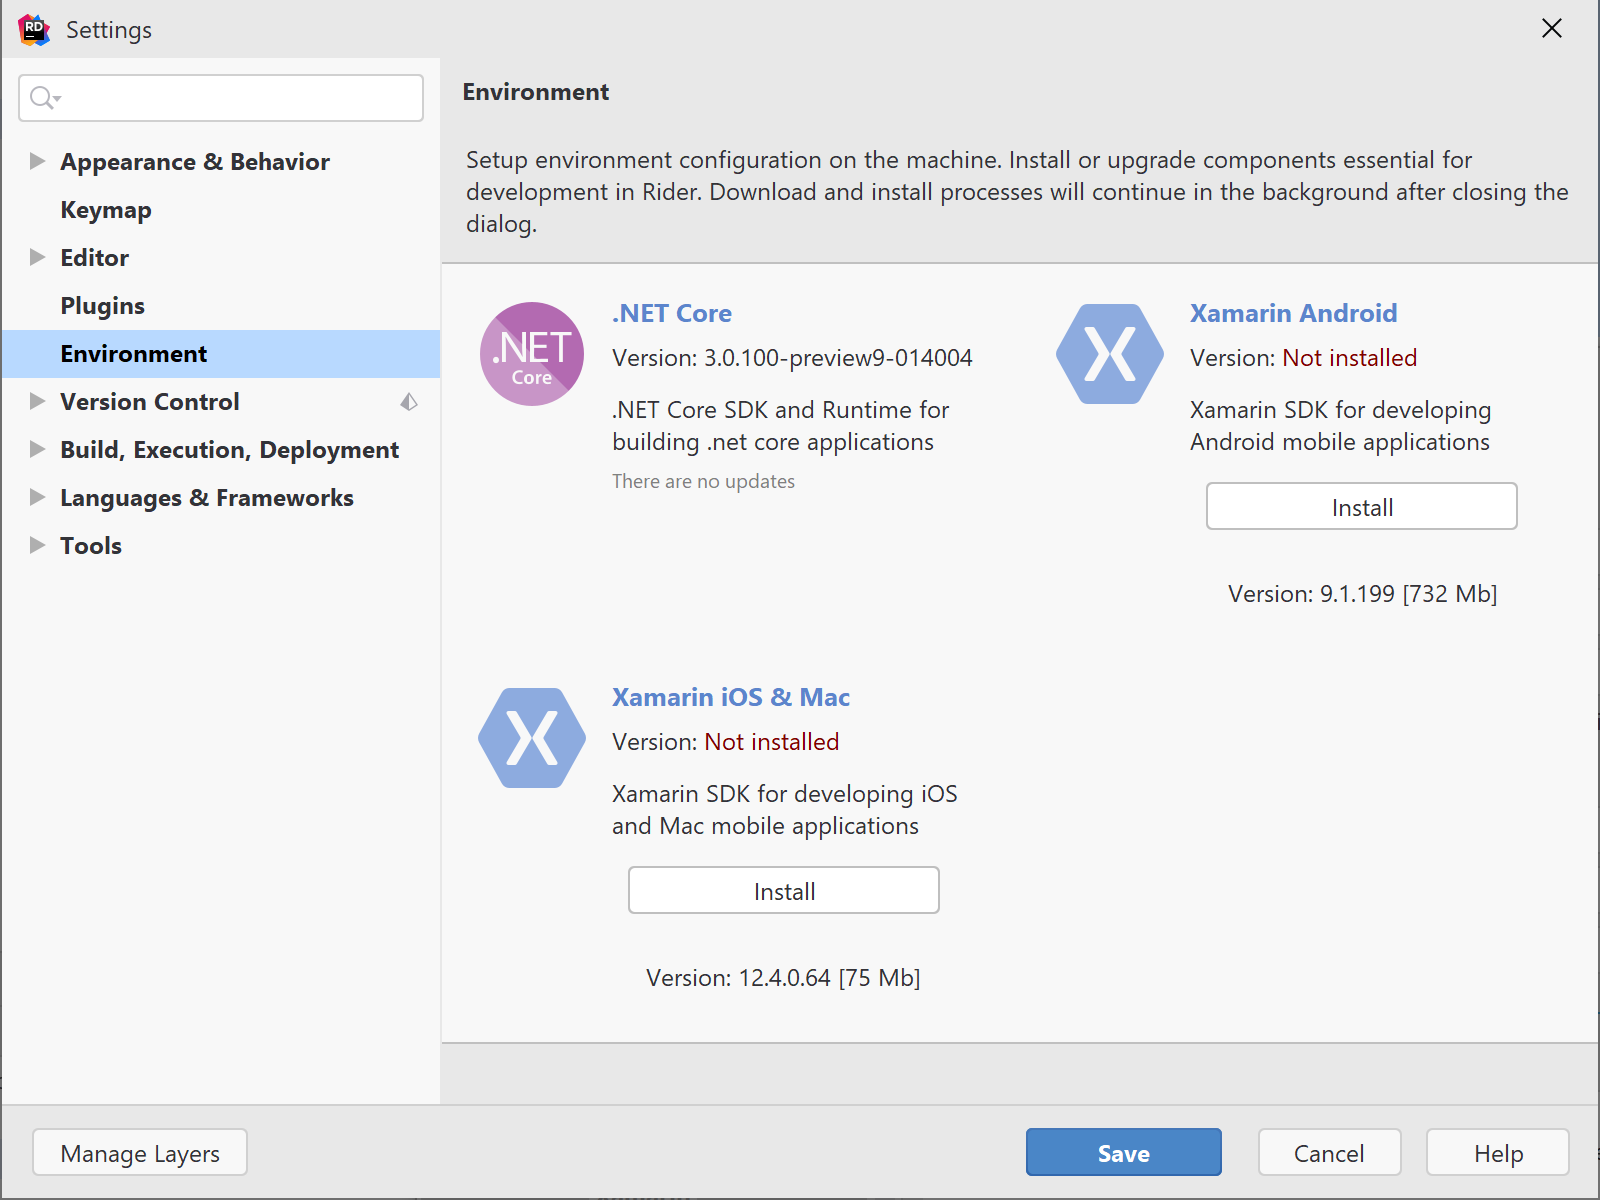
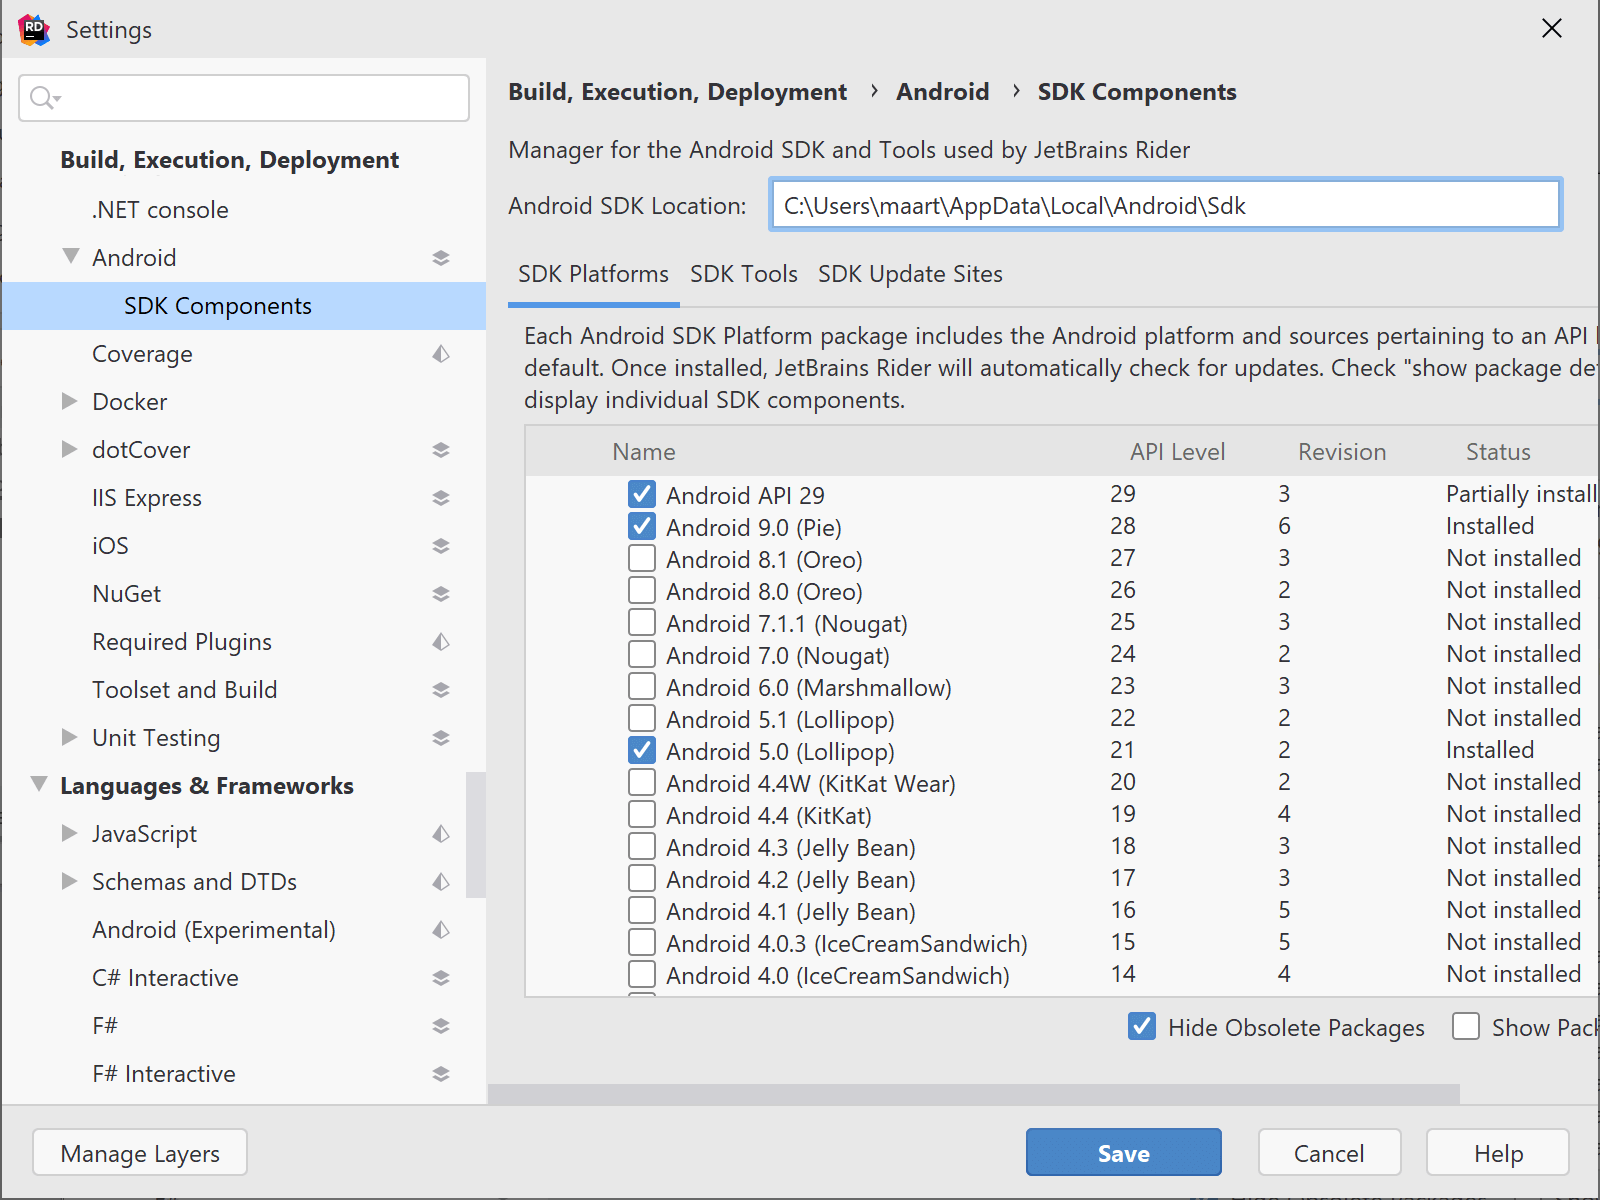
Similarly, Rider will help us install other required components. For example, when targeting Android devices, we’ll need the Android SDK installed, and probably also a device emulator and other components. Rider will suggest us to do so, or we can do so from the settings under Build, Execution, Deployment | Android | SDK Components.
For iOS, we’ll need to configure the path to Xcode under Build, Execution, Deployment | iOS.

Project templates
Once we have the required SDKs and tooling installed, we can start working on our code. We can open an existing application, or create a new one from scratch. Rider comes with templates for applications, libraries and unit test projects.
For each project template, we can choose from various options: which platform to target (Android/iOS/macOS/…), the type of application (e.g. native Android or Android Wear), the target API (Android or iOS version), and more.
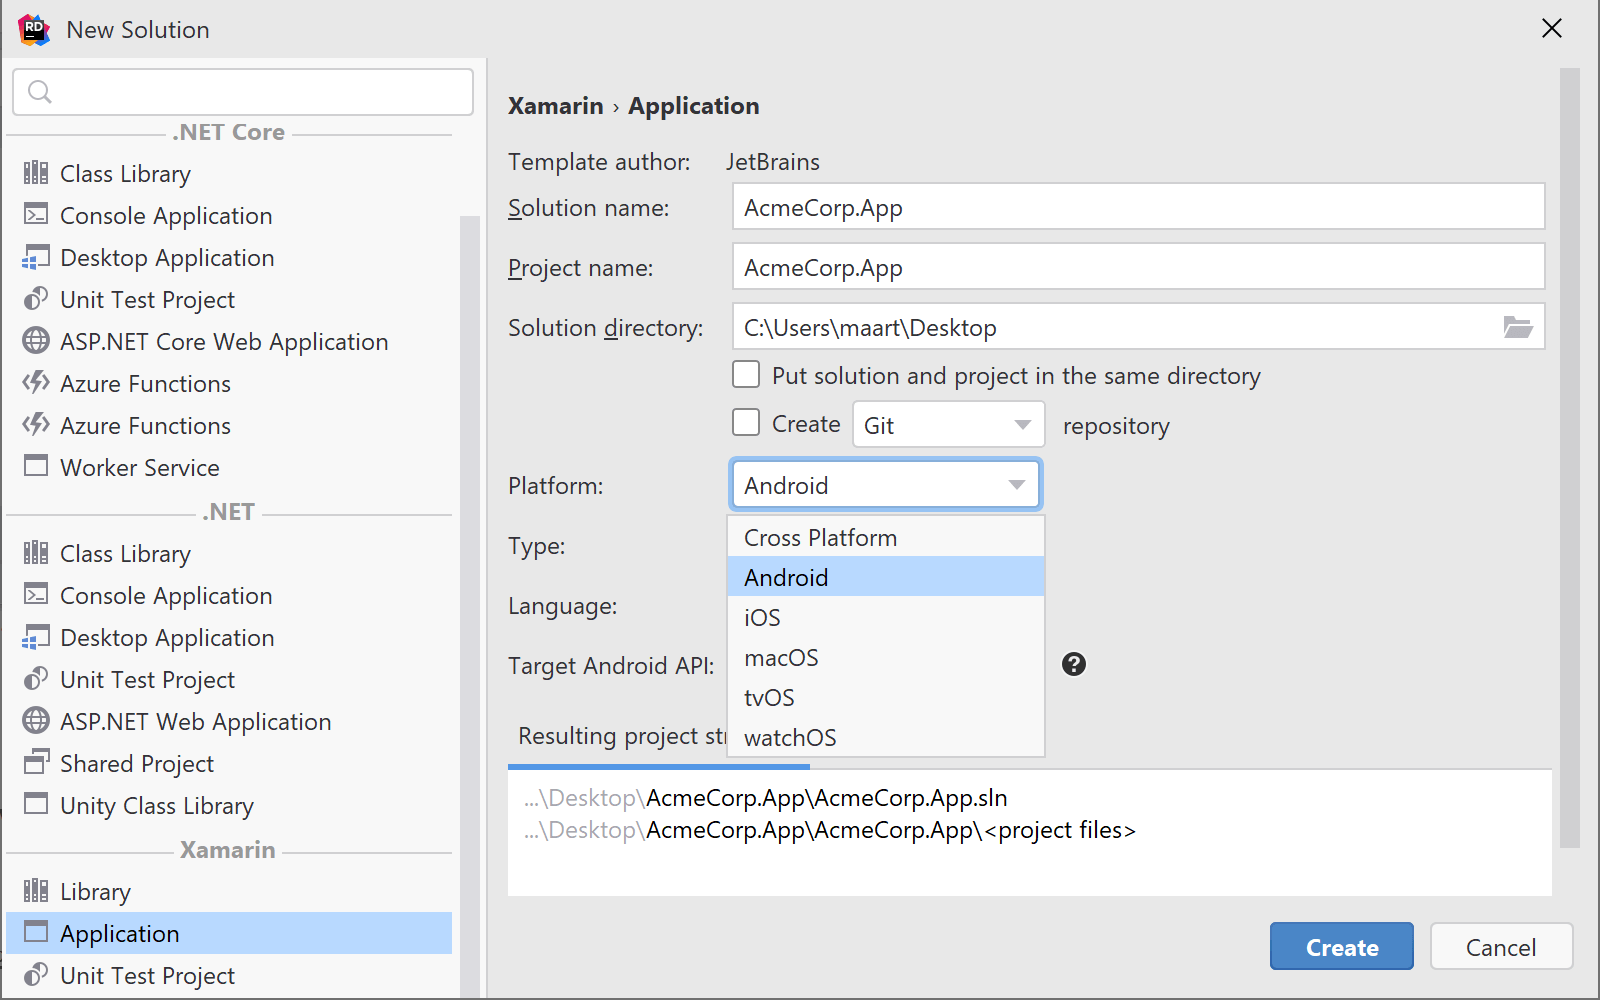
Templates are based on dotnet new, so we can always create our own templates or install third-party project templates. Very handy, for example to make use of Prism in our apps.
Code completion, code analysis, refactoring, navigation, …
A great part of developing an application is spent coding. Rider comes with a great editor that provides code completion, code analysis, refactoring, navigation and so on.
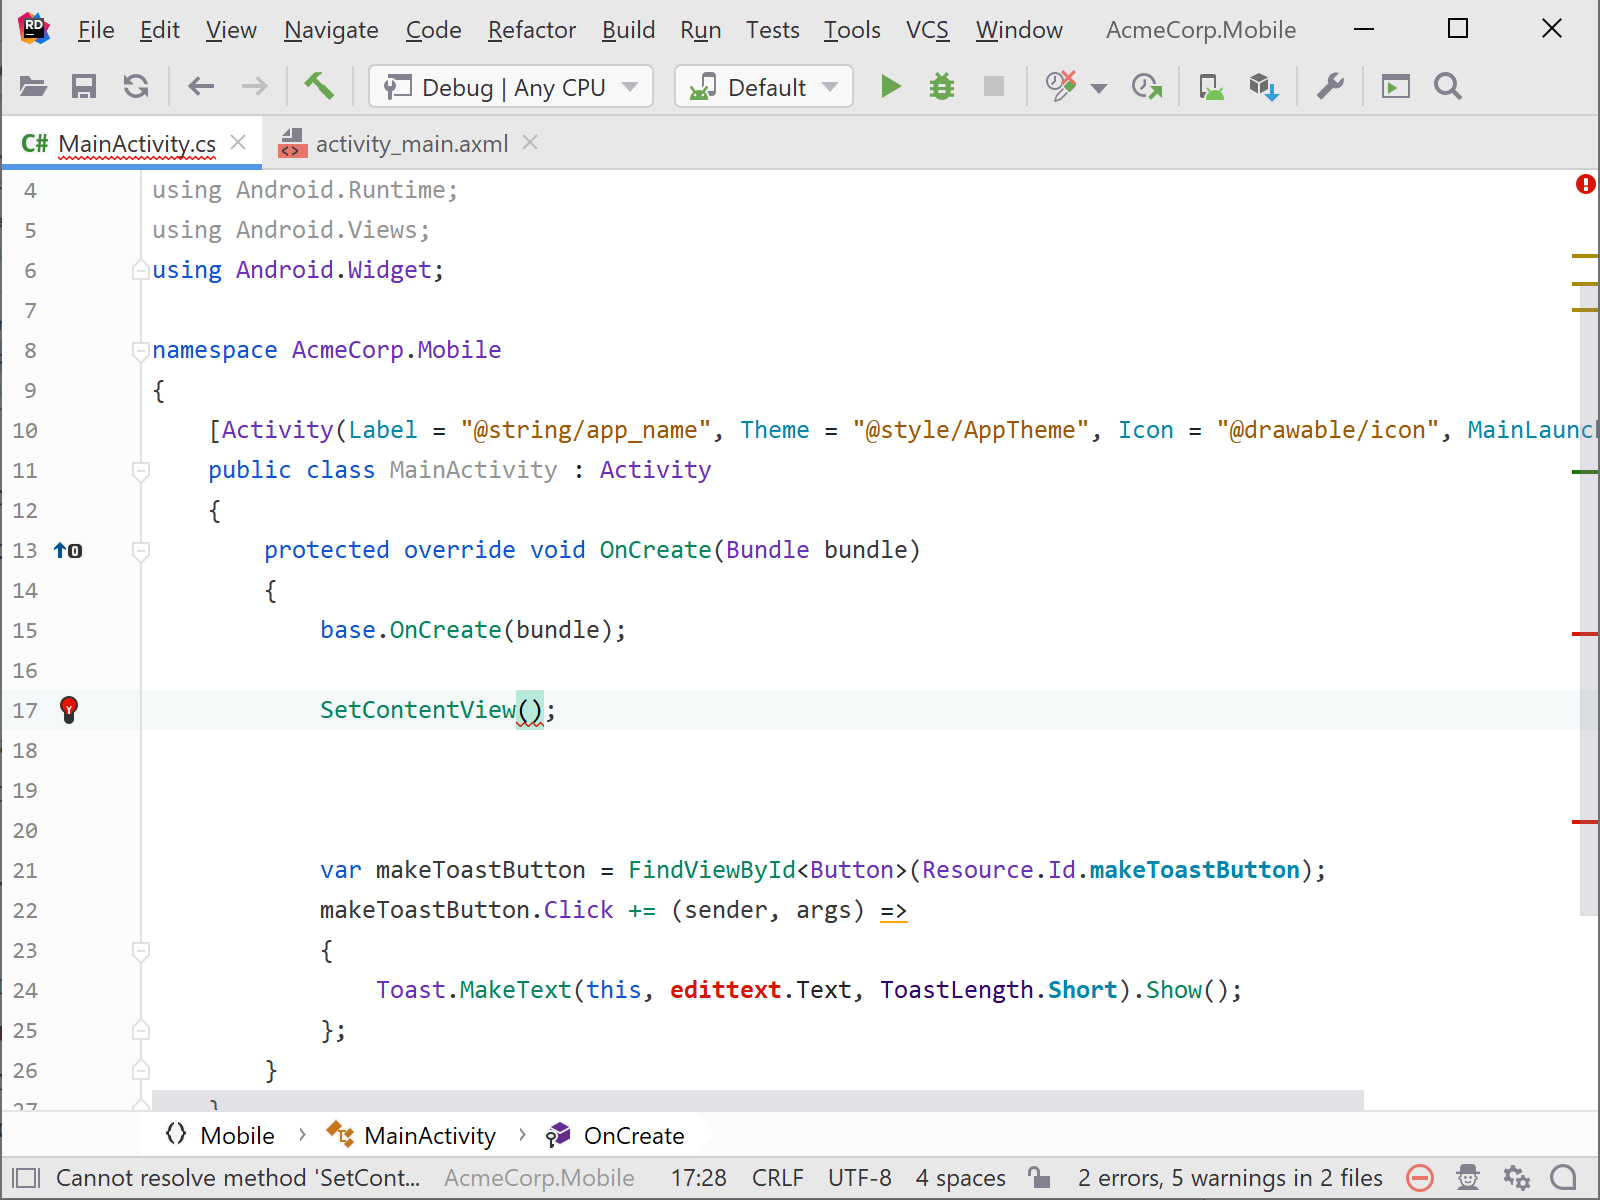
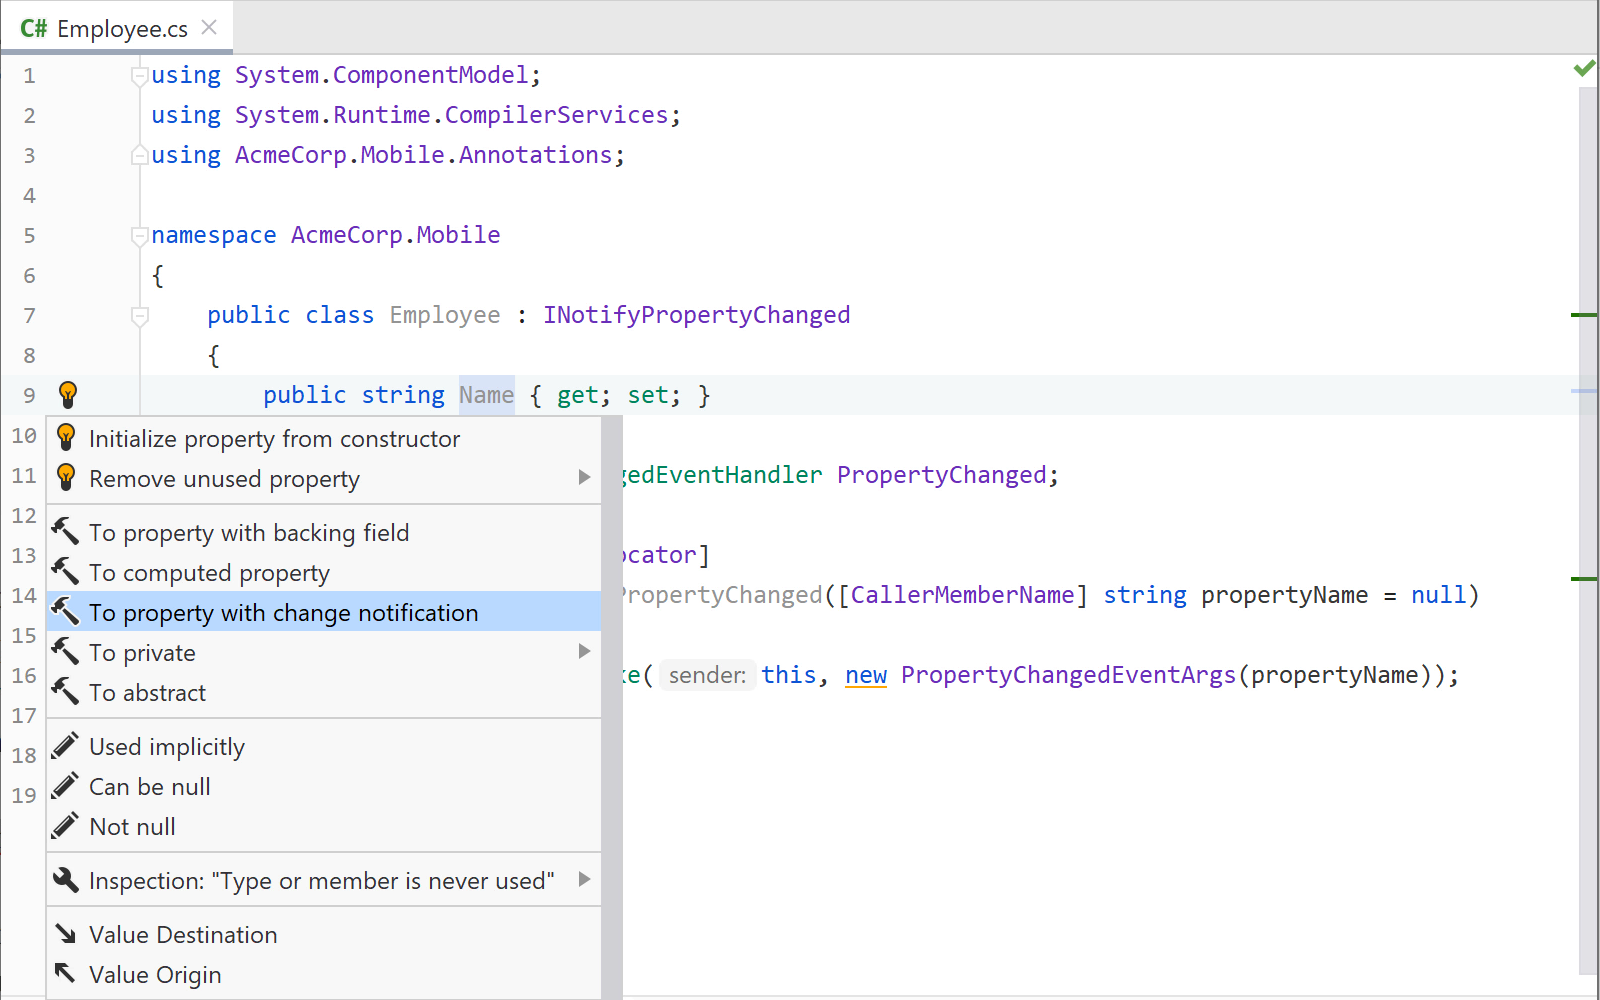
There are over 2200 code inspections and hundreds of context actions that will help us write better code, faster. By keeping track of how our project fits together, Rider can provide smart recommendations on how to improve our code.
One of my personal favorites is that Rider knows how some interfaces work. For example, when we have a model that implements INotifyPropertyChanged, Rider provides context actions to change auto-properties into properties with change notification!
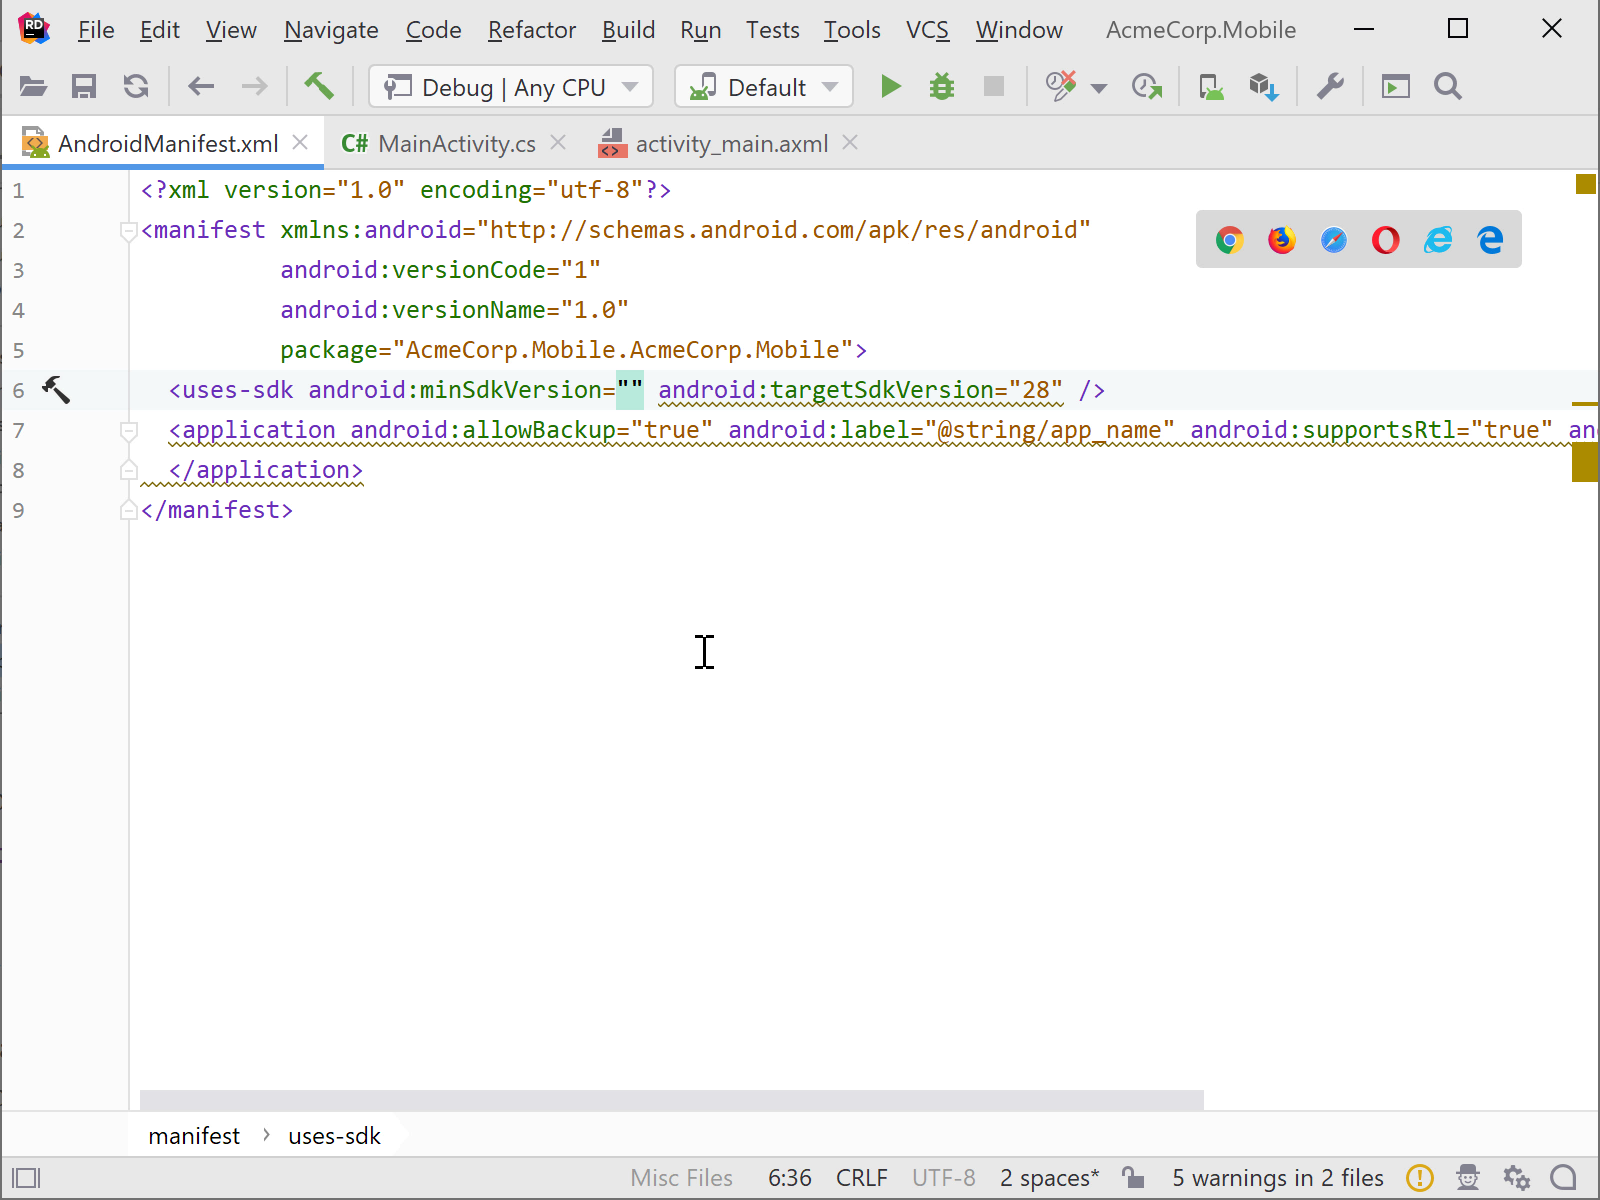
Editing and code analysis works not only for our actual application code, but also for various auxiliary files. For example, we get code completion while editing AndroidManifest.xml files, as well as suggestions on how we can make our application more discoverable.
Tip: check out our blog series on code analysis in Rider. It comes with many more examples, as well as how Rider can help us learn new C# language constructs!
Visual designer for AXML files
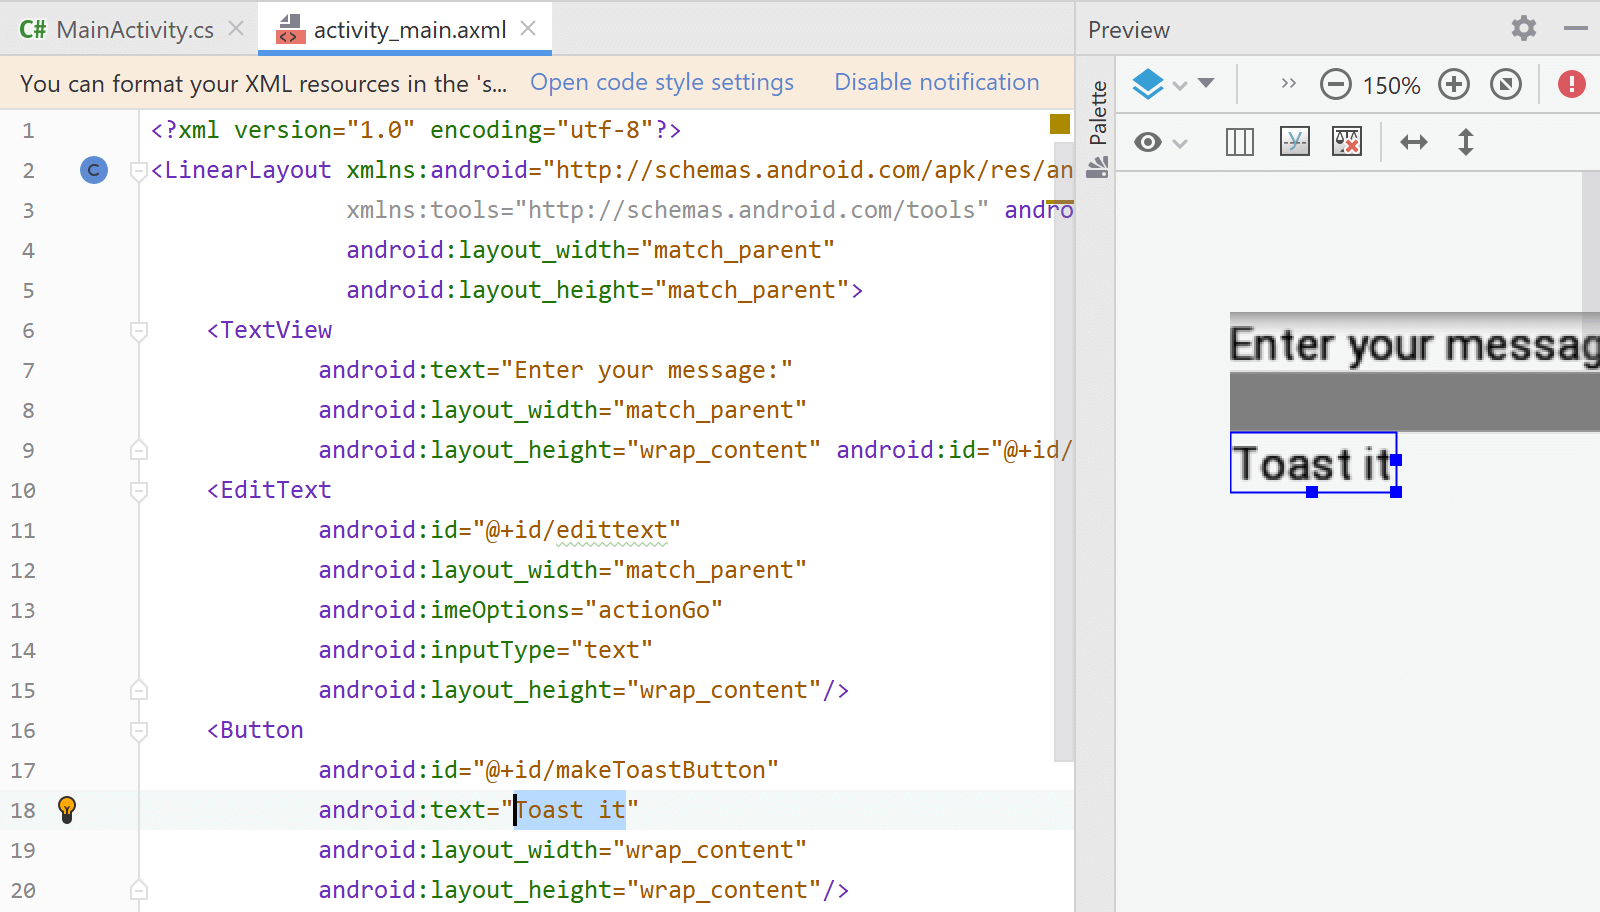
When targeting Android, we can build our application’s activities using AXML. We can edit the AXML syntax directly, or make use of the visual designer where we can drag and drop components and design interactions. There is also a component tree which displays how our components are structured.

We can switch between the designer and raw AXML using the tabs at the bottom. In text mode, Rider gives us a visual preview of the markup we are writing.
There is also a Layout Inspector (find it under the Tools | Android | Layout Inspector menu), which lets us inspect and examine the visual component tree of an app. And there’s also a Theme Editor (check the Tools | Android | Theme Editor menu) that helps us with styling our app.
Tip: read more about the Android AXML designer, the Layout Inspector and Theme Editor in Rider.
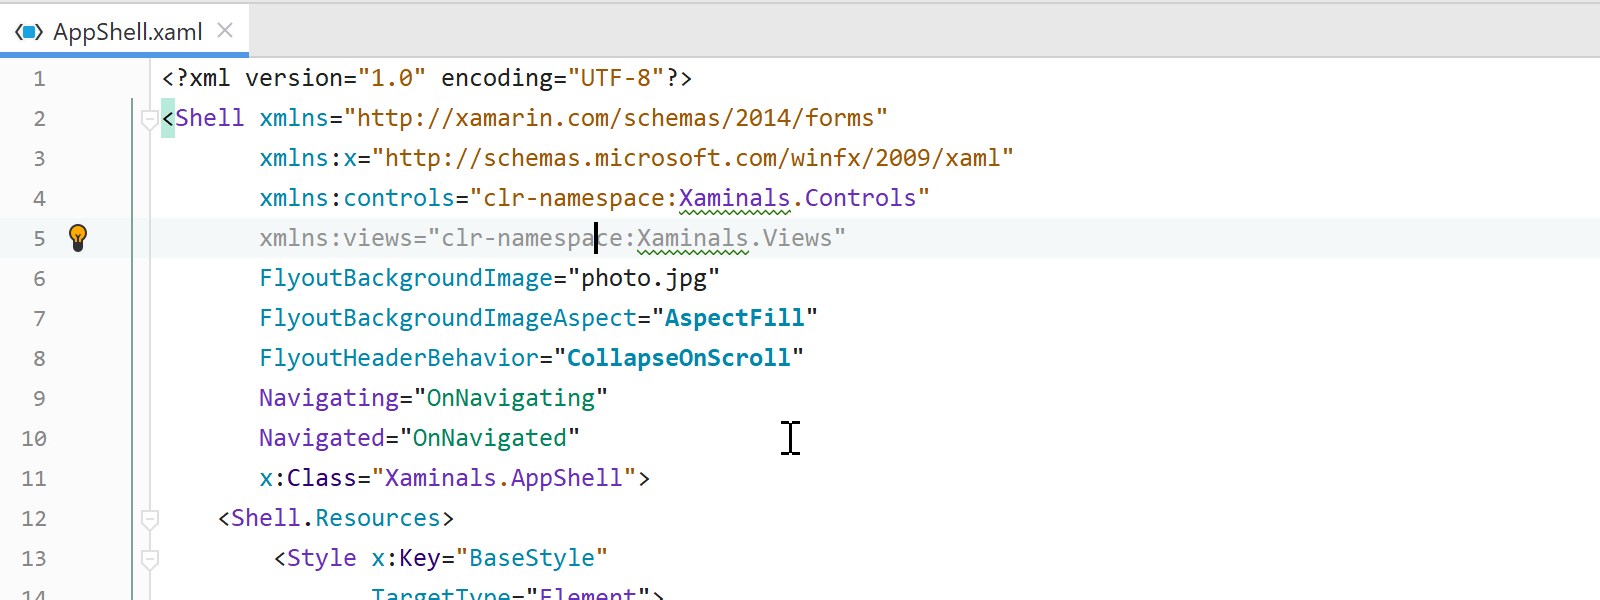
Xamarin Forms / XAML
Rider comes with a rich XAML editor that helps us craft our UI for both Android and iOS applications. We can aso navigate back and forth between our views and related code using Ctrl+Click or Navigate To… (Alt+` using the Visual Studio keymap).
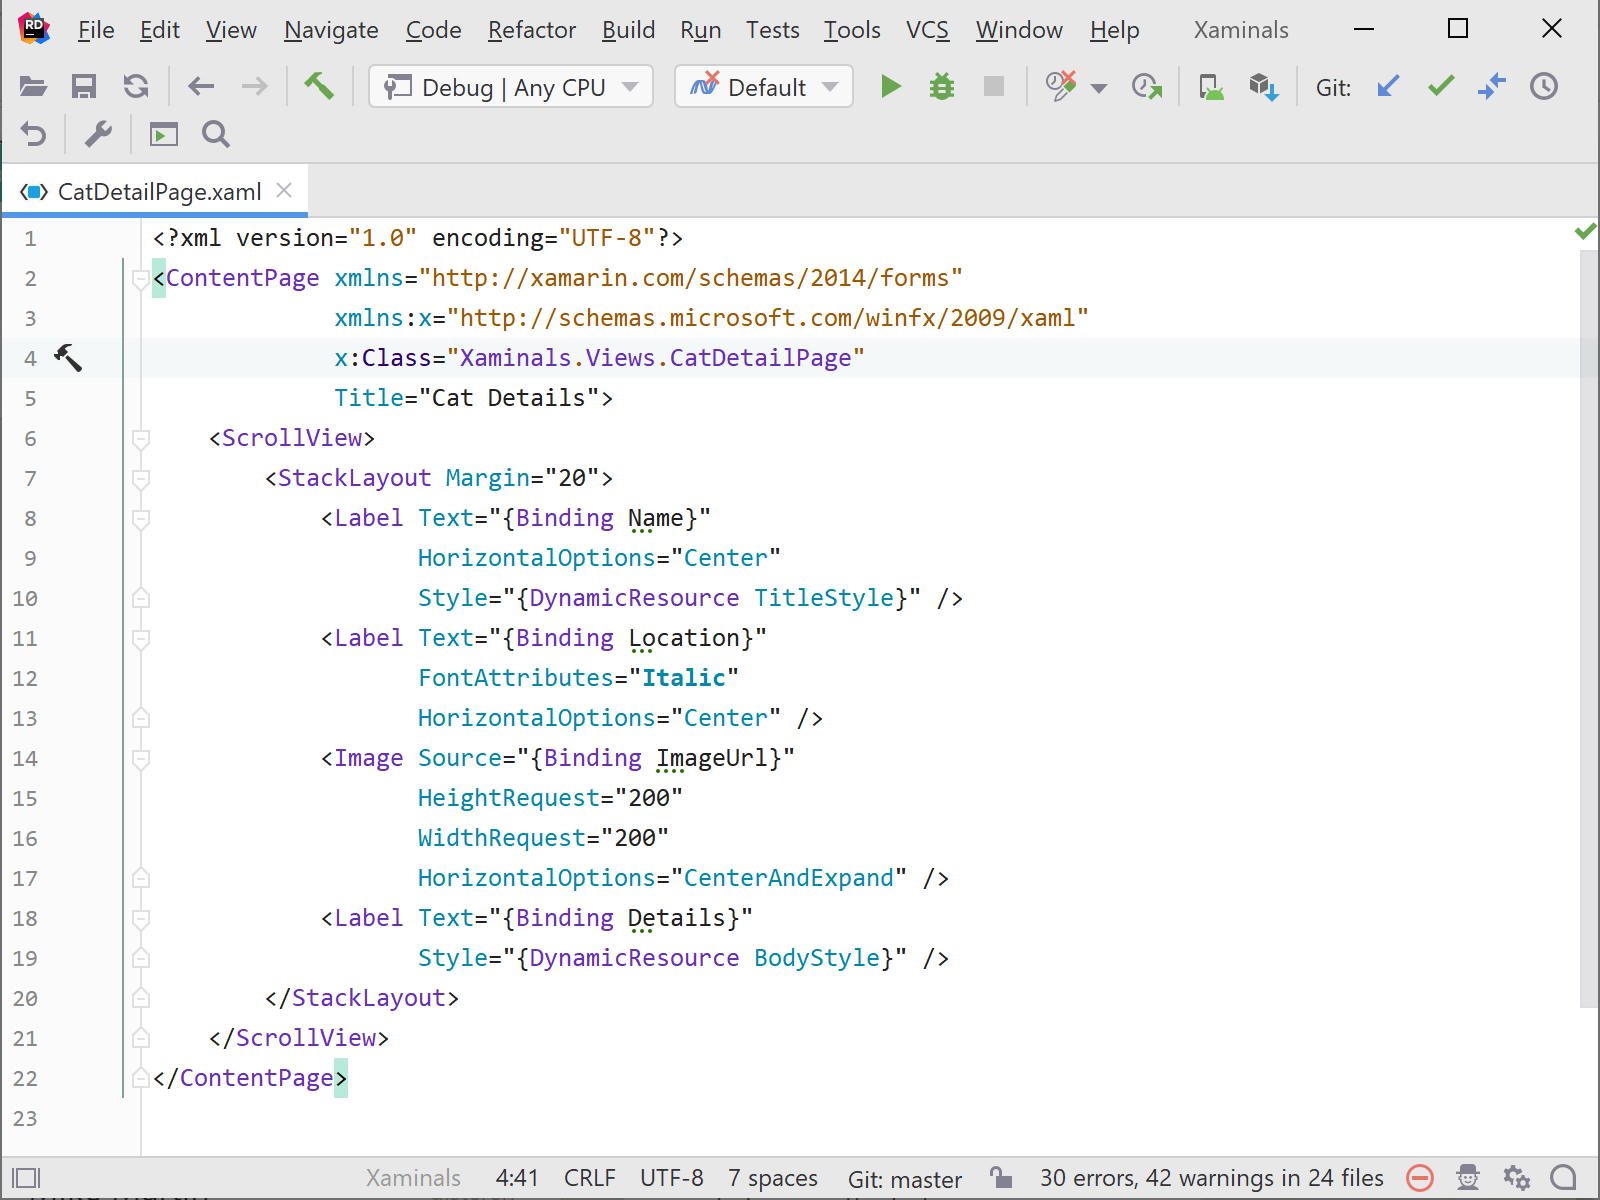
Note: there is currently no visual designer for Xamarin Forms XAML. Feel free to weigh in and add your +1 and comments on this issue.
Debugging and deploying Xamarin applications
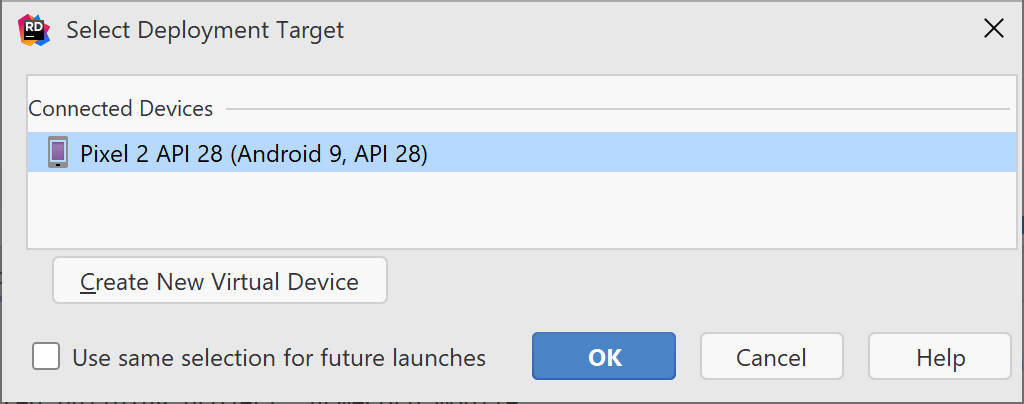
Rider helps us with debugging and deploying Xamarin applications, whether to an emulator or a real device. When we want to Run/Debug our app (F5 or Ctrl+Shift+Alt+R), we’ll be prompted to select the target device.
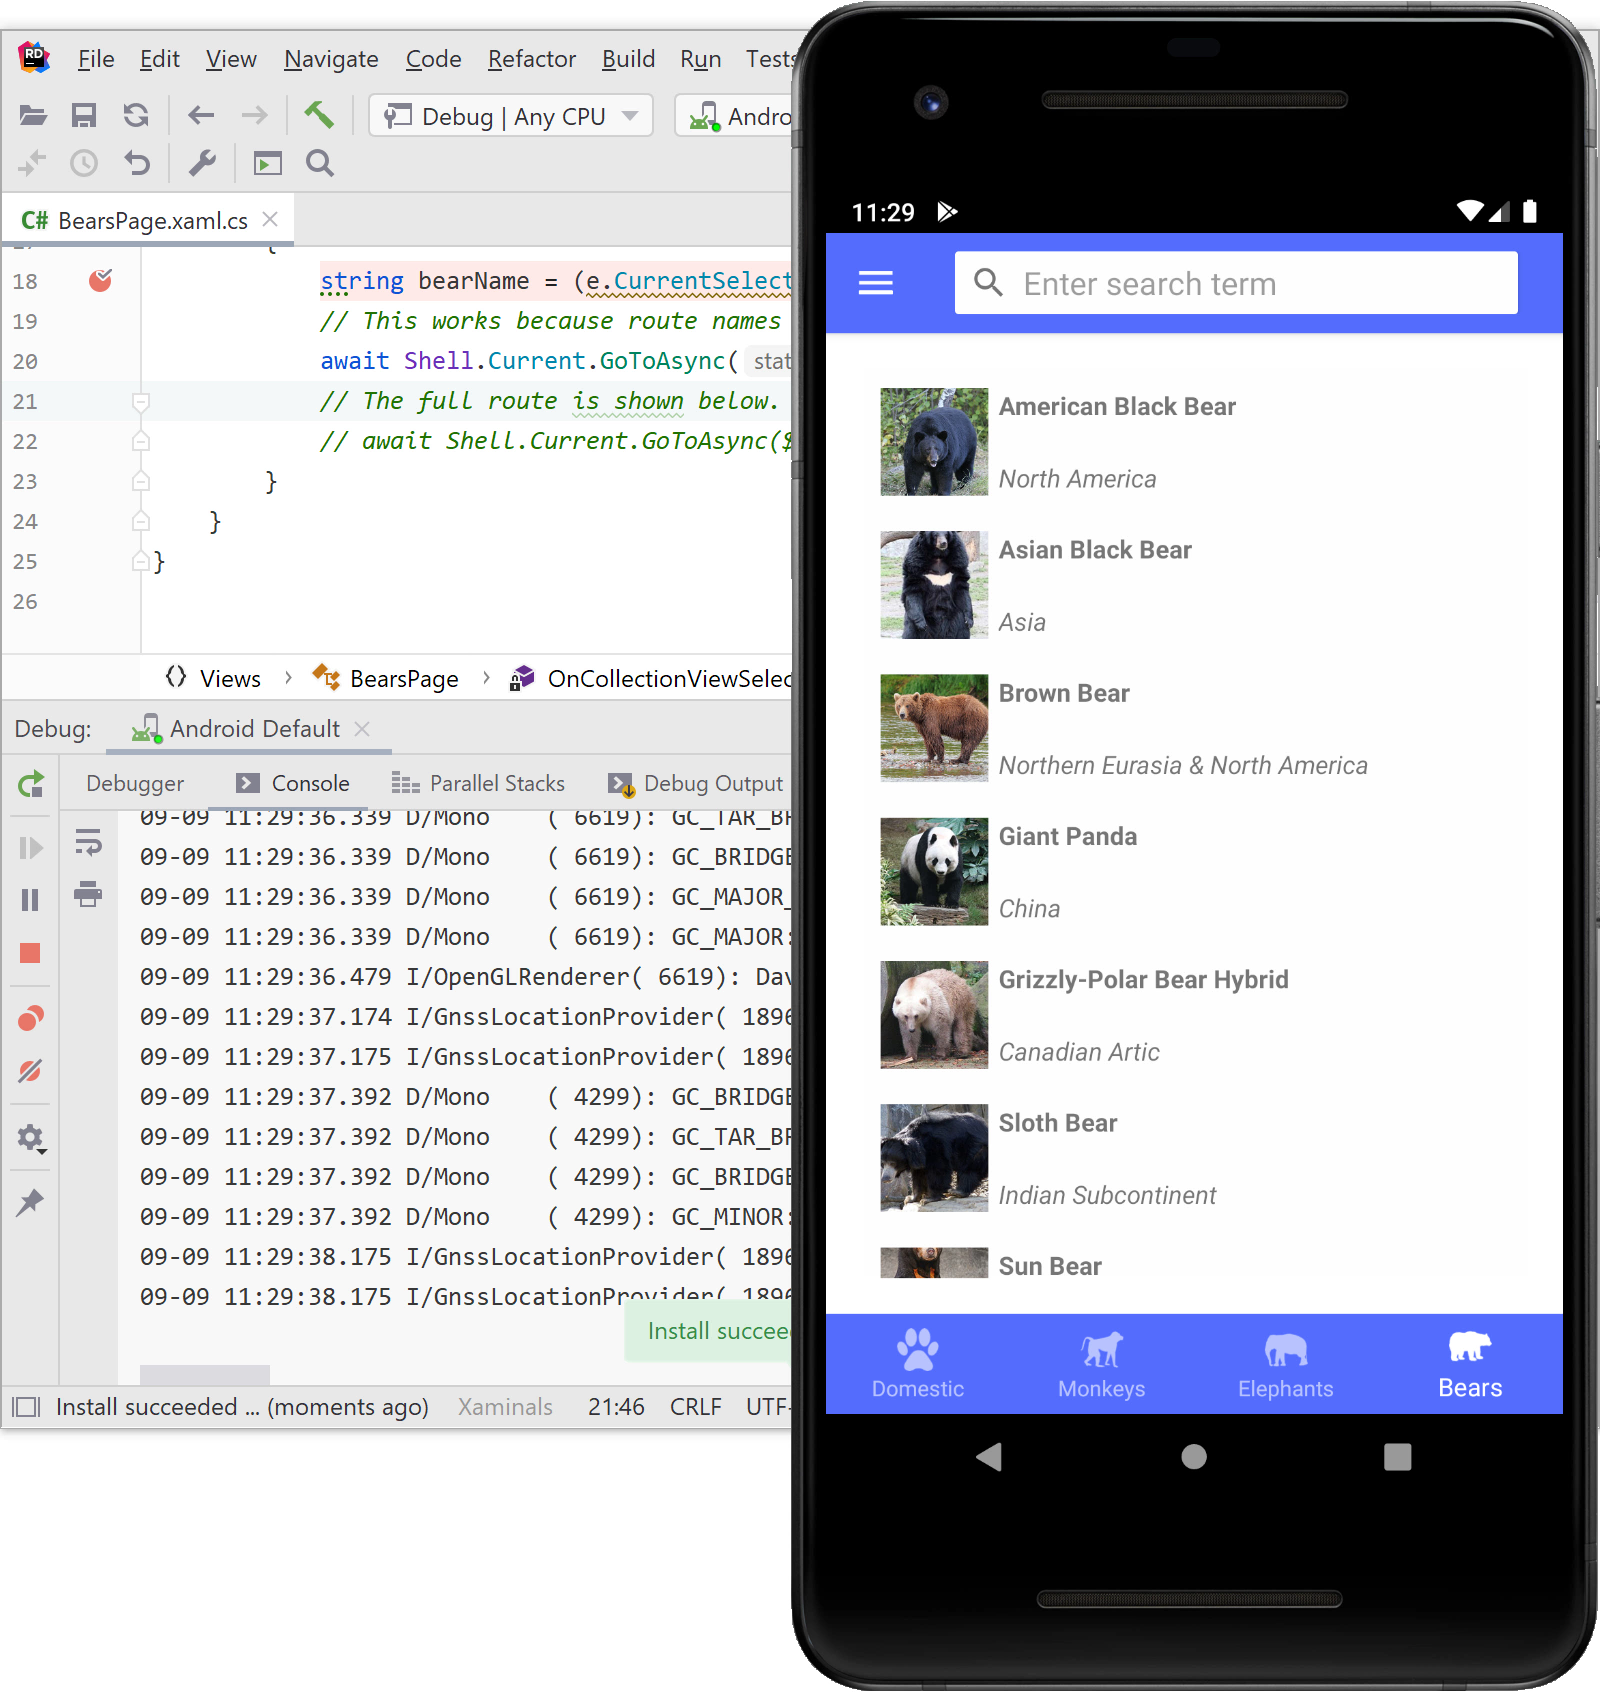
Rider will install our application onto the selected device, start it, and then attach the debugger. We can set breakpoints, inspect variables, use Run to cursor / Set next statement, and more. Variable values wil be displayed inline in the editor, making it easier to follow what is happening in our code.
Tip: check our blog series about debugging applications with Rider.
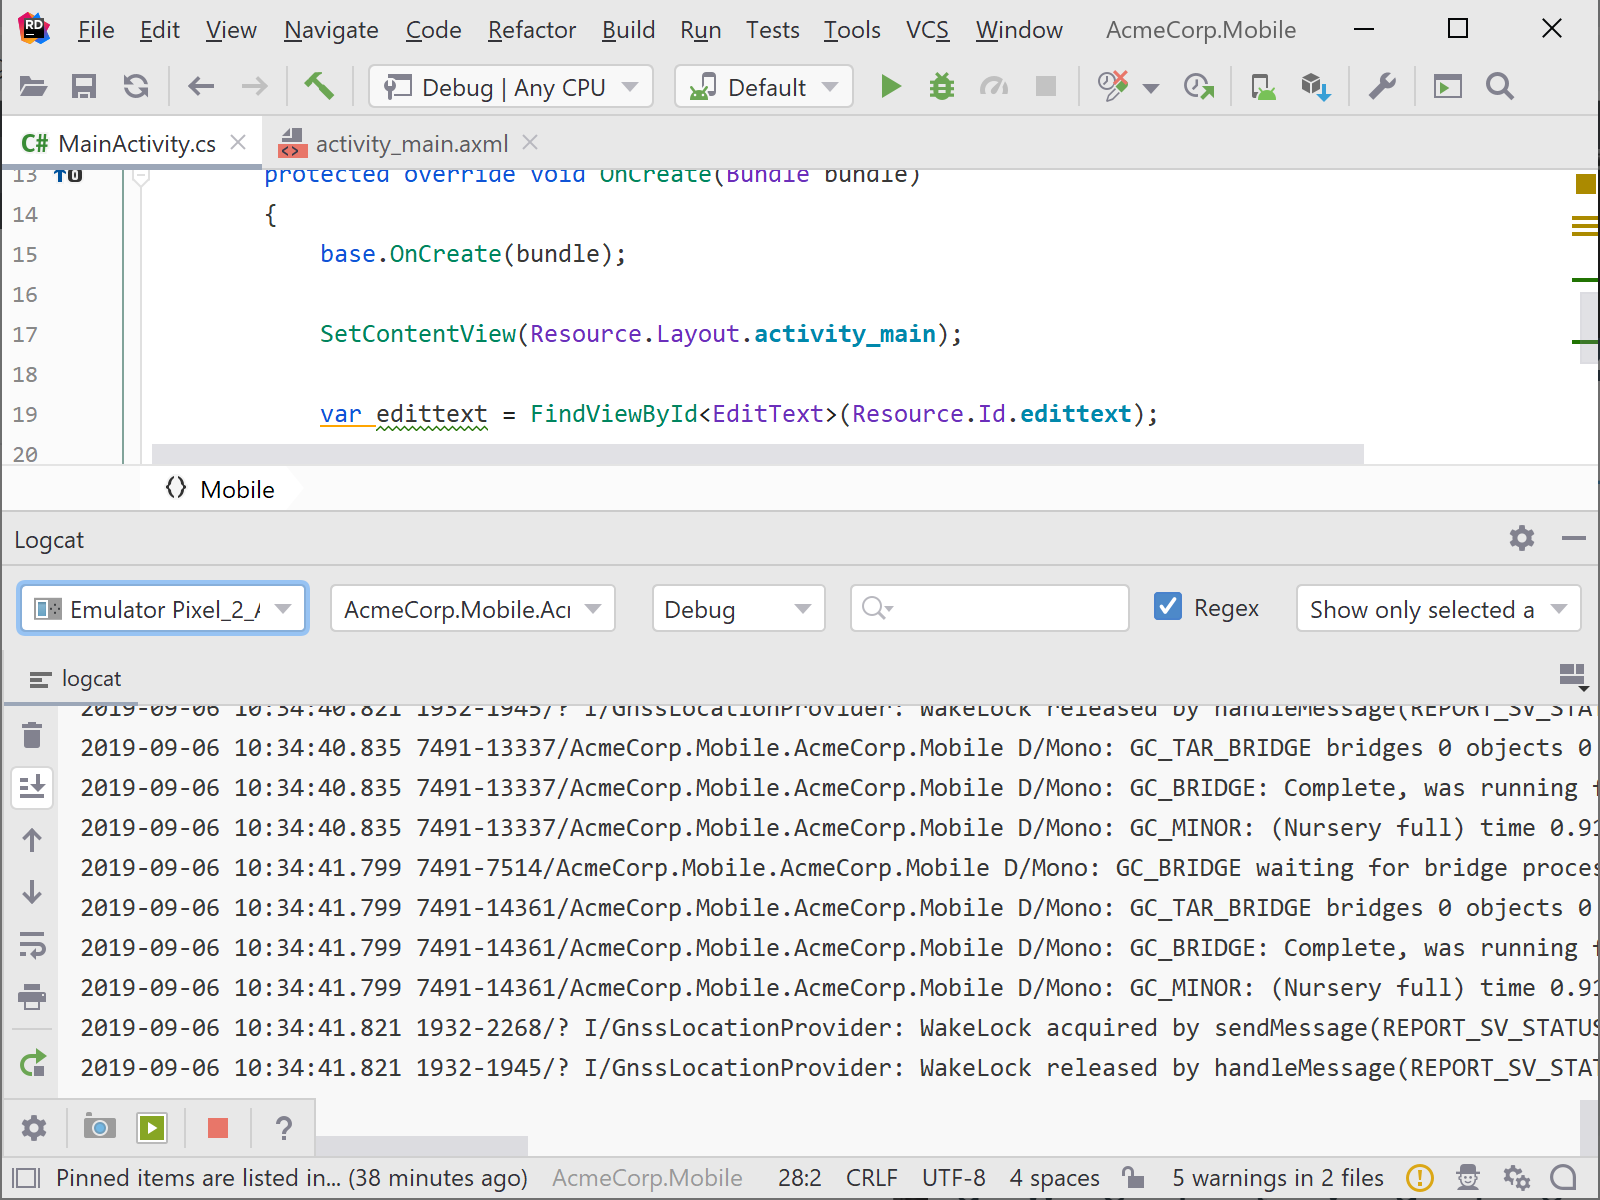
While running or debugging an application with Rider, we can use View | Tool Windows | Logcat menu and open the Logcat tool window. This tool window can help us analyze logs on an (emulated) device by providing search and filtering.
We can also use it to capture screenshots, as well as .webm videos of our application. Very useful when reporting issues, or to record a quick demo of a new feature we were working on!
Managing devices
While developing mobile applications, we often have to run our app on different (emulated) devices, to check whether our UI scales to the target form factor or whether it runs on a different target operating system.
We can manage devices from the Tools | Android | AVD Manager menu. Rider will list any (emulated) devices we have registered before, and allows us to setup new devices as well.

We can create new (virtual) devices based on existing ones, select their form factor, screen size, pixel density and more.
Exploring files on our device
Sometimes we may need to explore the file system on our (emulated) device. This is useful to see whether something was written or not, or to upload/download files. From the View | Tool Windows | Device File Explorer, we can navigate the file system and create new folders and files, and upload/download files using the context menu.
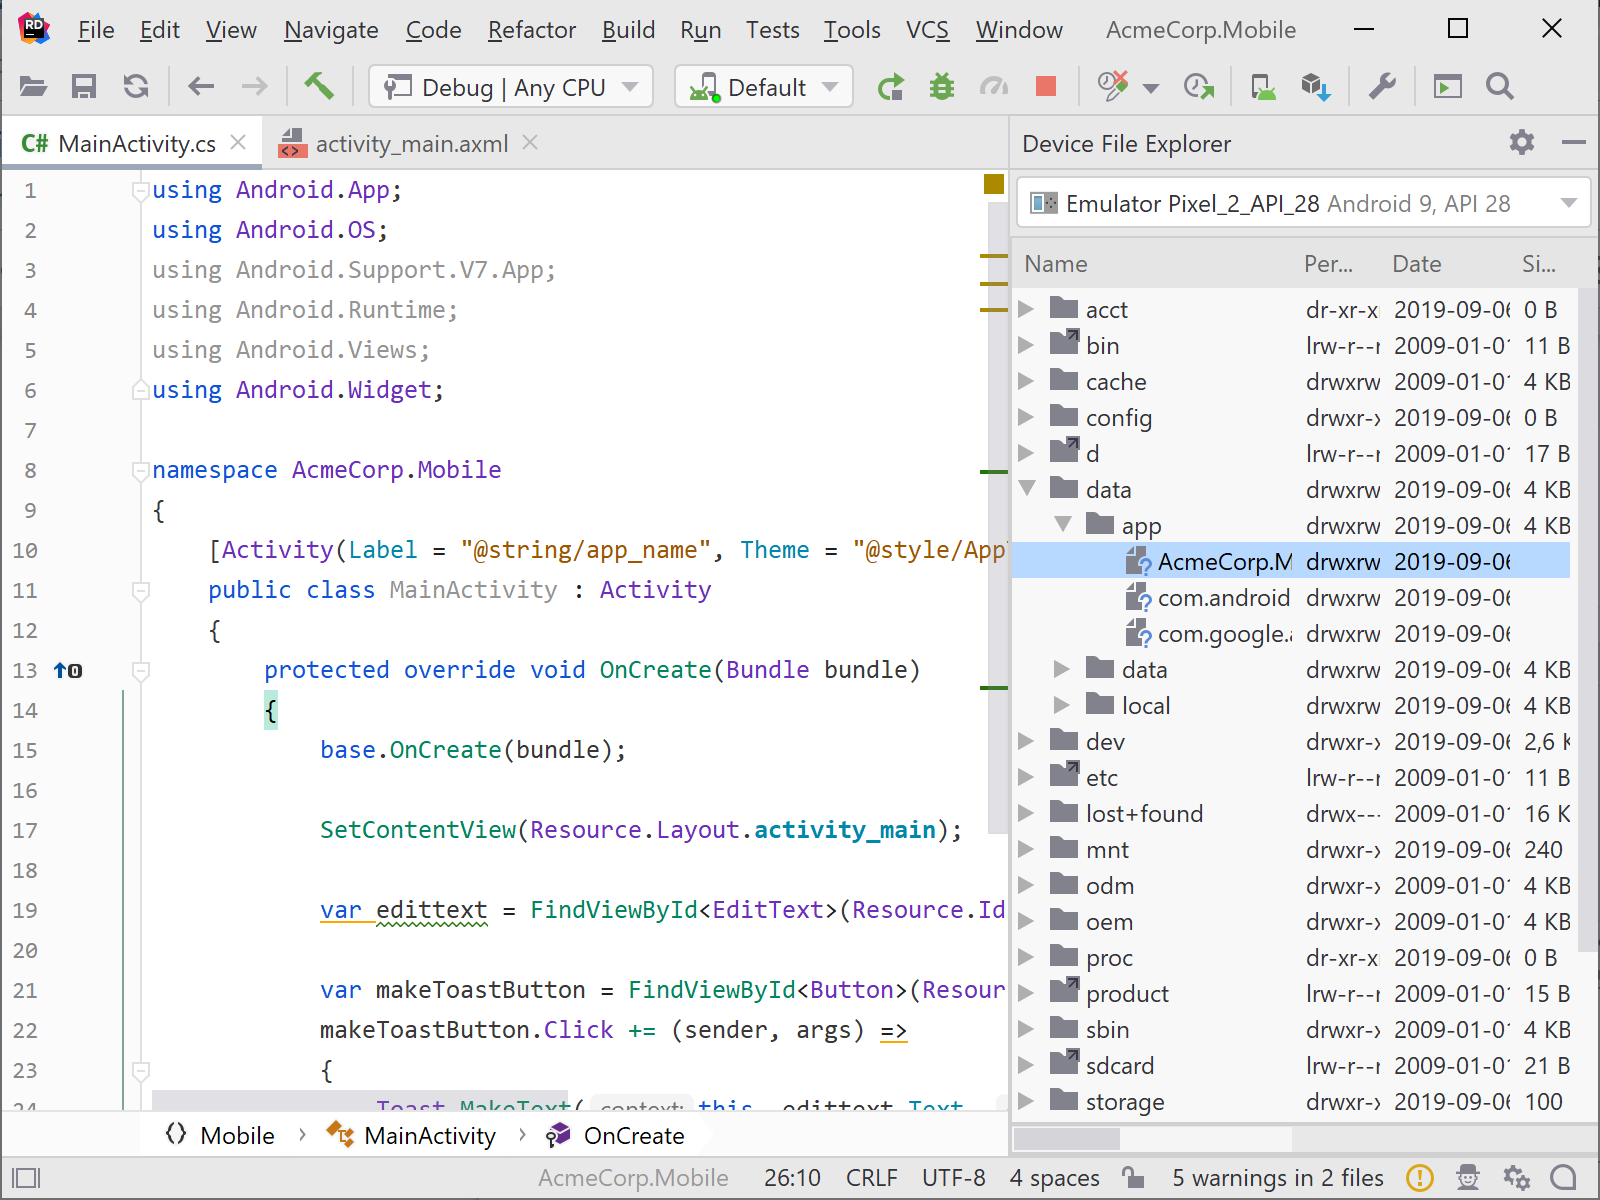
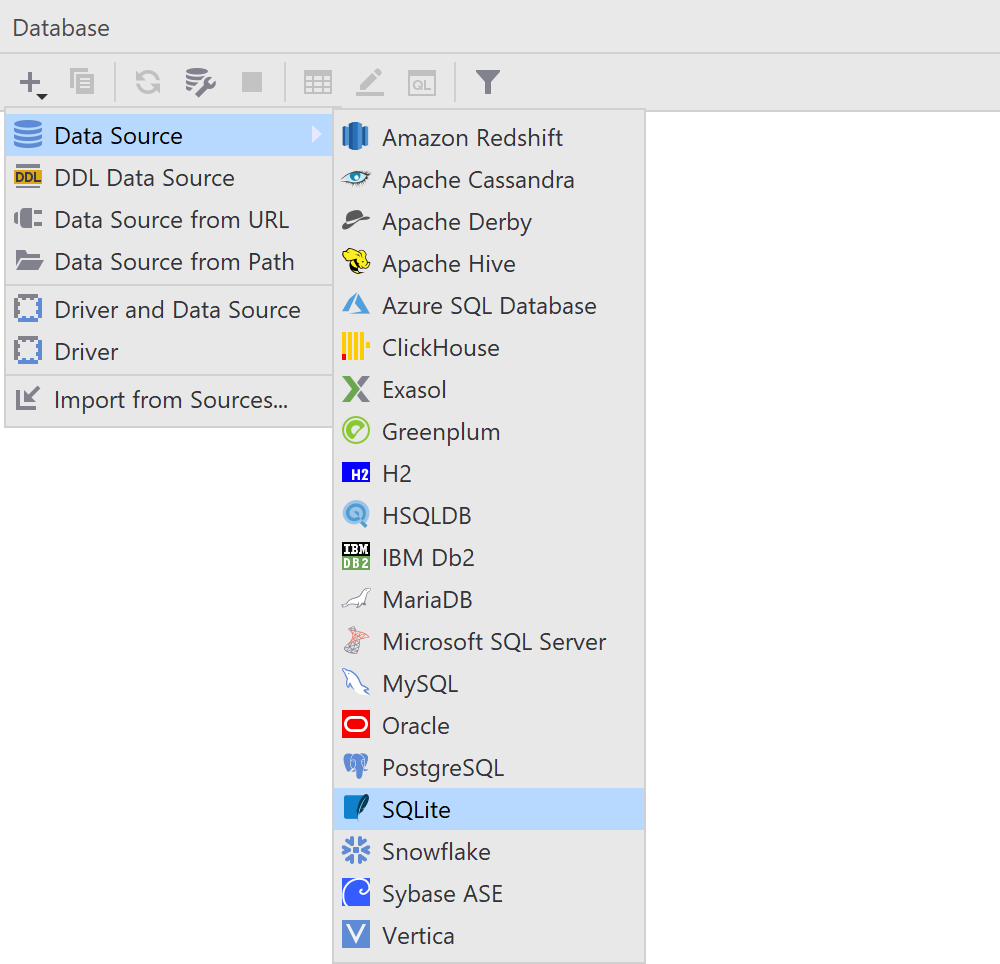
When using Akavache to store data in a SQLite database on the device, we can download the database file and use the Database tool window to explore tables and query the data stored inside.
Tip: check our tutorial on getting started with database support in Rider.
What else is there?
So far, we’ve seen how Rider can help us with coding, debugging and analyzing Xamarin applications. But there’s more!
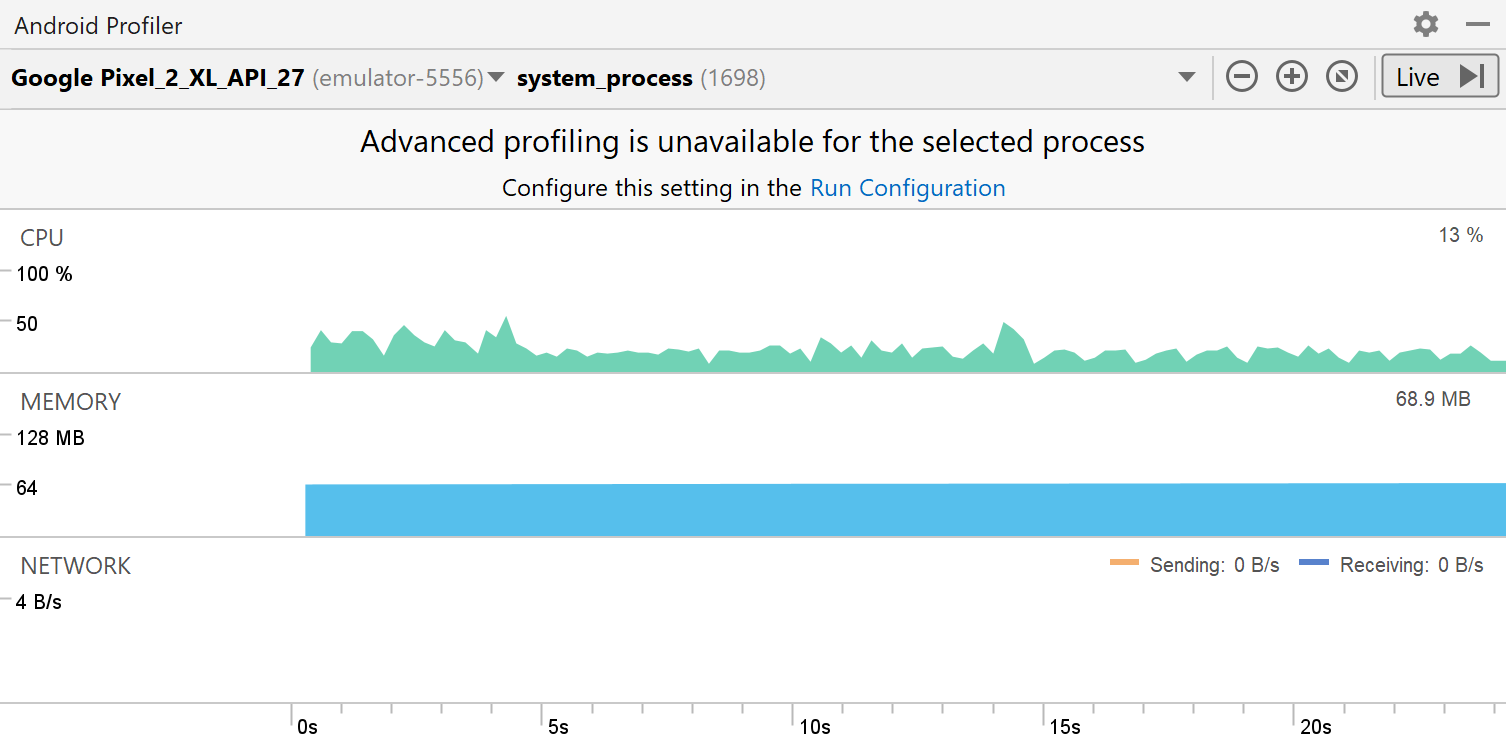
From the View | Tool Windows | Android Profiler menu, we can open the Android profiler to inspect CPU, memory and network utilization of our application while running on the device.
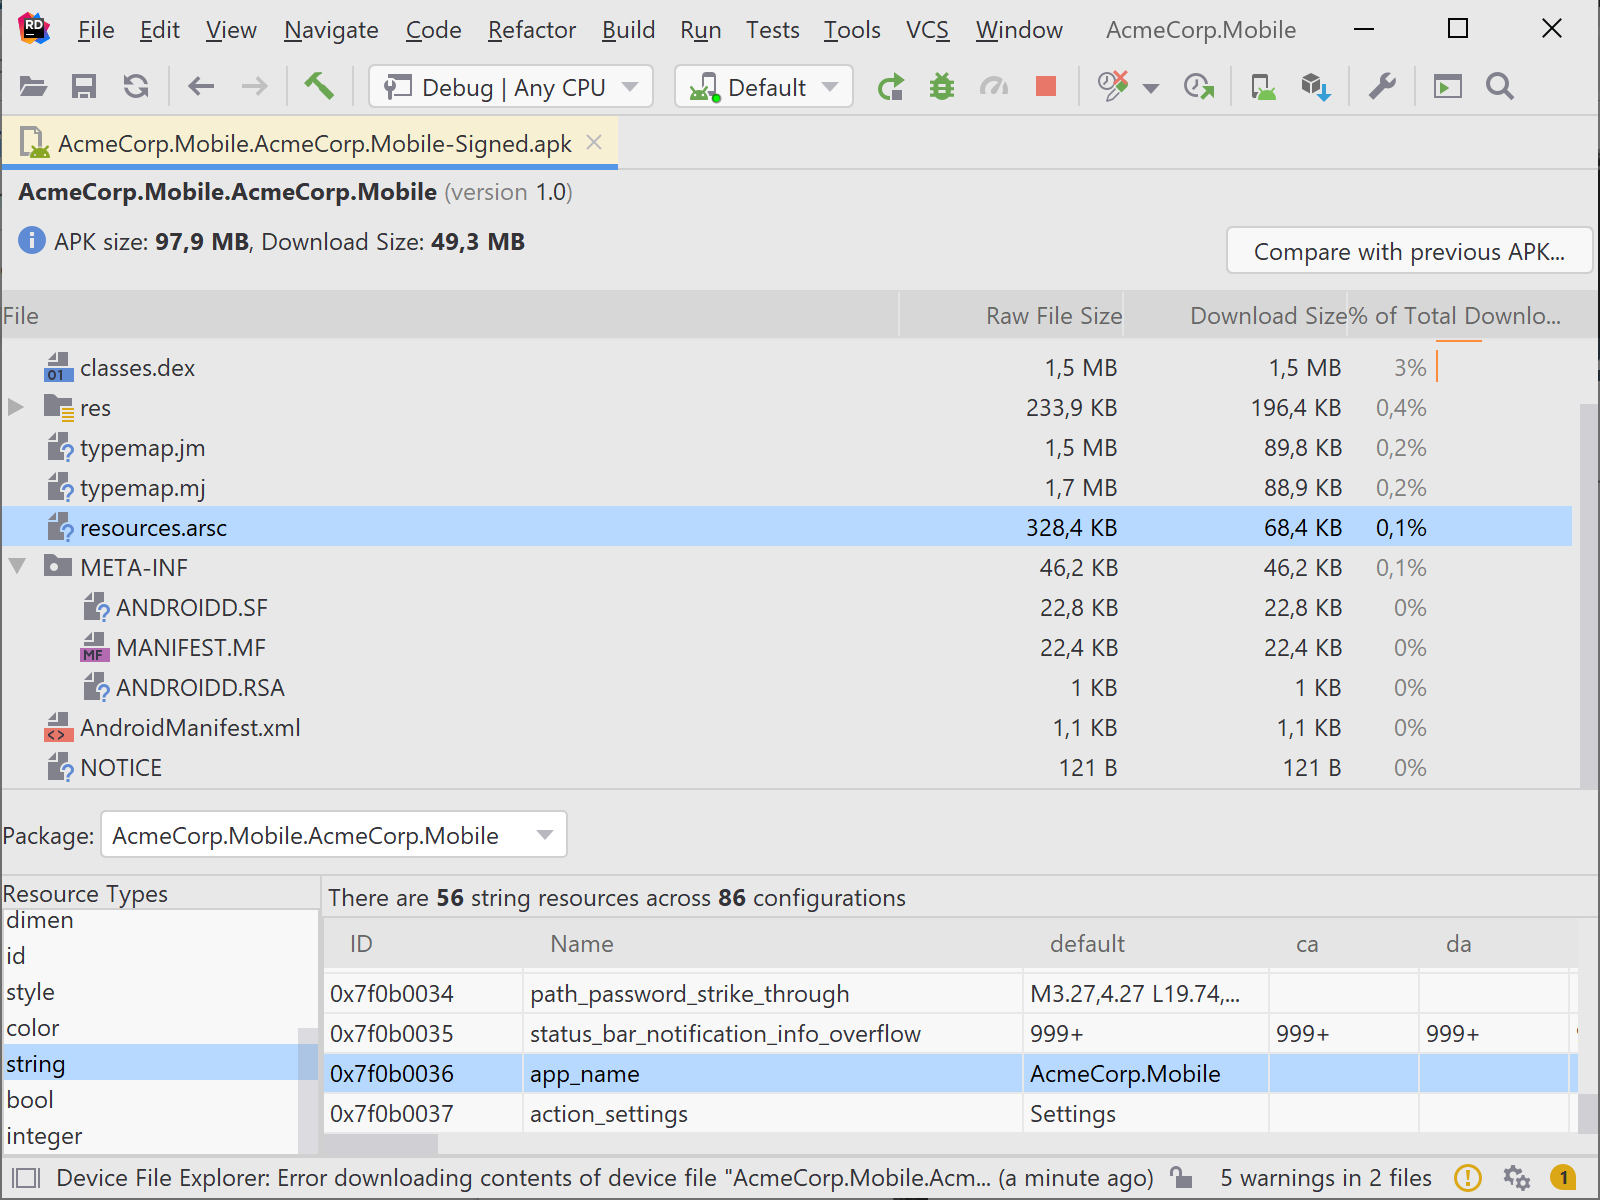
The Tools | Android | Analyze APK menu lets us analyze Android application package (APK) files inside Rider. It helps us verify resources embedded in the APK, and we can even use it to inspect embedded .dex files (Dalvik Executable Format, the bytecode of our Android program).
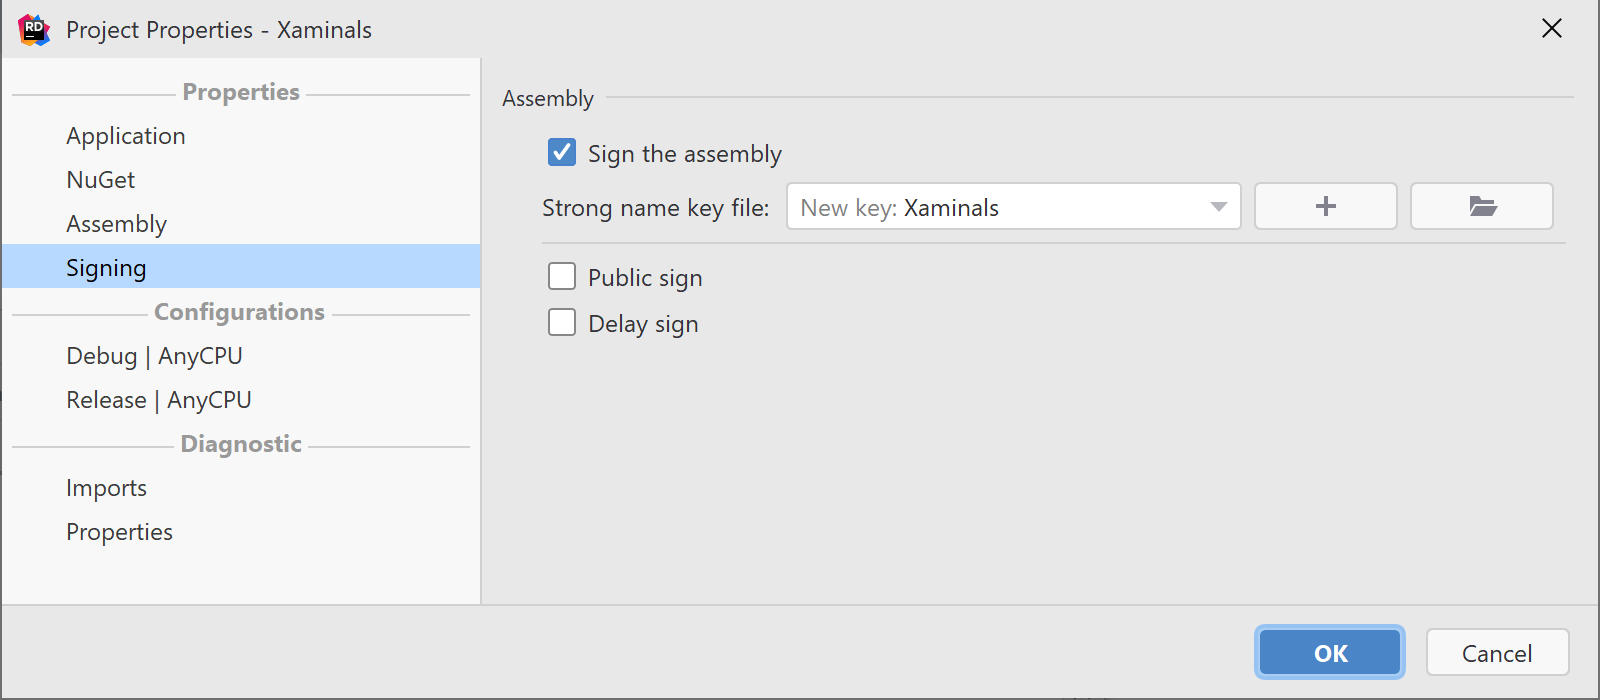
From the solution explorer, we can look into our application project’s properties, configure signing options and so on.
Do explore the other tool windows as well – Rider comes with a NuGet package manager, Version Control Integration (including GitHub and Azure DevOps), and a test runner that supports popular unit testing frameworks. There are several plugins such as the Azure Toolkit for Rider that can extend functionality even more.
Download Rider and give it a try! We would love to hear about your experiences building Xamarin applications with it.
P.S.: Join our free webinar on October 8, 2019 – Better Xamarin Development with Rider for Mac. More info »

Subscribe to a monthly digest curated from the .NET Tools blog:


