.NET Tools
Essential productivity kit for .NET and game developers
Building a Xamarin.Forms Moon Phase App

One of the wonderful things about .NET is the vast array of platforms .NET developers can target. My personal experience has been developing ASP.NET applications and HTTP APIs, but recently I’ve been dabbling with mobile applications built using Rider and Xamarin.Forms.
For those curious, or maybe even a little scared, about working with Xamarin.Forms, well, don’t be. I’ve found the Xamarin.Forms community to be welcoming and very helpful to a mobile newbie like me. I’ve also found the platform itself to be straightforward to get started and iterate on as I’ve learned new approaches to solving the same problems.
Before continuing, I recommend reading Maarten’s post, Developing Xamarin applications in Rider, which will help in setting up your Xamarin.Forms development environment. We’ll also need .NET Core 3.1 SDK or higher installed. An important note is that while it’s possible to develop iOS applications on Windows, I recommend doing so on macOS. Since this is a Xamarin.Forms application, readers are welcome to create the app for Android, iOS, or both.
In this post, we’ll be creating a Moon Phase app. The app allows the user to determine the moon’s phase and its appearance by entering a date/time and the user’s current hemisphere. To get in the space mindset, be sure to set your theme to dark mode, like I did.
For those interested in the final results, you can head over to the GitHub repository.
✨ Starting A New Project
We want to create a new Xamarin Application from Rider’s Welcome screen. After clicking the + New Solution text, we can pick the Application template from the Xamarin category. The solution name I chose is MoonPhaseApp, but feel free to be more creative. Some other settings on the new solution dialog include:

- Platform: Cross Platform
- Type: Xamarin.Forms
- Code sharing: .NET Standard
- Language: C#
The values for Target Android API and Target iOS API will depend on the SDKs installed. Please go back and read Maarten’s post, if these values are inactive. In my case, I chose Android 10 and iOS 13.2.
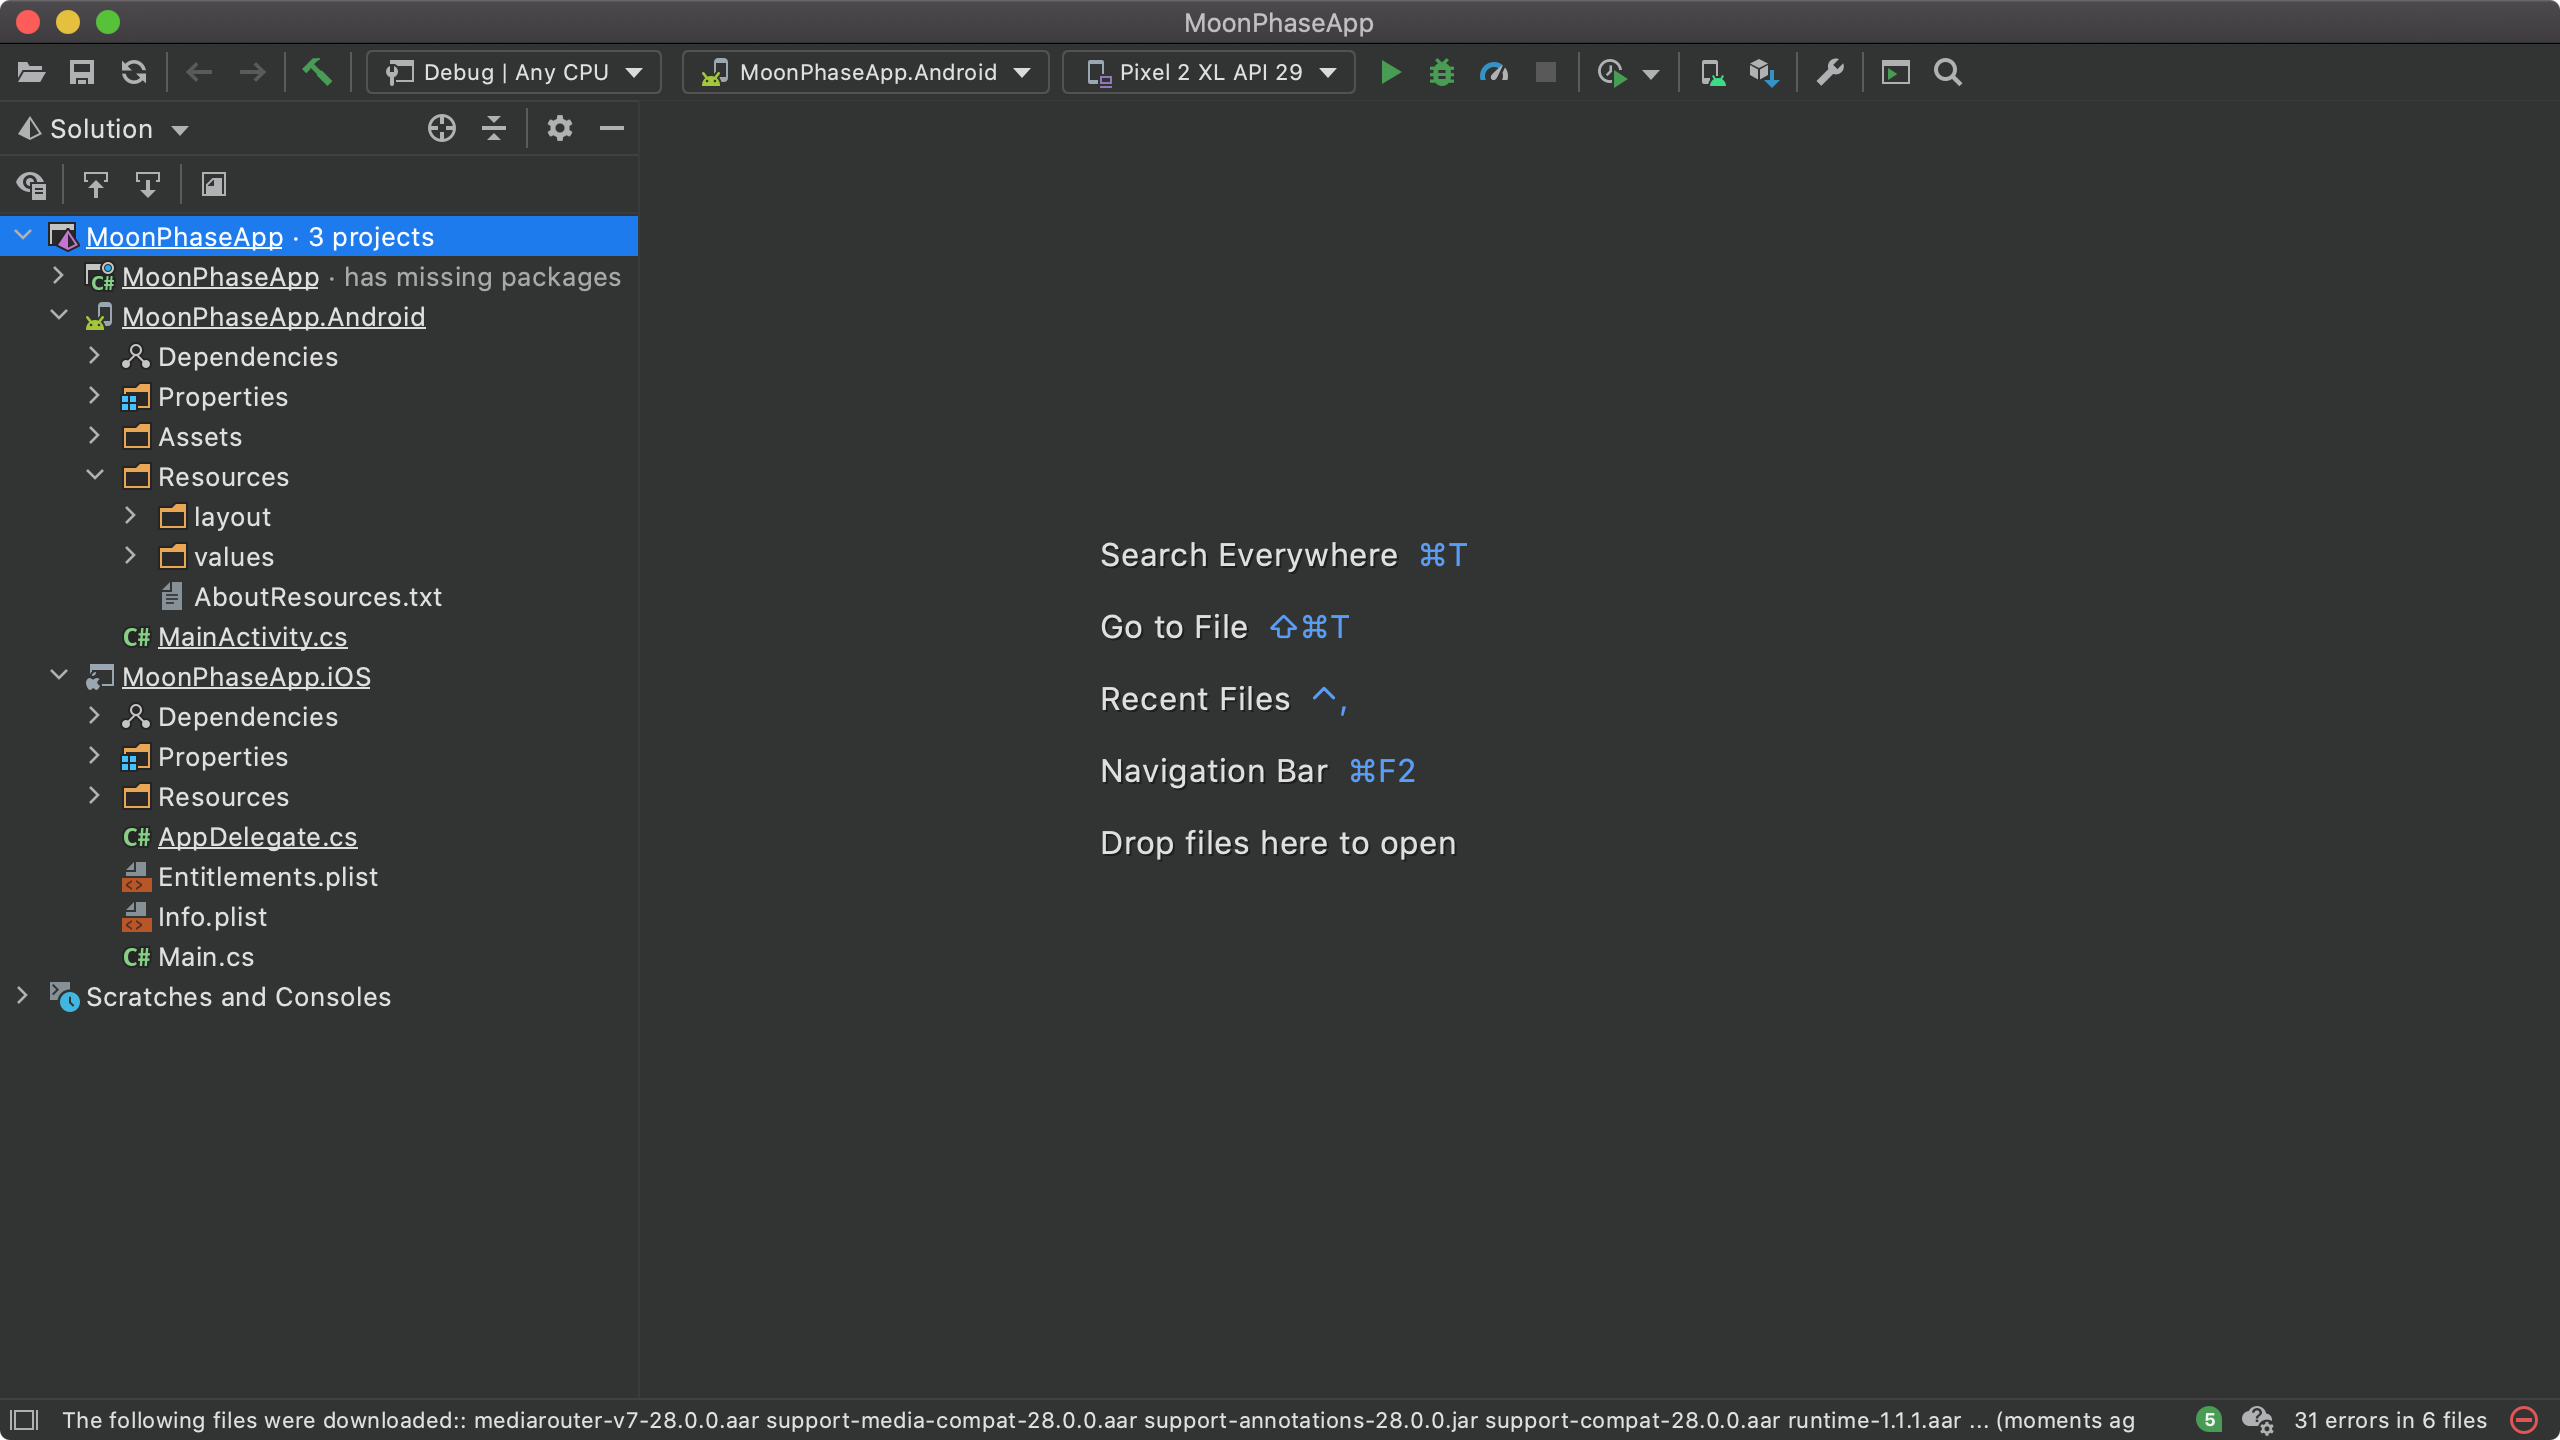
We may notice a has missing packages message if we have newer .NET Core SDKs installed. We can remedy this issue with a global.json file at the root of our solution folder. We can do this using the .NET CLI with the following command:
$> dotnet new globaljsonWe also need to ensure that we set the version to 3.1. Here’s what our global.json file should contain.
{
     "sdk": {
        "version": "3.1.000",
        "rollForward": "latestMinor"
     }
}
Once the global.json file has the correct version, we can use the NuGet window to restore the necessary Xamarin packages.
We should now have a solution with three projects: A .NET standard project, an android project, and an iOS project.

Great! Let’s get into developing our app.
🌌 Resources and Space Backgrounds
The cosmos is a beautiful sight, and why wouldn’t we want the Earth’s moon backdropped by the starry night sky? The following is the only step to interact with the individual platform projects for Android and iOS. We’ll do this step first because it is the least exciting part of this solution. Currently, each project is responsible for processing its resources. Managing assets is one of the more tedious aspects of building mobile applications.
First, we’ll need an image of the night sky. Luckily, I’ve included one at the GitHub repository. After we’ve downloaded this asset, we need to add it to our two OS-specific projects.
For our Android project, we’ll need to create a folder named drawable under the Resources folder in our .Android project. We can add the space.png to the folder, ensuring the Build Action property is AndroidResource.
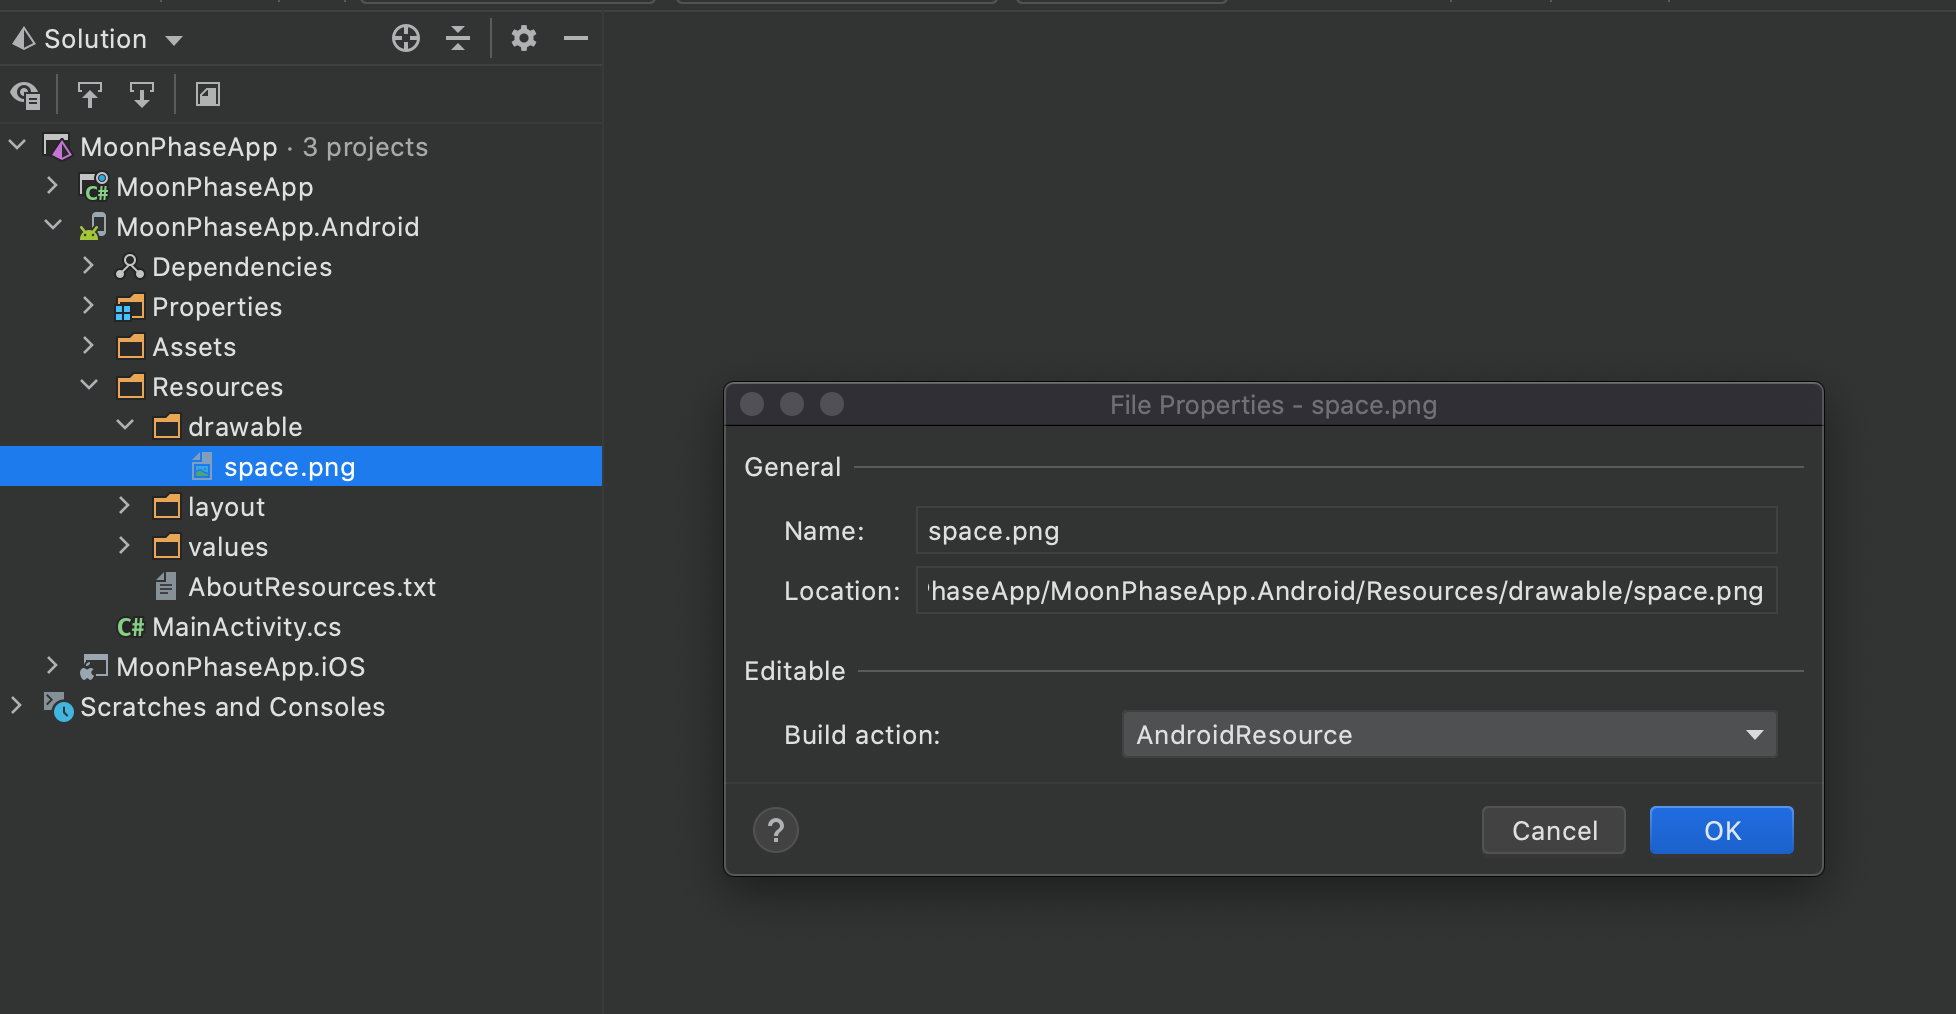
For our iOS project, we’ll need to add the space.png file directly to the Resources folder with a Build Action of BundleResource.
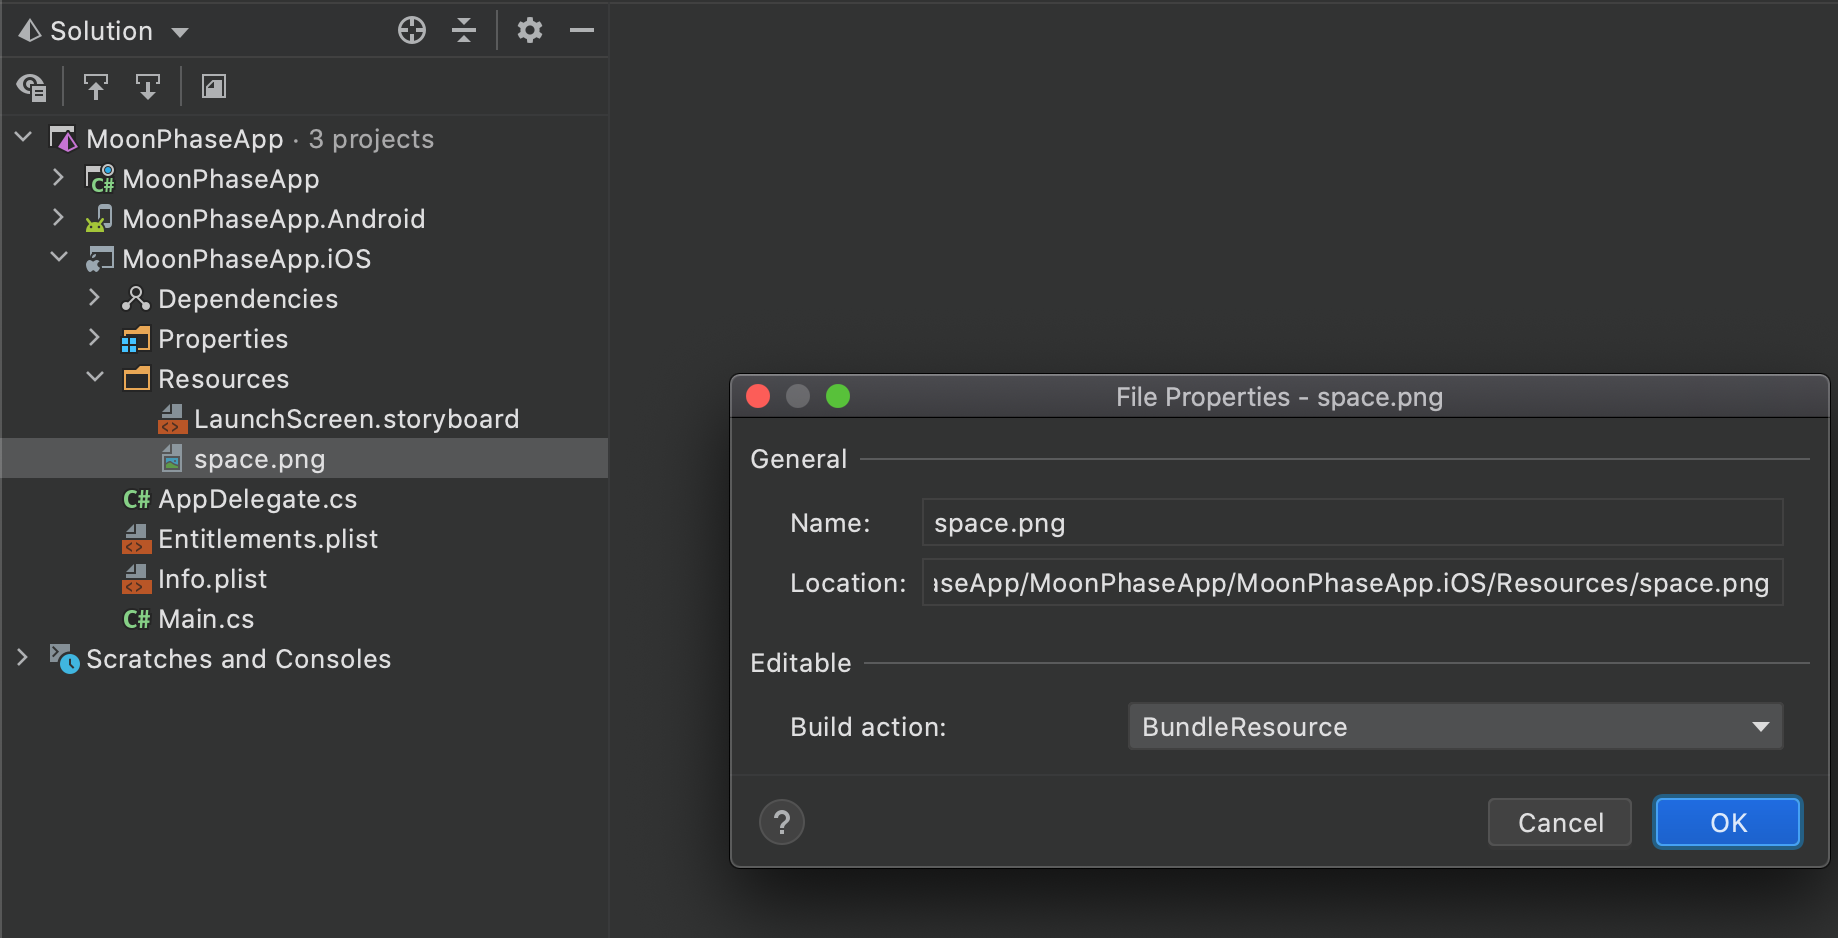
In later parts of this walkthrough, we’ll be accessing the resource using its name of space.png. Adding the image to both projects is critical to having the image be available to both iOS and Android apps.
👨🔬 Calculating The Moon Phase
In our .NET Standard project, we’ll need to write some non-trivial logic to calculate the moon’s current phase. Before we do that, let’s discuss how the moon (or our perception of it from Earth) works.
The moon has a 29.53 day cycle, phasing between entirely dark toward full. During this cycle, there are eight distinct checkpoints: New Moon, Waxing Crescent, First Quarter, Waxing Gibbous, Full Moon, Waning Gibbous, Third Quarter, and Waning Crescent. While the names are consistent within the hemispheres, the moon will look reversed to us, depending on which hemisphere we are standing. So how do we know which day of the cycle we’re on currently?
The approach I’ve taken is a self-contained one. I used data from the earliest known full moon and count forwards from then. Wikipedia outlines the process in detail:
The approximate age of the moon, and hence the approximate phase, can be calculated for any date by calculating the number of days since a known new moon (such as January 1, 1900 or August 11, 1999) and reducing this modulo 29.530588853… The difference between two dates can be calculated by subtracting the Julian day number of one from that of the other. —Wikipedia
The calculation is not perfect, but surprisingly close. Remember, we’re building a fun app, not trying to launch a lunar mission. This process is more than adequate for our needs and requires no outside services or API calls.
If you’d like to attempt to write the calculation yourself, pause here and have fun. For those who want to copy, I’ve included my implementation below.
public static class Moon
{
private static readonly IReadOnlyList NorthernHemisphere
= new List {"🌑", "🌒", "🌓", "🌔", "🌕", "🌖", "🌗", "🌘", "🌑"};
private static readonly IReadOnlyList SouthernHemisphere
= NorthernHemisphere.Reverse().ToList();
private static readonly List Names = new List
{
Phase.NewMoon,
Phase.WaxingCrescent, Phase.FirstQuarter, Phase.WaxingGibbous,
Phase.FullMoon,
Phase.WaningGibbous, Phase.ThirdQuarter, Phase.WaningCrescent
};
private const double TotalLengthOfCycle = 29.53;
public static DateTime MinimumDateTime
    =>  new DateTime(1920, 1, 21, 5, 25, 00, DateTimeKind.Utc);
private static readonly List allPhases = new List();
static Moon()
{
var period = TotalLengthOfCycle / Names.Count;
// divide the phases into equal parts
// making sure there are no gaps
allPhases = Names
.Select((t, i) => new Phase(t, period * i, period * (i + 1)))
.ToList();
}
///
/// Calculate the current phase of the moon.
/// Note: this calculation uses the last recorded new moon to calculate the cycles of
/// of the moon since then. Any date in the past before 1920 might not work.
///
///
/// https://www.subsystems.us/uploads/9/8/9/4/98948044/moonphase.pdf
///
/// The days into the cycle this phase starts
///
public double Start { get; }
///
/// The days into the cycle this phase ends
///
public double End { get; }
}
} Let’s take a quick look at this implementation. We’ll notice that I was able to use emojis to describe the moon’s phase visually. Emojis are amazing. Secondly, I have hardcoded a date for the earliest known full moon.
public static DateTime MinimumDateTime
=> new DateTime(1920, 1, 21, 5, 25, 00, DateTimeKind.Utc);The Moon class has a Calculate method that accepts a date-time and a hemisphere. The Calculate implementation assumes the individual is standing on UTC, but the result is still relatively close regardless of where we’re standing on the planet.
var result =
    Moon.Calculate(dateTime, Hemisphere);
The PhaseResult contains properties for Name, Emoji, DaysIntoCycle, Hemisphere, Moment, and Visibility. We’ll be using the PhaseResult in our XAML view.
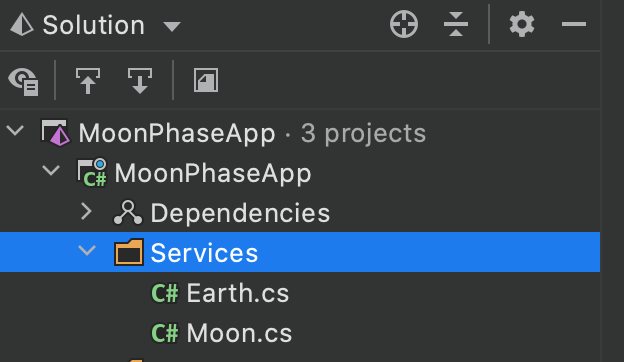
Let’s add these classes to a folder named Services in our .NET Standard project.
We can now launch into developing our mobile interface.
🛰 ViewModels and MVVM
For this sample, we’ll be using the Model-View-ViewModel (MVVM) approach to building our user interface. Like I mentioned at the beginning of this post, I’m still learning Xamarin.Forms, so there is likely a different approach. Explore the solution, and feel free to submit updates and improvements.
The advantage of the MVVM approach is that we can begin by implementing our properties and commands before diving into XAML. Keeping our Moon interface in mind, we need to accept a date-time and a hemisphere from our user. When the user enters values, we need to bind PhaseResult to our UI.
Let’s create a MainViewModel under a ViewModels folder in our .NET Standard project.
public class MainViewModel : INotifyPropertyChanged
{
    private string _emoji;
    private Earth.Hemispheres _hemisphere;
    private string _name;
    private DateTime _selectedDate;
    private string _display;

    public Command CalculateMoonPhaseCommand { get; set; }

    public MainViewModel()
    {
        SelectedDate = DateTime.UtcNow;
        SetMoonPhaseResult(Moon.Calculate(SelectedDate, Hemisphere));
        CalculateMoonPhaseCommand = new Command(CalculateMoonPhase);
    }

    public DateTime SelectedDate
    {
        get => _selectedDate;
        set
        {
            _selectedDate = value;
            OnPropertyChanged();
        }
    }

    public DateTime MinimumDateTime => Moon.MinimumDateTime;

    private void CalculateMoonPhase (DateTime dateTime)
    {
        var result = Moon.Calculate(dateTime, Hemisphere);
        SetMoonPhaseResult(result);
    }

    public string Name
    {
        get => _name;
        set
        {
            _name = value;
            OnPropertyChanged();
        }
    }

    public Earth.Hemispheres Hemisphere
    {
        get => _hemisphere;
        set
        {
            _hemisphere = value;
            OnPropertyChanged();
        }
    }

    public List Hemispheres
    {
        get
        {
            var list = new List();
            foreach (var value in Enum.GetValues(typeof(Earth.Hemispheres)))
            {
                list.Add((Earth.Hemispheres) value);
            }

            return list;
        }
    }
    public string Emoji
    {
        get => _emoji;
        set
        {
            _emoji = value;
            OnPropertyChanged();
        }
    }

    public string Display
    {
        get => _display;
        set
        {
            _display = value;
            OnPropertyChanged();
        }
    }

    public event PropertyChangedEventHandler PropertyChanged;

    private void SetMoonPhaseResult(Moon.PhaseResult result)
    {
        Emoji = result.Emoji;
        Hemisphere = result.Hemisphere;
        Name = result.Name;
        Display = result.ToString();
    }

    [NotifyPropertyChangedInvocator]
    protected virtual void OnPropertyChanged([CallerMemberName] string propertyName = null)
    {
        PropertyChanged?.Invoke(this, new PropertyChangedEventArgs(propertyName));
    }
}
Essential elements of our view model:
- The
CalculateMoonPhaseCommandwill calculate our result. - We have multiple properties that we’ll bind to the XAML UI.
INotifyPropertyChangedandOnPropertyChangedare implemented with the help of Rider code generation.
A note for folks using Rider to develop Xamarin.Forms apps for the first time. Rider will recognize our usage of INotifyPropertyChanged and will ask to enhance our project.
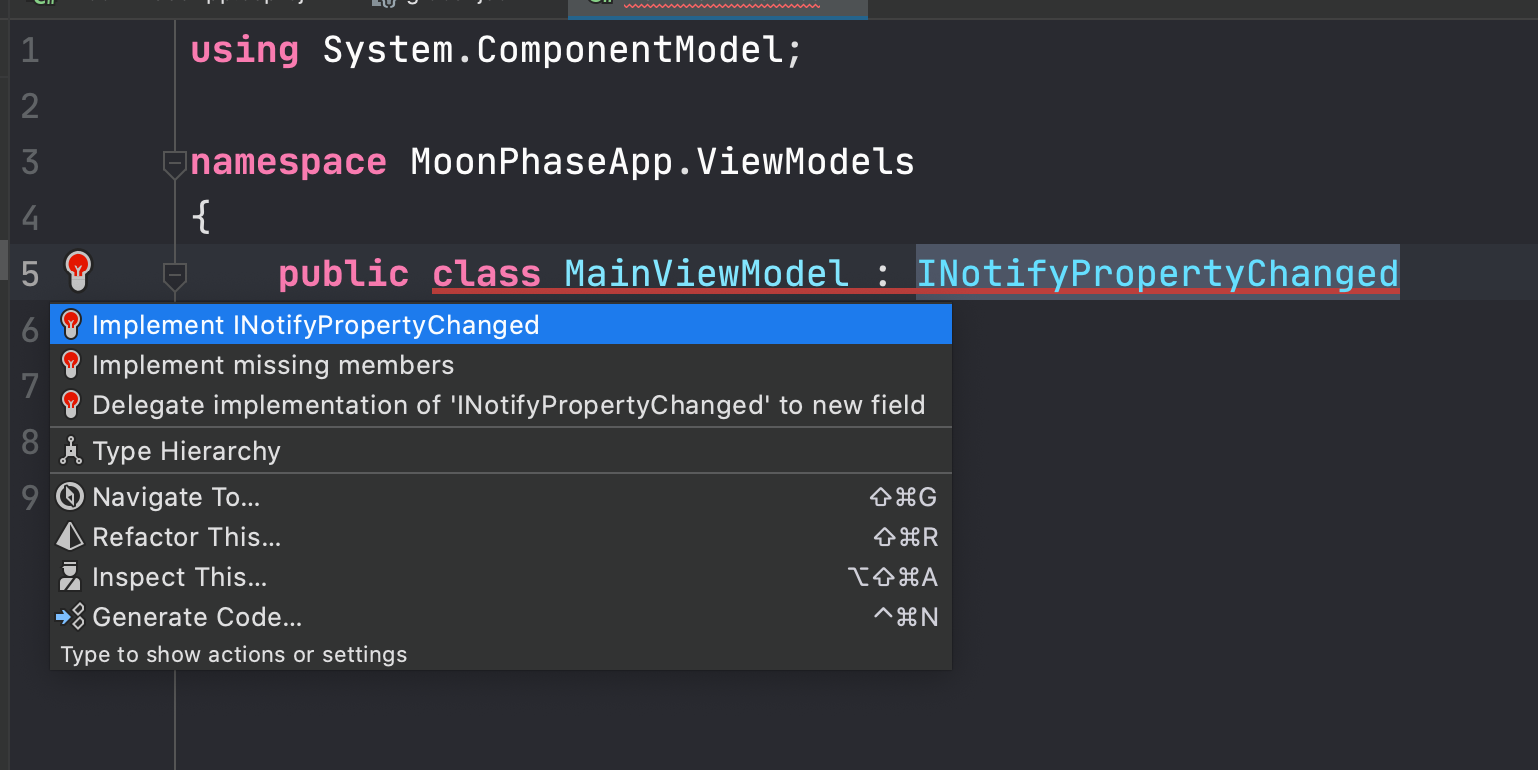
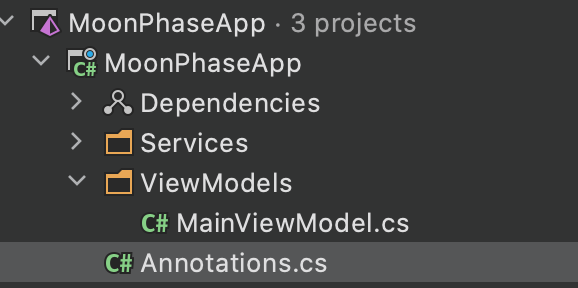
Rider will add a new Annotations.cs file to our project. The additional file includes attributes that protect against unintended nulls in addition to hint attributes that can trigger behaviors in Rider. While not in the scope of this post, I suggest folks explore JetBrains.Annotations.
Now, let’s get to some XAML!
👩🚀 Making a XAML User Interface
The app is almost complete, and the final step is to create our XAML UI. Since the app is a single page application, we’ll be working exclusively with MainPage.xaml. Let’s look at the final XAML markup, and then focus the essential parts.
<?xml version="1.0" encoding="utf-8"?>

<ContentPage xmlns="http://xamarin.com/schemas/2014/forms"
             xmlns:x="http://schemas.microsoft.com/winfx/2009/xaml"
             xmlns:local="clr-namespace:MoonPhaseApp"
             xmlns:viewModels="clr-namespace:MoonPhaseApp.ViewModels;assembly=MoonPhaseApp"
             x:Class="MoonPhaseApp.MainPage"
             BackgroundColor="Black">
    <ContentPage.BindingContext>
        <viewModels:MainViewModel />
    </ContentPage.BindingContext>

    <Grid>
        <Image HorizontalOptions="CenterAndExpand"
               VerticalOptions="CenterAndExpand"
               BackgroundColor="black"
               Scale="1.5"
               Source="space.png" />
        <StackLayout VerticalOptions="Center" Margin="0, 50">
            <Label
                HorizontalTextAlignment="Center"
                VerticalTextAlignment="Center"
                FontSize="300"
                TextColor="White"
                Text="{Binding Emoji}" />
            <Label
                TextColor="White"
                HorizontalTextAlignment="Center"
                VerticalOptions="EndAndExpand"
                Text="{Binding Name}"
                FontSize="25"
                FontAttributes="Bold"/>
            <Label
                Text="{Binding Display, Mode=TwoWay}"
                TextColor="White"
                HorizontalOptions="CenterAndExpand"
                VerticalOptions="CenterAndExpand"
                Margin="25, 0" />
            <Grid Margin="25" HorizontalOptions="CenterAndExpand" VerticalOptions="StartAndExpand">
                <Grid.ColumnDefinitions>
                    <ColumnDefinition Width="*" />
                    <ColumnDefinition Width="*" />
                </Grid.ColumnDefinitions>
                <StackLayout Grid.Column="0">
                    <Label Text="Date: "
                           HorizontalTextAlignment="Start"
                           TextColor="white" />
                    <DatePicker
                        TextColor="White"
                        BackgroundColor="DeepSkyBlue"
                        MinimumDate="{Binding MinimumDateTime}"
                        Date="{Binding SelectedDate, Mode=TwoWay}"
                        DateSelected="DatePicker_OnDateSelected" />
                </StackLayout>
                <StackLayout Grid.Column="1">
                    <Label Text="Hemisphere: "
                           HorizontalTextAlignment="Start"
                           TextColor="white" />
                    <Picker
                        Title="Select A Hemisphere"
                        BackgroundColor="DeepSkyBlue"
                        MinimumWidthRequest="10"
                        TitleColor="White"
                        TextColor="White"
                        ItemsSource="{Binding Hemispheres}"
                        SelectedItem="{Binding Hemisphere}"
                        SelectedIndexChanged="Picker_OnSelectedIndexChanged"
                        ItemDisplayBinding="{Binding .}" />
                </StackLayout>
            </Grid>
        </StackLayout>
    </Grid>
</ContentPage>
The most important part of our XAML UI is the declaration of our MainViewModel. We can assign our binding context using the ContentPage.BindingContext element.
<ContentPage.BindingContext>
    <viewModels:MainViewModel />
</ContentPage.BindingContext>
We can now bind our UI elements to the properties exposed on our MainViewModel class.
In this UI instance, we’ll use Grid and StackLayout tags to position our input and display elements. Frankly, this UI is straightforward enough that we could likely build it a dozen ways. Experiment and see which approach you like.
The first element in our Grid is an Image utilizing our space.png resource. We can reference it by name, and since the resource is added to both Android and iOS projects correctly, it will correctly resolve at runtime.
<Image HorizontalOptions="CenterAndExpand"
       VerticalOptions="CenterAndExpand"
       BackgroundColor="black"
       Scale="1.5"
       Source="space.png" />
Our layout has several bindings to our MainViewModel properties before we get to our user inputs of DatePicker and Picker. The DatePicker allows us to select a date-time for our calculation. When the user modifies the UI element, the framework updates our SelectedDate property.
<DatePicker
    TextColor="White"
    BackgroundColor="DeepSkyBlue"
    MinimumDate="{Binding MinimumDateTime}"
    Date="{Binding SelectedDate, Mode=TwoWay}"
    DateSelected="DatePicker_OnDateSelected" />
We take a similar approach with the Picker element. In this case, we provide an ItemSource of Hemispheres, limiting our users’ options.
<Picker
    Title="Select A Hemisphere"
    BackgroundColor="DeepSkyBlue"
    MinimumWidthRequest="10"
    TitleColor="White"
    TextColor="White"
    ItemsSource="{Binding Hemispheres}"
    SelectedItem="{Binding Hemisphere}"
    SelectedIndexChanged="Picker_OnSelectedIndexChanged"
    ItemDisplayBinding="{Binding .}" />
You may have noticed, we have events bound to our XAML elements. The XAML ties these events to our view model in the partial MainPage class.
public partial class MainPage
{
    public MainPage()
    {
        InitializeComponent();
    }

    private void DatePicker_OnDateSelected(object sender, DateChangedEventArgs e)
    {
        ((MainViewModel)this.BindingContext).CalculateMoonPhaseCommand.Execute(e.NewDate);
    }

    private void Picker_OnSelectedIndexChanged(object sender, EventArgs e)
    {
        var vm = ((MainViewModel)this.BindingContext);
        vm.CalculateMoonPhaseCommand.Execute(vm.SelectedDate);
    }
}
That’s it! We’re ready for lift-off. We can choose which project to run, either iOS or Android, but why not both?

🚀 Conclusion
We implemented the majority of this application using C#. The XAML and resource images played a minor role in the final product and could be changed to enhance the app experience. We took advantage of Emojis to reduce the need for more external resources. Since emojis are unique to each mobile ecosystem, it also adds a native feel to each version.
I hope you enjoyed this walkthrough, whether you followed along through this post, or explored the complete solution from GitHub. If you’re a Xamarin expert using Rider for your mobile applications, we’d love to hear from you. If there’s something I could have done differently or better, please feel free to comment or submit a pull request.
As always, if there’s a feature in Rider you would like, please visit our issue tracker and please let us know.