.NET Tools
Essential productivity kit for .NET and game developers
Remote Development with JetBrains Rider

With the release of JetBrains Rider 2022.2, .NET developers now have access to the Remote Development Beta. Already introduced for other JetBrains IDEs built on the IntelliJ Platform, Rider users can now experience the power of developing remotely on the .NET platform.
This post will answer the question, “what is remote development?”, “why would I want to use remote development?” and how to use remote development with your current version of JetBrains Rider. Let’s go ahead and get started.
What is remote development?
Remote development is familiar and dates back to the dawn of professional computing. Users would remotely connect to large computers using a terminal to accomplish their work. The history of the computer terminal is fascinating and helped usher in the modern era of personal computing we find ourselves in today.
Like most things in technology, trends are cyclical. So while we see computers on our desks with processing power beyond the imagination of history’s first computer scientists, you can still hit the limits of these devices in a modern development workflow. Current workloads can demand extreme amounts of CPU, Memory, and GPU, not to mention the ongoing development of Quantum computing.
For .NET developers, those limits have expanded beyond technical ones and include problems such as multi-targeting operating systems and hardware. While you could build a physical device library, it’s not practical for many developers. Virtualization and emulation also have limits, as hosting overhead typically can give less-than-accurate results.
What is a modern developer to do to overcome these challenges? Remote development, of course!
JetBrains Remote Development can host your source code, toolchain, and IDE backend on any remote server that supports SSH. Using a thin client based on the IntelliJ Platform, you can experience the same Rider development workflows you would locally. Write, navigate, refactor, run, debug and test your projects as you’ve always done.
As our previous announcements have detailed:
At its simplest, remote development will connect to an existing server via SSH. The IDE is installed as a backend service, where it will load a project without displaying a user interface. A thin client runs locally and connects to this IDE backend and provides a full working user interface as if the IDE was running locally, even though all the processing is done on the remote server.
JetBrains
While remote development isn’t a new idea in the computing world, the culmination of 20 years of JetBrains knowledge and state-of-the-art hosting choices brings everyone in the industry to a unique moment. You’ll be able to take advantage of remote development as long as you have access to an active JetBrains Rider subscription and remote server instance with SSH.
But why would you want to do remote development in the first place?
Why remote development?
While we’ve talked a bit about the technical parts of remote development, it may seem like a drastic shift in working for most developers. So why would you want to consider remote development?
Well, it depends on the beneficiaries’ perspectives. Let’s look at a few organizational stakeholders and see how they may benefit from a remote development team.
Developers can quickly spin up any development environment within a few minutes instead of spending hours running setup scripts, configuring environmental settings, and downloading dependencies. Developer machines can be based on images and scripted to provide a familiar development environment across a team, helping avoid the dreaded “works on my machine” issues we commonly see within teams. An added benefit is that developers can quickly switch between contexts with little downtime between tasks if a team is responsible for multiple projects.
Additionally, developers can now have limitless access to resources regardless of their current hardware. Remember, remote development uses a thin client, and the remote server does the expensive work. Need more CPU, Memory, or GPU access? Scale up your remote machine in minutes and continue working; no need to wait for that expensive laptop to show up in the mail anymore.
For IT and hardware managers, remote development will be cheaper over time than a typical enterprise hardware refresh cycle. For example, as of writing this post, one of our many partners, GitPod, can provision a workspace for less than $1 for an hour of work for a single developer. GitHub Codespaces offers free hours and a competitive pricing model as well. A $6,000 workstation with a two-year refresh cycle can be just over $1.50 per working hour (assuming a 48 work-week year with 40 hours of work). When measuring developer productivity, hardware acquisition, and hardware management costs, remote development looks more appealing for most teams.
Remote development also offers peace of mind, as intellectual property is always on the remote server and never on the developer’s machine. Dependencies such as databases, which may require storing sensitive information, are only accessible through secured environments. Remote development can protect businesses operating in highly-regulated industries, such as finance, government work, and healthcare. Stolen or lost hardware doesn’t put your entire organization at risk.
Finally, while we discussed some tangential benefits to everyone involved, the most significant benefit is your current development process will be mostly unaffected. You can take a lightweight device anywhere, knowing you’ll have the full power of a capable server, network permitting. As a result, developers can continue using the JetBrains tools they love to write and deploy .NET solutions.
Let’s look at how you can get started with JetBrains Rider’s Remote Development.
Getting Started with Remote Development in JetBrains Rider
You’ll need the latest release of JetBrains Rider, version 2022.3 or higher, to test the Remote Development beta. You can also just install JetBrains Gateway, which has identical features but only installs the thin client. JetBrains Gateway is an excellent option if you only want to do remote development moving forward.
You’ll also need a remote server with an operating SSH Server. We recommend starting with a remote server with 2+ cores, 4GB+ RAM, and 5GB+ disk space, but these requirements will depend on your solution and development workflows. The remote server must be Linux at this time, but we’re planning on supporting Mac and Windows very soon.
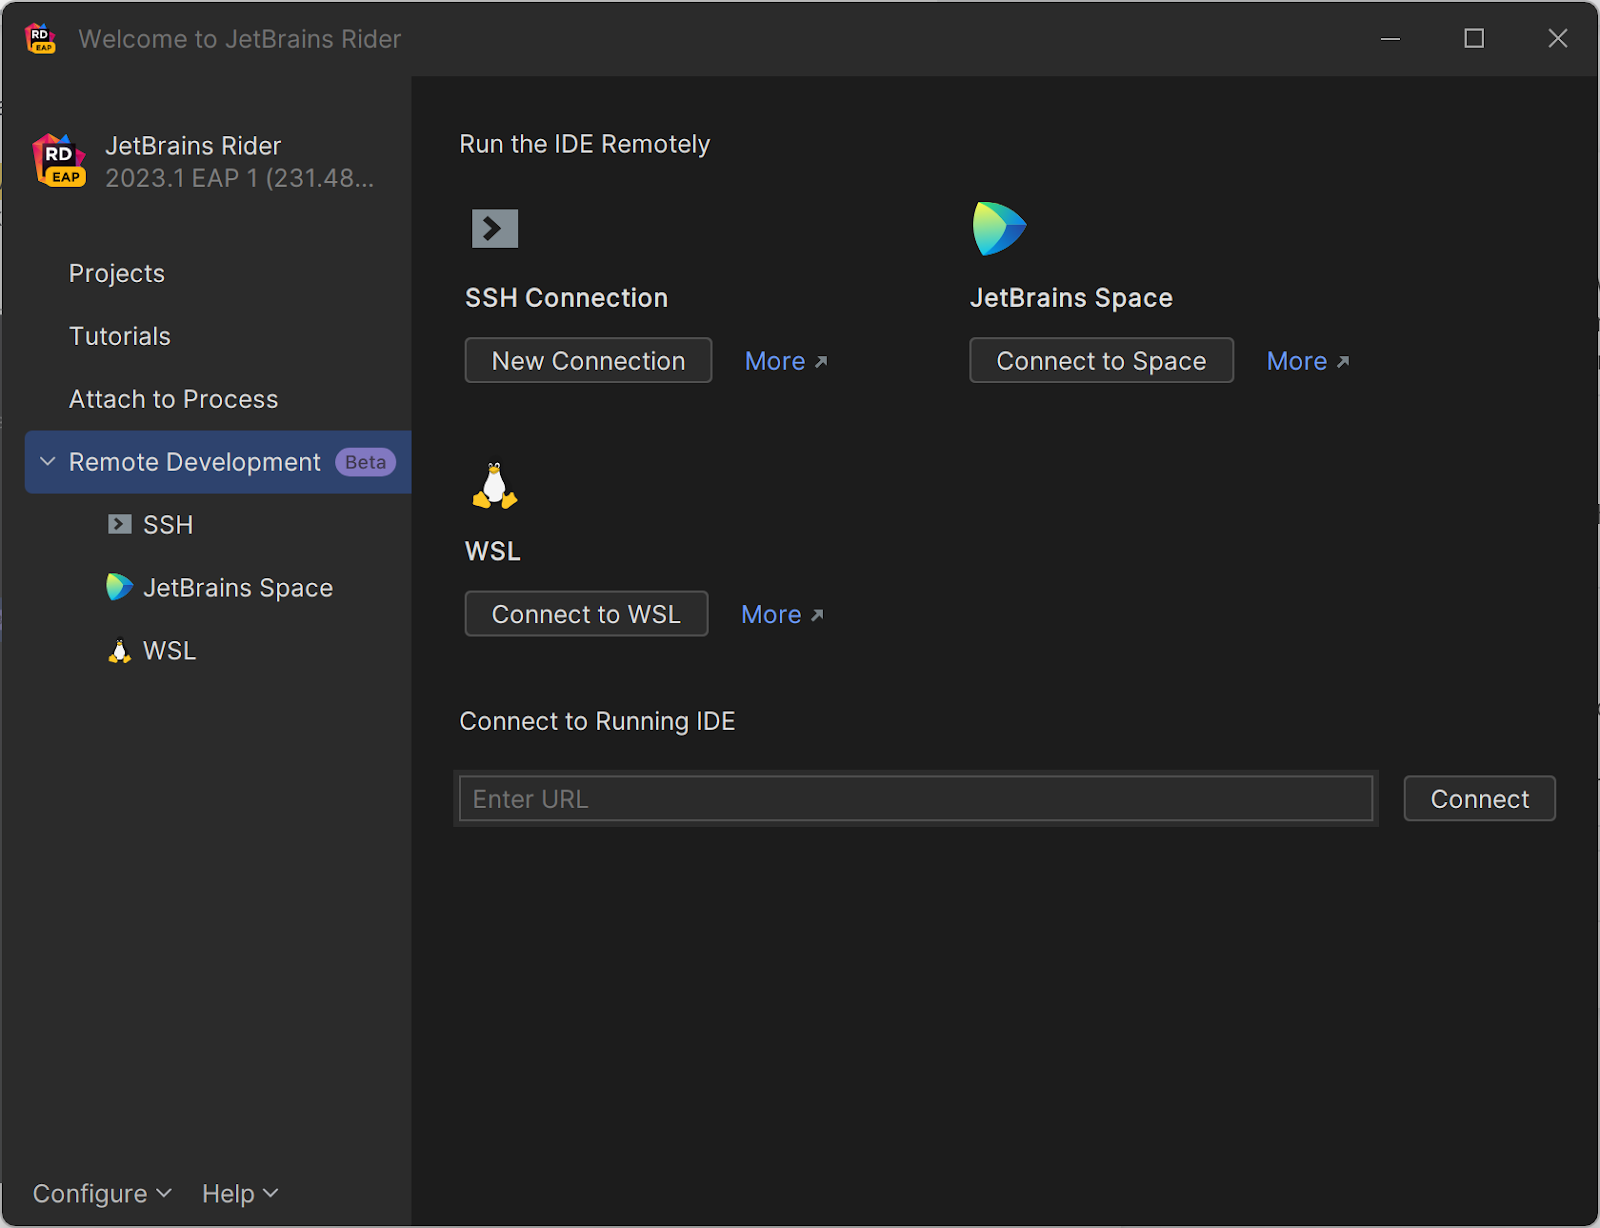
When starting JetBrains Rider, you’ll notice the Remote Development section on the right-hand side of the welcome screen, with two options: SSH and JetBrains Space. In the future, there will be more explicit providers from partners like GitHub, GitPod, Google, Amazon, and Windows Subsystem for Linux (WSL). Add a new SSH Connection by clicking New Connection.
On the Connect to SSH screen, you’ll have an opportunity to choose any existing connections or, for the first time, create a new SSH connection by specifying the username, host, port, and a local private key to add to your remote server for authentication to SSH-based services like Git.
Note: localhost and 127.0.0.1 are not supported, but you can use your local IP Address to connect to a local virtual machine for testing purposes.
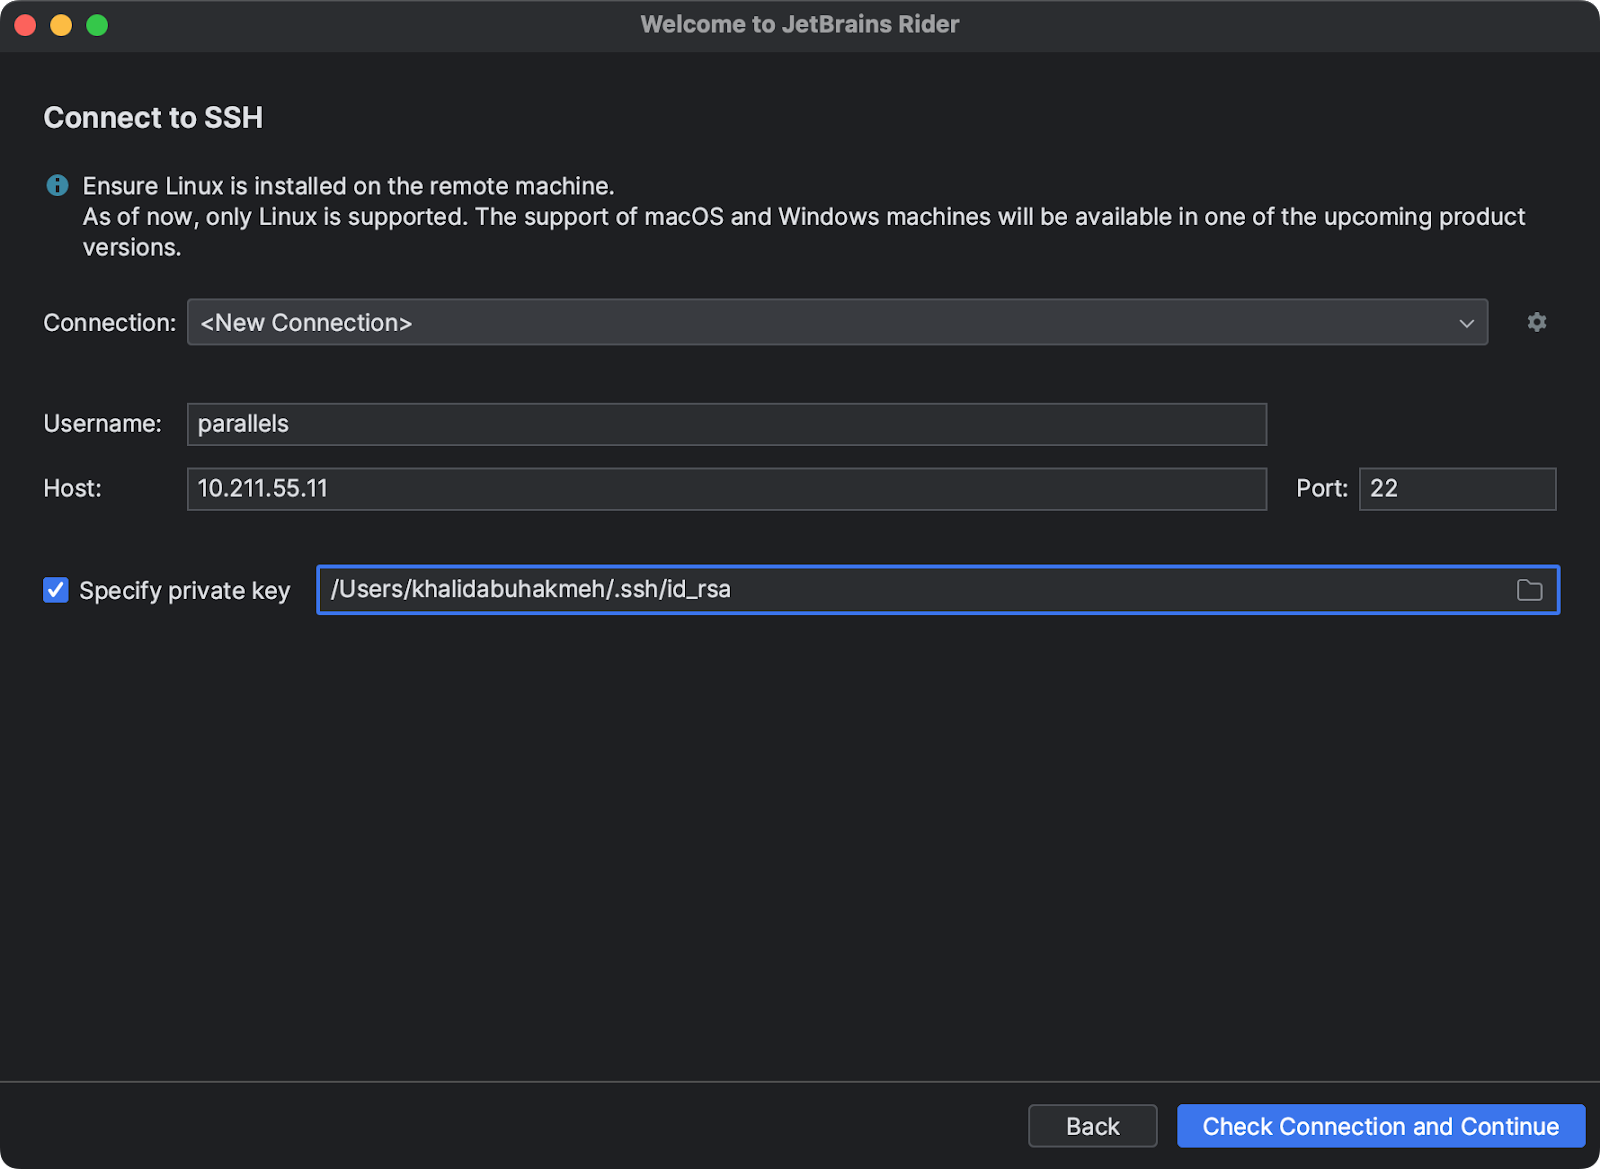
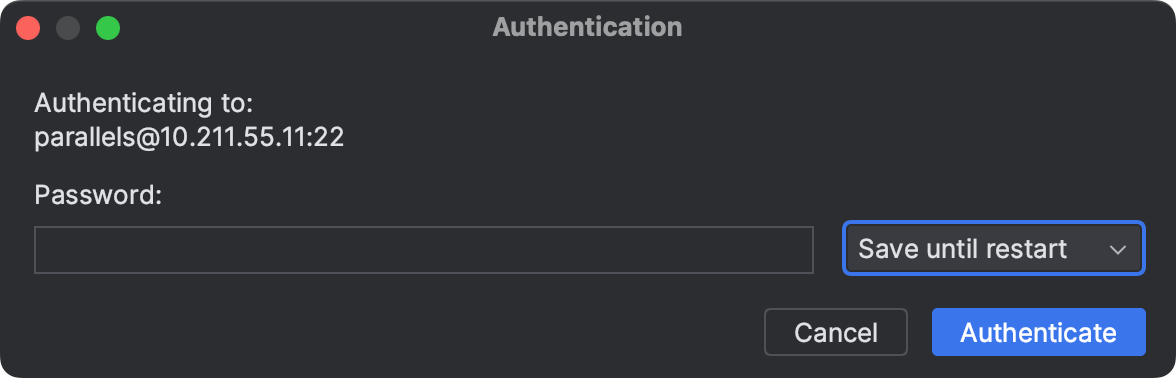
Once you have entered all the values correctly, you can click Check Connection and Continue. Next, JetBrains Rider will prompt you to type in a password, with the option to save credentials until restart, or permanently.
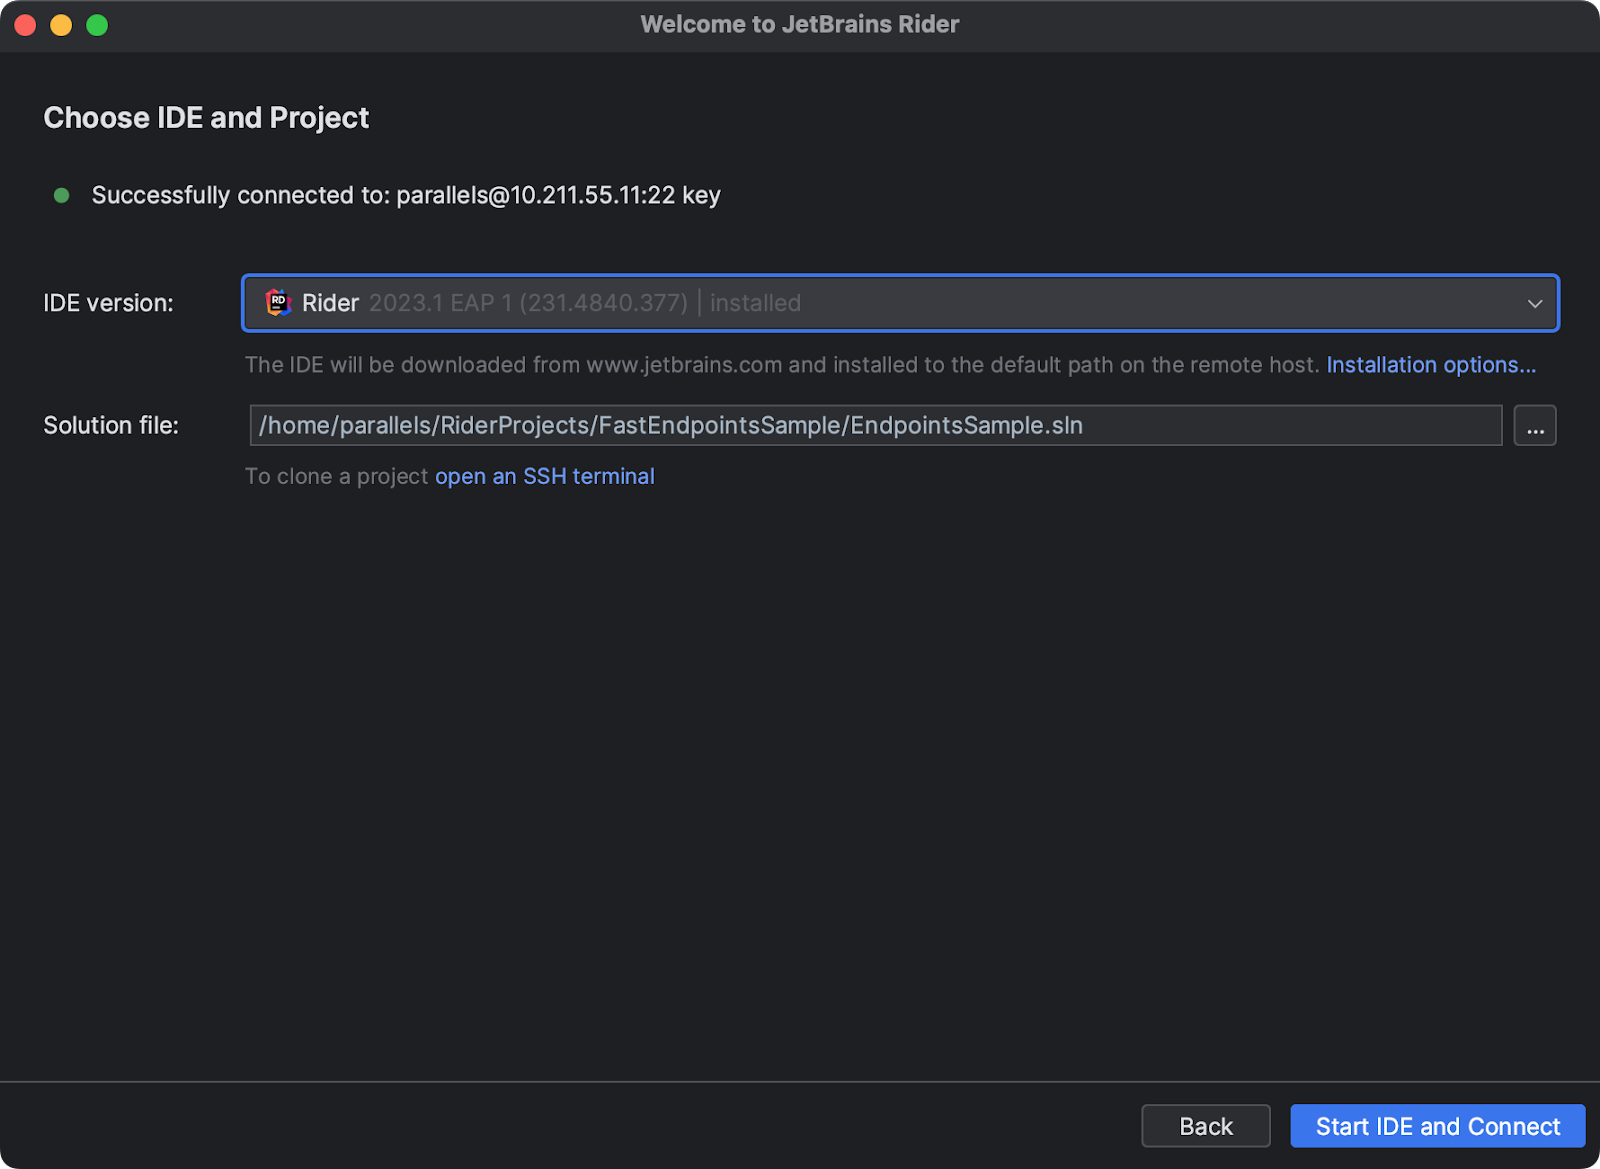
Once authenticated to your remote server, you’ll have the option to choose the JetBrains backend along with the solution file you’d like to open. On this screen, you can select Rider as a backend and open an SSH terminal to clone an existing solution from source control. Once you have selected all the options, click Start IDE and Connect.
Two possible progress bars will appear if this is your first time using Remote Development. The first will show you the progress of the backend service installation. The second progress bar is downloading the JetBrains Client, which will run locally on your development machine. This is only necessary the first time, as both the client and backend server will be persistent in both environments. Finally, once all processes are complete, the JetBrains client will present you with the familiar JetBrains Rider experience.
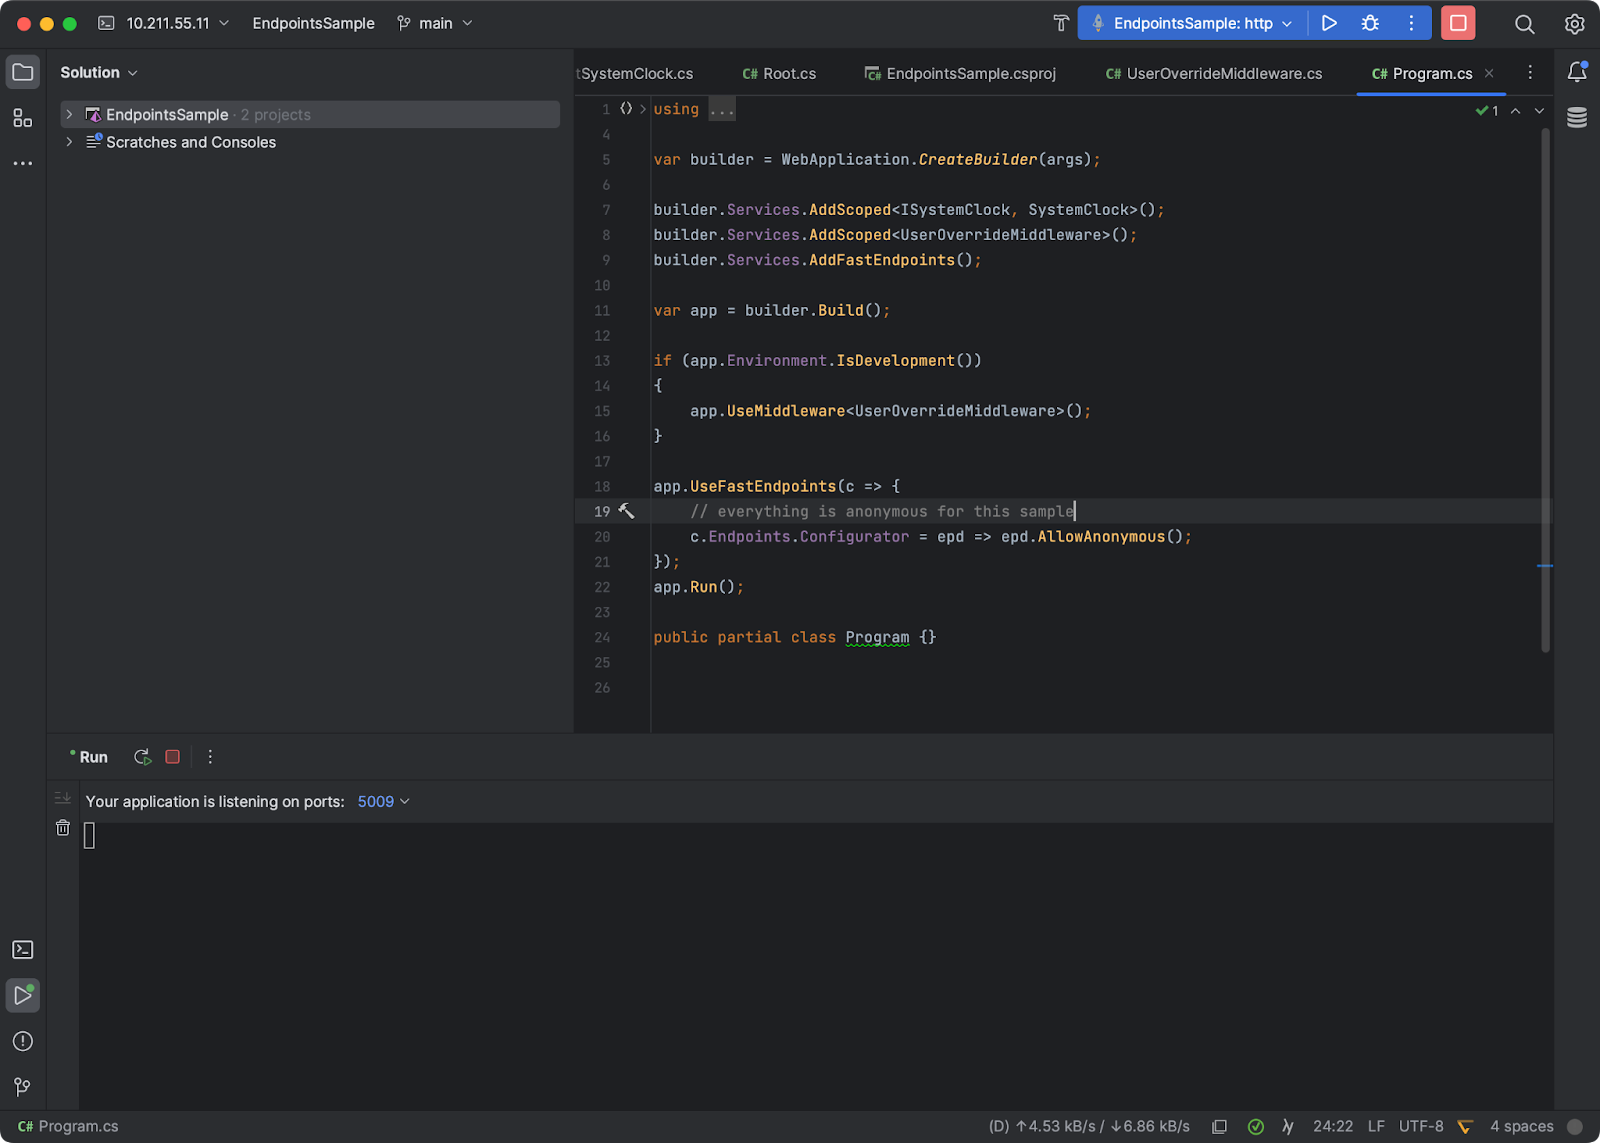
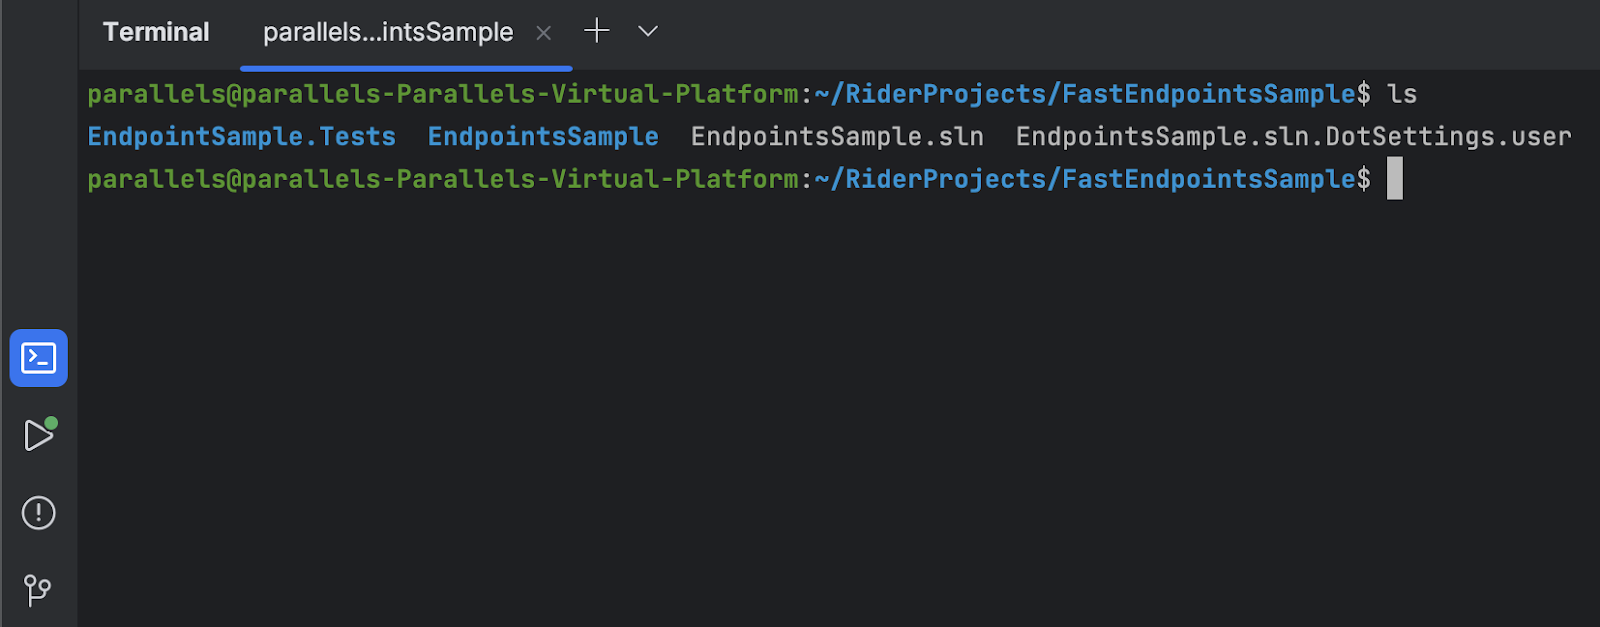
While developing, you might enjoy the quick and snappy response of the editor. Because the editing experience is local and the JetBrains Client is syncing changes to the backend. It’s important to remember that all processing occurs on the backend machine. That includes indexing solution files, disk access, quick-fix recommendations, and everything else. You can confirm this by opening Rider’s terminal if you like. You’ll also be able to customize the local JetBrains Client experience with plugins, themes, keymaps, and most entries in the JetBrains Marketplace.
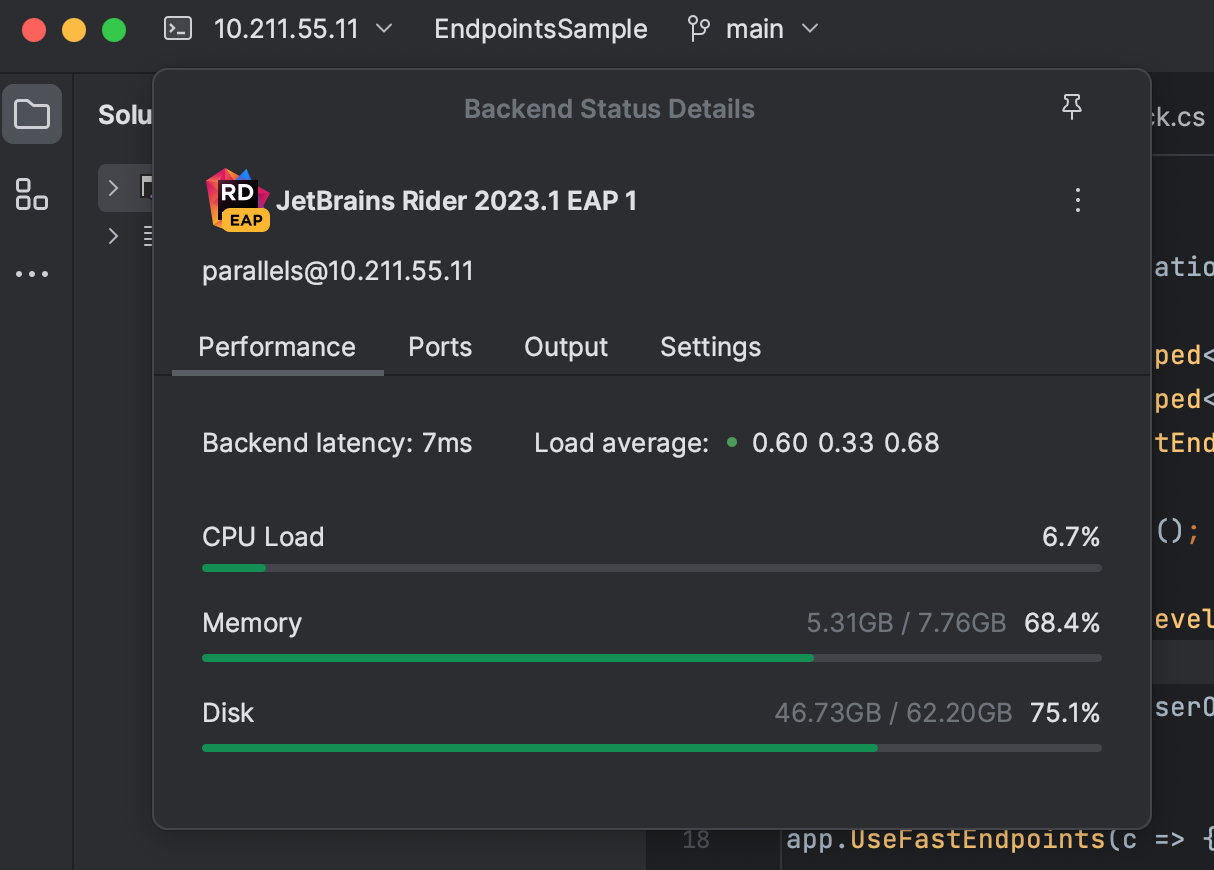
You can also see essential remote metrics using the Backend Status Details widget at the top of your Rider instance. This widget shows you resource utilization on the server for the CPU, Memory, and Disk. You can also manage exposed ports and see the output generated by the backend service.
While you could manually configure ports, Remote Development will automatically detect and forward all necessary ports to give you a seamless local development experience. For example, ASP.NET Core development requires forwarding HTTP ports when developing web applications.
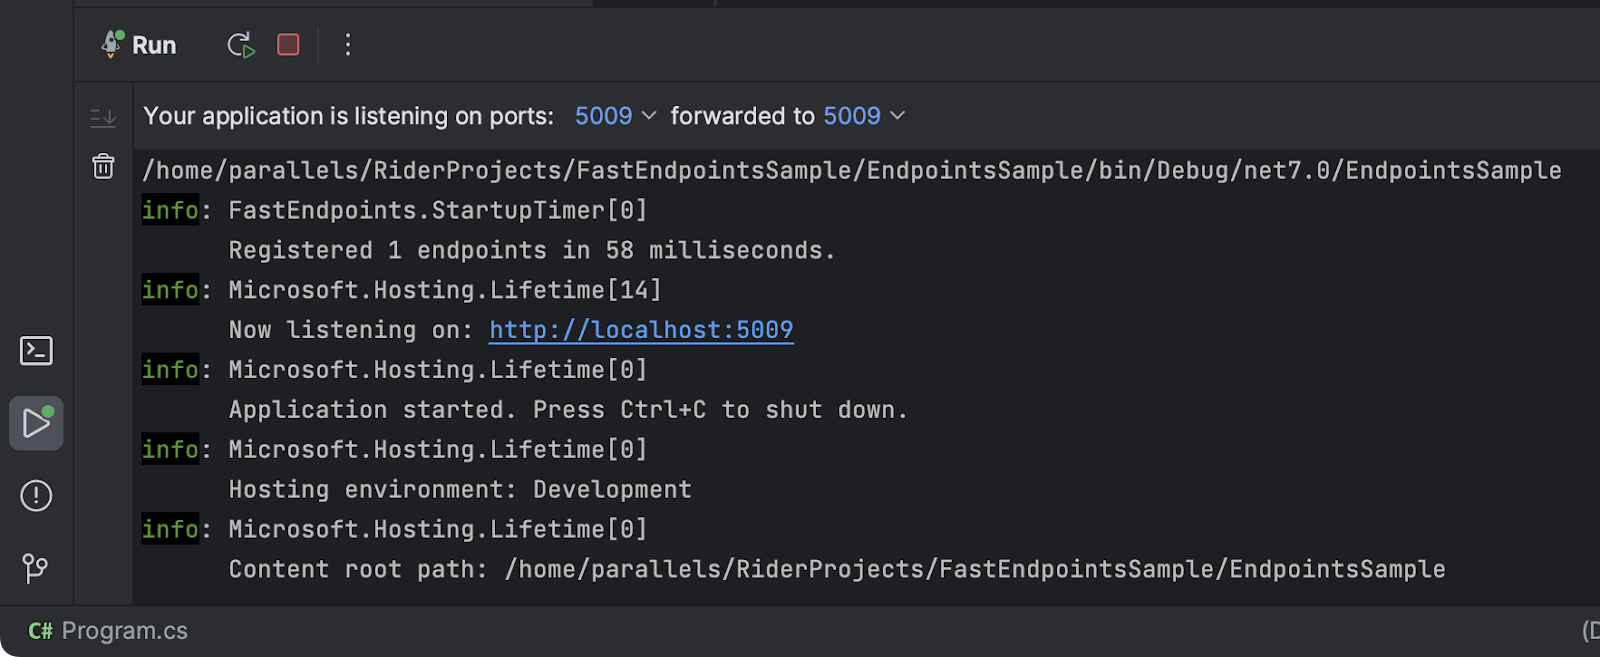
You can access any forwarded port from the server using localhost:port. You can see all forwarded ports near the top of the run window. Port forwarding makes it easy to test and debug any process running remotely using the same tools and experiences you already have being a Rider user.
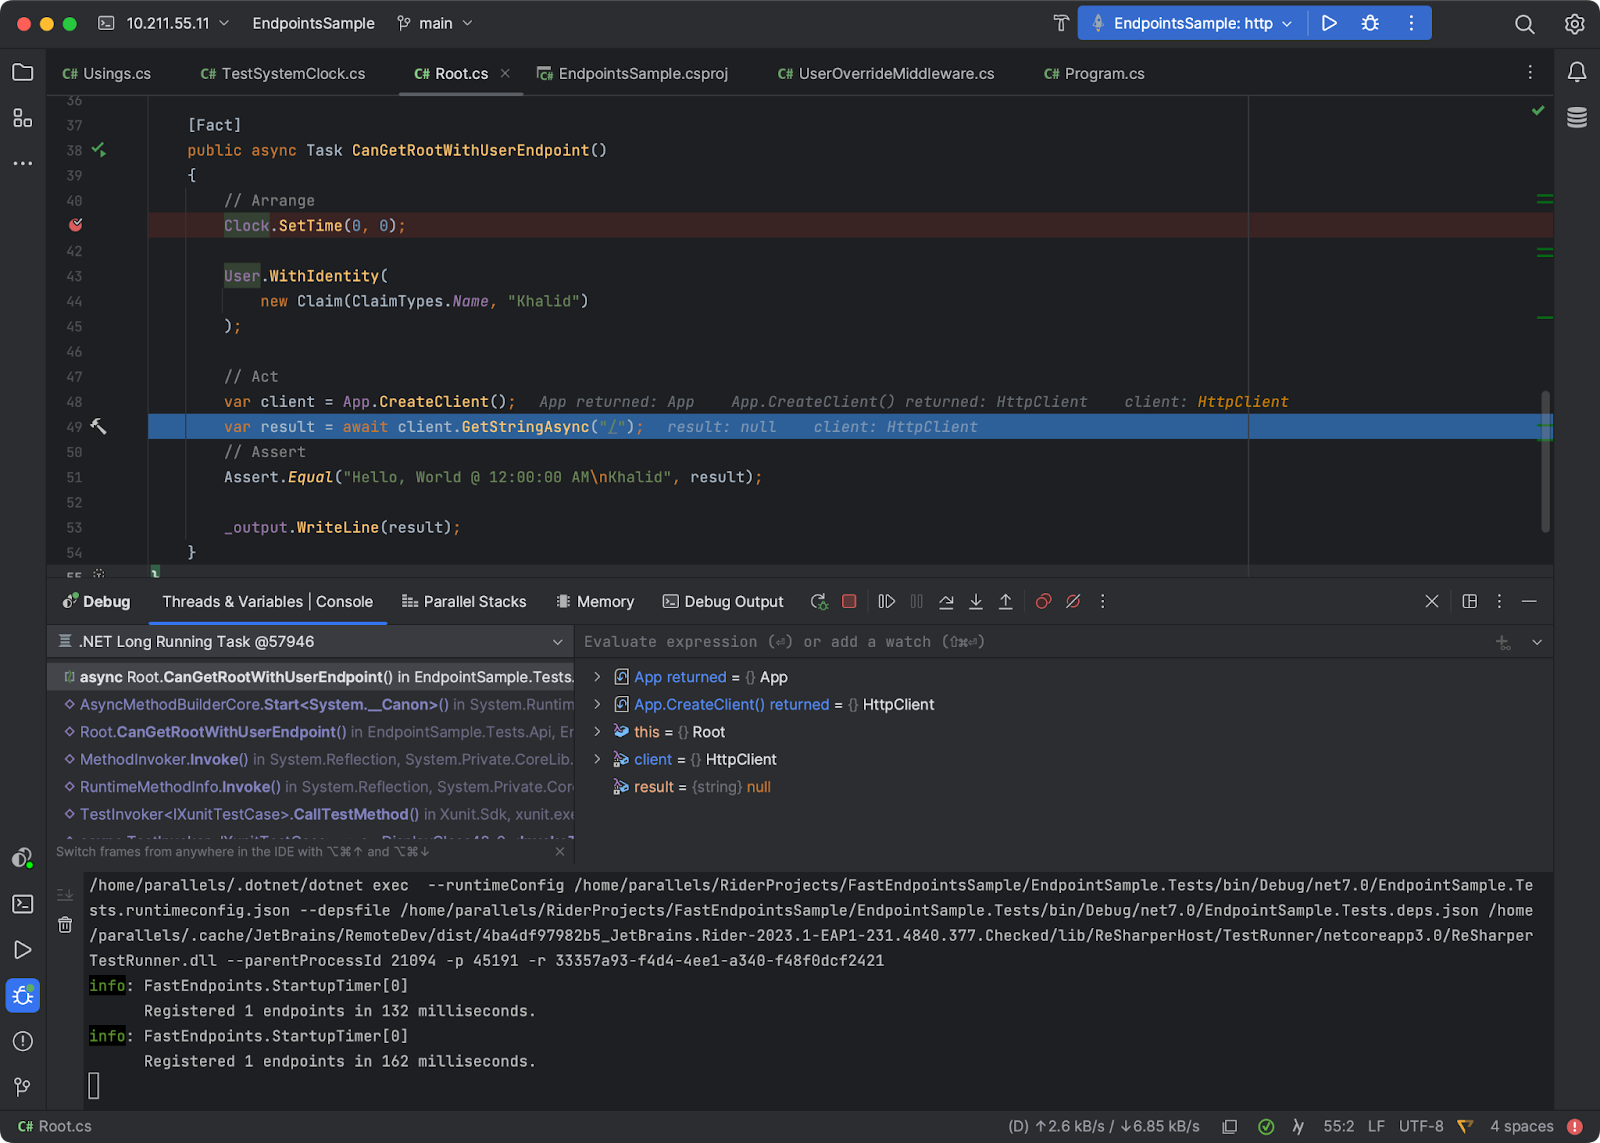
Debugging is also possible with Remote Development. Add the necessary breakpoints to your application or any unit test and start a new debugging session.
As you’ve seen in this section, getting started with JetBrains Rider Remote Development is quick and straightforward.
Conclusion
Remote Development is the future of modern software development, giving developers and other stakeholders the power and flexibility to tackle any problems. As outlined by this post, JetBrains Remote Development has many benefits while providing developers with the experience they know and love.
The current version is still in Beta, so we’d appreciate you try it out with JetBrains Space, GitPod, Google, AWS, GitHub, or even a local SSH server. Also, file any issues, and leave any comments or concerns below in the comments.
As always, thank you for reading and being a JetBrains customer.