Space
The intelligent code collaboration platform
Space and SpaceCode will be discontinued on June 1, 2025. Learn more → →
Rider Comes to Space Dev Environments

With the 2022.1 release of our tools, we also made a beta version of remote development support for JetBrains Rider available. And now, you can use JetBrains Rider with Space dev environments!
With dev environments, you can start working on your code almost immediately, in a pre-configured and reproducible environment. And this functionality now works for .NET projects, too.
You can develop any type of .NET application using Rider, including console applications, ASP.NET Core web apps, minimal APIs, and more. On a remote machine, in the Space cloud.
Let’s take a look at how to use them.
What are dev environments?
In JetBrains Space, you can launch dev environments to work on your code remotely. If you host your Git repository in Space (or mirror another Git host), you can start a powerful, dedicated virtual machine to work on your code, with the click of a button.
You can use these remote machines to develop your software on, instead of using your local machine. One of many advantages of using Space dev environments, is that the remote environment can be standardized for your team. New and existing developers can start working on a project almost instantly, without wasting hours setting up their local development machines.
How to get started
To launch Rider remotely, you’ll need to have the JetBrains Gateway app installed. It is available as a standalone application or via the Toolbox App.
In any project’s Git repository, the Open in IDE button lets you start a dev environment. Pick your desired machine size, select Rider as your IDE, specify the path to your .sln file, and Create your dev environment!
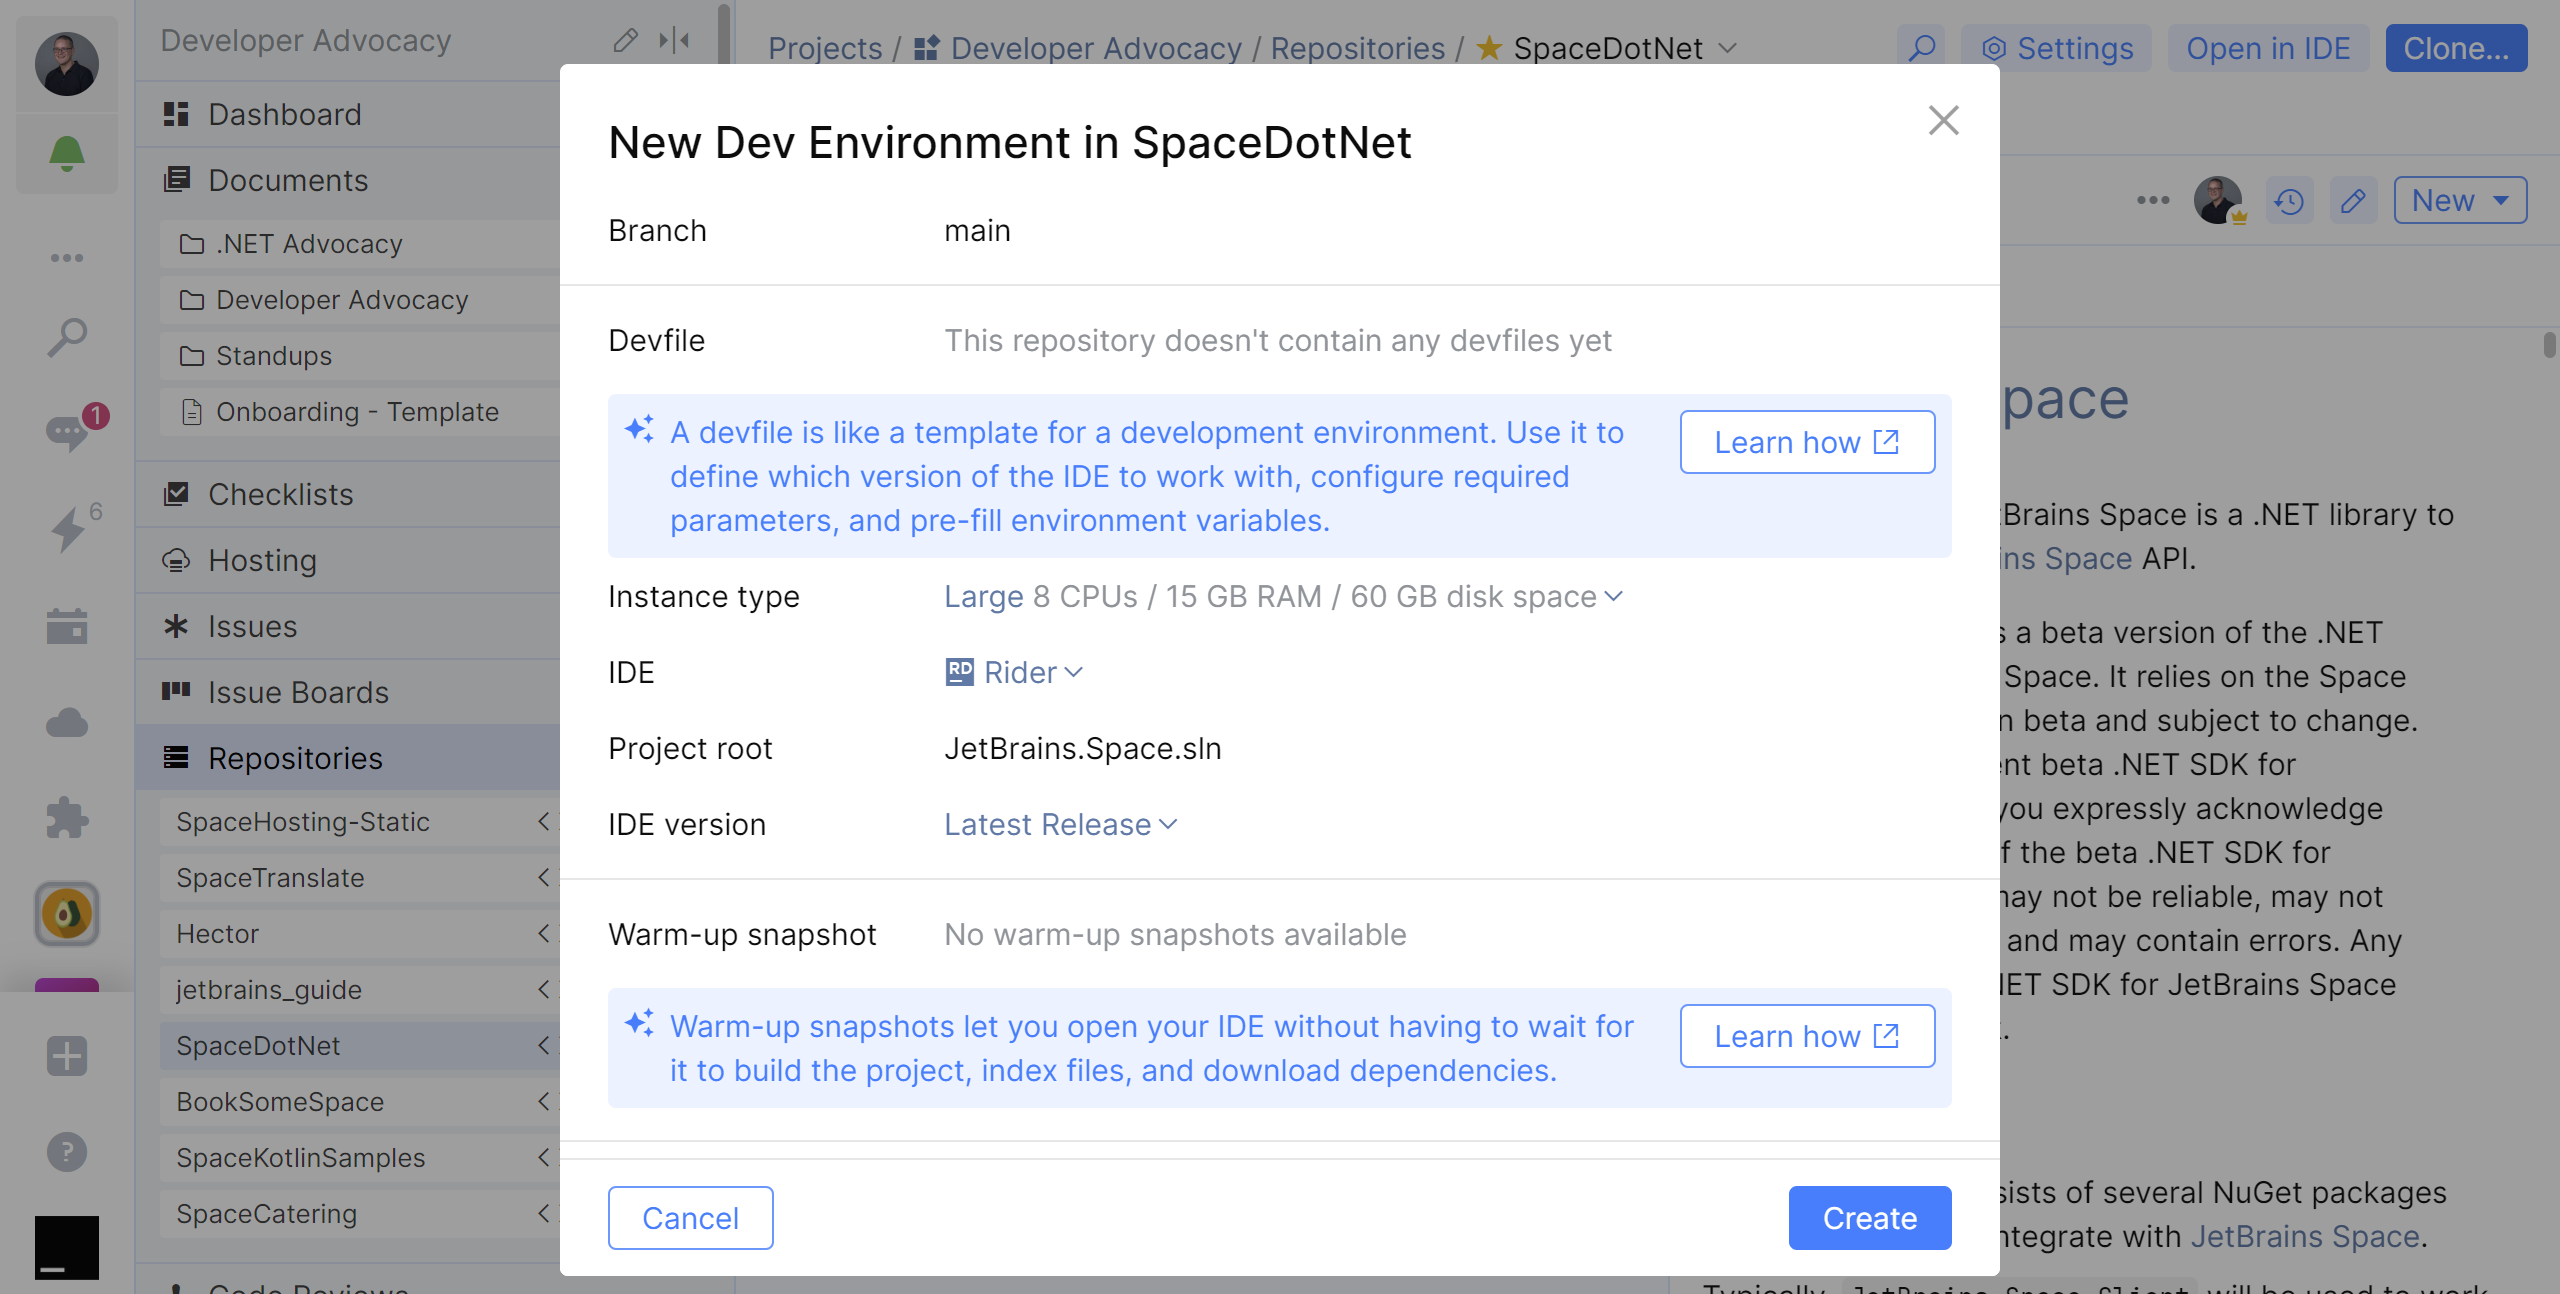
In the background, Space creates a new dev environment based on the default Docker image, which has many tools installed, including the .NET 6.0 SDK. At the same time, JetBrains Gateway connects to Space. When the dev environment is ready, you’ll have the chance to see the remote instance of Rider in action.
Tip: check out this blog post about how dev environments work under the hood.
Running and debugging applications
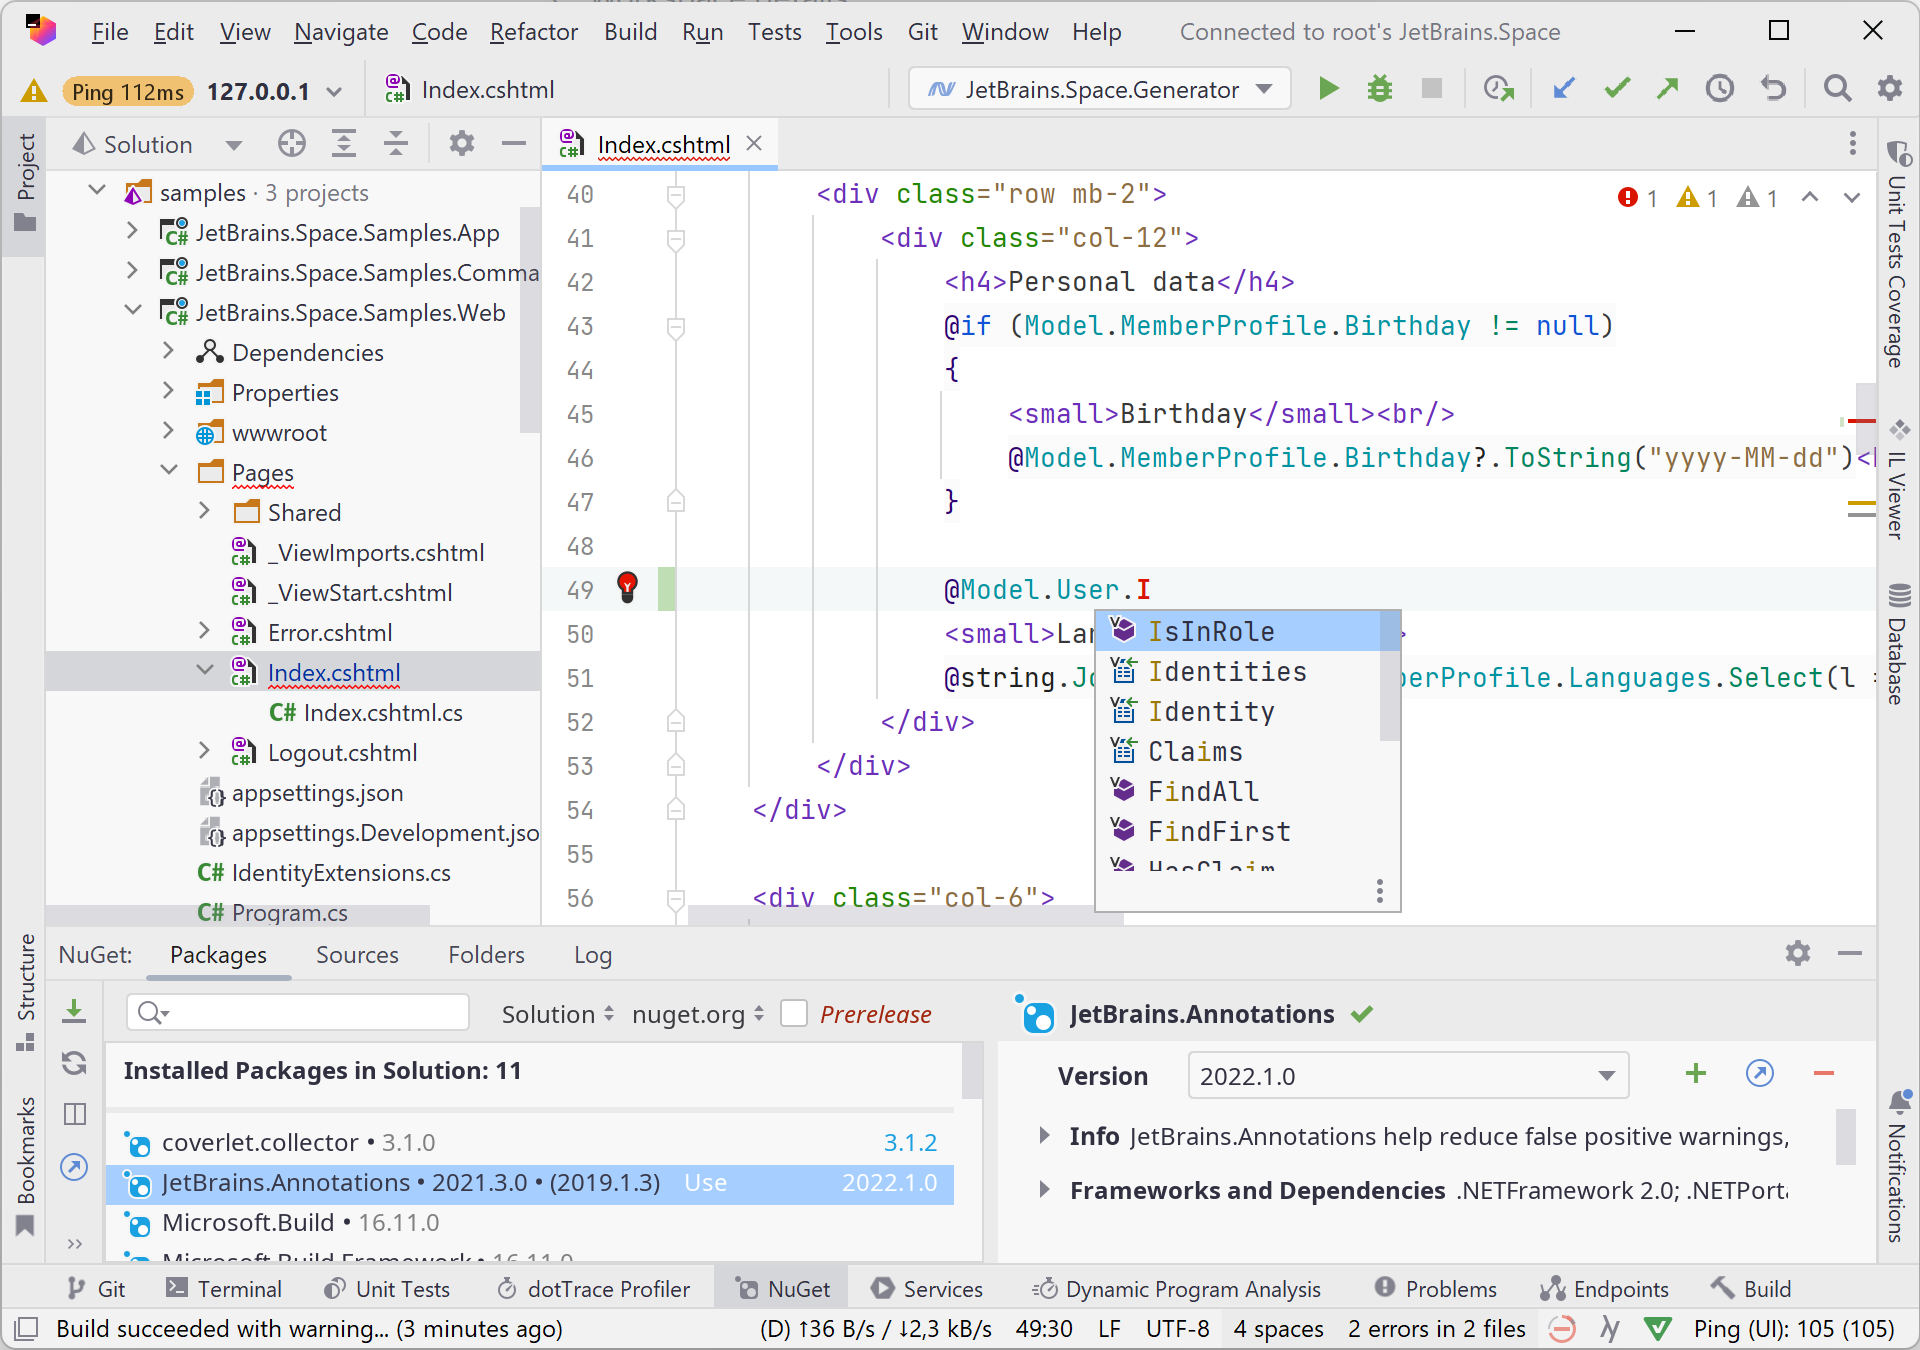
While you’re working in what looks and feels like a full version of Rider, remember that you’re using a thin-client that is connected to a remote IDE backend. All your code is remote. Working with the NuGet client is remote. Working with the terminal is remote. And it is all backed by Rider running in Space.
If you’re building a console application or are working on a web app, you can also run and debug your application remotely. Console output will be printed to the console tool window. You can add breakpoints and work with the debugger tool window just like you would with Rider on your own machine.
When you launch an ASP.NET application, Rider also sets up port forwarding so you can use your web app or API from your own machine. Here’s an example of me browsing an app in Chrome on my machine while the app is being debugged on the remote instance of Rider in Space:

If needed for your application, you can also use Docker in your dev environment and run tools like Microsoft SQL Server or other containers you may need for development.
What else is there?
One of the many advantages of using Space dev environments is that you can standardize the dev environment for your team, so everyone can start working on a project almost instantly instead of wasting hours setting up their local machines.
You can add a devfile to your repository to specify some defaults when creating a Space dev environment. For example, you can configure the default instance type, IDE, and solution to work with when someone on your team uses Open in IDE by adding this .space/devfile.yml file:
schemaVersion: 2.2.0
attributes:
  space:
    instanceType: large
    editor:
      type: Rider
      version: '2022.1'
    projectRoot: src/MySolution.sln
Note that you can create multiple devfiles for different solutions in a monorepository, for example to open the backend and frontend projects with different remote IDEs.
Like with other JetBrains IDEs, you can customize your dev environment using a Dockerfile. Instead of working with the default image that comes with Space, you can create a more specialized Dockerfile that contains the tools you need. Here’s a Dockerfile that installs the .NET Core 3.1 and .NET 6 SDKs.
FROM ubuntu:20.04

ENV LANG=C.UTF-8

RUN apt-get update && apt-get install -y apt-utils apt-transport-https

## Standard tools, Git, Docker
RUN set -ex -o pipefail && \
    apt-get install -y \
    # Utilities \
    curl unzip wget software-properties-common socat man-db gnupg2 pass lsof \
    # VCS \
    git \
    # Docker
    docker docker-compose

## .NET
RUN set -ex -o pipefail && \
    wget https://packages.microsoft.com/config/ubuntu/20.04/packages-microsoft-prod.deb -O packages-microsoft-prod.deb && \
    dpkg -i packages-microsoft-prod.deb && \
    rm packages-microsoft-prod.deb && \
    apt-get update && \
    apt-get install -y dotnet-sdk-3.1 dotnet-sdk-6.0

## Clean up packages list
RUN rm -rf /var/lib/apt/lists/*
If opening your solution takes a lot of time, or if you want to make sure that NuGet packages are already restored when you connect to your dev environment, you can run warm-up tasks and prepare a snapshot that runs dotnet restore.
Give JetBrains Space and dev environments with Rider a try! We’d love to hear what you think!