TeamCity
Powerful CI/CD for DevOps-centric teams
Test Automation using TeamCity, TestNG, and LambdaTest
This post has been created in collaboration with LambdaTest.
In this post, we will show how to set up TestNG tests in TeamCity and power them up with the LambdaTest signature Selenium Grid Cloud functionality. LambdaTest allows executing automated tests on over 2000+ browsers. This helps achieve quicker continuous integration and more stable delivery of products to consumers. With its interactive UI dashboard, you get detailed test reports, logs, and videos, which makes it easier to analyze and debug any product issues.
You can read more about the benefits of the TeamCity integration with LambdaTest in this post.
Prerequisites for the tutorial:
- Maven and project-related dependencies are installed on your build agent machine.
- You have a LambdaTest account. You will need a username and access key to integrate TeamCity with LambdaTest.
Configuring Selenium Grid test case
In the scope of the tutorial, we assume that you store the tests’ source code in a Git repository. The repository structure is a standard Maven project with tests and resources stored in the src/test folder and *.properties and pom.xml in the root folder.
You can find an example repository here.
Step 1. Inside the root folder, create the pom.xml file to describe the test run configuration and resolve dependencies.
This XML file will define all the required dependencies and plugins to run the test cases: TestNG dependencies, Selenium-Java to define web interactions, the Surefire plugin for reporting, and different profiles to define test run formats (such as single or parallel).
See the pom.xml example.
Step 2. Inside the root folder, create the Config.properties file to provide test run details and LambdaTest account credentials.
#Define the browser-related information to execute cases on LambdaTest Grid
browser=Internet Explorer
version=11.0
os=Windows 8.1
resolution=1024x768

#Lambdatest Credentials
LambdaTest_UserName=<YOUR_LT_USERNAME>
LambdaTest_AppKey=<YOUR_LT_ACCESS_KEY>
Step 3. Add the resources folder under src/test to store *.xml files for a single and parallel test configurations.
Example for a single test configuration: This XML file defines the class to be executed in case a single test is triggered.
<!DOCTYPE suite SYSTEM "http://testng.org/testng-1.0.dtd">
<suite thread-count="1" verbose="1" name="Lambdatest Suite" annotations="JDK" parallel="tests">
    <test name="Lambdatest Suite- Single">
        <classes>
            <class name="com.lambdatest.Tests.SingleTest" />
        </classes>
    </test>
</suite>
Example for a parallel test configuration: This XML file defines the class to be executed in case a parallel test is triggered.
<!DOCTYPE suite SYSTEM "http://testng.org/testng-1.0.dtd">
<suite thread-count="1" verbose="1" name="Lambdatest Suite" annotations="JDK" parallel="tests">
    <test name="Lambdatest Suite-Parallel">
        <classes>
            <class name="com.lambdatest.Tests.ParallelTest" />
        </classes>
    </test>
</suite>
Step 4. Add the tests folder to store the test case *.java files and a configuration file to fetch properties.
This configuration class file is to read and load the data related to the config properties from the Config.properties file so it can be accessed throughout the run. This data provides the LambdaTest account credentials to all instances during the execution.
Example test case for the configuration file:
package com.lambdatest.Tests;

import java.io.File;
import java.io.FileInputStream;
import java.io.FileNotFoundException;
import java.util.Properties;

public class Configuration {

    static String path = getFilePath();

    public static String readConfig(String key) throws Exception {
        String value = "";
        try {
            Properties prop = new Properties();
            File f = new File(path + "/Config.properties");  //To read the properties file
            System.out.println(path);
            if (f.exists()) {
                prop.load(new FileInputStream(f));
                value = prop.getProperty(key);       // to set all the property values to config
            } else {
                throw new Exception("File not found");
            }
        } catch (FileNotFoundException ex) {
            System.out.println("Failed to read from application.properties file.");
            throw ex;
        }
        if (value == null)
            throw new Exception("Key not found in properties file");
        return value;
    }

    public static String getFilePath() {
        String filepath = "";
        File file = new File("");
        String absolutePathOfFirstFile = file.getAbsolutePath();
        filepath = absolutePathOfFirstFile.replaceAll("\\\\+", "/");
        return filepath;
    }
}
See the test case for a single test execution. This Java test class file loads all the required details for the test execution on LambdaTest Grid and provides relevant information to execute the test case in a single mode.
See the test case for a parallel test execution. This Java test class file loads all the required details for the test execution on LambdaTest Grid and provides relevant information to execute the test case in a parallel mode.
Configuring project in TeamCity
- Create a new project in TeamCity. Its VCS root should point to the Git repository where the code of the Selenium test cases is stored.
- Create a new build configuration inside this project. Attach it to the project’s VCS root.
- Add the Maven build step. The Maven build runner supports the TestNG framework and provides real-time reports. In addition to those, the LambdaTest dashboard will provide informative logs and video recordings. To configure this step in your build configuration, refer to our documentation.To execute the test over LambdaTest Grid:
- For a single test execution, set the
testgoal and add-P singleas an additional command-line parameter. - For a parallel test execution, set the
testgoal and addmvn test -P parallelas an additional command-line parameter.
- For a single test execution, set the
- Set up additional build steps if necessary.
- On the Build Configuration Settings | Parameters tab, add environment variables with values for your LambdaTest username (
LT_USERNAME) and access token (LT_ACCESS_KEY). You can find them on your LambdaTest profile page. Values of these credentials will replace those specified in the LambdaTest Selenium Cloud Grid configuration files.
As the integration setup is completed, click Run to start a build. The build log will show that your build is being executed by LambdaTest.
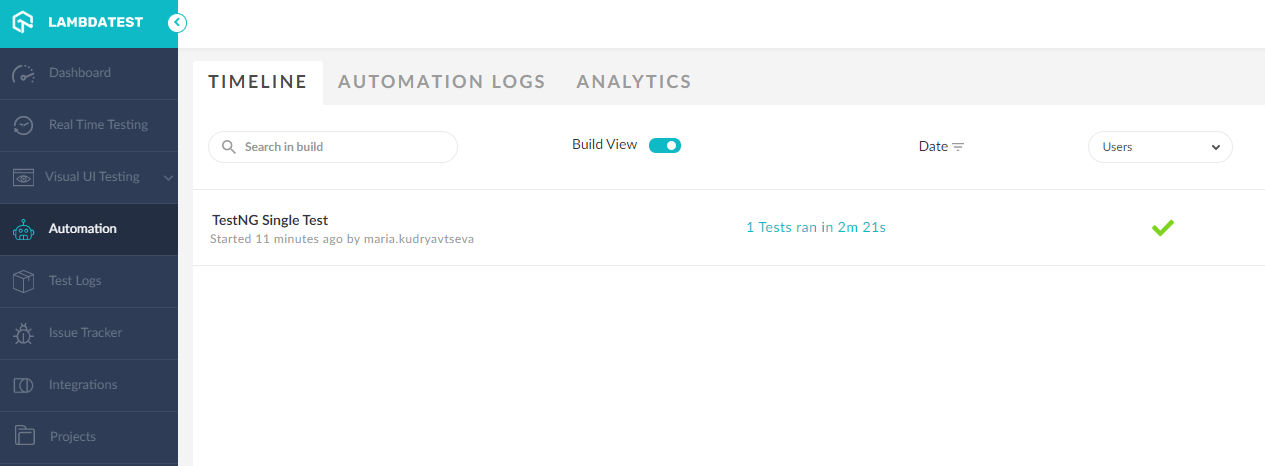
On the Automation tab of your LambdaTest dashboard, you can see that the test is completed and explore it in details.
Analyzing Build Results with LambdaTest Dashboard
After having completed the TeamCity setup and integration with LambdaTest and executed the build, you can analyze all the build-related information like timelines, scripts, videos, and logs. You can even report the bugs directly from LambdaTest to any supported project management tool.
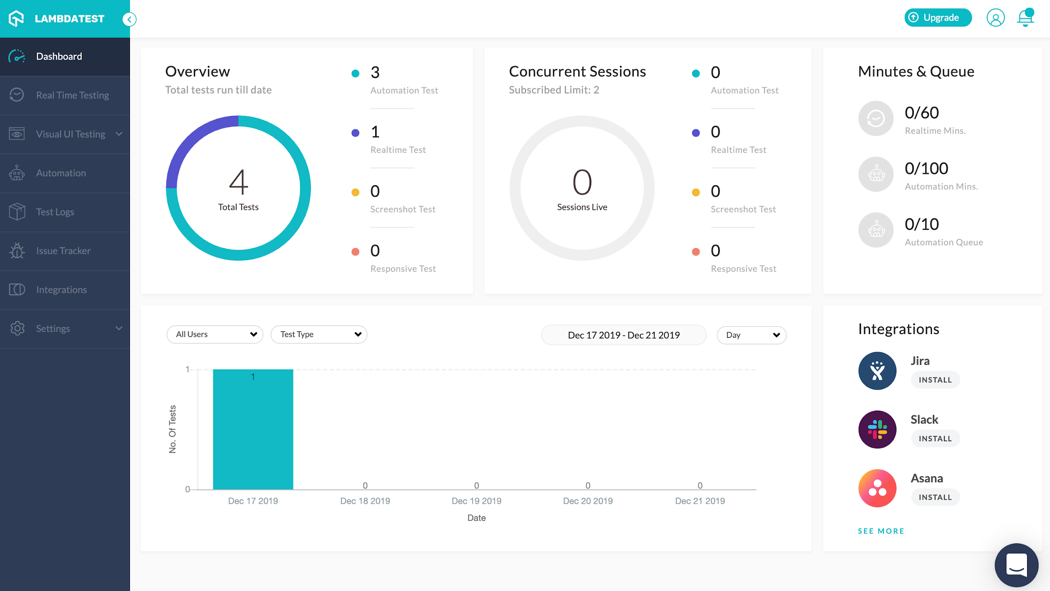
As you login to LambdaTest, you get redirected to the dashboard which gives the real-time overview of test runs executed so far (numbers, dates, graphs, and so on).
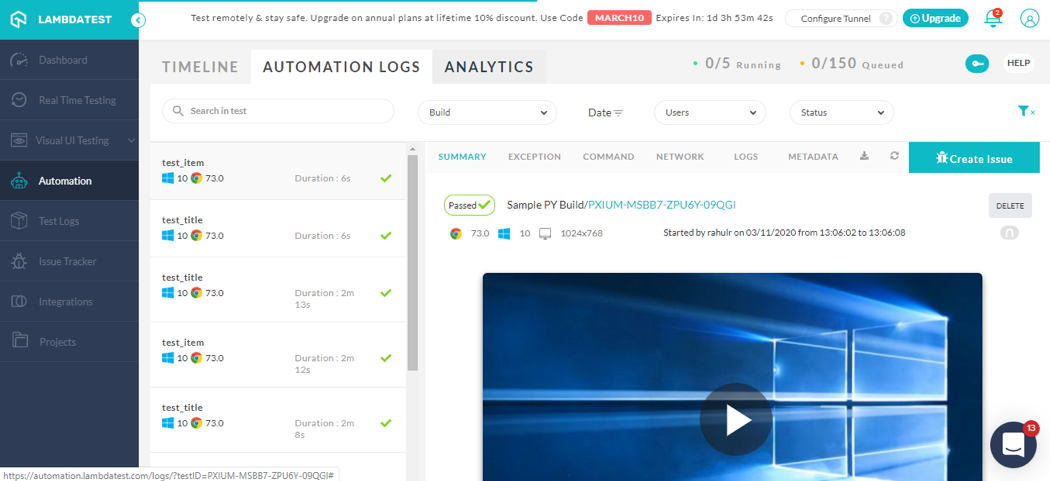
All the details about the Selenium test execution can be found in the Automation tab. It provides a variety of test logs including network, exception, and command logs. You will also have access to a video recording of your entire Selenium test execution, along with command-by-command screenshots.
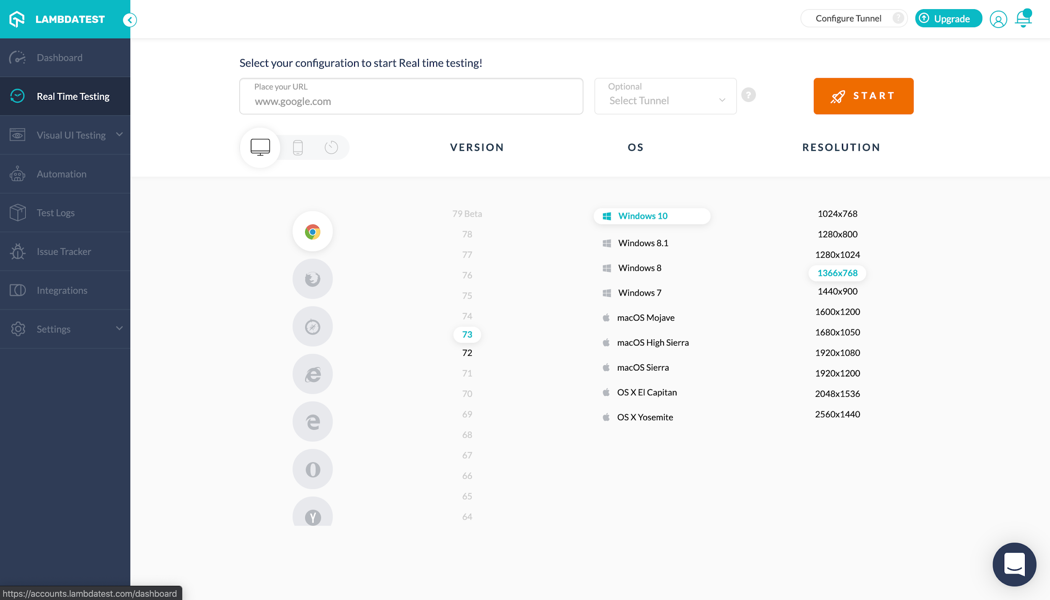
Other than Selenium test automation, LambdaTest helps with live-interactive testing, screenshot testing, responsive testing, and visual regression testing.
The Real Time Testing panel provides you the freedom to execute the test cases over 2000+ browsers with different combinations of browser/version/OS/resolution to serve all user needs.
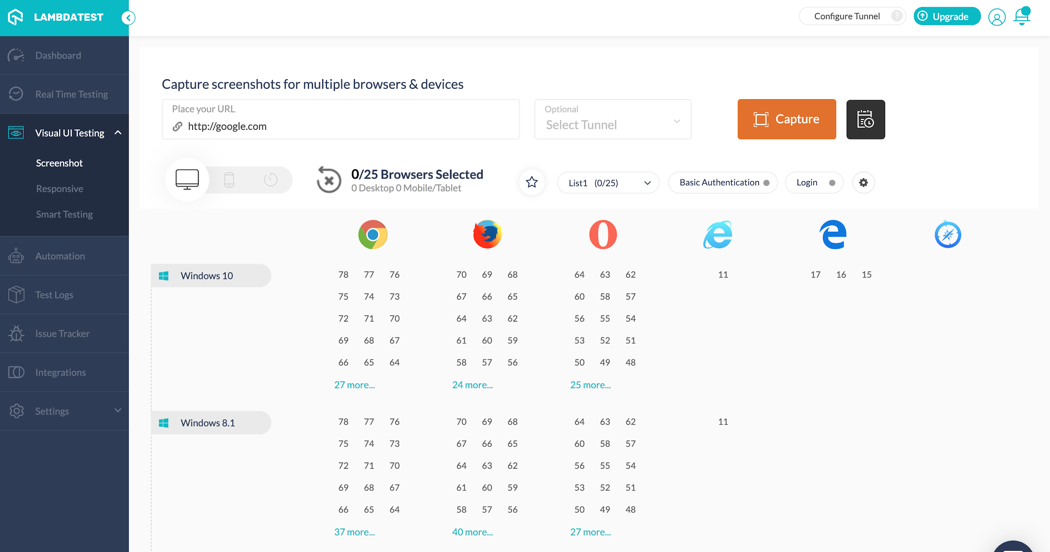
Under Visual UI Testing, you can easily run and compare screenshots on a wide combination of OS’s and browsers to explore the differences.
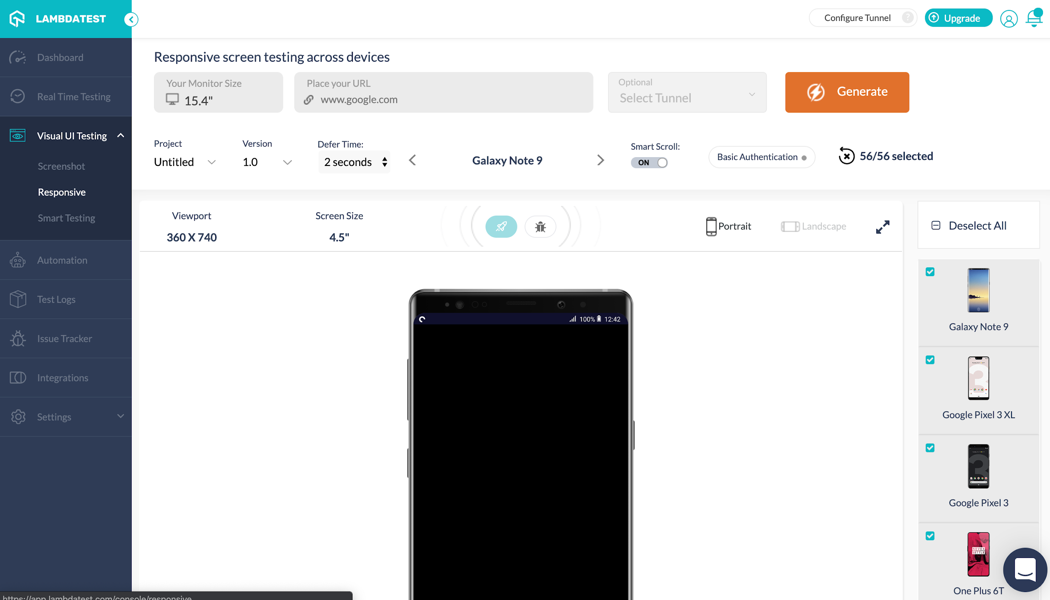
You can test across different screen sizes and resolutions to check for responsiveness of the nature of the changes.
Another advantage of choosing LambdaTest Cloud Grid is the range and variety of logs it provides. It captures logs in form of videos, screenshots, networks logs, and filters them for better analysis and thus facilitates troubleshooting.
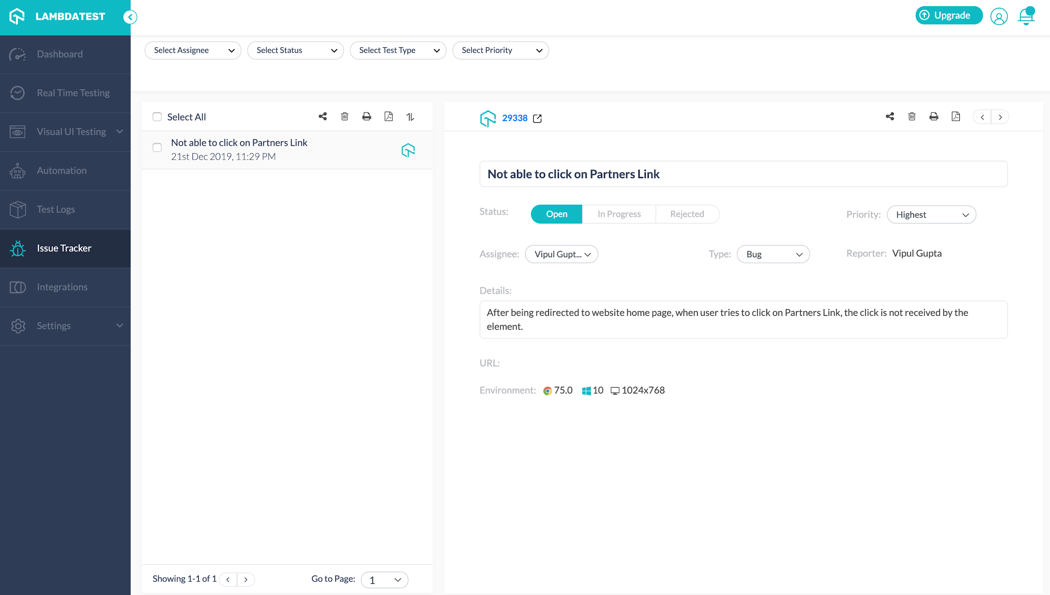
You can also track issues or bugs at the time of their occurrence during the run and add them in the Issue Tracker to share with the team.
Summing Up
With this tutorial, we explained why and how to integrate TeamCity with LambdaTest to make the development lifecycle easier and provide a faster shipping of products to the market. We’ve learnt how to perform the Selenium testing, configure the integration on the TeamCity server, and execute builds on LambdaTest Selenium Cloud Grid.
Now, you can get started with integrating your own TeamCity projects and achieving your own goals with the powerful LambdaTest toolkit.
Happy building!