
TeamCity integration with .NET, Part 2: Testing and building projects
In this blog series, we talk about the new approach we use to integrate TeamCity with .NET.
Part 1 describes the .NET runner, that covers most of the core integration functionality, and introduces a demo project. In Part 2, we will dig deeper into the demo project and explore its Test and Build configurations.
Source repo: https://github.com/JetBrains/teamcity-dotnet-samples
This project has already been built on the demo TeamCity server. You can sign in as a guest and explore the build results.
To run all build configurations, we use the following agents:
- (A) Windows 10 x64 Pro 10.0.19041
- Visual Studio 2019 Pro 16.7.5
- Docker (Windows container) 19.03.13
- .NET SDK 5.0
- (B) Ubuntu 16.04
- Docker 18.06.3
Cross-platform testing
As described in Part 1, the demo project contains two build configurations that provide cross-platform testing of our app.
These build configs, "Test on Windows" and "Test on Linux", test the app’s basic logic and collect code coverage statistics on Windows (agent A) and in a Linux Docker container .NET SDK (agent B), using a single .NET step. For example, in a Linux configuration, this step looks like this:
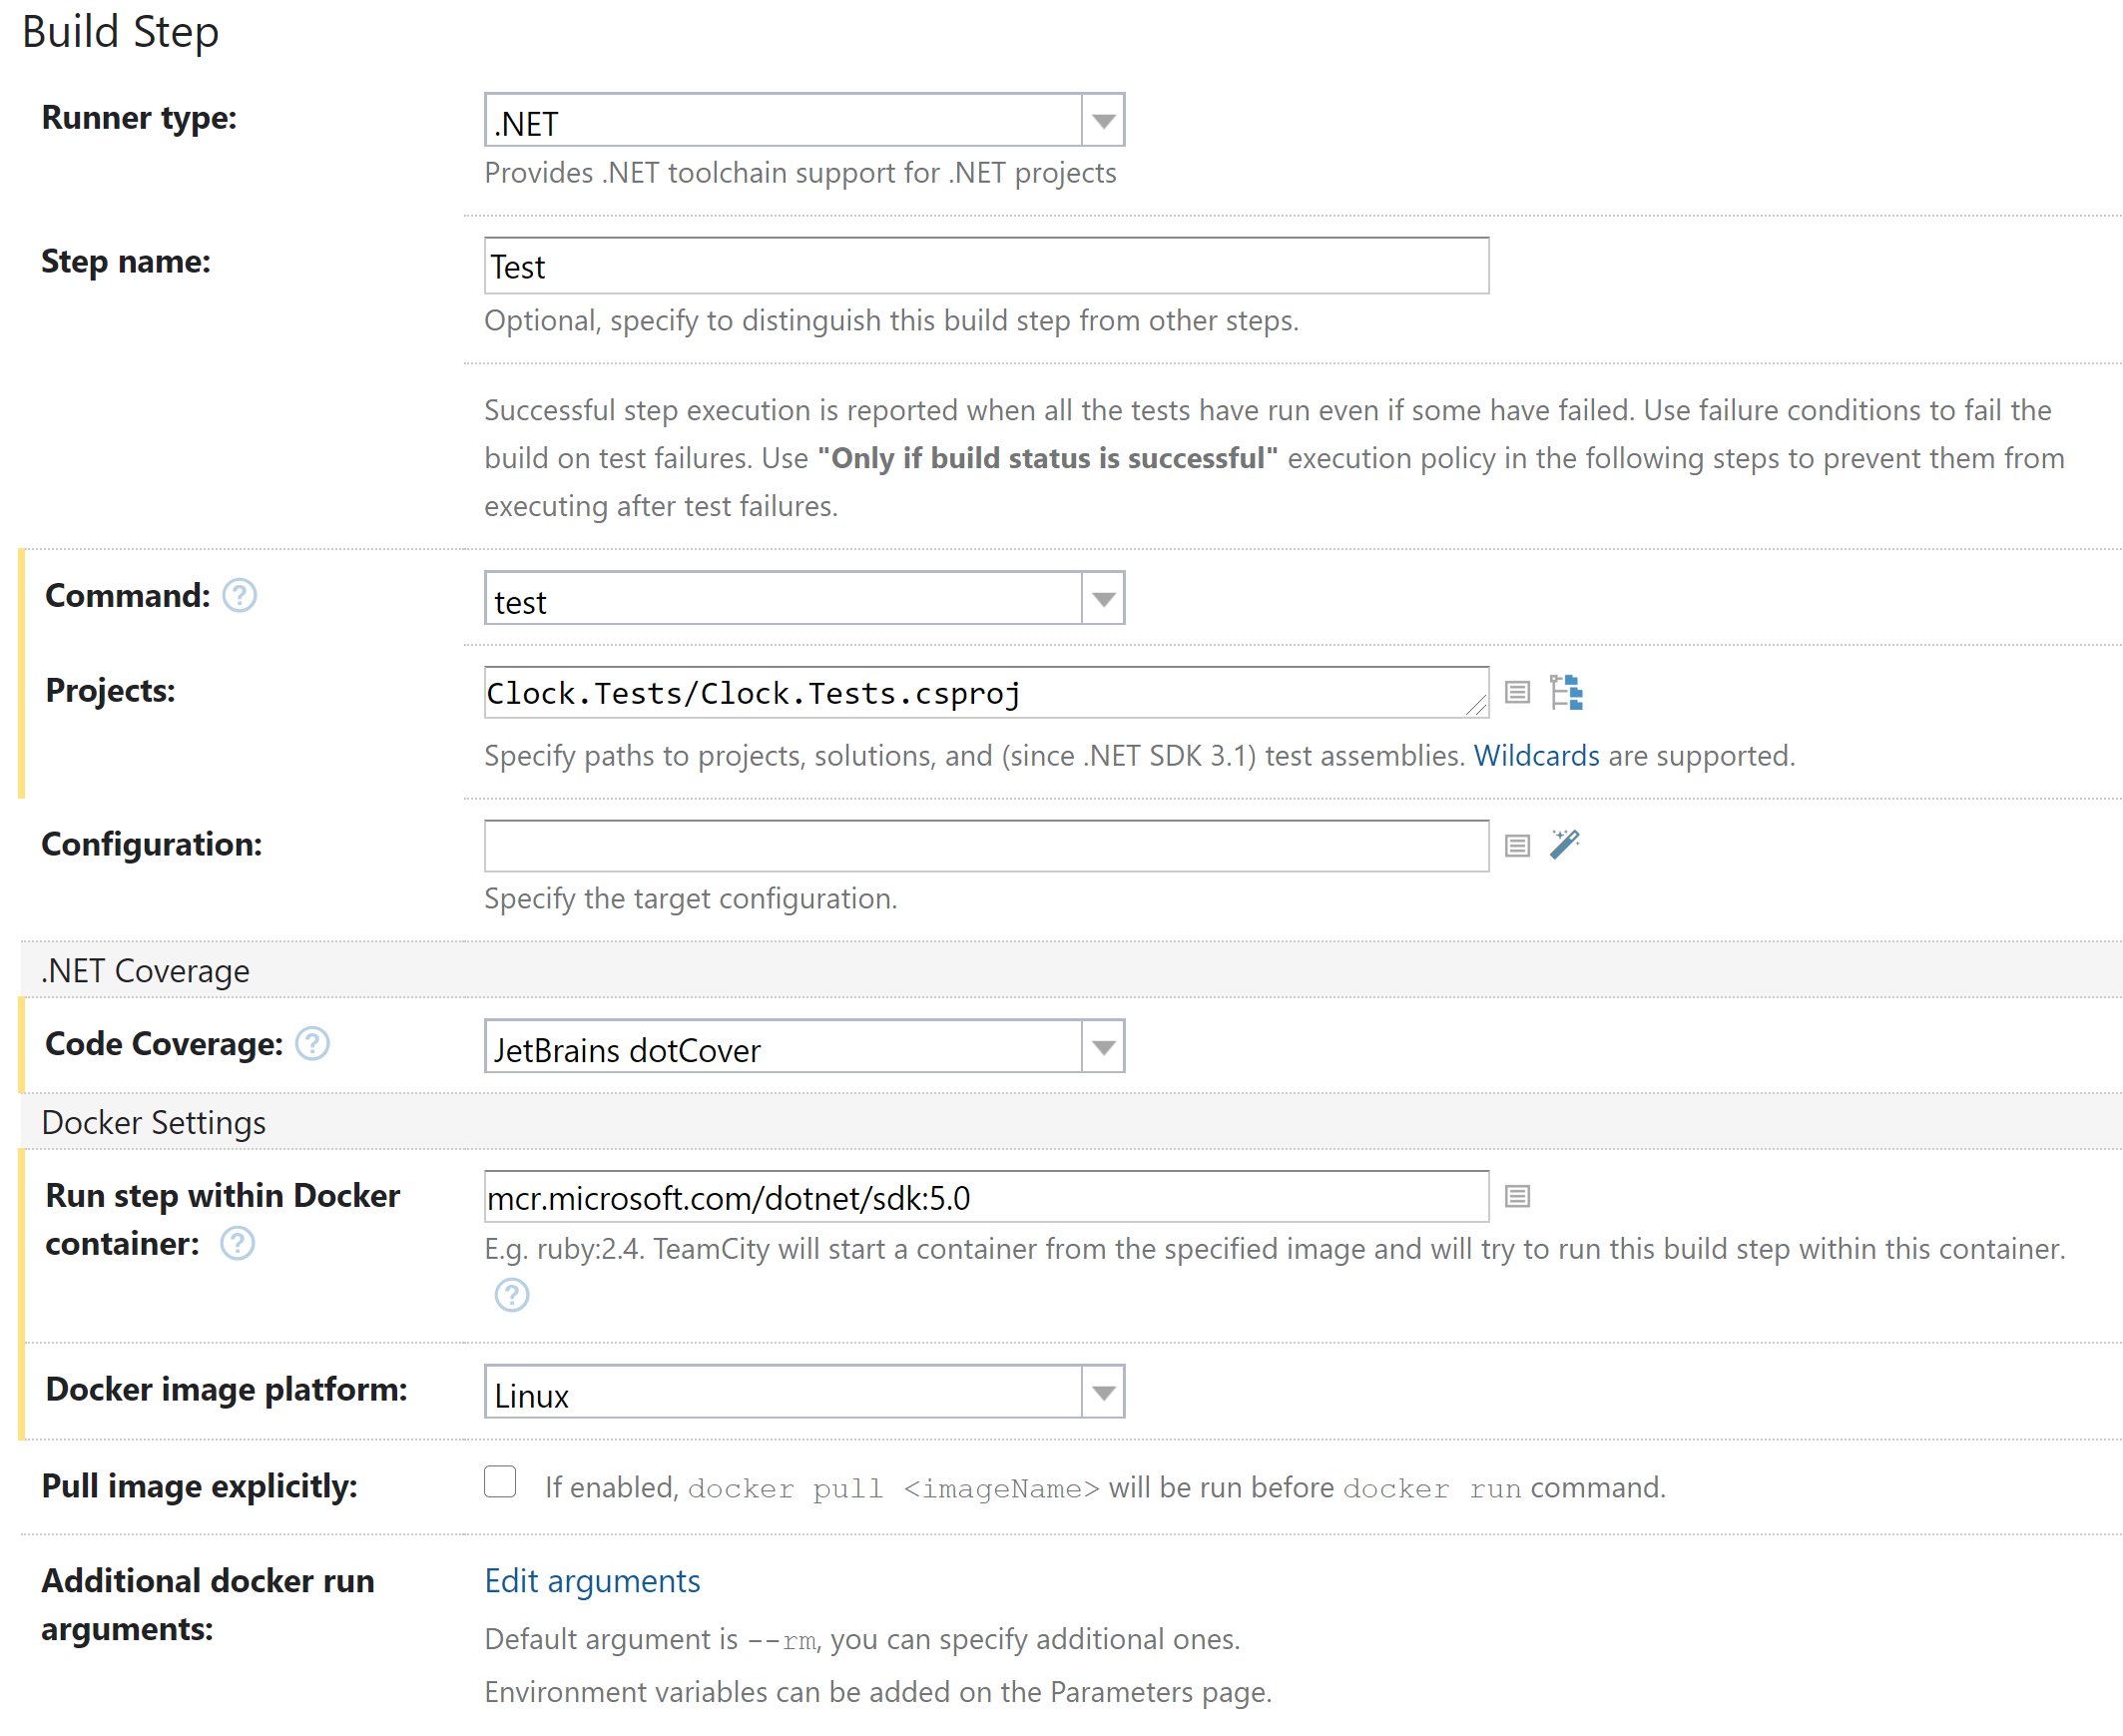
For Linux, the app’s libraries are tested inside the .NET SDK 5.0 container. In the Windows configuration, the step looks similar but doesn’t use Docker.
Our source subproject Clock.Tests is a .NET 5.0 application, so we can simply use the test command to run the tests. To collect and analyze code coverage statistics, we’ve selected JetBrains dotCover. It is automatically installed from the JetBrains.dotCover.DotNetCliTool package as an agent tool.
In the DSL, you can find both Linux and Windows test configurations under a common parent, TestBase.
Building console and web apps
As is clear from their names, the "Build console and web for win-x64" and "Build console and web for linux-x64" configurations are responsible for building two versions of the app from two source subprojects: Clock.Console and Clock.Web. Each configuration comprises two steps, one for each version of the app.
Clock.Console and Clock.Web are .NET 5.0 applications as well, so we can build and publish them using a single .NET Core CLI command – publish. Here is the example first step on Linux:

It builds and publishes the console Clock app into a single executable under the bin/Clock.Console/linux-x64 directory.
On Windows, this step has different values for the Runtime (win-x64) and Output directory fields (bin/Clock.Console/win-x64).
The second step builds and publishes the web version of the app. It uses a different project path and output directory.
After completing the two steps of each configuration, TeamCity publishes two resulting apps as build artifacts under the specified output directory.
In the DSL, these configs are inherited from the BuildConsoleAndWebBase class, which is inherited from BuildBase – the base class for all building configurations. We could have merged the two steps into one by declaring both subprojects in projects, but that would make it difficult to set apart binary files for the two apps. Now it is easily done with the help of the outputDir property.
Building Windows app
Our project can also build a desktop version of the app for Windows. The "Build Windows desktop" configuration has only one step:
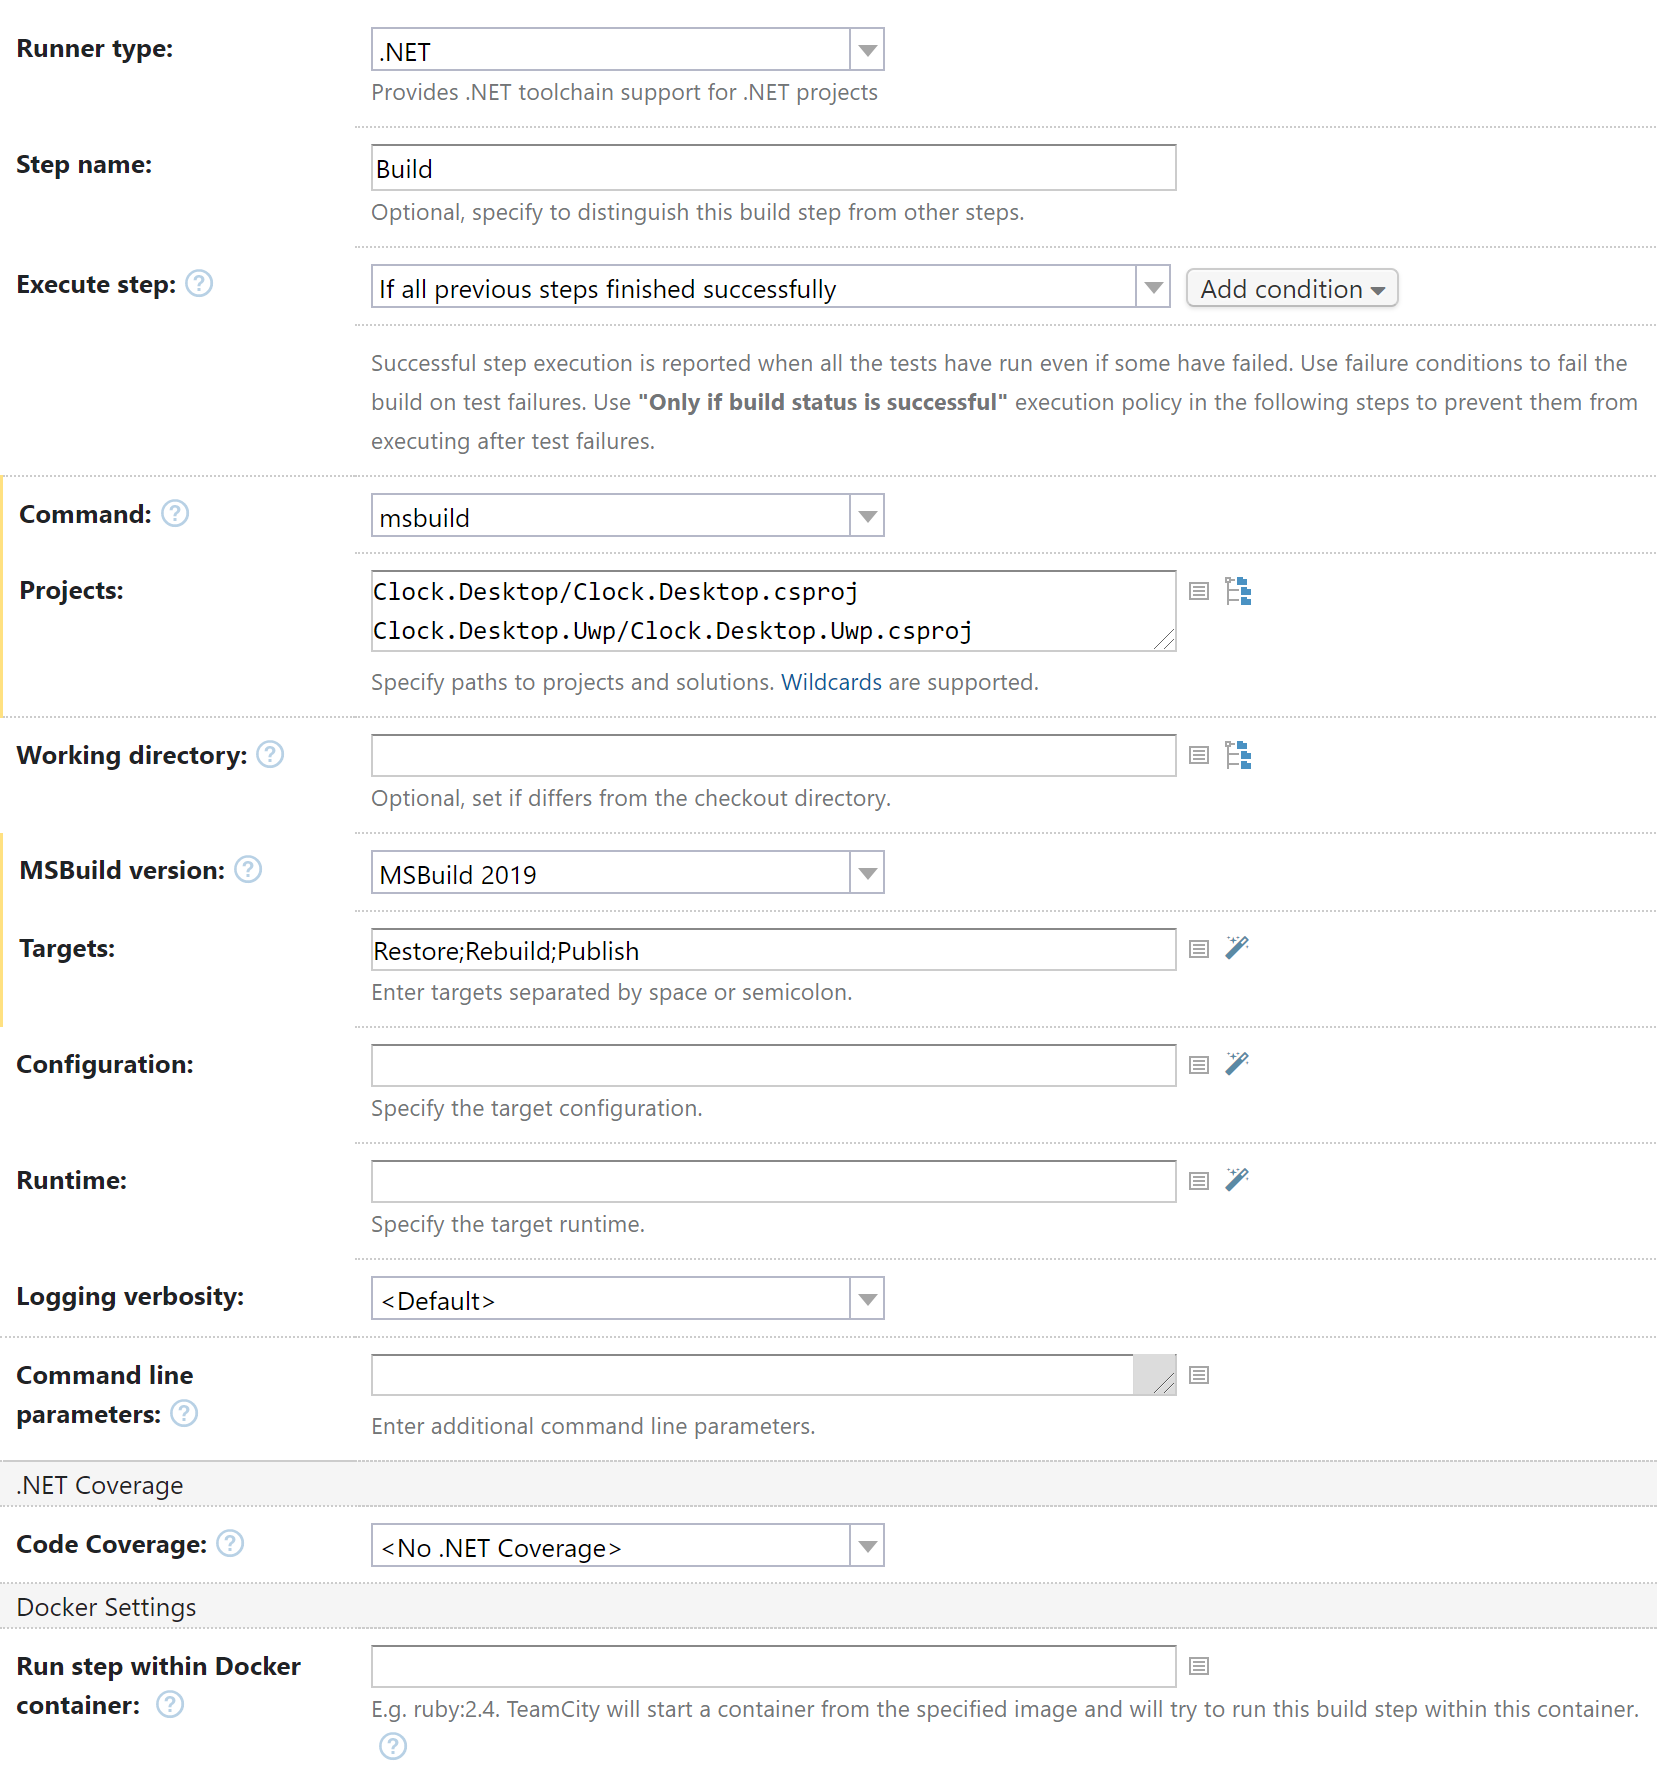
It runs MSBuild from Visual Studio 2019, which is installed on agent A, and consequently executes the required targets for two subprojects:
Clock.Desktop/Clock.Desktop.csprojClock.Desktop.Uwp/Clock.Desktop.csproj
The results are published into two different directories that are specified in the system parameters: PublishDir (for Clock.Desktop) and AppxPackageDir (for Clock.Desktop.Uwp). These directories then appear in the build results as the build artifacts.
Building Android app
The "Build Android App" configuration builds the Clock app for the Android platform. Like the Windows configuration, it uses MSBuild from Visual Studio 2019 installed on agent A:
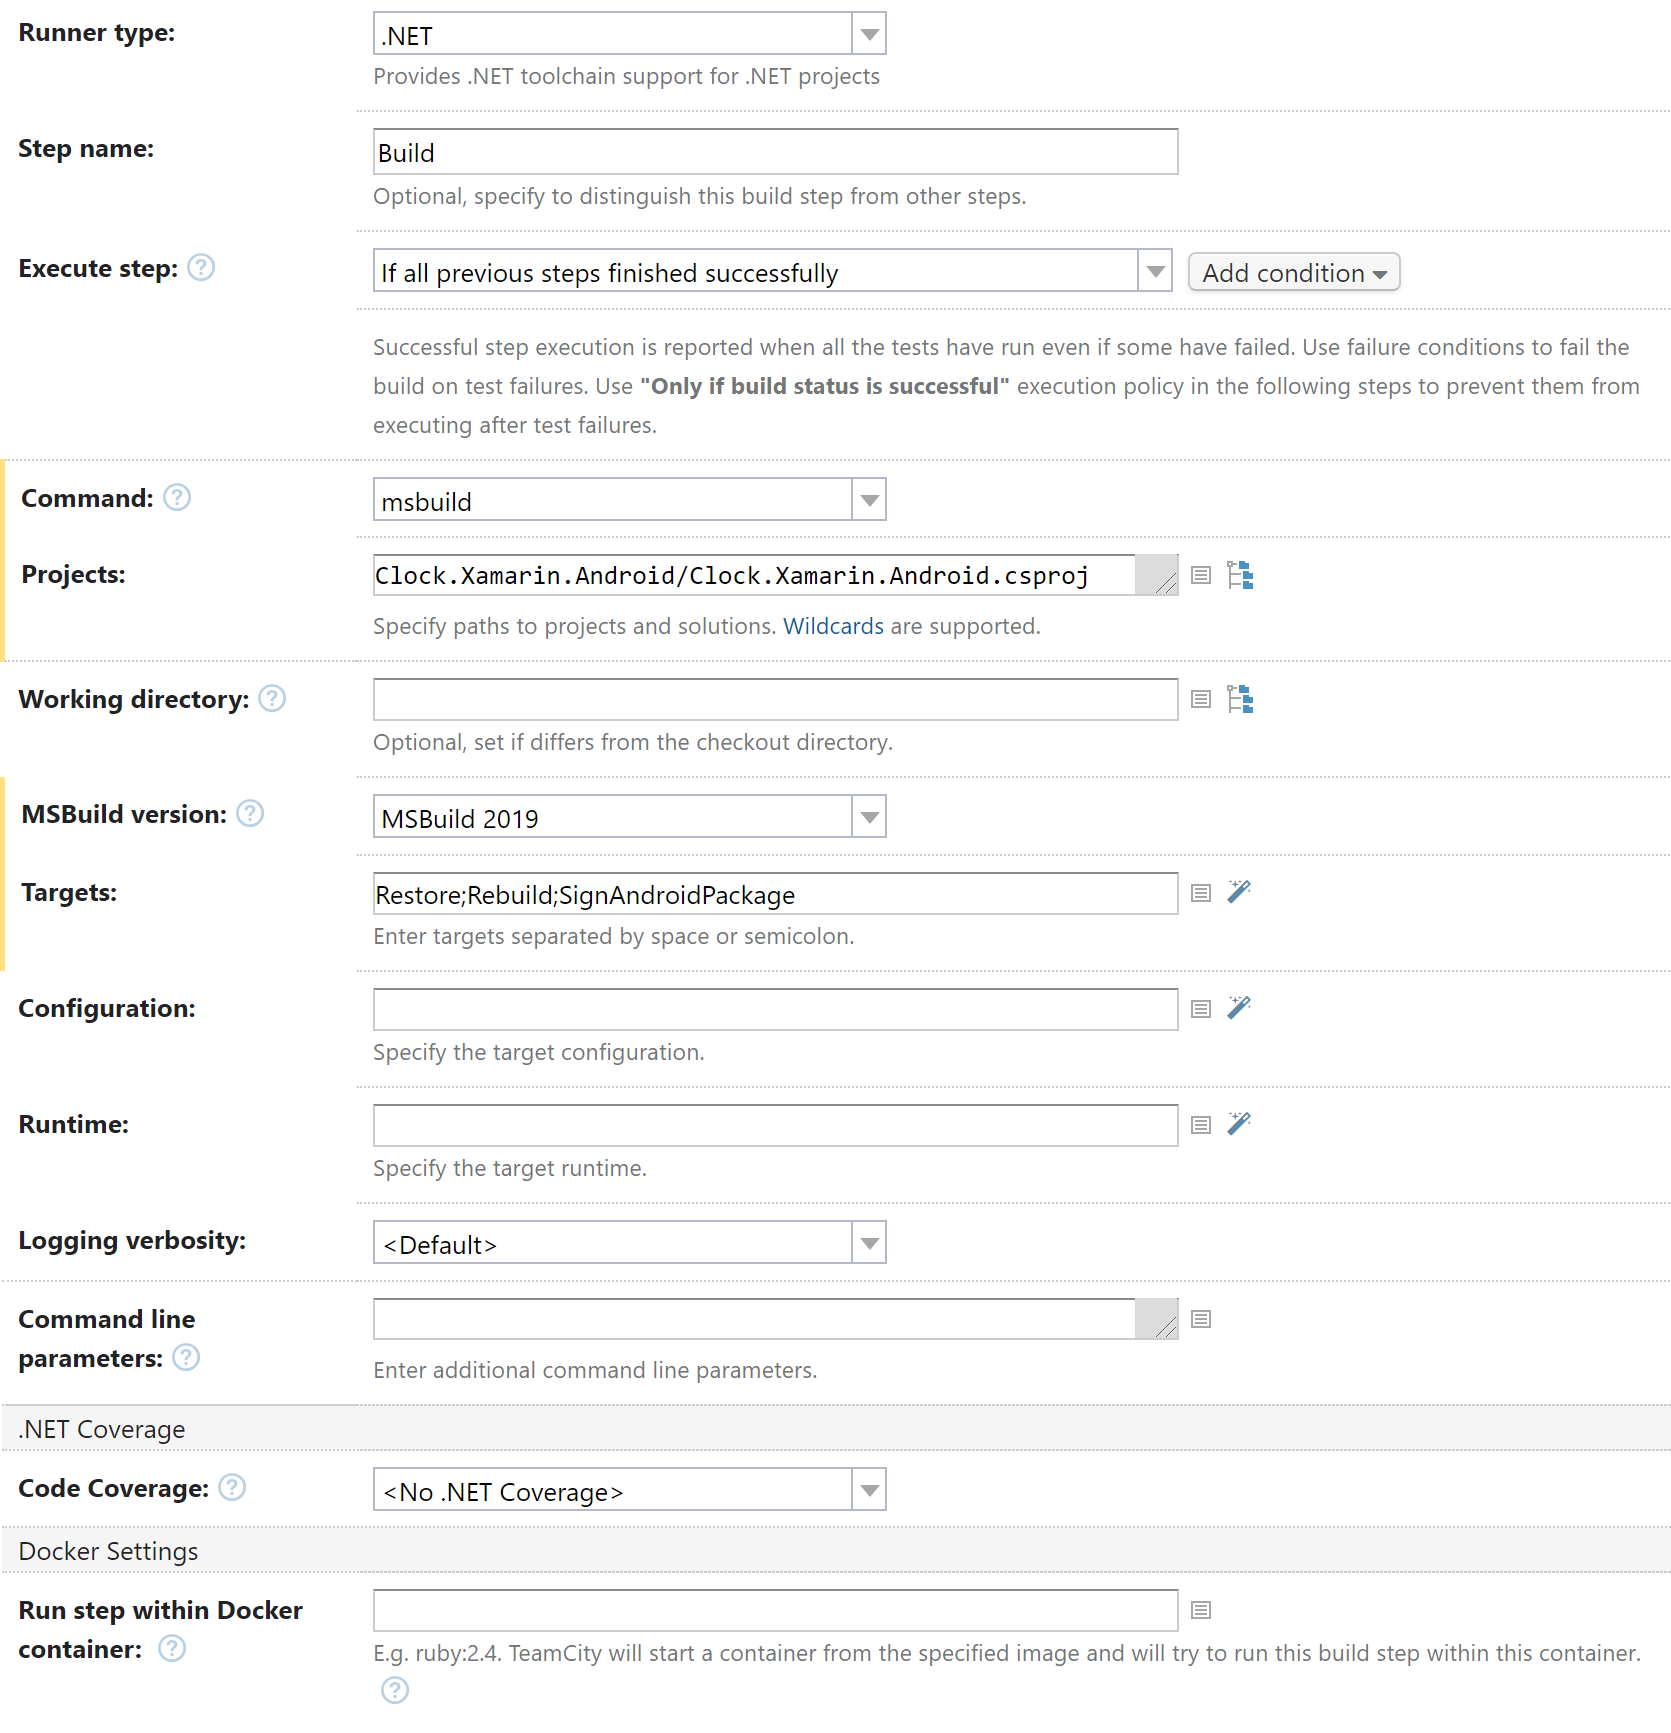
This config has only one step, and it is similar to the one on Windows. However, we use SignAndroidPackage instead of the Publish target because we need to publish a signed Android package.
That concludes the second part of our series. As you can see, building projects with our .NET runner is now more transparent than ever.
In the final part of this series, we will show how we pack, aggregate, and deploy our multi-platform app.
Your feedback is very important to us. If you’ve tried the new runner, please let us know about your experience and expectations.
Helpful links:
- .NET runner documentation
- TeamCity integration with .NET – Part 1: New approach and demo
- About .NET 5.0
Happy building!
Subscribe to TeamCity Blog updates


