.NET Tools
Essential productivity kit for .NET and game developers
Publishing ASP.NET Core web applications to IIS, FTP, and more with Rider 2018.2
The latest Rider 2018.2 EAP (Early Access Preview) build comes with a long-awaited feature: publish support for ASP.NET Core web applications. Two new run configuration types were introduced that can deploy our app using MSDeploy (local and remote IIS), Kudu, FTP and FTPS/SFTP.
Publish support through run configurations
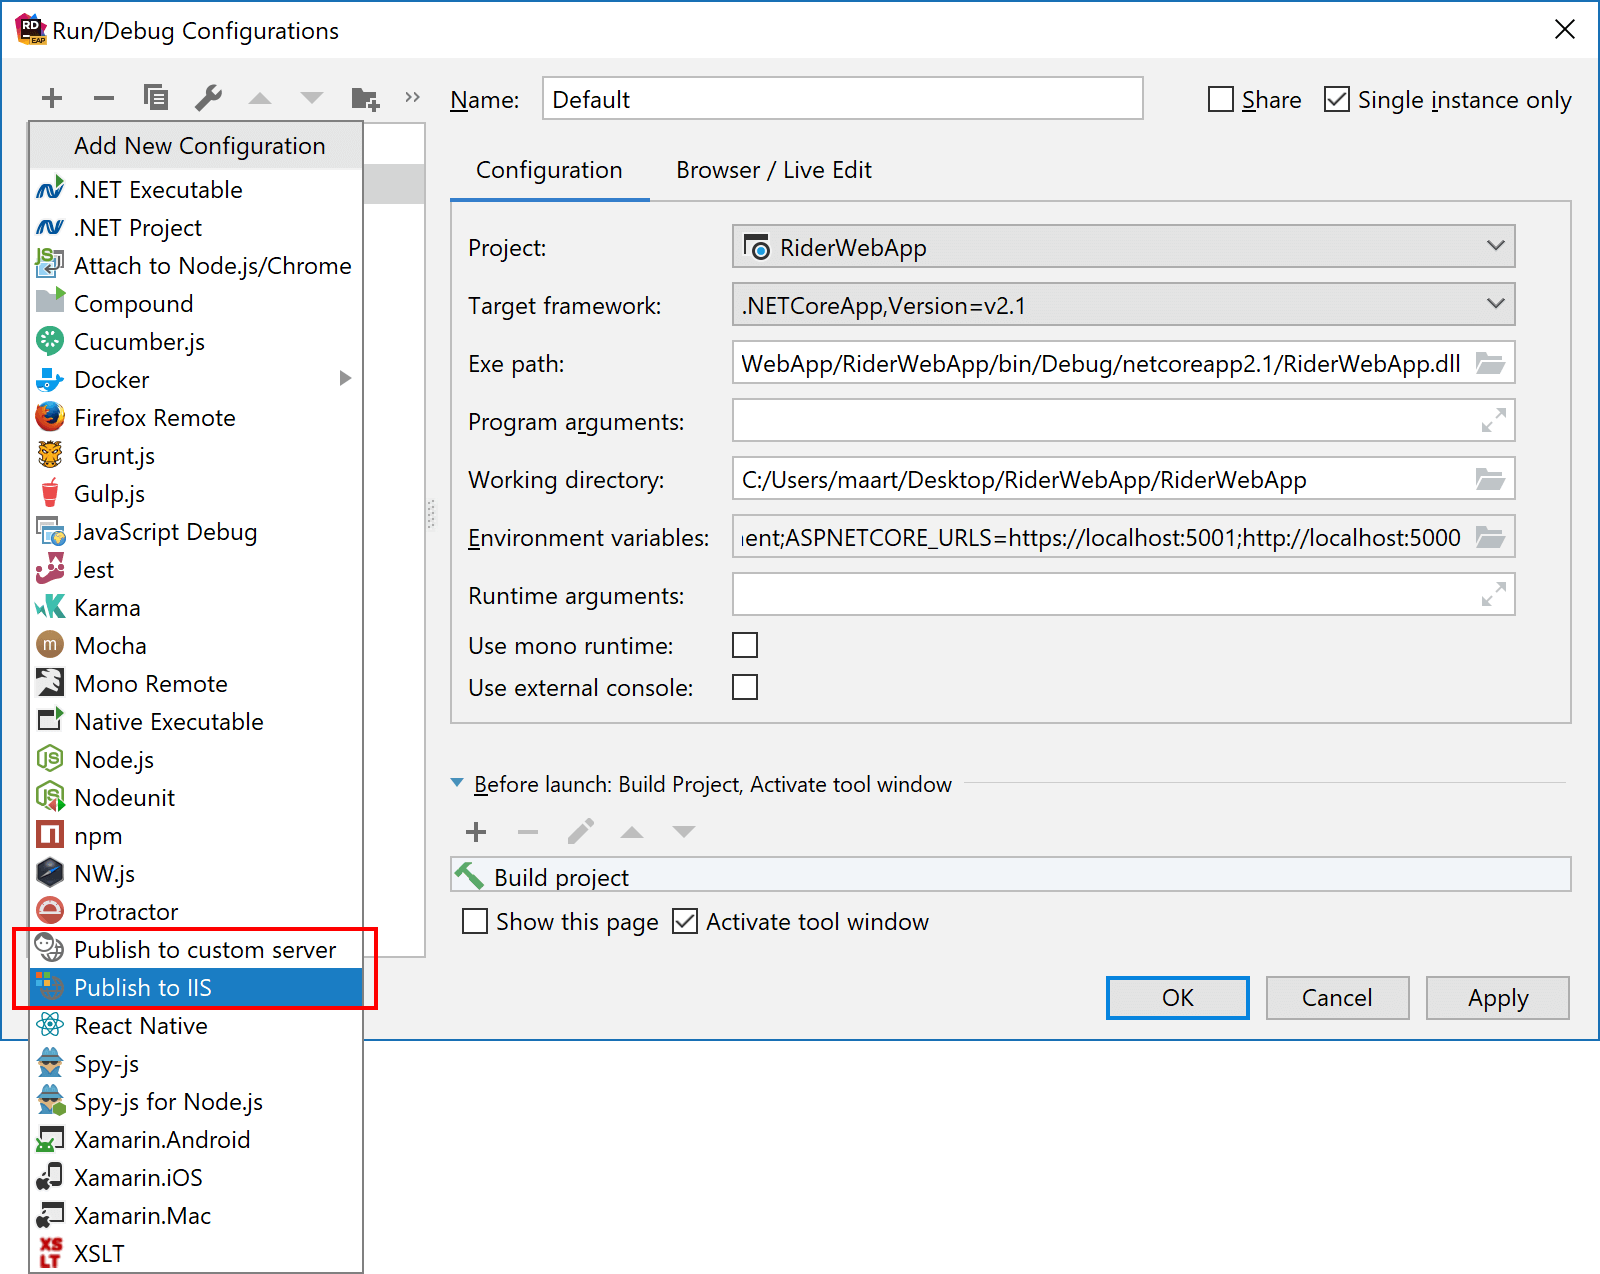
Rider introduces two new run configurations: Publish to IIS and Publish to custom server. Both serve the purpose of deploying our ASP.NET Core web application to a local or remote server, however, they use different means to do this:
- Publish to IIS uses MSBuild and MSDeploy to package and publish our application.
- Publish to custom server uses MSBuild and Rider’s built-in tooling to upload our application artifacts using FTP and FTPS/SFTP.
From the Run | Edit configurations… menu (or by editing configurations from the toolbar), we can add any of these two run configurations:
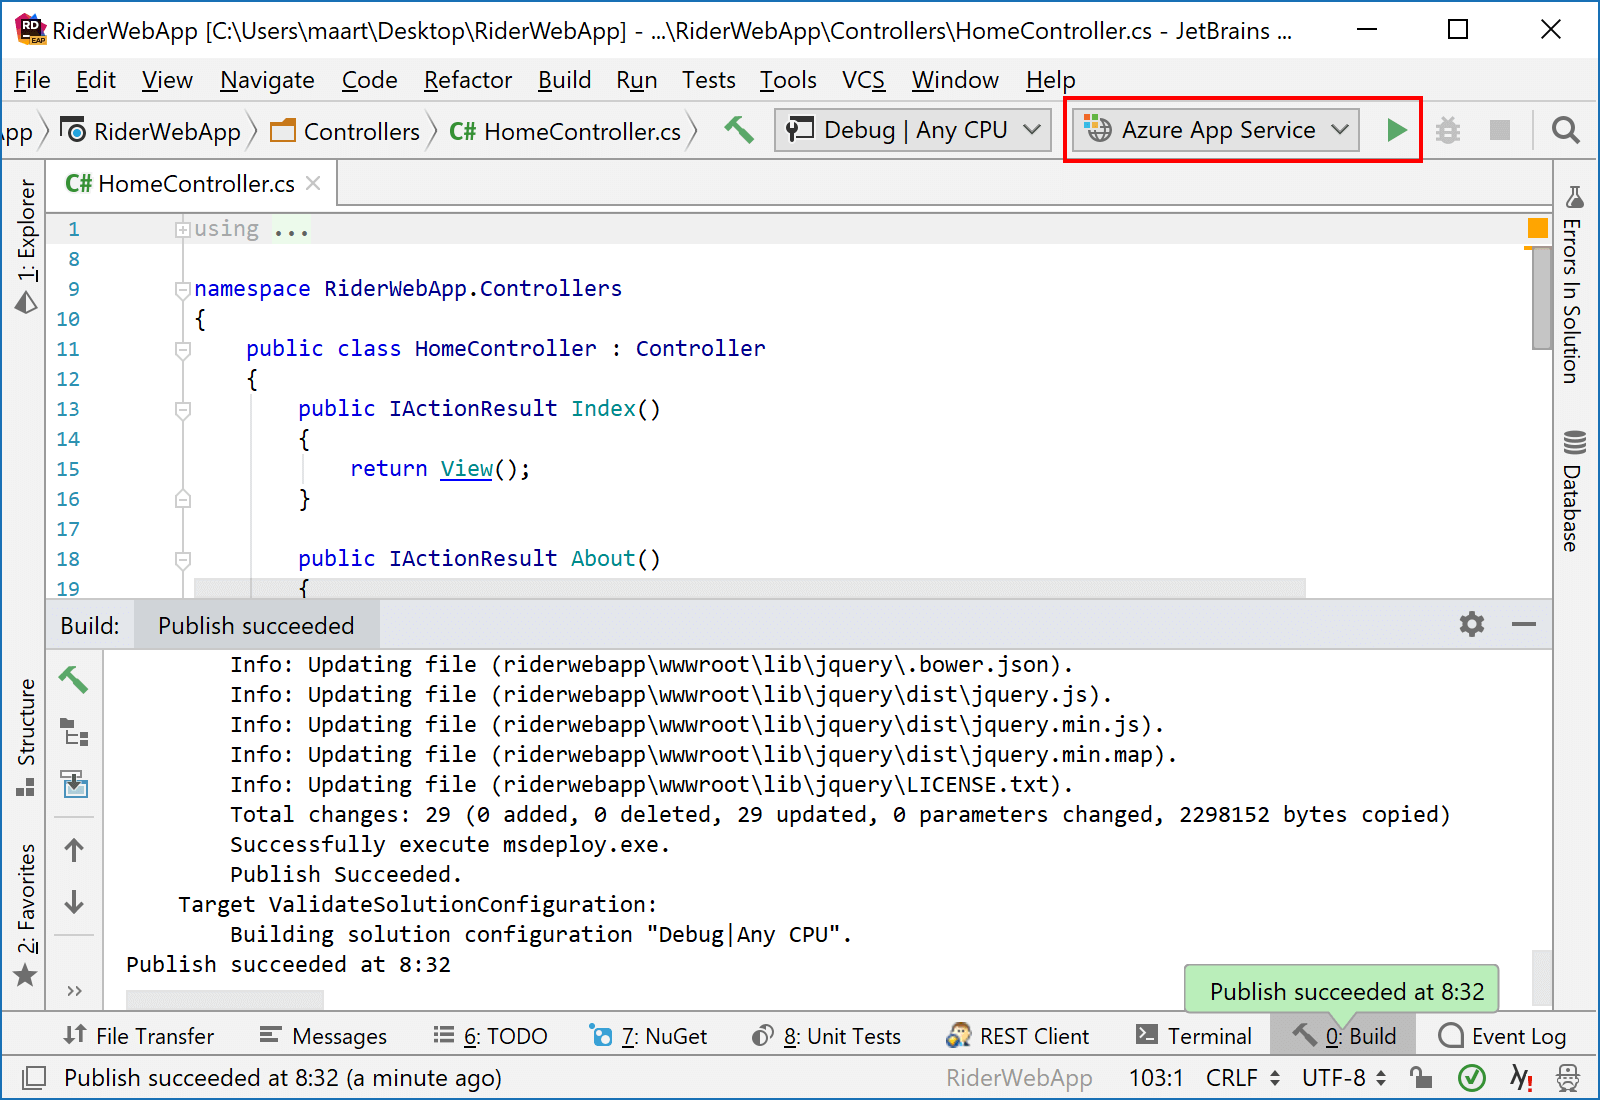
Once added, we can perform our deployment from Rider’s toolbar (or by hitting F5 when the deployment run configuration is selected).
Now let’s look at both new run configuration types and how we can configure them.
Publish to IIS (or Azure Web Apps)
What’s in a name? The Publish to IIS run configuration type can deploy our ASP.NET Core web application to local and remote IIS, Kudu (Azure Web Apps), as well as create an MSDeploy package. Under the hood, it makes use of MSBuild and MSDeploy to package and publish our application.
When we add a new Publish to IIS run configuration, we can give it a name and select the publish profile to use during deployment. Publish profiles come as .pubxml files, and contain the necessary parameters for MSDeploy to do its thing. Rider comes with a few templates for generating such .pubxml file:
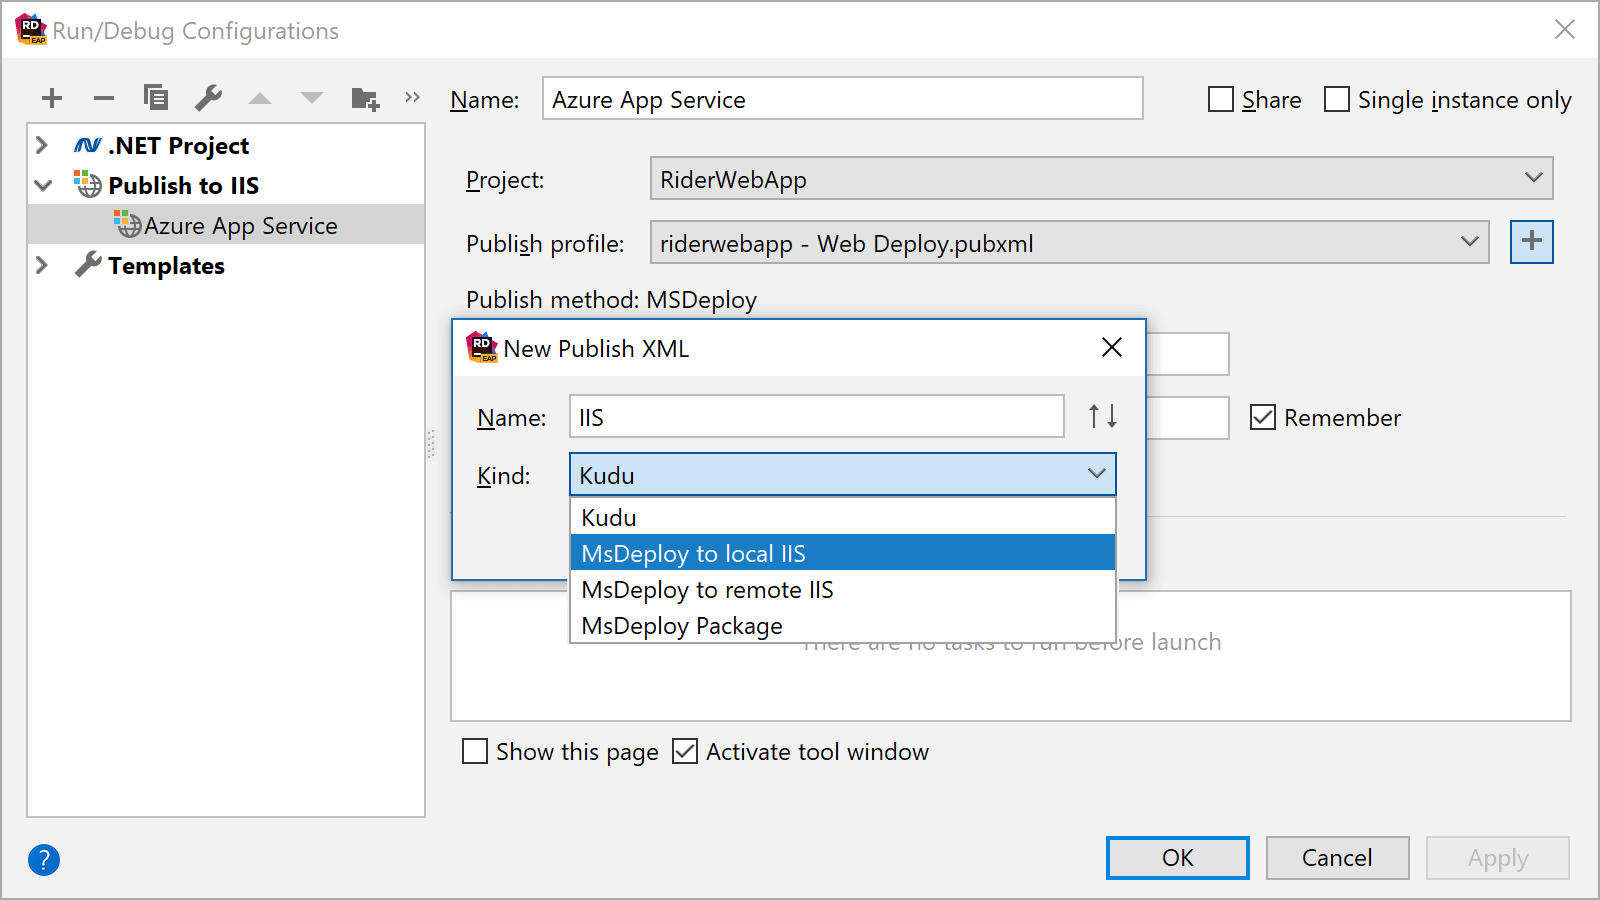
A .pubxml file has no fixed schema, apart from being an MSBuild file. The PublishProvider element is used by MSDeploy to determine which other settings will be used to perform our deployment.
For this post, I have been publishing to Azure Web Apps. Here’s the .pubxml file I have used throughout. Sayed Hashimi has many more examples for various MSDeploy options available. And the MSDeploy documentation provides some additional information as well.
Note that publishing to an IIS server only works on Windows. It may also be required to start Rider with elevated permissions. Rider will suggest this when using a publish profile that targets a local IIS server:

That’s it, really. Once added, we can deploy our ASP.NET Core web application by running this newly added Publish to IIS run configuration.
Publish to custom server
Rider provides a second option for uploading our application artifacts to a remote server. The Publish to custom server run configuration type supports using FTP and FTPS/SFTP to get our application out there. It is supported on Windows, Mac OS X, and Linux.
When adding a new Publish to custom server run configuration, we will have to select the remote server to publish to:
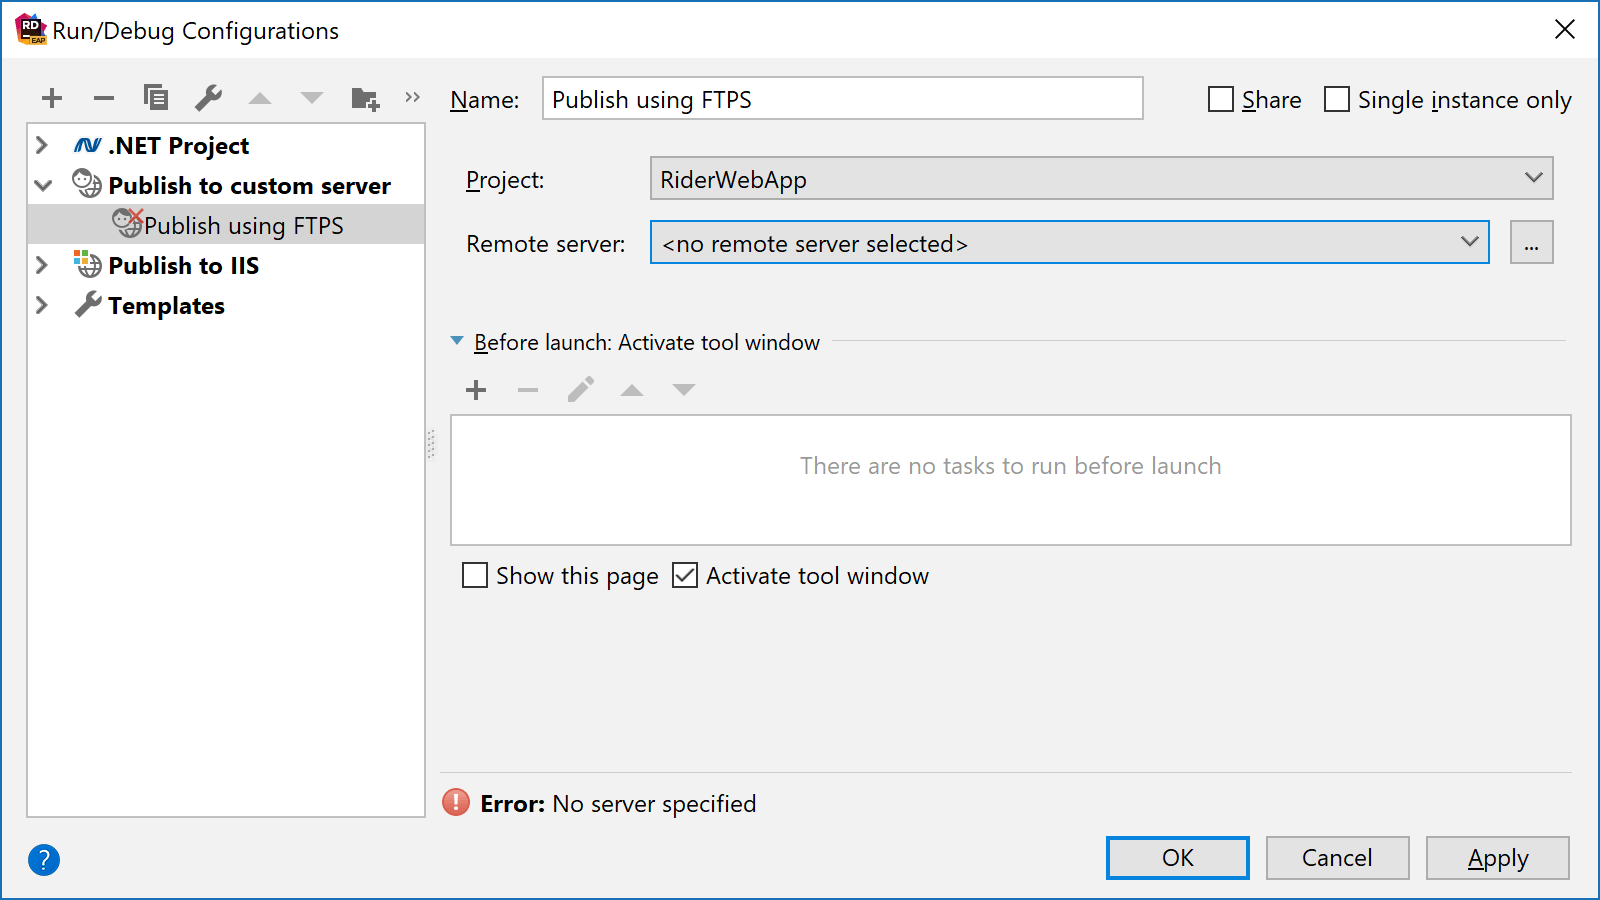
Remote servers can be added by clicking the … button, or under Build, Execution, Deployment | Deployment in Rider’s settings.
Let’s set up a new FTPS server. We’ll have to provide the FTPS host and port, credentials to connect to the remote server, and the remote path to use. Additionally, we can set the web server root URL as well.
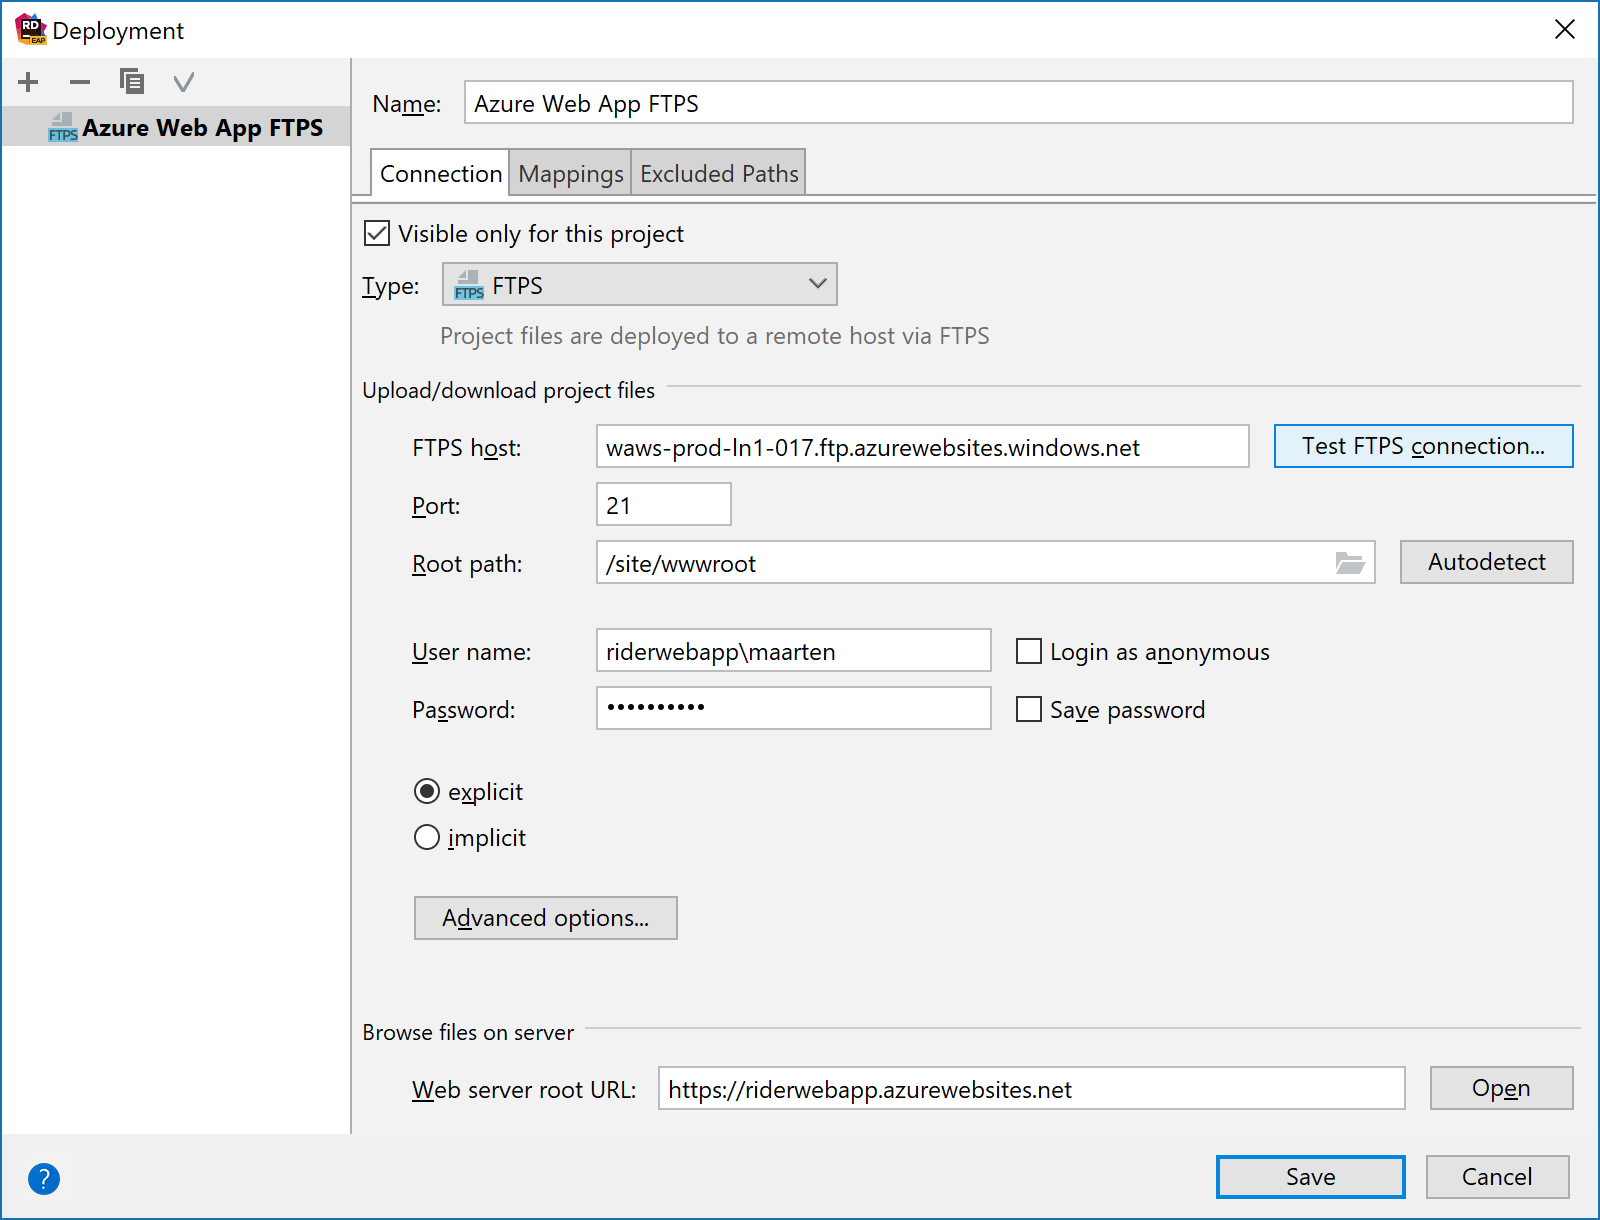
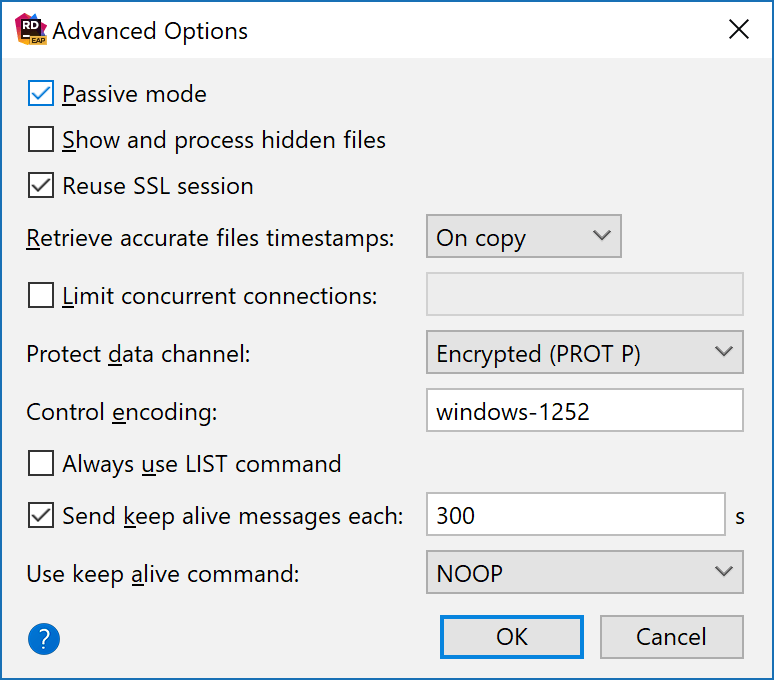
Some servers (like Azure Web Apps) require Passive mode to be used for uploading files. We can set this (and more) using Advanced options…
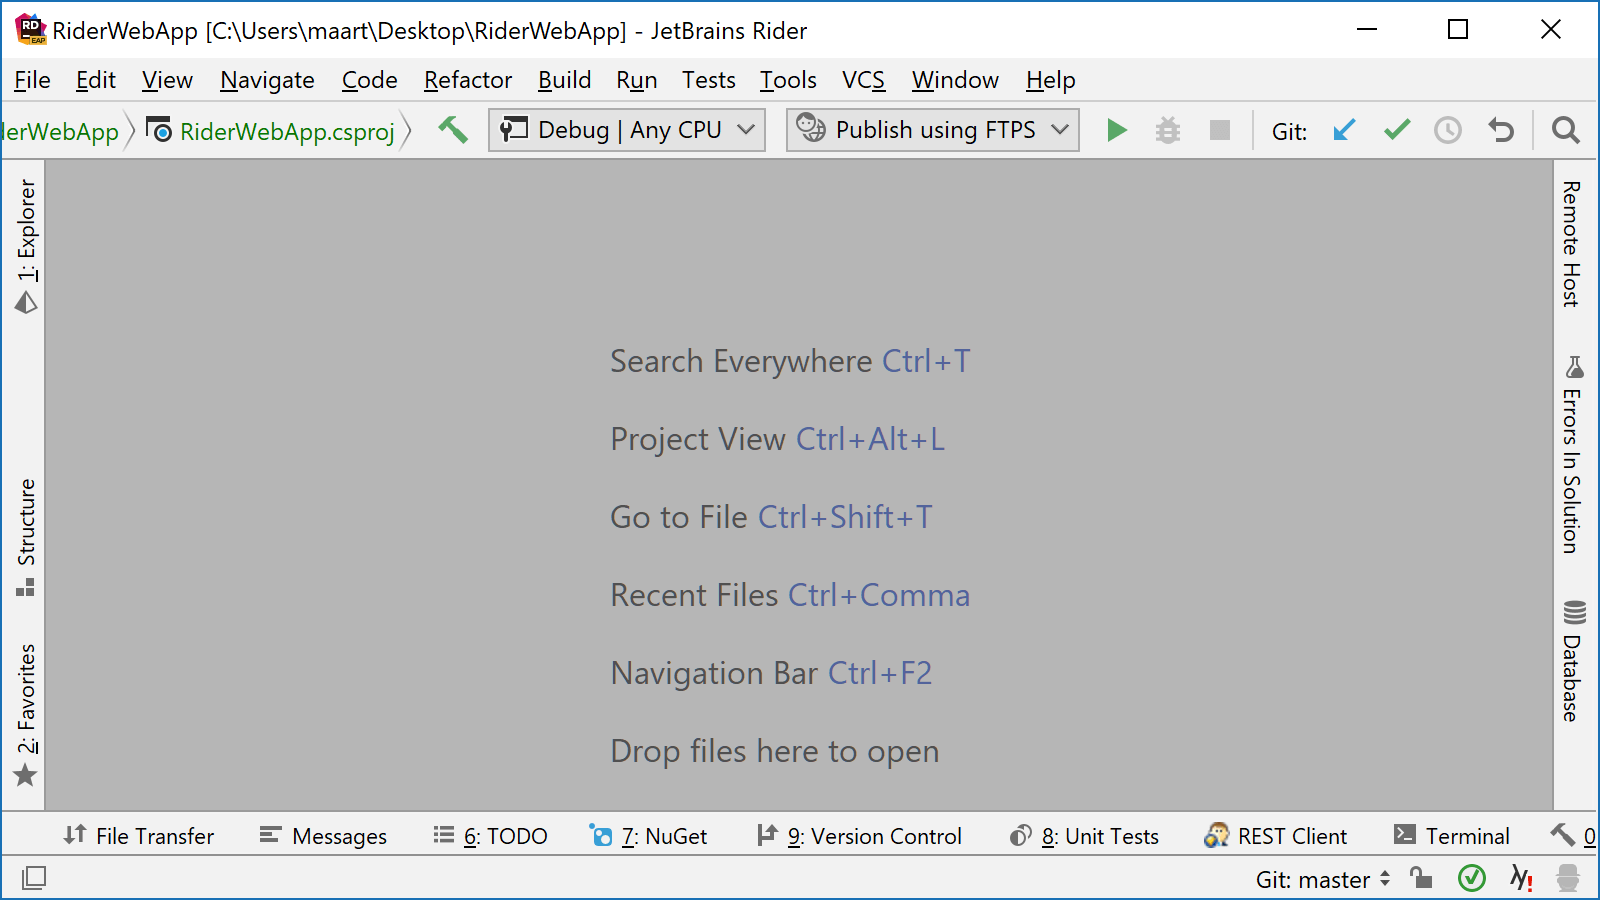
When we save our run configuration, we can use it to deploy our ASP.NET Core web application.
Browsing remote servers
Sometimes, it’s useful to see which files have been uploaded to a remote server. Using Go to Action (Ctrl+Shift+A in the Visual Studio keymap), we can open the Browse Remote Host tool window.
From here, we can browse, upload and download folders and files on our remote server.
Current limitations
Right now, only publishing of ASP.NET Core Web projects is supported. Additionally, using the Publish to IIS run configuration type to deploy to IIS will only work on Windows.
Note that for non-ASP.NET Core Web projects, the Build | Package Solution menu can generate a deployment package in the form of a .zip file, which can then be deployed using the MSDeploy command line.
We’d love to hear your feedback! If you are missing any features related to publishing, let us know by creating an issue in our tracker.
Download Rider 2018.2 EAP now and give it a try!
Subscribe to a monthly digest curated from the .NET Tools blog:


