

.NET Tools
Essential productivity kit for .NET and game developers
Live templates and file templates in Rider 2018.2

Using live templates and file templates can improve coding efficiency a lot while dealing with repetitive content, boilerplate code and language ceremony. For everyone who hasn’t heard of them:
In previous versions, we could already invoke existing templates. However, seventy developers can’t be wrong that editing templates in Rider is one of the most wanted features we miss from good ol’ ReSharper times – besides dotCover integration of course! Today we are pleased to announce that the necessary changes have been merged to Rider 2018.2. Be ready to browse and edit live templates and file templates from Rider’s settings dialog!
Learning the basics
Navigating to Rider’s settings dialog, we can find two new nodes Editor | Live Templates and Editor | File Templates. Both nodes can be further expanded to browse available templates by languages. On the right-hand side, we can select from a list of pre-installed and custom templates. Below the list, an editor shows the code for an actual template along with a couple of related settings:
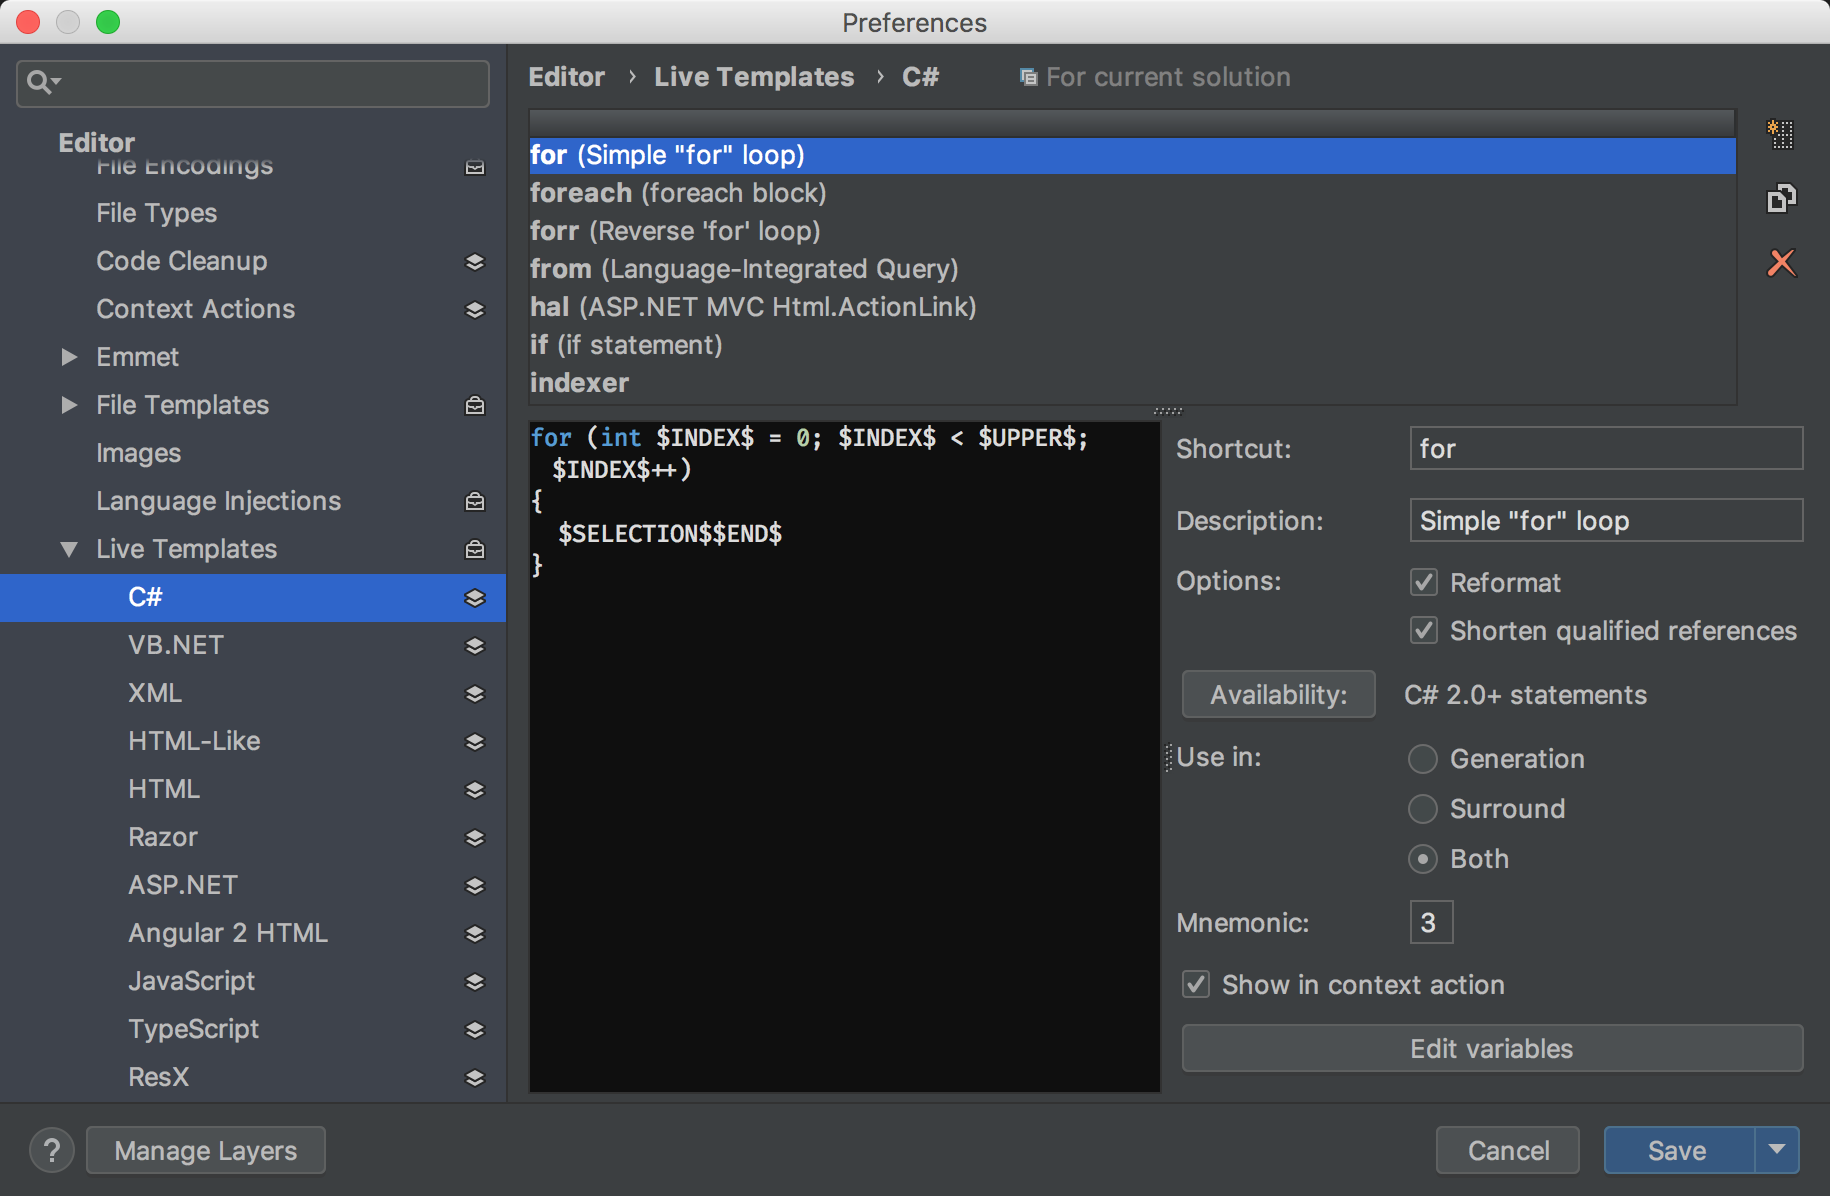
For both custom and pre-installed templates, we can set a shortcut that specifies how the templates are invoked.
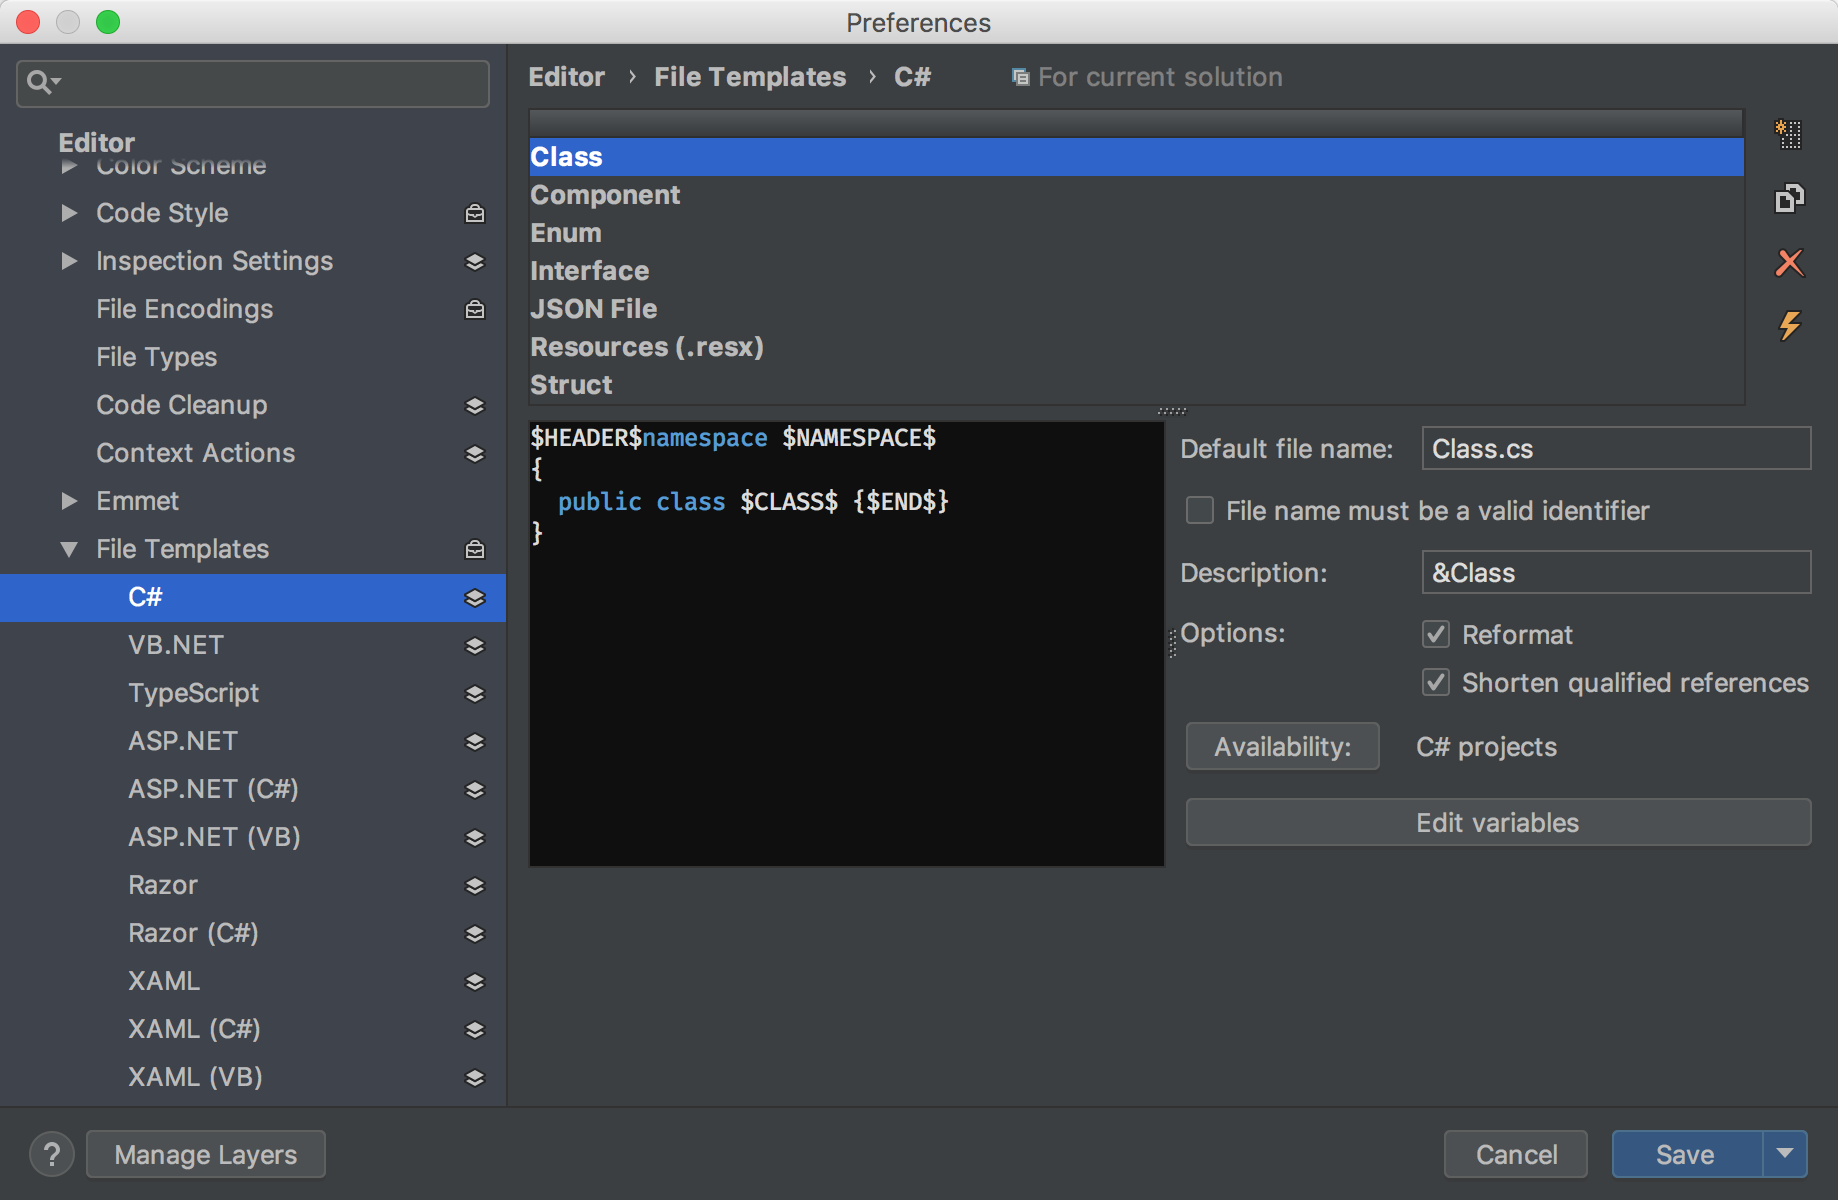
The editor for file templates looks roughly the same:
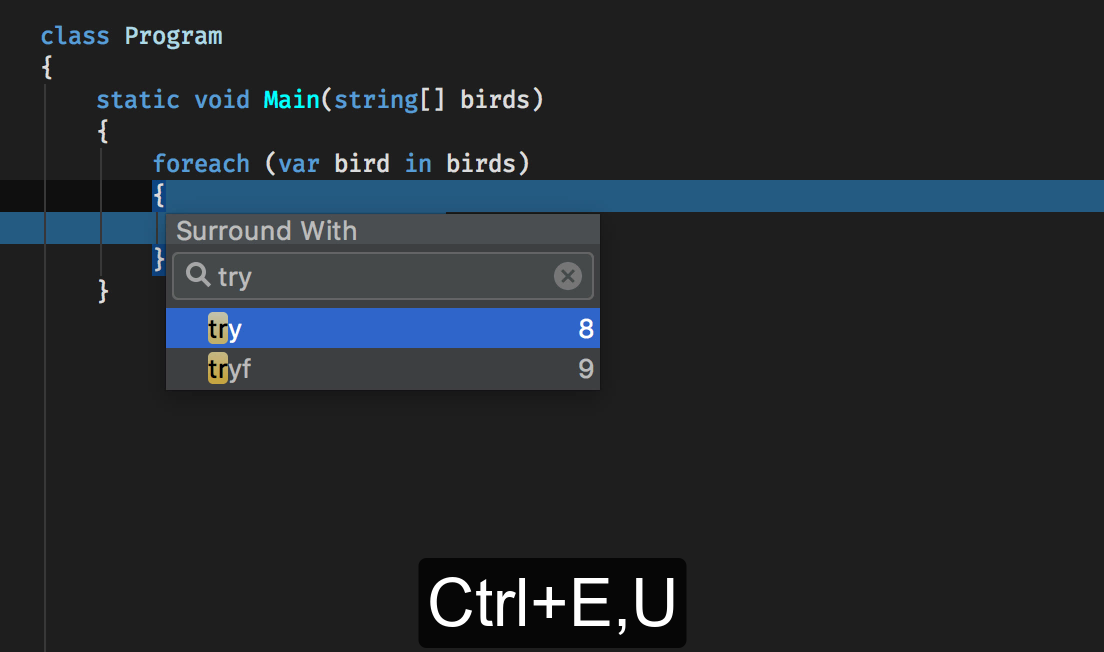
Some templates are being used in related quick-fixes and context actions. For instance, the template for Razor MVC View can be invoked from a quick-fix when the view doesn’t yet exist. We can modify this template to our needs and still have it deeply integrated into our development workflow.
Of course, the greatest power is only revealed, when adding custom templates for our individual needs, which can even be shared via DotSettings among our team. So how can we do that?
Writing a custom live template
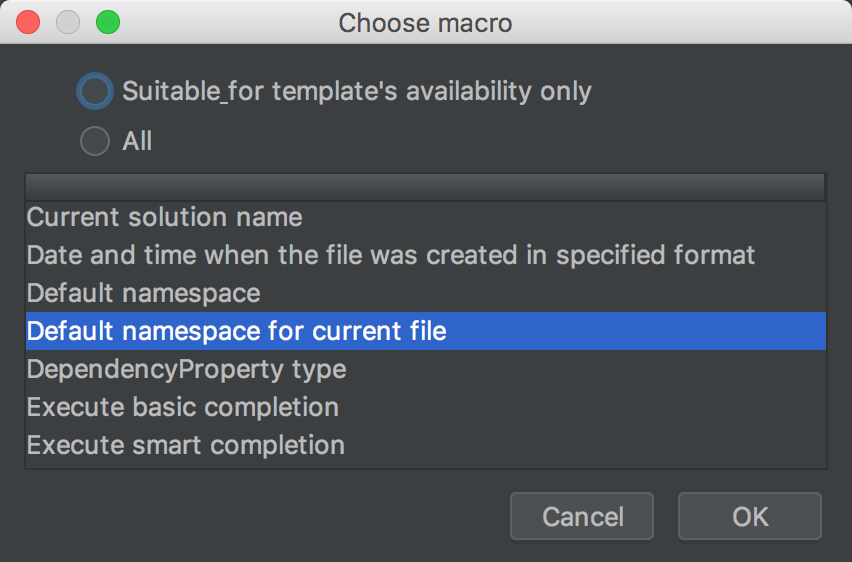
Generally, a template is just text that is copied into the current caret position. However, to make it a little more flexible, we can use variables (sometimes also refered to as hotspots or placeholders). Such variables will only get their final value at the time we execute the live template. We can either manually enter a value – usually used for identifiers and other text – or use so-called macros, which can help us finding a value from the current context:
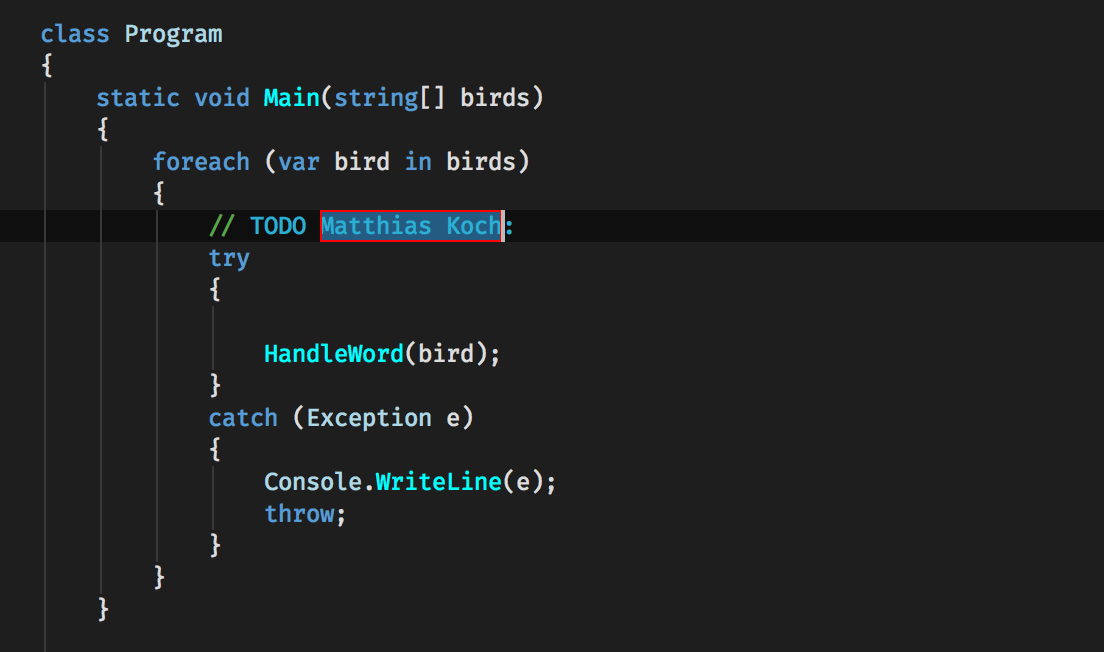
For instance, we could have a template // TODO $USER$: $END$ that can help us to add TODO comments in a flexible and convenient way. The $USER$ variable can be configured to use the current user’s full name macro, while $END$ denotes the final position of the caret. We can jump between variables by hitting TAB. Note that the $USER$ variable can still be marked as editable, to allow modifications, for instance during pair-programming sessions:
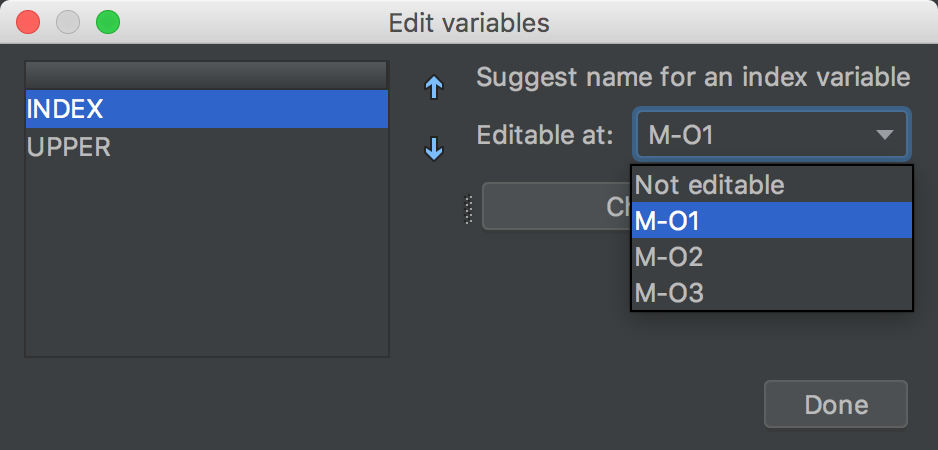
At times, we might need to use the same placeholder/value in multiple places. In that case, we can select which specific occurrence should be the editable occurrence:
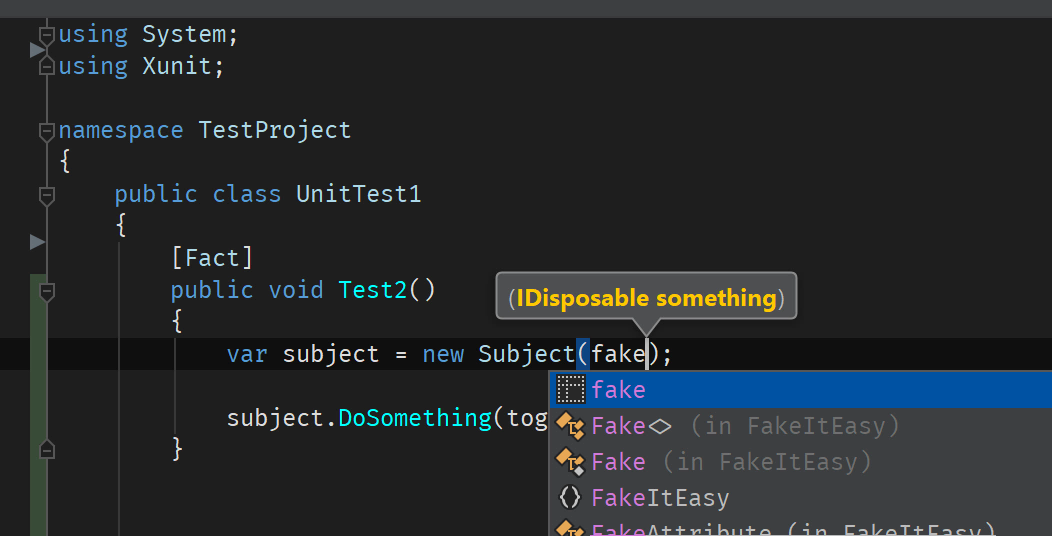
Other times, we can completely skip to edit a placeholder, like for the template FakeItEasy.A.Fake<$TYPE$>() where $TYPE$ will apply the Guess type expected at this point macro. Note that sometimes it’s a good idea to fully qualify the member, since we cannot expect the required namespace to be imported. In this case, Shorten qualified references will automatically clean up things:
Writing custom file templates
Out-of-the-box, Rider comes with file templates for classes, enums, test fixtures and many more. The test fixture template is actually written for NUnit – the most commonly used test framework. This is a good opportunity to look at how we can add our own file template that uses xUnit.net along with FluentAssertions to write tests. Here is how it could look like:
using FluentAssertions;
using Xunit;

// ReSharper disable ArgumentsStyleLiteral

namespace $NAMESPACE$
{
  public class $CLASS$
  {
    [Fact]
    public void $NAME$Test() { $END$ }
  }
}
Since test code is in some way different to production code, it comes in very handy that we can also apply certain adjustments to inspection and code formatting. However, alternatively we can also use project-specific settings. Basically, this depends on our individual needs.
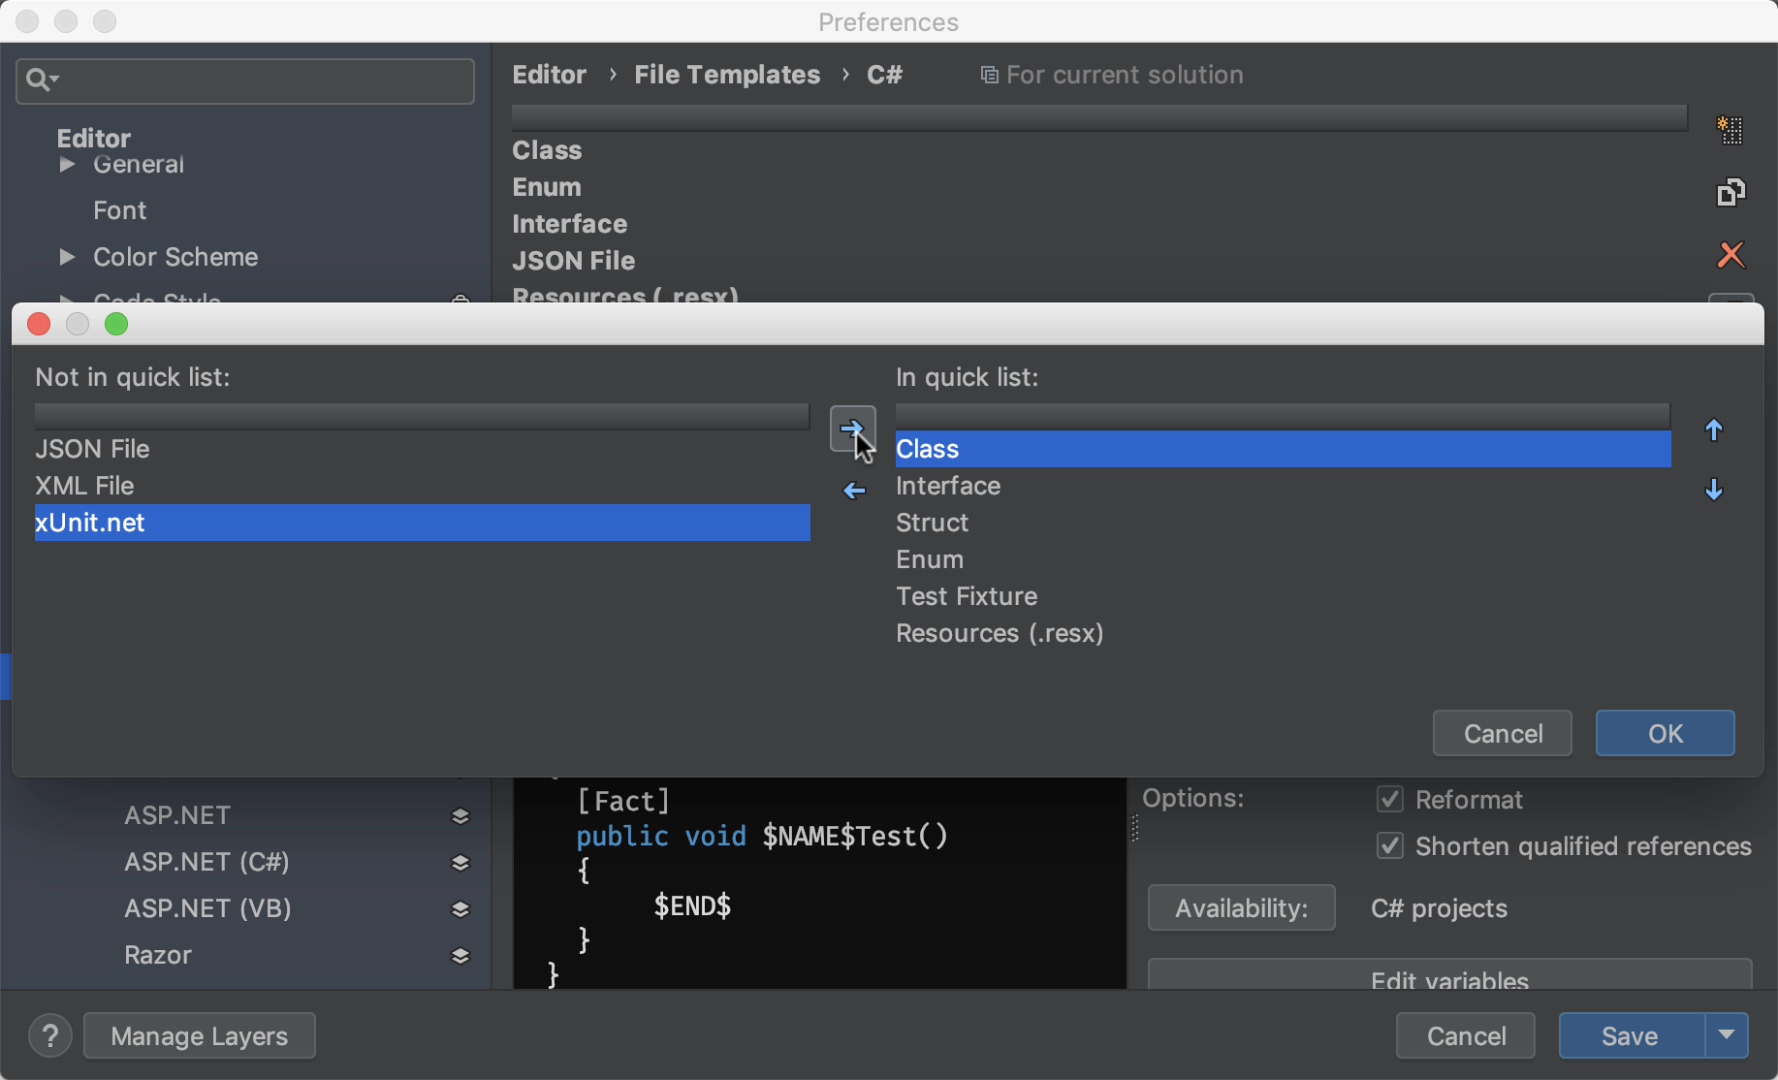
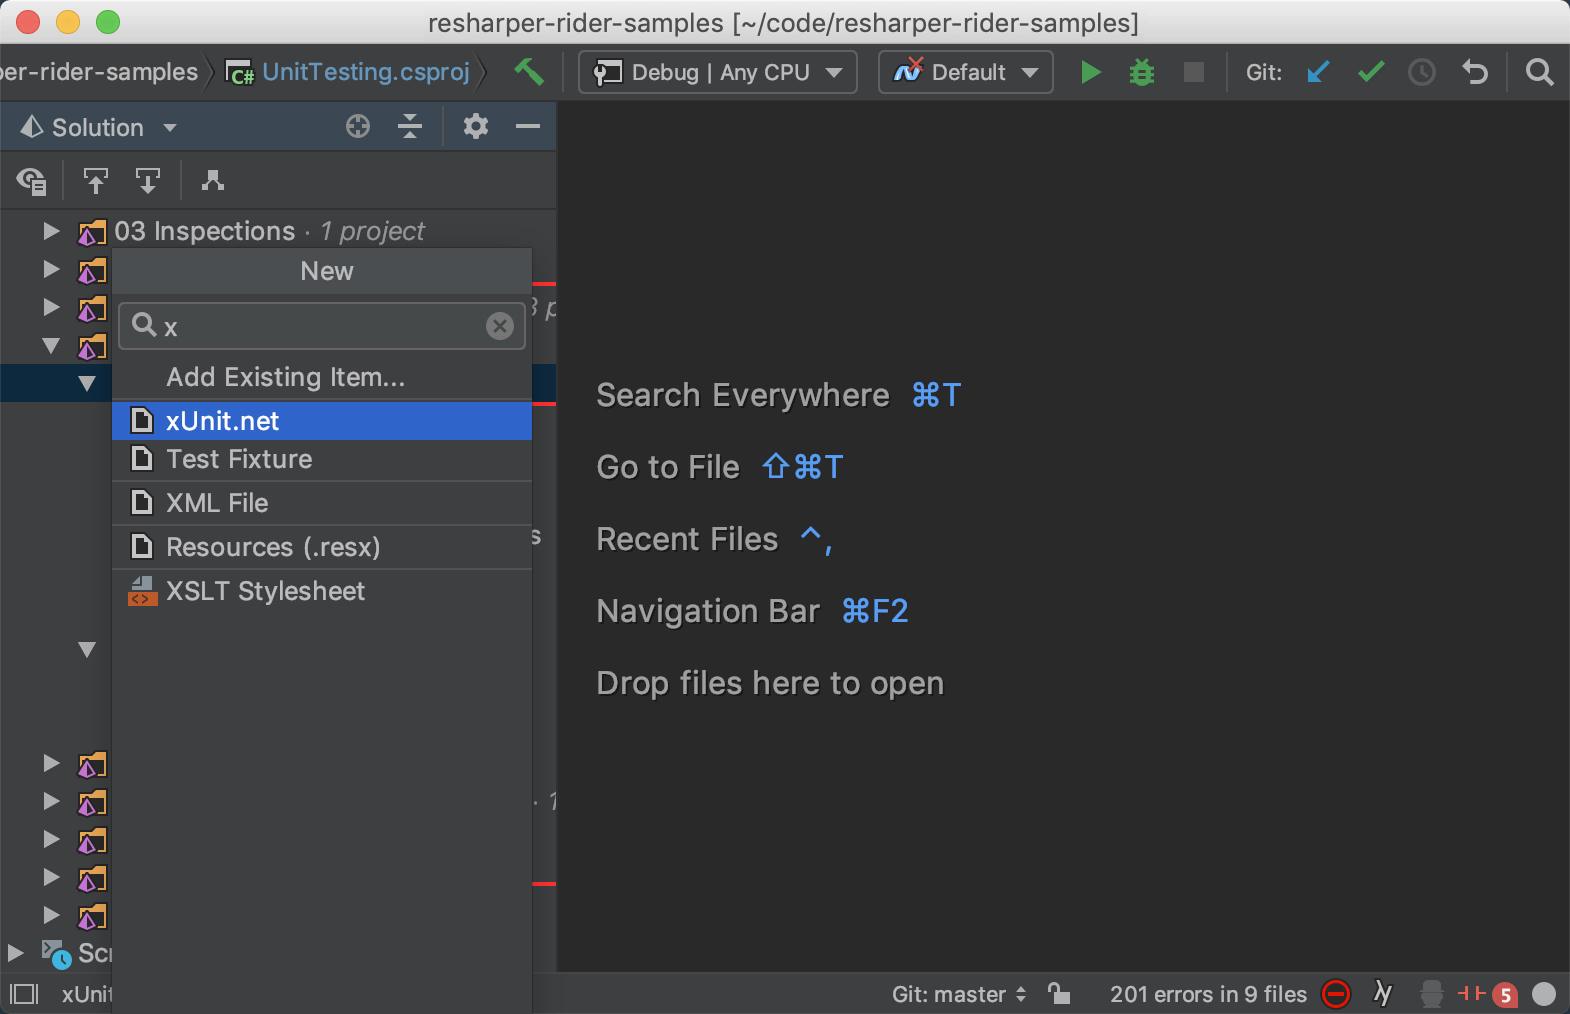
We must not forget to add the file template to the quicklist menu:
Afterwards, we can create a new file based on our template, by selecting the destination in the Solution View and hitting Alt+Insert:
Remember that we actually defined the test method on only one line? This magic happens if we enable the Reformat option, which will automatically reformat the template output according to the current formatting settings. This is especially helpful to allow templates being used across different solutions with different code styles.
Download Rider 2018.2 now! We’d love to hear your feedback!

Subscribe to a monthly digest curated from the .NET Tools blog:


