

.NET Tools
Essential productivity kit for .NET and game developers
Deploy web apps, explore resources and more – Introducing the Azure Toolkit for Rider

Today, we are happy to introduce the Azure Toolkit for JetBrains Rider – an open-source plugin that helps .NET developers easily create, develop, configure, test, manage and deploy web apps to Azure directly from within Rider, and work with resources such as storage, Redis cache and virtual machines.
TL;DR: Get the plugin for Rider 2018.2, install it, explore your Azure resources and deploy a Web App!
Let’s dive in and look at the Azure Explorer tool window and its functionality, as well as deploying ASP.NET web apps to Azure from within Rider!
Installing the Azure Toolkit for Rider
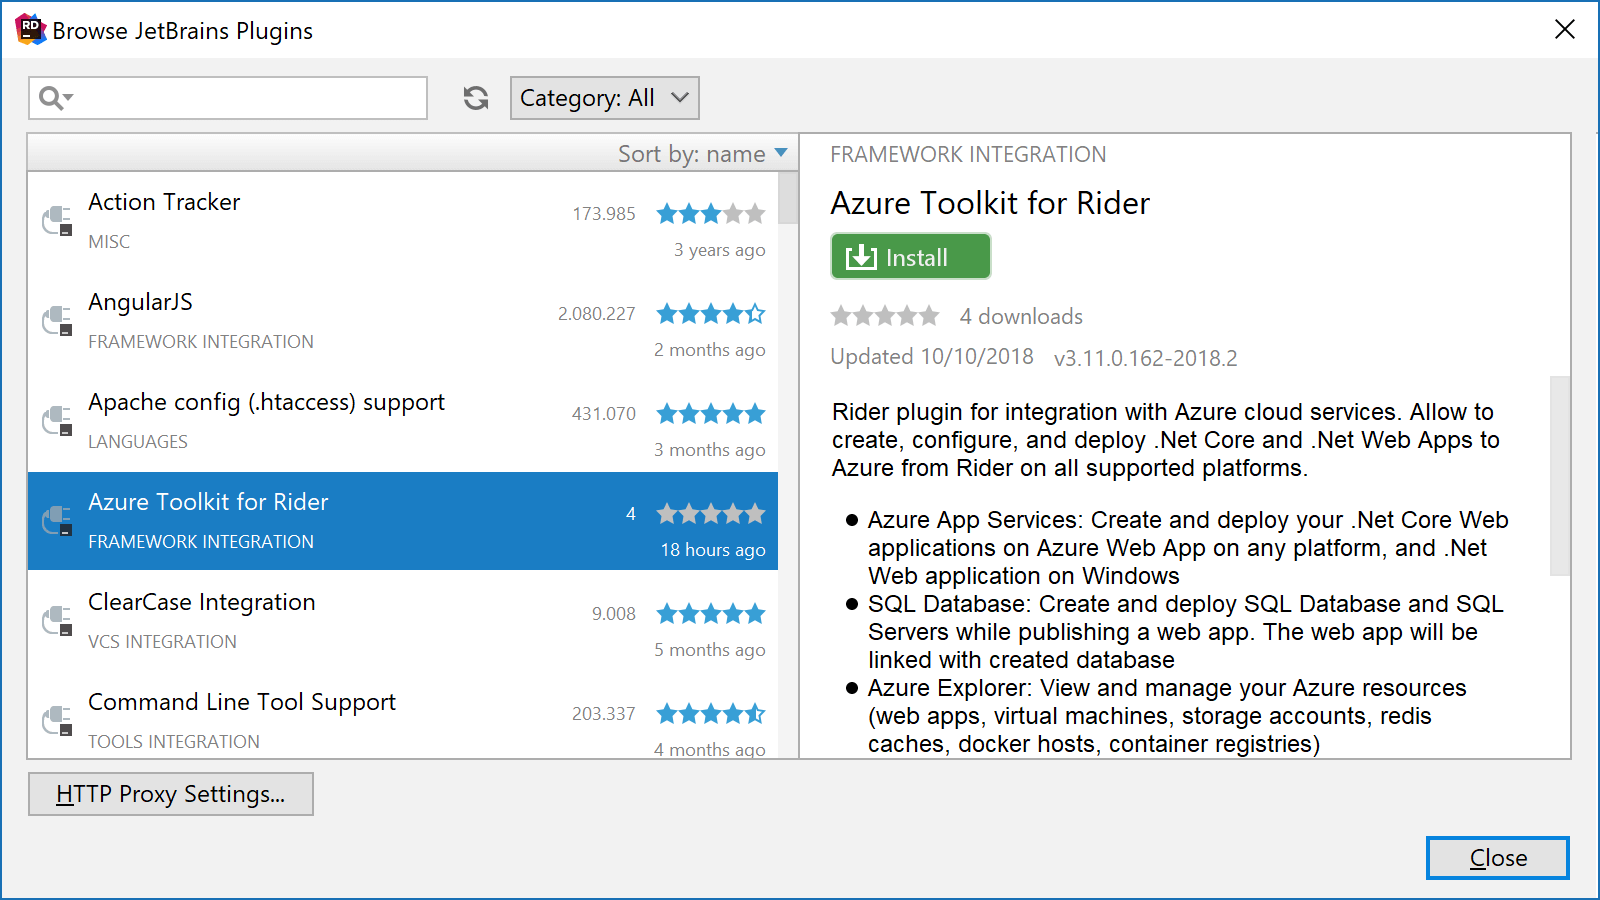
First of course, we will have to install the Azure Toolkit for Rider plugin. We can do this from the settings, then find Plugins. After clicking Install JetBrains plugin…, we can find the Azure Toolkit for Rider and Install it.
Note that currently, this plugin is only available for Rider 2018.2 (a version for Rider 2018.3 EAP will be released soon).
What can the Azure Toolkit for Rider do for me?
After installing the Azure Toolkit for Rider, we can sign in to an Azure account from the Azure Explorer tool window, optionally filtering the subscriptions for which resources will be displayed.
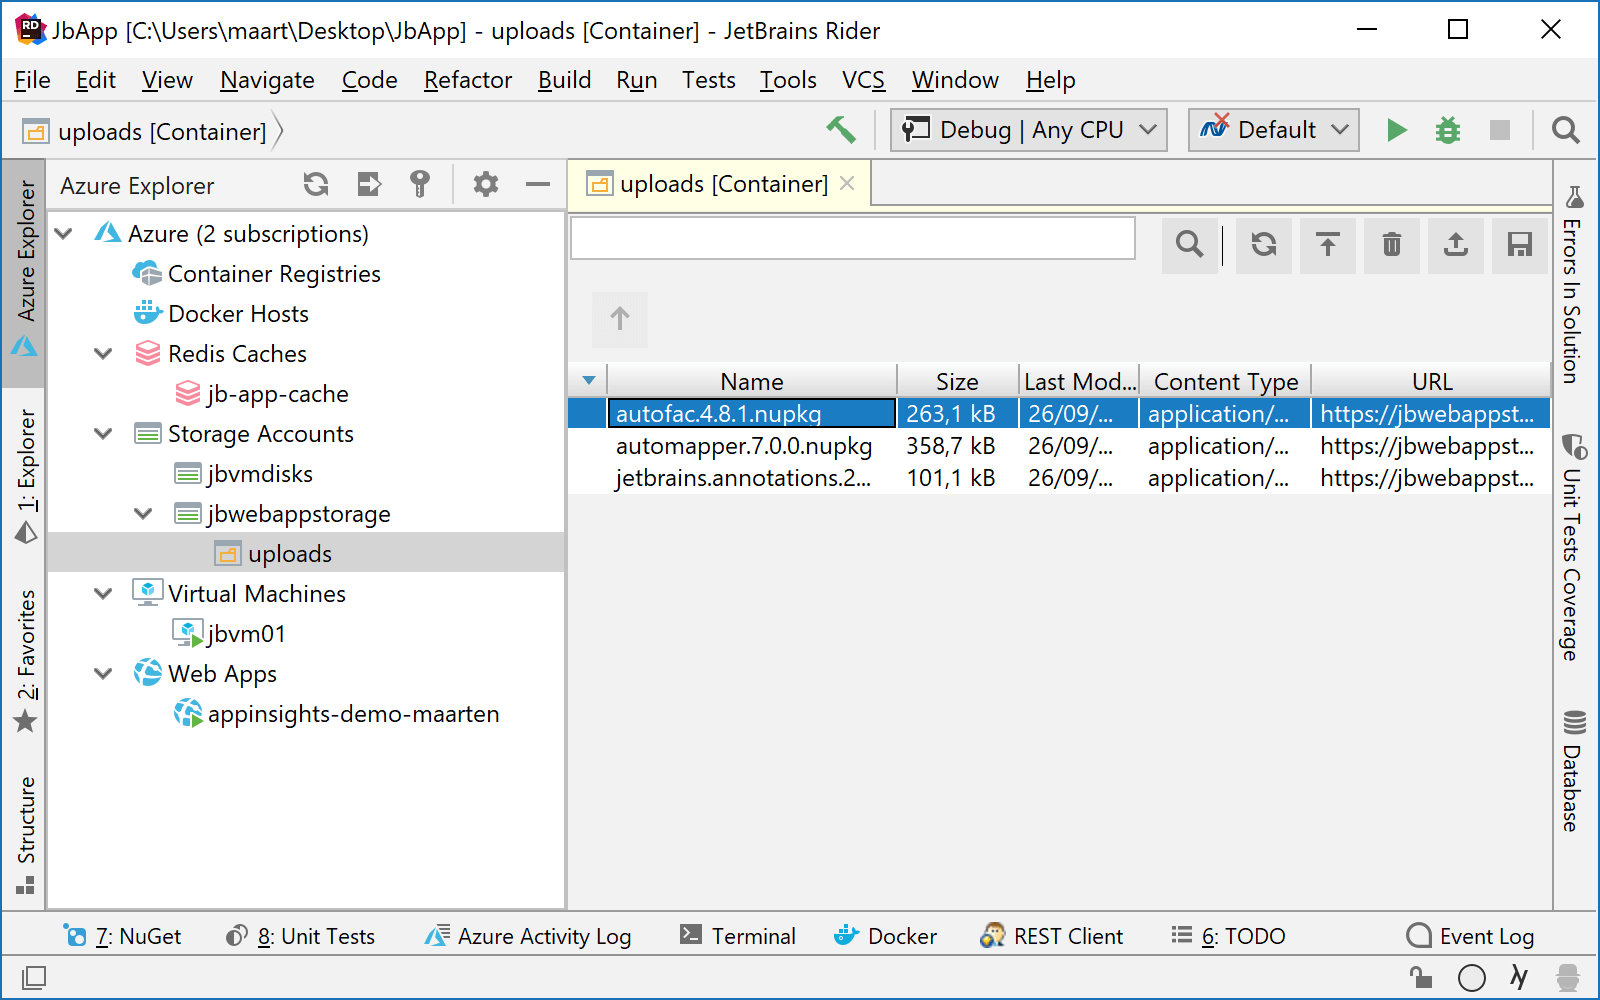
Clicking a node in the Azure Explorer will retrieve its resources. For example, we can list storage accounts and their blob containers, list blobs in that container, and perform tasks like uploading and downloading blobs.
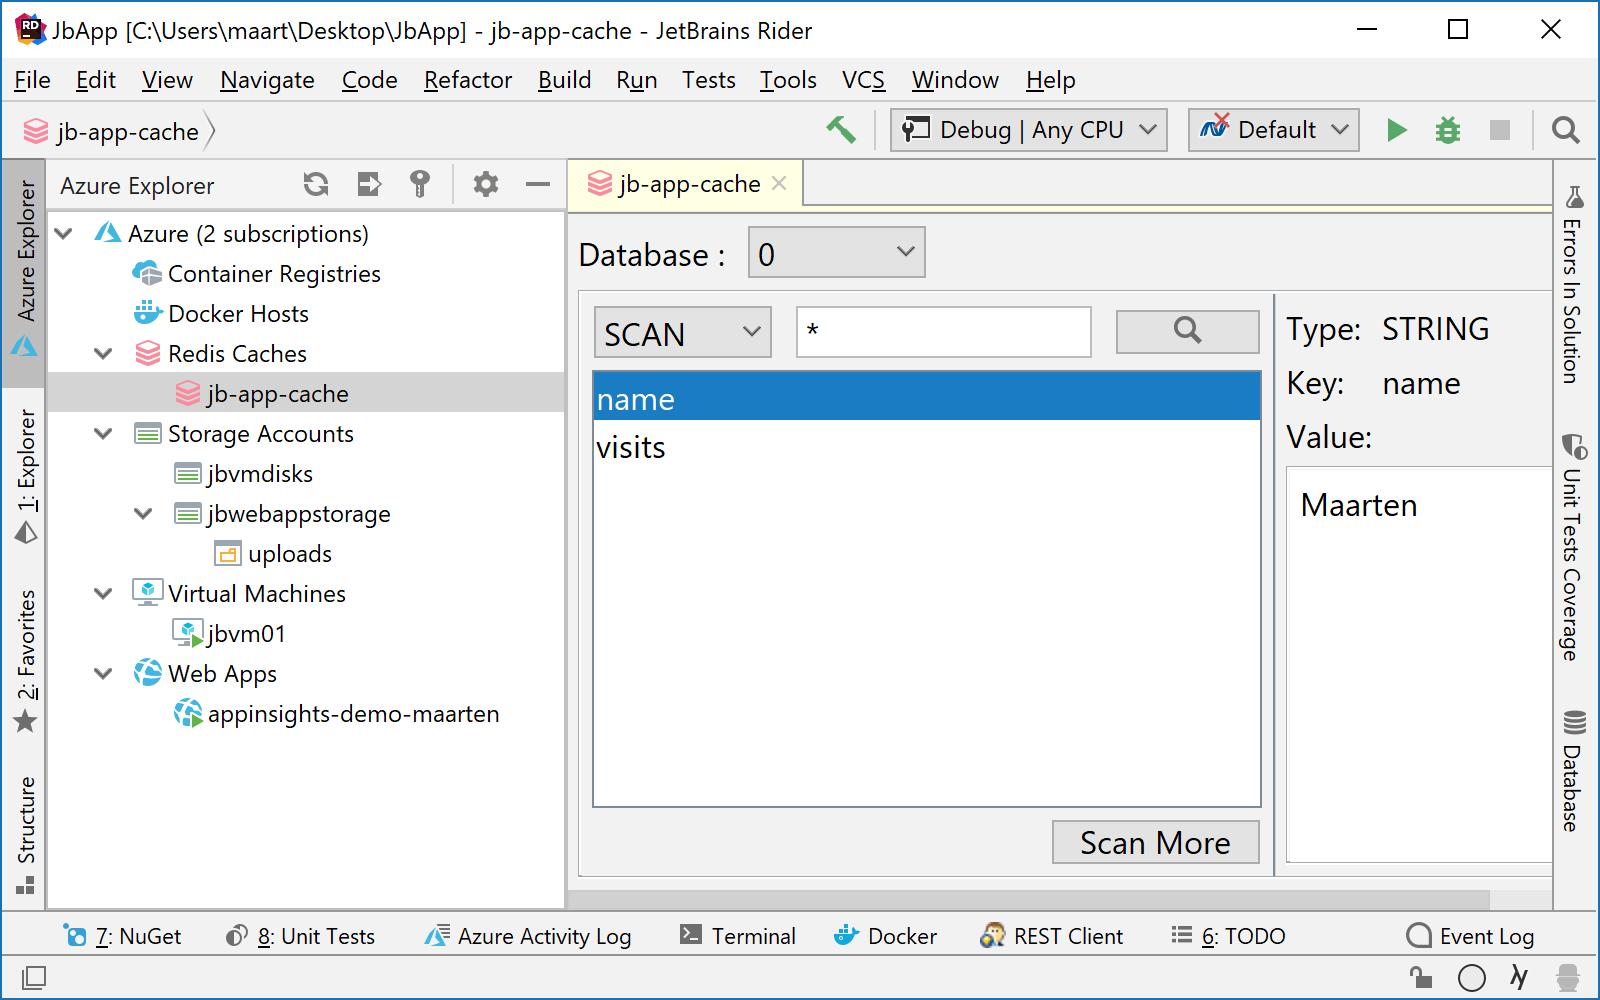
Similarly, for Redis caches, we can use the context menu to retrieve its properties and connection details, or use the Redis explorer to scan for existing keys and retrieve their values.
The following functionality is currently available in the Azure Toolkit for Rider:
- Sign in to an Azure account and select one or multiple subscriptions
- Basic management of:
- Container hosts (create/delete, start/stop, view details, list registries)
- Redis caches (create/delete, start/stop, view details, list keys/values)
- Storage accounts (create/delete, list/create/delete blob container, list/upload/download/delete blobs)
- Virtual machines (create/delete, start/stop, view details)
- Web apps (create/delete, start/stop, view details, edit settings)
- Run configuration to deploy ASP.NET web apps (can also provision SQL database)
- ASP.NET Core web apps (any platform)
- .NET Framework web apps (Windows)
Missing a feature? Spot a bug? Let us know via our issue tracker (we also welcome contributions!)
Deploying ASP.NET web apps to Azure
 At some point during development, we may want to publish our ASP.NET web application to an Azure web app. The Azure Toolkit for Rider comes with a dedicated run configuration which will do just that!
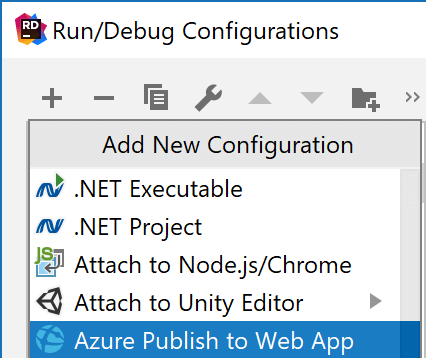
From the Run | Edit configurations… menu (or from the toolbar), we create a new run configuration of the type Azure Publish to Web App.
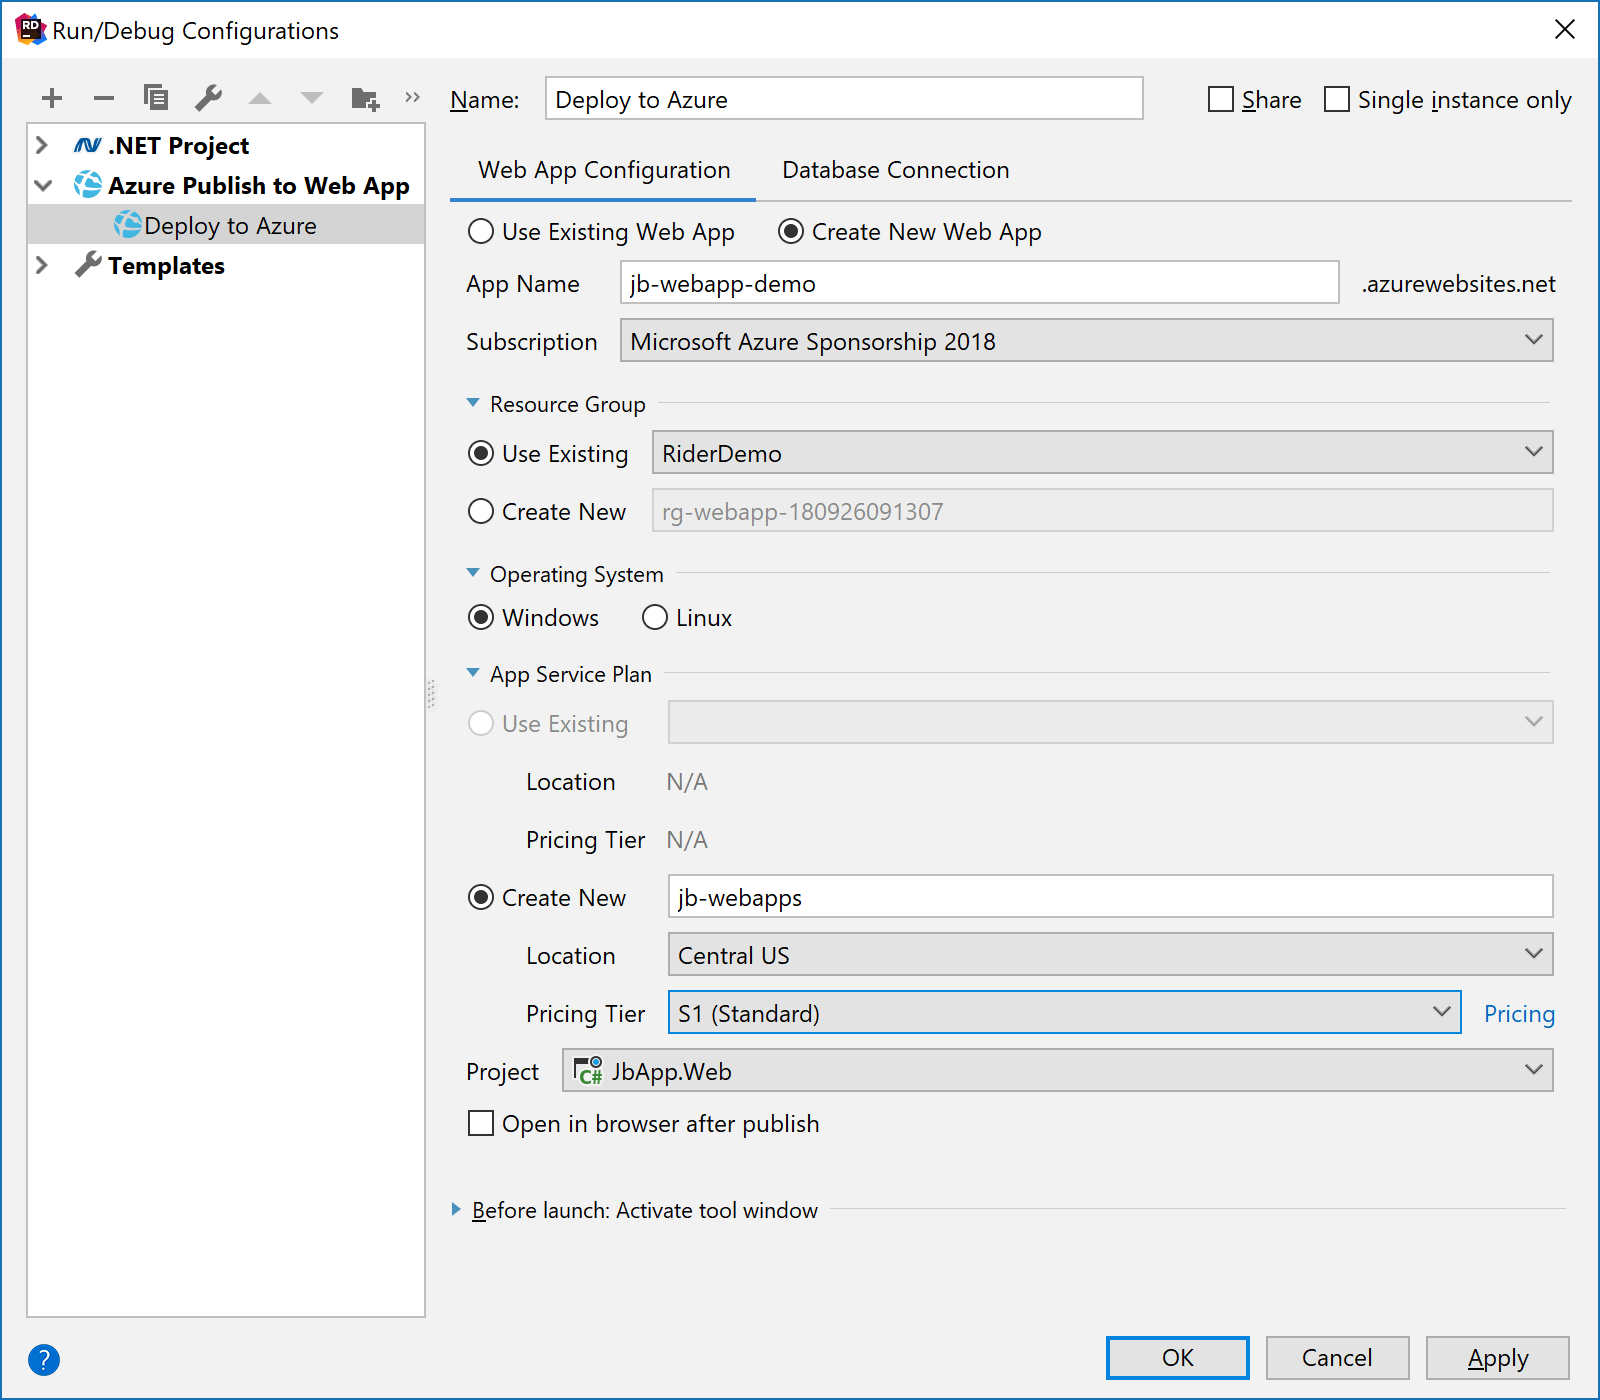
We can select an existing web app to deploy to, or create a new web app from within Rider. When running this configuration for the first time, Rider will create a new web app in the specified resource group, with the selected operating system, service plan and location.
In the database connection tab, we can specify connection details for an existing SQL database, or create a new one:
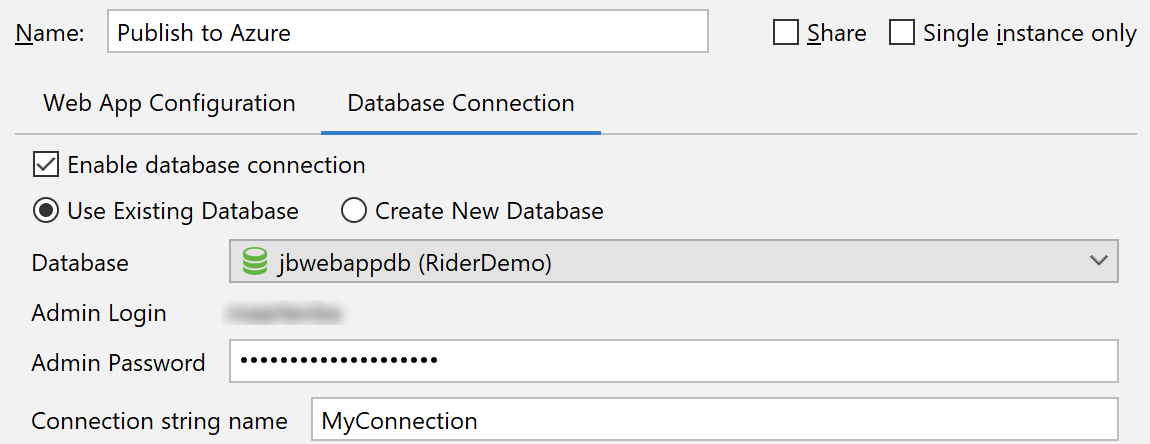
Important to note here is the connection string name: Rider will generate a connection string that can be used by our application when running as a web app:
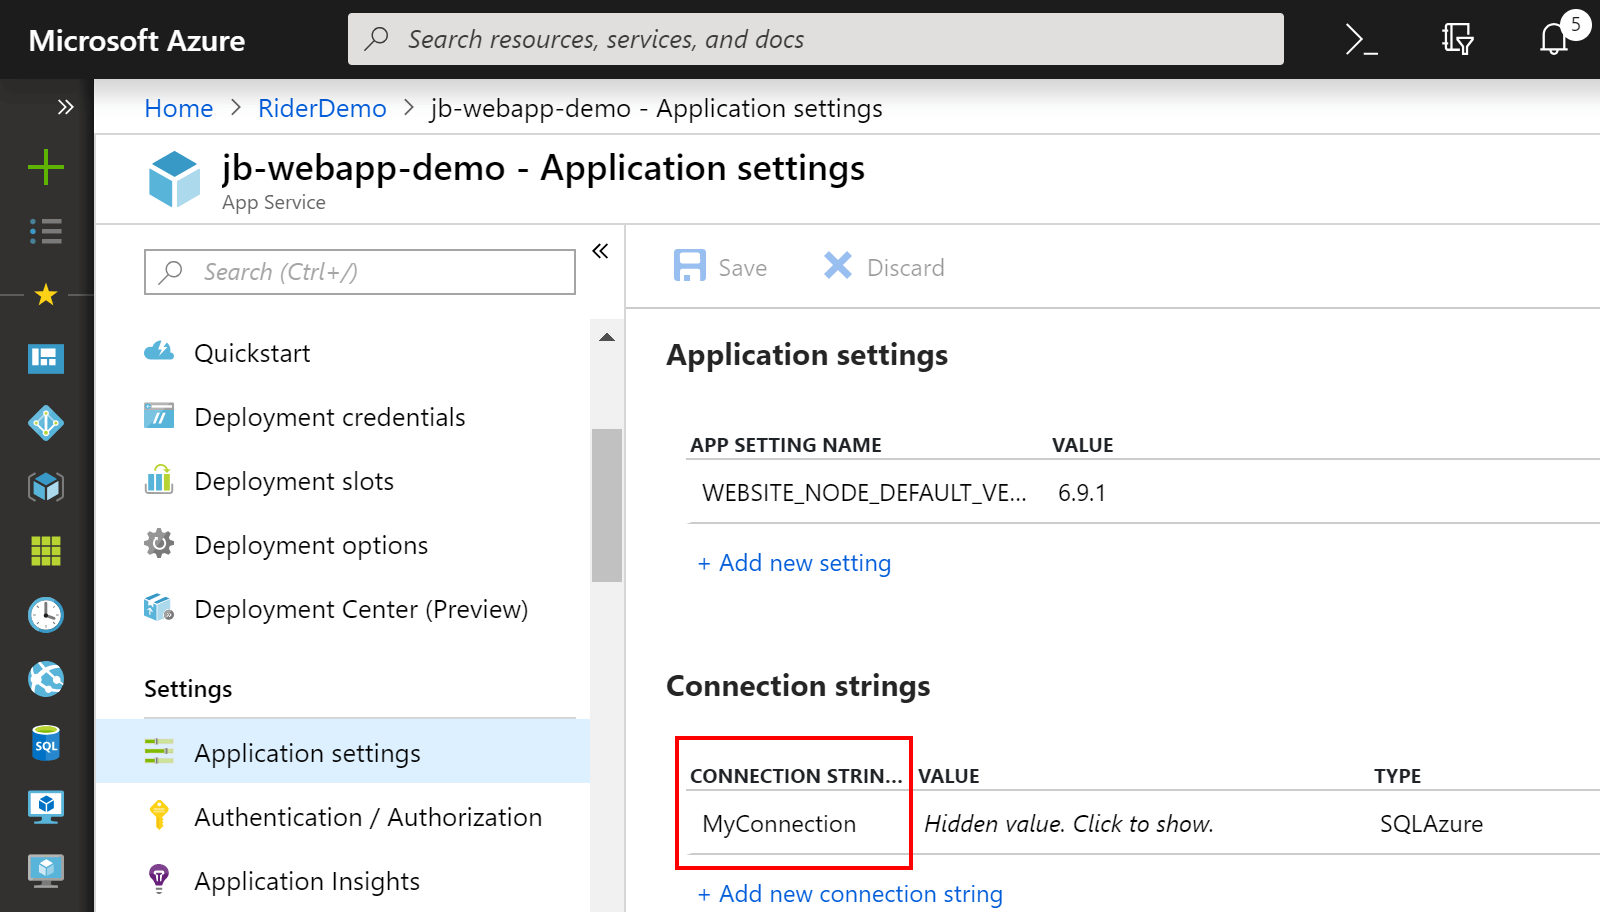
The Azure Publish to Web App run configuration can deploy ASP.NET Core web apps (on any platform), and .NET framework web apps (on Windows). Deployment activity and progress will be logged in the Azure Activity Log tool window.
What’s the difference with the Microsoft Azure Toolkit for IntelliJ?
The Azure Toolkit for JetBrains Rider is a fork of the Azure Toolkit for IntelliJ, available on GitHub. One might ask: with Rider being built on top of IntelliJ IDEA, and Microsoft already having released the Azure Toolkit for IntelliJ, why not re-use that one?
As it turns out, the Azure Toolkit for IntelliJ focuses heavily on the Java/JVM ecosystem and development flows. While it is possible to enable it in Rider as well, it doesn’t make a lot of sense. We decided to fork the original plugin, and split its base functionality (such as browsing Azure resources) from the Java/JVM-specific features (such as deploying a .war file to the HDInsight service).
The Azure Toolkit for JetBrains Rider comes with some notable differences:
- No telemetry or usage data is collected and sent to Microsoft;
- Icons have been replaced by custom icons, as the original icons are not open-source;
- Java/JVM-specific functionality was separated and removed;
- .NET-specific functionality, such as deploying an ASP.NET web application, has been added.
We opened a pull request with Microsoft’s Azure Toolkit for IntelliJ as well, which would contribute this effort back to the original plugin.
What is there to come?
Currently, this plugin is only available for Rider 2018.2. A version for Rider 2018.3 EAP will be released soon, where we plan to add:
- Display and manage SQL databases in the Azure Explorer tool window (issue)
- Connect to Azure Cloud Shell (pull request in the works)
- Work with other Azure resources
- Feature requests from our issue tracker
- And if you are up for it, features you contribute
Download Rider 2018.2.3, install the Azure Toolkit and give it a try! We would love to hear your feedback through the comments below, and in our issue tracker.

Subscribe to a monthly digest curated from the .NET Tools blog:


