

.NET Tools
Essential productivity kit for .NET and game developers
Connecting to a Microsoft SQL Server Linux Docker Container from Rider

There are many users of Rider that value the IDE for developing .NET Core applications on macOS. They also have need of running their Microsoft SQL Server databases locally for their work. This blog post will give developers insight on how to create SQL Server containers with Docker, and how to work with them in Rider. The best thing about working with Docker is that it is supported in many of our IDE’s – including DataGrip!
Note: If you don’t have Docker installed on your development computer, follow these instructions to install Docker Desktop for Mac
Setting Up a SQL Server Docker Container
We need to download the images that our Docker containers will use. There are many images for SQL Server to choose from, but let’s stick with the official image from Microsoft:
sudo docker pull microsoft/mssql-server-linux
Next is to create a container with initial details. We need to have the port we want Docker to listen to for the container. Port 1433 is the default for SQL Server so we will stay with that port. We also need a name (mssqllinux) for the container, and what image to use for the creation. Lastly, we need to accept the EULA for SQL Server by setting the ACCEPT_EULA setting and also give a SA_PASSWORD. Below is a sample command for creating the container.
docker run -e 'ACCEPT_EULA=Y' -e 'SA_PASSWORD=Pa55w0rd' -p 1433:1433 -d --name mssqllinux microsoft/mssql-server-linux
We can verify that the container was created by running the docker container ls command.
docker container ls

CONTAINER ID IMAGE                        COMMAND CREATED        STATUS                       PORTS                  NAMES
15beb69b1376 microsoft/mssql-server-linux "/opt/mssql/bin/sqls…" 10 minutes ago Up 10 minutes 0.0.0.0O1433->1433/tcp mssqllinux
Creating a SQL Server Docker Container in Rider
We’ve looked at using the command line to create our container that will hold SQL Server but we can also work with Docker containers inside Rider! We need to confirm that we have the Docker plugin installed so please check Preferences | Plugins.
Note: Rider should have this plugin installed by default, but you will have to install it for DataGrip.
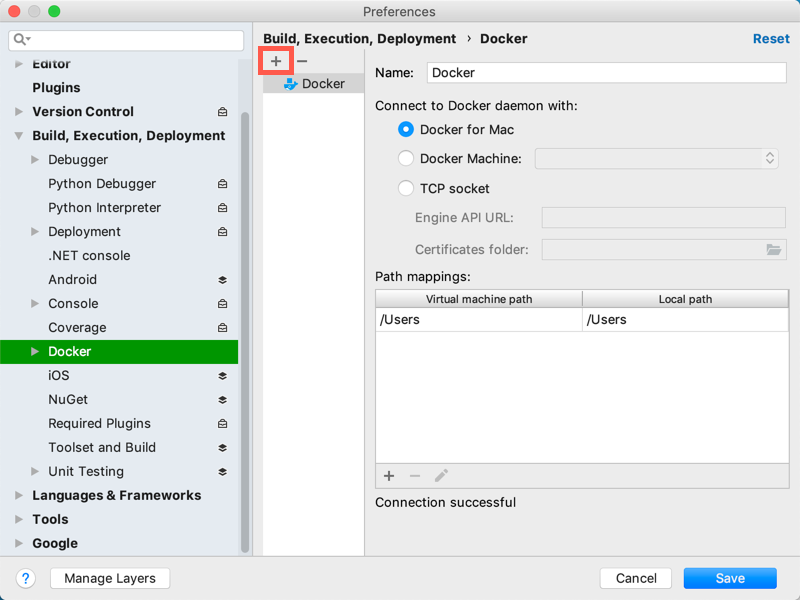
We need to connect Rider to the local Docker daemon. Open the Docker settings (Preferences | Build, Execution, Deployment | Docker) and configure Rider to use Docker for Mac.
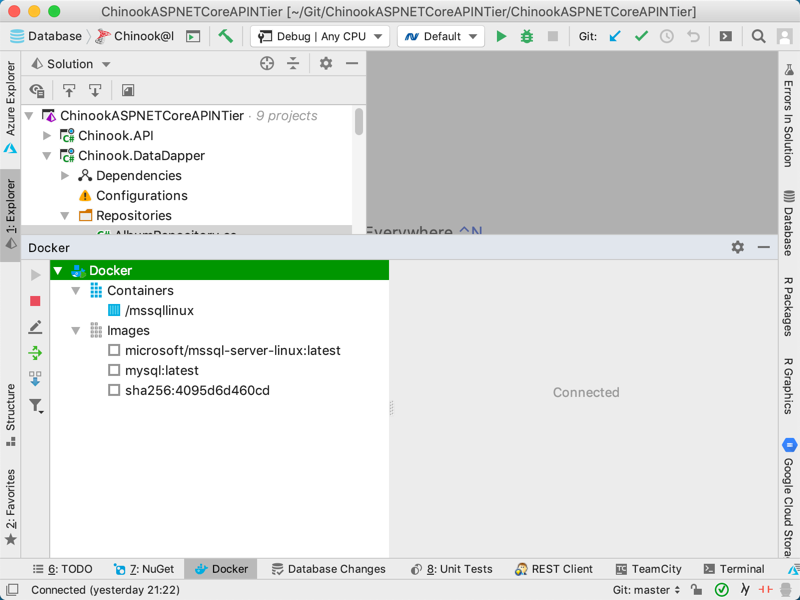
With Rider connected to our local Docker daemon, we can open the Docker Tool Window (View | Tools Windows | Docker) and see all containers and images that are on our computer.
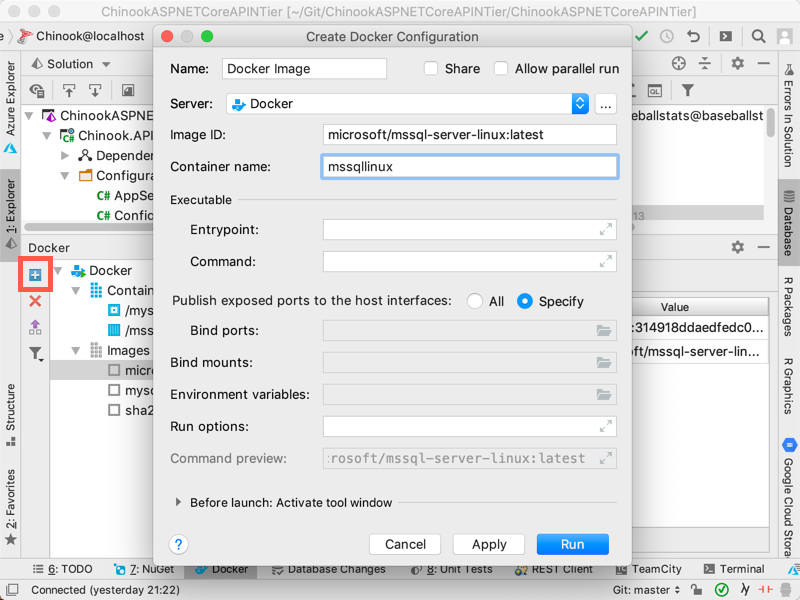
We can also create new containers from the images that are stored. Highlight an image in the tool window and select the blue plus icon on the left side. Fill in the container details and Docker will create the new container to use.
Connecting to the SQL Server Container
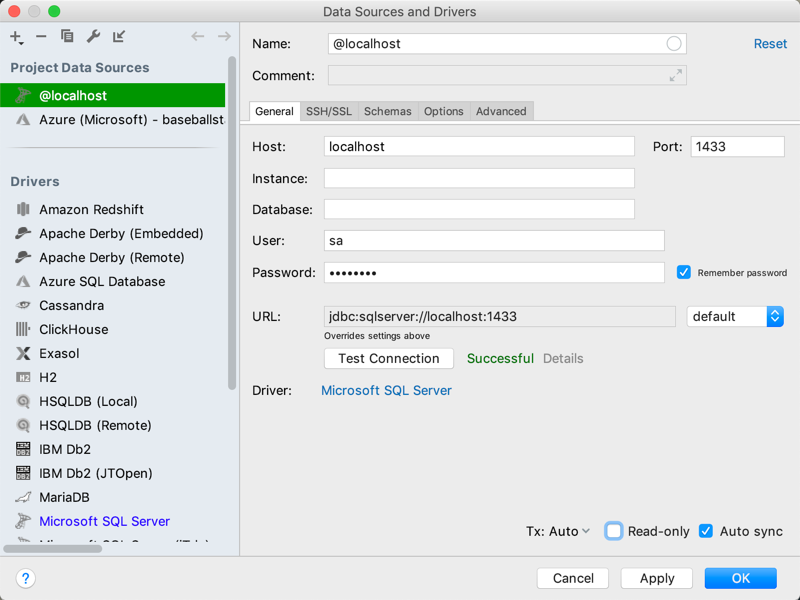
Connecting to the SQL Server running in the Docker Container is very simple. We just need to create a new Microsoft SQL Server data source from Rider.
We will set the port (1433), the username (sa) and the password (Pa55w0rd) for the container and SQL Server running inside. If we test the connection, we will find that the data source is configured correctly.
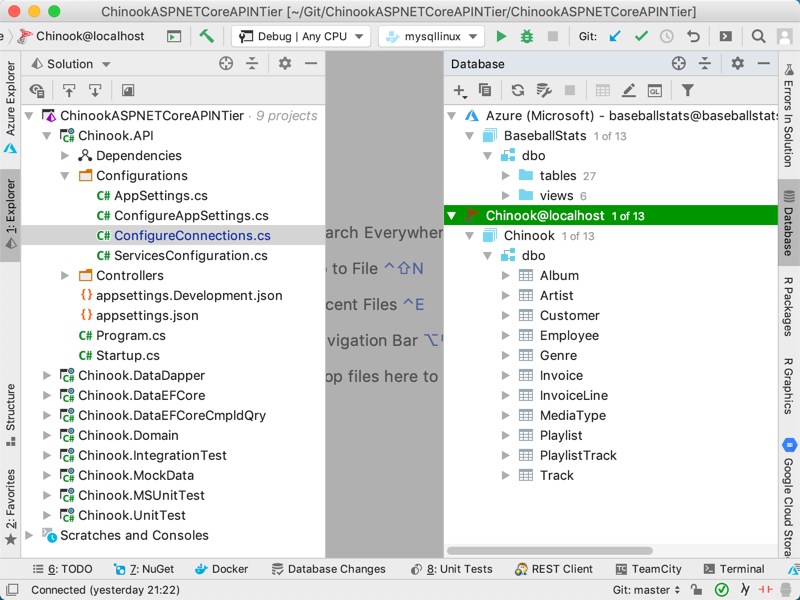
We can now work with our databases from Rider and get back to work on our projects and tasks. If you need to review how to connect to a Microsoft SQL Server database please look at the DataGrip help here.
Now that .NET Core is cross-platform, we need to discuss data connections. Here is a little extra nugget for having different connection strings for your solutions that depend on the operating systems they run on. I use it so I can develop my ASP.NET Core solutions on Windows with MSSQL running local and with MSSQL in Docker for Mac and Linux.
string connection = String.Empty;

if (RuntimeInformation.IsOSPlatform(OSPlatform.Windows))
{
	// MSSQL running locally
	connection = configuration.GetConnectionString("Server=.;Database=Chinook;Trusted_Connection=True;");
}
else if (RuntimeInformation.IsOSPlatform(OSPlatform.Linux) || RuntimeInformation.IsOSPlatform(OSPlatform.OSX))
{
	// MSSQL running in Docker container
	connection =
		configuration.GetConnectionString("Server=localhost,1433;Database=Chinook;User=sa;Password=Pa55w0rd;Trusted_Connection=False;");
}

services.AddDbContextPool<ChinookContext>(options => options.UseSqlServer(connection));
As we have seen, setting up a new Docker container for SQL Server is very easy and allows developers to create .NET Core and ASP.NET Core applications just as if they were on Windows!
Download Rider 2018.3 and give it a try! We’d love to hear your feedback!


