

.NET Tools
Essential productivity kit for .NET and game developers
A better look at Dockerfiles: creating a container with Rider

As we have seen in our previous post, Docker is a technology that allows you to create containers, which are units of software containing the environment and all the dependencies needed to develop, test, or deploy an app.
In this post, we’ll use a pre-existing image containing the resources necessary to develop apps using ASP.NET and add our own app to it for deployment. But before we start, we’ll need to configure Rider to use Docker.
Dockerfiles, images, and containers
Dockerfiles are text files that contain instructions that Docker understands. Docker uses the instructions in these files to build images by running the docker build command against the Dockerfile. Once we have built an image, we can run an instance of it: a container.
Images are composed of layers. Layers are files that are generated from individual commands in the Dockerfile. Many are read-only, usually the bottom layers, while the top ones are usually read-write and often contain applications. For example, an image might contain a layer for the OS, one for the .NET Framework, and another for the application we want to deploy. Layers make containers small, and easy to build and distribute.
We can use images from the Docker hub to serve as a base layer, and then build our own images on top of it.
Build a custom image from a Dockerfile
To build a custom image, add a file named Dockerfile with no file extension to the root of your project. Note the file doesn’t have to be named Dockerfile, but it is a common convention. It’s also common to have different Dockerfiles for development, QA, production, and any other environments with a similar naming convention. For example, we can have a Dev.Dockerfile, QA.Dockerfile, and Prod.Dockerfile for these different environments.
We can get pre-built images at the Docker Hub, and for this example, we will layer our image on top of the Microsoft’s ASP.NET Core image. Once we’ve decided on the base image we’ll use, we can pull and manage it directly from Rider.
That base image however doesn’t contain our application we want to run or debug. We’ll need to add our application layer on top using the Dockerfile.
Docker supports several commands we can use to build images. Some common ones:
FROM: Initializes a new build stage and sets the base image for subsequent instructions.WORKDIR: The working directory for the container.COPY: Copies files from location on the host to the image.ADD: Copies files from a location on the host to the image. Add also enables copying from a URL and extracting the contents of a tar file to the image.RUN: Executes a command and saves the results as a new layer in the image.MAINTAINER: The author or maintainer of the image. [Deprecated]LABEL: A key-value pair to store metadata about the container.BUILD: Defines a variable to pass to the build command.
Note: The commands aren’t case sensitive, but it’s Docker’s preferred convention that we use upper case to distinguish them from arguments easily.
There are more commands and details about them at the Dockerfile reference.
Fortunately, Rider helps us by providing syntax highlighting and autocompletion for Dockerfile commands. Very convenient!
Once we’ve coded the commands for an image, we can build or run it (running includes building it), right from Rider. Just click on the green arrow in the top left of the file, in the gutter area to start a build or run.
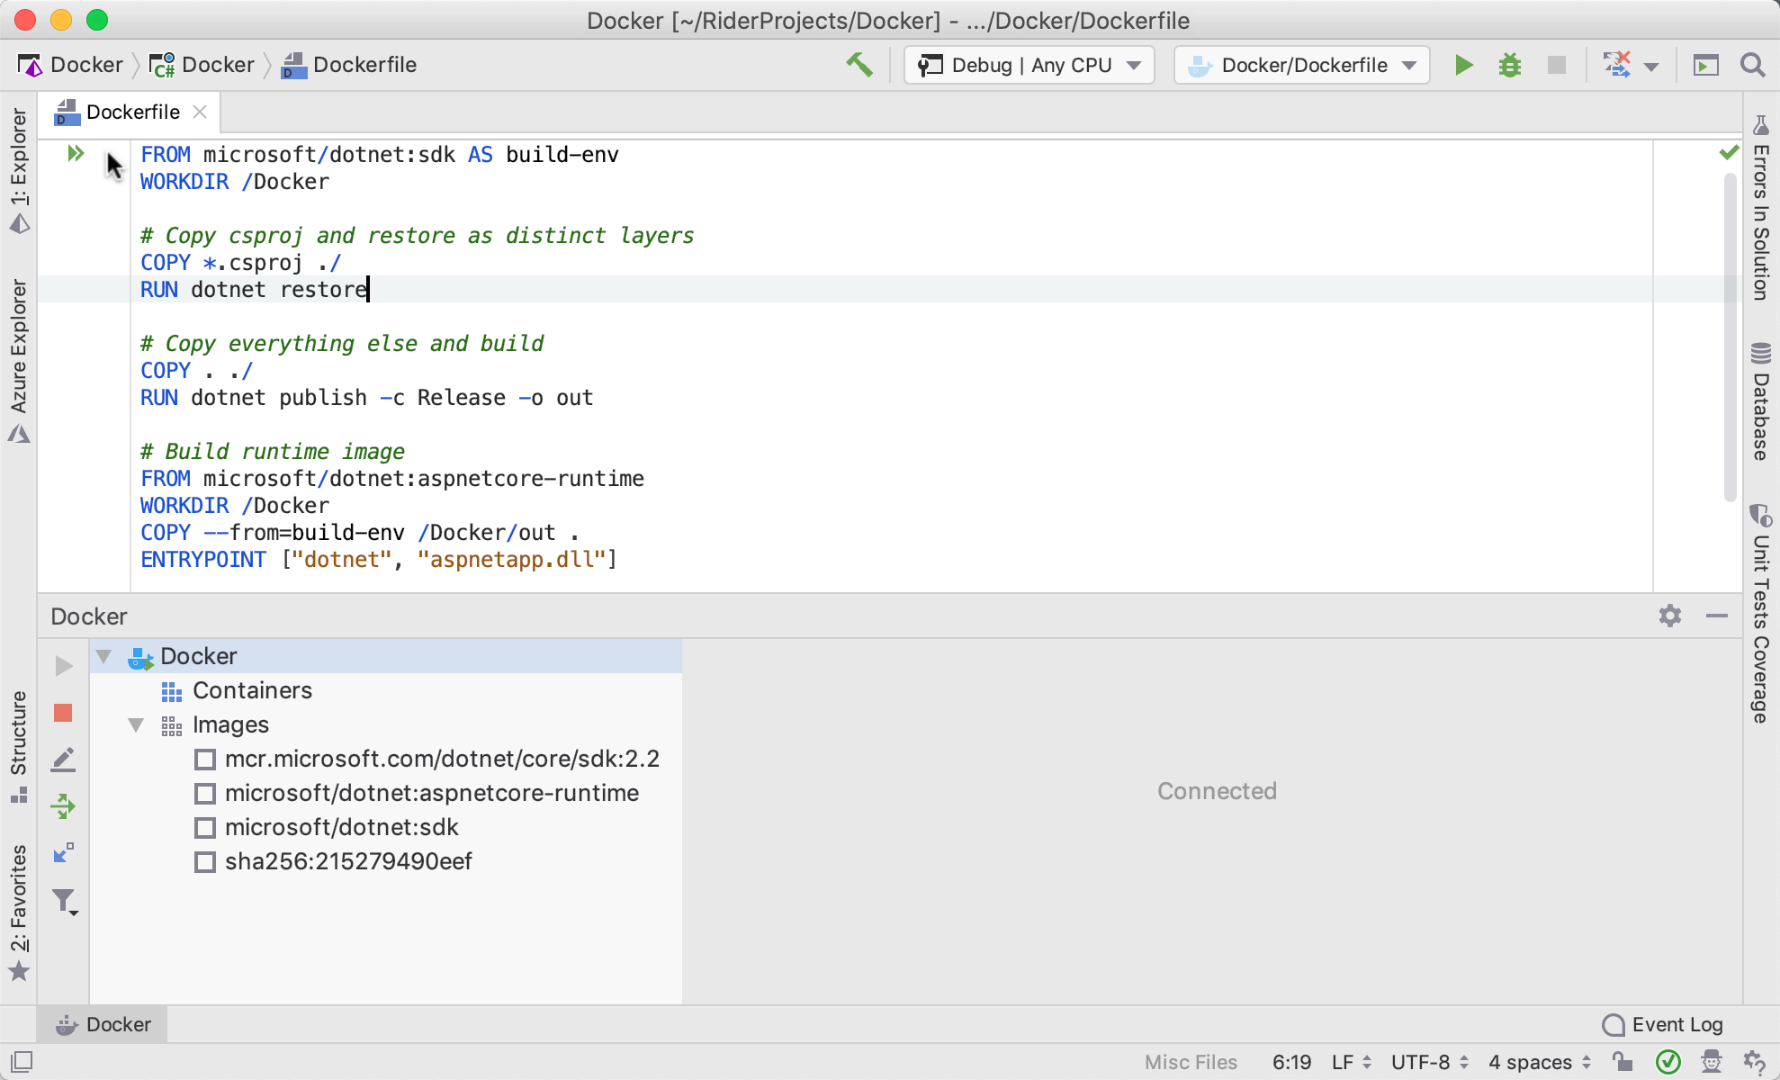
We see the image and container that’s been added to the Docker assets shown in Rider. From previous builds, Docker had built an image as a layer, with no name – just a SHA hash that was used to build this image on top of that layer. Docker can reuse the bottom layers for other images as well, making them portable and easy to work with.
Multi-stage builds
Each command creates a new layer, which in turn adds to the size of the image. We want to keep image sizes small, and multi-stage builds are a way to do that. Historically, image creators would author multiple Dockerfiles and stitch them together in build scripts with the Docker build command to create a smaller image.
In the Dockerfile, authors would chain multiple RUN commands together so as to make one big command for one small image. However, since version 17.05, multi-stage builds allow us to use the FROM command multiple times, which use different bases to begin new build stages. Because of this, we can copy from stage to stage and leave out any assets that we don’t want in the final build.
Docker creates incremental layers that it can later use if it is unchanged. That means that once a layer is built, if nothing changes, Docker will just reuse that layer. This makes images smaller, easier to build and manage, and more portable.
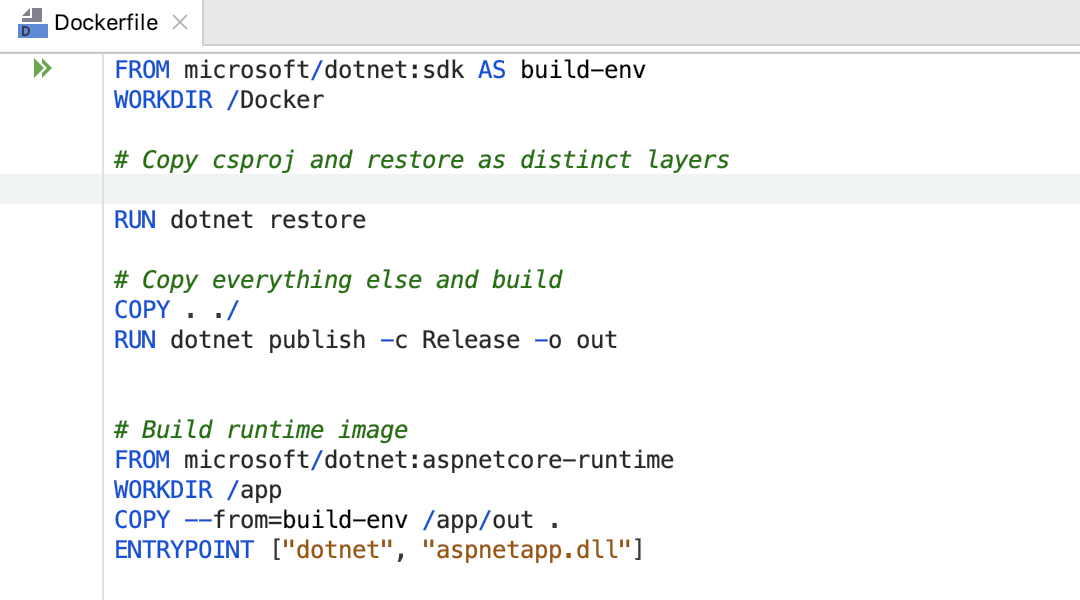
As shown in the following example, the first FROM statement sets a stage that a subsequent COPY statement uses. Without multi-stage builds, this image would be much larger than we would want.
FROM microsoft/dotnet:sdk AS build-env
WORKDIR /Docker

# Copy csproj and restore as distinct layers
COPY *.csproj ./
RUN dotnet restore

# Copy everything else and build
COPY . ./
RUN dotnet publish -c Release -o out

# Build runtime image
FROM microsoft/dotnet:aspnetcore-runtime
WORKDIR /Docker
COPY --from=build-env /Docker/out .
ENTRYPOINT ["dotnet", "aspnetapp.dll"]
See the Docker reference online for more details on setting up multi-stage builds.
Go ahead and try out Docker images with Rider. Then send us your feedback. We’d love to hear from you.


