.NET Tools
Essential productivity kit for .NET and game developers
Project Dependency Diagrams come to Rider 2020.3

In the latest Rider 2020.3 Early Access Preview (EAP) builds, we’re bringing in Project Dependency Diagrams from ReSharper!
With project dependency diagrams you can visualize project dependencies in your solution, and explore its architecture. In this post, we’ll have a look at what project dependency diagrams look like, what information they show, and how we can use them to analyze project coupling in a solution.
Hello, project dependency diagrams!
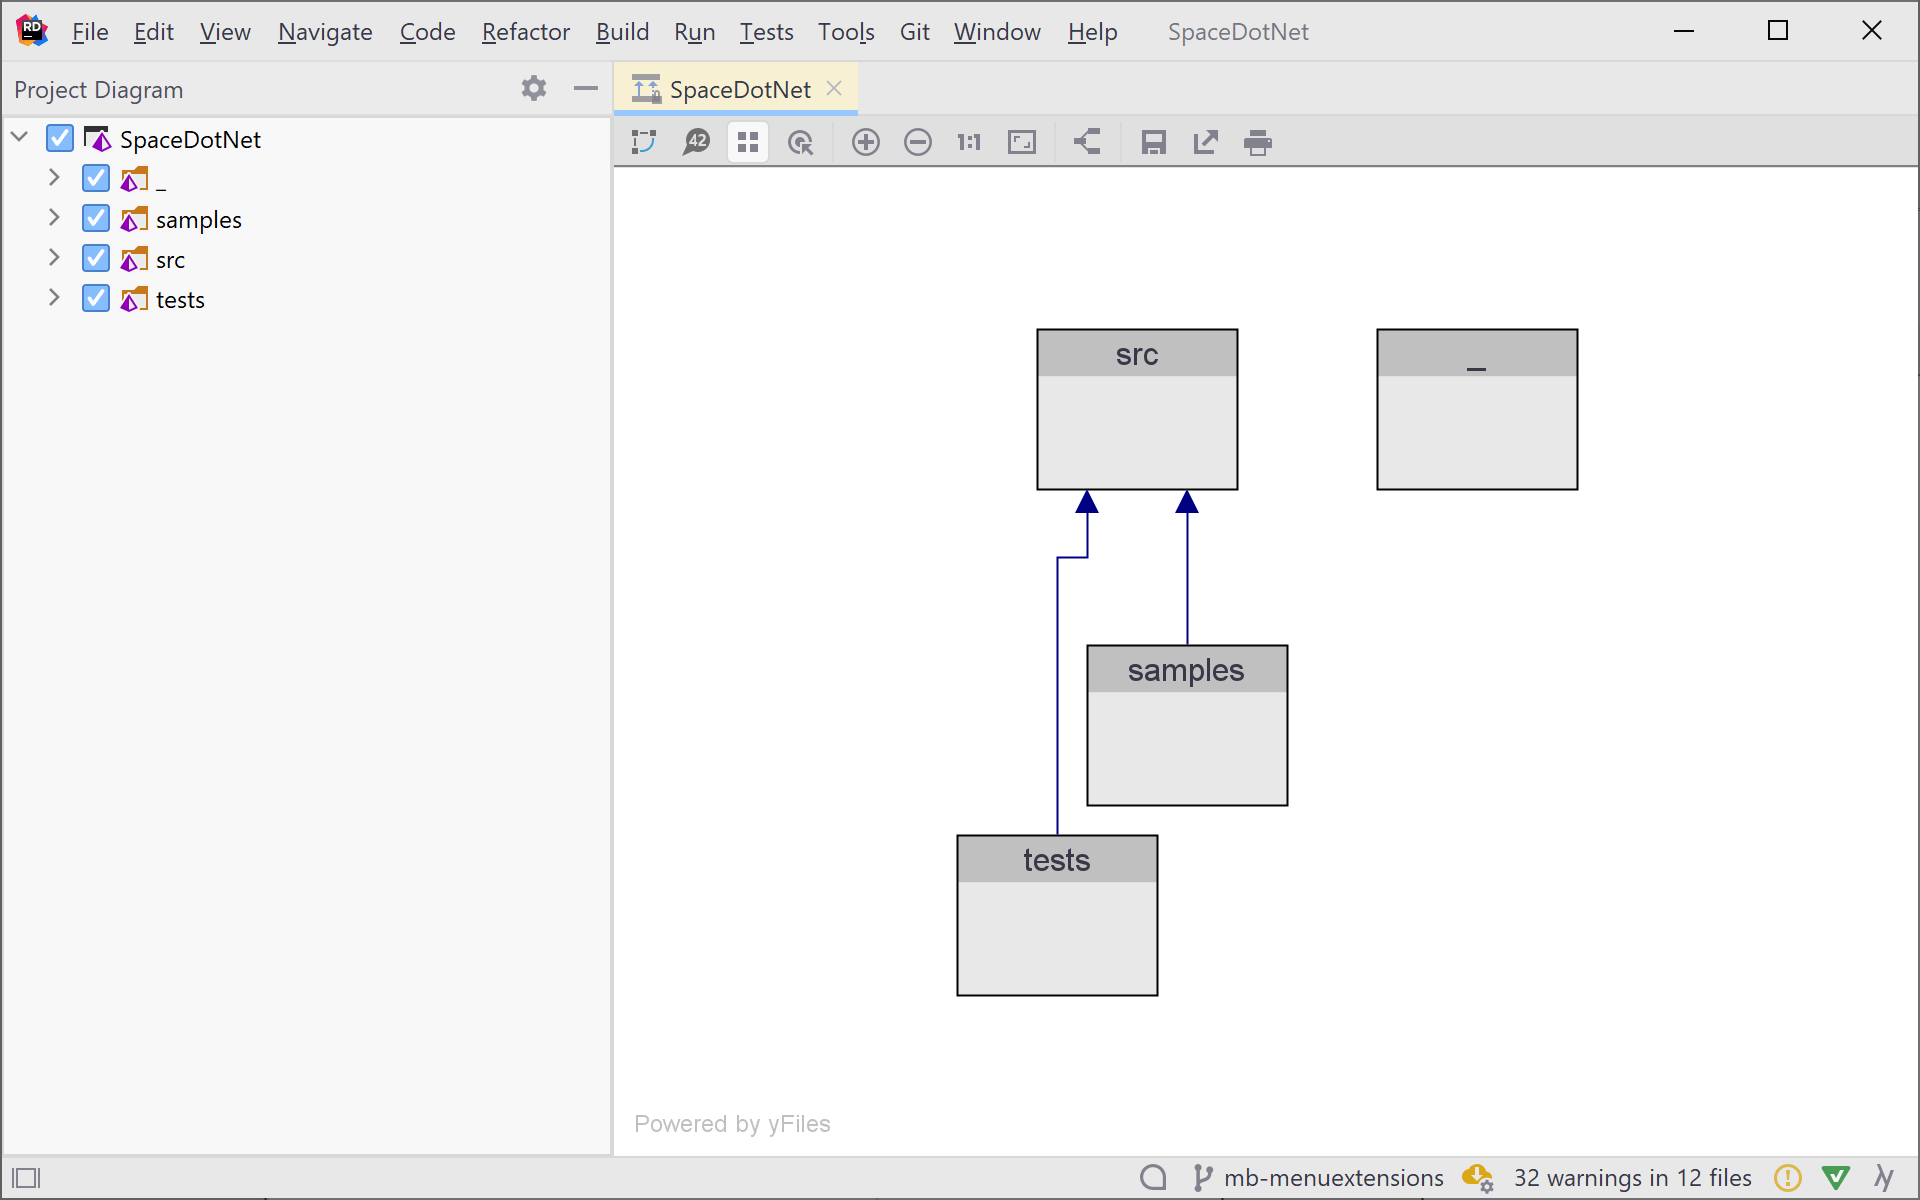
You can open the project dependency diagram from the context menu in solution explorer, or by using the Tools | Architecture | Show Project Diagram menu. The project dependency diagram follows your solution structure, and starts by showing all top-level items in your solution.
In this particular solution, I have some solution folders (src, tests, samples), so those will be shown by default. Double-clicking an item in the diagram will expand (or collapse) its child items. In the Project Diagram tool window, you can also select which projects (or solution folders) should be visible.
Have a look at the various context menus and toolbar icons, and try zooming/panning the diagram. Blocks in the diagram can also be moved around. Using the context menu, you can enable a grid (and the snap to grid option, if needed), so you can organize the project dependency diagram to your liking. You can also add notes to annotate certain projects.

From the toolbar, you can export the diagram as an image, and include it in your documentation. Or print it and hang it on your team room wall!
Navigating the Project Dependency Diagram
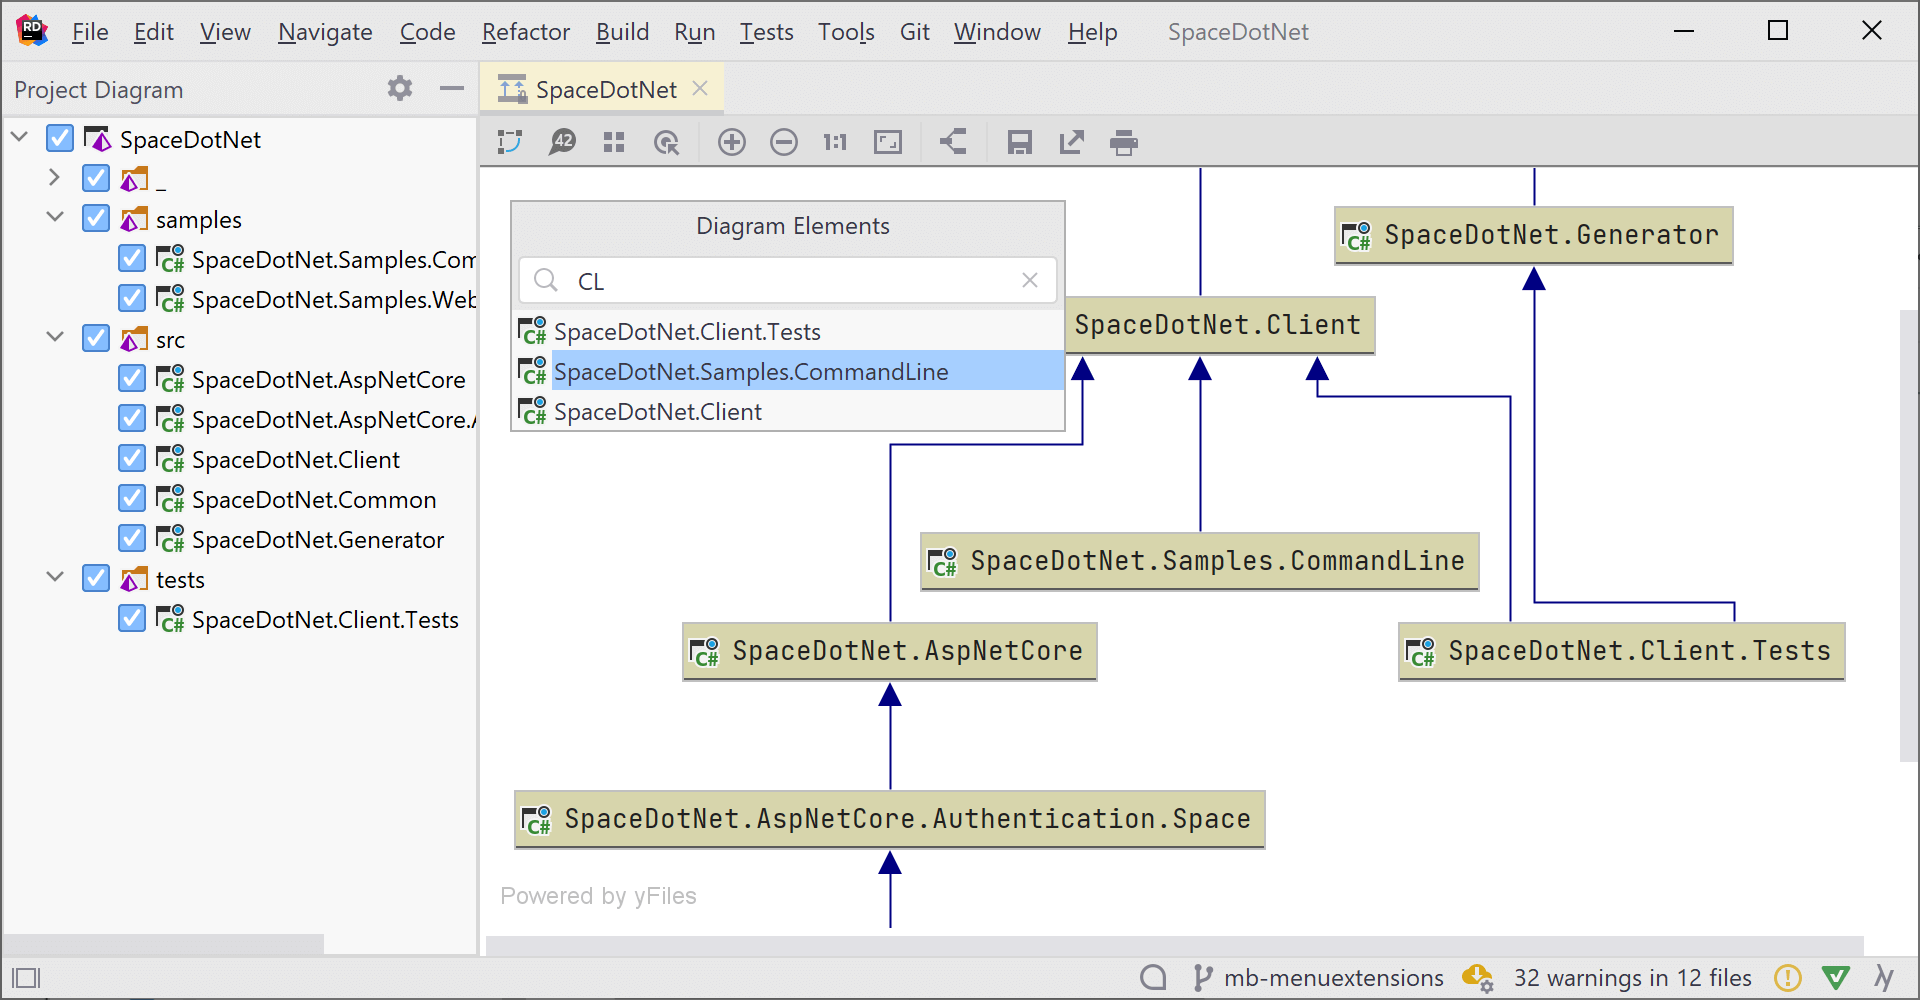
It is possible to navigate to a given project and position it at the center of your project dependency diagram. Use the Ctrl+F on Windows or Cmd+F on macOS, and find the project you want to focus on.
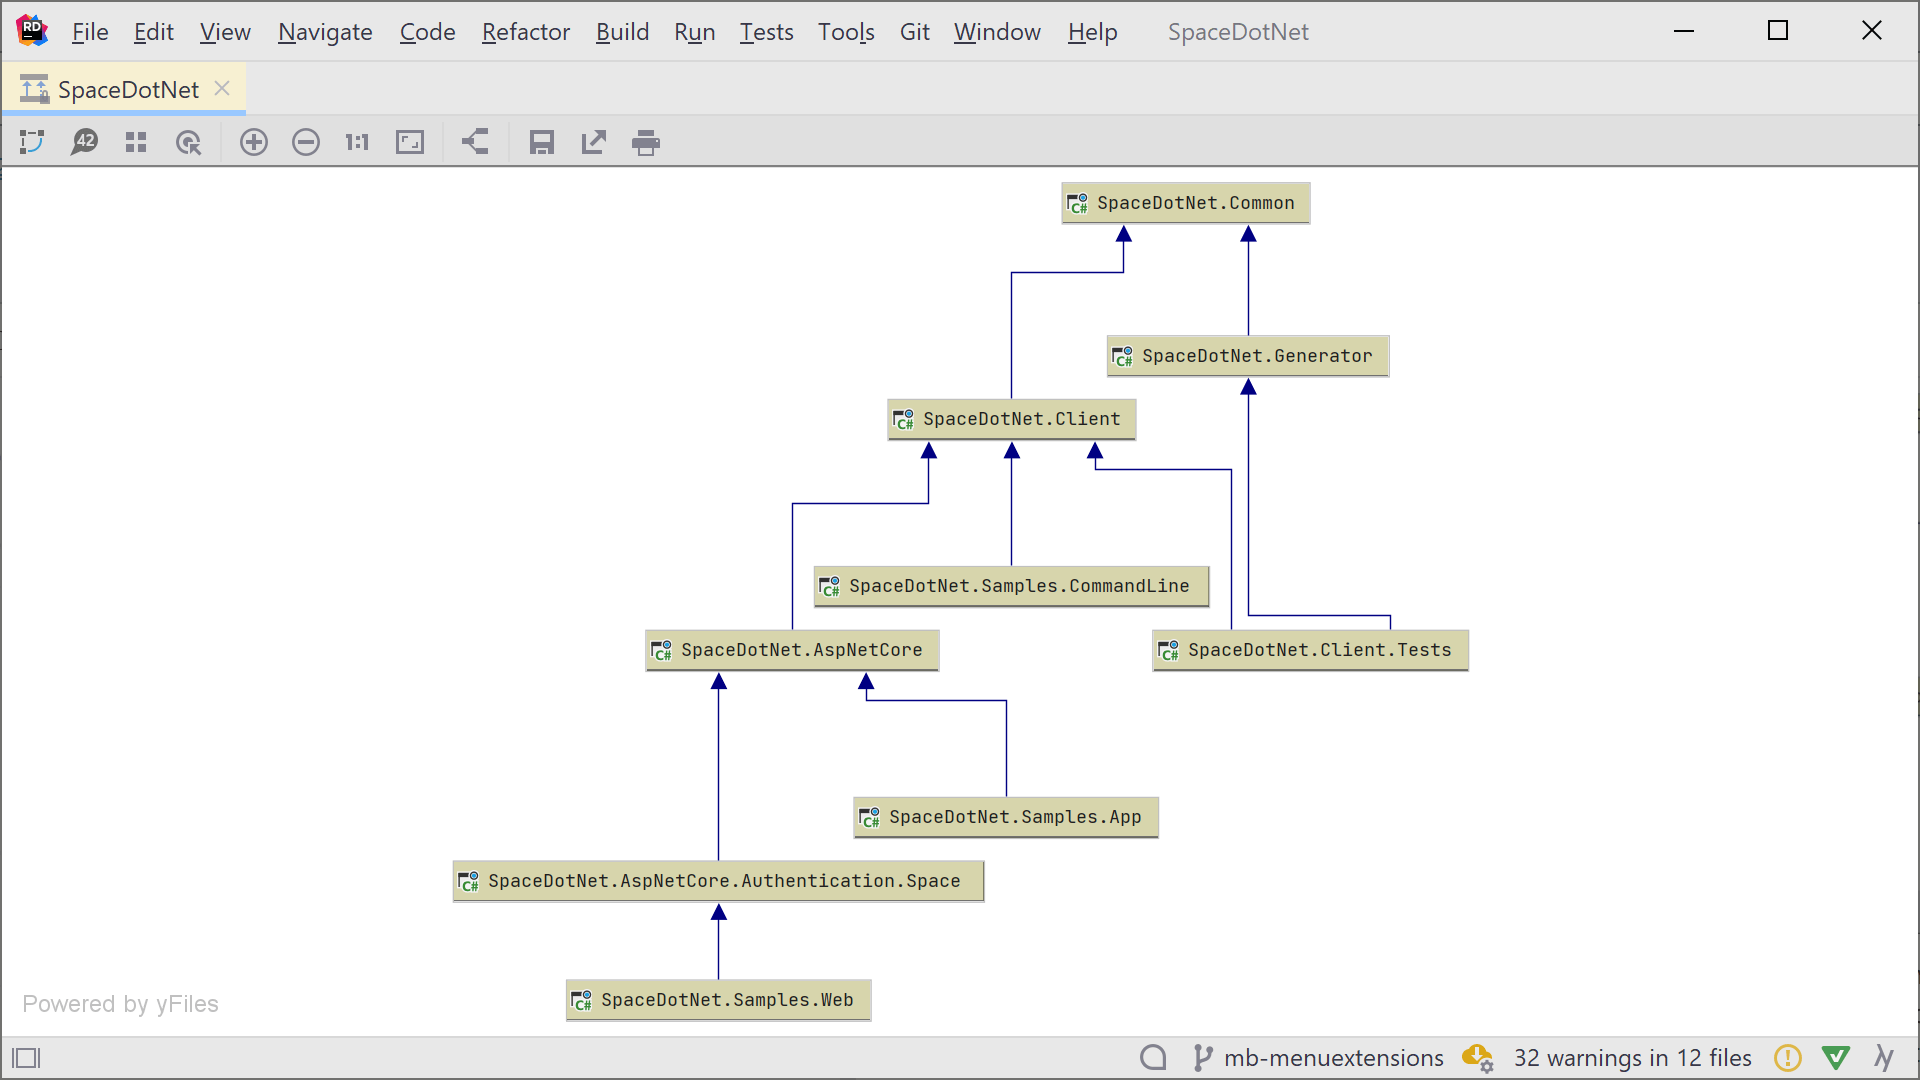
The Show Neighbours of Selected Nodes toolbar button filters the project dependency diagram to the selected node, its direct dependencies, and the projects that depend on this project. For example, after clicking SpaceDotNet.AspNetCore, the diagram will be filtered to the projects that reference this project, and its direct dependencies.
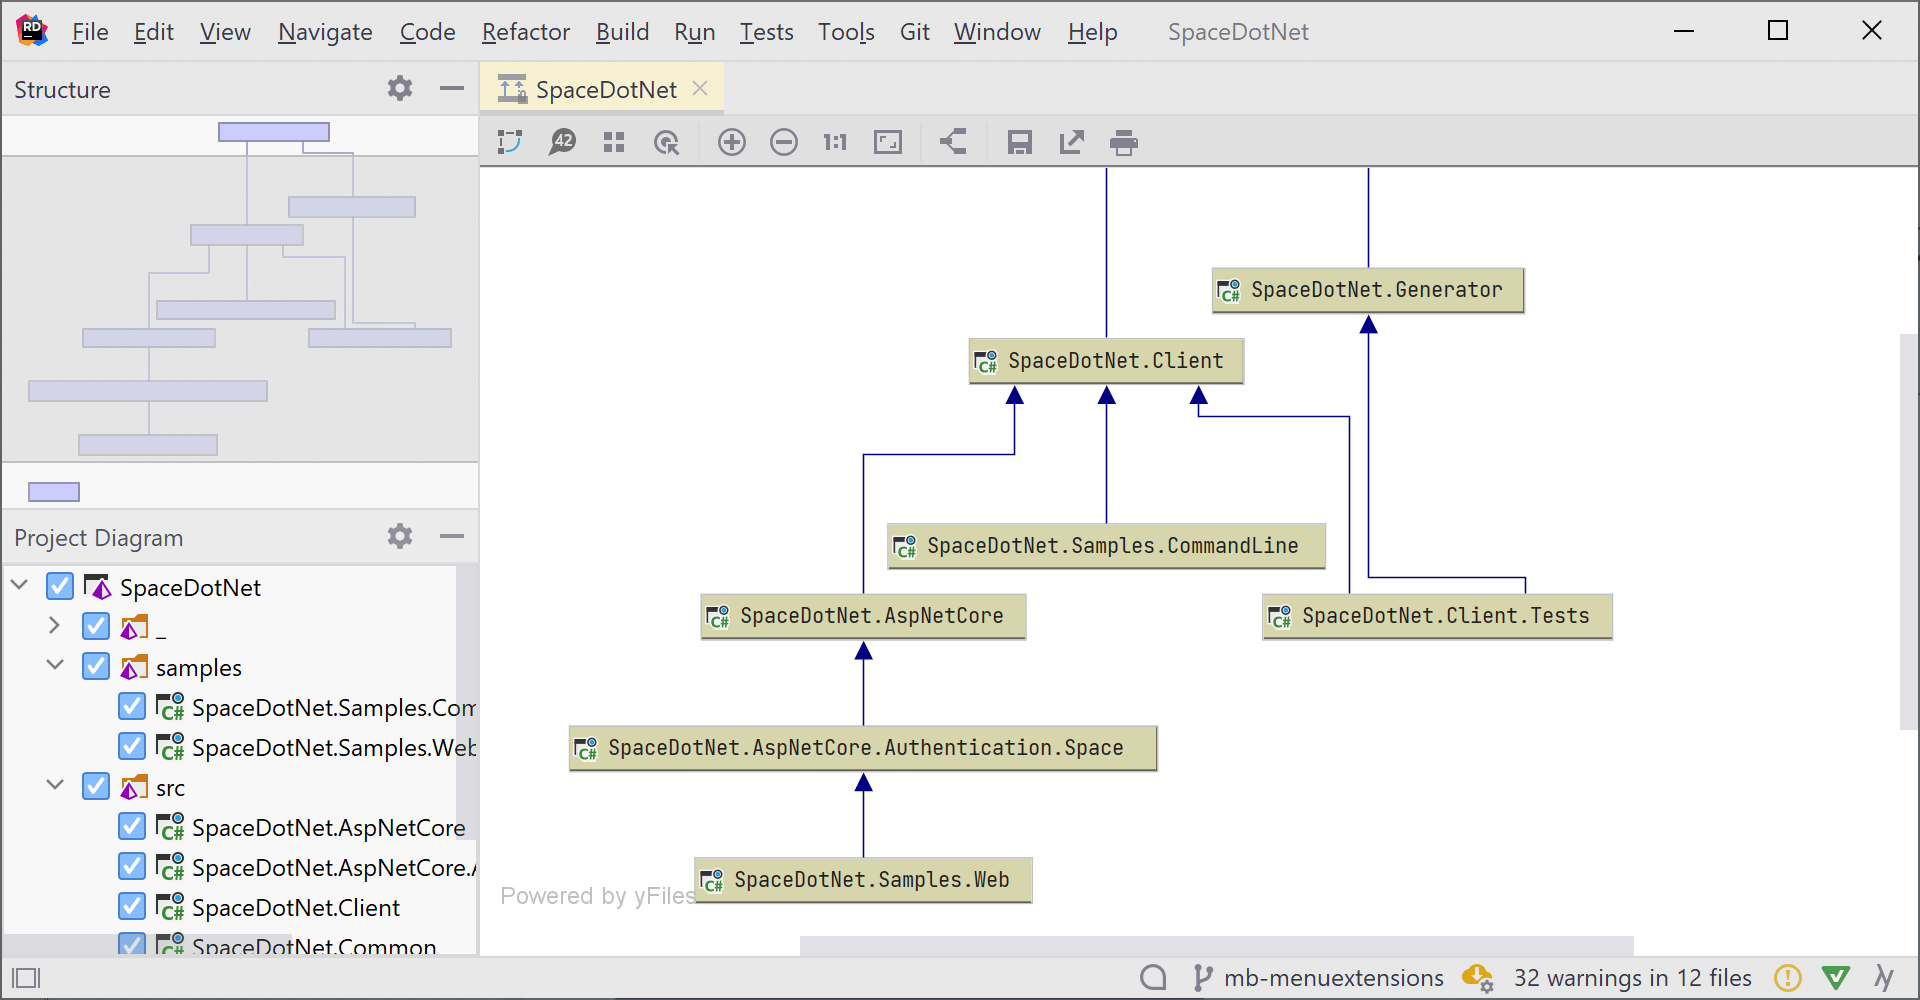
For large project dependency diagrams, you can open the File Structure tool window (Ctrl+Alt+F in the Visual Studio keymap) and pan around using a high-level overview.
Analyze coupling between projects
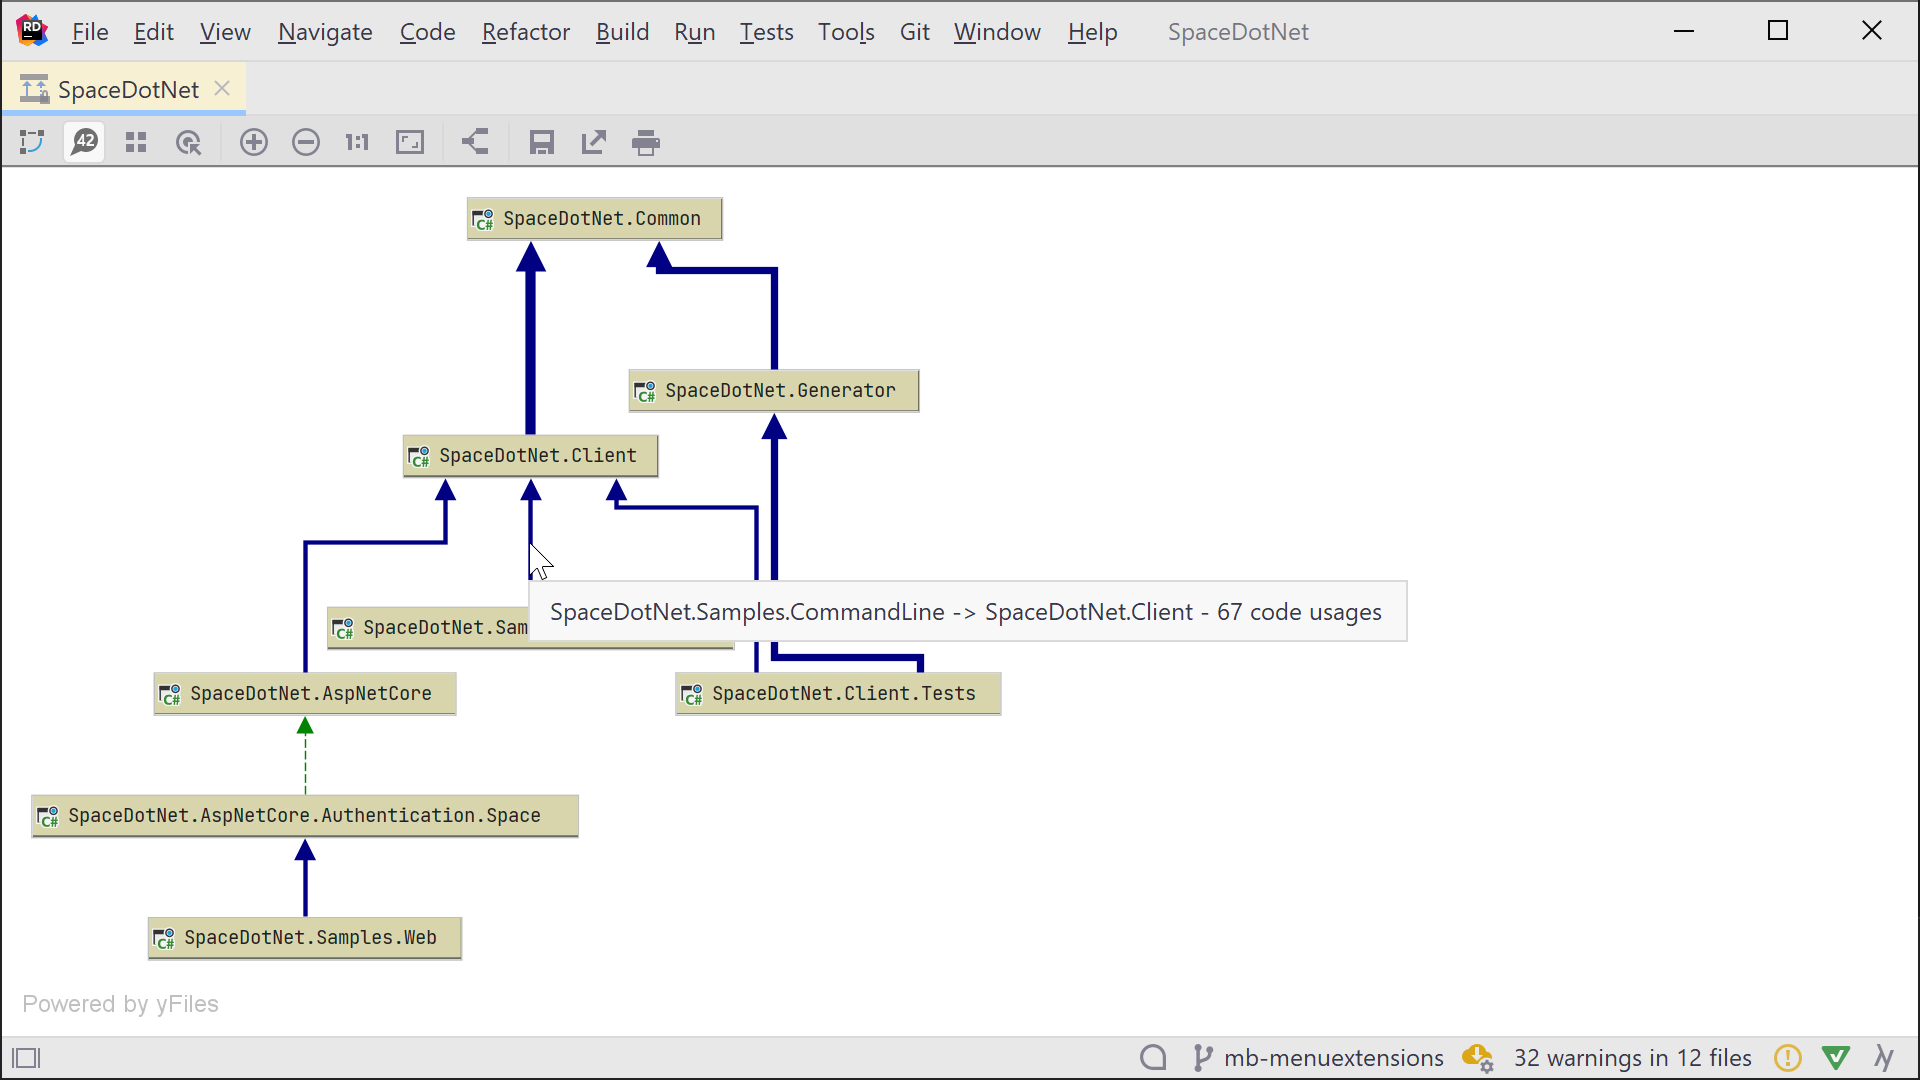
A project dependency diagram helps you analyze coupling between projects. When you click the Enable Coupling Analysis icon in the toolbar, Rider will perform additional analysis and update the diagram. The thickness, color, and style of the links may change, depending on how tight the coupling between projects is.
![]()
A solid link means compile-time references exist between two projects. The thickness of the link gives you an idea of how many usages exist. The more usages exist, the thicker the link will be drawn.
Dotted links are drawn between projects that have no compile-time usages.
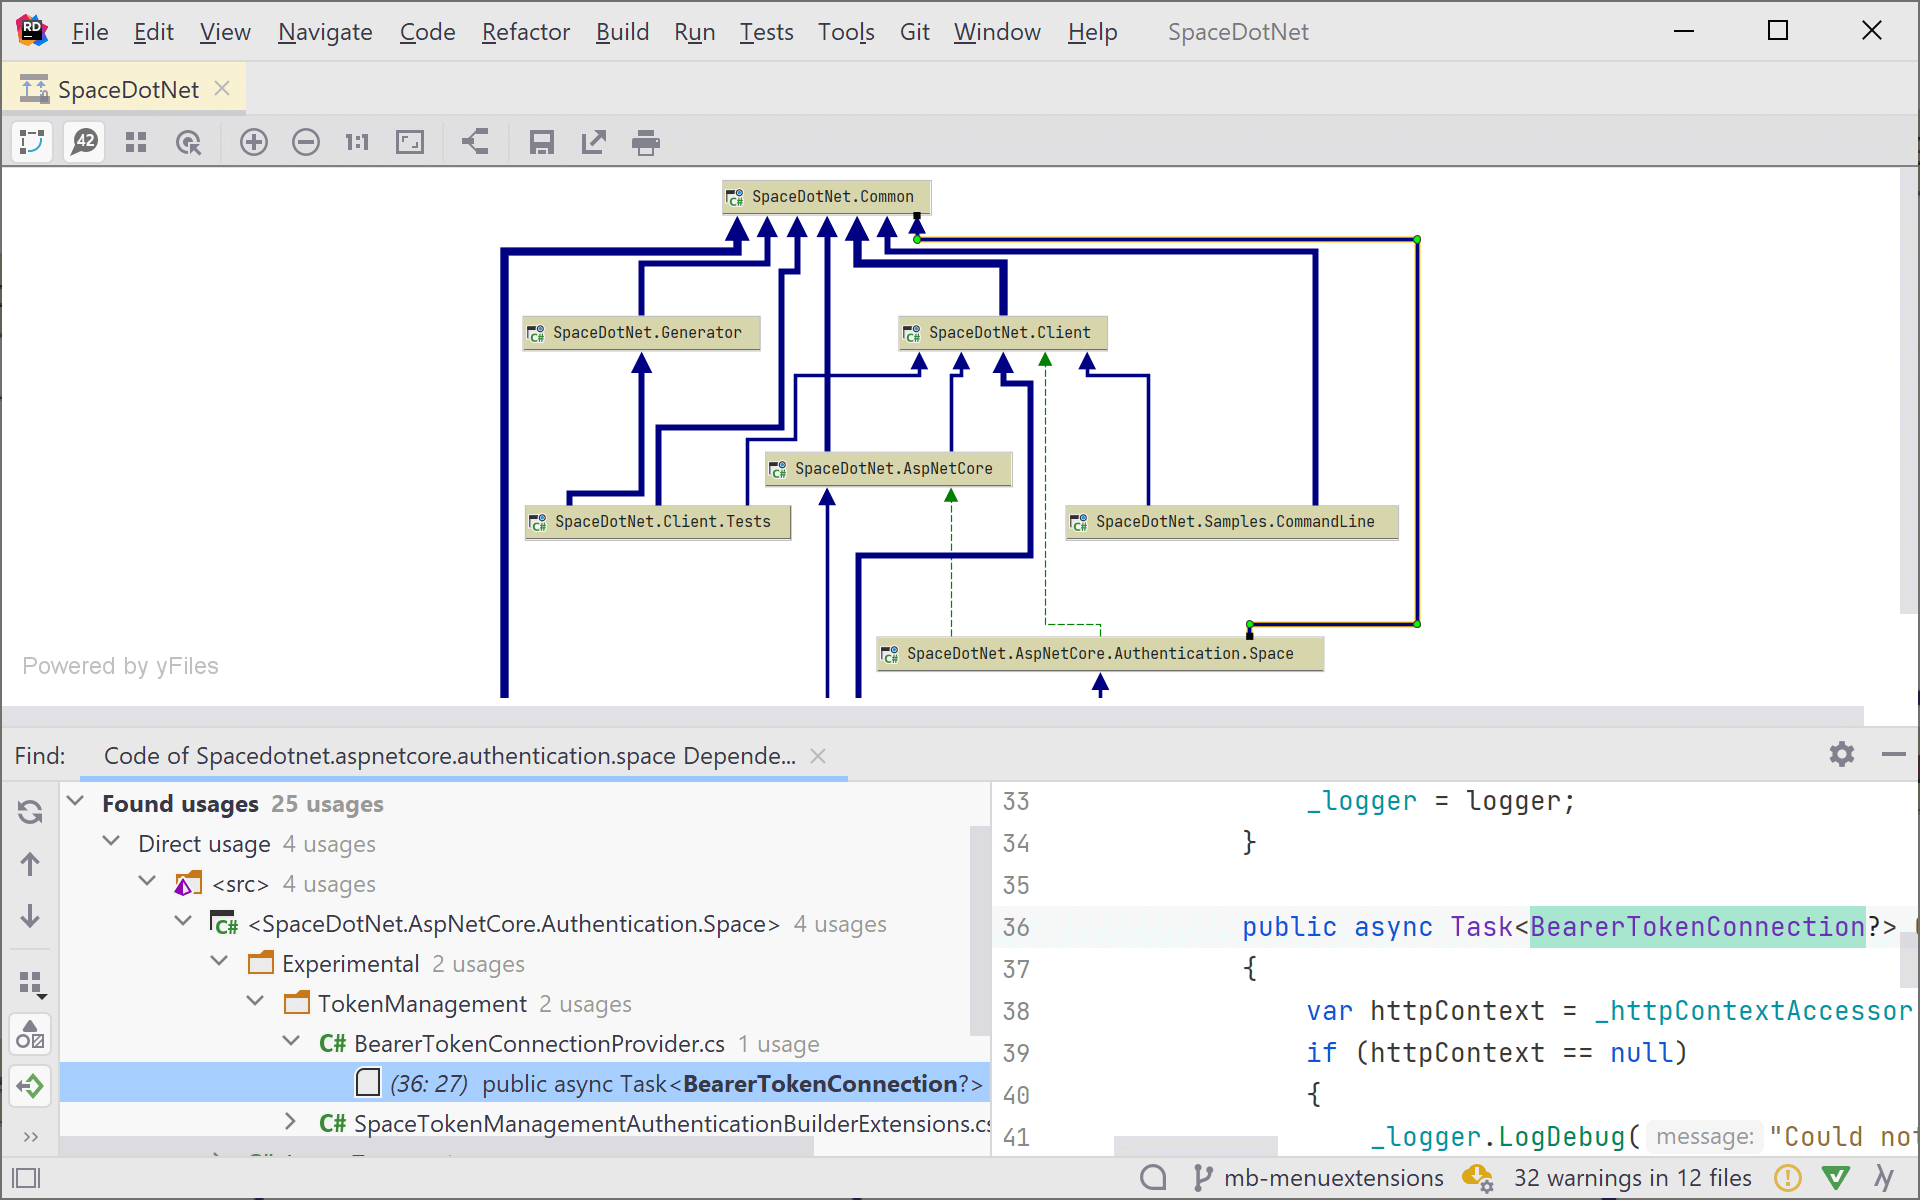
When in doubt, hover the link. Rider will display a tooltip with the exact number of usages. Clicking the link will gather details about dependent code, and show them in a separate tool window.
In a project dependency diagram, you can also Show Transitive Dependencies. This will render not only direct project dependencies, but also indirect dependencies. In the following diagram, the SpaceDotNet.AspNetCore.Authentication.Space project has no direct reference to SpaceDotNet.Common, however, it does have a transitive dependency. When clicking the link, you can see that we are using types from SpaceDotNet.Common. It could be a good idea to make this an explicit project reference after all.
Note that for large solutions, building the dependency diagram and calculating code metrics can take some time.
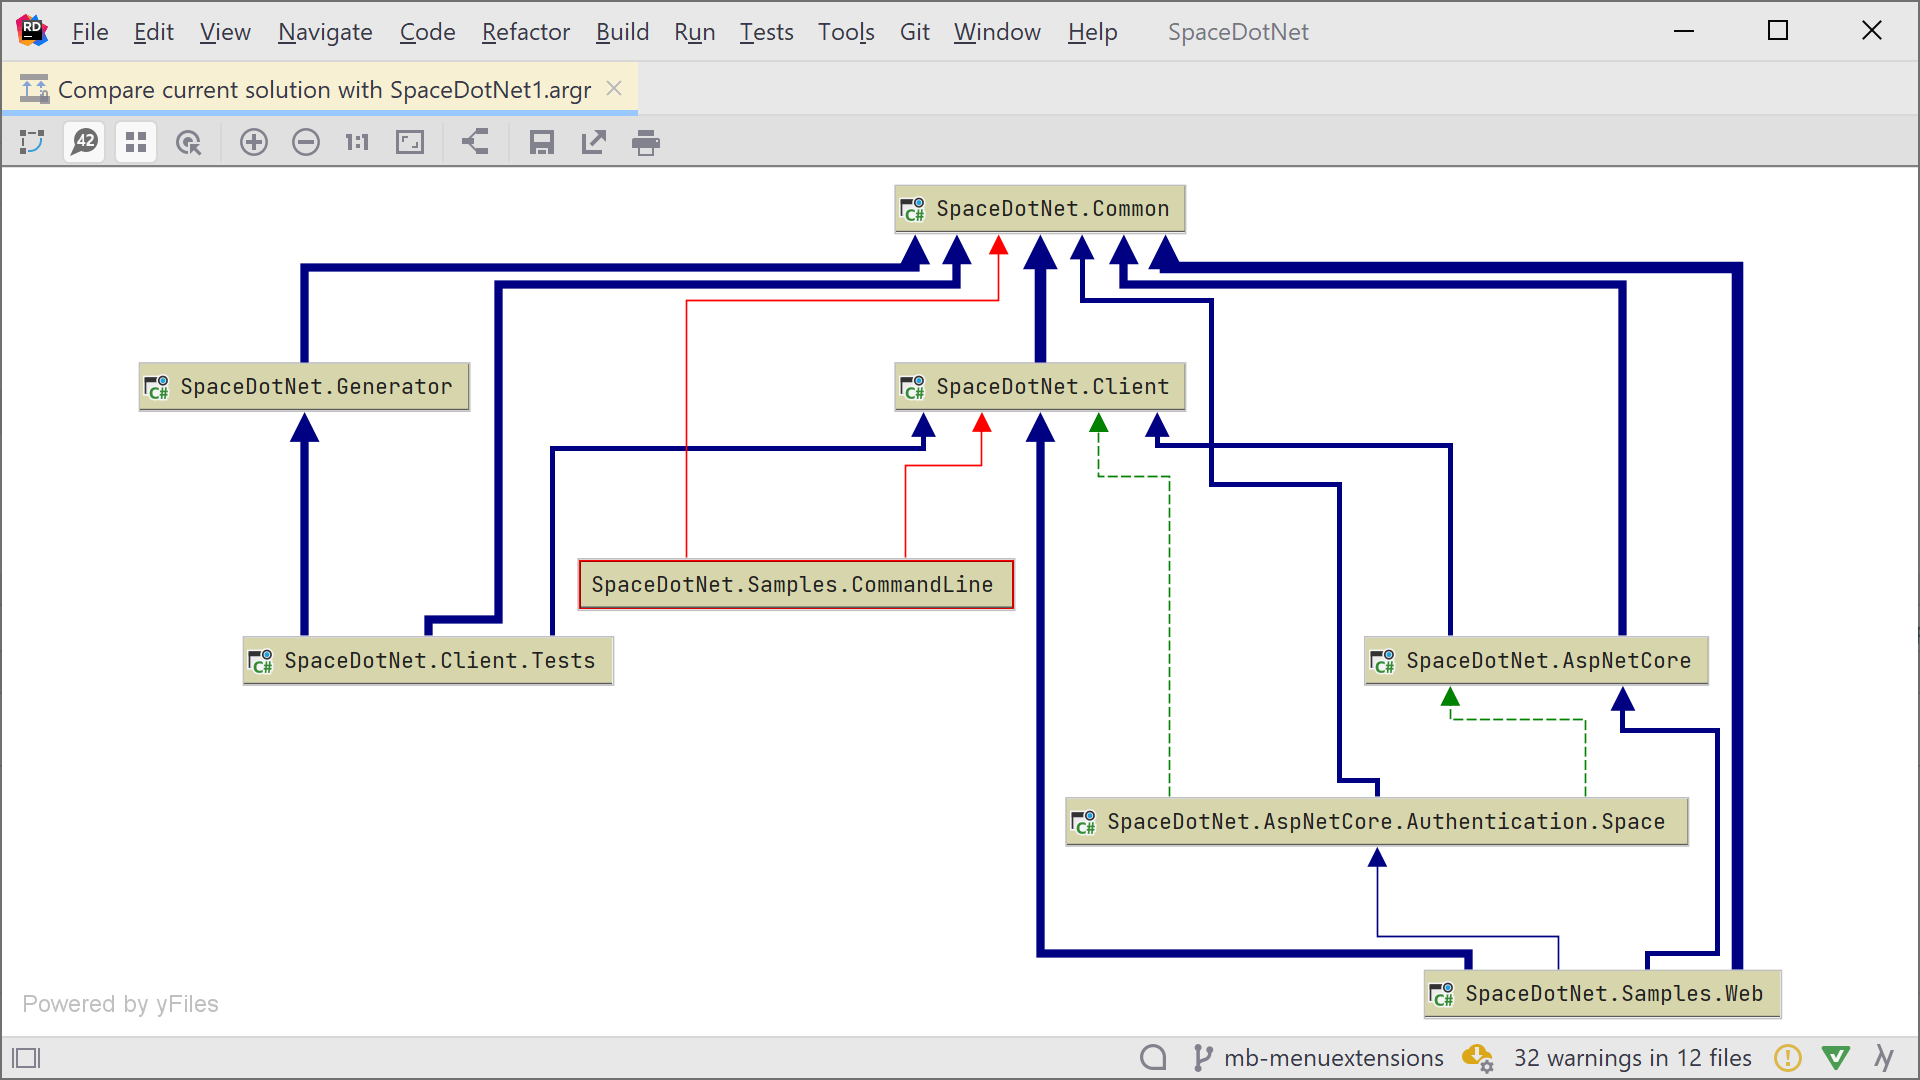
Compare saved snapshots with the current solution
From the toolbar, you can save a project dependency diagram for future use. Using the Tools | Architecture | Compare With Saved… menu, you can load and inspect previously saved snapshots. If your solution’s current project dependencies are different from the saved diagram, Rider will show those differences. This helps to keep track of the evolution of dependencies in your solution.
Feedback
We’ll be releasing Project Dependency Diagrams in Rider 2020.3. While you can use it in the early access previews of Rider already, we’re still polishing this new feature. If you run into any issues, we welcome your feedback in this issue.
Download Rider 2020.3 EAP and give it a try!