.NET Tools
Essential productivity kit for .NET and game developers
Build Serverless Apps with Azure Functions

Azure Functions is a cloud technology from Microsoft. It helps individuals and companies from startups to mega-corporations, since they all have these few things in common:
- Code that doesn’t fit into traditional or popular application architectures.
- Code that must run based on some event that happens.
- Software that must integrate with other software.
And this is where Azure Functions can help. So in this blog post, we’ll review what Azure Functions are and how they can help you, as well as demonstrate the basics of building an Azure Function app.
Azure Functions Overview
An Azure function is just that – a function. A single unit of work. The difference between an Azure Function and any plain old function from any language is that Azure Functions run in the cloud, and a single function can be treated as a deployable unit. Multiple functions can be bundled into an Azure Functions App and deployed as a unit as well.
There are many usage scenarios for Azure Functions that make it a better choice than traditional application architectures. Let’s take a look at some examples:
- A lot of software does ETL batch processing on a scheduled basis, such as uploading Excel files, running some business rules against that data, then ultimately storing it in a SQL or other type of database.
- Every company has at least one extremely small application that does only one specific thing. This could be something like a time-keeping utility, where employees log their time on their phone, and an Azure Function sends the data off for processing.
- Quite a bit of software is complex and would benefit from a microservice-style architecture. These apps often integrate with other applications. Some are purchased as packaged software (CRM, ERP, etc…), and others built in-house. Either way, you can integrate them seamlessly with Azure Functions.
- Software that needs to quickly scale, or that runs sporadically. For example, event organizers that host their event once a year shouldn’t have to maintain, pay for, secure, and run the event software and hardware for several months while nobody is using it. That’s a big expense when the software is used 25% of the time. Azure Functions helps you manage everything from deployment to scaling for occasionally-used software like this.
These represent just a few common use cases that fit well with Azure Functions. Additionally, Azure Functions works well in several other scenarios.
Azure Functions Apps
There are two things you’ll need to install to get started building Azure Functions apps with Rider:
- Azure Toolkit for Rider: The Azure Toolkit provides features to help you manage Azure assets with Rider. The toolkit installs project templates for Azure Functions. This plugin lets you download, install, and update the Azure Core Tools (see Settings | Tools | Azure | Functions). Additionally, there are many useful local development tools in the plugin such as Azurite support, Azure AD support, and log streaming.
- Azure Functions Core Tools: These tools enable local development for Azure Functions.
Functions Apps created using Rider’s Azure Functions project template contain three files, a .gitignore, host.json and local.settings.json. Host.json is a file that contains global configuration options that affect all functions in a function app. Local.settings.json contains information about the development environment, such as logging, local connection strings, and more. Fortunately, Rider has great features to help you work effectively with JSON.
A function app provides an execution context in Azure in which your functions run. Function apps can contain as little as a single function, or as many functions as you’d like. Each function is normally represented by a single function inside of a single class and some companion configuration, that is declared in a file called function.json, or as attributes in the function code itself.
Azure Functions API
Because a function is a deployable unit, there needs to be a way to invoke it. That’s where triggers fit in. A trigger is the event that causes a single function to run. Each function in a function app has its own trigger, configured by a binding. There are several trigger types available, covering common scenarios in which you’d want to launch a function. The other bindings available are input or output. Input and output bindings are mechanisms that allow you to connect to resources, such as a CosmosDB data stores, queues, notifications or more.
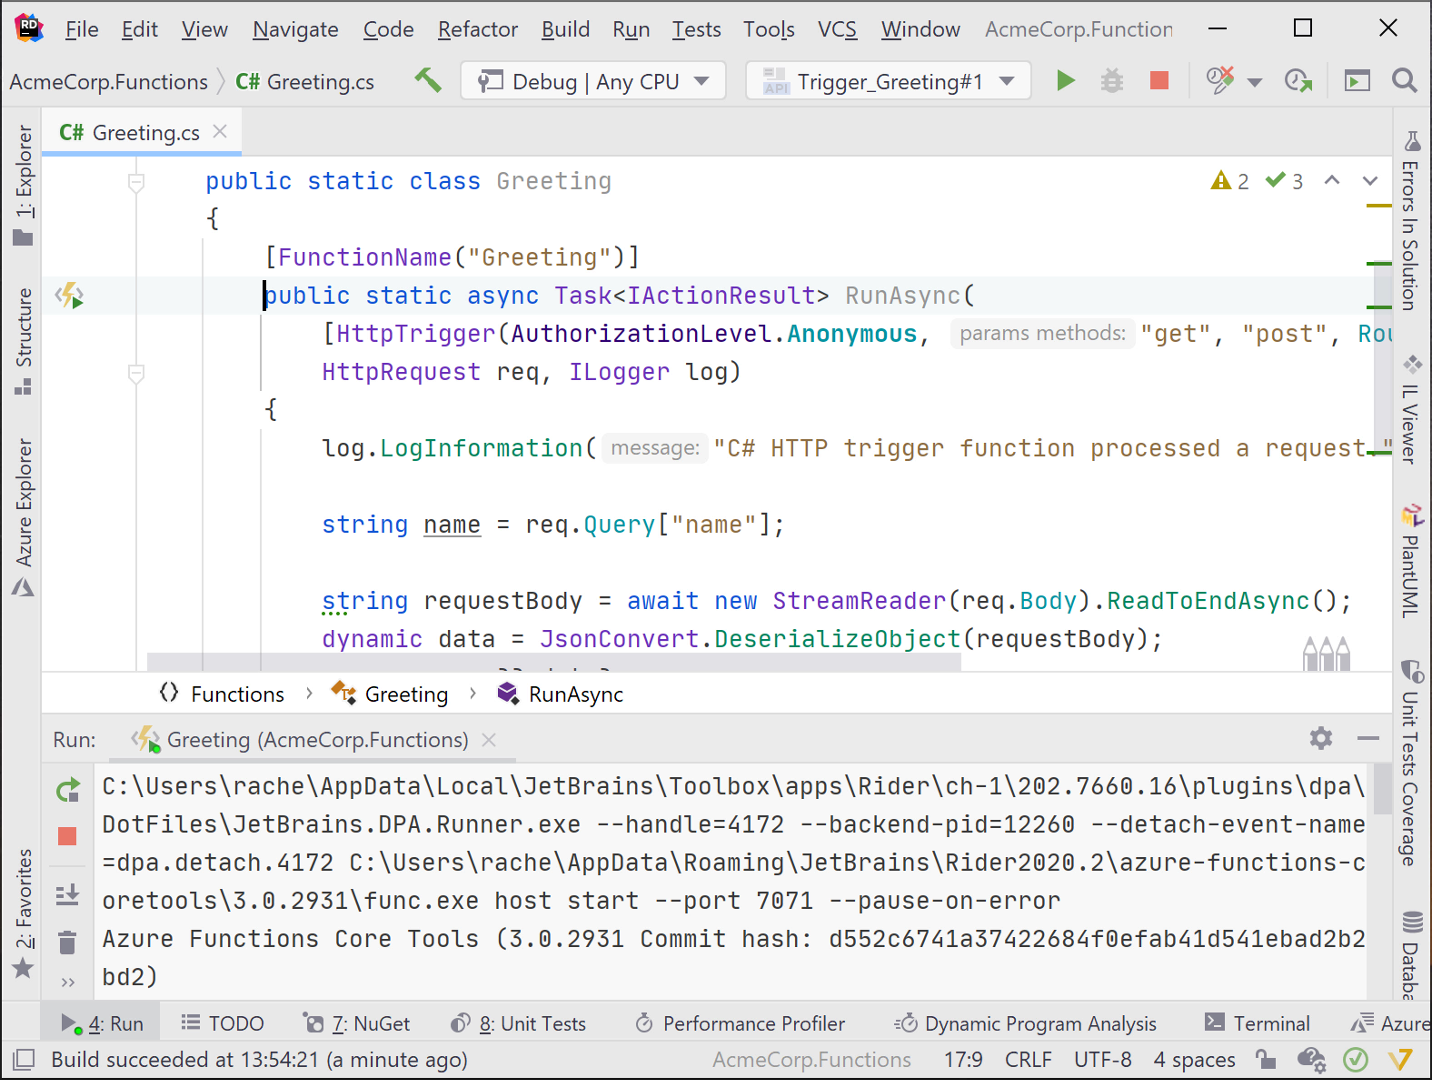
Since there is one Azure Function per class (there can be many private functions), the function’s name is RunAsync. However, having several different classes with a RunAsync function gets confusing, quickly. To make the name friendly, use the FunctionName attribute.
[FunctionName("Greet")]
public static async Task RunAsync(
    [HttpTrigger(AuthorizationLevel.Anonymous, "get", "post", Route = null)]
    HttpRequest req, ILogger log)
Another attribute of importance is the output binding which specifies what resource the function should connect to. In the following example, when a value is returned – it’s not returned to the caller as would happen in a function in any given language, but into the queue that’s been defined in the attribute, as shown below.
[return: Queue("greetings-queue", Connection = "StorageConnectionAppSetting")]Use a return statement and the .NET Framework will put the data where it belongs – in this case, the queue named greetings-queue as defined previously. This is a great way to chain resources together in Azure, for example, input via an HTTP trigger to a queue, or to CosmosDB, or both. Below is the complete function demonstrating accepting a value from an HTTP Request then adding it to CosmosDB.
[FunctionName("Greet")]
[return: Queue("greetings-queue", Connection = "StorageConnectionAppSetting")]
public static async Task RunAsync(
    [HttpTrigger(AuthorizationLevel.Anonymous, "get", "post", Route = null)]
    HttpRequest req, ILogger log)
{
    log.LogInformation("C# HTTP trigger function processed a request.");

    string name = req.Query["name"];

    string requestBody = await new StreamReader(req.Body).ReadToEndAsync();
    dynamic data = JsonConvert.DeserializeObject(requestBody);
    name = name ?? data?.name;

    return name != null
        ? (ActionResult) new OkObjectResult($"Hello, {name}")
        : new BadRequestObjectResult("Please pass a name on the query string or in the request body");
}
After creating a function, try it out by choosing to run or debug it. When using Debug or Run, the function executes locally, so you may need to configure some options in package.json. If you’re testing a Timer Trigger, you can easily run or debug it: there’s no need to sit around waiting for the timer, or have to change it to one second then risk commiting pushing the wrong timer settings to production. Test Timer Triggers the same way as HTTP triggered functions, with Alt+Enter or the gutter icon.

Running or debugging a function starts the local web server and shows a link to URL in Rider’s Terminal window. If you prefer to test everything in the IDE, create an HTTP Request instead. This is a great way to keep some sample data to send in the request without having to type it in every time you test it. The easiest way to create a request is to click on the Trigger gutter icon, or use Alt+Enter. Alternatively, you can right-click in the Solution window and choose Add | HTTP Request. This adds an .http file that you can place commands in, then run those commands with Rider’s built-in tooling.
Manage & Deploy Function Apps
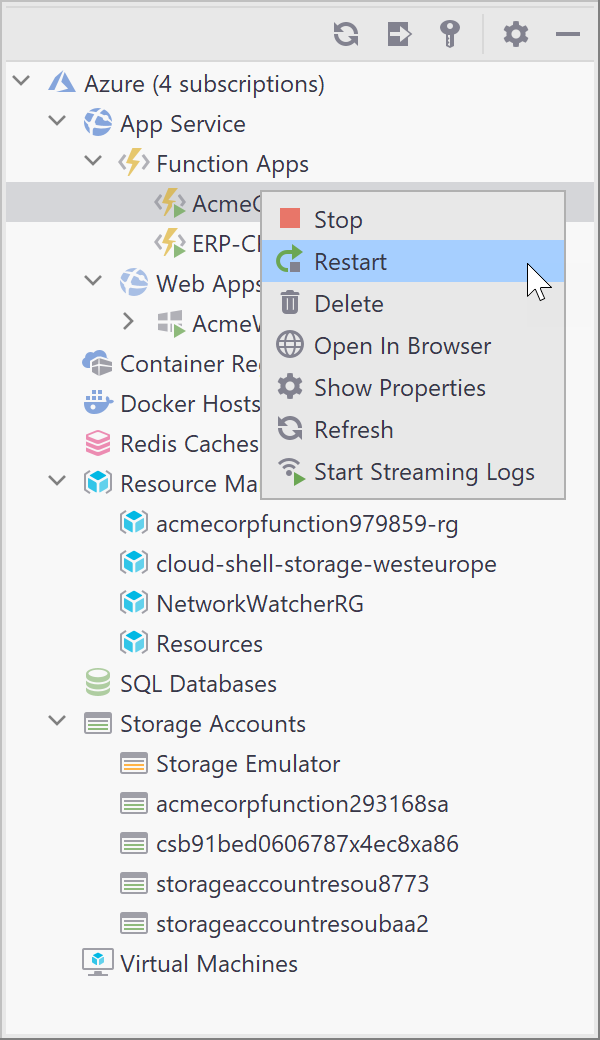
Because the Azure Toolkit is a Rider plugin, you can use it to manage Azure assets such as function apps, storage accounts, app services, docker hosts, and more. Choose Azure Explorer from View | Tool Windows, then right-click on the various nodes in Azure Explorer to reveal context sensitive options for managing assets.
Alternatively, if you prefer the keyboard or scripts over point and click the Azure Cloud Shell is available through Tools | Azure | Start Azure Cloud Shell.
The Azure Portal is Microsoft’s online tool for managing cloud resources. You may find yourself using a combination of Rider’s Azure Explorer, the Azure CLI, and the Azure Portal, depending on your needs.
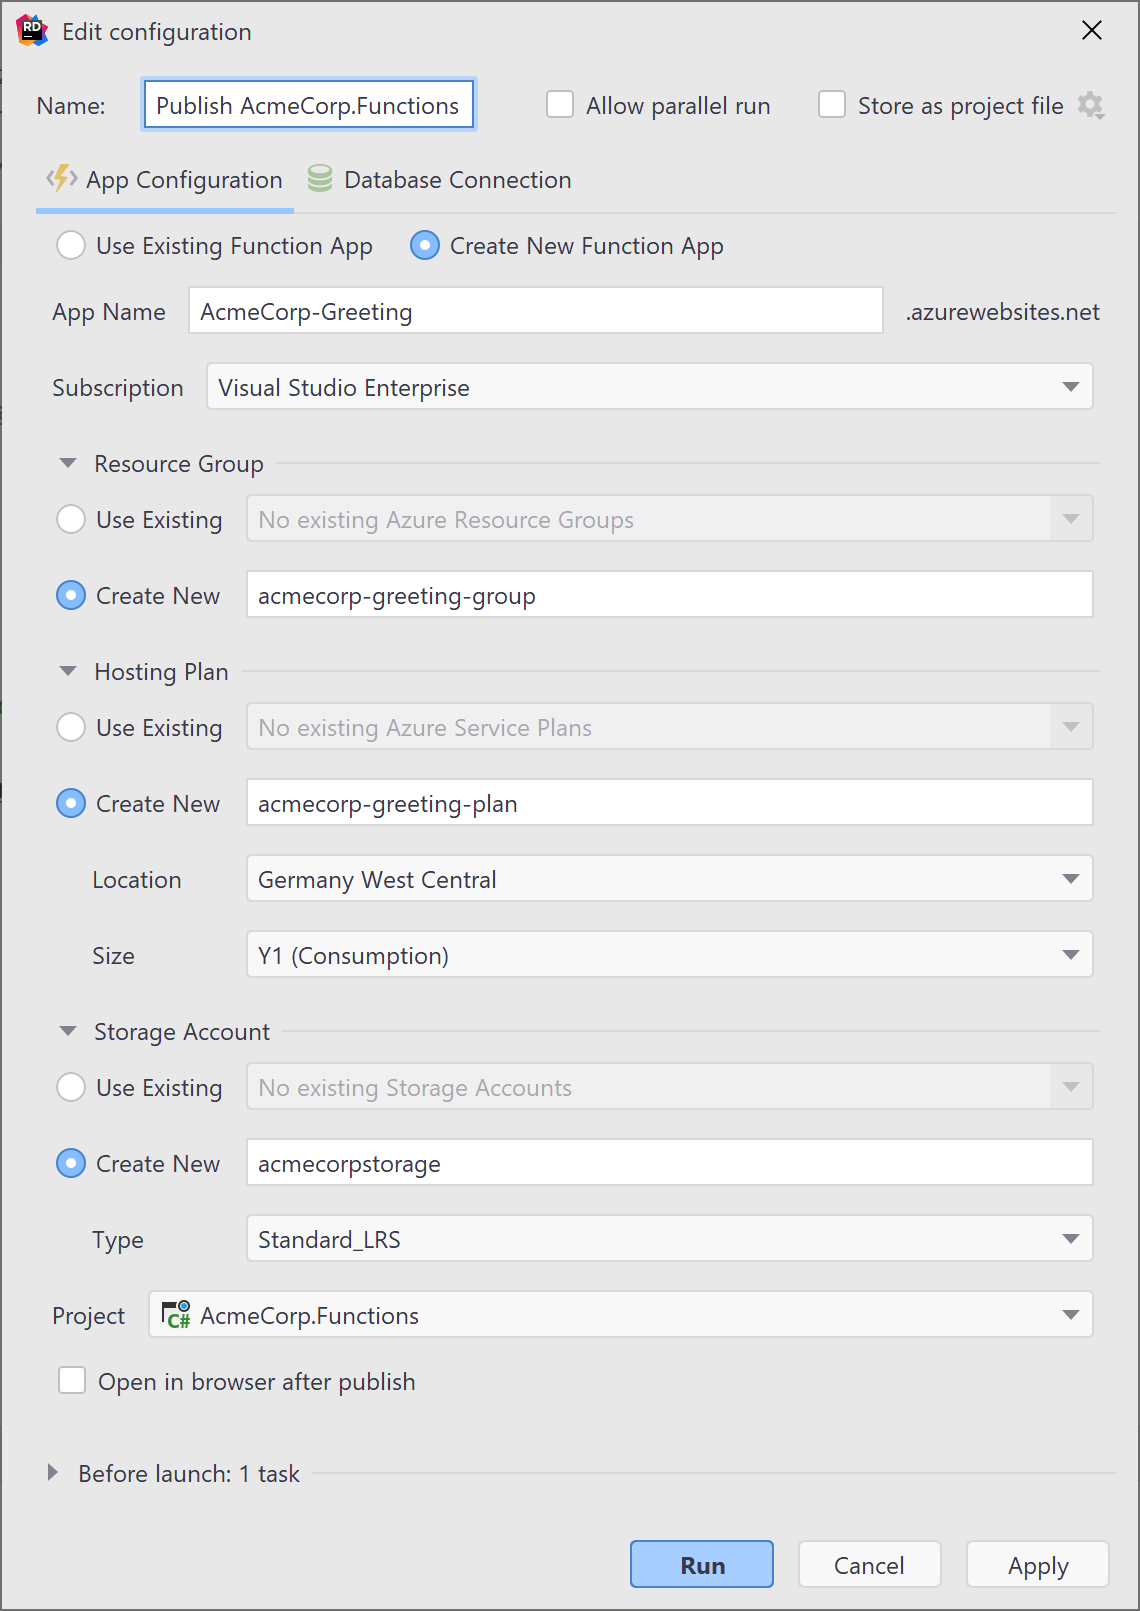
When you’re ready to deploy, go ahead and right click in the Solution Window and choose Publish | Publish to Azure. Choose an existing app to publish to or enter the required information for Azure, such as subscription and storage options, resource groups, hosting plans and other information.
Conclusion
Azure Functions is a cloud-based technology that enables you to work seamlessly with integrated data, as well applications outside the boundaries of traditional app structures. Building serverless apps with Azure Functions? Let Rider help you achieve your goals, and let us know about your experience!