.NET Tools
Essential productivity kit for .NET and game developers
Run Blazor Apps Within Electron Shell

Hi-diddly-ho Blazorinos! A long-lived mantra of the .NET community has concentrated on transferable knowledge of C# into different paradigms, including desktop, mobile, web, and embedded systems. Blazor continues that trend of using what we know to build new and exciting solutions. Blazor has recently garnered a lot of buzz in our industry, focusing on bringing C# programming to frontend HTML experiences.
In this post, we’ll go one step further and see how we can embed Blazor into an Electron app to ship Blazor on the desktop. We’ll also look at how we can debug our Electron application using Rider.
What Is Blazor?
Blazor is a new approach to developing interactive HTML experiences using the C# language and the technologies of ASP.NET and SignalR.
Blazor lets you build interactive web UIs using C# instead of JavaScript. Blazor apps are composed of reusable web UI components implemented using C#, HTML, and CSS. Both client and server code is written in C#, allowing you to share code and libraries.
— Microsoft
Blazor makes a concerted effort to be interoperable with JavaScript. Blazor’s focus on interop allows us to call existing JavaScript libraries and take advantage of a buzzing frontend ecosystem. By choosing Blazor, we aren’t forsaking decades of advancement on the web platform. Its quite the opposite; we embrace the standards and technology that made the web what it is today.
Tip: Check the in-depth tutorial on creating a Blazor application with Rider we published a while ago.
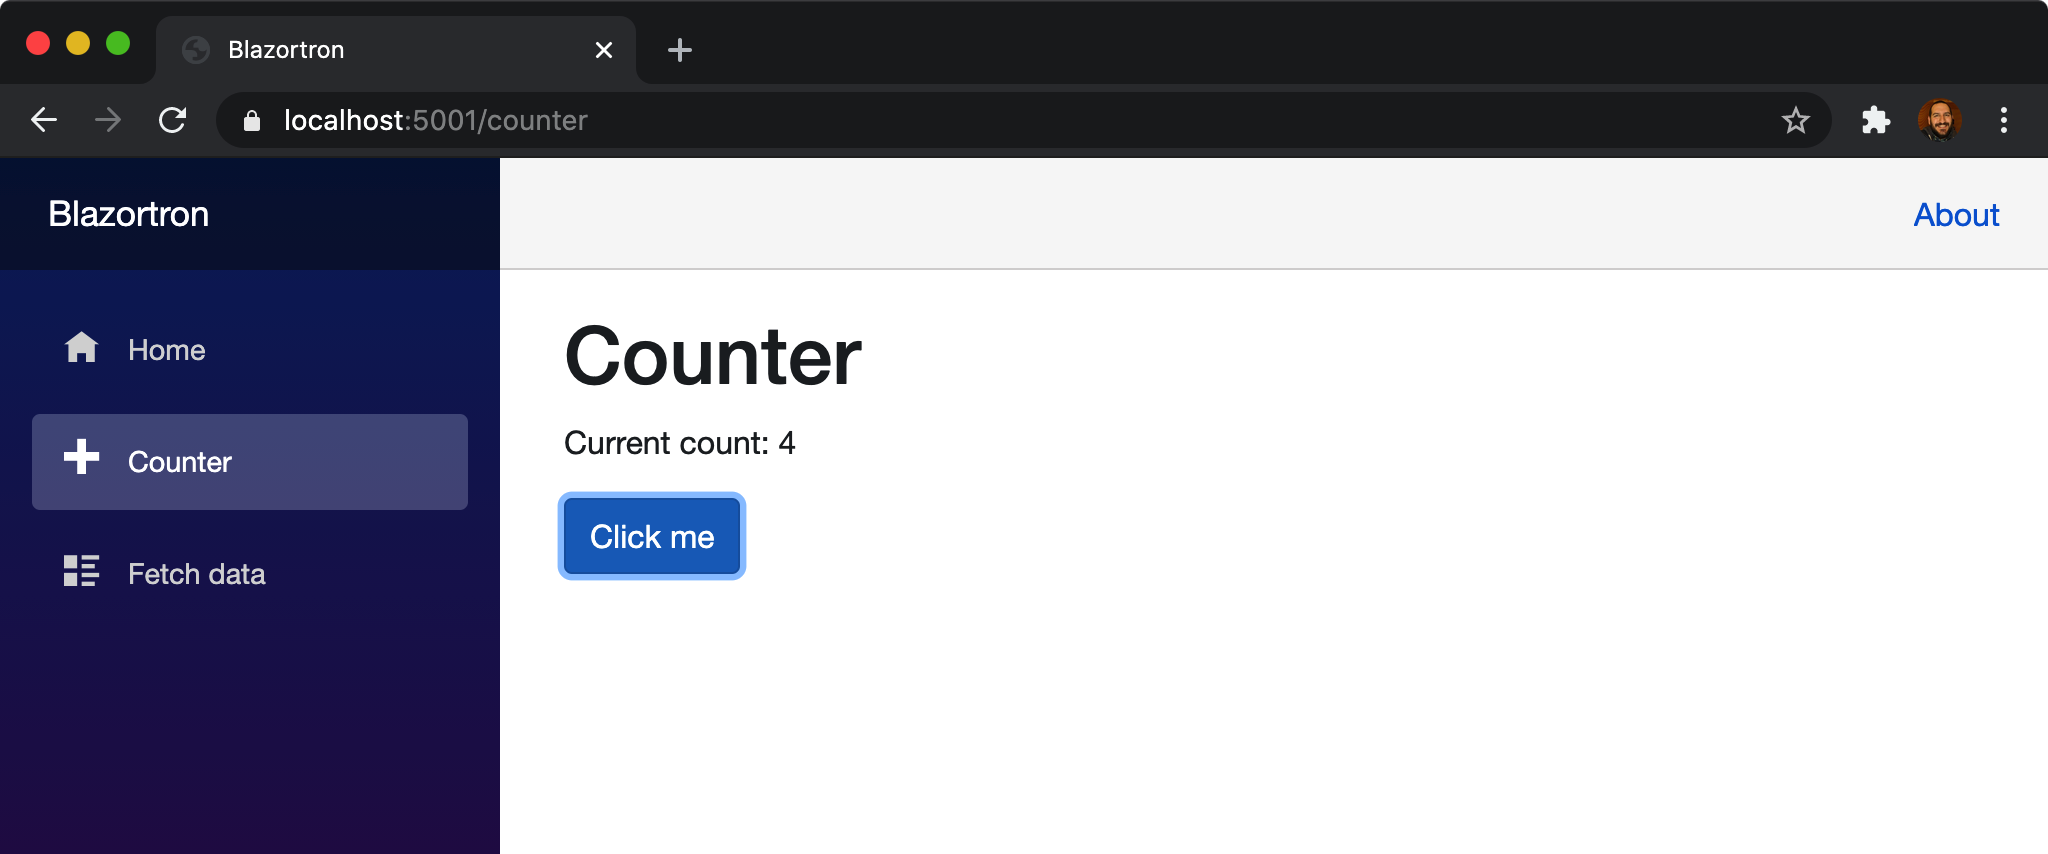
Let’s look at a simple example of a Blazor page to understand the programming model. Starting with a Blazor template, we can find an example of the programming model within a Counter.razor file.
@page "/counter"

<h1>Counter</h1>
<p>Current count: @currentCount</p>
<button class="btn btn-primary" @onclick="IncrementCount">Click me</button>

@code {
    private int currentCount = 0;
    private void IncrementCount()
    {
        currentCount++;
    }
}
The above implementation allows us to maintain a current count client-side. As we may have noticed, there is no JavaScript visible. Blazor uses Razor to link C# code to HTML elements. In this case, we are tying the @onclick event to our IncrementCount method. We can also see the placeholder for the incremented count regarding the @currentCount variable.
A more complex example that also ships with the template includes fetching the weather and displaying it within a table. The following code comes from the file FetchData.razor.
@page "/fetchdata"

@using Blazortron.Data
@inject WeatherForecastService ForecastService

<h1>Weather forecast</h1>
<p>This component demonstrates fetching data from a service.</p>

@if (forecasts == null)
{
    <p>
        <em>Loading...</em>
    </p>
}
else
{
    <table class="table">
        <thead>
        <tr>
            <th>Date</th>
            <th>Temp. (C)</th>
            <th>Temp. (F)</th>
            <th>Summary</th>
        </tr>
        </thead>
        <tbody>
        @foreach (var forecast in forecasts)
        {
            <tr>
                <td>@forecast.Date.ToShortDateString()</td>
                <td>@forecast.TemperatureC</td>
                <td>@forecast.TemperatureF</td>
                <td>@forecast.Summary</td>
            </tr>
        }
        </tbody>
    </table>
}

@code {
    private WeatherForecast[] forecasts;

    protected override async Task OnInitializedAsync()
    {
        forecasts = await ForecastService.GetForecastAsync(DateTime.Now);
    }
}
The reason we are looking at this example is because of ForecastService.GetForecastAsync. The page calls the method clientside. When invoked, Blazor sends this information from our server backend to our frontend utilizing SignalR. Shifting between C# on the server and clientside is transparent to the developer. The fluid nature in which developers can switch between clientside and serverside is the biggest draw of Blazor.
As an added benefit, there is also a version of Blazor that is hosted on WebAssembly, which will allow an entire application to run client-side within a browser. Blazor WebAssembly is a work in progress, and while it “works” today, there is still much room for improvement.
Learn more about Blazor by visiting the official site.
What’s Electron
Electron is a popular method in which developers can build cross-platform desktop applications utilizing web technologies. Developed initially for use with GitHub’s Atom editor, it has seen a proliferation across our industry. Electron utilizes Node and Chromium to encapsulate a developer’s web experience into a desktop shell. Organizations such as Facebook, Twitch, Adobe, and Microsoft have all shipped successful products utilizing the Electron platform.
An added benefit of porting web experiences to a desktop environment is the ability to support new experiences. Through Node, developers have access to Operating System features, such as Bluetooth, file system access, system statistics, peripherals, clipboard access, to name a few.
Learn more about Electron by visiting the official site.
Running Blazor Server-Side In Electron
We’re going to walk step-by-step through the entire process of running Blazor within an Electron shell. Before getting started, we need to ensure we are running a version of .NET Core 3.1 or higher.
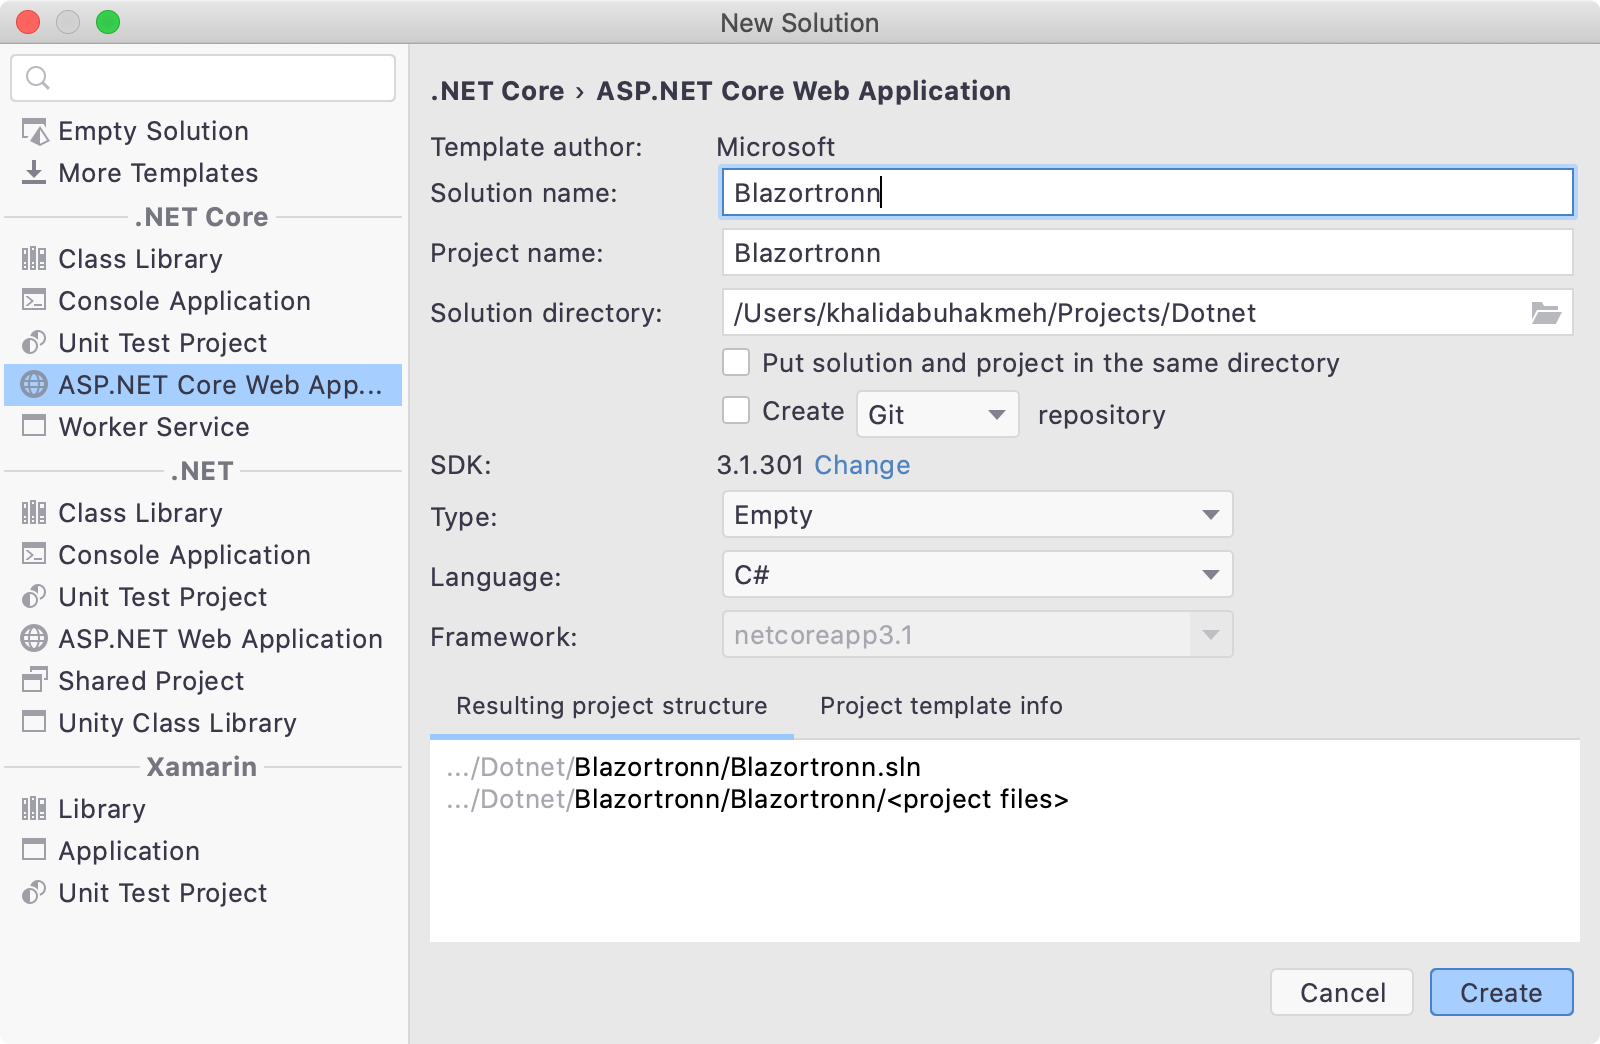
Our first step will be to start a new Blazor project. From the New Solution window in Rider, we need to create a new ASP.NET Core Web Application project and set the type to Blazor Server App.
After initializing our project, we need to install a few NuGet packages. Let’s start by installing ElectronNET.API to our Blazor project. We can do this using the NuGet window within Rider.

A big appreciative shout-out to the maintainers of Electron.NET, Gregor Biswanger and Robert Muehsig, who worked hard to make this post a posibility. If you’re interested in sponsoring the project, head to Electron.NET’s Donor box page. A thank you as well to the contributors of the project.
Now, we need to install the Electron.NET CLI tool. I recommend installing the tool locally, as this will make it reproducible for other developers working on the solution. To install a .NET tool locally, we need to open a command prompt at the root of our solution and run the following command. For folks who may not know, there is an embedded terminal in Rider.
dotnet new tool-manifest
When successful, we should see a .config folder with a dotnet-tools.json file. The file represents our local tool manifest. Currently, the file will be empty.
{ "version": 1, "isRoot": true, "tools": {} }
From the same command line, we need to install the ElectronNET.CLI package.
dotnet tool install ElectronNET.CLI
Our local tools manifest should look like this now, where the version number may vary based on this article’s publishing.
{
  "version": 1,
  "isRoot": true,
  "tools": {
    "electronnet.cli": {
      "version": "9.31.2",
      "commands": [
        "electronize"
      ]
    }
  }
}
From the command line, we want to change into our project folder. We need to run the following command to initialize our Blazor/Electron app.
dotnet run electronize init
Running the command will add an electron.manifest.json to our project. The file allows us to change our native app’s properties, including the app’s name, splash screen, copyright information, and additional resources.
All we need to do now is wire up our ASP.NET Blazor application with Electron. We can connect the two with the following code snippets. We’ll first start in Program.cs with a call to UseElectron in our CreateHostBuilder method.
public class Program
{
    public static void Main(string[] args)
    {
        CreateHostBuilder(args).Build().Run();
    }

    public static IHostBuilder CreateHostBuilder(string[] args) =>
        Host.CreateDefaultBuilder(args)
            .ConfigureWebHostDefaults(webBuilder =>
            {
                webBuilder
                    // Use Electron Registration
                    .UseElectron(args)
                    .UseStartup<Startup>();
            });
}
Jumping over to our Startup file, we need to start the shell. We need to add this method anywhere inside of our Startup class.
public async void ElectronBootstrap()
{
    var browserWindow = await Electron.WindowManager.CreateWindowAsync(new BrowserWindowOptions
    {
        Width = 1152,
        Height = 940,
        Show = false
    });

    await browserWindow.WebContents.Session.ClearCacheAsync();

    browserWindow.OnReadyToShow += () => browserWindow.Show();
    browserWindow.SetTitle("JetBrains!");
}
We can change our Electron window’s properties in this method, so feel free to tweak these for your use case.
Finally, let’s call this method. At the end of the Configure method, let’s call our new ElectronBoostrap method.
// This method gets called by the runtime. Use this method to configure the HTTP request pipeline.
public void Configure(IApplicationBuilder app, IWebHostEnvironment env)
{
   //
   // Normal Middleware Registrations...
   // ....

    if (HybridSupport.IsElectronActive)
    {
        ElectronBootstrap();
    }
}
The if statement’s added benefit is we could run our app in a web client and an Electron shell. Great! Let’s run our Blazor app. I’ve included a launch settings file for simplicity, and we want to run the Electron profile.
{
  "profiles": {
    "Electron" : {
      "commandName": "Executable",
      "executablePath": "dotnet",
      "commandLineArgs": "electronize start",
      "workingDirectory": "$(ProjectDir)"
    },
    "Blazortron": {
      "commandName": "Project",
      "launchBrowser": true,
      "applicationUrl": "https://localhost:5001;http://localhost:5000",
      "environmentVariables": {
        "ASPNETCORE_ENVIRONMENT": "Development"
      }
    }
  }
}
We could also run the following command from the project directory.
$> dotnet run electronize start
The first time running the electron application will be a little slow, so we need to be a little patient as the build process bootstraps our application together.
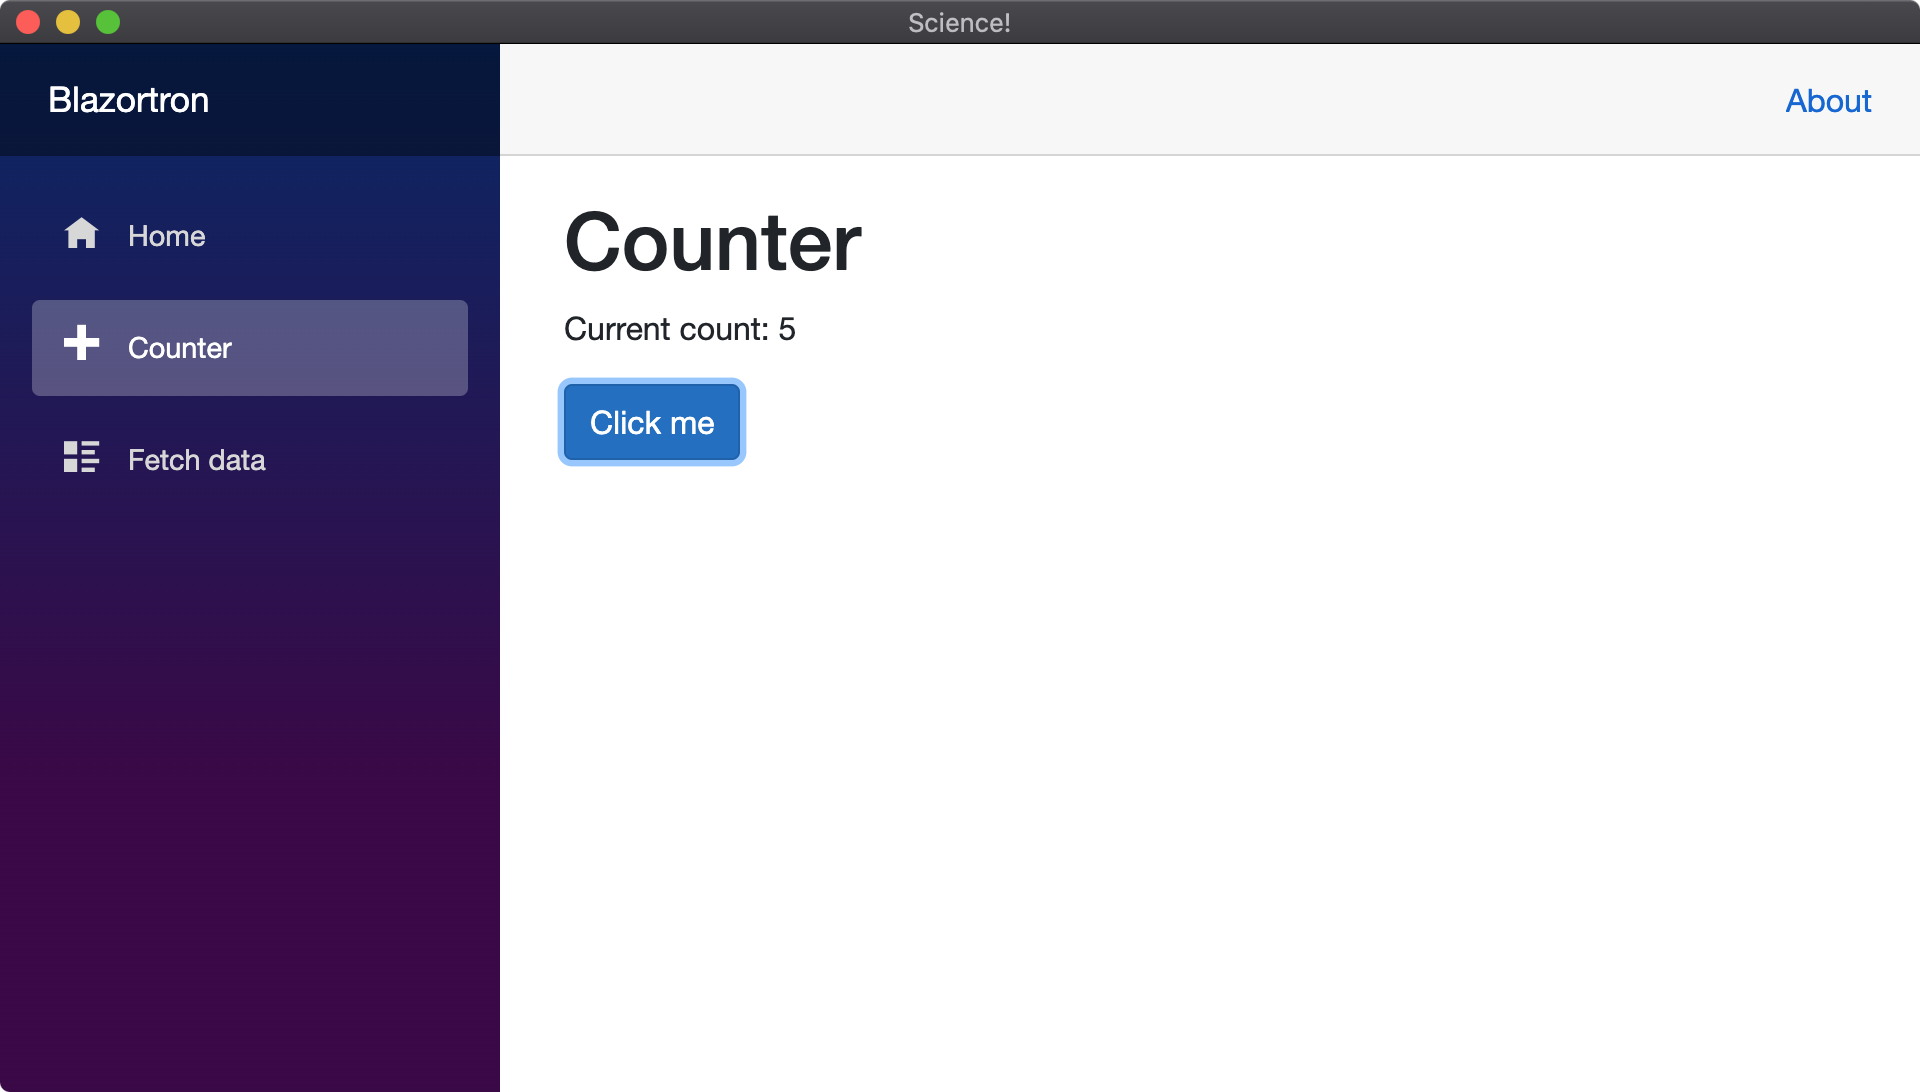
Wow! We are running Blazor inside of an Electron shell. Feel free to navigate and test functionality. As our application becomes more complex, we can also attach the debugger to our running process. A helpful hint, look for the electron* command arguments to quickly identify the process.

We can set breakpoints after attaching and debug our application like we usually would with any Blazor application. Clicking the gutter in the editor on any file that supports breakpoints, or by using the Set Breakpoint shortcut key.
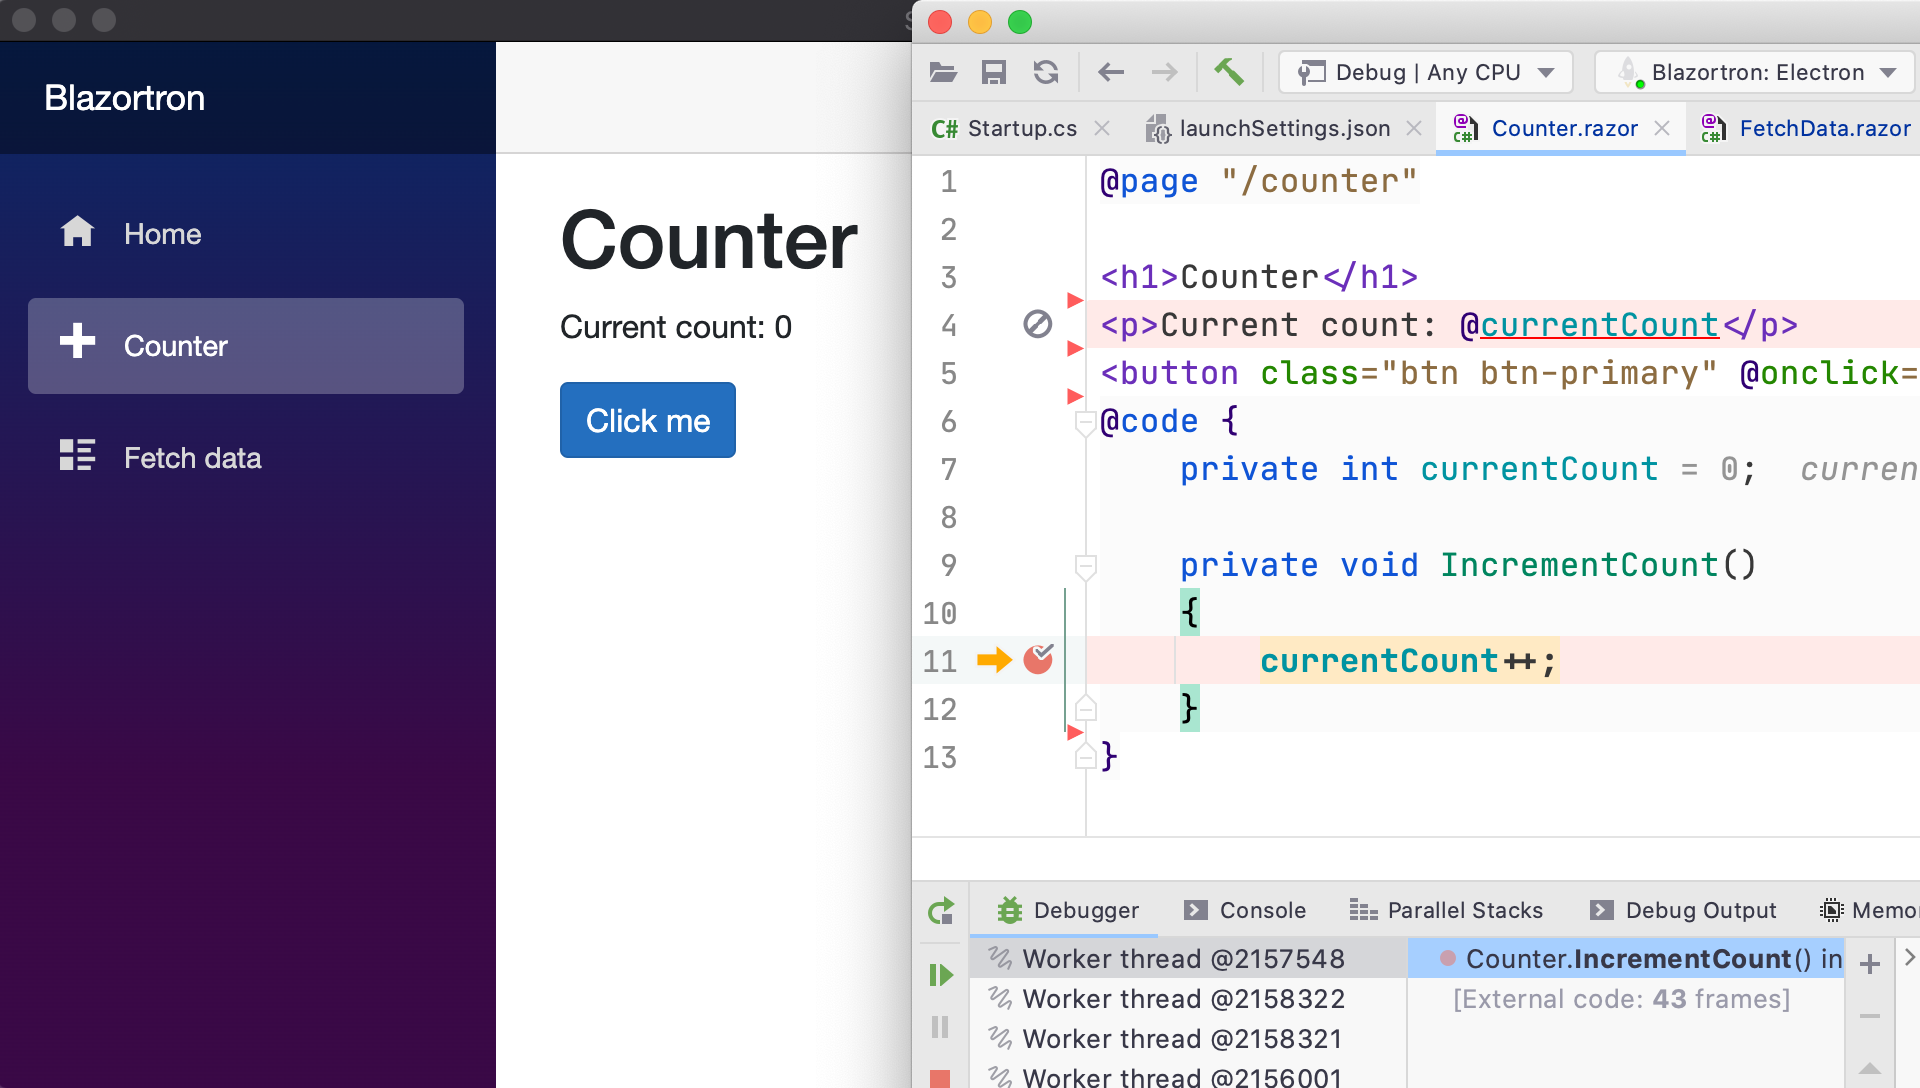
Simply amazing.
Conclusion
This post aimed to help developers get started with Blazor hosting within Electron. Electron as a platform is rich with functionality, and I recommend looking at more of the sample at the Electron.NET GitHub repository. We didn’t even look into Node integration and OS feature access, which add an additional layer of awesome.
With over 4.8K stars and recent updates, the Electron.NET project is healthy and vibrant. The programming model of Blazor mixed with an ability to ship native apps to Windows, macOS, and Linux should make .NET developers very happy.
If you want to try out the Blazor and Electron without the work of creating the solution, I have a GitHub repository with steps to recreate this sample.
I hope you enjoyed this post, and please feel free to leave a comment below.