.NET Tools
Essential productivity kit for .NET and game developers
Localization Becomes easier with the Localization Manager in ReSharper 2019.3
In the latest ReSharper 2019.3 Early Access Preview (EAP), we have added a new Localization Manager to assist you in localizing applications. It lets you view and edit localizable resources in a single grid, helping you add/edit/rename localizable strings and spot missing localized values.
More than enough for a blog post, so let’s dive in!
We can open the Localization Manager from the Extensions | ReSharper | Windows | Localization Manager menu, or use Go to Action (Ctrl+Shift+A and search for “Localization Manager”).
From here, we can see our solution’s resource files (.resx) and their contents – all in one grid. If we have multiple resource files, their resources will be merged into this grid as well, helping us speed up the localization process.

Granted, the above screenshot doesn’t show a lot yet, so let’s make things more interesting!
Adding resources using the Localization Manager
We’ll start with adding a new localized resource and use it in our code.
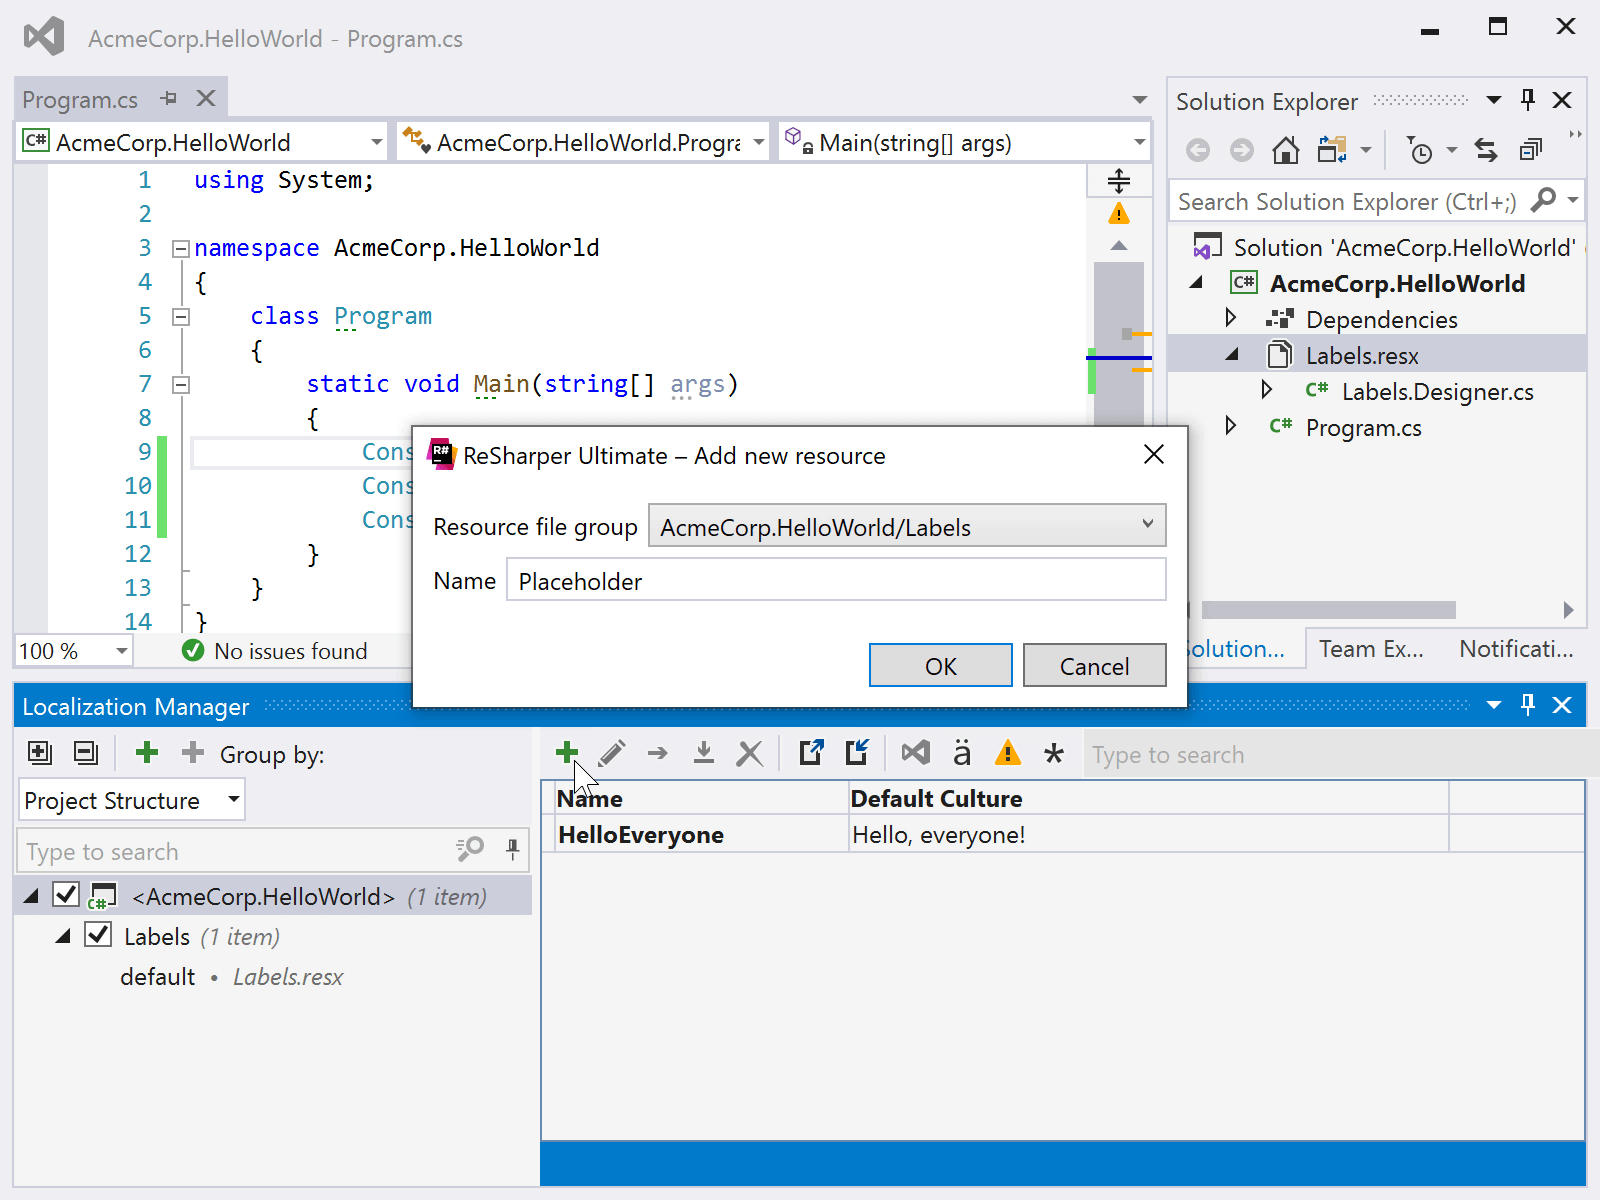
Great! We now know how we can add and edit existing localized values from the toolbar.
Adding resources from the editor
How can we convert existing string literals into resources? Well, once we have a resource file in our project, ReSharper will show a suggestion for string literals in our code base, informing us they can be localized.

We can use the context actions (Alt+Enter) to move this string literal into a resource, or use the Move to Resource refactoring (Ctrl+R, O) to quickly convert a string literal into a resource!
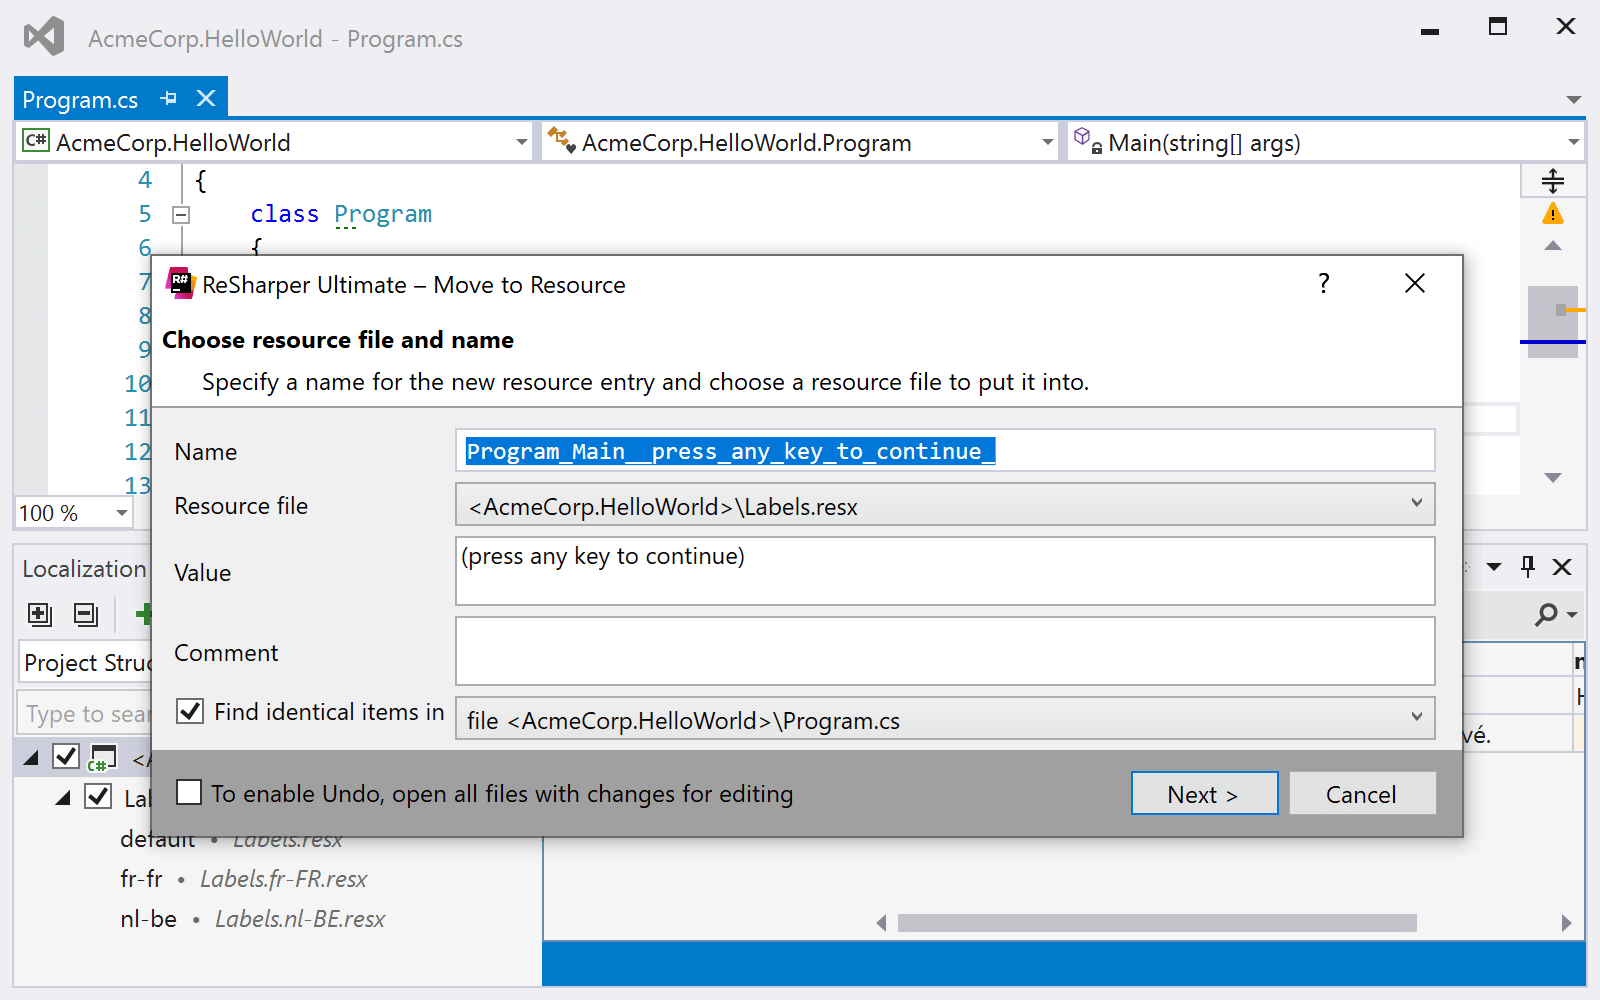
We can also use the context action Edit with Localization Manager (Alt+Enter) to open the tool window and select the current resource and its localized versions.

Adding a culture using the Localization Manager
Back in the Localization Manager, let’s add a new culture, say nl-BE, which happens to be my mother tongue. We can do this from the toolbar.
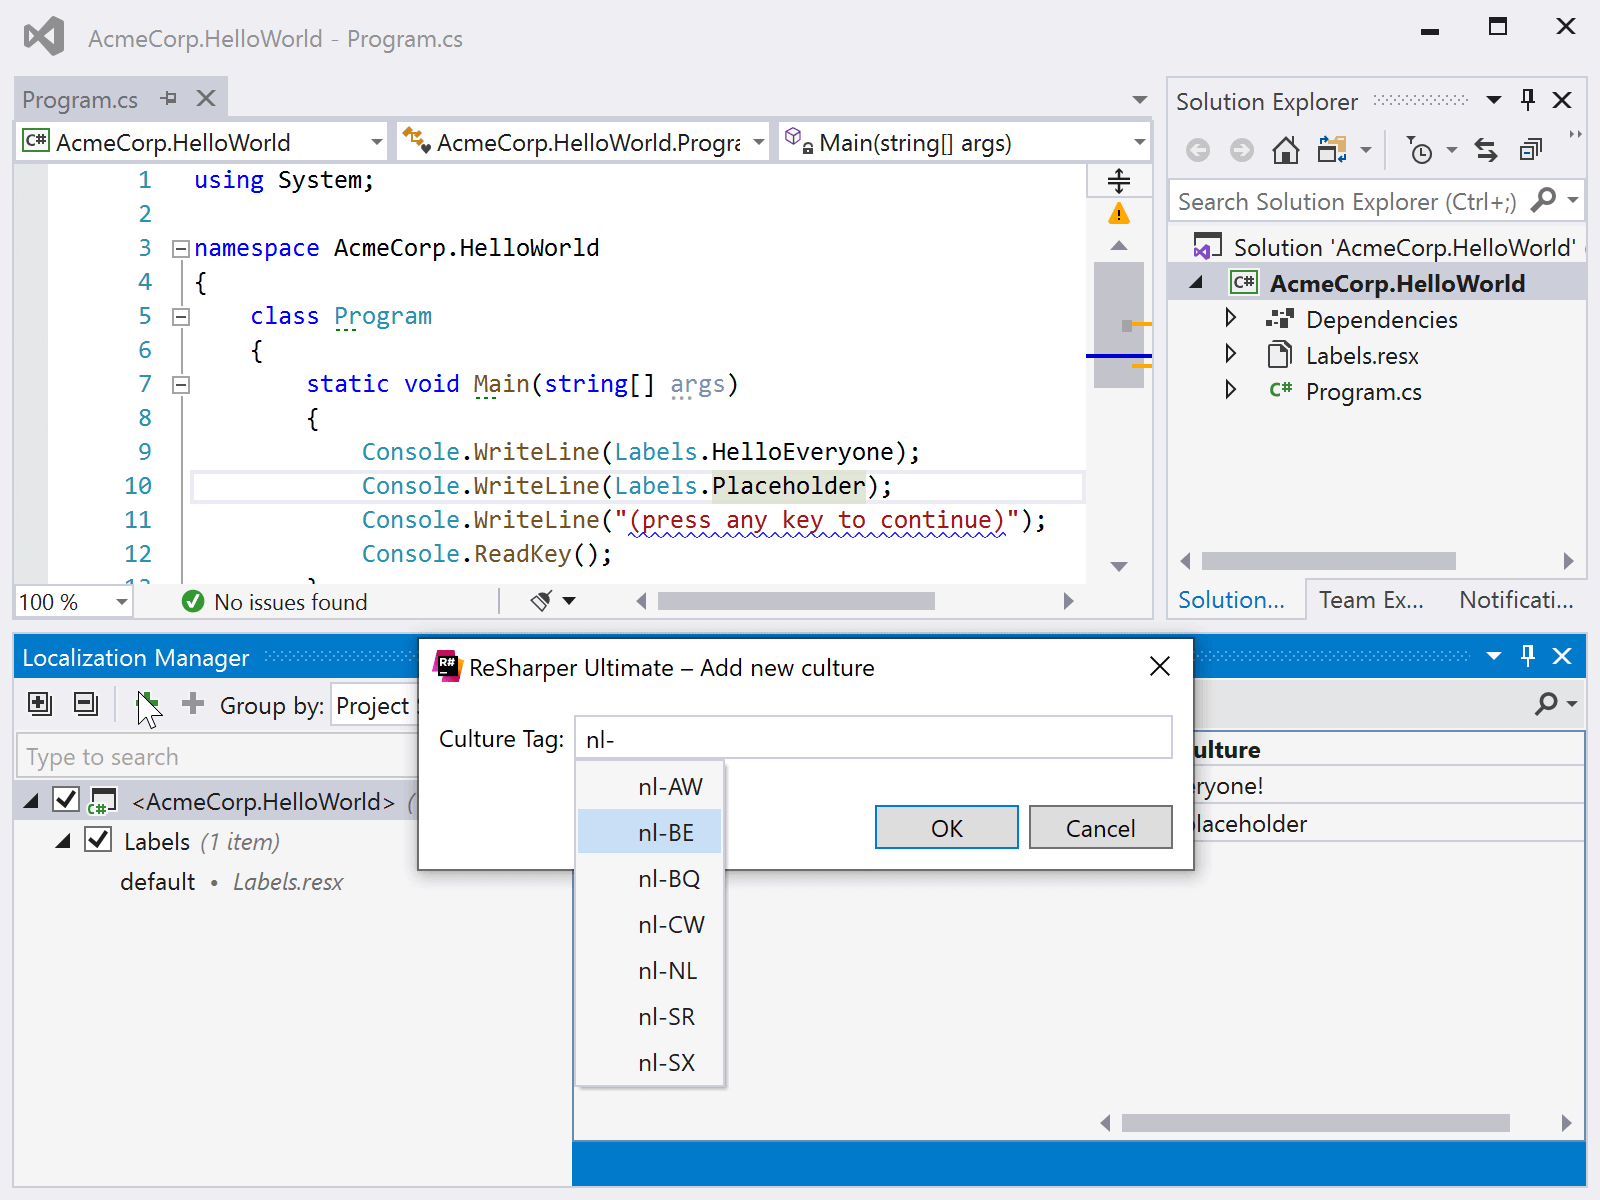
Note how we got code completion for various culture codes, and how a new resource file Labels.nl-BE.resx was created.
Filtering resources
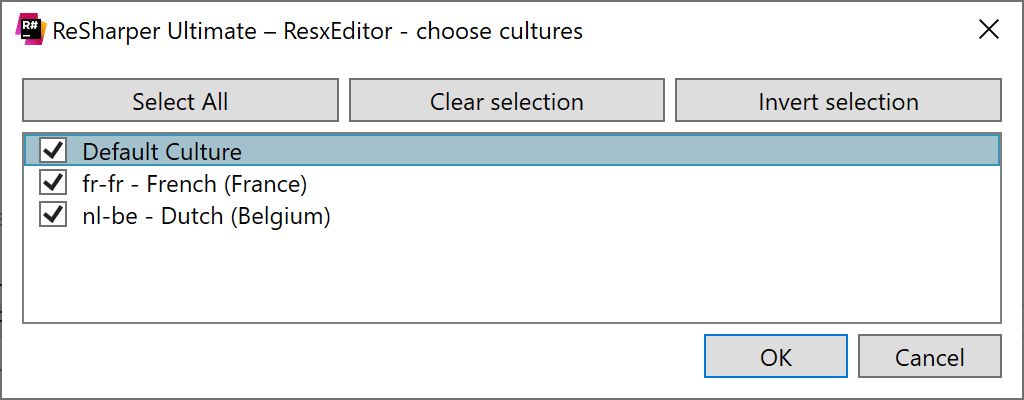
The Localization Manager will display all of our resource files, cultures, and localized values. We can use the filters and search to scope the editor grid to what we want to work with. This ranges from the various resource files in our solution to the cultures to show, which is especially useful if there are a lot of supported cultures in your application.
Import/Export localized values
In case other people are providing translations, resources from the Localization Manager can be imported and exported using CSV files, and copy/pasting from Google Sheets or Microsoft Excel is possible as well.
Spotting missing translations
From the Localization Manager tool window, we can easily spot missing translations and localized values: they will be displayed in a different color.

Note that by clicking the warning icon in the toolbar, we can filter the grid to only show missing localized values.
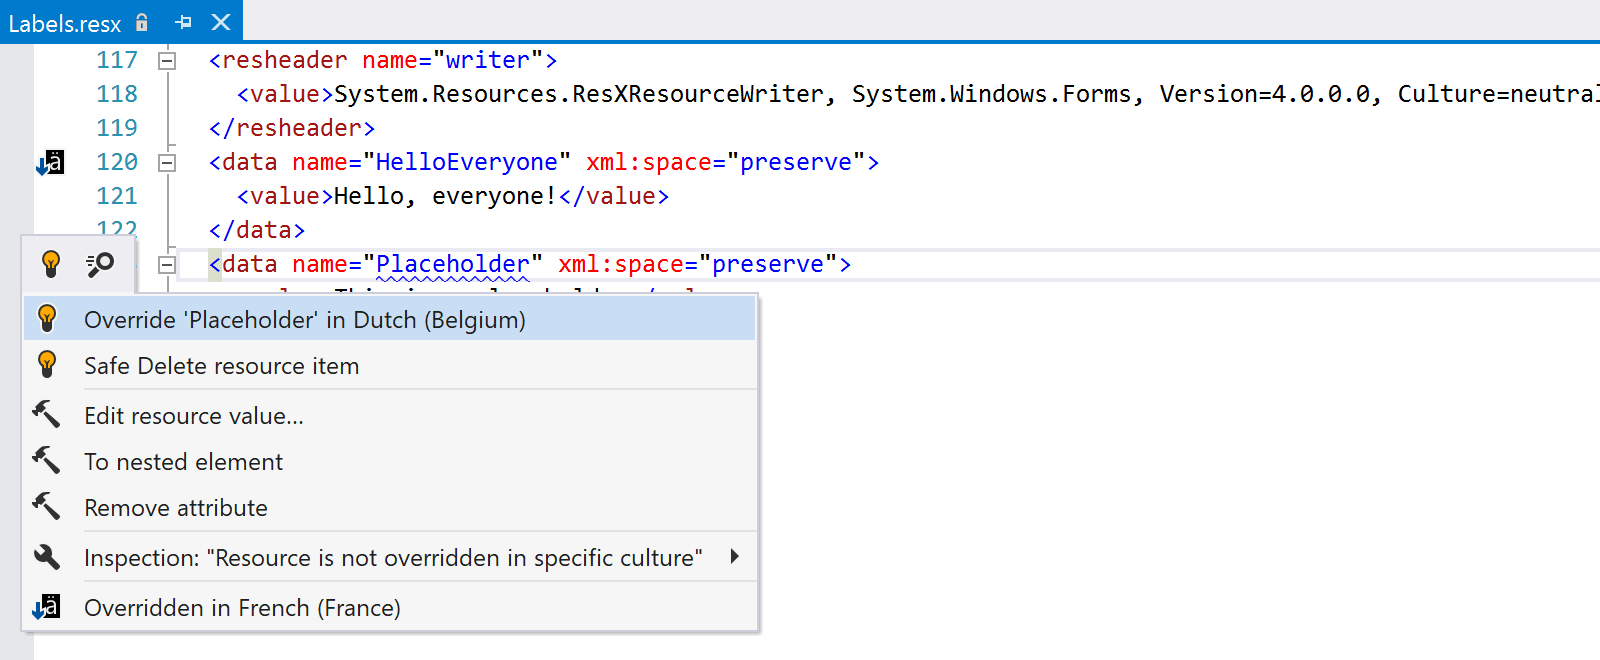
As a reminder, we can also use ReSharper’s context actions (Alt+Enter) while editing a .resx file to override a resource in a different culture, as well as inspect which cultures already override the selected resource.
Spotting unused resources
When Solution-Wide Analysis (SWA) is enabled, the Localization Manager will scan our entire solution for usages of resources. Resources that are in use are rendered in bold, while unused resources are not.

Having this information allows us to clean-up resources we may have used in the past but aren’t using anymore. If would like to double check whether a resource can be removed safely, there’s the Safe Delete refactoring which we will cover next.
Refactoring resources: Rename and Safe Delete
So far, we have seen how we can add and edit resource values. But how can we rename a resource? And how do we safely delete a resource, making sure it’s no longer being used in our application? The Localization Manager comes with two refactorings that do exactly that!
From the toolbar, we can click the Rename resource button and provide a new name. When we continue, ReSharper will rename our resource across all cultures (and .resx files), and update all usages in the code in one go.

With Safe Delete, ReSharper will verify a resource can be deleted without breaking existing code. It will tell us when there are usages left, so we can take action.
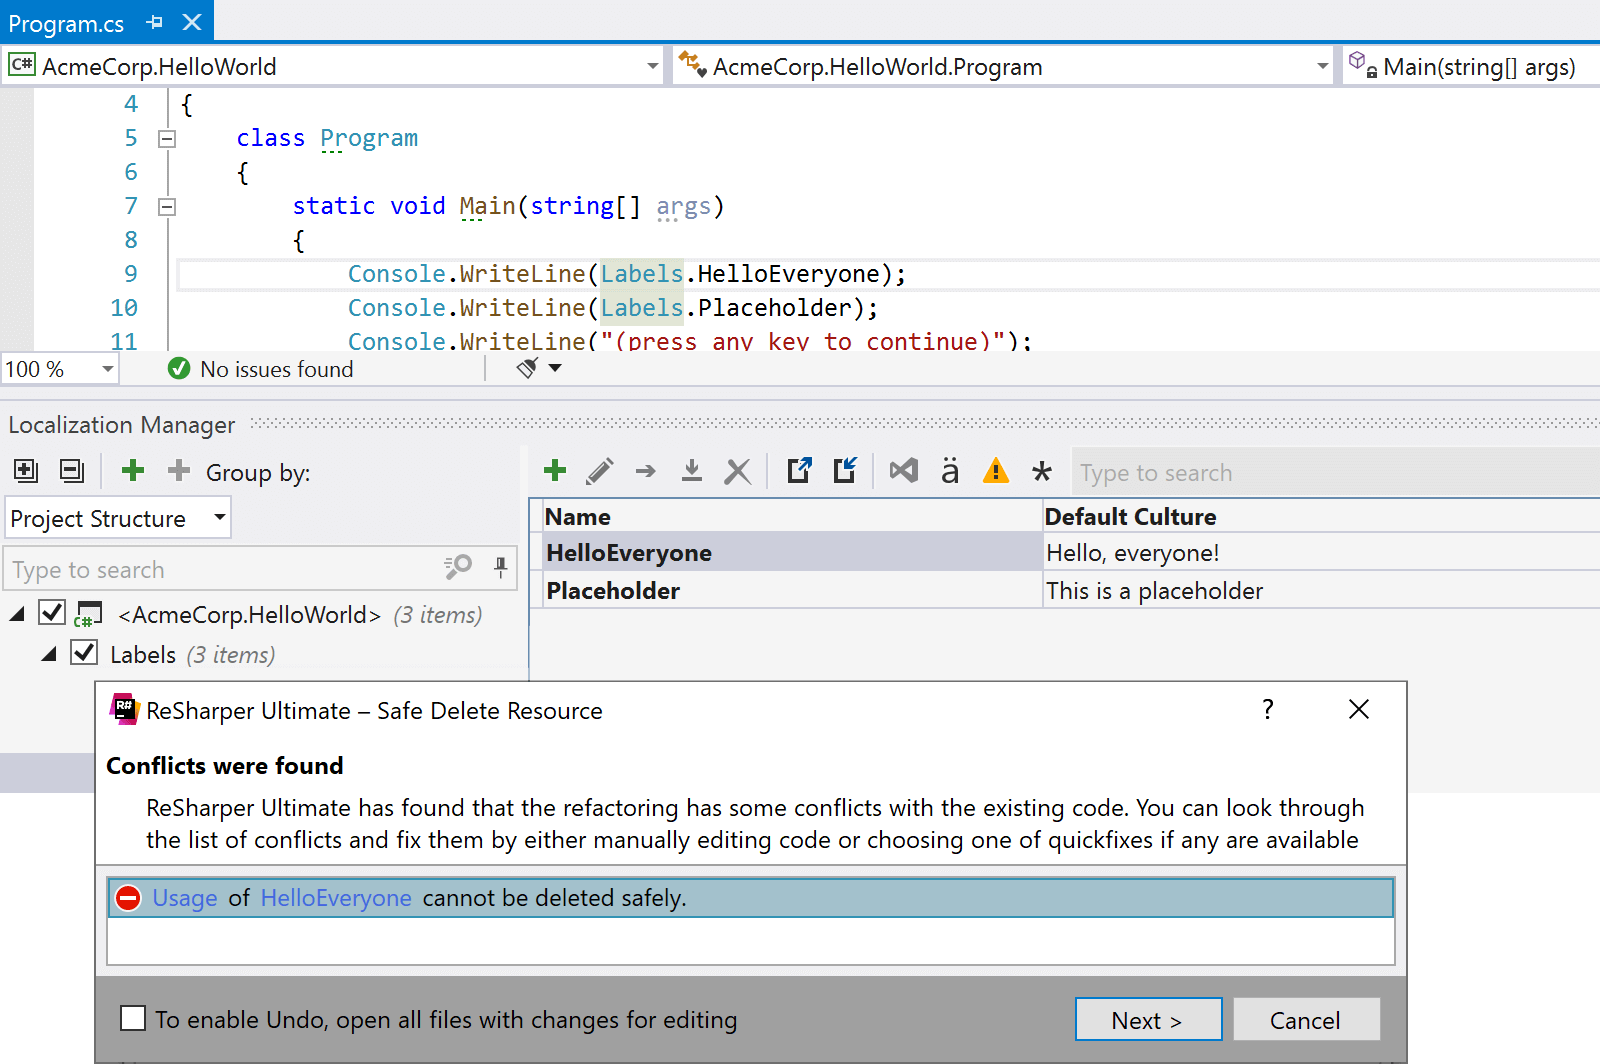
We can also refactor resources from the editor, either from inside a resource file or from our code, by either using the Rename/Delete refactorings directly, or using Refactor This… (Ctrl+Shift+R).
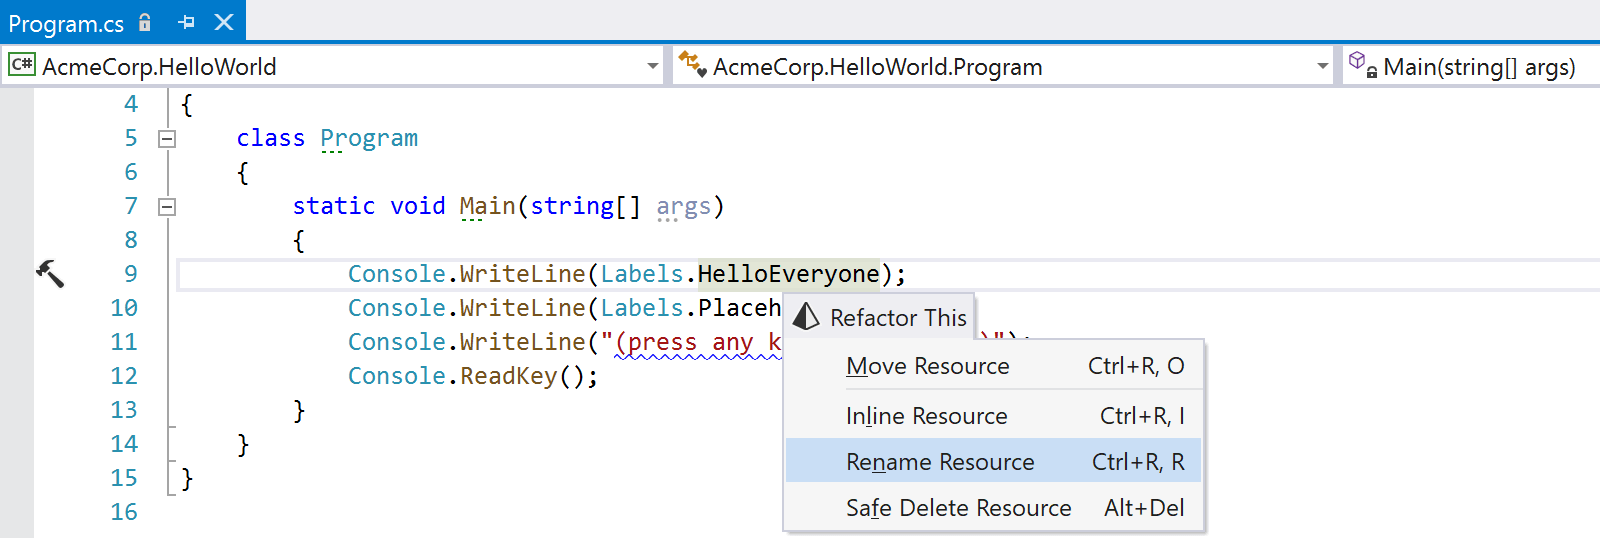
Note that we can also move and inline resources from here.
Download ReSharper 2019.3 EAP now! We would love to hear what you think about the new Localization Manager!
Subscribe to a monthly digest curated from the .NET Tools blog:


