.NET Tools
Essential productivity kit for .NET and game developers
Generate Dockerfile for .NET Applications with Rider

The modern development stack continues to evolve, bringing along with it incredible conveniences for developers. Arguably, one of the most significant advancements has been the ability to containerize applications. The ability to define, develop, and deploy applications within a reproducible environment gives developers more confidence to deliver a quality application experience for users.
Docker has been at the forefront of the container revolution, helping developers adopt the new skill into their workflow. Containers are a great tool, regardless of the approach: whether we’re creating traditional monoliths with external dependencies, designing an infrastructure focused on microservices, or anywhere in between. .NET developers should be keeping an eye on containerization, especially as .NET takes a more cross-platform-friendly approach.
Rider developers have been hard at work bringing first-class Docker support to the .NET development stack, all in an effort to help developers stay current with their technology choices. In this post, we’ll explore some of the enhancements coming with the latest Rider 2021.1 Early Access Program (EAP) and how these features help jumpstart the journey into containerizing applications.
We’re so excited about this next feature that we can hardly contain ourselves.
New Solution Docker Support
When starting a .NET solution, we’ll notice a new Docker Support dropdown in the project dialog screen for the ASP.NET Core Web Application, Worker Service, and Console Application templates. We can choose between a default value of disabled or one of two currently-supported target environments: Linux and Windows.
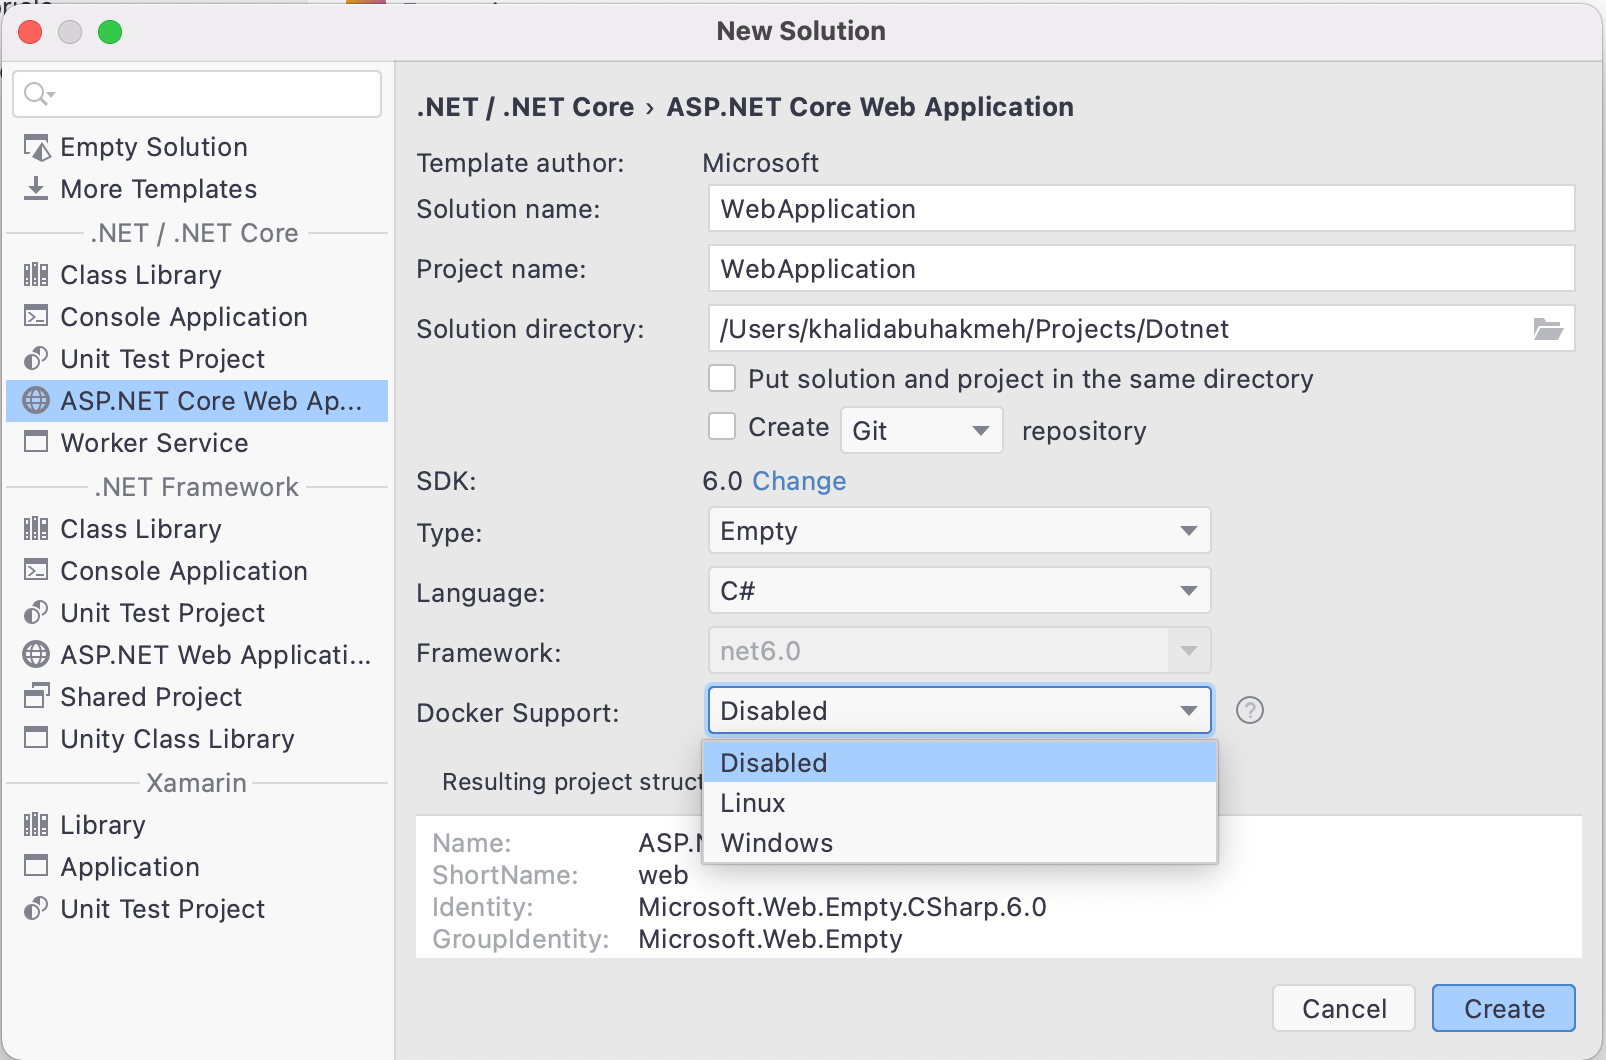
For developers new to containerization and Docker, Linux is the optimal starting point for base images. Linux is supported as a native host and through virtualization on all modern OSes, while Windows docker images will only work on the Windows OS.
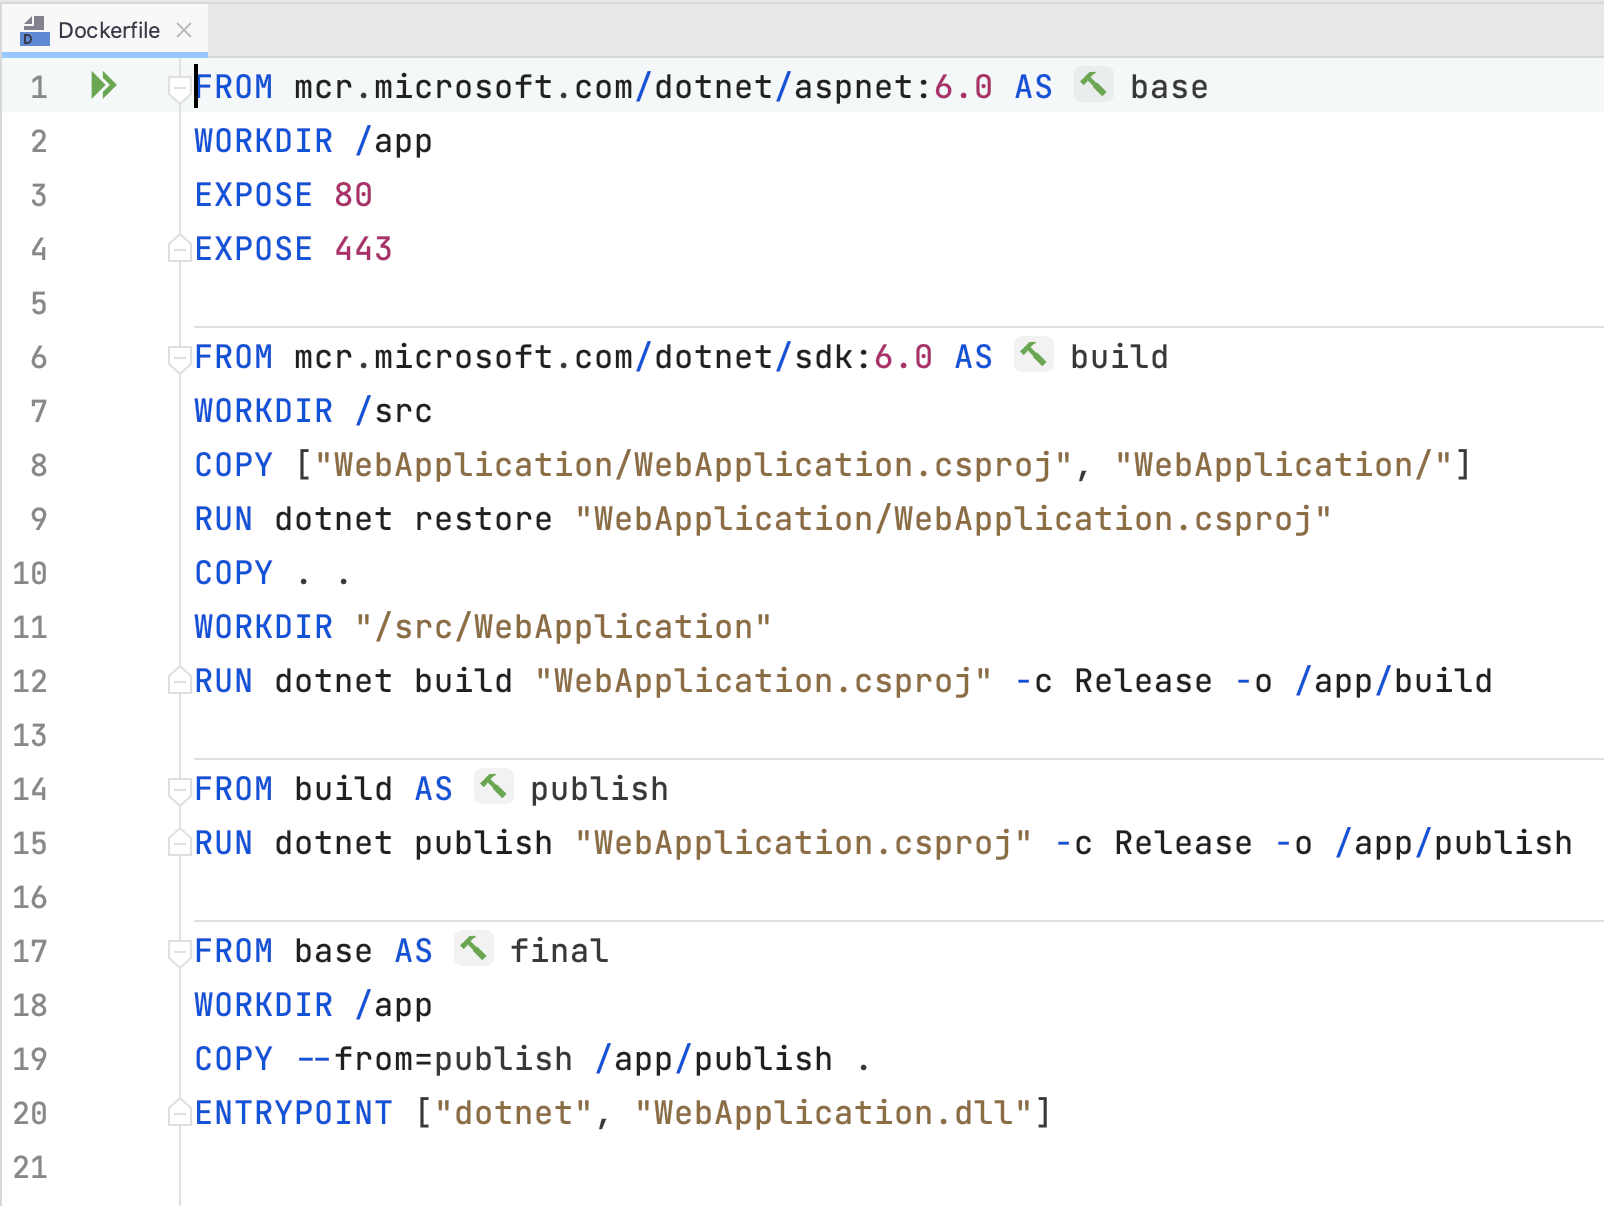
Once we’ve selected our Docker Support value, we will see two new files in our project: Dockerfile and .dockerignore. Dockerfile is the more important of the two files, as it defines the build steps required to build our production-ready container.
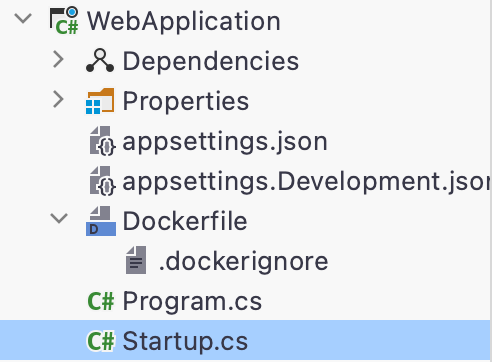
Note: the template generated file is for production build images and will package the application to run within the container. Change all the build flags within the Dockerfile from Release to Debug for optimal debugging capability.
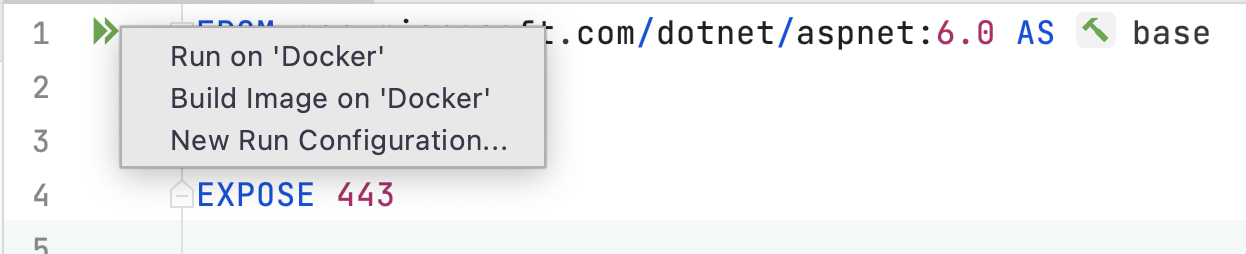
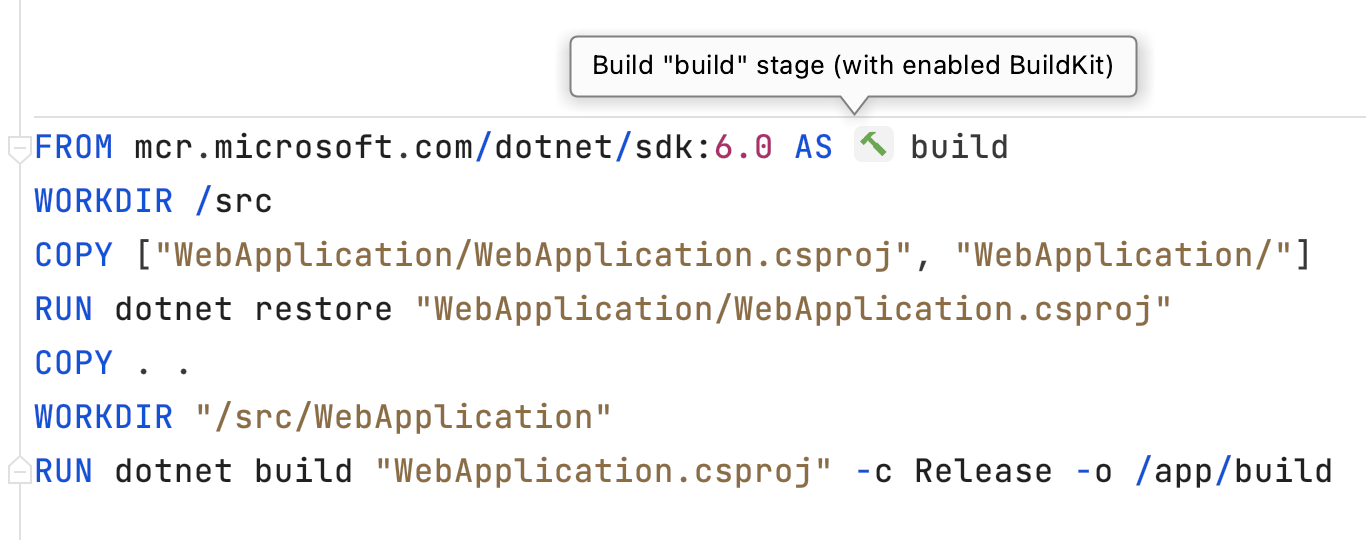
With the Dockerfile open, we can see several actionable icons appear in the editor.
At the top left, within the gutter, we have the double play icon, which allows us to perform one of three actions:
- Run on ‘Docker’ : Running will run an existing container if it exists, or build a new image from the
Dockerfileand then run the image as a new container. - Build Image on ‘Docker’ : Building an image will execute all steps found in the
Dockerfileand create a new local image. - New Run Configuration : This option allows us to create a brand new run configuration and accompanying
Dockerfile. Additionally, Run Configurations allow us to set tags on our images, set a container name, and apply build arguments using Rider’s UI interface.
Choosing the Run on ‘Docker’ option will run the docker build command and begin displaying the Services tool window results.
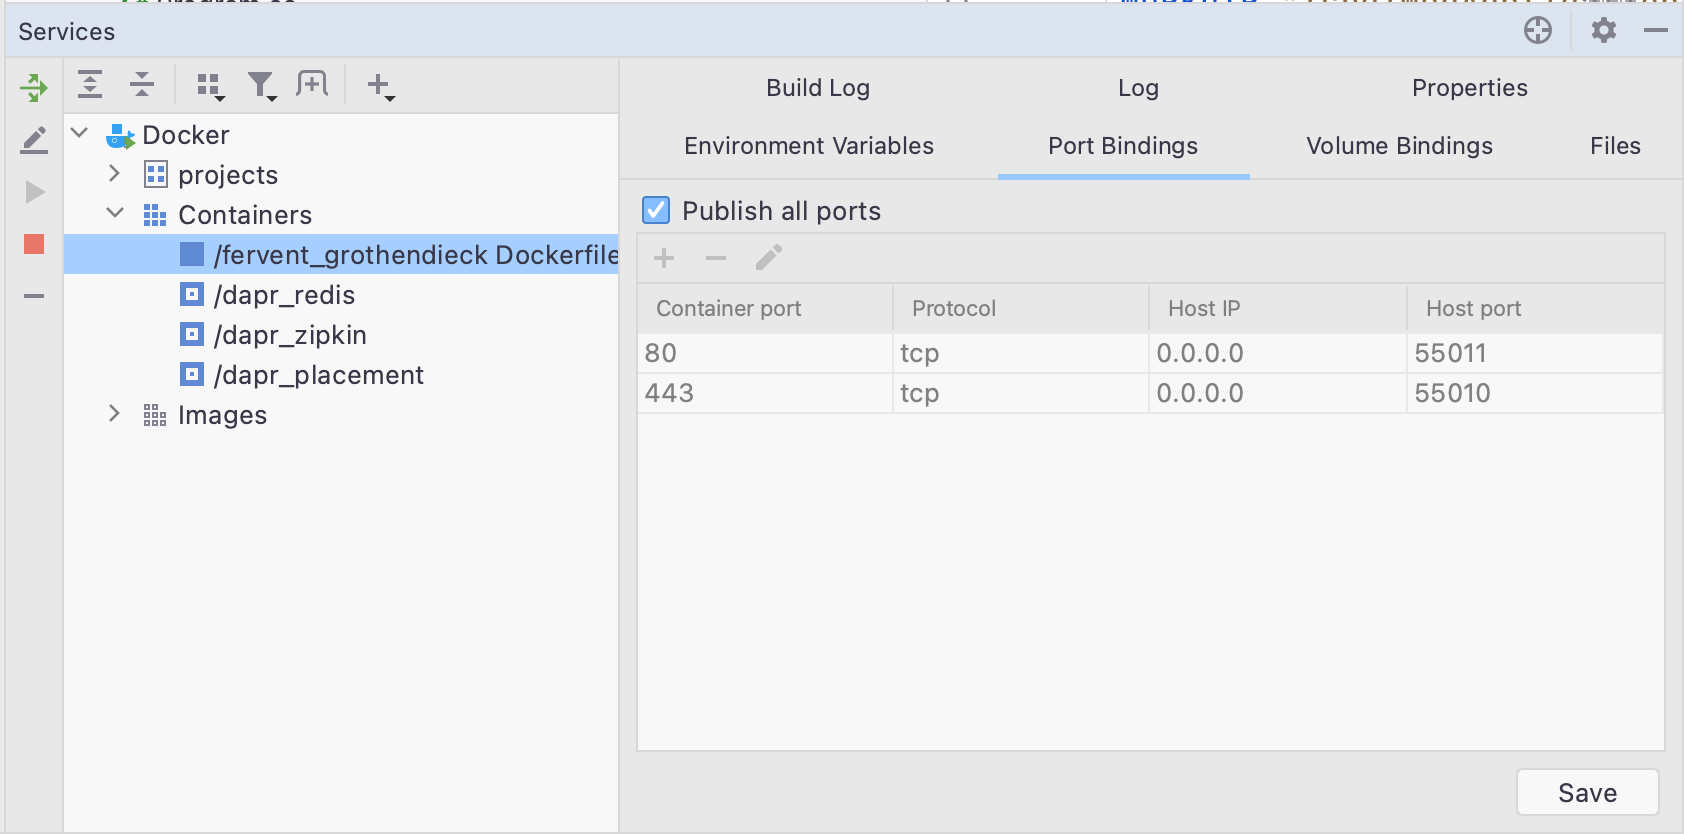
The built image can either be run or deployed to a docker image registry for consumption by other team members in different environments. For developers getting started with running Docker locally, be sure to use the Services tool window and check to see the HTTP and HTTPS ports have been mapped to the host operating system. Clicking the Publish all ports will automatically assign the container ports to a host port. HTTPS support requires additional setup for SSL certificates as outlined in the Microsoft documentation.
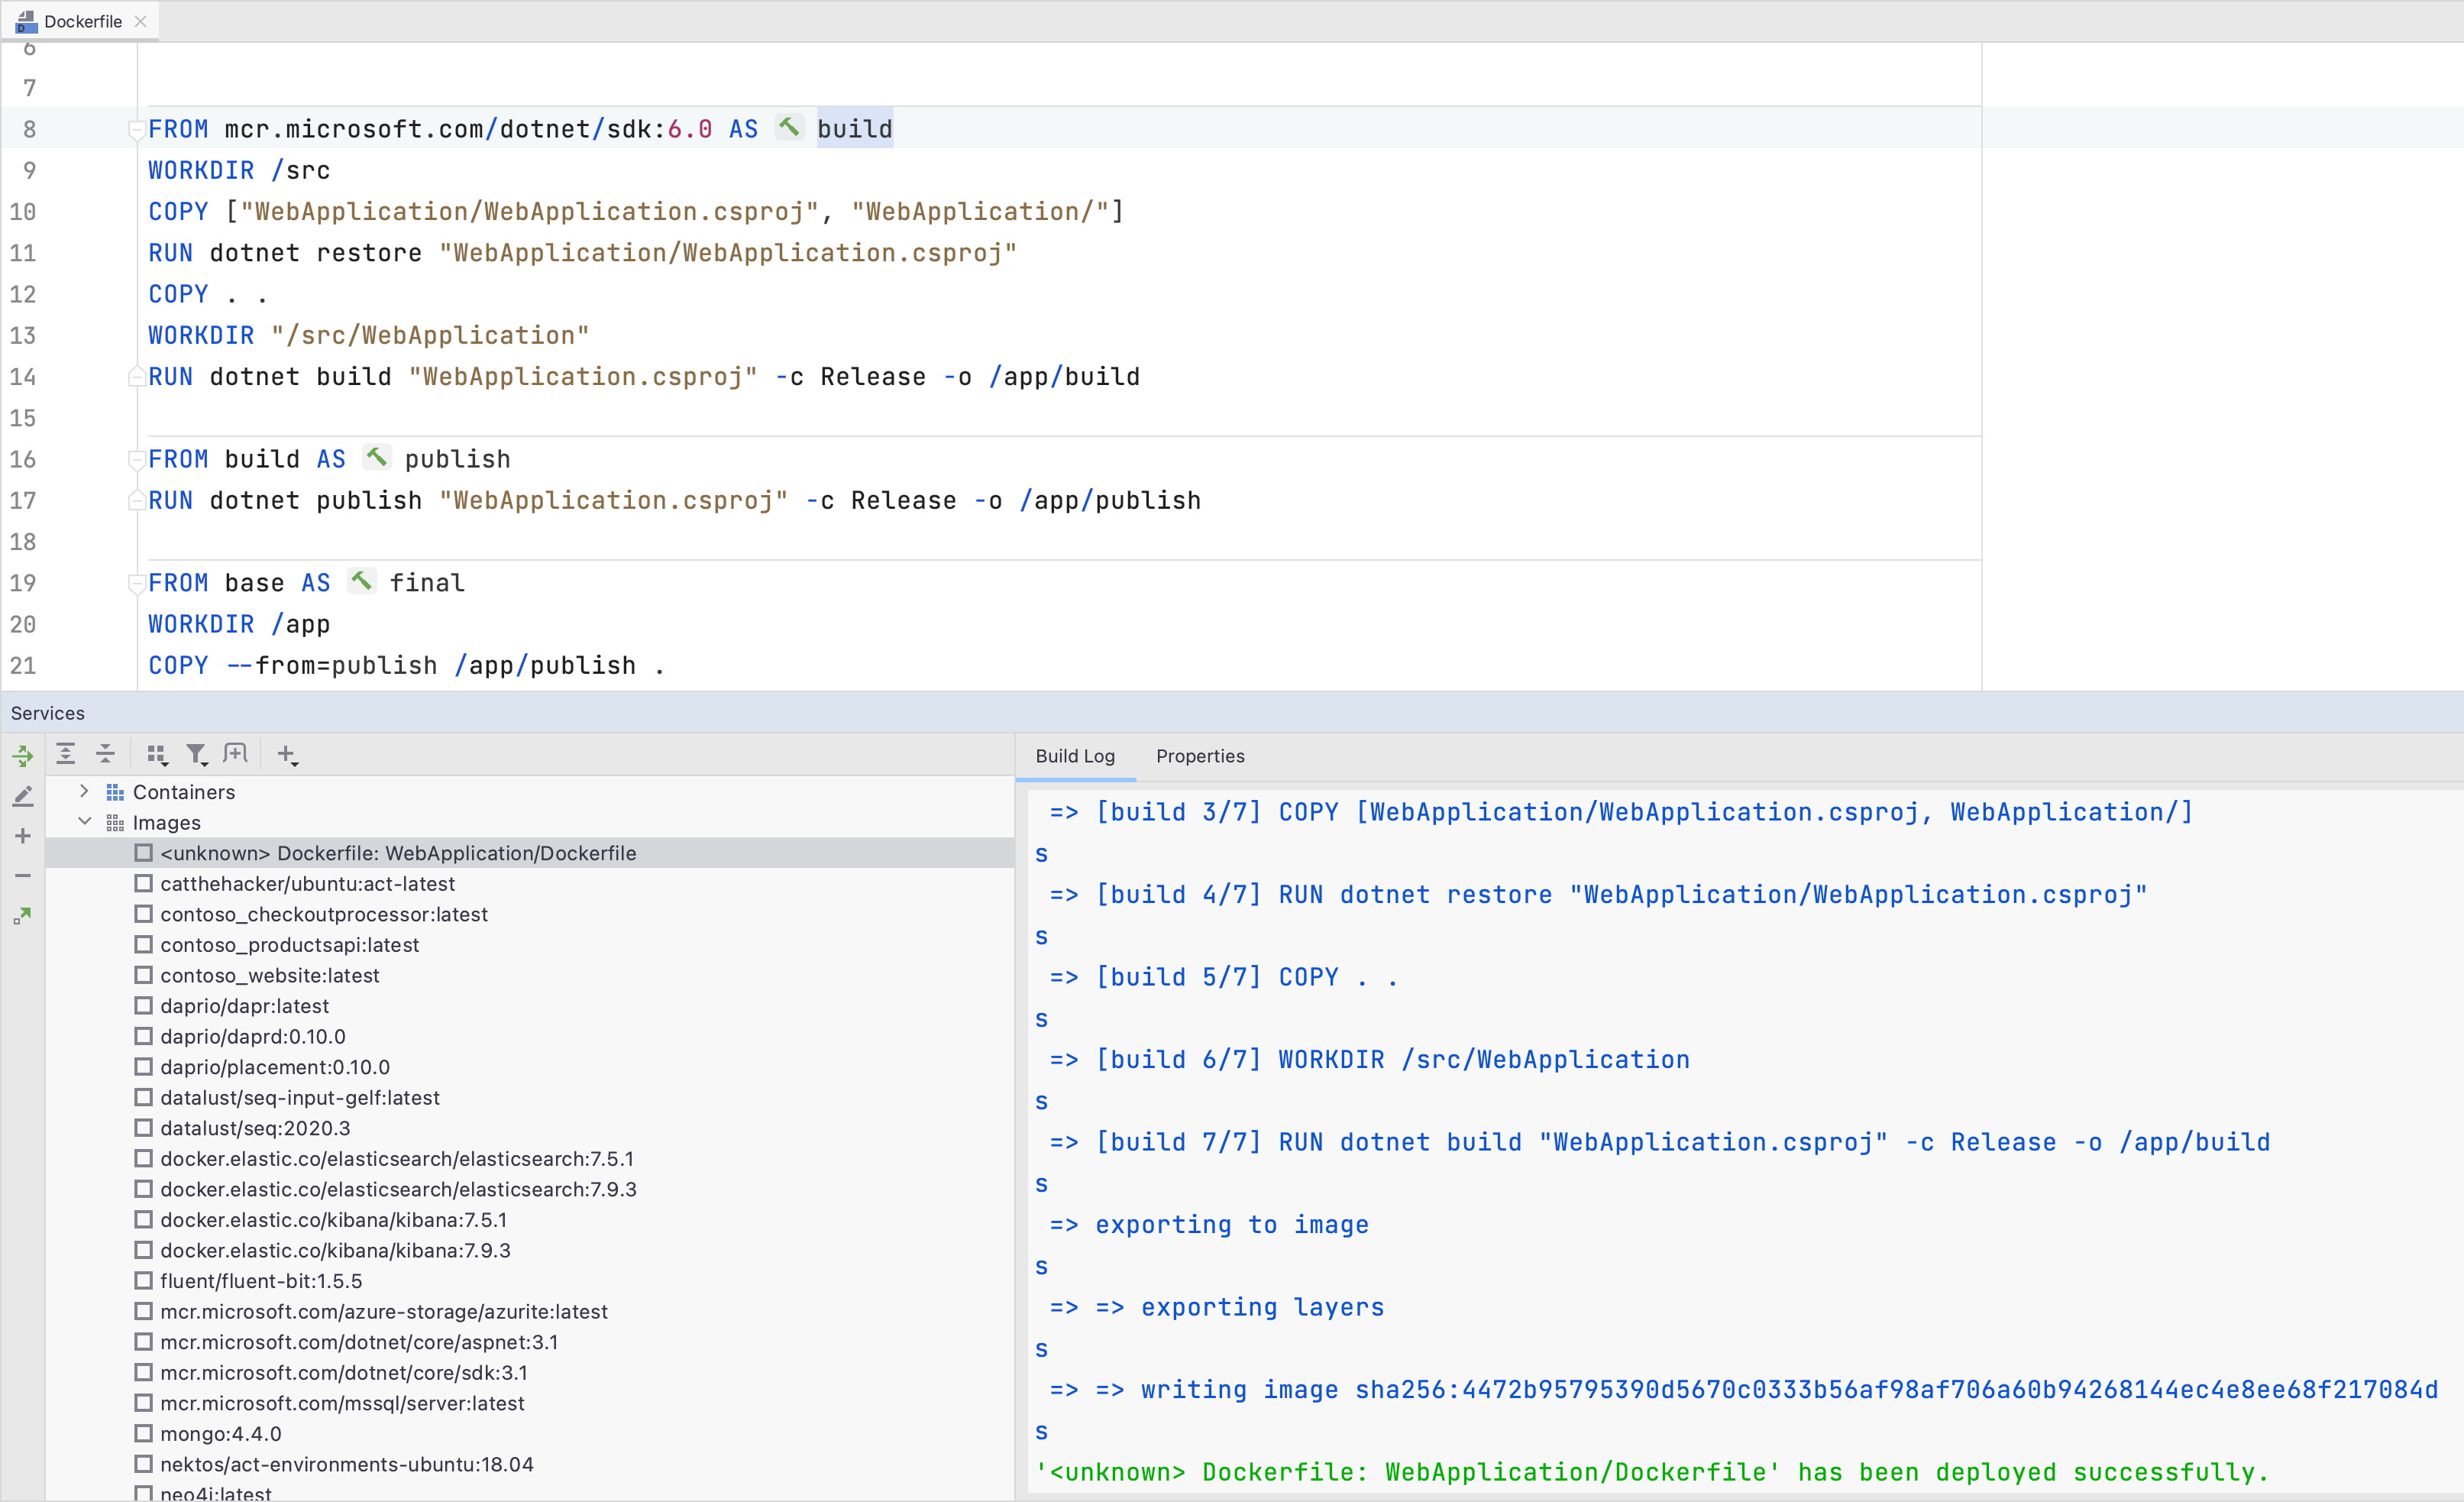
In addition to running the complete build script, Rider’s Docker support will recognize the incremental build steps on the way to building a whole Docker image. To test each step incrementally, we can use the build action (hammer icon) to initiate the build step. Since the build stages are dependant on each other, Rider will also build each previous step. To verify the build was successful, we can use the Services tool window to see the results in the Build Log tab along with the new image now visible under the Images section under Docker.
What a fantastic addition to greenfield development projects, but what about folks looking to containerize existing solutions?
Add Docker To Existing Projects
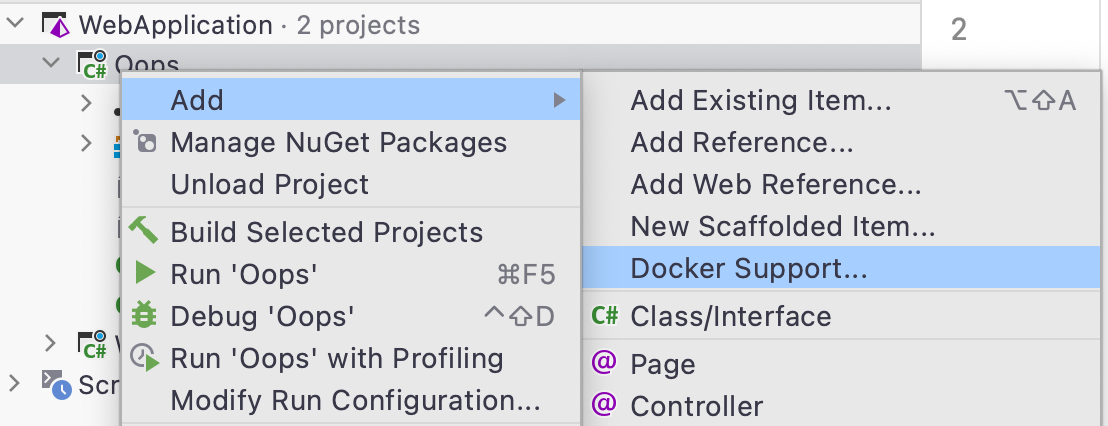
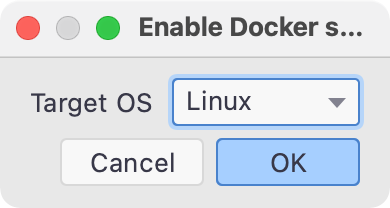
Containerizing existing .NET applications is as straightforward as starting with Docker support. From an existing project, right-click the project icon and select Add > Docker Support.
A small dialog screen will appear, allowing us to choose our target environments of Linux or Windows.
Once we’ve selected our target environment, we’ll see the same two files of Dockerfile and .dockerignore in our project. From here, it’s business as usual.
Conclusion
Rider’s focus has always been to help developers achieve ultimate productivity, focusing on providing first-class tooling for the current and next technology trends.
Rider’s Docker support is an excellent tool to have at your disposal, whether we need containers to consume external dependencies or need to containerize our applications. With Docker support for .NET applications, developers can jump right into adopting Docker from the start or add Docker support later in the development process when they’re ready.
To learn more about Docker support in Rider, check out our previous blog posts:
- Containers? Images? An introduction to Docker in Rider
- A better look at Dockerfiles: creating a container with Rider
- Docker Compose, edit & continue for C# 8 and more debugger updates in Rider 2019.3
Thank you for reading this post. Download Rider 2021.1 Early Access Program (EAP), and please leave feedback in the comments below.