.NET Tools
Essential productivity kit for .NET and game developers
A Better Way To Discover APIs With The New Endpoints Window
Despite the name, endpoints are generally where ASP.NET Core development starts for many developers. Endpoints handle incoming requests and provide appropriate responses to clients. While the concept of endpoints has existed since the inception of web development, it was only recently formalized into ASP.NET Core 3.1.
Developers can implement endpoints as Razor Pages, ASP.NET Core MVC controllers, or using the newly available Map methods in ASP.NET Core. However, as our application domain grows, it can become cumbersome to discover endpoints. Additionally, an application may depend on external APIs that you might need to discover and understand as developers. All adding to the strain of working on existing applications.
Luckily, with the latest release of Rider 2021.2 EAP, developers will have access to the new Endpoints tool window.
Let’s take a quick look at what this new Rider feature can do, and how it can help you work better with web APIs.
Endpoints Tool Window
Rider users will see the Endpoints tool window when starting an ASP.NET Core web application. The tool currently scans the existing project for specific ASP.NET Core attributes: Route, Http{Method}, and AcceptVerbs. Future releases of the endpoint tool will support more ways of adding endpoints, such as the explicit calls to Map{Method}.
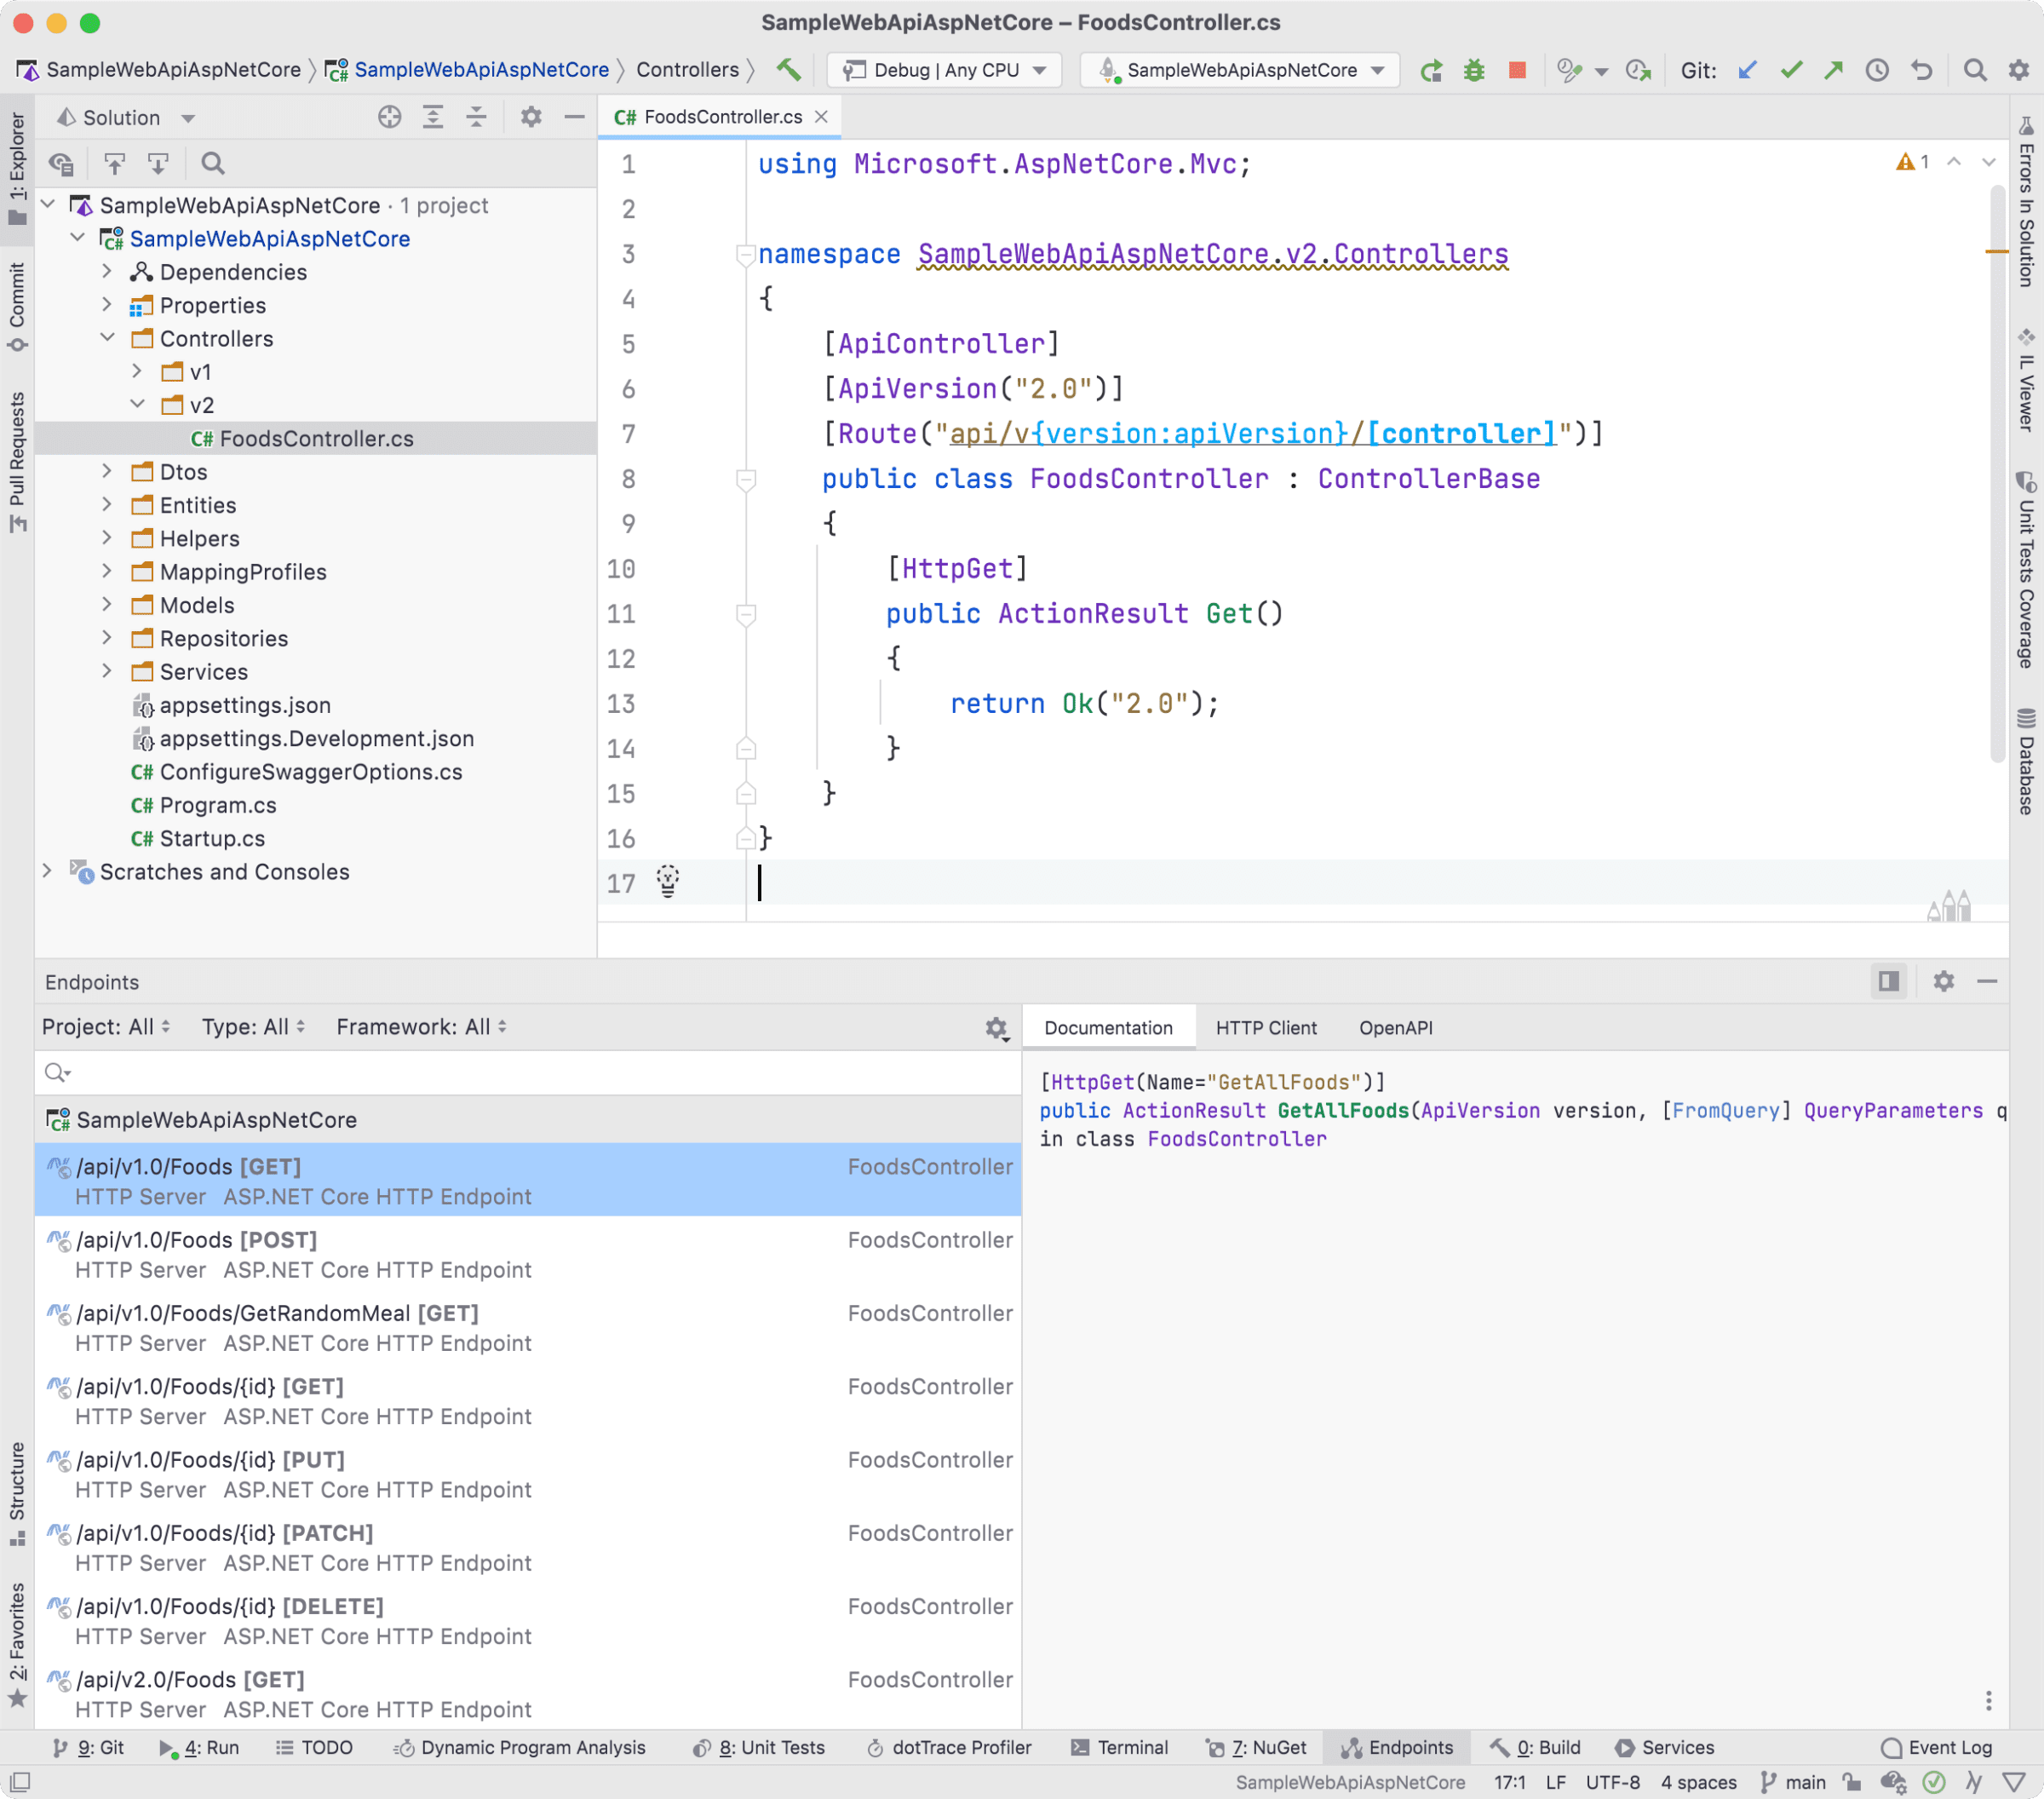
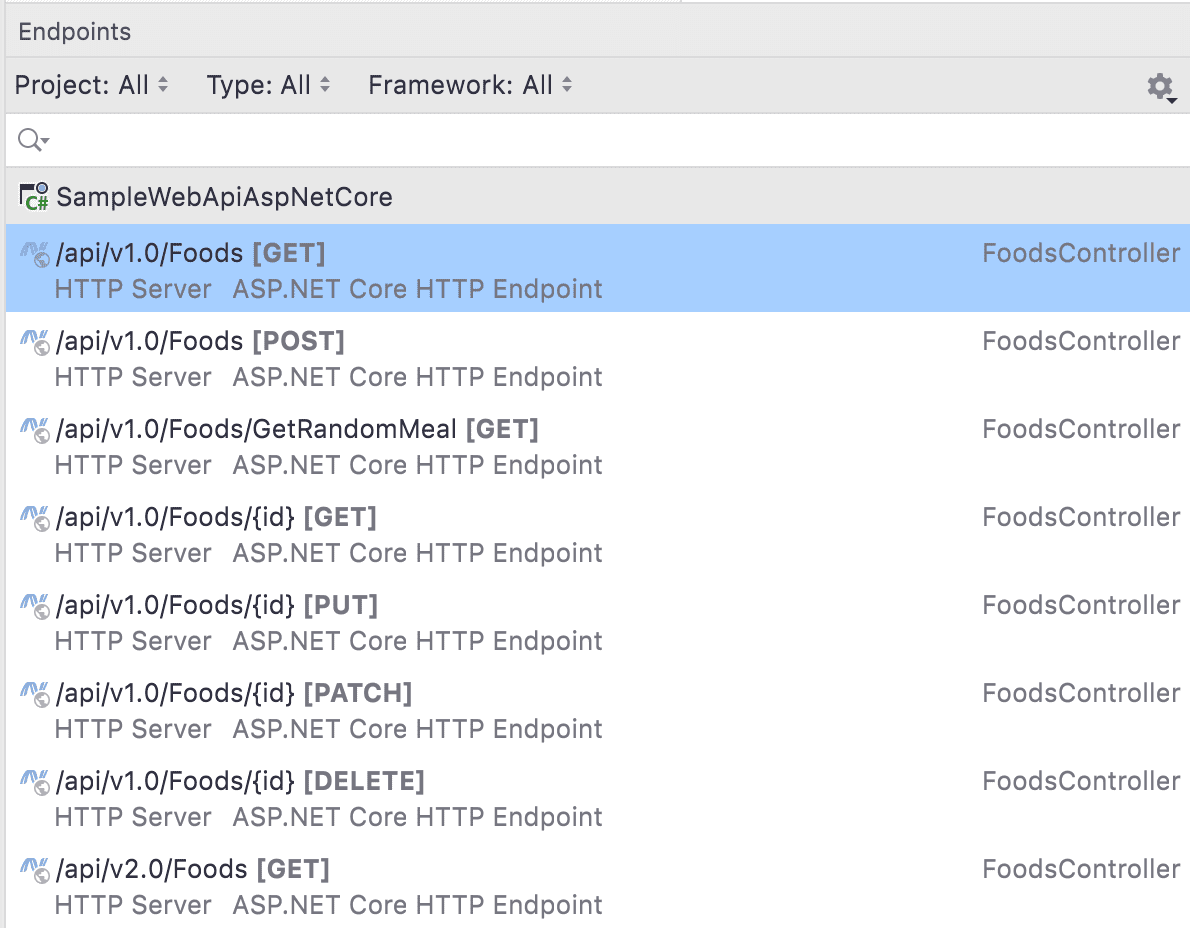
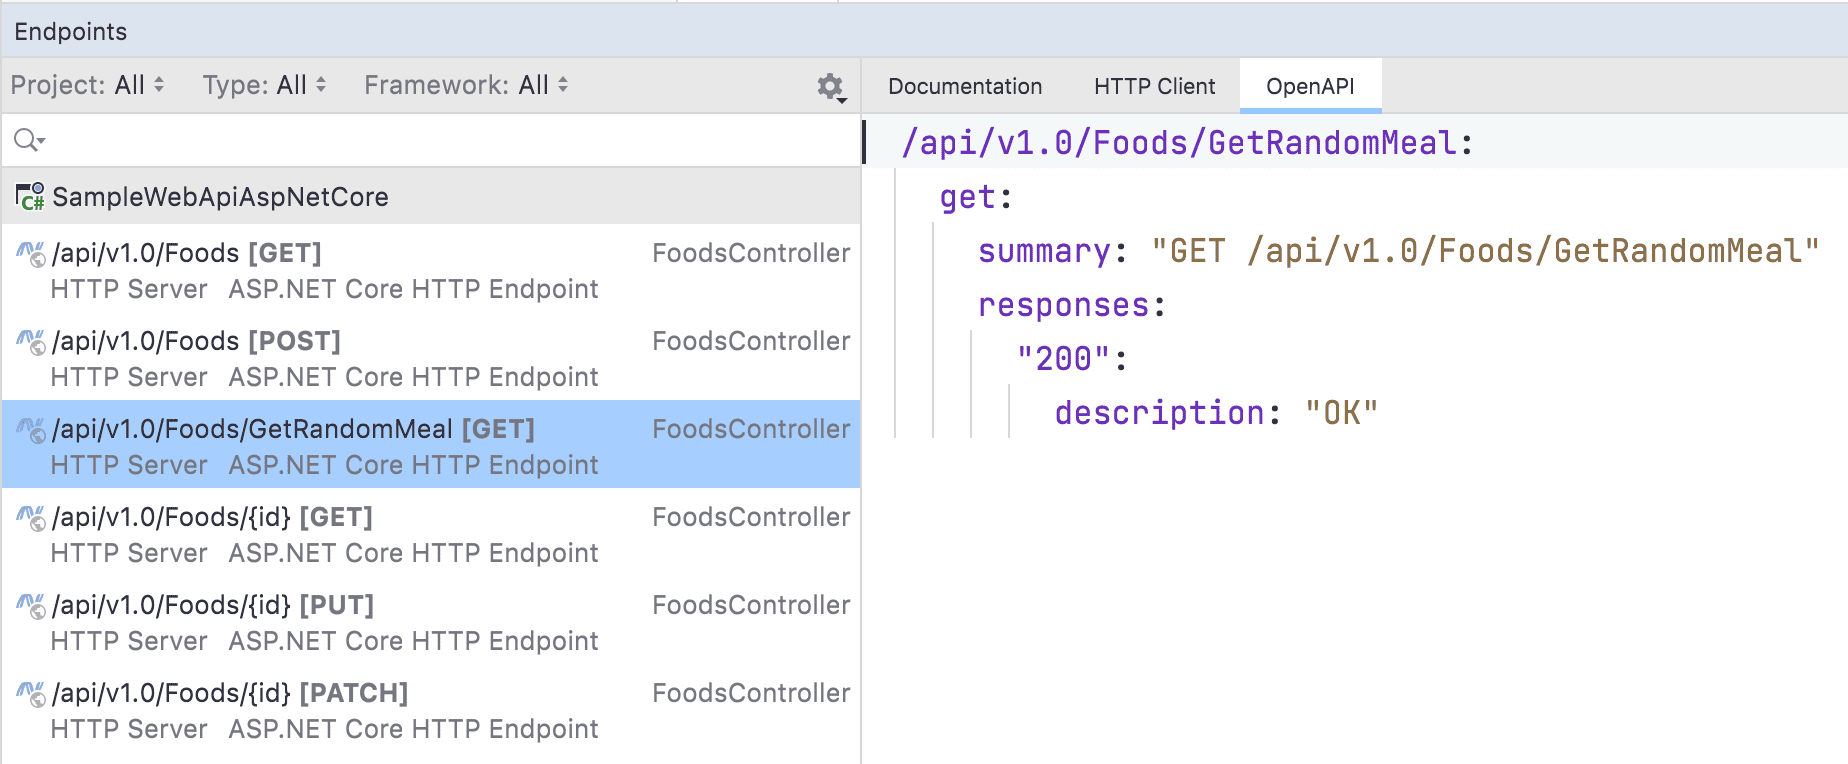
On the left side of the tool window, Rider displays ASP.NET Core endpoints that have been discovered. In addition, each endpoint entry will display a URI path, HTTP method, along with the originating ASP.NET Core Controller.
Double-click an entry or use Jump to Source F4 to navigate to code, or use Find Usages to discover where an endpoint is used or registered. Also, keep in mind in the editor you can always use various features around Route templates, such as completion, introducing new route parameters, and more.
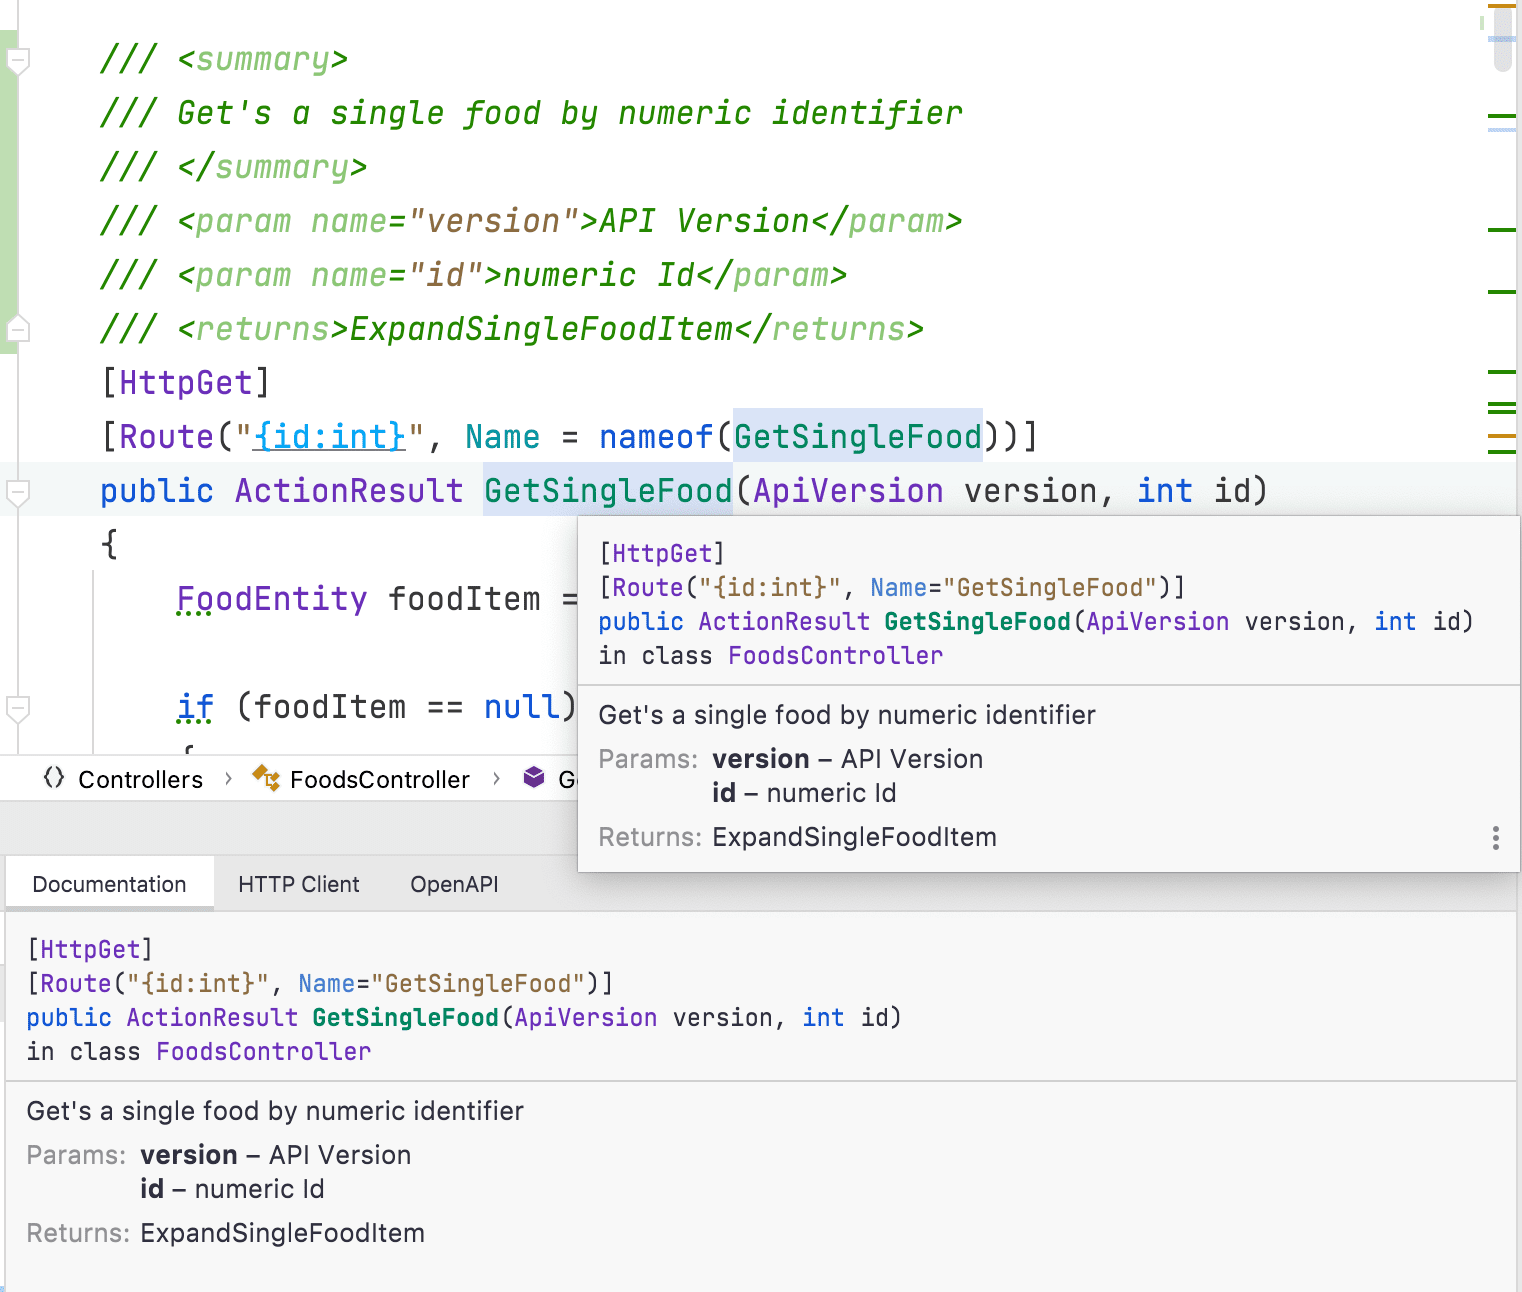
On the right side of the tool window, developers will have access to three tabs: Documentation, HTTP Client, and OpenAPI.
The Documentation tab reads the XML documentation found on the endpoint code. The documentation text is the same you would see if you hovered over usage of the endpoint.
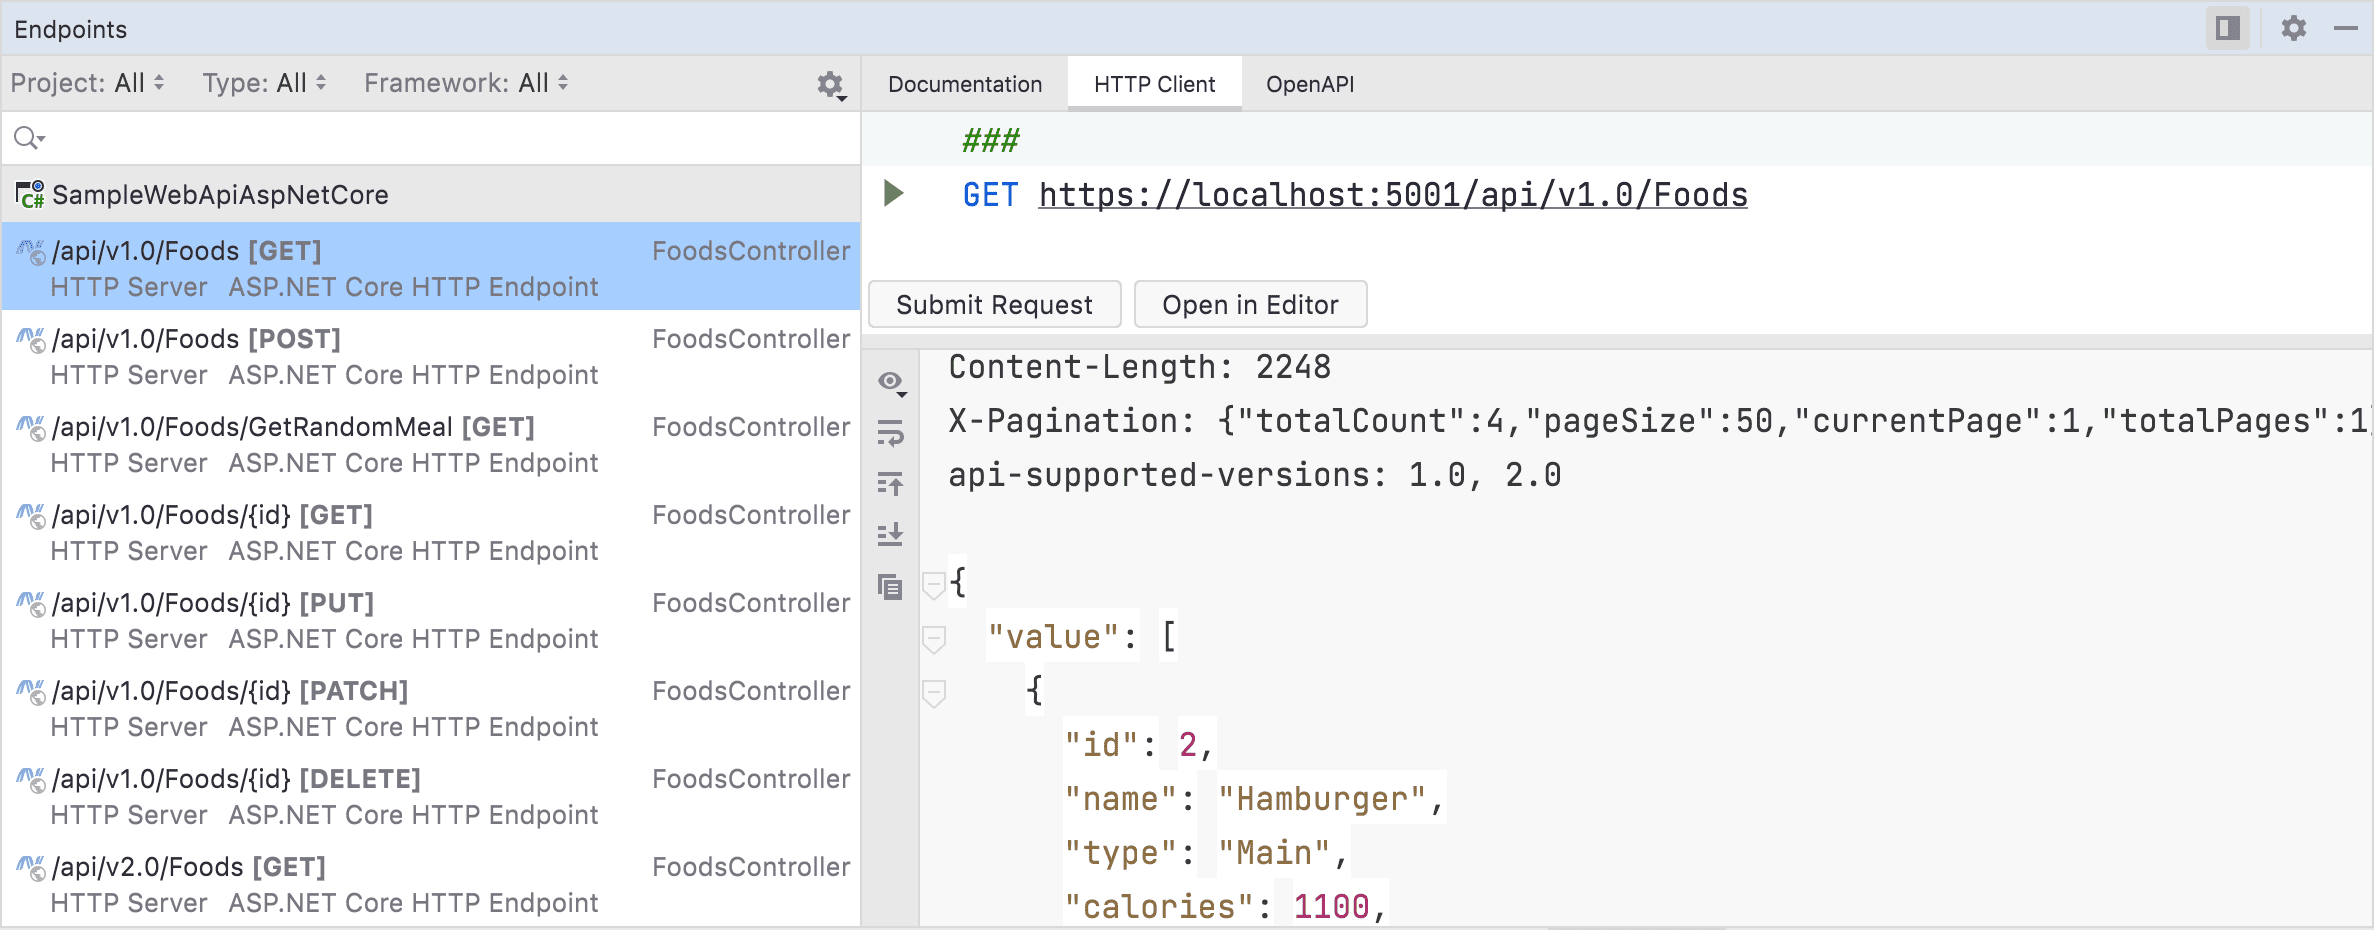
The HTTP Client tab allows you to use Rider’s powerful HTTP Client tool directly from within the Endpoints window:
- The method and URL are set for you using the endpoint information.
- You can substitute placeholder variables by clicking the highlighted text, such as the base URI or any path parameters.
- When the application is running, you can execute the request using the green play button.
- The response is displayed below our request.
Access to the HTTP Client is helpful, and you can open our request in a new editor window using the Open in Editor window, which allows you to save our work to .http files for later use.
Finally, you have the OpenAPI tab, which shows you the OpenAPI specification for the endpoint. Generating OpenAPI specifications can be helpful for developers writing specifications manually using a specification-first approach. In addition, managing OpenAPI specifications as files helps avoid unnecessarily using resources at runtime.
Exporting Endpoints To An OpenAPI Specification
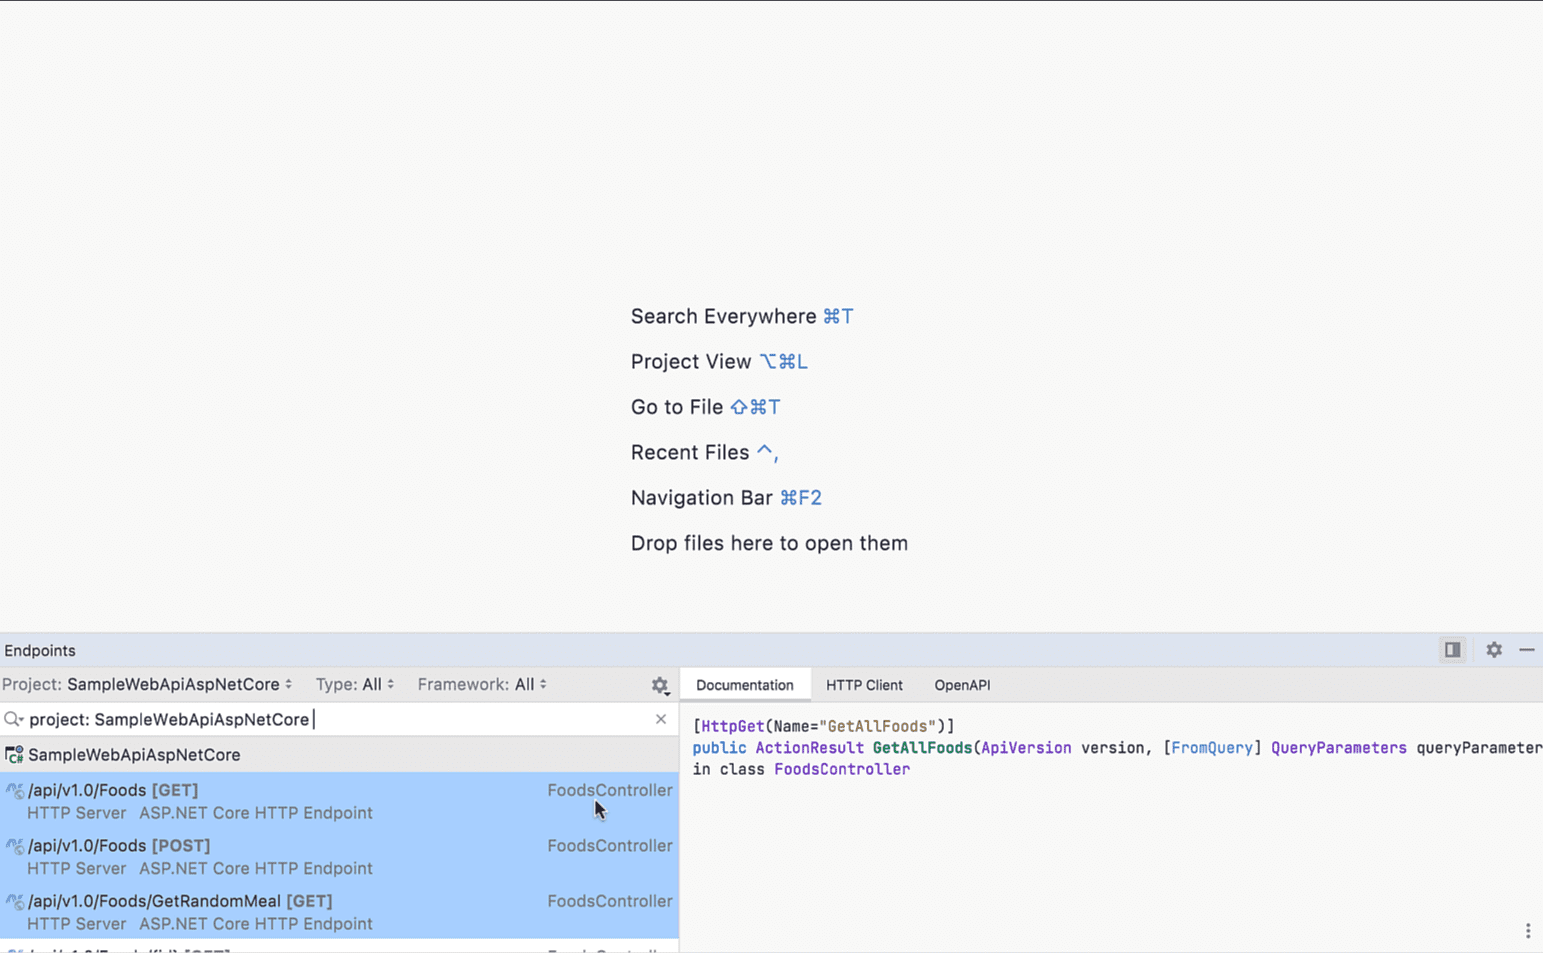
When working in the Endpoints window, you can select multiple ASP.NET Core endpoints and choose to export them into a single OpenAPI specification file. This can be helpful when selectively sharing specifications with third parties or for using the preview window for local testing.
Existing OpenAPI Specifications and External APIs
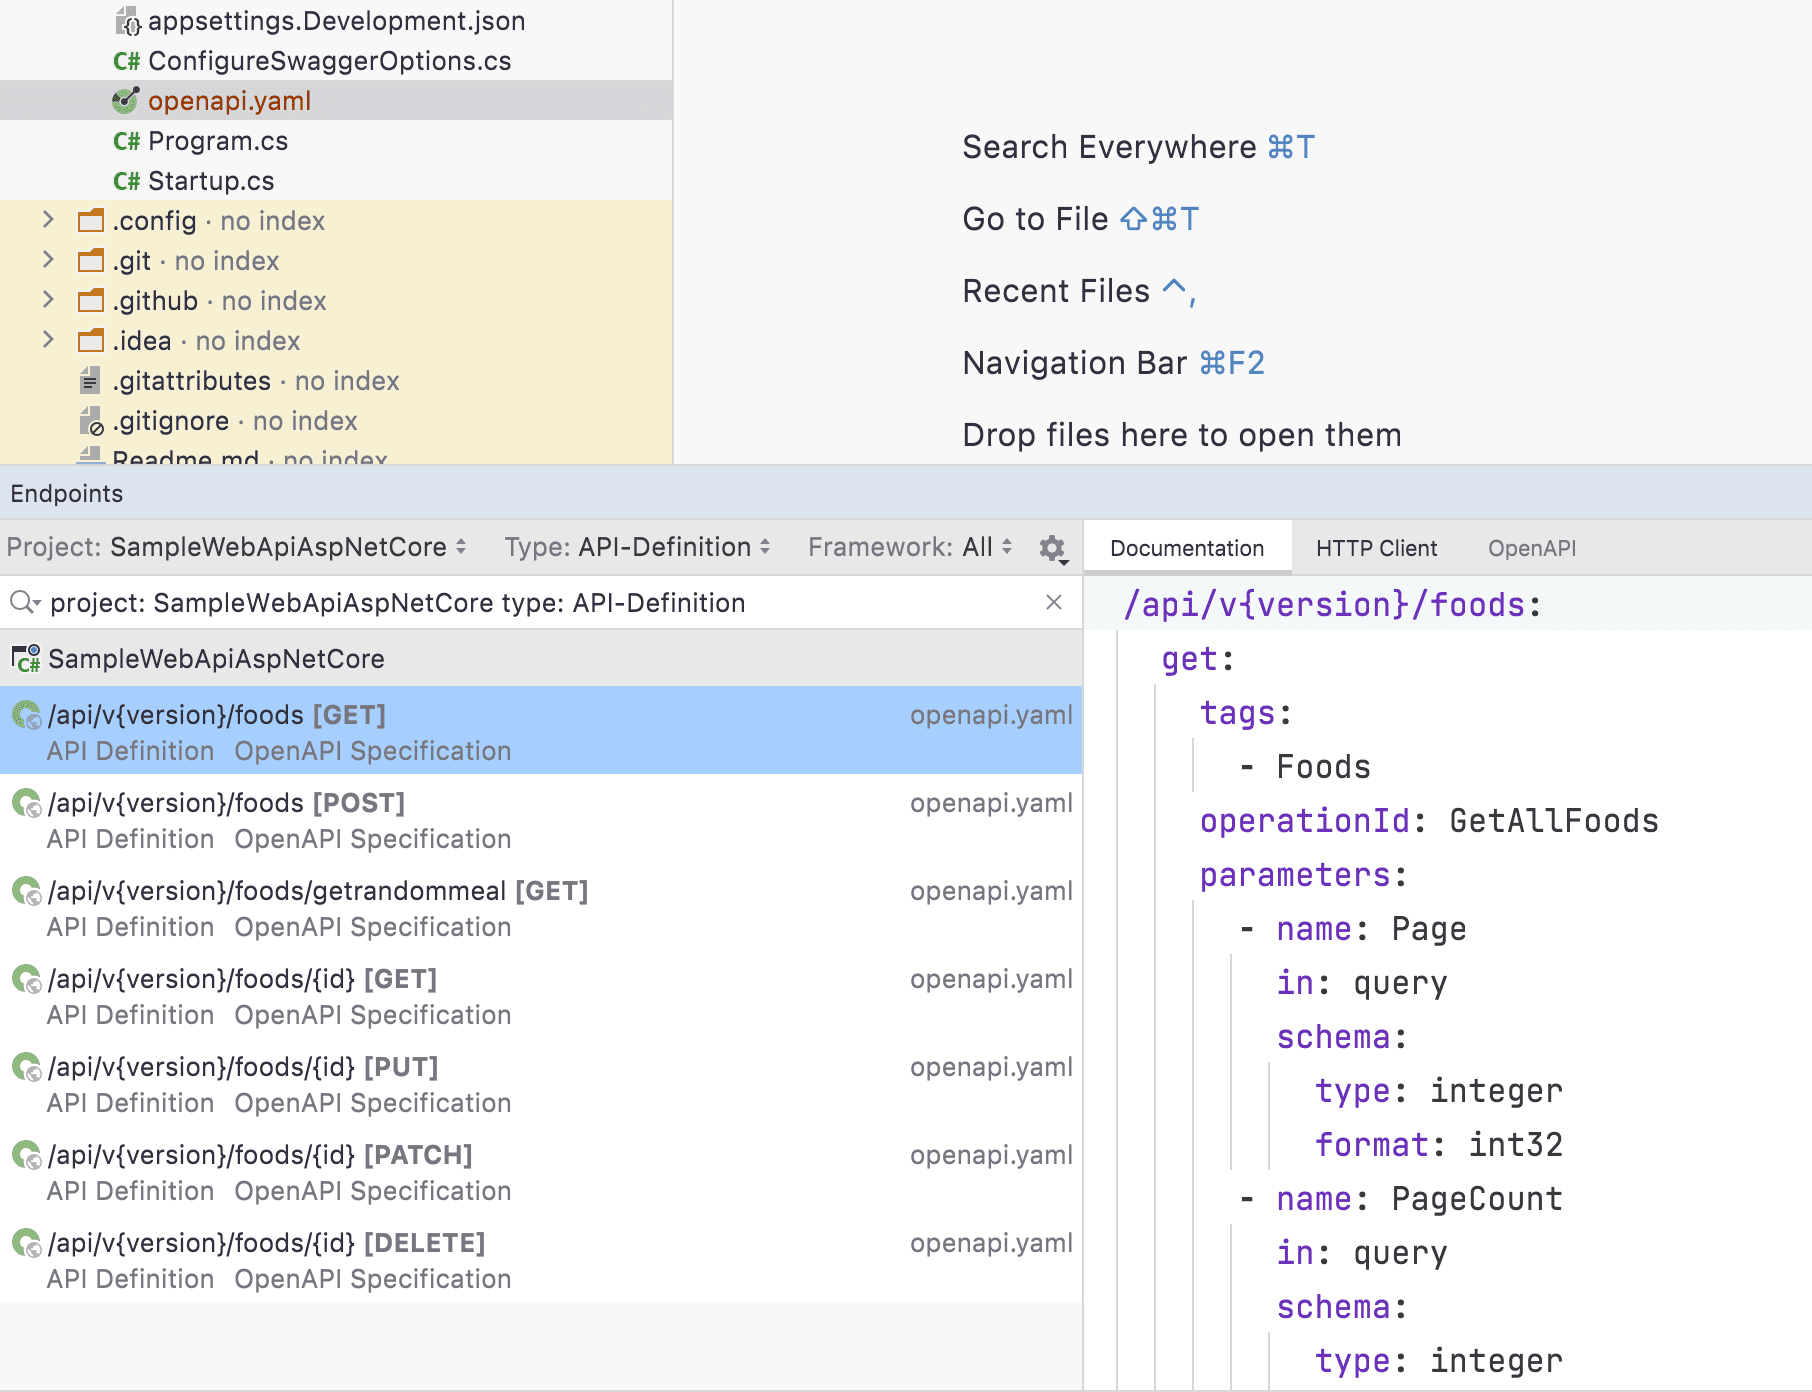
The Endpoints tool window can also discover endpoints found in OpenAPI specifications located within the solution. you can filter only to see OpenAPI specifications using the Type option.
OpenAPI specifications don’t have to be local; they can point to third-party APIs. While it’s best to include the specification with the project, you can also add specifications using the OpenAPI Specifications settings window.
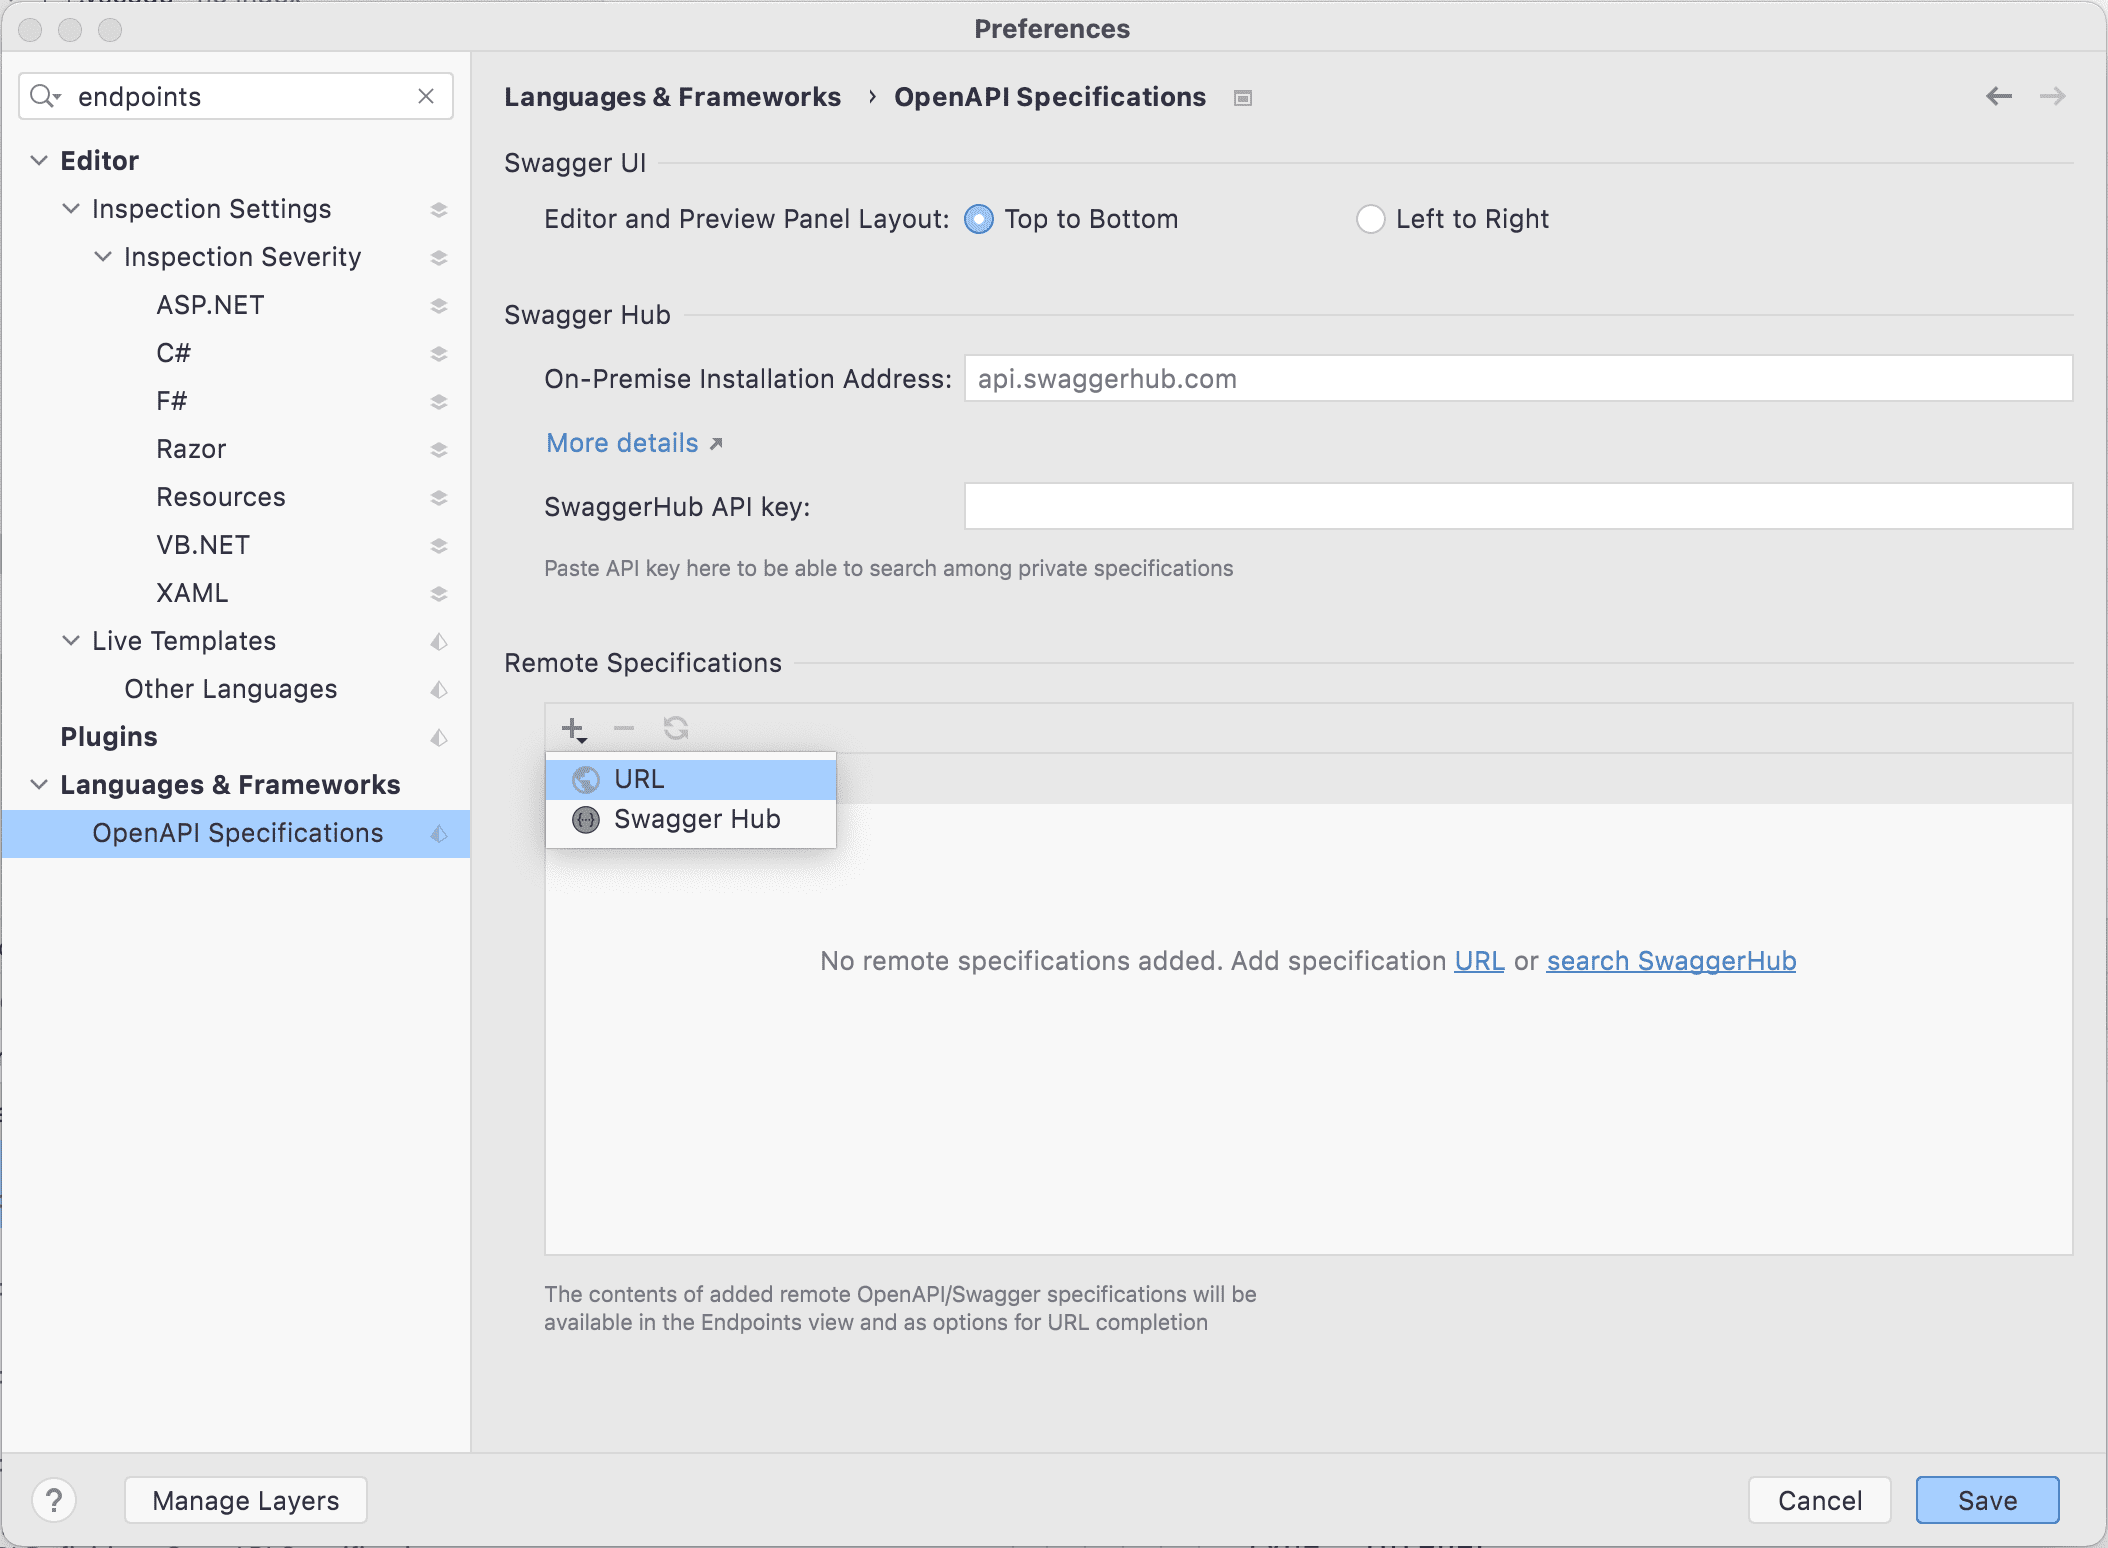
You can add specifications using a direct URL or pull in any specification hosted on SwaggerHub. Here, I’ll pull in the common “Petstore” specification that most OpenAPI users are familiar with using.
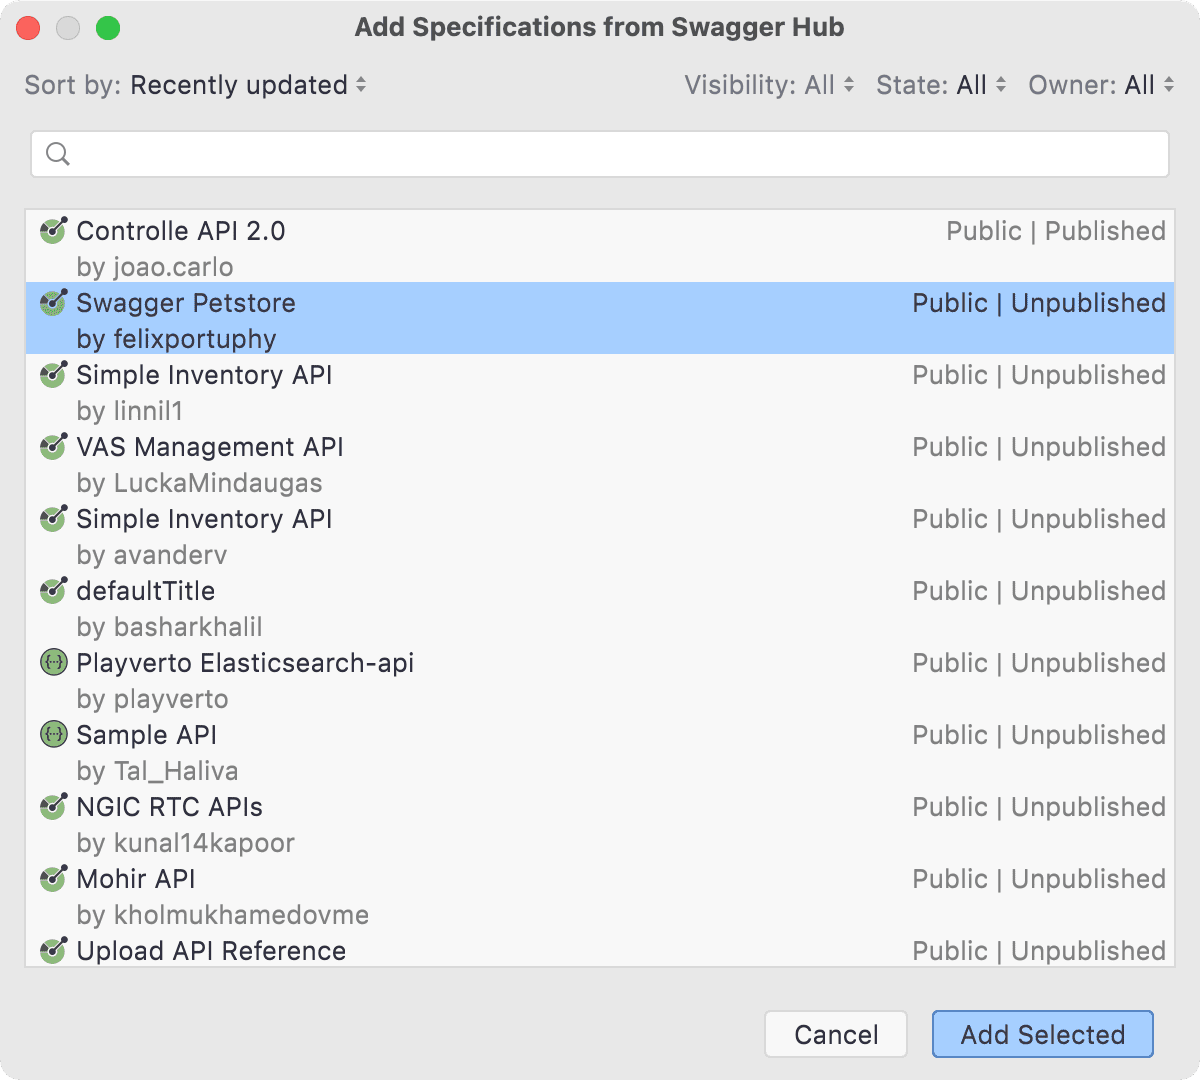
Back in the Endpoints window, you can filter to our external OpenAPI specification and use the HTTP Client to call the defined endpoints.
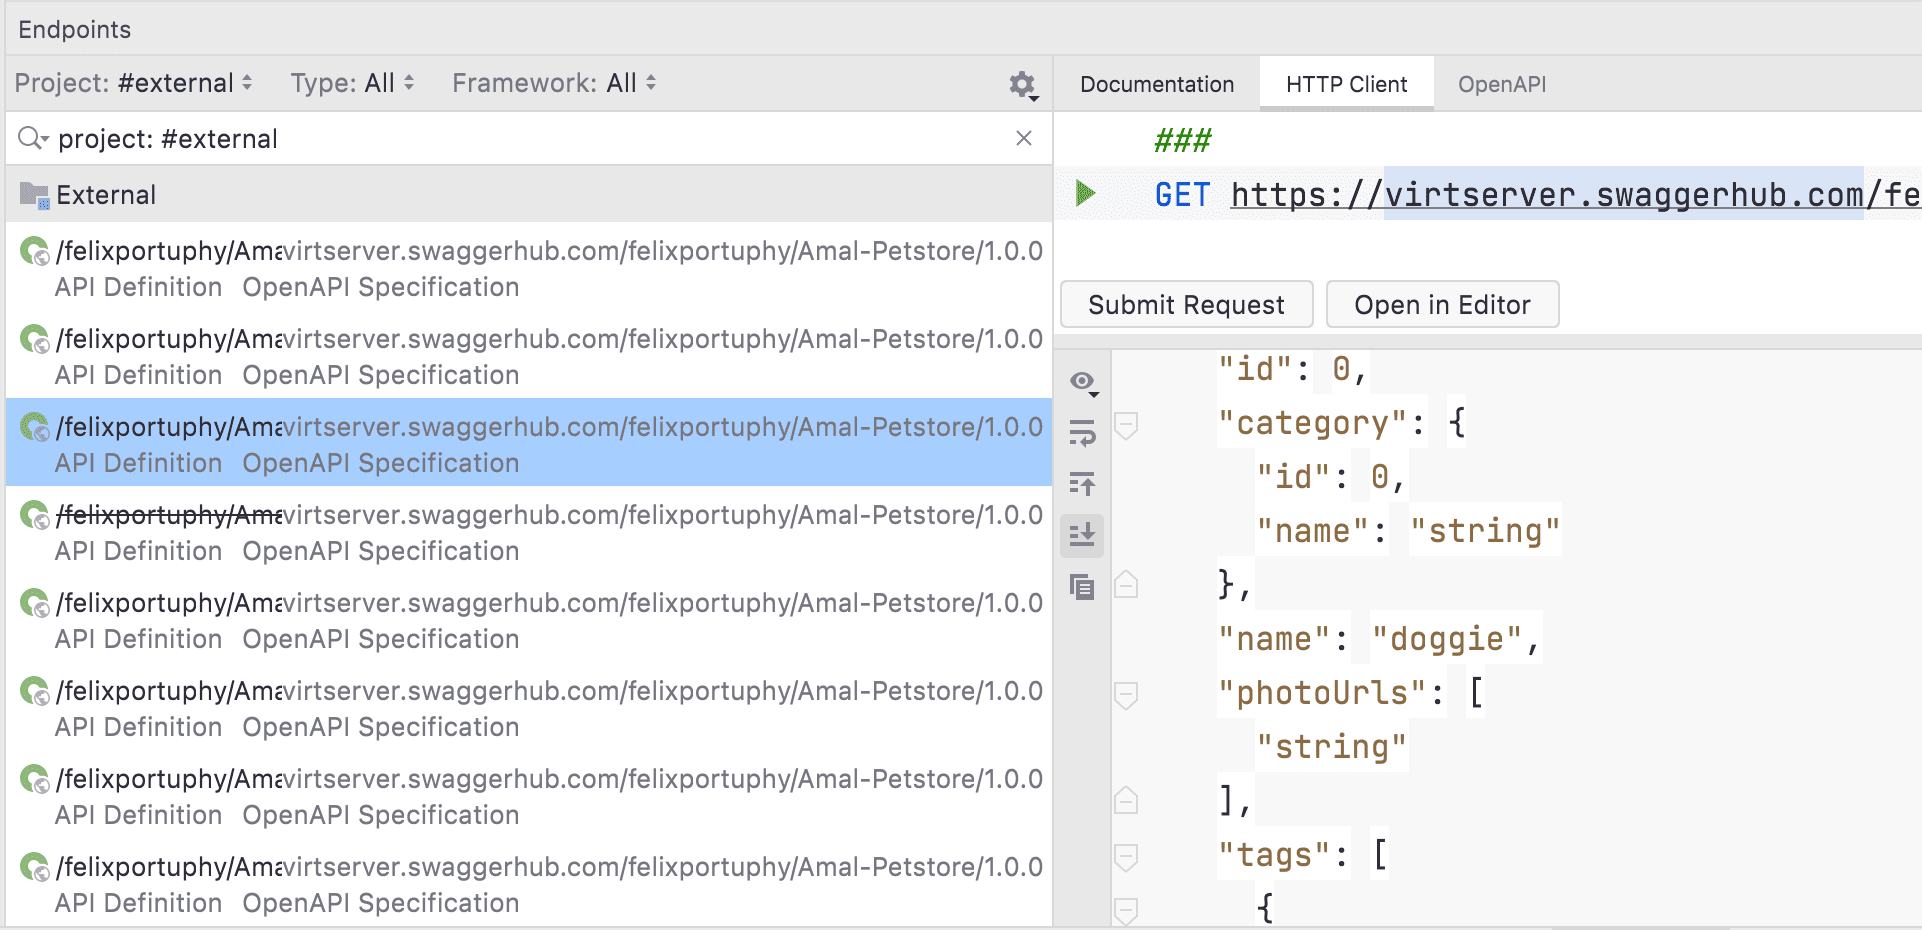
Importing OpenAPI specifications is especially helpful with third-party APIs that are part of our web applications dependency graph.
Update: Minimal API Endpoints Support
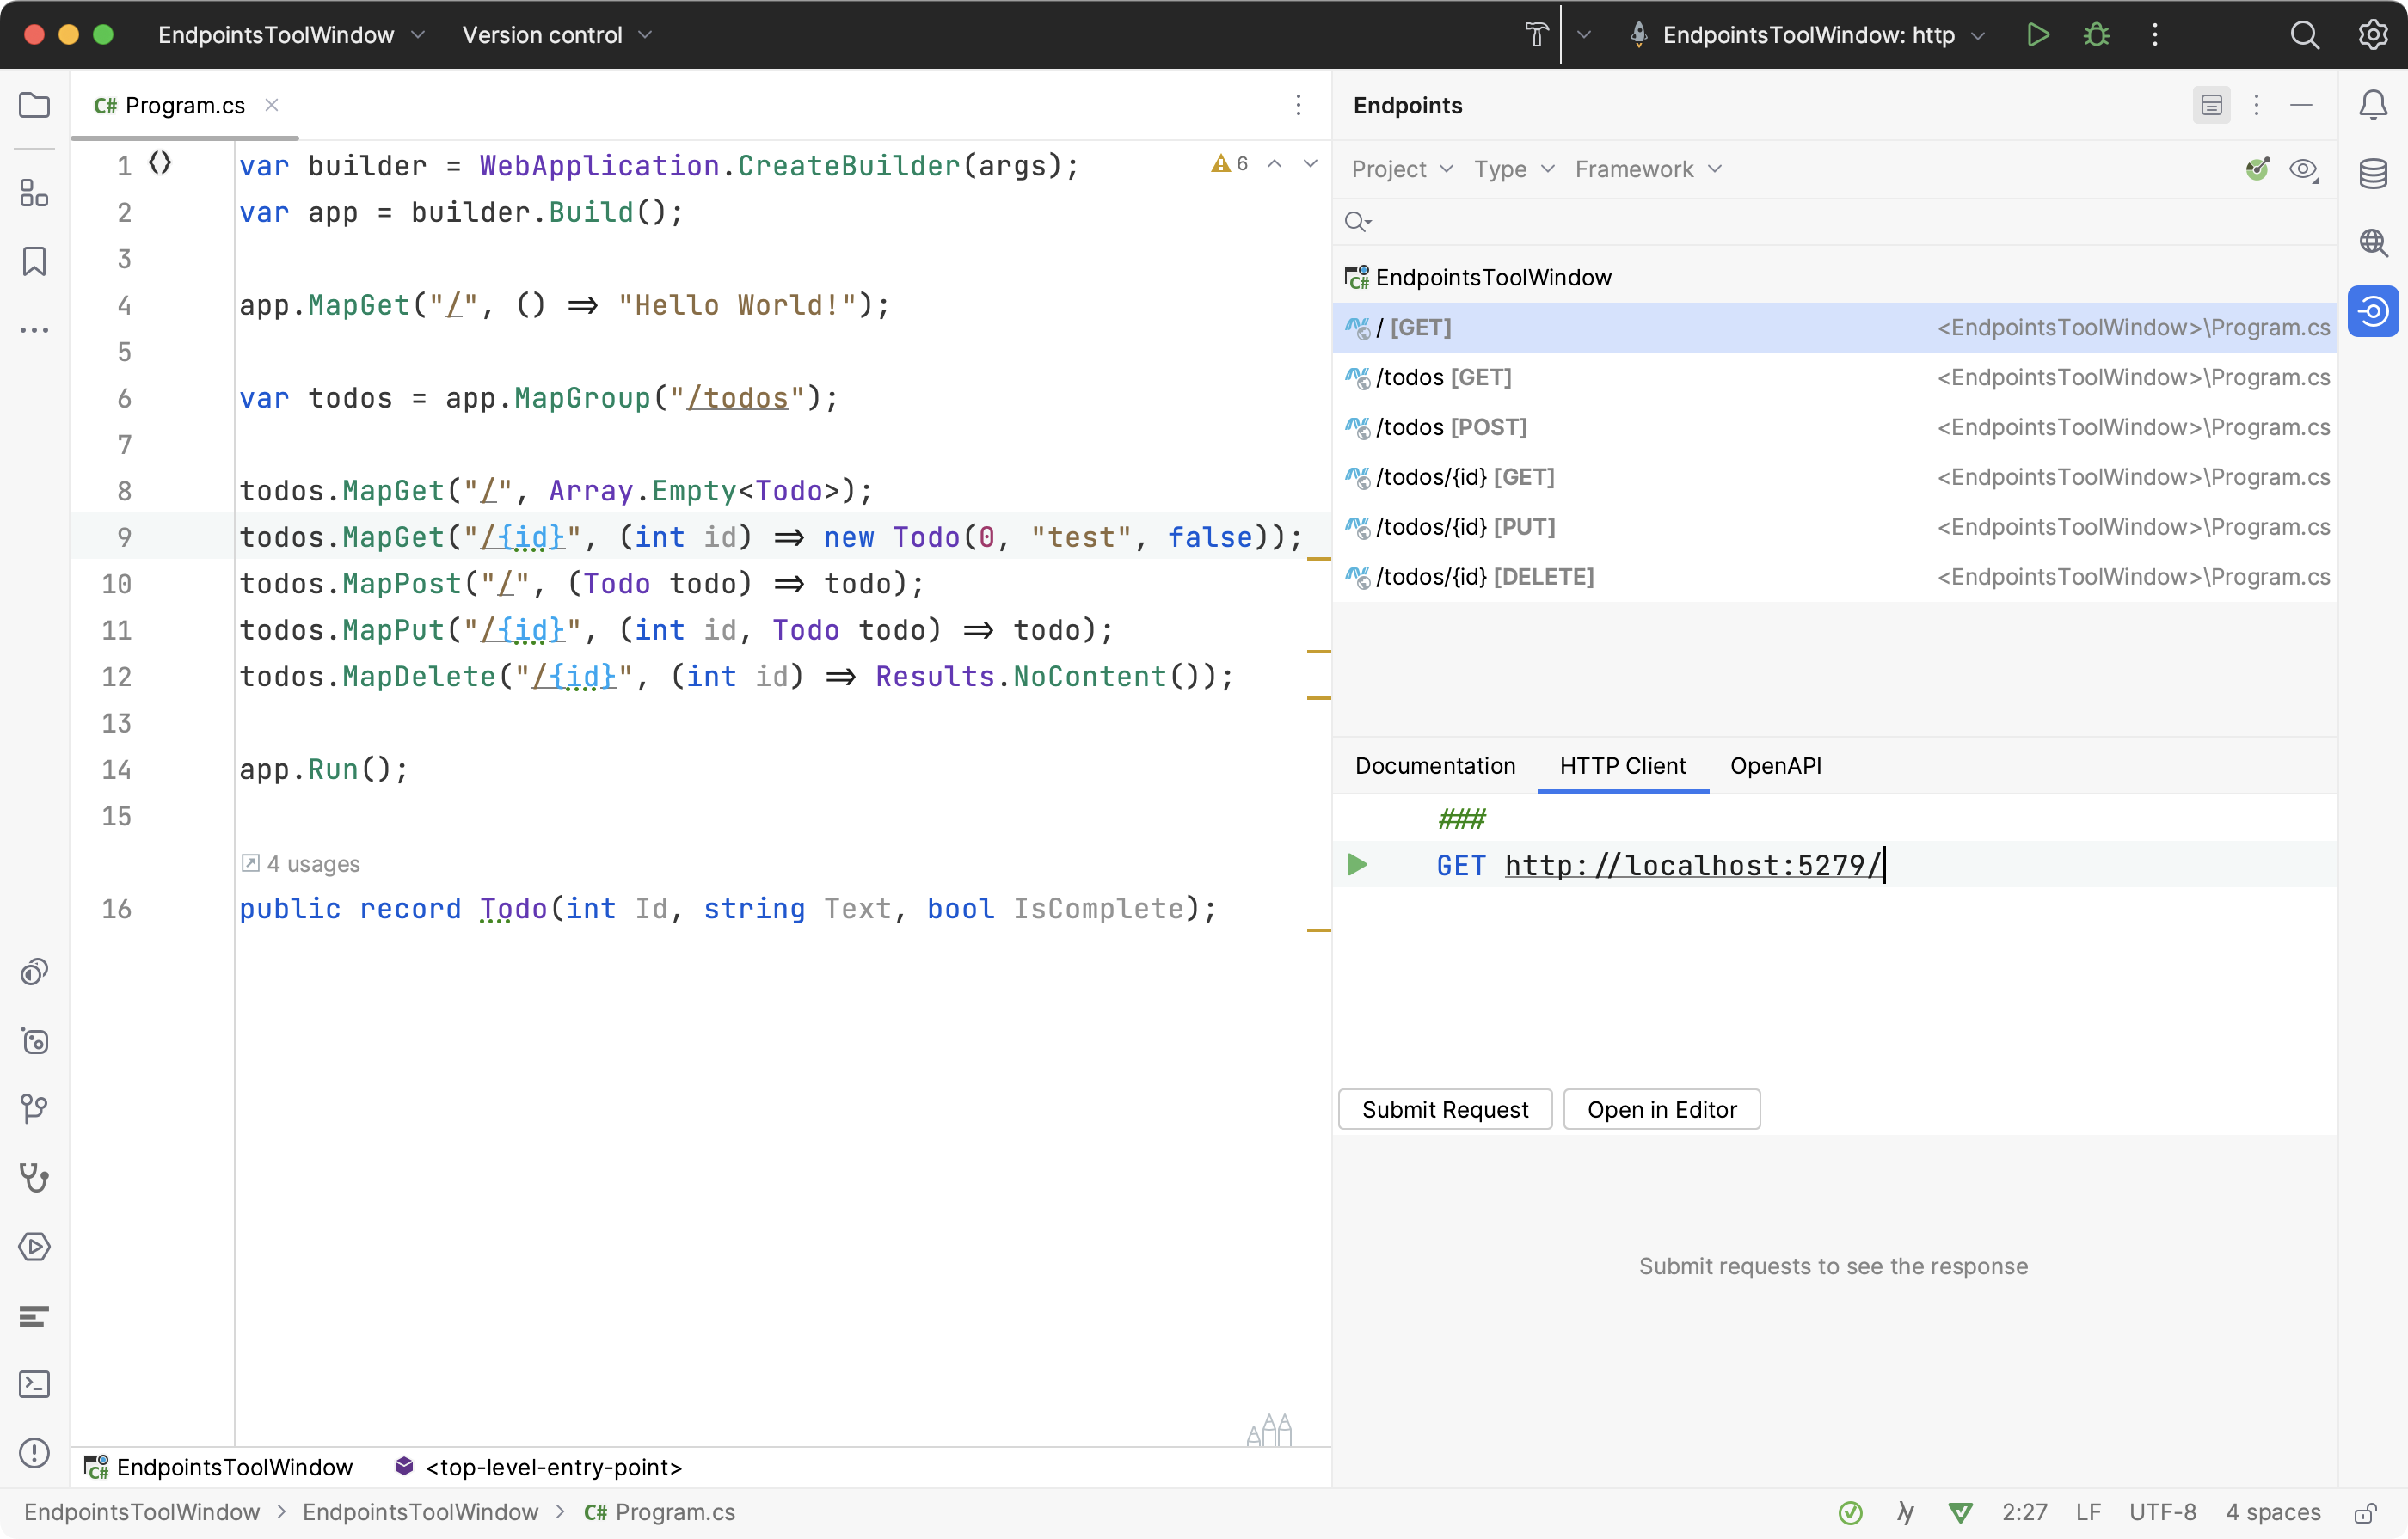
Since the 2022.3 release of JetBrains Rider, we have added Minimal API endpoints discovery support. If you’re writing microservices powered by ASP.NET Core Minimal APIs, you should see all your endpoints in the endpoints tool window. Additionally, we support Minimal API route groups, so all grouped endpoints will show in their expanded view.
Conclusion
The Endpoints window is a powerful addition to Rider’s feature set even while being in the early stages of development, and we have big plans on improving its abilities. Nevertheless, we hope you find the new Endpoints tool window helpful in your development workflow, whether you’re developing APIs locally, discovering endpoints through documentation, using external OpenAPI specifications, or exercising endpoints using the built-in HTTP Client.
If you’d like to try the new Endpoints feature, be sure to download Rider 2021.2 EAP and give it a try. Feedback and comments are always appreciated as always.
Subscribe to a monthly digest curated from the .NET Tools blog:


