.NET Tools
Essential productivity kit for .NET and game developers
EditorConfig, Code Style, and Configuring Code Inspections

Code is a mixture of style and substance, with many developers adopting particular habits throughout their careers. For individual projects, style is typically not a point of contention since you’re likely the only individual who will ever use and look at the code. However, as projects grow in scale, a consensus on stylistic choices can lead to less friction, fewer arguments, and an increased ability to maintain a code base. These benefits cannot be underestimated in maintaining development and shipping velocity.
Most developers will opt to use the out-of-the-box style of their IDE and editors, but as tools get better and there’s a variety of choices, it becomes more challenging amongst team members to decide on the “default”.
Luckily for modern developers, there is EditorConfig, an option to standardize formatting across most of the code editors in the marketplace.
In this post, we’ll take a quick look at what EditorConfig is, how to use it in your solutions, and how you can explore the additional options supported by Rider and ReSharper.
What is EditorConfig?
EditorConfig is a formal specification that allows development teams to maintain consistent coding styles across editors and IDEs. Code styling includes indentation, newlines, comments, and language-specific constructs with a particular style.
By using EditorConfig files, you can maintain a particular aesthetic in your codebase that, in theory, should lead to cleaner code, more straightforward code reviews, and a better understanding of implementation.
You can locate multiple .editorconfig files within your solution, each taking precedence over the last. The closest .editorconfig file’s rules will apply to the current directory. Editors will read the rules within a file from top to bottom, meaning rules at the bottom can and will override matching rules defined at the top. This behavior allows you to define general rules at the start of a file while having more explicit rules at the bottom.
In addition to standard formatting across technologies and editors, you can include editor-specific settings to fine-tune the development-time experience. For example, you’ll see that you can toggle quick-fix suggestions in tools like ReSharper and Rider in a later section.
EditorConfig uses an INI format that can easily be modified and managed in source control. In addition, the text-based format is highly portable and reusable across multiple solutions and environments. Let’s see an example of a .editorconfig file.
# EditorConfig is awesome: https://EditorConfig.org

# top-most EditorConfig file
root = true

# Unix-style newlines with a newline ending every file
[*]
end_of_line = lf
insert_final_newline = true

# Matches multiple files with brace expansion notation
# Set default charset
[*.{js,py}]
charset = utf-8

# 4 space indentation
[*.py]
indent_style = space
indent_size = 4

# Tab indentation (no size specified)
[Makefile]
indent_style = tab

# Indentation override for all JS under lib directory
[lib/**.js]
indent_style = space
indent_size = 2

# Matches the exact files either package.json or .travis.yml
[{package.json,.travis.yml}]
indent_style = space
indent_size = 2
You can go to the official documentation page to see a complete list of standard EditorConfig options.
In addition to your favorite local development tool supporting .editorconfig files, you can configure many CI/CD pipelines to warn or reject incoming work based on incorrect styling. Additionally, you can have your CI/CD pipeline reformat based on a .editorconfig to speed up clean-up efforts on your codebase.
Adopting EditorConfig can help standardize your team’s work, reduce discussions around style, and is supported locally and remotely in all your favorite toolings. Speaking of favorite toolings, let’s see how you can configure JetBrains Rider with EditorConfig.
Note: If you’d like to learn more about the specifics of EditorConfig, check out the official EditorConfig website.
EditorConfig and ReSharper Code Inspections
As a plugin to Visual Studio and the engine that powers .NET support in JetBrains Rider, ReSharper provides two kinds of code inspections.
The first detects broken syntax, unresolved symbols, compiler errors, etc. These code inspections cannot be disabled since they typically mean your application is in a “broken” state, and you should address these problems immediately.
The second kind of code inspection helps you detect potential design-time code issues. These can range in severity from hints, suggestions, warnings, and errors. This level of code inspection is open to your interpretation. While our developers have made the best effort to group these 899 proprietary code inspections in the correct category, you may rightfully disagree with our assessment.
Luckily, most code inspections of the second kind are configurable in the settings of Rider under the Code Style section. This section of the settings allows you to fine-tune your code style and then export to a .editorconfig file on disk to share across team members’ environments. A similar option is available in ReSharper.
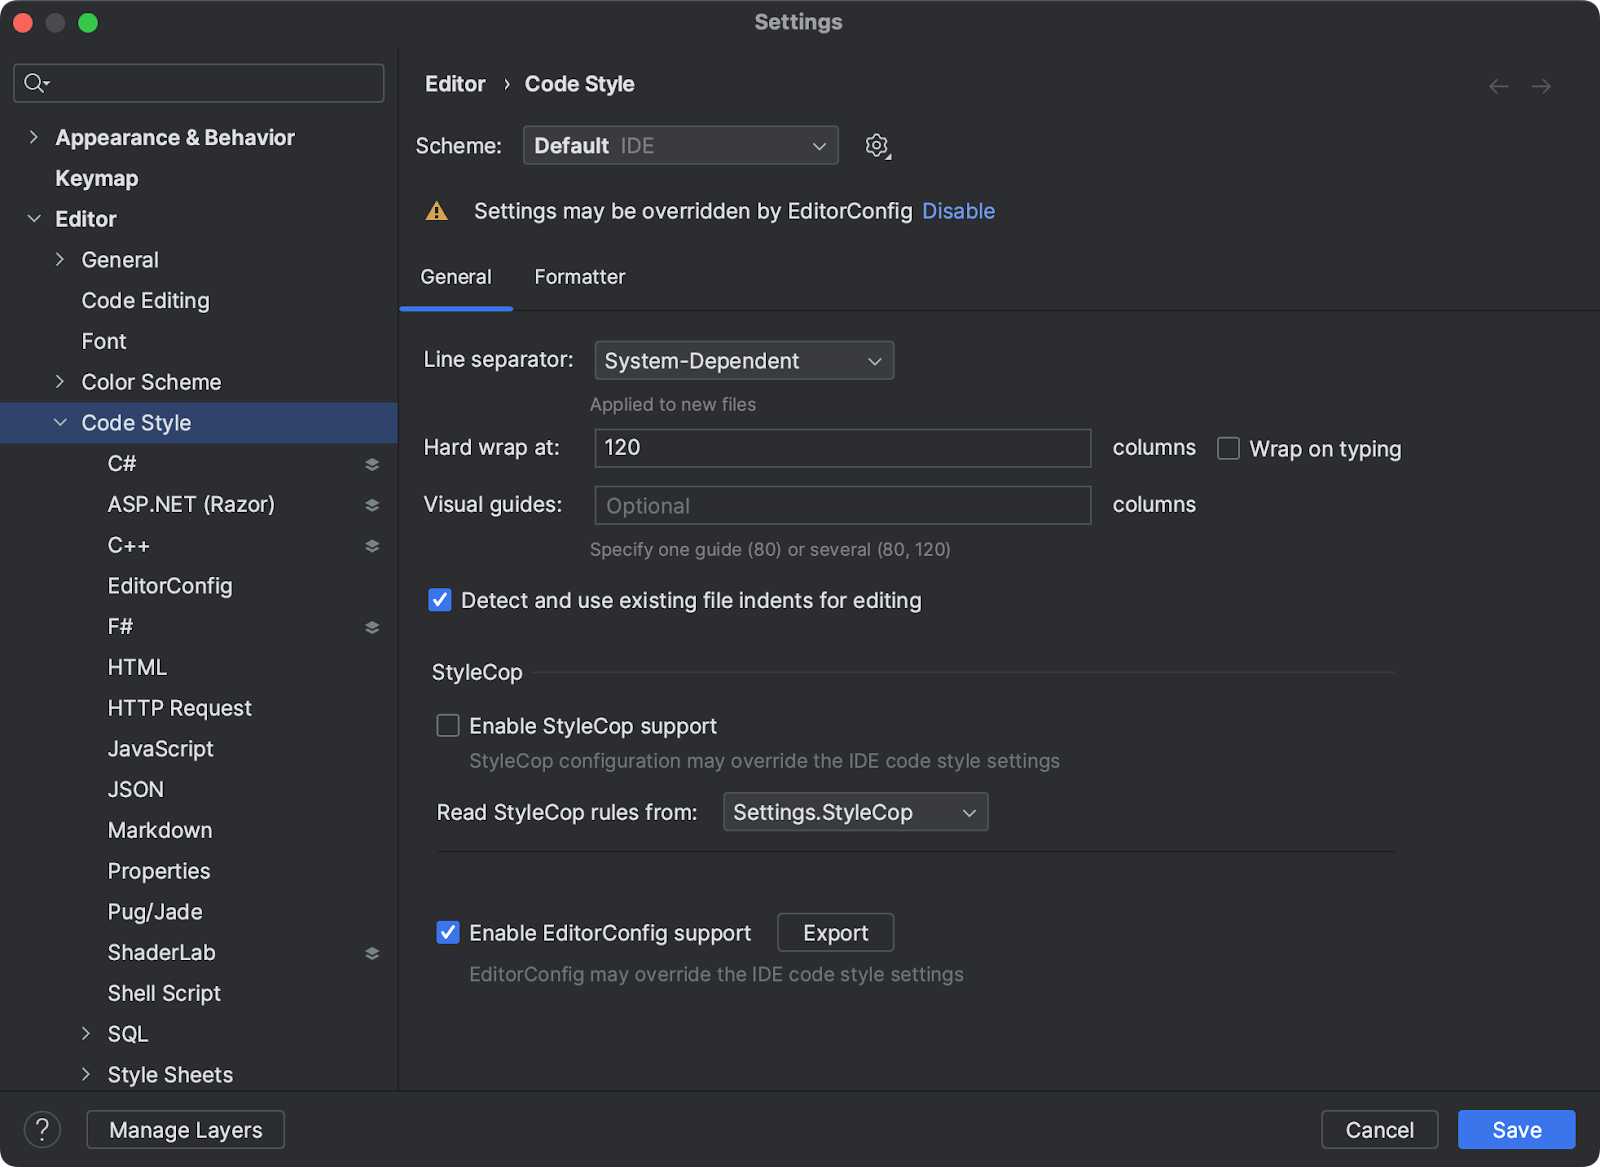
You’ll have the option to configure inspections including, but not limited to, C#, ASP.NET, C++, F#, HTML, CSS, and JavaScript. Once you’ve used Rider’s UI to configure your code style, you can go back to the main Code Style section and export the file.

Before Rider writes the new .editorconfig file to disk, it will show you a preview. The preview allows you to double-check your settings. From here, you can also choose the target destination of the file.
If you’d prefer to edit the EditorConfig file directly, you can consult our documentation on Code Inspections to learn about all the available keys and supported values.
Configuring Code Inspections In-Editor
While you could undoubtedly configure all code inspections using the settings menu, it can be challenging to envision what setting changes will affect your codebase. JetBrains Rider will also show a “squiggly” line under an element code with an outstanding suggestion. The line’s color will correspond to the severity: Error is red, Warning is yellow, and Suggestions are green. You can configure the severity using the quick-fixes menu.

You can also use the “Why is Rider Suggesting this?” menu item to go directly to community documentation explaining the reasoning behind any quick-fix suggestions. This is a great way to expand your knowledge.
Additionally, you can always code in the style you prefer and have JetBrains Rider automatically detect your rules. This is an excellent option for existing codebases with a general style and makes for a good starting point to adopt EditorConfig. Once in a Code Style section for C#, you can choose “Auto-Detect Code Style Rules,” which will adapt code inspections to the current style of the open solution.

Once Rider has determined the solution’s conventions, you can export the detected settings to a physical .editorconfig file, as mentioned in the previous section.
You can also be selective about the code-style inspections you want to configure. Highlighting a code block will show a brush icon in the editor’s gutter. Expanding the quick fix menu will have an additional “Reformat and cleanup…” option. Opening this menu item will allow you to configure the code style or detect code style settings from the current code selection.

Choosing “Configure code style…” will also allow you to see a live preview of the changes to your settings as it applies to your code. This will help you make the right choices for you and your team members.
Conclusion
As teams grow and code bases expand, there’s value in having a consistent programming style. With EditorConfig supported in most major programming tools, you can maintain a style during development and source control check-in. In addition, using EditorConfig can help limit the time spent discussing aesthetic differences and more time on critical business tasks.
Being able to configure inspection severity and additional tools settings, and share them across your team, is icing on the cake.
While starting with a .editorconfig file may be preferable, it’s also never the wrong time to add EditorConfig to your projects, as you can start with a few rules and grow the settings over time.
I hope you found this post helpful, and please feel free to share your EditorConfig experiences, tips, and tricks below in the comments.