.NET Tools
Essential productivity kit for .NET and game developers
How to Install JetBrains Rider on Steam Deck


The Steam Deck is a handheld gaming computer developed by Steam and Half-Life creators Valve. It allows you to take your favorite PC games wherever you go, whether on your couch or long trips. It’s remarkable to see the evolution of handheld gaming, from Nintendo’s single-color LCDs to handheld HD gaming.
While the Steam Deck is made primarily for playing video games, SteamOS is a complete and capable Linux environment based on version 3 on the Arch Linux distribution with KDE Plasma. At JetBrains, we make world-class developer tools that run on all operating systems, including Linux. The OS allows Steam Deck owners to modify and enhance their devices to suit their needs. The high-end unit includes a 512 GB NVMe SSD storage unit, 16 GB of RAM, and an AMD Zen 2 4-core processor, which is more than enough to run JetBrains developer tools.
With the help of our JetBrains colleague and indie game developer Anna Sevryugina, we are happy to show you a step-by-step guide to getting .NET and JetBrains Rider running on your own Steam Deck.
Let’s get started!
But Why?
Running JetBrains tools on your devices is cool, but some may ask, “Why would anyone want to install developer tools on their Steam Deck?” We’ve identified a few use cases that make sense for the curious:
- Building plugins for the Steam Deck environment
- Developing games directly on the target platform
- Debugging apps
- Building tools
- Having fun
The SteamOS site proclaims, “Most of all, it is an open Linux platform that leaves you in full control. You can take charge of your system and install new software or content as you want.” We hear you loud and clear, Valve!
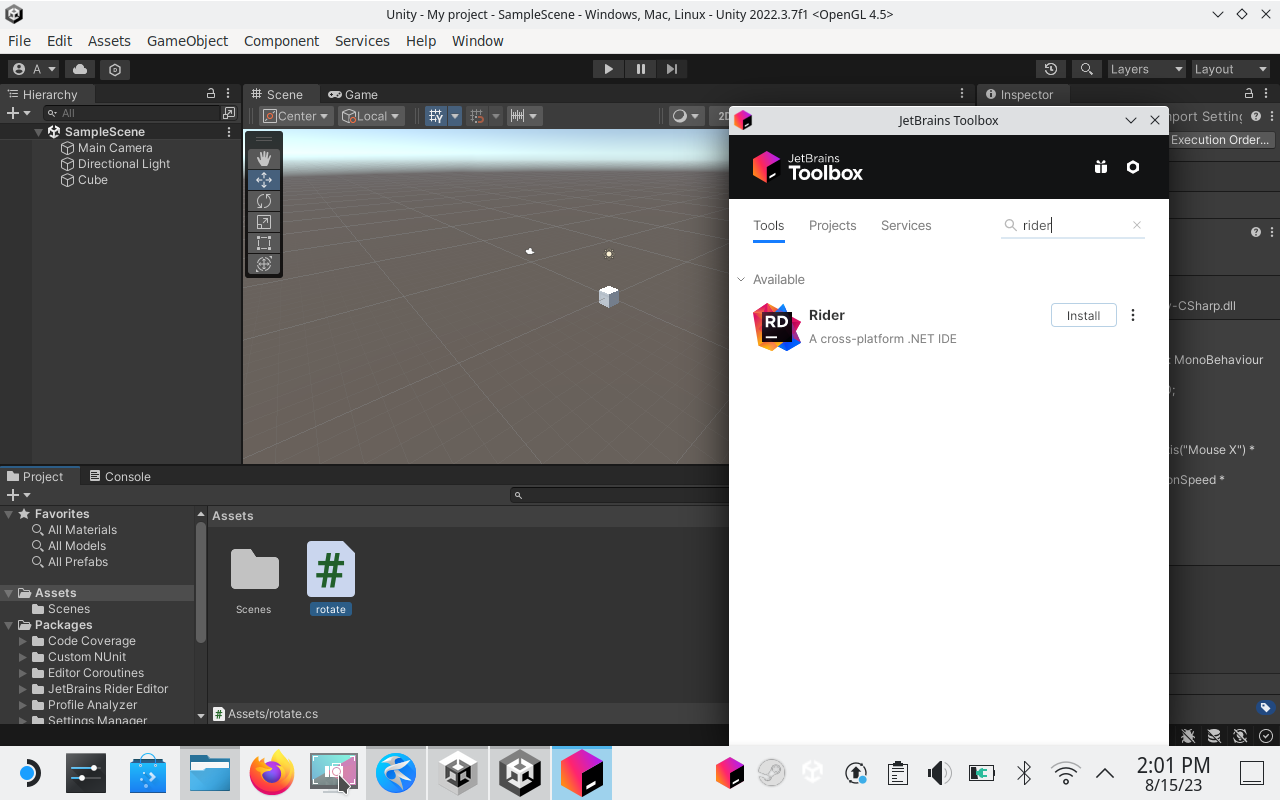
Installing JetBrains Rider with JetBrains Toolbox
You’ll need to switch your Steam Deck to desktop mode to start. From the Steam menu, select the Power option, then Switch to Desktop. Once in desktop mode, you’ll want to download the latest version of JetBrains Toolbox for Linux using Mozilla’s Firefox browser.
Using JetBrains Toolbox to install JetBrains Rider instead of the Flatpak is vital to get full debugging capabilities for Unity game development, as we’ll see later. Use the toolbox to install the latest version of JetBrains Rider and any other IDE you’d like to use.
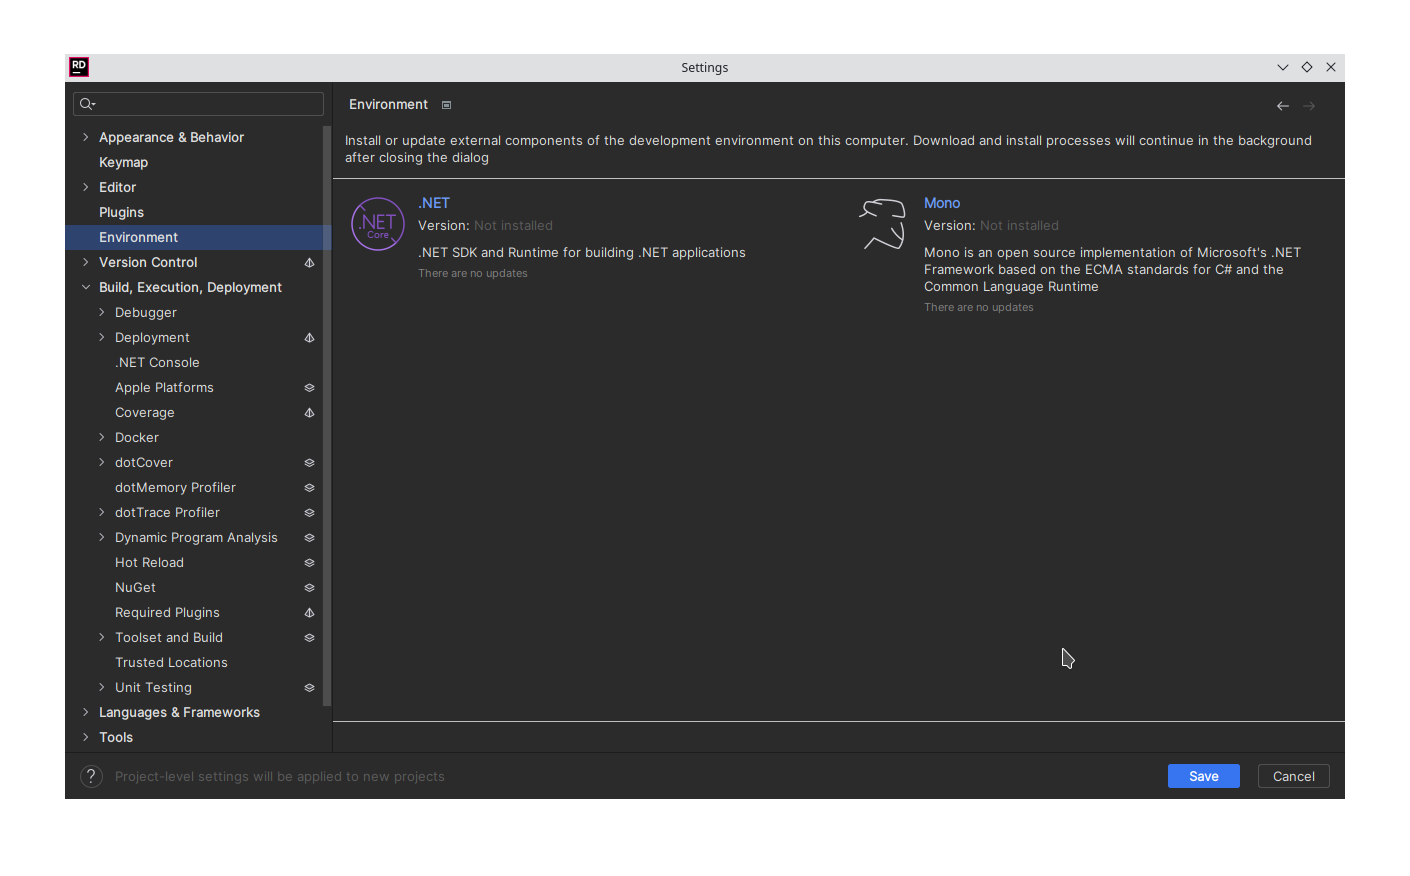
Next, run JetBrains Rider for the first time. Navigating to the Settings menu, you’ll notice in the Environment section that .NET and Mono display a “not installed” label. Don’t worry. We’ll fix this issue in the next section.
Close the instance of JetBrains Rider, as the next step will be updating our environment.
Installing .NET on Steam Deck
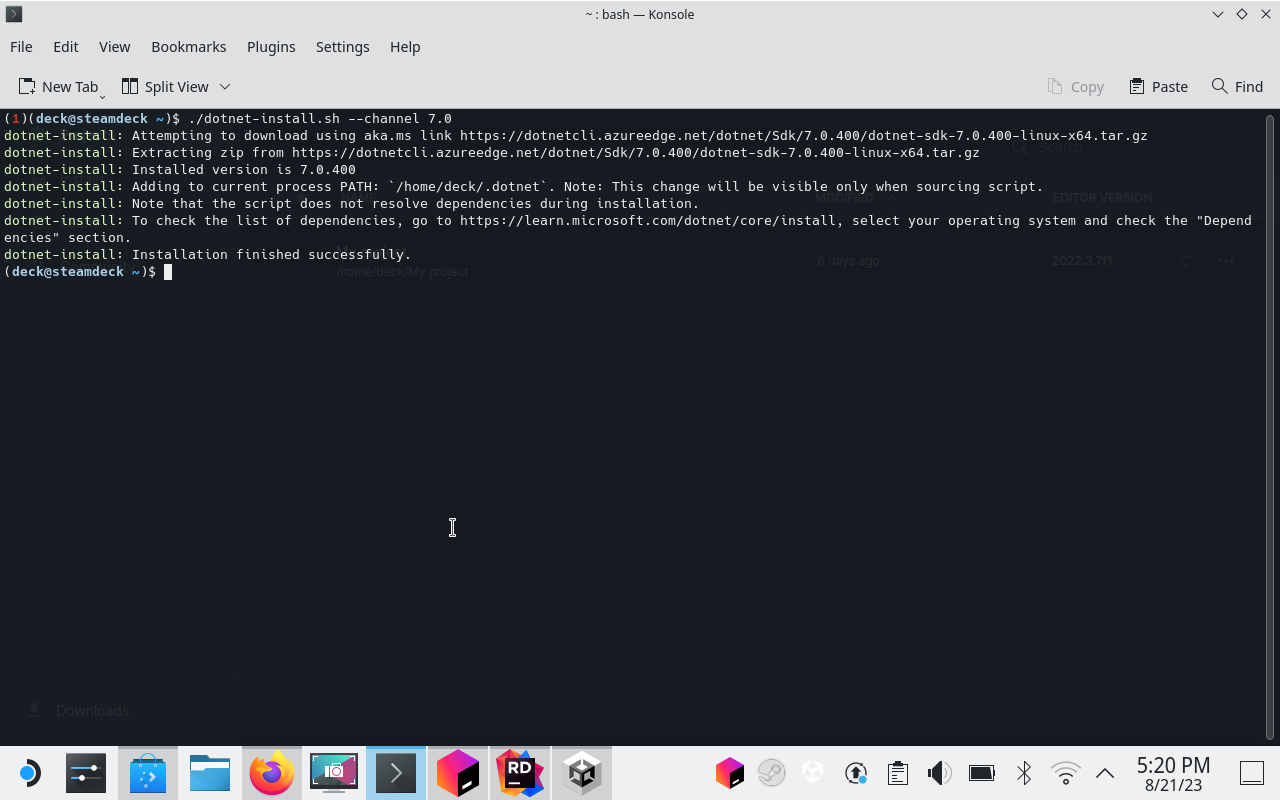
To get the latest version of .NET on your Steam Deck, we highly recommend the .NET install script provided by Microsoft. It allows you to install multiple versions of the .NET SDK side-by-side.
After downloading the install script, you must make it executable. From the Steam Deck’s app manager, start a new instance of Konsole and navigate to the download directory using cd followed by the chmod command.
chmod +x ./dotnet-install.sh
Now you can install the latest version of the .NET SDK with the following command.
./dotnet-install.sh –channel 7.0
The script installs all versions of the .NET SDK to a .dotnet folder at the root of your device. You can check the directory to see the version of the SDK installed correctly.
Note: You may want to add the .dotnet directory to your PATH variable in your .bashrc to run dotnet commands from the command line.
Installing Mono on Steam Deck
To get a complete .NET experience, you’ll also want to install Mono. As of writing this post, the Unity Game Engine, Xamarin, and many Linux applications use the Mono Framework. To install Mono, we recommend using Flatpak. Flatpak is an application distribution platform used in Debian flavors of Linux, which makes managing dependencies easier.
Type the following command into a running Konsole instance.
flatpak install org.freedesktop.Sdk.Extension.mono6
When presented with a list of options, select version 22.08. The following screenshot shows the mono option is 2 but may vary based on the time you read this post.

Flatpak will install the Mono SDK in the following directory. You may need this path when configuring Rider.
/var/lib/flatpak/runtime/org.freedesktop.Sdk.Extension.mono6/x86_64/22.08/active/deploy
So far, we’ve installed JetBrains Toolbox, JetBrains Rider, the .NET SDK, and Mono. Now it’s just a matter of restarting JetBrains Rider and checking the settings.
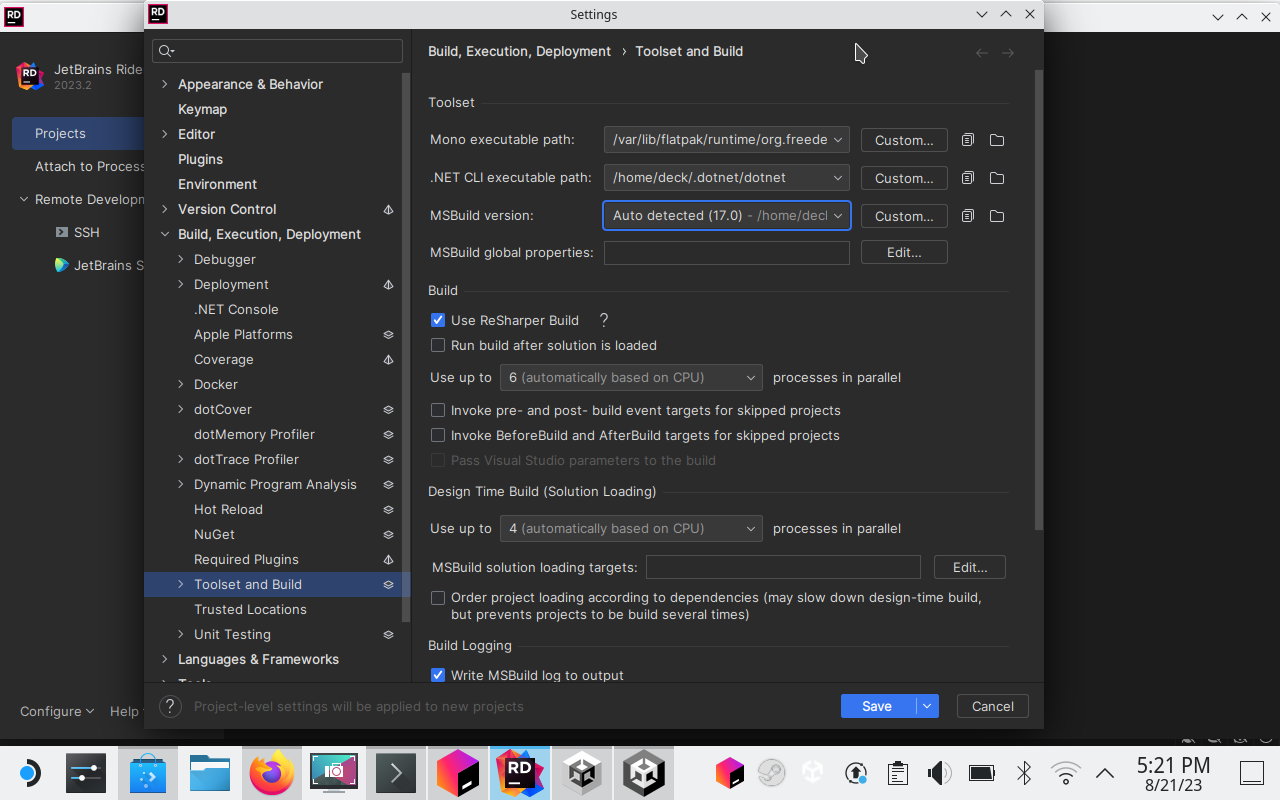
Starting JetBrains Rider, navigate to the Toolset and Build settings to see if the Mono executable path and .NET CLI executable have values. If they do, then you’ve successfully set up your development environment.
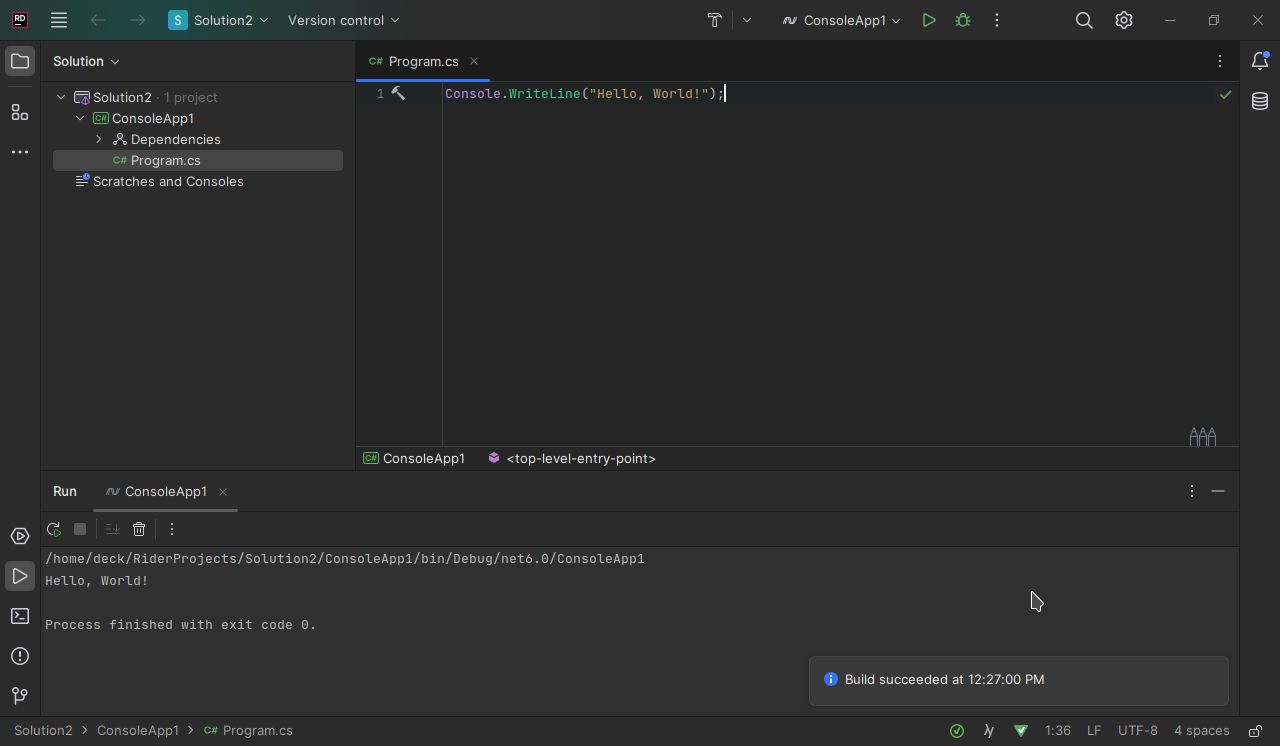
From here, you can start a new .NET application and start programming.
If you’re interested in purely .NET development, you can stop here, but Steam Deck is a gaming platform, and you may be interested in building games. In the next section, you’ll see how to install the Unity Game Engine to work alongside JetBrains Rider.
Installing Unity Hub on Steam Deck
We recommend using Flatpak to install the Unity Hub, which lets you install the Unity Editor. To start, you’ll want to install the Unity Hub. Like JetBrains Toolbox, Unity Hub helps you manage different Unity Game Engine Editor versions. You can also use Steam Deck’s Discover Software Center (found in the taskbar) to install Unity Hub.
In a Konsole instance, type the following command:
flatpak install flathub com.unity.UnityHub
Once you’ve installed Unity Hub, you can install the Unity Editor. Launching a new Unity Game Engine project, you can now set the External Script Editor to Rider 202*.* (JetBrains Toolbox). This change will ensure that Unity will launch all your C# scripts in JetBrains Rider.
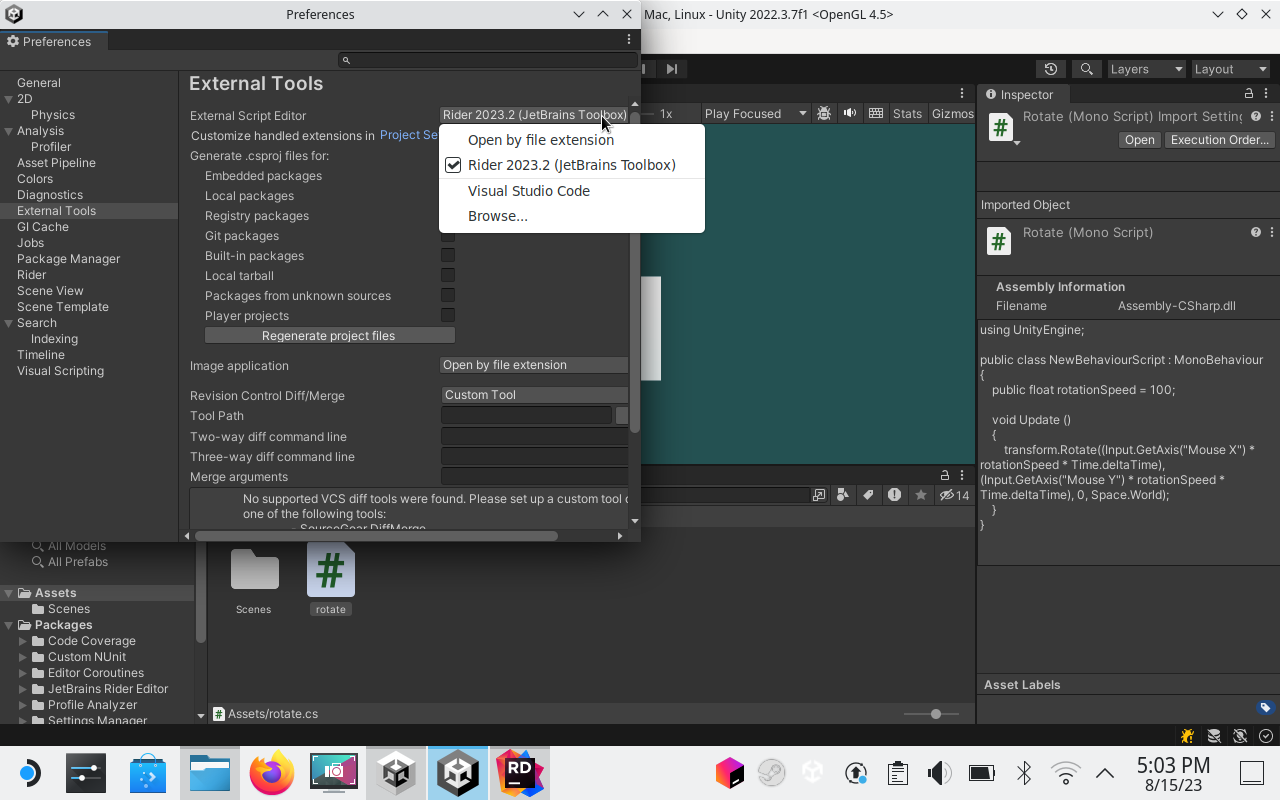
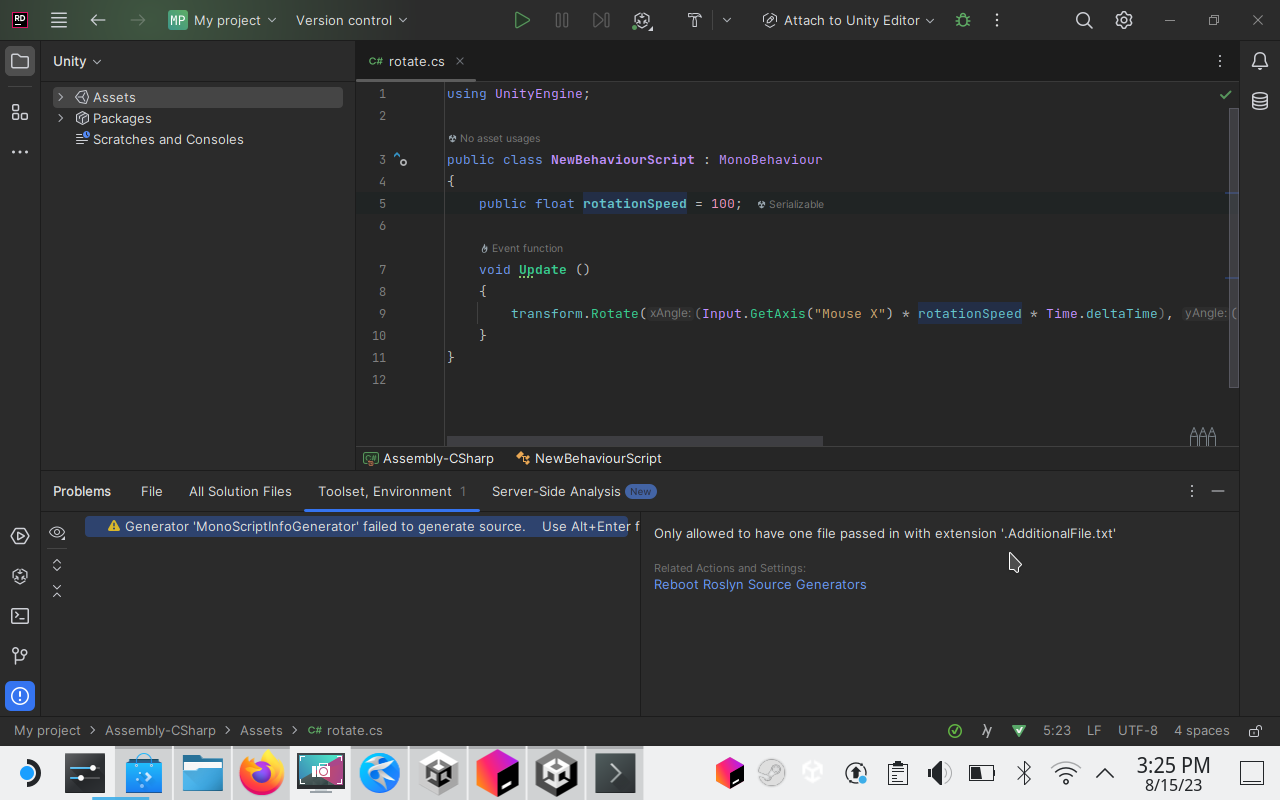
Double-clicking any of your C# scripts should now open them in JetBrains Rider and allow you to access all the integrations between the IDE and your current game project. These integrations include debugging, code inspections, the Unity toolbar, and more.
You’re ready to start working on your Unity and .NET projects, all on your Steam Deck. Here’s a quick video demonstrating what your new development setup may look like in action.
Conclusion
The Steam Deck is arguably one of the most successful Linux deployments, bringing a Linux desktop environment to millions of users worldwide. While most Steam Deck owners will be gamers, who want to play excellent titles, an adventurous few will want to explore the limits of what’s capable on the handheld. Those folks can transform the mighty handheld into a development environment in a few straightforward steps. If you find yourself in the cross-section of gamers and developers, we hope you’ve found this blog post interesting.
If you’re inspired to try it out, please let us know about your experience in the comments. For the rest of the Steam Deck audience, please let us know what titles you’re currently playing and what titles you recommend we play.