

.NET Tools
Essential productivity kit for .NET and game developers
Control Unity editor play mode with Rider 2018.1

One of our big themes with Rider’s Unity support is to reduce how much time you spend context switching between Rider and the Unity editor, and Rider 2018.1 introduces some new features that are designed to do just that.
Our new secret sauce is that we’ve improved our existing Unity editor integration. We’ve added a much smarter editor plugin that opens up two way communication between Rider and the editor. This means the editor can talk to Rider, to tell it to open a C# file that’s just been double clicked, but even better, it means Rider can now talk to the editor, and tell it to do things, such as switch to play mode.
In this series:
- Control Unity editor play mode from within Rider
- View Unity console logs directly in Rider
- Run Unity tests directly from Rider
- Unity Explorer and new code inspections
Over the next couple of posts, we’re going to take a look at some of the ways this will help reduce context switching, namely a log viewer to bring Unity’s console log directly into Rider, and integration with the unit test runner.
But for this post, we’ll start nice and easy, with a look at how to get installed and up and running, and the new controls that deal with play mode.
Getting started
The good news is that Rider will handle installing and upgrading the editor plugin for you. There are a couple of things you should be aware of, but nothing too scary – remember that the Unity editor plugin is per project, and installed into your Assets folder.
This version of Rider replaces the existing Unity3DRider.cs script based editor plugin with an assembly – JetBrains.Rider.Unity.Editor.Plugin.Repacked.dll. Rider will automatically find and delete the old C# file, even if it’s been moved, and automatically copy the assembly to Assets/Plugins/Editor/JetBrains/.
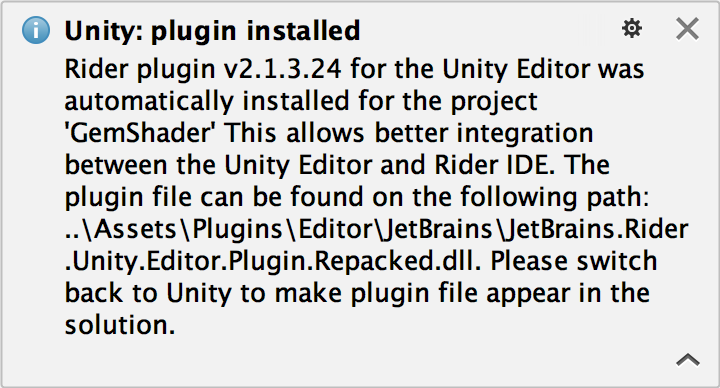
If you had previously committed Unity3DRider.cs into source control, now’s the time to delete it. We also strongly recommend excluding the new .dll from source control, for several reasons. Firstly, it’s a binary file, and will only cause your repository to grow. Secondly, Rider will automatically keep the assembly up to date, copying a new version across whenever you run a new version of Rider (this behavior can be changed in settings). And thirdly, we actually install a different version of the plugin for versions of Unity 5.5 and below. We suggest updating your .gitignore file or equivalent to exclude JetBrains.Rider.Unity.Editor.Plugin.Repacked.dll.
Talking to the editor
Enough with the boring install details. On to the fun stuff!
Once a project has been loaded with the new plugin (you might need to switch focus back to the editor if you’ve just installed it), Rider and the Unity editor should now be connected. This is shown with a small Unity icon in the status bar, marked with a green dot to indicate a live connection.
![]()
Or a plain icon if Rider can’t make the connection.
![]()
You might also notice some other changes to the UI. We’ve started to streamline the UI when you open a Unity project. Firstly, we’re hiding some tool windows that are less relevant while working with Unity, such as the NuGet and Database tool windows. Also, we’re hiding the Debug/Release configuration selector, and introducing a new, Unity specific mini toolbar in the top right of the IDE.
![]()
Controlling play mode
One of the main benefits of the new plugin architecture is that we can now expose Unity editor functionality directly in Rider, such as switching to play mode. The new toolbar includes play/pause/step buttons that correspond to the same buttons in the Unity editor, and control the behavior just as you’d expect. You can now switch into and out of play mode, pause and step a single frame, all from Rider.
https://youtu.be/MG8laUAX1rM
We haven’t yet added keyboard shortcuts for these actions (finding consistently available shortcuts across the 14 different keymap schemes that ship with Rider is surprisingly tricky!) but you can add your own if you search for “Unity” in the Keymap settings page.
The Refresh icon on the toolbar will cause the Unity editor to refresh the asset database, which will cause the Unity editor to import any newly added assets, and if necessary, compile the project and regenerate the solution files (which Rider will silently reload). This is useful when adding new files through Rider, either by refactoring and renaming a file, or by adding new C# script or shader via file templates. It’s also really helpful when adding a new .asmdef assembly definition file – create the file in Rider, save, hit refresh and Unity will generate a new project file that Rider will silently reload, all without leaving Rider, or being blocked from working. And we also have an automatic refresh, which happens whenever a file is saved.
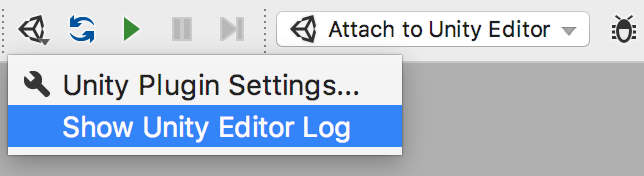
Finally, there’s the Unity related action drop down. This menu offers a number of useful actions, such as opening Rider’s Unity specific settings, and also opening the log viewer, which we’ll take a look at in the next post.
Download Rider today and give the new Unity editor integration a go! Let us know how you get on – leave comments here, or raise an issue in YouTrack or on GitHub.

Subscribe to a monthly digest curated from the .NET Tools blog:


