

.NET Tools
Essential productivity kit for .NET and game developers
Unity Package Explorer in Rider 2018.2

Rider 2018.2 has been another bumper release for Unity features and updates! Today, we’re going to start a series of blog posts looking at what’s new. We’re going to start with a look at how we’ve integrated Unity packages into the Unity Explorer, and future posts will look at new code analysis features, improvements in the Unity Editor integration and more.
In this series:
- Unity Package Explorer
- Assembly Definition Files
- Unity Editor integration updates
- Unity specific code analysis
Unity Explorer
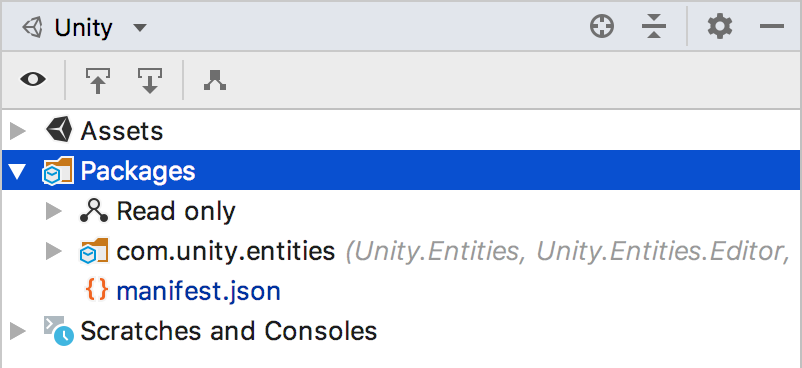
Rider 2018.1 introduced the Unity explorer as an alternative way of viewing your C# solution, as a view of the Assets folder, in a way familiar to users of Unity’s Project tool window. In Rider 2018.2, we’ve extended the Unity explorer with two new nodes – Packages and Scratches and Consoles.
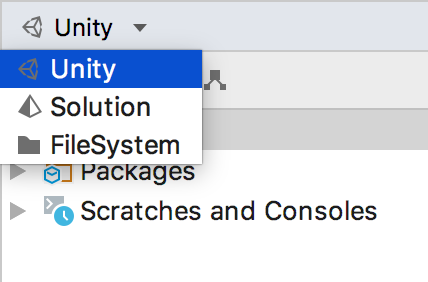
The Unity explorer view should be the default view when you first open a Unity project, but if you don’t see it, simply click the drop down at the top of the Solution Explorer and select your view – Solution, File System or Unity view.
One other little feature that the Unity explorer inherits from the Solution explorer view is a new toolbar, with buttons to show all files, scroll to/from source and open the file nesting settings dialog. When auto-scroll to source is checked, Rider will make sure the currently selected file is visible in the editor. Similarly, when auto-scroll from source is enabled, the Unity explorer view will highlight whichever file currently has the focus in the editor.
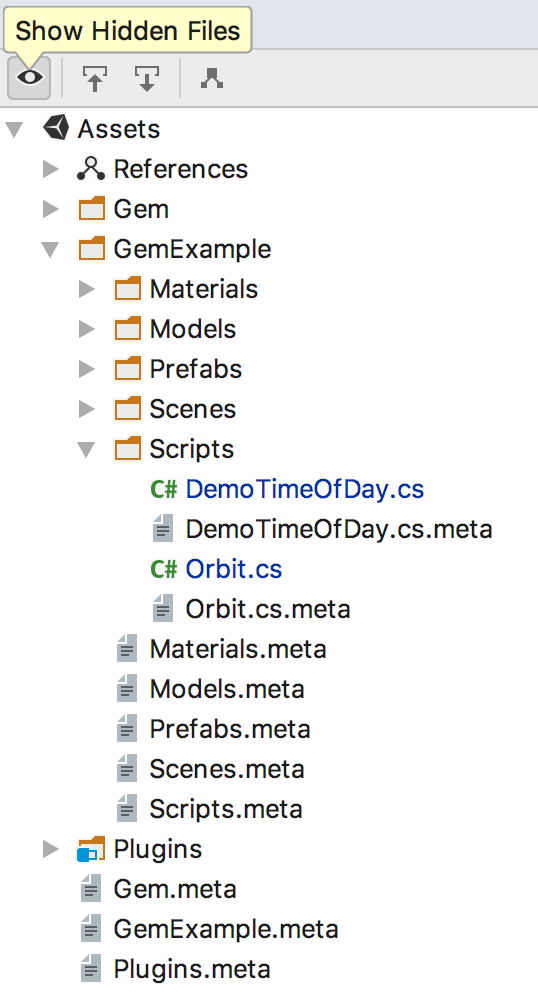
The show hidden files toggle button will show all files in the explorer view that are normally hidden, which is a great way to see your .meta files.
Packages
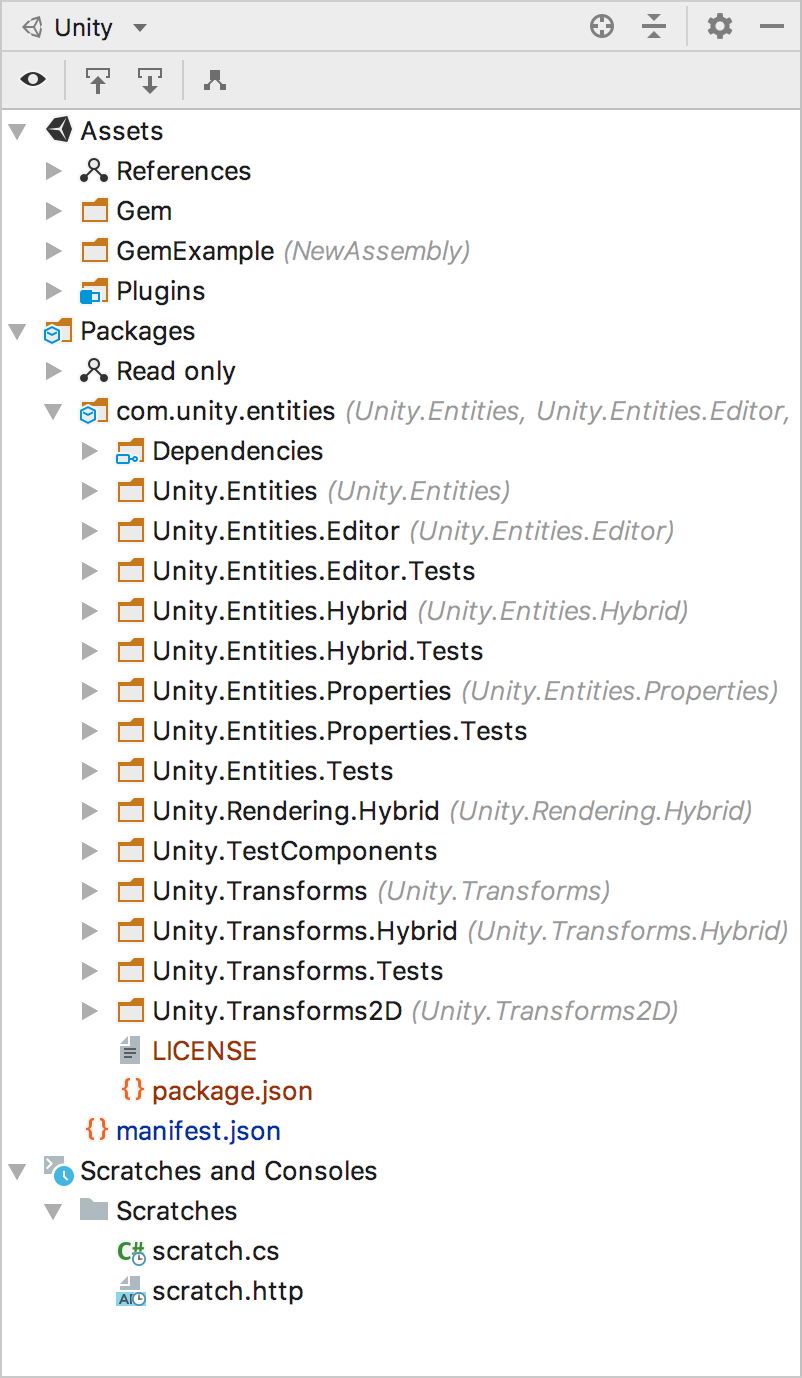
Unity has recently introduced a new Package Manager as a new way of packaging and distributing features, including both assets and scripts (not to be confused with Asset Packages, which is how content is packaged up for distribution via the Unity Asset Store. This blog post might help clear things up). Unity 2018.2 added these Unity packages directly in the Project view, and Rider 2018.2 is doing the same, by adding a Packages node to the Unity explorer view.
Primarily, the Packages node shows you the contents of the Packages folder in the root of your project. This might well only contain a manifest.json file which you can edit in Rider and when saved, Unity will update your project to include the packages you’ve added.
More importantly, the Packages node will also show all of the packages referenced in your project. Unity supports a number of different package types, and Rider will show them all.
Referenced Packages
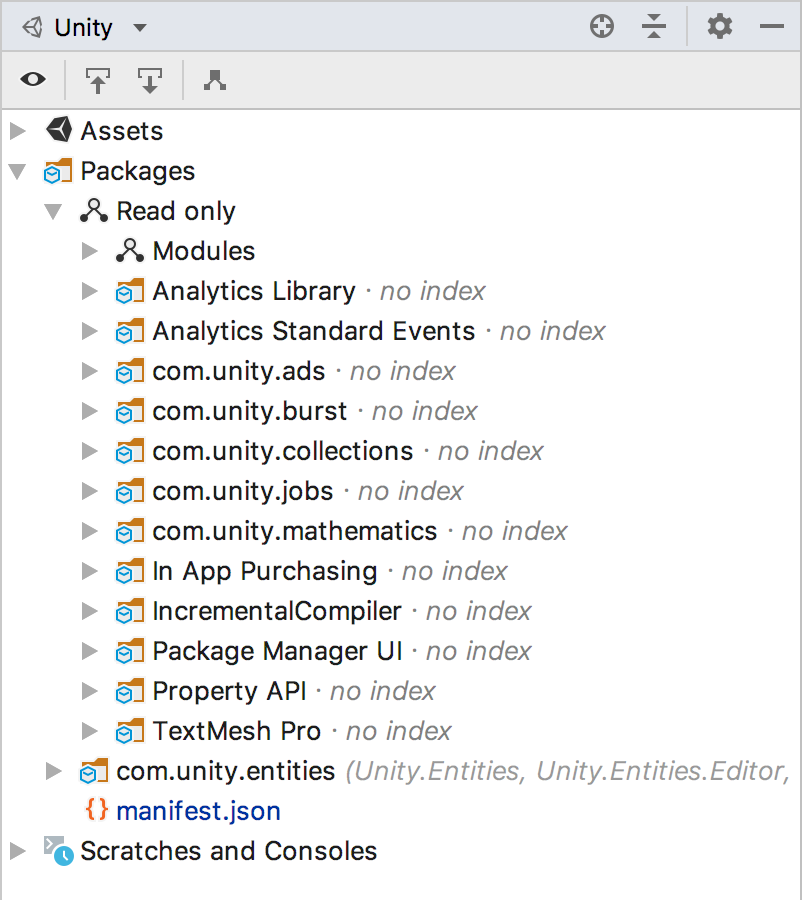
When you add a package to the manifest.json file (or use Unity’s own Package Manager) Unity will download the package, store it in a local cache, compile it to one or more assemblies and add these assemblies as references to your project. These are read only referenced packages and Rider lists them under the Read Only node.
From here, you can browse the assets and open the scripts, but you can’t edit the files. But Rider will help you navigate these packages – Rider’s Go to Declaration and Find Usages actions will help you go directly to the source of referenced packages, and see where it’s being used in your own code. And if you have auto-scroll from source enabled in the explorer toolbar, Rider will highlight the file in the cached package folder whenever it is open in the editor.
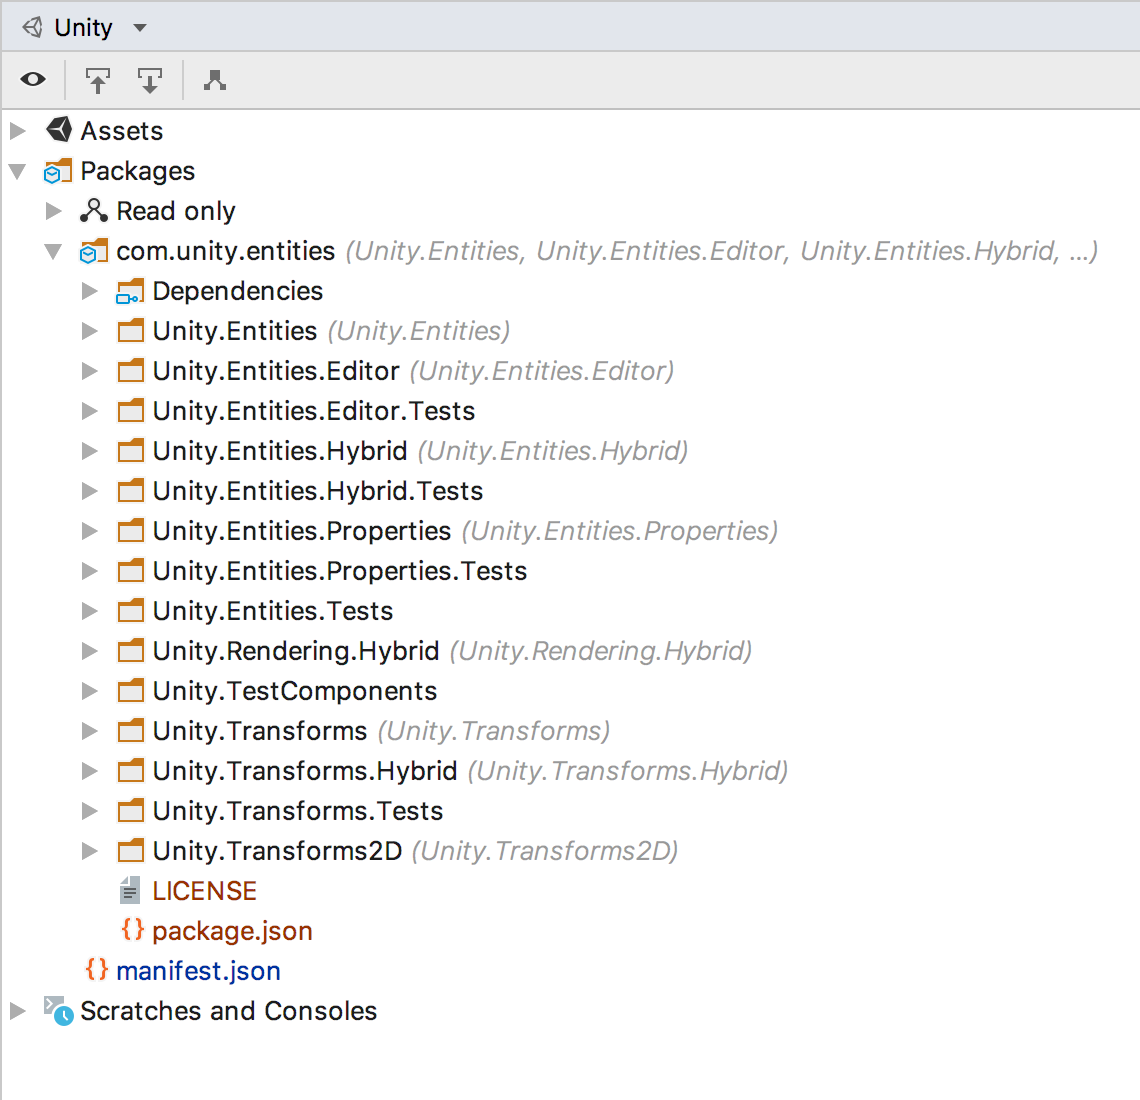
Eagle eyed users might notice that Rider doesn’t always show the same set of packages that Unity does – it will sometimes show more. This is because Unity’s Project view is showing the packages that you have listed in your manifest.json, but doesn’t show any of the dependencies that might get automatically included. For example, the com.unity.entities package for the new Entity Component System has dependencies on com.unity.collections and com.unity.incrementalcompiler, among others. Rider will resolve these dependencies and show them in the Packages view. You can expand the Dependencies node inside a package to see the list of dependencies, and double-clicking on the listed node will take you directly to that package.
Built-in Packages
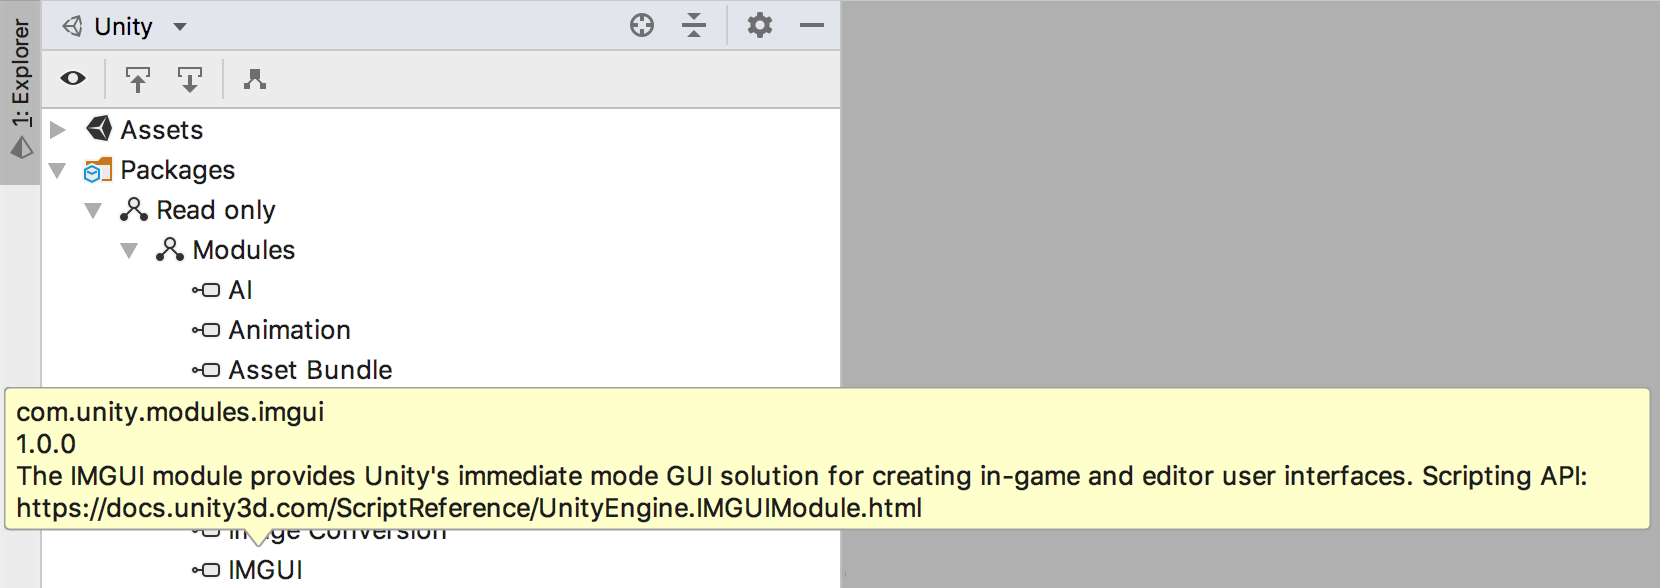
If you look under the Read Only node, you’ll see that there’s a Modules node. This lists all of the built-in packages that provide core Unity functionality. The package names are listed, and when Rider’s Unity Editor plugin is installed, Rider can show more information about these modules via a tooltip.
Embedded and Local Packages
But packages get a bit more interesting when you can edit them. You can create your own packages in the Packages folder (there isn’t much official documentation for this yet, but Lotte May has a great tutorial showing how you can do this), and Unity will add these as projects to your C# solution. Of course, Rider will load these C# projects and provide full functionality, from navigation to code completion and code analysis for the files in these projects. The Unity explorer will even highlight package files that contain errors and show version control status!
In fact, Unity will create one C# project for each assembly definition file in the package, so you might get more than one project for a package. In the same way that Rider shows which folders have code from other projects under the Assets folder, it will also show them for packages. And we’ll have more to say about Rider and assembly definition files next time.
Another way of creating embedded packages is by copying a cached, read only referenced package directly into the Packages folder, which allows you to extend or fix issues in externally provided packages. We’re hoping to add functionality into Rider to make this easier in a future version.
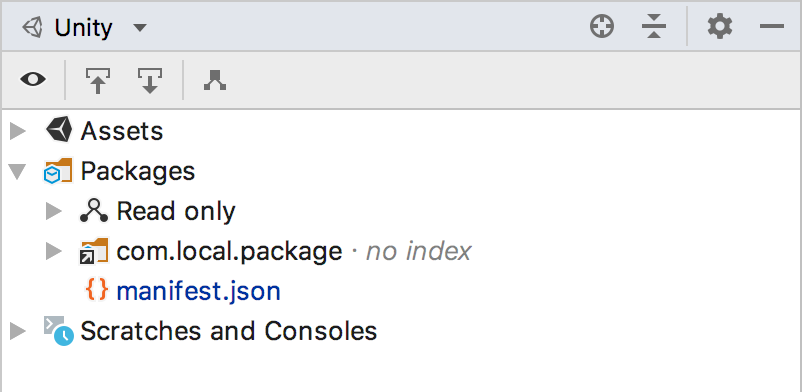
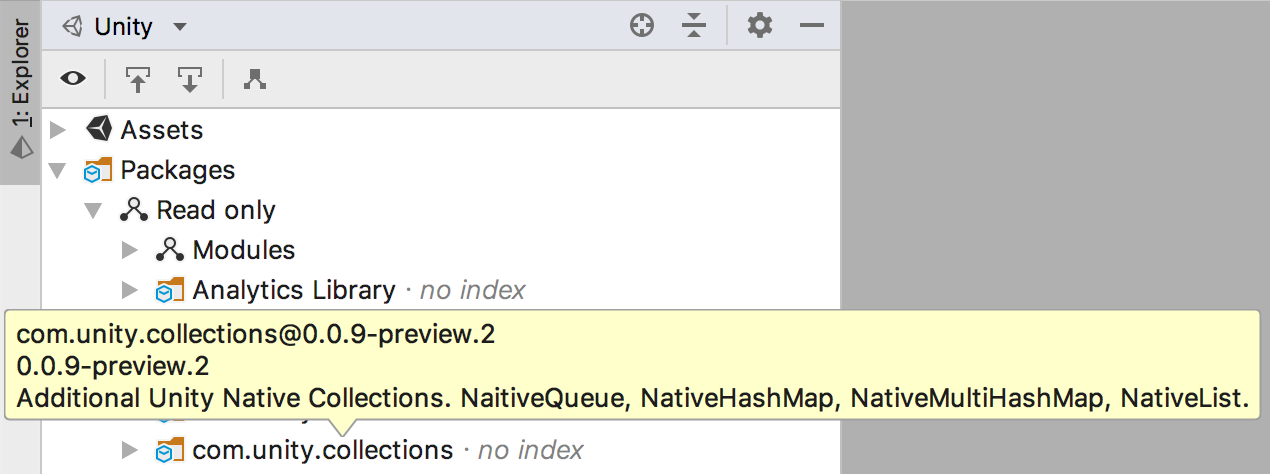
And because embedded packages live directly in the Packages folder, Rider indexes them as part of the project, which means you can use Rider’s super fast Find in Path indexed search to find text in these packages. This isn’t the case for referenced read only packages, which are stored external to the project, and not treated as source (you’ll see the “no index” marker next to each read only package name to remind you).
Or you can use the file:// syntax in the list of packages in manifest.json and specify a path directly to a local or file system package, so you can have packages that live externally to your project. Rider supports these packages too, and they are also treated as editable, with full Rider functionality.
Finally, whether a package is referenced, embedded, local or built-in, Rider will show details of the package, such as id, display name, version and description in a tooltip.
This is just the first iteration of the Packages view in Rider, expect to see more functionality, such as package specific context menus, converting to embedded packages and more in future versions. Let us know if you have any ideas or feature requests!
Scratches and Consoles
There’s another new node in the Unity view and that’s Scratches and Consoles. This isn’t specific to Unity, but is another feature inherited from the Solution and File System views. But what are Scratches and Consoles?
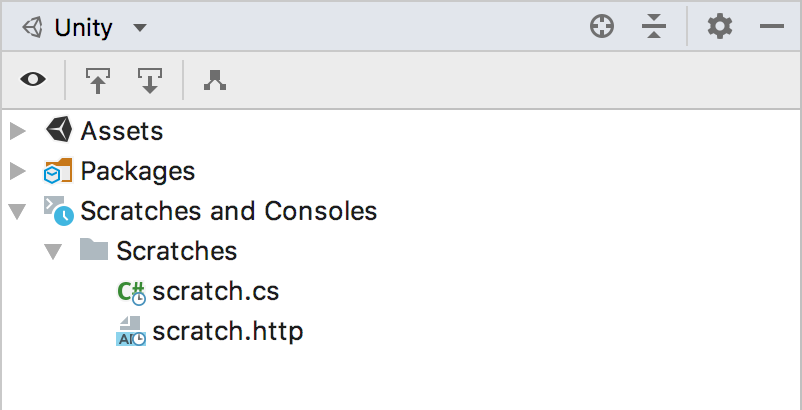
This node is a place for saving and managing your scratch files and database consoles.
A scratch file is a temporary file that you can use to write code that won’t be a part of your project. You can use this to create drafts of code, to “think out loud” as you’re working on a design, or to write some code that you can then execute inside the C# Interactive tool window – you’ll even get code completion! But please remember that the Interactive window is a separate C# process to the Unity Editor, and won’t be able to run Unity code.
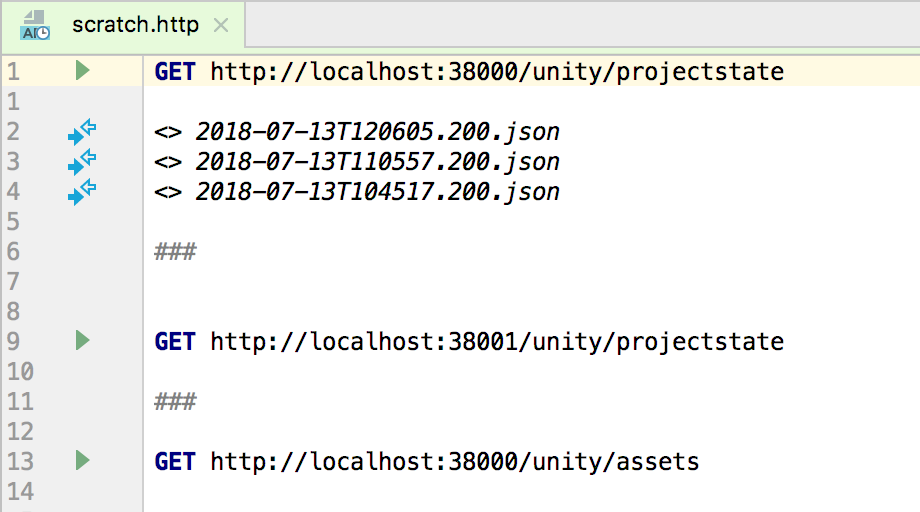
You can create a scratch file through the context menu or New item keyboard shortcuts, and you have a variety of file types to choose from, not just C#. One very useful scratch file is HTTP Request, which allows writing simple HTTP requests as text and executing them directly from the editor.
Database consoles are similar to scratch files, but are created automatically when you connect to a database source, and allow you to compose and execute SQL commands against this source.
While scratch files and database consoles are temporary files, they are saved to disk as part of your profile until you don’t need them any more. They are shared across projects, and will always appear in the Scratches and Consoles node where you can manage the files, moving and deleting as required.
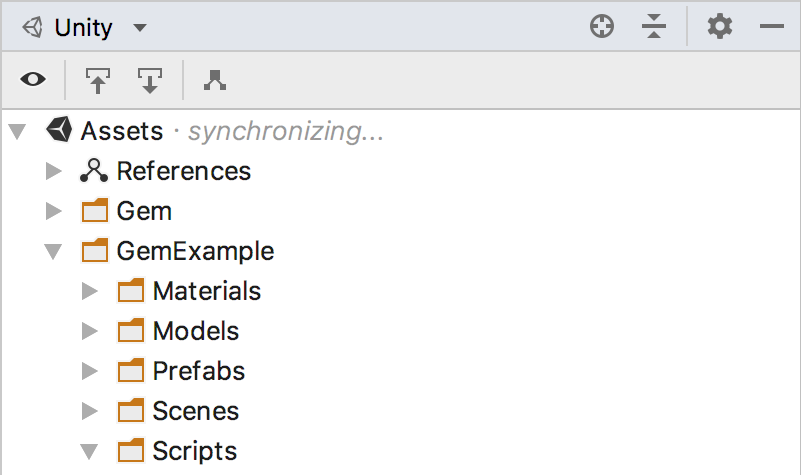
And finally, the Unity explorer has one last new feature. We now display project loading status next to the Assets node. This is useful to see when Rider is (quickly, silently) reloading and synchronising the solution or a project after adding new assets, and will also show when there’s been an error loading the project.
Next time, we’ll take a look at Rider’s new support for assembly definition files, used heavily by packages. Until then, please download Rider 2018.2 today and give it a go! Let us know how you get on, either in the comments below, or by raising an issue on GitHub or our YouTrack issue tracker.


