

.NET Tools
Essential productivity kit for .NET and game developers
Unit testing memory leaks using dotMemory Unit

In our previous post, we looked at how I caused a memory leak when working on a feature in Rider, and how I could not merge that feature into the product because the test that checks for a particular memory leak was failing. Today, let’s shift gears and look at how to write a similar type of test using the (free!) dotMemory Unit framework.
In this mini series:
- Analyzing a memory leak discovered by our build server (and fixing it before merging it into the product)
- Unit testing memory leaks using dotMemory Unit – setting up a similar memory test using dotMemory Unit
Let’s write a test that verifies a certain object was properly removed from memory!
Testing for memory leaks using dotMemory Unit
There are good reasons to not only run unit tests and integration tests, but also to monitor their behavior in terms of memory usage. This is exactly where dotMemory Unit comes in: it is a unit testing framework which allows us to write tests that check our code for memory issues.
dotMemory Unit (dMU) integrates with other test frameworks such as NUnit, MSTest and xUnit, and captures memory snapshots that can be analyzed using dotMemory – our memory profiler. And best of all: dotMemory Unit itself is completely free.
But enough with the marketing: let’s get to work.
Adding dotMemory Unit to our test project
In order to be able to run unit tests with dotMemory Unit, we’ll have to install it. Note that currently, dotMemory Unit only works on Windows.
There are a few options to get started – the easiest being the Reference dotMemory Unit Framework action which is available when you are using ReSharper, Rider or dotCover.
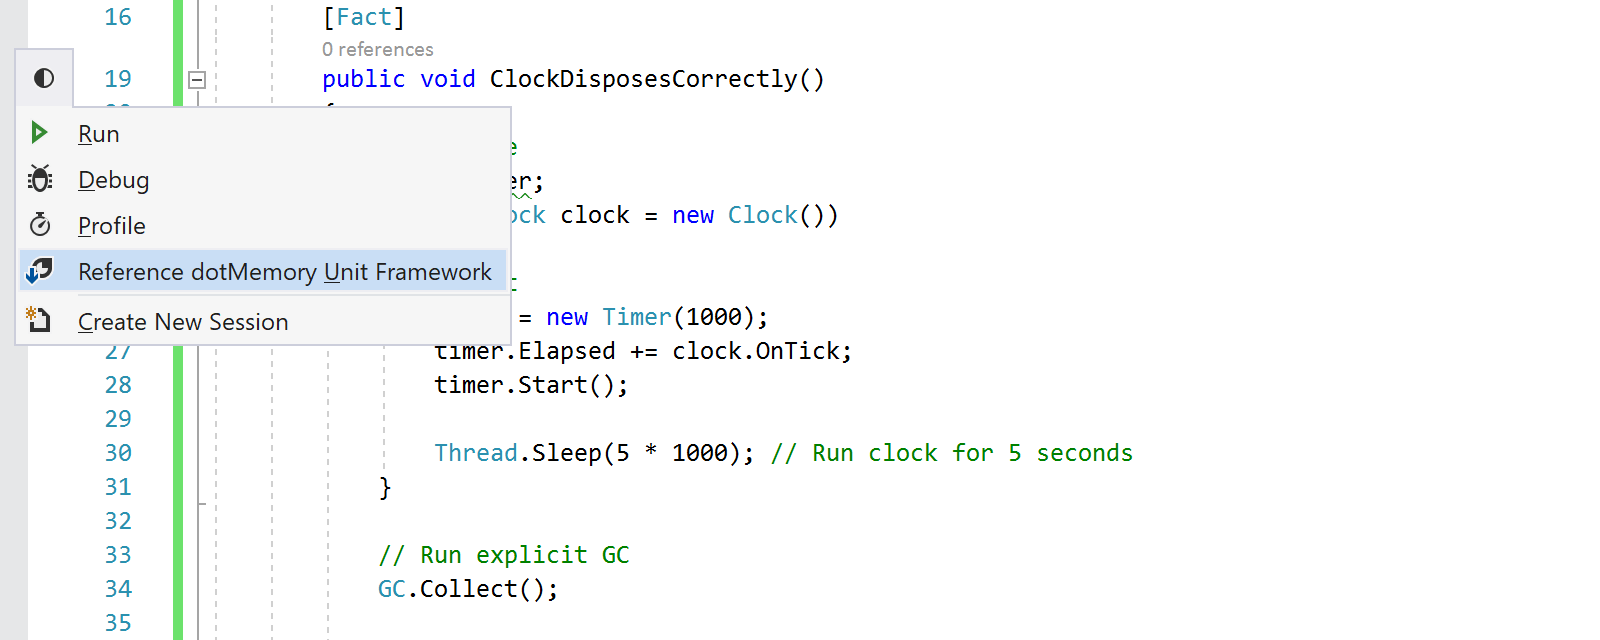
Another option is to add a NuGet package reference to JetBrains.DotMemoryUnit.
Writing tests with dotMemory Unit
Once we have referenced dotMemory Unit, we can start writing tests with it. The dotMemory.Check method is the heart of the framework: it provides access to all information made available by the memory profiler:
- We can use it to check general memory usage and heap sizes;
- We can search for objects of a specific type and check the number of objects, calculate their size, and more;
- We can analyze memory traffic (e.g. how many objects were allocated / collected);
- We can compare snapshots (e.g. which objects were added to memory since the previous time we called into
dotMemory.Check).
I created a simple piece of code that generates a memory leak – I will explain why later on. For now, suffice to say that we will be instantiating a Clock that runs some code based on a timer, and then is disposed. Our test will check whether our Clock was correctly disposed and removed from memory. In code:
[Fact]
public void ClockDisposesCorrectly()
{
    // Arrange
    Timer timer;
    using (Clock clock = new Clock())
    {
        // Act
        timer = new Timer(1000);
        timer.Elapsed += clock.OnTick;
        timer.Start();

        Thread.Sleep(5 * 1000); // Run clock for 5 seconds
    }

    // Run explicit GC
    GC.Collect();

    // Assert Clock is removed from memory
    dotMemory.Check(memory =>
        Assert.Equal(0, memory.GetObjects(where =>
            where.Type.Is<Clock>()).ObjectsCount));
}
That should be it. Now let’s see if we can run this test!
Running dotMemory Unit tests
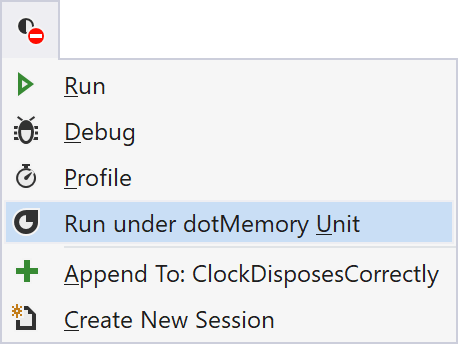
With ReSharper, as well as with Rider or dotCover, we can easily run our dotMemory Unit tests from the gutter or using the Alt+Enter menu:
When not using ReSharper, Rider or dotCover, or when on a continuous integration server, a standalone console launcher can be used. This standalone launcher will wrap the unit test process in a dotMemory profiling session and provides the memory snapshot information our tests are interested in.
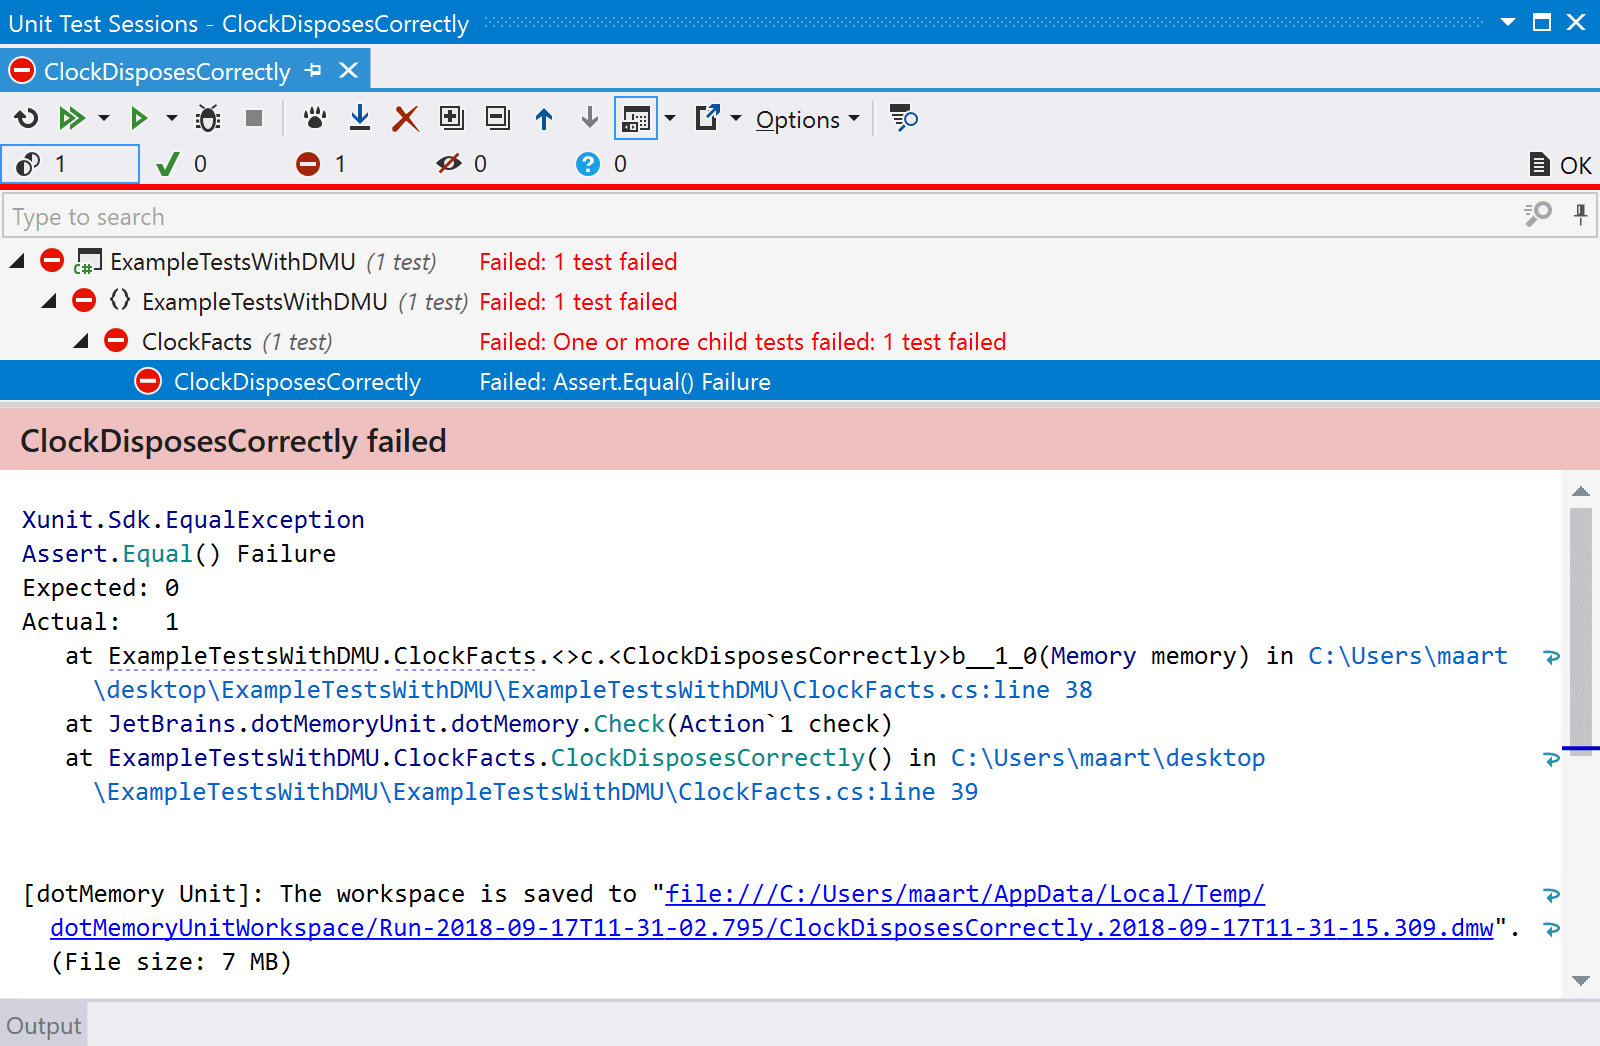
Our test will run like any other test, except that it will be profiled by dotMemory and have access to the current memory snapshot. And when a test fails, we can see the failure reason just like with any other unit test – only this time it will contain a link to the dotMemory snapshot as well:
Note: when using xUnit, dotMemory Unit’s output will not be visible by default. In order to make it visible, we’ll have to instruct it to use xUnit’s output helper:
public ClockFacts(ITestOutputHelper outputHelper)
{
    DotMemoryUnitTestOutput.SetOutputMethod(
        message => outputHelper.WriteLine(message));
}
Now, since our test failed, let’s click the link to the snapshot that was captured and dive in.
Analyzing dotMemory Unit snapshots
Snapshots captured by dotMemory Unit can be opened using dotMemory. Since our test checks the number of instances of Clock is zero, we can immediately search for the Clock type. From there, we can look at the key retention paths at once.
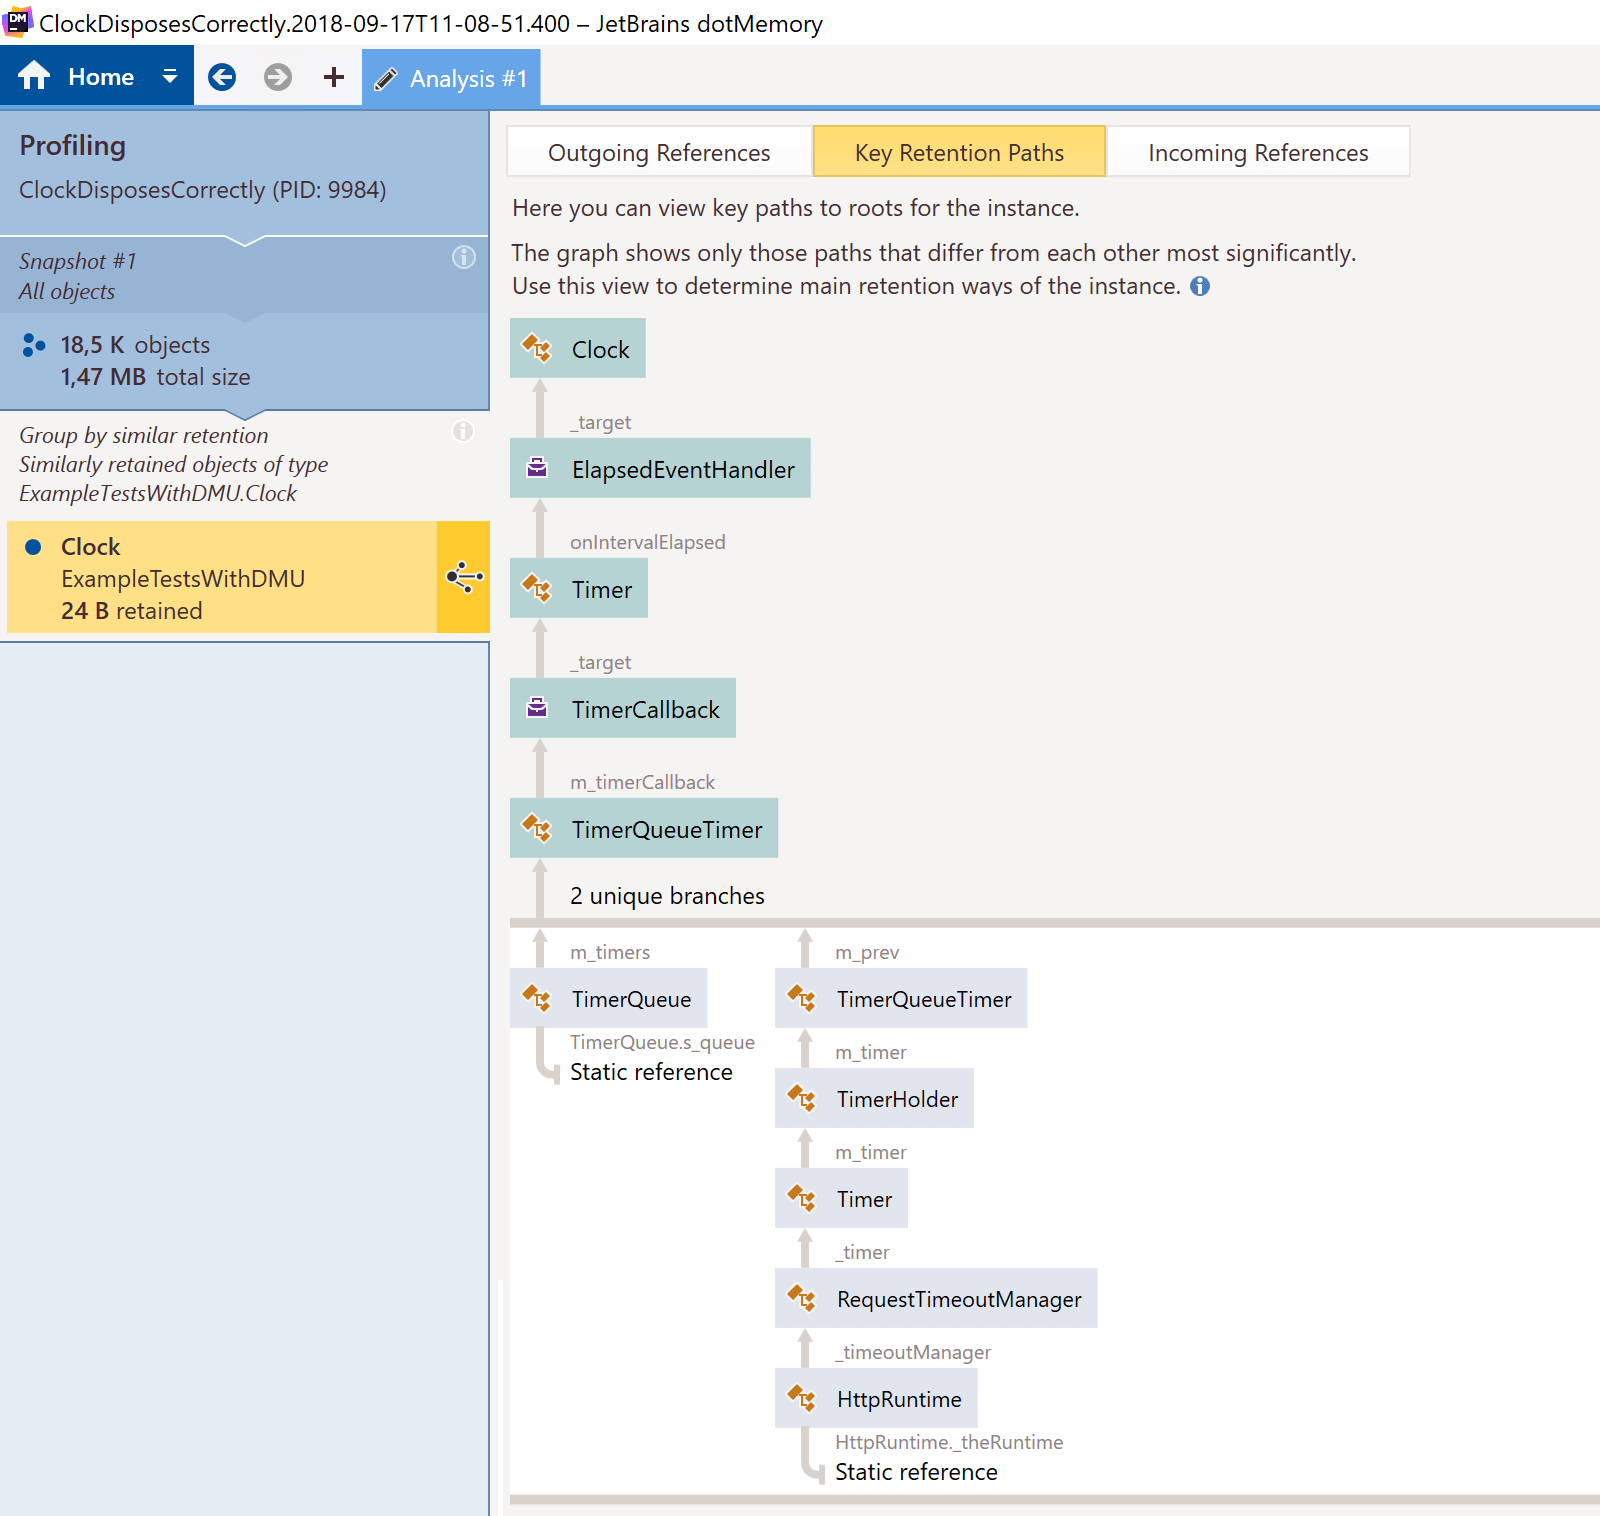
The key retention paths view shows us the objects that are holding a reference to our object. In this case, we can see that a TimerCallback (and its parents) are holding a reference to our Clock, immediately providing us with information about why it is still in memory!
In our test, we are creating a Timer instance which calls the Clock‘s OnTick method every second. We expected the using statement to dispose all of these objects, but alas! The Timer stays around, and it’s Tick event is still wired to our Clock. This means Clock will be kept in memory until we break that reference – either by unsubscribing the event handler or destroying the timer itself.
Note that with this particular example, dotMemory’s automatic inspections would also detect an event handler leak is present:

Let’s see if we can resolve the issue by unsubscribing the event handler:
[Fact]
public void ClockDisposesCorrectlyFixed()
{
    // Arrange
    using (Clock clock = new Clock())
    using (Timer timer = new Timer(1000))
    {
        // Act
        timer.Elapsed += clock.OnTick;
        timer.Start();

        Thread.Sleep(5 * 1000); // Run clock for 5 seconds

        timer.Stop();
        timer.Elapsed -= clock.OnTick; // <-- remove the reference
    }

    // Run explicit GC
    GC.Collect();

    // Assert Clock is removed from memory
    dotMemory.Check(memory =>
        Assert.Equal(0, memory.GetObjects(where =>
            where.Type.Is<Clock>()).ObjectsCount));
}
Alternatively, we could write the check for our event handler leak using the LeakedOnEventHandler() query, which is similar to the automatic inspection found in dotMemory::
// Assert Clock is removed from memory
dotMemory.Check(memory =>
    Assert.Equal(0, memory.GetObjects(where =>
        where.LeakedOnEventHandler()).ObjectsCount));
When we now run our test under dotMemory Unit, it will pass. The event handler callback was removed, and thus, the reference keeping our object in memory, broken. This will properly remove the Clock instance from memory.
That’s a lie! The test still fails!
Indeed, even after our fix, the test still fails as there is a Clock still in memory. I am happy to hear you tried running it :-) Reality is, the example used in this blog post is too simple.
Since all of our logic is being run in one method (our test method), the garbage collector will not clean up local variables that are still available in the context of our function. As it turns out, the CLR keeps the event handler delegate around (and thus, the reference to our Clock):

We will have to re-write our test a little bit, so that the local variables used are considered out of scope when validating memory usage. This can be done by creating a separate method to run the code being tested, or inline using a local function or an Action.
[Fact]
public void ClockDisposesCorrectlyFixed()
{
    var isolator = new Action(() =>
    {
        // Arrange
        using (Clock clock = new Clock())
        using (Timer timer = new Timer(1000))
        {
            // Act
            timer.Elapsed += clock.OnTick;
            timer.Start();

            Thread.Sleep(5 * 1000); // Run clock for 5 seconds

            timer.Stop();
            timer.Elapsed -= clock.OnTick;
        }
    });

    isolator();

    // Run explicit GC
    GC.Collect();

    // Assert
    dotMemory.Check(memory =>
        Assert.Equal(0, memory.GetObjects(where =>
            where.Type.Is<Clock>()).ObjectsCount));
}
When running the above, our Clock will be removed from memory – finally!
Conclusion
Using dotMemory Unit, we can automate memory profiling and write logic against a memory snapshot to verify our code is cleaning up memory properly. We have looked at how we can write tests with dotMemory Unit to check whether an object was indeed removed from memory.
There are many more features in dotMemory that we did not cover in this post. Head over to our dotMemory Unit landing page to learn more about comparing snapshots as part of a test, analyzing memory traffic, and more.
With the standalone console launcher, dotMemory Unit can also be run as part of a continuous integration process. A dotMemory Unit plugin for TeamCity exists as well, making it even easier to integrate memory unit tests into your workflow.
Give dotMemory Unit a try! It’s a powerful (and free) tool that helps make sure code is behaving the way it should be in terms of memory usage.


